290639
72
Verklein
Vergroot
Pagina terug
1/80
Pagina verder
www.polaroid.com
User Guide
...................................................
PDC 5355 5.3 Megapixels Digital Camera
.............................................................
Downloaded from www.Manualslib.com manuals search engine
2
Polaroid PDC 5355 Digital Camera User Guide
www.polaroid.com
3
Polaroid PDC 5355 Digital Camera User Guide
www.polaroid.com
Product Overview
1. Self-timer/AF assist LED
2. Wrist strap holder
3. Microphone
4. Flash
5. Viewnder
6. Zoom lens
PDC 5355
Front View
1. Capture/Playback mode button
2. Power LED
3. Flash charging LED
4. Viewnder
5. Auto-focus LED
6. LCD screen
7. Display button
8. Menu button
Back View
OK
M
W
T
9. OK button
10. Cover for USB port
11. USB port
12. Wide zoom/Thumbnail button
13. Tele zoom button
14. Buzzer
15. Flash/Up button
16. Right button
17. Self-timer/Down button
18. Macro/Left button
Downloaded from www.Manualslib.com manuals search engine
2
Polaroid PDC 5355 Digital Camera User Guide
www.polaroid.com
3
Polaroid PDC 5355 Digital Camera User Guide
www.polaroid.com
1. Power button
2. Shutter button
3. Battery/SD card door
4. Tripod mount
Bottom View
3
4
    
2
Top View
1
Downloaded from www.Manualslib.com manuals search engine
4
Polaroid PDC 5355 Digital Camera User Guide
www.polaroid.com
5
Polaroid PDC 5355 Digital Camera User Guide
www.polaroid.com
Table of Contents
1 Getting Started .........................................................................................7
Camera Package Contents ....................................................................8
Attaching the Wrist strap .....................................................................8
Installing the Batteries .........................................................................9
Turning the Camera On and Off and Setting the Current Date and Time....9
Checking the Battery Level .................................................................10
How to Navigate Menus .....................................................................10
2 Camera Setting ....................................................................................... 11
Checking Camera Status .................................................................... 11
Camera Mode ....................................................................................13
Drive Mode .......................................................................................14
Setup Menu ......................................................................................14
Setting the Current Date and Time ......................................................15
Auto Power Save Settings .................................................................. 16
Setting the Beep Sound On/Off........................................................... 17
Setting Frequency.............................................................................. 17
Setting Display Language ...................................................................18
Setting the Date Stamp On and Off .....................................................18
Resetting to Default Settings..............................................................19
Formatting the Internal Memory ..........................................................20
Turning the Information Display and LCD Screen On/Off .......................21
3 Taking Pictures........................................................................................22
Taking a Picture .................................................................................22
Taking Macro Pictures ........................................................................24
Taking a Picture with the LCD Screen Off ............................................25
Setting Flash Mode ............................................................................25
Setting Self-Timer..............................................................................27
Zoom Feature ....................................................................................28
Setting the Image Size and Quality......................................................29
Setting Exposure Compensation..........................................................31
Setting the White Balance for Pictures.................................................32
Changing the ISO Speed.....................................................................33
Downloaded from www.Manualslib.com manuals search engine
4
Polaroid PDC 5355 Digital Camera User Guide
www.polaroid.com
5
Polaroid PDC 5355 Digital Camera User Guide
www.polaroid.com
4 Recording Video Clips ...............................................................................34
Recording Video Clips .........................................................................34
Setting Video Resolution......................................................................35
Setting the White Balance for Video Clips ..............................................36
5 Reviewing and Managing Pictures and Video Clips........................................37
Reviewing Pictures on the LCD Screen ..................................................37
Reviewing Picture and Video Clip Files in Thumbnail................................38
Auto Play ..........................................................................................39
Playing the Video Clip ......................................................................... 41
Protect or Unprotect Picture(s) or Video Clip(s)....................................... 41
Deleting Picture(s) and Video (Clips) .....................................................42
6 Print Setting ............................................................................................44
About PictBridge.................................................................................44
DPOF (Digital Print Order Format) ......................................................... 51
7 Using the SD (Secure Digital) Card .............................................................54
Using the SD Card ..............................................................................54
To Copy Pictures and Video Clips from Internal Memory to a Memory Card..57
8 Installing the Software Onto a Computer.....................................................59
Installing the Software ........................................................................59
Software Included with Your Camera ....................................................61
Computer System Requirements...........................................................62
9 Transferring Pictures and Video Clips to a Computer.....................................63
Before You Transfer Files.....................................................................63
Connecting to Your Computer ..............................................................63
Transferring Pictures and Video Clips ....................................................64
PhotoImpression 5.0 Hot Plug Function (PC Only) ...................................65
Downloaded from www.Manualslib.com manuals search engine
6
Polaroid PDC 5355 Digital Camera User Guide
www.polaroid.com
7
Polaroid PDC 5355 Digital Camera User Guide
www.polaroid.com
10 Troubleshooting Problems.......................................................................67
Troubleshooting ................................................................................67
11 Getting Help.......................................................................................... 70
Polaroid-digital Online Services ............................................................70
ArcSoft Software Help .......................................................................70
12 Appendix.............................................................................................. 71
Technical Specications ..................................................................... 71
Capacity of SD Card ..........................................................................73
Uninstalling Polaroid PDC 5355 driver (PC Only).................................... 75
Camera Default Settings..................................................................... 76
Using Your Batteries ..........................................................................77
Tips, Your Safety & Maintenance ........................................................78
Regulatory Information .......................................................................78
Downloaded from www.Manualslib.com manuals search engine
6
Polaroid PDC 5355 Digital Camera User Guide
www.polaroid.com
7
Polaroid PDC 5355 Digital Camera User Guide
www.polaroid.com
1 Getting Started
Thank you for selecting the Polaroid PDC 5355 digital camera. Designed
with a powerful 5.3 mega pixels CCD sensor and a bright color 1.5 inch
color LCD for preview and review, the PDC 5355 is the perfect camera
for the photographer looking for point & shoot simplicity and sound
optical performance.
Other important information about the PDC 5355 digital camera that
you may nd interesting is:
A high quality glass lens system for sharp image shooting from
3.9 inches to innity with 12 zoom positions
Selectable image size and quality settings for emailing and
printing
Auto focus, macro mode and 3X optical zoom mode.
Built-in ash with four modes (off, on, red-eye reduction and
auto)
Everything in the box necessary to take pictures in minutes!
Enjoy PictBridge directly plug-and-print experience.
Downloaded from www.Manualslib.com manuals search engine
8
Polaroid PDC 5355 Digital Camera User Guide
www.polaroid.com
9
Polaroid PDC 5355 Digital Camera User Guide
www.polaroid.com
• Camera Package Contents
PDC 5355
Quick Start Guide
Guide de Démarrage rapide
Guida Rapida
Guía Rápida de Inicio
Guia de Início Rápido
ML 0403
Part no.: OM837657 R1
Printed in China
Schnellanleitung
PDC 5355
PDC 5355
Wrist Strap
PDC 5355
USB Cable
2 x AA-size Batteries
Registration Card
Digital Imaging Products
201 Burlington Road
Bedford, MA 01730 -1434
Carrying Case
PDC 5355 CD-ROM includes
Polaroid PDC 5355 Camera Driver (PC)
Arcsoft PhotoImpression® 5 (PC & Mac),
Adobe® Acrobat® Reader™ (PC & Mac)
User Guide (in PDF format)
Quick Strat Guide
• Attaching the Wrist Strap
PDC 5355
PDC 5355
PDC 5355
Downloaded from www.Manualslib.com manuals search engine
8
Polaroid PDC 5355 Digital Camera User Guide
www.polaroid.com
9
Polaroid PDC 5355 Digital Camera User Guide
www.polaroid.com
• Installing the Batteries
Two AA-size batteries are supplied with the product. For a detailed
guideline on battery usage, please see Using Your Batteries on page 77.
1. Open the camera battery door by pushing it outwards as illustrated.
2. Insert the batteries as shown, ensuring you follow the +/- signs
correctly.
3. Close the battery door by pressing it downwards and then sliding it
towards the camera to lock.
Turning the Camera On and Off and Setting the Current Date
and Time
Fully press the Power button until the
LCD screen is on. The Power LED lights
up and remains on while the camera is
powered on. Press the Power button
again to turn off the camera.
PDC 5355
The rst time the camera is turned on,
it will directly enter the interface for
setting the current date and time. Please
refer to “Setting the Current Date and
Time” on page 15 for further details.
Downloaded from www.Manualslib.com manuals search engine
10
Polaroid PDC 5355 Digital Camera User Guide
www.polaroid.com
11
Polaroid PDC 5355 Digital Camera User Guide
www.polaroid.com
Checking the Battery Level
Check the battery power level before taking pictures.
1. Turn on the camera.
2. Check the battery power level that appears on the LCD screen.
Battery power is full.
Battery power is adequate.
Battery power is low.
Battery power is exhausted.
NOTE:
The Power LED will blink when battery power is low. Please replace the batteries.
How to Navigate Menus
Menus are used to adjust capture and
play settings, as well as other camera
settings like the Date/Time and Auto
Power Off.
OK
M
W
T
M
1. Press the
M
button to enter a menu bar
and press it again to exit.
2. Press the or button to select a menu
item.
DRIVE MODE
STILL
VIDEO
3. Press the or button to select item
contents.
4. Press the
OK
button to conrm.
SETUP
FORMAT
DATE/TIME
AUTO OFF
BEEP
Downloaded from www.Manualslib.com manuals search engine
10
Polaroid PDC 5355 Digital Camera User Guide
www.polaroid.com
11
Polaroid PDC 5355 Digital Camera User Guide
www.polaroid.com
2 Camera Setting
• Checking Camera Status
Turn on the camera, view the camera LCD screen to check which
camera settings are active. If the feature icon is not displayed, it means
that particular feature is not activated.
Still Image Mode
Self-timer On
Digital Zoom Status
Number of remaining
pictures
White Balance
Auto*
Daylight
Cloudy
Tungsten
Fluorescent
Battery Level
Full
Adequate
Low
Exhausted
ISO Sensitivity
Auto*
ISO 100
ISO 200
ISO 400
Flash Off
Auto Flash*
Red-eye reduction
Forced On
Flash Mode
Optical and digital
zoom status bar
Capture Mode
Still Image*
Video
Quality
High*
Normal
Low
2592 x 1944
7
Image Resolution
2592 X 1944*
2304 X 1728
2048 X 1536
640 X 480
SD Card Inserted
Exposure Compensation
Value
-0.3
100
W T
X 4.0
Focus mark
Normal mode
Macro mode
* Default Setting
Downloaded from www.Manualslib.com manuals search engine
12
Polaroid PDC 5355 Digital Camera User Guide
www.polaroid.com
13
Polaroid PDC 5355 Digital Camera User Guide
www.polaroid.com
Video Mode
640 x 480
00:00:03
x1.0
640 x 480*
320 x 240
Resolution
Video Mode
Recording time
counter
White Balance for Video clips
Auto*
Daylight
Cloudy
Tungsten
Fluorescent
Recording Indicator
* Default Setting
Playback Mode
Play
Pause
2592 x 1944
0003-0003
02/02/05
09:14
Locked File
Date
Time
File Type
Folder Number/File
Number
Picture
Video Clip
Downloaded from www.Manualslib.com manuals search engine
12
Polaroid PDC 5355 Digital Camera User Guide
www.polaroid.com
13
Polaroid PDC 5355 Digital Camera User Guide
www.polaroid.com
• Camera Mode
The camera has two working modes, Capture
mode and Playback mode. You can switch
between them by pressing the Capture/
Playback mode button at the back of the
camera.
OK
M
W
T
Capture mode
Under this mode, you can select the image and video settings according
to the shooting environment, and take pictures and video clips under
the settings you have selected. For more details, please refer to Taking
Pictures” on page 22 and “Recording Video Clips” on page 34.
Playback mode
This mode allows the playback or deletion of pictures and video clips
from the camera. For more details, please refer to Reviewing and
Managing Pictures and Video Clips” on page 37.
Downloaded from www.Manualslib.com manuals search engine
14
Polaroid PDC 5355 Digital Camera User Guide
www.polaroid.com
15
Polaroid PDC 5355 Digital Camera User Guide
www.polaroid.com
• Drive Mode
The camera has two modes, one for taking pictures and the other for
taking video clips.
Still Image Mode
Video Mode
You may switch between these two modes according to the following
steps.
1. Set the camera to Capture mode.
2. Press the
M
button.
3. Press the or button to select (DRIVE
MODE).
4. Press the or button to select the
desired setting.
5. Press the
OK
button.
2592 x 1944
0010
NOTE:
Still Image mode is the default capture mode.
This setting is also available in Video mode.
DRIVE MODE
STILL
VIDEO
• Setup Menu
Setup menu can be accessed in both Still Image and Video modes. Here
we take Still Image mode for an example.
1. Set the camera to Still Image mode.
2. Press the
M
button.
3. Press the or button to select
(SETUP).
SETUP
FORMAT
DATE/TIME
AUTO OFF
BEEP
4. Press the or button to select the
desired setting.
Downloaded from www.Manualslib.com manuals search engine
14
Polaroid PDC 5355 Digital Camera User Guide
www.polaroid.com
15
Polaroid PDC 5355 Digital Camera User Guide
www.polaroid.com
• Setting the Current Date and Time
1. Set the camera to Still Image mode.
2. Access the Setup menu.
3. Press the or button to select
DATE/TIME”.
4. Press the
OK
button.
SETUP
FORMAT
DATE/TIME
AUTO OFF
BEEP
Setting the date format:
5. Press the or button to select “DATE
FORMAT”.
6. Press the
OK
button.
DATE/TIME
DATE FORMAT
DATE SETUP
DATE FORMAT
DD/MM/YY
MM/DD/YY
YY/MM/DD
7. Press the or button to select the
desired setting.
8. Press the
OK
button.
Setting the date and time:
5. Press the or button to select “DATE
SETUP.
6. Press the
OK
button.
DATE/TIME
DATE FORMAT
DATE SETUP
7. Press the or button to adjust the
value.
8. Press the or button to switch to the next
eld.
9. Press the
OK
button.
DATE SETUP
DD/MM/YY
04/12/03
12:33:55
EXIT
NOTE:
This setting is also available in Video mode.
Downloaded from www.Manualslib.com manuals search engine
16
Polaroid PDC 5355 Digital Camera User Guide
www.polaroid.com
17
Polaroid PDC 5355 Digital Camera User Guide
www.polaroid.com
• Auto Power Save Settings
The camera performs the following power save operations to conserve
battery power.
1/3/5 MIN The camera is designed to switch off automatically to
save battery life after the specied period of inactivity.
OFF The power save feature is not activated.
You can change the power save setting according to the following steps:
1. Set the camera to Still Image mode.
2. Access the Setup menu.
3. Press the or button to select “AUTO
OFF”.
4. Press the
OK
button.
SETUP
FORMAT
DATE/TIME
AUTO OFF
BEEP
6. Press the or button to select the
desired setting.
7. Press the
OK
button.
AUTO OFF
OFF
1 MIN
3 MIN
5 MIN
NOTE:
Auto power off is automatically disabled under any one of the following
conditions.
- While an auto play is undergoing.
- While the cameras USB port is connected to a computer or other external
devices, or while the camera is being controlled by an external device.
This setting is also available in Video mode.
The LCD screen automatically goes to hibernation after one minute of
inactivity. Press any button, except the Power button, to re-activate the
LCD screen.
Downloaded from www.Manualslib.com manuals search engine
16
Polaroid PDC 5355 Digital Camera User Guide
www.polaroid.com
17
Polaroid PDC 5355 Digital Camera User Guide
www.polaroid.com
• Setting the Beep Sound On/Off
You can turn the beep sound on and off in Capture mode. When the beep
sound is turned on, the camera will beep when you press the buttons.
1. Set the camera to Still Image mode.
2. Access the Setup menu.
3. Press the or button to select
BEEP.
4. Press the
OK
button.
SETUP
FORMAT
DATE/TIME
AUTO OFF
BEEP
5. Press the or button to select the
desired setting.
6. Press the
OK
button.
BEEP
ON
OFF
NOTE:
This setting is also available in Video mode.
• Setting Frequency
In order to take a better indoor picture, the camera needs to be set to
suit the correct lighting frequency. Set the frequency to 60Hz for US
and 50Hz for Europe.
1. Set the camera to Still Image mode.
2. Access the Setup menu.
3. Press the or button to select
FREQUENCY”.
4. Press the
OK
button.
SETUP
DATE/TIME
AUTO OFF
BEEP
FREQUENCY
5. Press the or button to select the
desired setting.
6. Press the
OK
button.
FREQUENCY
50 Hz
60 hz
NOTE:
This setting is also available in Video mode.
Downloaded from www.Manualslib.com manuals search engine
18
Polaroid PDC 5355 Digital Camera User Guide
www.polaroid.com
19
Polaroid PDC 5355 Digital Camera User Guide
www.polaroid.com
• Setting Display Language
Under this setting, you can select the language you prefer for the LCD screen.
1. Set the camera to Still Image mode.
2. Access the Setup menu.
3. Press the or button to select
LANGUAGE”.
4. Press the
OK
button.
SETUP
AUTO OFF
BEEP
FREQUENCY
LANGUAGE
5. Press the or button to select the
desired setting.
6. Press the
OK
button.
NOTE:
This setting is also available in Video mode.
LANGUAGE
ENGLISH
DEUTSCH
FRANÇAIS
ESPAÑOL
• Setting the Date Stamp On and Off
Use the Date Stamp to imprint the date on your pictures. Make sure the
camera clock is set to the correct date before setting the date stamp on.
1. Set the camera to Still Image mode.
2. Access the Setup menu.
3. Press the or button to select “DATE
STAMP.
4. Press the
OK
button.
SETUP
BEEP
FREQUENCY
LANGUAGE
DATE STAMP
5. Press the or button to select the
desired setting.
6. Press the
OK
button.
DATE STAMP
ON
OFF
NOTE:
This setting is also available in Video mode.
This setting is congured for images only.
Downloaded from www.Manualslib.com manuals search engine
18
Polaroid PDC 5355 Digital Camera User Guide
www.polaroid.com
19
Polaroid PDC 5355 Digital Camera User Guide
www.polaroid.com
• Resetting to Default Settings
You can easily change all the settings you made back to the camera
default settings by the following steps.
Please refer to “Camera Default Settings” on page 76 for more details.
1. Set the camera to Still Image mode.
2. Access the Setup menu.
3. Press the or button to select
DEFAULT SETTING”.
SETUP
FREQUENCY
LANGUAGE
DATE STAMP
DEFAULT SETTING
4. Press the
OK
button.
5. Press the or button to select “YES”.
6. Press the
OK
button.
NOTE:
This setting is also available in Video mode.
RETURN TO
DEFAULT SETTING?
NO
YES
Downloaded from www.Manualslib.com manuals search engine
20
Polaroid PDC 5355 Digital Camera User Guide
www.polaroid.com
21
Polaroid PDC 5355 Digital Camera User Guide
www.polaroid.com
• Formatting the Internal Memory
Formatting the internal memory deletes all data stored in it.
1. Set the camera to Still Image mode.
2. Access the Setup menu.
3. Press the or button to select
FORMAT”.
4. Press the
OK
button.
5. Press the or button to select “FORMAT”.
6. Press the
OK
button.
SETUP
FORMAT
DATE/TIME
AUTO OFF
BEEP
REALLY WANT TO
FORMAT?
FORMAT
CANCEL
NOTE:
Data deleted by a format operation cannot be recovered. Make sure you
do not have any useful data currently stored in the internal memory before
you format it.
Formatting the internal memory destroys all the pictures, even those are
protected.
With a memory card inserted, the above operation would format the
inserted memory card only. The internal memory will not be formatted
with a memory card inserted.
This setting is also available in Video mode.
Downloaded from www.Manualslib.com manuals search engine
20
Polaroid PDC 5355 Digital Camera User Guide
www.polaroid.com
21
Polaroid PDC 5355 Digital Camera User Guide
www.polaroid.com
• Turning the Information Display and LCD Screen On/Off
Pressing the
button each time
switches the LCD screen to the next
display mode in the following sequence.
NOTE:
The LCD screen automatically goes to hibernation
after one minute of inactivity. Press any button,
except the Power button, to re-activate the LCD
screen.
OK
M
W
T
Capture Mode
Press Press
Press Press
2592 X 1944
0005
2592 X 1944
0005
Playback Mode
Press Press
Press
2592 X 1944
0005
2592 X 1944
0005
Downloaded from www.Manualslib.com manuals search engine
22
Polaroid PDC 5355 Digital Camera User Guide
www.polaroid.com
23
Polaroid PDC 5355 Digital Camera User Guide
www.polaroid.com
3 Taking Pictures
Before you take pictures, please read this note rst:
IMPORTANT!
Never remove batteries while a picture is being saved. Doing so will prevent
the current picture being saved and may corrupt other pictures already stored
in the camera’s internal memory or on a memory card.
Outdoor Pictures Without the Flash
Avoid intense sunlight that may cause sun spots in pictures.
Always make sure that the sun or other light source is in front of
the subject.
• Taking a Picture
Taking pictures at approximately 2 feet to innity (0.6 meter to innity).
1. Turn on the camera.
2. Set the camera to Still Image mode.
3. Frame your subject using the LCD screen or the viewnder.
4. Press the shutter button halfway to set the exposure and focus. The
camera automatically detects the subject and highlights the focus
mark, which it will use to determine the focus. If the focus is locked
on the subject, the Auto-focus LED remains steady on and the focus
mark turns green.
Downloaded from www.Manualslib.com manuals search engine
22
Polaroid PDC 5355 Digital Camera User Guide
www.polaroid.com
23
Polaroid PDC 5355 Digital Camera User Guide
www.polaroid.com
NOTE:
There is difculty in focusing the subject when the Auto-focus LED blinks or
the red focus mark appears on the LCD screen. Release the shutter button,
recompose the scene and press the shutter button halfway to reset the focus.
Focus Mark
5. Press the shutter button completely down to take a picture while
holding the camera steady. A beep will sound (if the Beep sound is
turned on) when a picture is taken.
Auto Focus LED Operation:
When you see this:
Auto Focus LED blinks.
Auto Focus LED remains steady on.
It means this:
There is difculty in focusing the subject.
The camera focus is locked on the subject.
Downloaded from www.Manualslib.com manuals search engine
24
Polaroid PDC 5355 Digital Camera User Guide
www.polaroid.com
25
Polaroid PDC 5355 Digital Camera User Guide
www.polaroid.com
• Taking Macro Pictures
Use the Macro mode to capture subjects close to the camera lens:
Wide angle: 3.9 ~ 27.6 inches (10 ~ 70 centimeters)
Telephoto: 7.9 ~ 27.6 inches (20 ~ 70 centimeters)
1. Turn on the camera.
2. Set the camera to Still Image mode.
3. Press the Macro button to activate the Macro mode. The image
displayed on the LCD screen will change accordingly.
NOTE:
The
icon will appear on the LCD screen, indicating the Macro mode is
activated.
Pressing the Macro button again will disable the Macro mode.
OK
M
W
T
4. Capture procedures are the same as for taking a picture in the
normal capture mode. Please see “Taking a Picture” on page 22.
Downloaded from www.Manualslib.com manuals search engine
24
Polaroid PDC 5355 Digital Camera User Guide
www.polaroid.com
25
Polaroid PDC 5355 Digital Camera User Guide
www.polaroid.com
• Taking a Picture with the LCD Screen off
You can also take a picture with the LCD screen off in the normal or
Macro mode. Capture procedures are the same as for taking a picture
in the normal capture mode but frame your subject using the viewnder
instead.
• Setting Flash Mode
1. Turn on the camera.
2. Set the camera to Still Image mode.
3. Press the Flash button to cycle through the ash settings and select the
one you need.
2592 x 1944
7
Flash Mode
OK
M
W
T
When you press the Flash button, the icon (according to the ash
setting you selected) will appear on the LCD screen. You can now take
pictures using the ash mode you selected. The ash will recharge after
each ashed picture.
Flash Range:
Wide: 3.2 ~ 9.8 feet (1 ~ 3 meters)
Telephoto: 3.2 ~ 6.7 feet (1 ~ 2 meters)
Downloaded from www.Manualslib.com manuals search engine
26
Polaroid PDC 5355 Digital Camera User Guide
www.polaroid.com
27
Polaroid PDC 5355 Digital Camera User Guide
www.polaroid.com
The camera has four ash modes (default setting is Auto Flash). Use the
ash when you take pictures at night, indoors, or outdoors in heavy shadows.
Flash Off Mode. The ash does not re. Use this setting
for outdoor pictures or where ash is prohibited or may be
distracting. Also use when shooting towards a reective
surface, such as a window or a mirror. If the brightness of the
environment is not enough when using this setting, your pictures
will be too dark.
Auto Flash Mode. The ash res automatically as needed. Use
this setting to take most pictures.
Red-eye Reduction Mode. Use this setting to avoid red glare
in your subjects eyes. The camera res a brief, preash ash
before the regular ash.
Forced On Mode. The ash res for every picture. Use this
setting in high-contrast situations to provide ll-light or use it
indoors with low light.
NOTE:
Flash modes are not available in Video mode.
Never touch or block the ash with your ngers. Doing so can soil these
components and interfere with the correct ash operation.
Downloaded from www.Manualslib.com manuals search engine
26
Polaroid PDC 5355 Digital Camera User Guide
www.polaroid.com
27
Polaroid PDC 5355 Digital Camera User Guide
www.polaroid.com
• Setting Self-timer
Your camera is designed with a self-timer function, which allows you to
take pictures with a 10-second built-in timer.
1. Turn on the camera.
2. Set the camera to Still Image mode.
3. Press the Self-timer button to activate the self-timer function.
4. The icon
will appear on the LCD screen.
10-second Self-timer indicates a countdown of ten seconds.
NOTE:
Press the Self-timer button again to disable the self-timer function and the
SELF TIMER OFF” indicator will be shown on the LCD screen for a while.
OK
M
W
T
2592 x 1944
7
Self-time On
5. Capture procedures are the same as for taking a picture in the
normal capture mode. Please see “Taking a Picture” on page 22.
6. Press the shutter button to take a picture. The camera beeps (if the
beep sound is turned on) and the Self-timer LED blinks slowly for 6
seconds, then quickly for 4 seconds before the picture is taken.
NOTE:
Place the camera on a at surface or use a tripod when using the self-timer function.
Downloaded from www.Manualslib.com manuals search engine
28
Polaroid PDC 5355 Digital Camera User Guide
www.polaroid.com
29
Polaroid PDC 5355 Digital Camera User Guide
www.polaroid.com
• Zoom Feature
There are two types of zoom in this camera: optical zoom and digital
zoom. Optical zoom alters the focal distance of the lens zoom, and its
factor range is 1X to 3X. Digital zoom is activated after you reach the
maximum optical zoom (3X). It enlarges the part of the image at the
center of the image screen. Digital zoom factor range is 1X to 4X.
These zoom features let you zoom in the central area of an image and
photograph only the enlarged portion of the picture.
1. Turn on the camera.
2. Set the camera to Still Image mode.
3. Press the Tele Zoom or Wide Zoom
button to zoom in or zoom out the
subject image. Keep pressing the Tele
Zoom button and the camera switches
from optical zoom to digital zoom when
it reaches the maximum optical zoom.
OK
M
W
T
W
T
4. Now you can takes pictures and playback
them under the zoom setting. The zoom
setting will remain after taking pictures.
If you want to take a normal size picture,
please use the Wide Zoom button.
2592 x 1944
7
W T
Digital zoom
status
X 4.0
Optical and digital zoom
status bar
Downloaded from www.Manualslib.com manuals search engine
28
Polaroid PDC 5355 Digital Camera User Guide
www.polaroid.com
29
Polaroid PDC 5355 Digital Camera User Guide
www.polaroid.com
For digital zoom feature, the viewnder may not reect the actual image
taken. We recommend the user to use the LCD screen to monitor the
zoom feature.
NOTE:
You may notice a decrease in image quality when using the digital zoom.
Zoom feature is not available Macro mode or while recording a video clip.
Digital zoom feature is also available in Video and Playback modes.
• Setting the Image Size and Quality
Picture resolution refers to the number of pixels in a digital picture.
Picture quality depends on the JPEG le compression that the camera
applies when the picture is taken. Higher resolution and less compression
produces better quality but occupies more memory space. Smaller size
pictures and normal quality are easier to email while larger size and ne
quality are better for printing.
Image Size Setting
1. Set the camera to Still Image mode.
2. Press the
M
button.
3. Press the or button to select
(IMAGE SIZE).
4. Press the or button to select the desired
setting.
5. Press the
OK
button.
IMAGE SIZE
2592 x 1944
2304 x 1728
2048 x 1536
640 x 480
Downloaded from www.Manualslib.com manuals search engine
30
Polaroid PDC 5355 Digital Camera User Guide
www.polaroid.com
31
Polaroid PDC 5355 Digital Camera User Guide
www.polaroid.com
Quality Setting:
1. Set the camera to Still Image mode.
2. Press the
M
button.
3. Press the or button to select
(QUALITY).
4. Press the or button to select the desired
setting.
5. Press the
OK
button.
QUALITY
HIGH
NORMAL
LOW
The chart below indicates the approximate numbers of pictures you can
expect the camera to hold at each setting based on the 16MB internal
memory. You can expand the memory with an SD card, please refer to
Capacity of SD Card on page 73 for further details.
Resolution
2592 x 1944
2304 x 1728
2048 x 1536
High Normal Low
4 pictures 8 pictures 10 pictures
6 pictures 10 pictures 16 pictures
9 pictures 13 pictures 21 pictures
Quality
640 x 480
52 pictures 82 pictures 122 pictures
Downloaded from www.Manualslib.com manuals search engine
30
Polaroid PDC 5355 Digital Camera User Guide
www.polaroid.com
31
Polaroid PDC 5355 Digital Camera User Guide
www.polaroid.com
NOTE:
Scene complexity affects a picture’s le size. For example, a picture of
trees in autumn has a larger le size than a picture of blue sky at the same
resolution and quality setting. Therefore, the number of pictures you can
store on the camera internal memory may vary. The number of pictures on
the LCD screen is for reference only.
It is recommended to use the 2592 x 1944 resolution for printing.
• Setting Exposure Compensation
You can adjust the exposure compensation value (EV) within the range of
-1.5EV to +1.5EV in order to compensate for current lighting conditions.
This setting can be used to obtain better result when shooting with
backlighting, indirect indoor lighting, a dark background, etc.
1. Set the camera to Still Image mode.
2. Press the
M
button.
3. Press the or button to select
(EXPOSURE).
4. Press the or button to select the desired
setting.
5. Press the
OK
button.
EXPOSURE
AUTO
NOTE:
A higher EV value is best used for light-colored subjects and backlit
subjects. A lower EV value is best for dark-colored subjects and for
shooting outdoors on a clear day.
When shooting under very dark or very bright conditions, you may not
be able to obtain satisfactory results even after performing exposure
compensation.
Downloaded from www.Manualslib.com manuals search engine
32
Polaroid PDC 5355 Digital Camera User Guide
www.polaroid.com
33
Polaroid PDC 5355 Digital Camera User Guide
www.polaroid.com
• Setting the White Balance for Pictures
Selecting the right type of white balance can help to make the color of
a subject in a picture appear more natural under the type of lighting that
is available.
1. Set the camera to Still Image mode.
2. Press the
M
button.
4. Press the or button to select
(WHITE
BALANCE).
5. Press the or button to select the desired
setting.
6. Press the
OK
button.
WHITE BALANCE
AUTO
DAY LIGHT
CLOUDY
TUNGSTEN
When shooting under these conditions: Select this setting
Automatic adjustment
Outdoor daylight
Cloudy
Indoors, illuminated by tungsten lighting
Indoors, illuminated by uorescent lighting
Downloaded from www.Manualslib.com manuals search engine
32
Polaroid PDC 5355 Digital Camera User Guide
www.polaroid.com
33
Polaroid PDC 5355 Digital Camera User Guide
www.polaroid.com
• Changing the ISO Speed
This function enables you to change the camera’s sensitivity to light
by selecting different ISO values. ISO is a measure of how quickly
your camera reacts to light. The higher the ISO value, the less the
light needed to make an exposure, allowing the same exposure to be
achieved with higher shutter speeds or smaller apertures. In a digital
camera, higher ISO value allows higher shutter speed, at the expense of
mottled or grain appearing in the nal picture.
1. Set the camera to Still Image mode.
2. Press the
M
button.
3. Press the or button to select
(ISO).
4. Press the or button to select the desired
setting.
5. Press the
OK
button.
ISO
AUTO
100
200
400
AUTO The camera’s sensitivity is automatically detected by
different lighting value or subject brightness.
100/200/400 In the same lighting condition, higher the ISO value it is,
faster the shutter speed it will be.
NOTE:
Increase in ISO value affects image quality with more noise. Use as low an
ISO value as possible.
Downloaded from www.Manualslib.com manuals search engine
34
Polaroid PDC 5355 Digital Camera User Guide
www.polaroid.com
35
Polaroid PDC 5355 Digital Camera User Guide
www.polaroid.com
4 Recording Video Clips
NOTE:
Change the drive mode from Still Image mode to Video mode before recording
video clips, since Still Image mode is the default capture mode. For more
details, please refer to “Drive Mode” on page 14.
• Recording Video Clips
Use the Video mode to record video clips with audio. The recording time
displayed on the LCD screen will decrease and the
icon will blink while
recording.
1. Turn on the camera.
2. Set the camera to Video mode.
3. Frame your subject using the LCD screen.
4. Press the shutter button completely down to start
recording.
5. Press the shutter button again to stop recording, or
recording stops when the current memory is full.
640 x 480
00:00:28
Recording Indicator
Downloaded from www.Manualslib.com manuals search engine
34
Polaroid PDC 5355 Digital Camera User Guide
www.polaroid.com
35
Polaroid PDC 5355 Digital Camera User Guide
www.polaroid.com
• Setting Video Resolution
Video resolution refers to the number of pixels in a digital video clip.
Video clip quality depends on the le resolution that the camera applies
when the video clip is recorded. Higher resolution makes better quality
which occupies more memory space.
1. Set the camera to Video mode.
2. Press the
M
button.
3. Press the or button to select
(IMAGE SIZE).
4. Press the or button to select the desired
setting.
5. Press the
OK
button.
IMAGE SIZE
640 x 480
320 X 240
Here are the approximate length of video clips you can expect the
camera to hold at each setting based on the 16MB internal memory. You
can expand the memory with an SD card.
Resolution: 640 x 480 Approx. 0.45 minute (10 fps)
320 x 240 Approx. 0.9 minute (15 fps)
Downloaded from www.Manualslib.com manuals search engine
36
Polaroid PDC 5355 Digital Camera User Guide
www.polaroid.com
37
Polaroid PDC 5355 Digital Camera User Guide
www.polaroid.com
• Setting the White Balance for Video Clips
Selecting the right type of white balance can help to make the color of
a subject in the video clip appear more natural under the type of lighting
that is available.
1. Set the camera to Video mode.
2. Press the
M
button.
3. Press the or button to select
(WHITE
BALANCE).
4. Press the or button to select the desired
setting.
5. Press the
OK
button.
WHITE BALANCE
AUTO
DAY LIGHT
CLOUDY
TUNGSTEN
When shooting under these conditions: Select this setting
Automatic adjustment
Outdoor daylight
Cloudy
Indoors, illuminated by tungsten lighting
Indoors, illuminated by uorescent lighting
Downloaded from www.Manualslib.com manuals search engine
36
Polaroid PDC 5355 Digital Camera User Guide
www.polaroid.com
37
Polaroid PDC 5355 Digital Camera User Guide
www.polaroid.com
5 Reviewing and Managing Pictures and Video Clips
NOTE:
Change the camera mode from Capture mode to Playback mode before
reviewing pictures and video clips. For a detailed guideline on setting the
Playback mode, please see “Camera Mode” on page 13.
• Reviewing Pictures on the LCD Screen
1. Turn on the camera.
2. Set the camera to Playback mode.
3. Press the left or right button to view the pictures taken.
The icon is shown on the LCD screen when a picture is selected.
The currently displayed picture can be magnied up to 4 times using the
Tele Zoom button. You can move around the magnied picture using the
left, right, up or down button. Press the Wide Zoom button to view the
picture in the original size.
Downloaded from www.Manualslib.com manuals search engine
38
Polaroid PDC 5355 Digital Camera User Guide
www.polaroid.com
39
Polaroid PDC 5355 Digital Camera User Guide
www.polaroid.com
• Reviewing Picture and Video Clip Files in Thumbnail
You can view up to 9 picture and video clip les at a time on the LCD
screen by using the Thumbnail function.
1. Turn on the camera.
2. Set the camera to Playback mode.
3. Press the Display button continuously twice and up to 9 picture and
video clip les will be shown on the LCD screen at a time. The latest
reviewed picture will be highlighted.
OK
M
W
T
W
T
4. Use the up, down, left and right buttons to select a thumbnail le
and view it in full screen by pressing the Display button again.
Press Press
Press
2592 X 1944
0005
2592 X 1944
0005
NOTE:
In the normal playback mode, you can also view the thumbnail les on
the LCD screen by pressing the Wide Zoom button, and view the selected
thumbnail le in full screen by press the button again.
Downloaded from www.Manualslib.com manuals search engine
38
Polaroid PDC 5355 Digital Camera User Guide
www.polaroid.com
39
Polaroid PDC 5355 Digital Camera User Guide
www.polaroid.com
• Auto Play
The Auto Play function enables you to view all the picture and video
clip les stored in the camera one by one forward or backward on the
LCD screen.
You can activate the Auto Play function and make Auto Play direction
and interval according to the following steps:
1. Set the camera to Playback mode.
2. Press the
M
button.
3. Press the or button to select
(AUTO PLAY).
4. Press the or button to select “SETUP.
5. Press the
OK
button.
AUTO PLAY
ON
SETUP
Set Auto Play Direction
6. Press the or button to select
DIRECTION”.
7. Press the
OK
button.
AUTO PLAY
DIRECTION
INTERVAL
8. Press the or button to select the desired
setting.
9. Press the
OK
button.
DIRECTION
FORWARD
BACKWARD
Downloaded from www.Manualslib.com manuals search engine
40
Polaroid PDC 5355 Digital Camera User Guide
www.polaroid.com
41
Polaroid PDC 5355 Digital Camera User Guide
www.polaroid.com
Set Auto Play Interval
6. Press the or button to select “INTERVAL.
7. Press the
OK
button.
AUTO PLAY
DIRECTION
INTERVAL
8. Press the or button to select the desired
setting.
9. Press the
OK
button.
INTERVAL
1 SEC
10 SEC
Start Auto Play
Perform steps 1, 2 and 3 on page 39.
4. Press the or button to select “ON”.
5. Press the
OK
button.
AUTO PLAY
ON
SETUP
The camera will automatically run from the rst le or from the last le
stored. Every le will display for the specied period according to your
interval setting. You can press the left or right button to manually skip
backward or forward. You may press the OK button to pause or press
the Wide Zoom button to stop the auto play. The auto play will keep
running as long as there is power.
Downloaded from www.Manualslib.com manuals search engine
40
Polaroid PDC 5355 Digital Camera User Guide
www.polaroid.com
41
Polaroid PDC 5355 Digital Camera User Guide
www.polaroid.com
• Playing the Video Clip
1. Turn on the camera.
2. Set the camera to Playback mode.
3. Use the left or right button to select the video clip
you want to play.
4. Press the OK button to start playing video clip.
Press it again to pause.
5. Press the Wide Zoom button to stop.
640 x 480
0004-0004
04-06-04
00:42
The icon is shown on LCD screen when a video clip is selected.
• Protect or Unprotect Picture(s) or Video Clip(s)
1. Set the camera to Playback mode.
2. Press the
M
button.
3. Press the or button to select
(PROTECT).
PROTECT
LOCK THIS
UNLOCK THIS
LOCK ALL
UNLOCK ALL
4. Press the or button to select the desired
setting.
5. Press the
OK
button.
640 x 480
0004-0004
04-06-04
00:42
LOCK THIS Protect the selected picture or video clip
UNLOCK THIS Remove protection from the selected picture or video
clip
LOCK ALL Protect all pictures and video clips in the current
memory
UNLOCK ALL Remove protection from all of the pictures and video
clips
Downloaded from www.Manualslib.com manuals search engine
42
Polaroid PDC 5355 Digital Camera User Guide
www.polaroid.com
43
Polaroid PDC 5355 Digital Camera User Guide
www.polaroid.com
The icon appears on the information display when you review the
protection status of the protected picture or video clip.
NOTE:
To protect one picture or video clip or to remove protection from one picture
or video clip, use the or button to select the one you want to protect or
unprotect before the above operation.
• Deleting Picture(s) and Video Clip(s)
1. Set the camera to Playback mode.
2. Press the
M
button.
3. Press the or button to select
(ERASE).
4. Press the or button to select the desired
setting.
ERASE
ERASE THIS
ERASE ALL
Downloaded from www.Manualslib.com manuals search engine
42
Polaroid PDC 5355 Digital Camera User Guide
www.polaroid.com
43
Polaroid PDC 5355 Digital Camera User Guide
www.polaroid.com
5. Press the
OK
button.
6. Press the or button to select the desired
setting.
7. Press the
OK
button.
ERASE
ERASE ALL ?
You can cancel the deletion by choosing “NO”.
NOTE:
To delete one picture or video clip, use the or button to select the one
you want to delete before the above operation.
Protected les can not be deleted. Remove protection before deleting.
All deleted picture and video clips can not be recovered.
Downloaded from www.Manualslib.com manuals search engine
44
Polaroid PDC 5355 Digital Camera User Guide
www.polaroid.com
45
Polaroid PDC 5355 Digital Camera User Guide
www.polaroid.com
6 Print Settings
• About PictBridge
PictBridge is a new industry standard that allows you to print images
directly from a PictBridge enable digital still camera to a PictBridge
compatible printer without using a photo editing software or a computer.
Printing Procedures
1. Preparing the camera and the printer.
Printer
Camera
Be sure battery level is full before printing.
Refer to the user guide that comes with your
printer and make preparations (paper, ink cassette,
cartridge, etc.) as required.
Turn on the camera and the printer.
2. Selecting PictBridge mode
Set the camera to Playback mode and select the PictBridge mode.
Refer to page 45 for details.
3. Connecting the camera to the printer
Refer to "Camera/Printer Connection" on page 46 for details.
4. Select print settings.
Use the camera's function and navigation buttons to select the print
settings. Refer to page 47 for details.
5. Printing
Press the
OK
button to start printing.
Downloaded from www.Manualslib.com manuals search engine
44
Polaroid PDC 5355 Digital Camera User Guide
www.polaroid.com
45
Polaroid PDC 5355 Digital Camera User Guide
www.polaroid.com
Cancelling Printing
Press the
OK
button to cancel printing the print job.
The printer will stop printing and eject the paper.
PRINT SETTING
SELECT OK
PROGRESS 001/002
PRINTED 000
CANCEL
Printing Errors
If for some reason an error occurs during or before
printing, select “CANCELor “CONTINUE” and then
press the
OK
button.
PRINT SETTING
SELECT OK
ERRORS
CANCEL
CONTINUE
NOTE:
Please refer to the printers user guide for the solutions. Printing may
resume once the problem is solved.
Printing operation may still fail with some errors even if you press the OK
button after selecting “CONTINUE”. In that case, select “CANCEL” and
press the OK button.
Selecting PictBridge Mode
1. Set the camera to Playback mode.
2. Press the
M
button.
PRINT SETTING
PICTBRIDGE
DPOF
4. Press the or button to select
(PRINT
SETTING).
5. Press the or button to select
PICTBRIDGE.
PLEASE
CONNECT TO DEVICE
6. Press the
OK
button.
NOTE:
To print a single image, select the image before enabling PictBridge mode.
Downloaded from www.Manualslib.com manuals search engine
46
Polaroid PDC 5355 Digital Camera User Guide
www.polaroid.com
47
Polaroid PDC 5355 Digital Camera User Guide
www.polaroid.com
Camera/Printer Connection
Connecting with the USB Cable.
OK
M
W
T
USB port
To Printer
1. Plug Series A of the USB cable into the
marked socket on your
printer. Location of USB socket will vary from printer to printer.
2. Plug Series Mini B of the USB cable into the port on your camera.
Downloaded from www.Manualslib.com manuals search engine
46
Polaroid PDC 5355 Digital Camera User Guide
www.polaroid.com
47
Polaroid PDC 5355 Digital Camera User Guide
www.polaroid.com
DEVICE
IS CONNECTED
NOTE:
DEVICE IS CONNECTED” displays on the LCD
screen, indicating a proper connection to the printer.
Do not connect the USB cable to the camera until
PictBridge is enable and when prompted by the
PLEASE CONNECT TO DEVICE” screen. Or if you
already have connected the cable to the camera, do not
plug into printer until prompt to do so. Not following this
sequence will result in connection failure.
When “PLEASE CONNECT TO DEVICE” is displayed for about ten
seconds, it will skip to the PictBridge print setting screen even if there is
no connection between camera and printer.
Selecting Print Settings
1. Press up or down button to select the print
mode.
PICTBRIDGE
THIS IMAGE
ALL IMAGES
ALL INDEX
SELECT
OK
Downloaded from www.Manualslib.com manuals search engine
48
Polaroid PDC 5355 Digital Camera User Guide
www.polaroid.com
49
Polaroid PDC 5355 Digital Camera User Guide
www.polaroid.com
2. The following options are available.
ALL IMAGES
THIS IMAGE
Print the selected image in the camera’s internal
memory or a memory card according to specied
settings. Use the or button to designate the
image you want to print before selecting the
PictBridge mode.
Print all images in the cameras internal memory or
a memory card according to the specied settings.
ALL INDEX
All images in the cameras internal memory or
a memory card are given an index and printed
according to the specied settings.
NOTE:
To print a single image, select the image before enabling PictBridge.
Print settings are congured for images only. Make sure there are no video
clips or other le besides images in the memory before printing, otherwise,
an error will occur if trying to print using the “ALL IMAGES” or “ALL
INDEX” option.
Not all printers will support all these print options. Please refer to the
printer user guide for options available.
3. Press the
OK
button to select the print settings.
NO. OF COPY
SIZE
SELECT
SELECT
x
Number of Copies
Print Layout
File Name On/Off
Date Stamp On/Off
4 x 6
Paper Size
OK
OK
01
1
ON
DEFAULT
Select a setting item using the up or down button and select setting
contents using the or button.
Downloaded from www.Manualslib.com manuals search engine
48
Polaroid PDC 5355 Digital Camera User Guide
www.polaroid.com
49
Polaroid PDC 5355 Digital Camera User Guide
www.polaroid.com
NOTE:
PRINTER SETTING NOT SUPPORTED” may appear
on the LCD screen after selecting a particular setting.
The camera’s print settings are not supported by
the printer. In this case, select “DEFAULT” for this
particular setting, or visit
http://www.polaroid.com for possible solutions.
PRINTER SETTING
NOT SUPPORTED
Specifying the Number of Copies
1. Press the or button to specify the
number of copies (from 1 to 99) you want to
print for the selected image or all images.
2. Press the
OK
button to start printing.
NOTE:
01” is the default setting.
NO. OF COPY
SELECT
x
OK
01
1
ON
DEFAULT
Selecting Print Layout
1. Press the or button to specify the
number of printed images on a page.
2. Press the
OK
button to start printing.
N-UP LAYOUT
SELECT
x
OK
01
1
ON
DEFAULT
DEFAULT Print settings differ according to the printer model.
1/2/4/6/8 Specify the number of printed images on a page.
BORDERLESS Print right to the edge of the page.
Downloaded from www.Manualslib.com manuals search engine
50
Polaroid PDC 5355 Digital Camera User Guide
www.polaroid.com
51
Polaroid PDC 5355 Digital Camera User Guide
www.polaroid.com
Setting the File Name On/Off
1. Press the or button to select
DEFAULT”, “ON” or “OFF”.
2. Press the
OK
button to start printing.
FILE NAME
SELECT
x
01
1
ON
DEFAULT
OK
DEFAULT Print settings differ according to the printer model.
ON Add the le name to the printed image.
OFF Print without the le name.
Setting the Date Stamp On/Off
1. Press the or button to select
DEFAULT”, “ON” or “OFF”.
2. Press the
OK
button to start printing.
DATE STAMPING
SELECT
x
01
1
ON
DEFAULT
OK
DEFAULT Print settings differ according to the printer model.
ON Add the date stamp to the printed image.
OFF Print without the date stamp.
Selecting Paper Size
1. Press the or button to select the
paper size.
The following paper sizes are available:
8” x 10”, 4” x 6”, A4 and default.
2. Press the
OK
button to start printing.
SIZE
SELECT
OK
4 x 6
DEFAULT Print settings differ according to the printer model.
Downloaded from www.Manualslib.com manuals search engine
50
Polaroid PDC 5355 Digital Camera User Guide
www.polaroid.com
51
Polaroid PDC 5355 Digital Camera User Guide
www.polaroid.com
• DPOF (Digital Print Order Format)
DPOF” stands for “Digital Print Order Format, which is a format for
recording on a memory card or other medium which captured images
and how many copies should be printed. Then you can print on a DPOF-
compatible printer or at a professional print service from the memory
card in accordance with the le name and number of copies settings
recorded on the card.
With this camera, you should always select images by viewing them on
the LCD screen. Do not specify images by le name without viewing the
le contents.
NOTE:
Print settings are congured for images only. Make sure there are no video clips
or other le besides images in the memory before printing, otherwise, an error
will occur if trying to print using the “ALL IMAGES” option.
1. Insert an SD card into the camera.
2. Turn on the camera.
3. Set the camera to Playback mode.
4. Press the
M
button.
5. Press the or button to select
(PRINT
SETTING).
6. Press the or button to select “DPOF”.
PRINT SETTING
PICTBRIDGE
DPOF
Downloaded from www.Manualslib.com manuals search engine
52
Polaroid PDC 5355 Digital Camera User Guide
www.polaroid.com
53
Polaroid PDC 5355 Digital Camera User Guide
www.polaroid.com
7. Press the
OK
button.
8. Press the or button to select the desired
setting.
DPOF
THIS IMAGE
ALL IMAGES
THIS IMAGE The selected picture in a memory card will be printed up
to 99 copies.
ALL IMAGES All pictures in a memory card will be printed up to 99
copies for each picture.
9. Press the
OK
button.
10. Press the or button to select the
desired setting.
11. Press the
OK
button.
DPOF
PRINT 01 COPIES
To print a single picture, press the or button to select the picture you
want to print before the above operation. Press the or button to
specify the number of copies. Press the Menu button to exit.
Downloaded from www.Manualslib.com manuals search engine
52
Polaroid PDC 5355 Digital Camera User Guide
www.polaroid.com
53
Polaroid PDC 5355 Digital Camera User Guide
www.polaroid.com
12. Remove the memory card from the camera and insert it into the
printers card slot (as illustrated). Location of the card slot may vary
from printer to printer model.
NOTE:
Make sure you turn off the camera before inserting or removing a memory card.
13. Press the Print button on the printer to start printing.
Downloaded from www.Manualslib.com manuals search engine
54
Polaroid PDC 5355 Digital Camera User Guide
www.polaroid.com
55
Polaroid PDC 5355 Digital Camera User Guide
www.polaroid.com
7 Using the SD (Secure Digital) Card
• Using the SD card
Your camera comes with a 16MB built-in ash memory for storing
pictures and video clips. You can expand the memory using a
commercially available SD card (up to 1GB). The camera senses
whether a memory card is inserted, and automatically saves pictures
and video clips accordingly. Note that you cannot save pictures
or video clips to the built-in ash memory while a memory card is
installed in the camera.
Memory Card Precautions
1. Use only an SD memory card with this camera.
2. Electrostatic charge, electrical noise, and other phenomena can
cause data corruption or even loss. Always make sure that you
always back up important data on other media (MO disc, computer
hard drive, etc.).
3. If a memory card starts to behave abnormally, you can restore
normal operation by reformatting it. However, we recommend that
you always take along more than one memory card whenever using
the camera far away from the home or ofce.
4. We recommend that you format a memory card before using it for
the rst time after purchasing it, or whenever the card you are
using seems to be the cause of abnormal pictures. Remember to
format a memory card if it was used in another digital camera or
other devices.
Downloaded from www.Manualslib.com manuals search engine
54
Polaroid PDC 5355 Digital Camera User Guide
www.polaroid.com
55
Polaroid PDC 5355 Digital Camera User Guide
www.polaroid.com
IMPORTANT!
Make sure you turn off the camera before inserting or removing a memory card.
Be sure to orient the card correctly when inserting it. Never try to force a
memory card into the slot when you feel resistance.
SD memory cards have a write protection switch that you can use to
protect les from accidental deletion. However, you must remove the write
protection whenever you want to record new les onto it, format it, or
delete its les.
Files contained in the SD card recorded by other cameras may conict
with the PDC 5355 camera, and valuable data in your existing SD card
may be distorted or lost when the card is inserted in the PDC 5355
camera. We strongly recommend the user to use a NEW or formatted SD
card for the PDC 5355 camera. The manufacturer is not liable for losing or
corrupting any valuable data or les in your SD card due to your improper
operation.
Inserting the SD Card
Turn off the camera and open the Battery/SD card door as illustrated.
Insert the SD Card, ensuring the card is inserted the correct position as
illustrated. Close the Battery/SD card door before using the camera.
Notched corner
of SD card
The
icon will appear on the LCD screen when a SD card is inserted
into the camera.
Downloaded from www.Manualslib.com manuals search engine
56
Polaroid PDC 5355 Digital Camera User Guide
www.polaroid.com
57
Polaroid PDC 5355 Digital Camera User Guide
www.polaroid.com
Removing the SD Card
To remove the SD card, turn off the camera and open the Battery/SD
card door. Gently use your nger to push the SD card inwards and then
release it for the SD card to bounce out of the SD card slot as illustrated.
IMPORTANT!
Never insert any other object into the camera’s SD card slot. Doing so
creates the risk of damage to the camera and card.
Should water or any foreign objects ever get into the card slot,
immediately turn off the camera, remove the batteries and contact your
dealer or nearest service provider.
Never remove a card from the camera while the camera is powered on.
Doing so can cause the picture or video recording operation to fail, and
even damage the memory card.
Downloaded from www.Manualslib.com manuals search engine
56
Polaroid PDC 5355 Digital Camera User Guide
www.polaroid.com
57
Polaroid PDC 5355 Digital Camera User Guide
www.polaroid.com
Formatting the SD Card
Formatting the SD card erases all les stored in it, including the
protected ones. Removing the SD card during formatting may damage
the card.
1. Insert an SD card into the camera.
2. Turn on the camera.
3. Procedures are the same as for formatting the internal memory.
Refer to “Formatting the Internal Memory” on page 20 for details.
IMPORTANT!
You can format a memory card on the camera or on a computer. However
formatting a memory card on a computer takes much longer.
Note that data deleted by a format operation cannot be recovered. Make
sure you do not have any useful data currently stored on a memory card
before you format it.
Formatting a memory card destroys all the pictures, even those are protected.
Downloaded from www.Manualslib.com manuals search engine
58
Polaroid PDC 5355 Digital Camera User Guide
www.polaroid.com
59
Polaroid PDC 5355 Digital Camera User Guide
www.polaroid.com
To Copy Pictures and Video Clips from Internal Memory to a
Memory Card
1. Insert an SD card into the camera.
2. Turn on the camera.
3. Set the camera to Playback mode.
4. Press the
M
button.
5. Press the or button to select
(COPY TO
CARD).
6. Press the or button to select “COPY.
COPY TO CARD
CANCEL
COPY
7. Press the
OK
button.
In the above operation, you can exit to the normal playback mode by
choosing “CANCELand conrm it. Please note that you cannot copy
pictures or video clips from a memory card to the internal memory.
NOTE:
The NOT ENOUGH SPACE TO COPY” indicator appears on the LCD screen
when the current memory card is full.
The “NO CARD” indicator appears on the LCD screen when no memory card
is inserted into the camera.
Downloaded from www.Manualslib.com manuals search engine
58
Polaroid PDC 5355 Digital Camera User Guide
www.polaroid.com
59
Polaroid PDC 5355 Digital Camera User Guide
www.polaroid.com
8 Installing the Software Onto a Computer
• Installing the Software
For Windows® Users:
PC
IMPORTANT!
Please backup all the necessary data before any driver and software installation.
The CD-ROM is tested and recommended to use under English Windows OS.
Please restart the computer after installing the software.
IMPORTANT! (For Windows® 98SE)
Windows® 98SE needs to install the PDC 5355 Camera Driver for Mass
Storage function. After the installation, please restart the Windows before
connecting the camera to the PC.
IMPORTANT!
To experience higher performance in graphics and sound when youre
watching video clips on your PC, it is recommended to install the DirectX ver.
9.0 or above. It can be downloaded from http://www.microsoft.com/directx
IMPORTANT! (For Windows® Me, 2000, XP)
Directly plug-in the camera to transfer and play the pictures and video clips.
No need to install the camera driver.
Downloaded from www.Manualslib.com manuals search engine
60
Polaroid PDC 5355 Digital Camera User Guide
www.polaroid.com
61
Polaroid PDC 5355 Digital Camera User Guide
www.polaroid.com
1. Before you begin, close all other software
applications open on your computer.
2. Insert the CD supplied into the
computer CD-ROM Drive.
3. The CD User Interface Screen will
automatically launch.
4. With the mouse, click on each
software interface button in turn and
follow the on screen instructions.
Open & Close
NOTE:
If the setup screen does not appear after loading the CD, then you can
manually start it by double clicking the My Computer” icon on your desktop,
then double clicking the icon for the CD-ROM drive. When the CD-ROM
window opens, double click the “INSTALL-E.EXE” icon.
For Macintosh Users:
Mac
1. Before you begin, close all other software applications opened on
your computer.
2. Insert the CD supplied into the computer CD-ROM Drive.
3. Double click the CD-ROM icon “Polaroid.
4. Install the software included.
Downloaded from www.Manualslib.com manuals search engine
60
Polaroid PDC 5355 Digital Camera User Guide
www.polaroid.com
61
Polaroid PDC 5355 Digital Camera User Guide
www.polaroid.com
• Software Included with Your Camera
PDC 5355 Camera Driver Plug & Play removable disk
Easy to use, just plug the camera to a computer and use it as a
removable disk. Use the ArcSoft PhotoImpression® 5 to edit and print
the Pictures.
ArcSoft PhotoImpression® Picture Editing Software
ArcSoft PhotoImpression is an easy to use image-editing program. This
program enables users to upload still image and movie clips stored in
your camera. You could also edit and retouch your photos, then add
special effects or place them in cards, calendars, frames and fantasy
templates. ArcSoft PhotoImpression® 5 also includes a wide variety of
printing options.
Adobe® Acrobat® Reader.PDF File Reading Software
Adobe® Acrobat® Reader lets you view and print Adobe Portable
Document format (PDF) les on all major computer platforms, as well
as ll in and submit Adobe PDF forms online.
Downloaded from www.Manualslib.com manuals search engine
62
Polaroid PDC 5355 Digital Camera User Guide
www.polaroid.com
63
Polaroid PDC 5355 Digital Camera User Guide
www.polaroid.com
• Computer System Requirements
For acceptable picture transferring and editing performance, we
recommend the following minimum requirements;
For Windows® Users
PC
Compatible with Microsoft® Windows® 98SE, Me, 2000 or XP
Pentium® III 450MHz or equivalent processor
128MB RAM (512MB recommended)
USB Port
DirectX 9.0 or higher
500MB free disk space
Color monitor with high color (16-bit) graphic capability or higher
CD-ROM drive
Standard mouse and keyboard
Stereo speakers
For Macintosh Users
Mac
PowerPC® Processor
Mac OS Version 9.2~X
USB Port
96MB RAM (128MB recommended)
400MB Free disk space
Color monitor with high color (16-bit) graphic capability or higher
CD-ROM drive
Standard mouse and keyboard
Stereo speakers
Downloaded from www.Manualslib.com manuals search engine
62
Polaroid PDC 5355 Digital Camera User Guide
www.polaroid.com
63
Polaroid PDC 5355 Digital Camera User Guide
www.polaroid.com
9 Transferring Pictures and Video Clips to a Computer
• Before You Transfer Files
IMPORTANT!
BEFORE YOU CONNECT YOUR DIGITAL CAMERA TO THE COMPUTER, MAKE
SURE THAT YOU HAVE INSTALLED THE SOFTWARE FROM THE ENCLOSED
CD. PLEASE REFER TO “8 Installing the Software Onto a Computer.
• Connecting to Your Computer
Connecting with the USB Cable.
OK
M
W
T
OK
M
1.
Turn on the camera.
2.
Plug Series A of the USB cable into the
marked socket on your
computer.
3.
Plug Series Mini B of the USB cable into the port on your camera.
4.
Turn on the camera and an interface “New Hardware Found” will
show on the computer desktop.
5.
A removable disk drive will be installed onto your computer automatically.
Downloaded from www.Manualslib.com manuals search engine
64
Polaroid PDC 5355 Digital Camera User Guide
www.polaroid.com
65
Polaroid PDC 5355 Digital Camera User Guide
www.polaroid.com
• Transferring Pictures and Video Clips
For Windows® Users
PC
NOTE:
You can transfer pictures and video clips in any mode.
1. Turn on the camera
2. Connect the camera to a computer via the USB cable.
3. Double click on “My Computer” on your PC desktop and you will
see a “Removable Disk” drive.
4. Double click “Removable Disk” -> double click “DCIM”-> double
click any directory folder under “DCIM.
5. All the pictures and video clips are in the directory folder. Highlight
the pictures and video clips and drag them to a folder of your
choice. You can also create sub-folders to group them or use the
ArcSoft software to edit and manage the pictures or video clips.
For Macintosh Users
Mac
NOTE:
For Mac user, directly plug-in the camera and no need to install the driver.
1. Turn on the camera
2. Set the camera to Playback mode.
3. Connect the camera to a computer via the USB cable, the systems
will automatically recognize the MASS STORAGE drive. (System
will automatically create a Mass Storage named “Unlablled)
NOTE:
This Drive name will vary from different version of Mac OS system.
4. Double click the folder “Unlabelled” to enter sub-folder “DCIM”.
5. Double click the folder “DCIM” and then any sub folder inside.
6. You can copy the pictures and video clips from this directory folder
and paste to the hard disk.
Downloaded from www.Manualslib.com manuals search engine
64
Polaroid PDC 5355 Digital Camera User Guide
www.polaroid.com
65
Polaroid PDC 5355 Digital Camera User Guide
www.polaroid.com
• ArcSoft PhotoImpression® 5 Hot Plug Function (PC Only)
Arcsoft PhotoImpression® 5 will detect the connection between the
camera and the computer automatically.
When connect the camera to the computer, Arcsoft PhotoImpression® 5
will launch on your desktop automatically.
Arcsoft PhotoImpression® 5 will detect any new photos in the camera.
Click “OK” button to start the copying new photos to the computer.
Downloaded from www.Manualslib.com manuals search engine
66
Polaroid PDC 5355 Digital Camera User Guide
www.polaroid.com
67
Polaroid PDC 5355 Digital Camera User Guide
www.polaroid.com
You can select the destination which the photos are copied to.
Click the “folder” icon - >Browse for folder - > Click the “OK” button
to conrm.
Click “OK” to start copying.
The photos have been copy to the computer successfully. You can start
to use the PhotoImpression® 5 to edit the photos.
Downloaded from www.Manualslib.com manuals search engine
66
Polaroid PDC 5355 Digital Camera User Guide
www.polaroid.com
67
Polaroid PDC 5355 Digital Camera User Guide
www.polaroid.com
9 Troubleshooting Problems
• Troubleshooting
The troubleshooting guide is designed to help you. If problems continue,
please contact customer support. Details are provided under “Getting
Help”.
Symptom Problem Solution
I receive an error message
when I am installing “Polaroid
PDC 5355 Camera Driver”.
“Polaroid PDC 5355 Camera
Driver” does not load.
Shut down all other applications and attempt
to reinstall the driver.
Check to see if the USB controller in your BIOS
if it is activated. Please refer to Polaroid website
for how to active USB controller in BIOS
I cannot upload images to
my computer.
Connection failure. Check all cable connections are secured.
I cannot run the “Polaroid
PDC 5355 Camera Driver”.
Conict with another camera
driver or capture device.
If you have another camera installed on your
computer, remove it and it’s driver completely
from your system to avoid conicting with
your PDC 5355
Camera Driver is not installed.
You need to install the camera driver for
Windows 98SE systems.
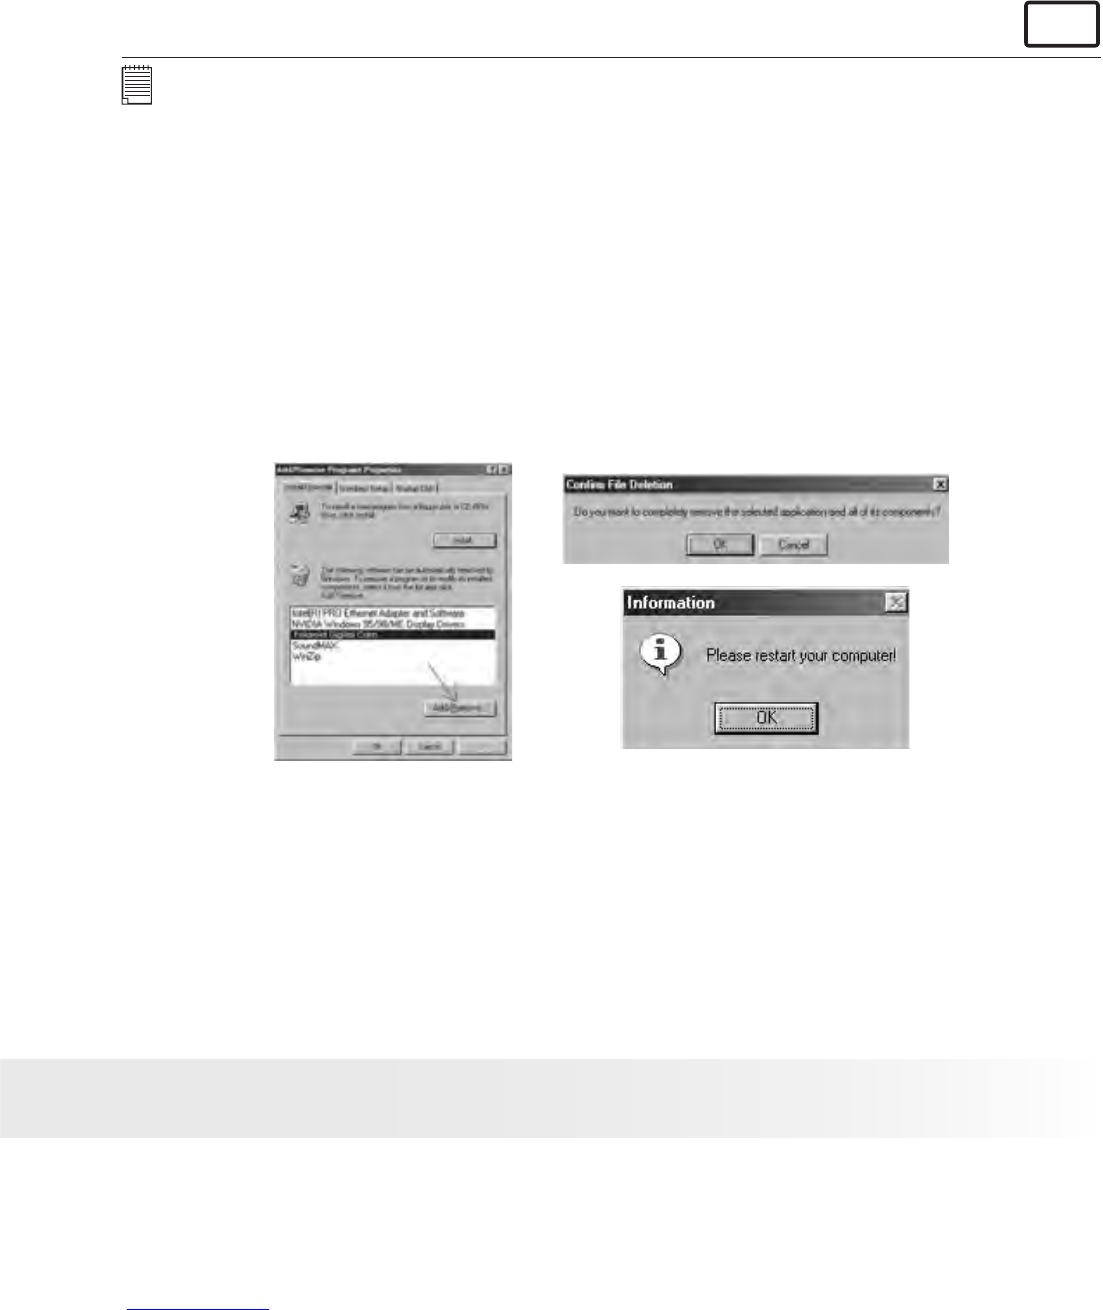
My CD Installation wizard
does not work.
The auto installation le is
switched off or the CD-ROM is
disconnected.
Go to the computer desktop. Right click
on “My Computer”. Click “Properties”.
Select “Device Manager”. Double click on
“CD_ROM”, double click on “CD-R (normally
the manufacturer’s name. Click on “Settings”.
Ensure both “Auto insert notication” and the
“disconnect” are ticked. If you change the
settings the computer will ask you to restart
your PC. Click “Yes”.
I get a blurred image when
uploading my images to my
computer.
There may be a momentary
delay between pressing the
shutter button and the actual
exposure.
Hold your PDC 5355 camera steady until you
hear a beep which indicates the exposure is
completed.
My PDC 5355 camera
hanged and all buttons do
not work.
Your camera may be affected
by the electrostatic discharge.
Take out the batteries and disconnect the
camera from the computer for 10 seconds.
Insert the batteries again.
Downloaded from www.Manualslib.com manuals search engine
68
Polaroid PDC 5355 Digital Camera User Guide
www.polaroid.com
69
Polaroid PDC 5355 Digital Camera User Guide
www.polaroid.com
I cannot activate my digital
camera by pressing the
Power button.
Insufcient battery power or
batteries are missing.
Replace batteries.
Symptom Problem Solution
Camera does not turn on. Batteries are not oriented correctly.
Or
Batteries are dead.
Orient batteries correctly.
Or
Replace batteries.
Camera suddenly powers off. Auto power off function activated.
Or
Batteries are dead.
Turn the camera on.
Or
Replace batteries.
Image is not recorded when
the shutter button is pressed.
Camera is turned off.
Or
Flash unit is charging.
Or
Memory is full.
Turn the camera on
Or
Wait until ash unit charging nishes
Or
Delete images you no longer need, or
use another memory card.
Camera powers off during
self-timer countdown.
Batteries are dead.
Replace batteries.
LCD screen image is out of focus. Macro Mode being used for scenery
or portraits
Or
Normal focus being used for
macro images.
Use normal focus for scenery and portraits
Or
Use Macro mode for macro images.
Recorded pictures are not
saved in memory.
Camera powers off before the save
operation is complete.
Or
Removing the memory card before
the save operation is complete.
If the Power LED blinks on the LCD
screen, replace batteries with a full set
of new ones as soon as possible.
Or
Do not remove the memory card before
the save operation is complete.
Color of the playback pictures is
different from the picture on the
LCD screen during recording.
Sunlight or light from another source
is shining directly into the lens
during recording.
Position the camera so that sunlight
does not shine directly onto the lens.
Downloaded from www.Manualslib.com manuals search engine
68
Polaroid PDC 5355 Digital Camera User Guide
www.polaroid.com
69
Polaroid PDC 5355 Digital Camera User Guide
www.polaroid.com
AVI le cannot be played. DirectX version is lower than 9.0.
Or
Windows Media player not installed
in the computer
Install directx 9.0 or above.
Visit http://www.microsoft.com/directx
for more detail.
Or
Please go to
http://www.microsoft.com/windows/
windowsmedia/players.aspx to
download the Windows Media Player to
play the video clips.
Symptom Problem Solution
Pictures are not displayed. A memory card with non-DCF
pictures recorded with another
camera is loaded in the camera.
This camera cannot display non-DCF
pictures recorded onto a memory card
used by another digital camera.
I cannot erase pictures. All the pictures in memory are
protected.
Unprotected the pictures you want
to delete.
The camera is detected by the
Windows and works properly.
But a driver letter of the
Removable disk is not created.
The removable disk crashes with the
network drives.
Disconnect the crashed network drive
and reserve this drive letter for the
camera.
There is no response from the
camera while pressing any
buttons.
The LCD screen is frozen or the
camera is hanged.
Remove and re-install the battery or
batteries to reset the camera. Your
valuable data stored in the camera will
not be lost.
An error message appears
on the LCD screen before or
during printing.
Printer may not support some
advanced print features.
Or
Some fault occurs with the printer.
Or
Print settings can be congured for
image only.
Select “DEFAULT” for a particular
print setting or visit http://
www.polaroid.com for the solutions.
Or
Please refer to the printer’s user guide
for the solutions.
Or
Make it sure that there is no video
clips or other le format in the current
memory before printing.
Please also refer to the help les & User Guides that accompany the enclosed
applications.
For further information and support, please visit our website:
http://www.polaroid.com
Downloaded from www.Manualslib.com manuals search engine
70
Polaroid PDC 5355 Digital Camera User Guide
www.polaroid.com
71
Polaroid PDC 5355 Digital Camera User Guide
www.polaroid.com
10 Getting Help
• Polaroid Online Services
Website: http://www.polaroid.com
• Customer Support
Questions? Need Help? Call us at 1-877-388-3779 (USA),
001-866-722-0866 (Mexico), 1-888-235-0808 (Canada).
Monday thru Friday, 10 am-7 pm EST and Sat 10 am-4 pm
EST Or visit us at http://www.polaroid.com
• ArcSoft Software Help
For North America For South & Central America
ArcSoft HQ Support Center Tel: 1-510-979+5520
(Fremont California, CA) Fax: 1-510-440-1270
Tel: 1-800-762-8657 E-mail:latlnsupport@arcsoft.com
(toll free number)
Fax: 1-510-440-1270
E-mail: support@arcsoft.com
For China For Japan
ArcSoft China Support Center (Beijing) ArcSoft Japan Support Center (Tokyo)
Tel: 8610-6849-1368 Tel: +81-03-3834-5256
Fax: 8610-6849-1367 Fax: +81-03-5816-4730
E-mail: china@arcsoft.com Web: http://www.mds2000.co.jp/arcsoft
E-mail: japan@arcsoft.com and
support@mds2000.com
For Oceania For Europe/Middle East/
ArcSoft Australian Support Center Africa & Rest of the World
(Baulkham Hills, New South Wales) ArcSoft Europe Support Center
Tel: 61 (2) 9899-5888 (Ireland)
Fax: 61 (2) 9899-5728 Tel: +353-(0) 61-702087
E-mail: support@supportgroup.com.au Fax: +353-(0) 61-702001
E-mail: europe@arcsoft.com
Visit
http://
www.arcsoft.com for technical support and frequently asked questions (FAQ’s).
Polaroid” and “Polaroid and Pixel” are trademarks of Polaroid Corporation, Waltham, MA,
USA
Downloaded from www.Manualslib.com manuals search engine
70
Polaroid PDC 5355 Digital Camera User Guide
www.polaroid.com
71
Polaroid PDC 5355 Digital Camera User Guide
www.polaroid.com
11 Appendix
• Technical Specications
Resolution
2592 x 1944
2304 x 1728
2048 x 1536
High Normal Low
4 pictures 6 pictures 10 pictures
6 pictures 10 pictures 16 pictures
9 pictures 13 pictures 21 pictures
Quality
640 x 480
52 pictures 82 pictures 122 pictures
Sensor
Resolution
Sensor:
- 1/2.5 inch
- 5.3 Mega Pixels CCD
Resolution & Storable Images (based on 16 MB
internal memory)
Type: 6 groups, 7 elements
Aperture: F 2.65 ~ 4.97
Focal Length: 5.9 ~ 17.17 mm
Focal Distance
- Normal Focus: 2 ft to innity (0.6 m to innity)
- Macro Focus:
Wide angle: 3.9 ~ 27.6 in. (10 ~ 70 cm)
Telephoto: 7.9 ~ 27.6 in. (20 ~ 70 cm)
(The focusing range is the distance from the lens
surface to the subject.)
Focus Zones: center-zone
Lens
1.5” TFT color panel
LCD Screen
Downloaded from www.Manualslib.com manuals search engine
72
Polaroid PDC 5355 Digital Camera User Guide
www.polaroid.com
73
Polaroid PDC 5355 Digital Camera User Guide
www.polaroid.com
Exposure
Control
-/+1.5 EV in 0.3 increments
ISO Speed
Auto, 100, 200, 400
Shutter
Speed
Mechanical shutter 1/1000 sec ~ 1/8 sec
White
Balance
Auto, Daylight, Cloudy, Tungsten, Fluorescent
Storage Internal Memory: 16 MB Nand Flash
External Memory
- supports SD card up to 1GB (not included)
File Format Still Image
- EXIF 2.2 compatible format (JPEG compression)
Video Clip: AVI format
Power
Supply
2 x AA-size batteries (included)
Self-timer
10 seconds with beep sound
Tripod
Socket
Yes
Connectivity With computer via USB cable (included)
Dimension Size: (W) 97.6 mm x (D) 32 mm x (H) 65.5 mm
Weight: Approximately 150g excluding batteries or card
Built-in
Flash
Modes:
- Flash Off, Auto Flash, Red-eye Reduction, Forced On
Range: Wide: 3.2 ~ 9.8 feet (1 ~ 3 meters)
Telephoto: 3.2 ~ 6.7 feet (1 ~ 2 meters)
For Windows® Users: Microsoft® Windows® 98SE,
Me, 2000 or XP
For Macintosh Users: Mac OS 9.2~X
Operating
System
Downloaded from www.Manualslib.com manuals search engine
72
Polaroid PDC 5355 Digital Camera User Guide
www.polaroid.com
73
Polaroid PDC 5355 Digital Camera User Guide
www.polaroid.com
• Capacity of SD Card
512MB
32MB
64MB
128MB
256MB
SD Card
Normal
Quality
High
Quality
120
200
176
256
1040 1640
10
15
15
25
22
32
130 205
20 30
30
50
44
64
260
410
40
60
60
100
88
128
520
820
80
120
2592 x 1944
2304 x 1728
2048 x 1536
640 x 480
2592 x 1944
2304 x 1728
2048 x 1536
640 x 480
2592 x 1944
2304 x 1728
2048 x 1536
640 x 480
2592 x 1944
2304 x 1728
2048 x 1536
640 x 480
2592 x 1944
2304 x 1728
2048 x 1536
640 x 480
Low
Quality
1GB
320
480
480
800
704 1024
4160 6560
2592 x 1944
2304 x 1728
2048 x 1536
640 x 480
160 240
240
400
352
512
2080
3280
320
416
2440
25
40
52
305
50
80
104
610
100
160
208
1220
200
800
1280
1664
9760
400
640
832
4880
Downloaded from www.Manualslib.com manuals search engine
74
Polaroid PDC 5355 Digital Camera User Guide
www.polaroid.com
75
Polaroid PDC 5355 Digital Camera User Guide
www.polaroid.com
512MB
32MB
64MB
128MB
256MB
SD Card
Video clips can be taken
640 x 480
320 x 240
1.3 minute
640 x 480
320 x 240
640 x 480
320 x 240
640 x 480
320 x 240
1GB
640 x 480
320 x 240
640 x 480
320 x 240
2.5 minutes
2.6 minute
5 minutes
5.2 minutes
10 minutes
10.4 minutes
20 minutes
20.8 minutes
40 minutes
41.6 minutes
80 minutes
16MB
640 x 480
320 x 240
0.45 minute
0.9 minute
NOTE:
Scene complexity affects a picture’s le size. For example, a picture of
trees in autumn has a larger le size than a picture of blue sky at the same
resolution and quality setting. Therefore, the number of pictures and length
of video clips you can store on a memory card may vary.
Downloaded from www.Manualslib.com manuals search engine
74
Polaroid PDC 5355 Digital Camera User Guide
www.polaroid.com
75
Polaroid PDC 5355 Digital Camera User Guide
www.polaroid.com
• Uninstalling Polaroid PDC 5355 Driver (PC Only)
For Windows® 98SE Users:
PC
NOTE:
The following driver uninstall procedure is for Windows 98SE users only
because only Windows 98SE needs to install the PDC 5355 driver.
1. Open Add/Remove Program Properties in Control Panel and select
Polaroid Digital Cam" program, then click Add/Remove .
2. The following dialog box appears, click "OK" to conrm removing
the camera driver.
3. The uninstallation program runs automatically, please restart your
computer when it is nished.
Downloaded from www.Manualslib.com manuals search engine
76
Polaroid PDC 5355 Digital Camera User Guide
www.polaroid.com
77
Polaroid PDC 5355 Digital Camera User Guide
www.polaroid.com
• Camera Default Settings
Camera Mode
Still Image Mode
Video Mode
Setup Mode
Description
Image Resolution
Quality
Exposure Compensation
White Balance for Pictures
ISO Sensitivity
Flash Mode
Video Resolution
White Balance for Video Clips
Date Format
Auto Power Off
Beep
Frequency
Language
Date Stamp
Default
2592 x 1944
High
Auto
Auto
Auto
Auto Flash
640 x 480
Auto
DD/MM/YY
Off
On
50 Hz
English
Off
Downloaded from www.Manualslib.com manuals search engine
76
Polaroid PDC 5355 Digital Camera User Guide
www.polaroid.com
77
Polaroid PDC 5355 Digital Camera User Guide
www.polaroid.com
• Using Your Batteries
IMPORTANT NOTE:
For best performance and prolonged battery life, we recommend the use of
AA lithium or rechargeable NiMH.
Limit the following activities that reduces battery life:
Reviewing your pictures on the LCD screen.
Using the LCD screen to take pictures (Use the optical viewnder to
frame pictures).
Excessive use of the ash.
WARNING!
Batteries should be replaced by an adult.
Do not mix different types of batteries (or new and used batteries).
Use recommended or equivalent type of batteries only.
Insert the batteries in the correct polarity.
Remove exhausted batteries from the camera immediately.
Do not short the supply terminals.
Do not dispose the batteries in re.
Remove batteries from the camera when not in use.
These instructions should be retained for future reference.
Downloaded from www.Manualslib.com manuals search engine
78
Polaroid PDC 5355 Digital Camera User Guide
www.polaroid.com
79
Polaroid PDC 5355 Digital Camera User Guide
www.polaroid.com
• Tips, Your Safety & Maintenance
Your Camera should only be operated within the following environmental
conditions;
32 - 104º Fahrenheit; 0 - 40º Celsius
20% - 85% relative humidity, non condensing
Battery life or image quality may be affected outside these conditions.
Camera Cautions
NEVER immerse any part of the Camera or its accessories into any
uid or liquid.
ALWAYS disconnect the Camera from your PC or TV before cleaning
it.
ALWAYS remove dust or stains with a soft cloth dampened with
water or neutral detergent.
NEVER place hot items on the surface of the Camera.
NEVER attempt to open or disassemble Camera as this will affect
any warranty claim.
• Regulatory Information
FCC Notice
This device complies with Part 15 of FCC Rules. Operation is subject
to the following two conditions: (1) This device may not cause harmful
interference, and (2) This device must accept any interference received,
including interference that may cause undesired operation.
Downloaded from www.Manualslib.com manuals search engine
78
Polaroid PDC 5355 Digital Camera User Guide
www.polaroid.com
79
Polaroid PDC 5355 Digital Camera User Guide
www.polaroid.com
Warning: Changes or modications to this unit not expressly approved
by the party responsible for compliance could void the users authority
to operate the equipment.
NOTE: This equipment has been tested and found to comply with the
limits for Class B digital device, pursuant to Part 15 of the FCC Rules.
These limits are designed to provide reasonable protection against
harmful interference in a residential installation. This equipment
generates, uses and can radiate radio frequency energy and, if not
installed and used in accordance with the instructions, may cause
harmful interference to radio communications.
However, there is no guarantee that interference will not occur in a
particular installation. If this equipment does cause harmful interference
to radio or television reception, which can be determined by turning
the equipment off and on, the user is encouraged to try to correct the
interference by one or more of the following measures:
Reorient or relocate the receiving antenna.
Increase the separation between the equipment and receiver.
Connect the equipment into an outlet on a circuit different from that
to which the receiver is needed.
Consult the dealer or an experienced radio/TV technician for help.
Shielded cable must be used with this unit to ensure compliance with
the Class B FCC limits.
Under the environment with electrostatic discharge, the product may
malfunction and require user to reset the product.
Downloaded from www.Manualslib.com manuals search engine
US 0206
Part No.: OM3365US002
Downloaded from www.Manualslib.com manuals search engine
72

Hulp nodig? Stel uw vraag in het forum

Spelregels
1

Forum

Polaroid-pdc-5355

Misbruik melden

Gebruikershandleiding.com neemt misbruik van zijn services uitermate serieus. U kunt hieronder aangeven waarom deze vraag ongepast is. Wij controleren de vraag en zonodig wordt deze verwijderd.

Product:

Bijvoorbeeld antisemitische inhoud, racistische inhoud, of materiaal dat gewelddadige fysieke handelingen tot gevolg kan hebben.

Bijvoorbeeld een creditcardnummer, een persoonlijk identificatienummer, of een geheim adres. E-mailadressen en volledige namen worden niet als privégegevens beschouwd.

Spelregels forum

Om tot zinvolle vragen te komen hanteren wij de volgende spelregels:

Belangrijk! Als er een antwoord wordt gegeven op uw vraag, dan is het voor de gever van het antwoord nuttig om te weten als u er wel (of niet) mee geholpen bent! Wij vragen u dus ook te reageren op een antwoord.

Belangrijk! Antwoorden worden ook per e-mail naar abonnees gestuurd. Laat uw emailadres achter op deze site, zodat u op de hoogte blijft. U krijgt dan ook andere vragen en antwoorden te zien.

Abonneren

Abonneer u voor het ontvangen van emails voor uw Polaroid pdc 5355 bij:


U ontvangt een email met instructies om u voor één of beide opties in te schrijven.


Ontvang uw handleiding per email

Vul uw emailadres in en ontvang de handleiding van Polaroid pdc 5355 in de taal/talen: Engels als bijlage per email.

De handleiding is 1,39 mb groot.


U ontvangt de handleiding per email binnen enkele minuten. Als u geen email heeft ontvangen, dan heeft u waarschijnlijk een verkeerd emailadres ingevuld of is uw mailbox te vol. Daarnaast kan het zijn dat uw internetprovider een maximum heeft aan de grootte per email. Omdat hier een handleiding wordt meegestuurd, kan het voorkomen dat de email groter is dan toegestaan bij uw provider.

Stel vragen via chat aan uw handleiding

Stel uw vraag over deze PDF

Uw handleiding is per email verstuurd. Controleer uw email

Als u niet binnen een kwartier uw email met handleiding ontvangen heeft, kan het zijn dat u een verkeerd emailadres heeft ingevuld of dat uw emailprovider een maximum grootte per email heeft ingesteld die kleiner is dan de grootte van de handleiding.

Er is een email naar u verstuurd om uw inschrijving definitief te maken.

Controleer uw email en volg de aanwijzingen op om uw inschrijving definitief te maken

U heeft geen emailadres opgegeven

Als u de handleiding per email wilt ontvangen, vul dan een geldig emailadres in.

Uw vraag is op deze pagina toegevoegd

Wilt u een email ontvangen bij een antwoord en/of nieuwe vragen? Vul dan hier uw emailadres in.


Info