5
Polaroid PDC 5350 Digital Camera User Guide
www.polaroid-digital.com
4 Recording Video Clips.......................................................................................45
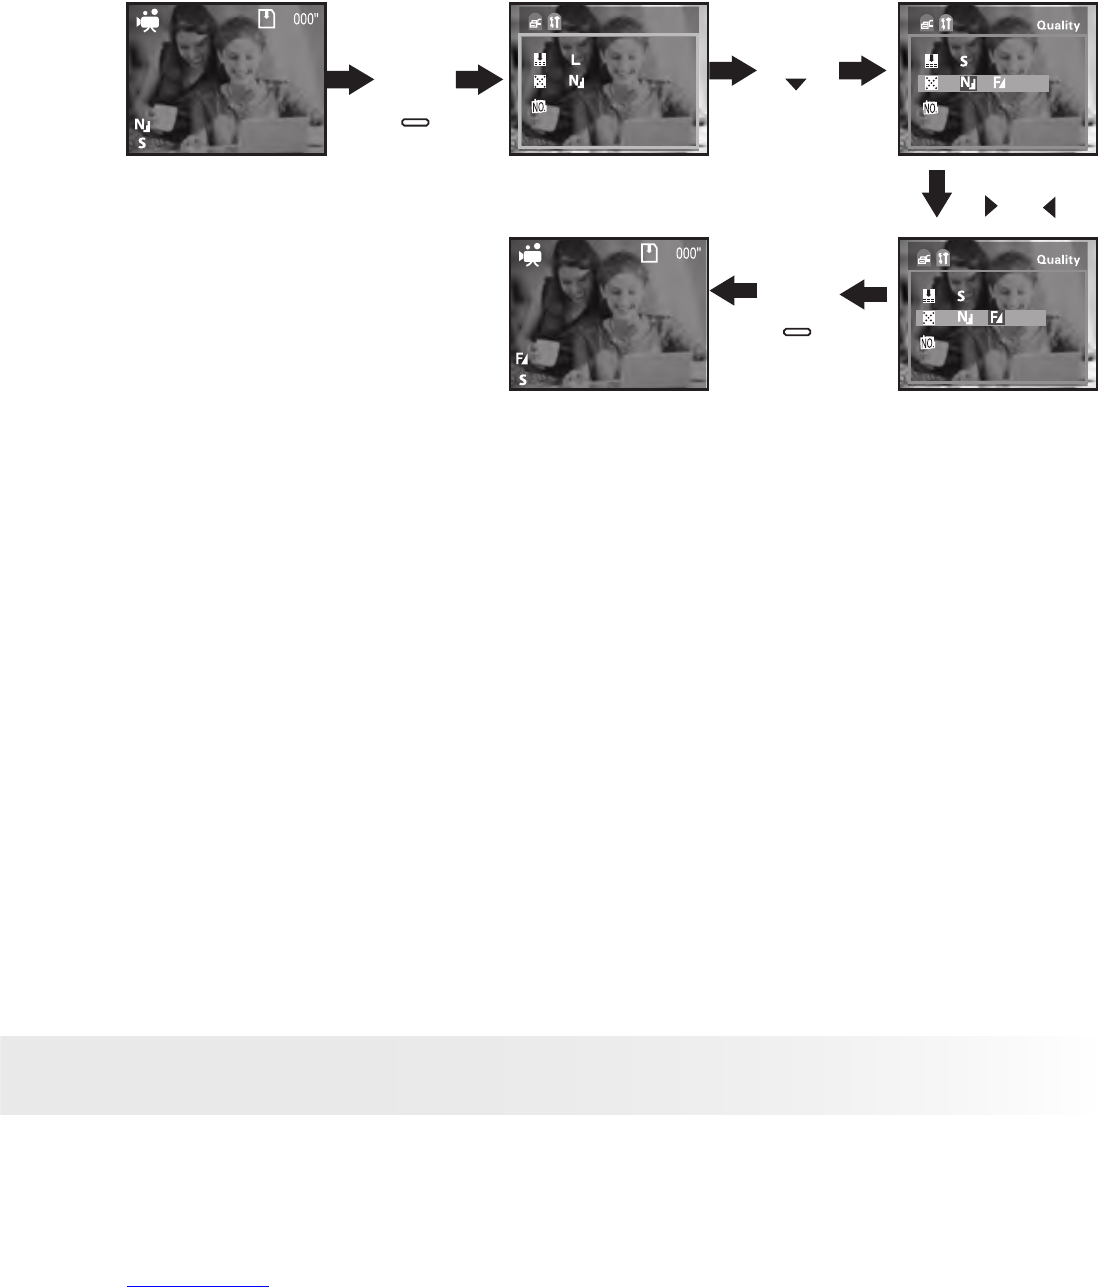
• Recording Video Clips ................................................................................45
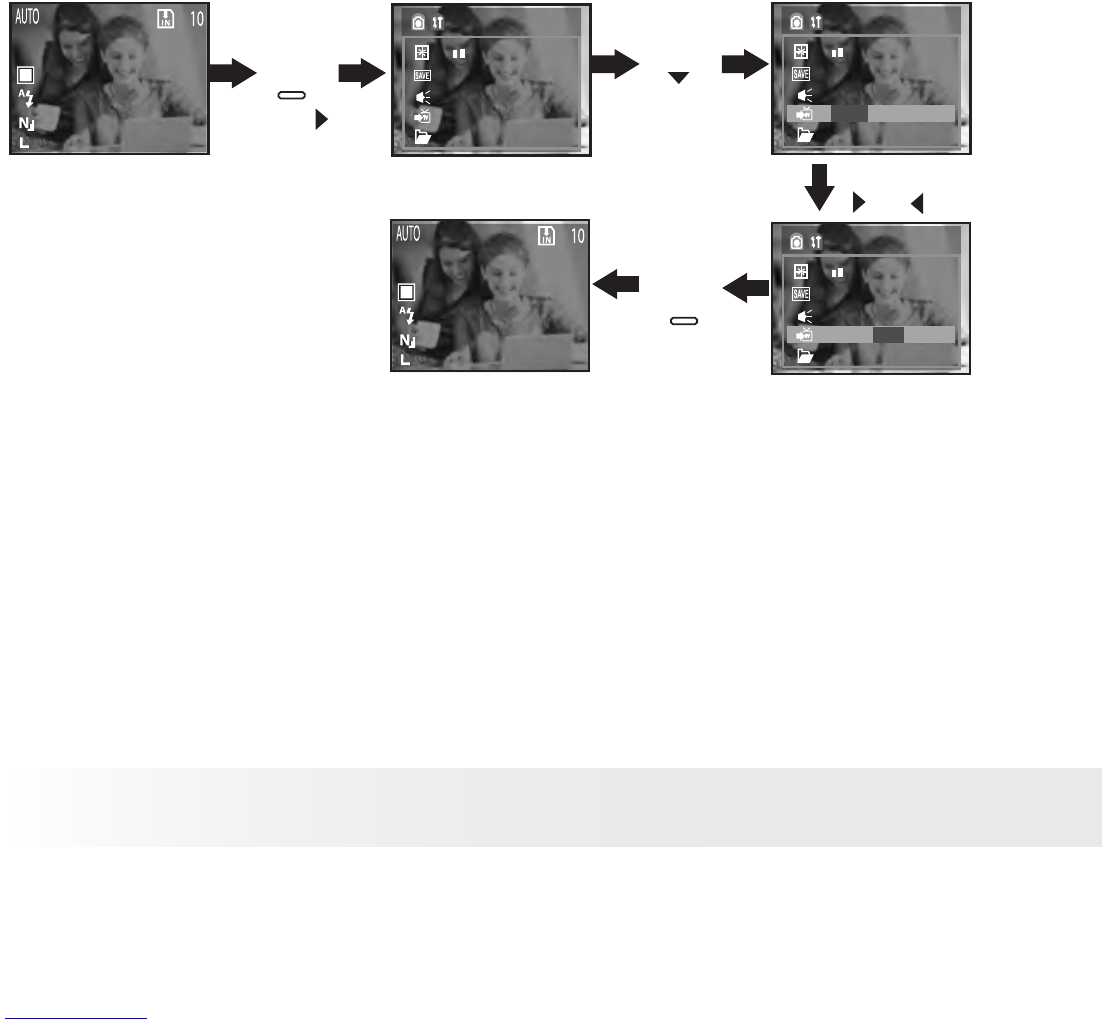
• Setting Video Resolution and Quality...........................................................46
5 Playback
..........................................................................................................48
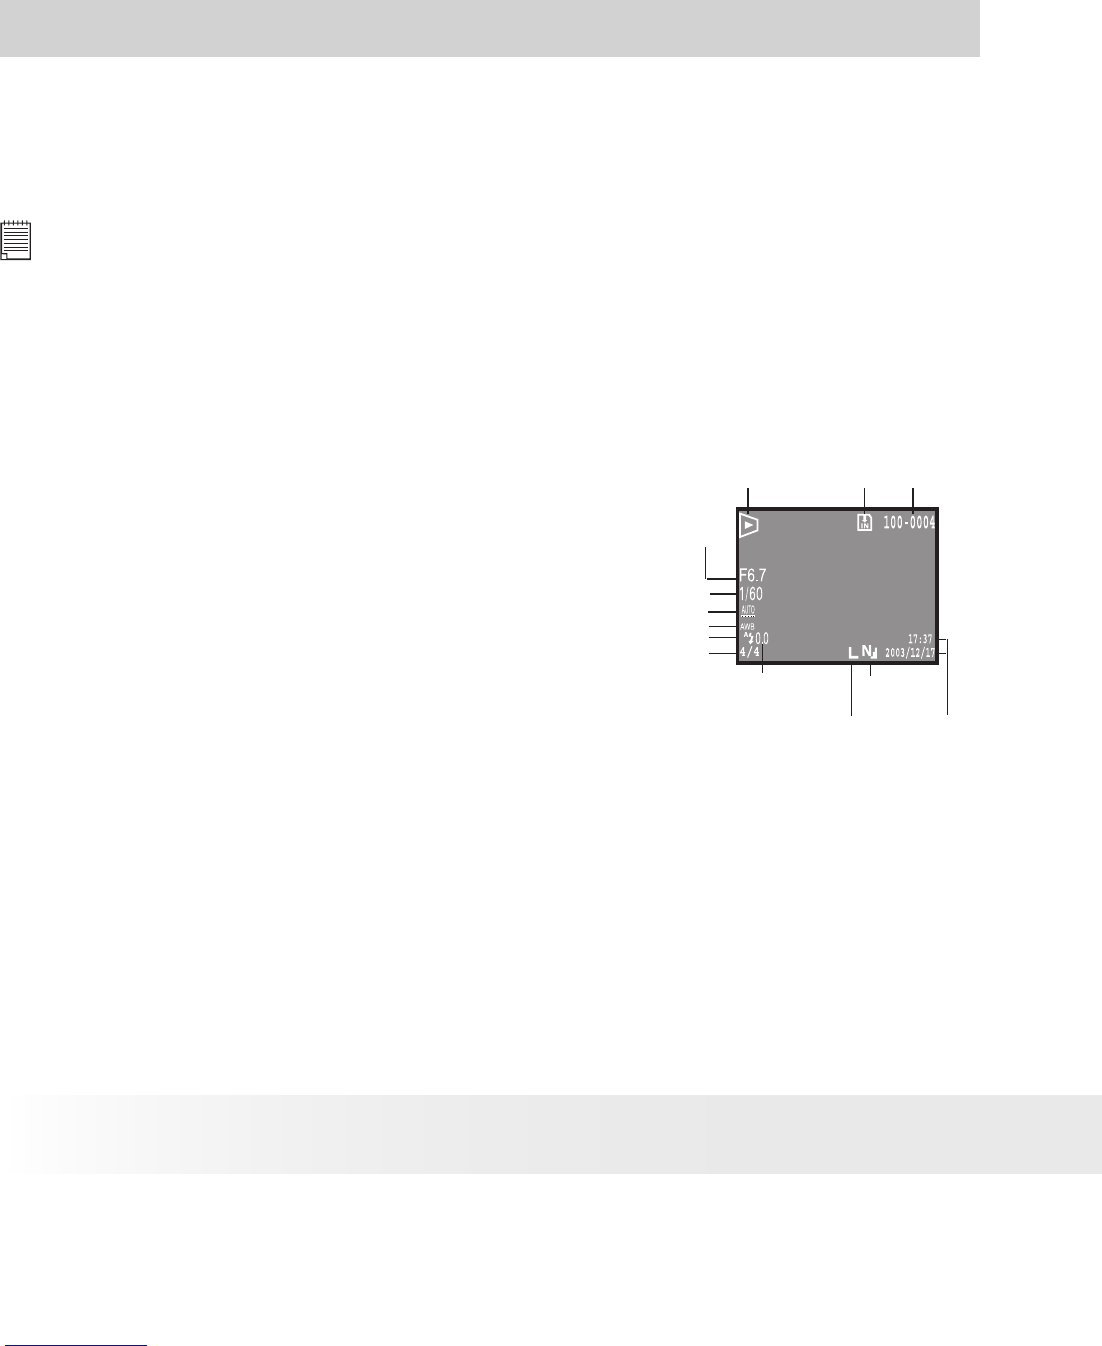
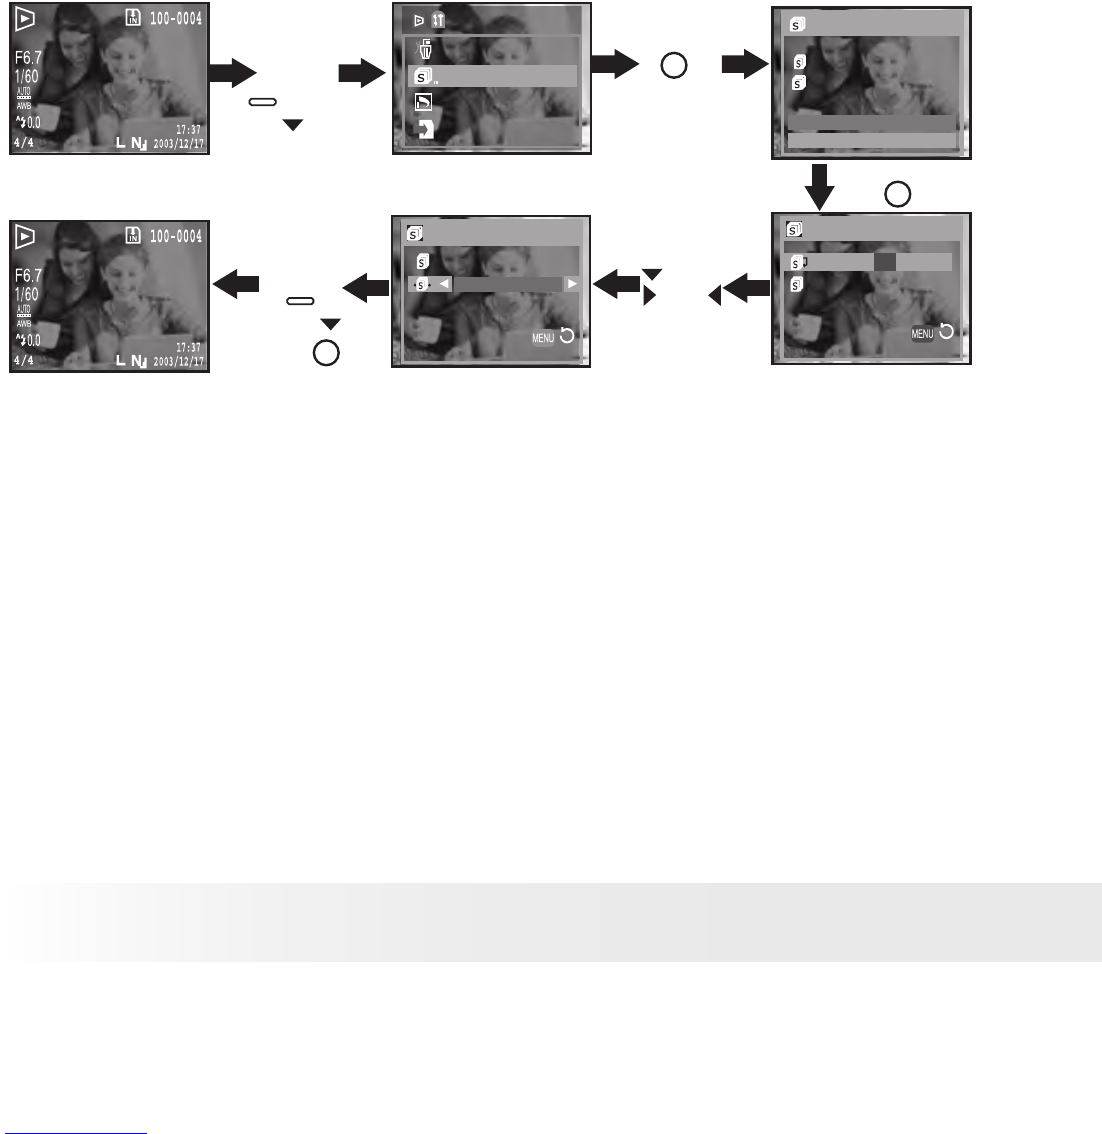
• Playback Pictures.......................................................................................48
• Playing the Video Clips ...............................................................................51
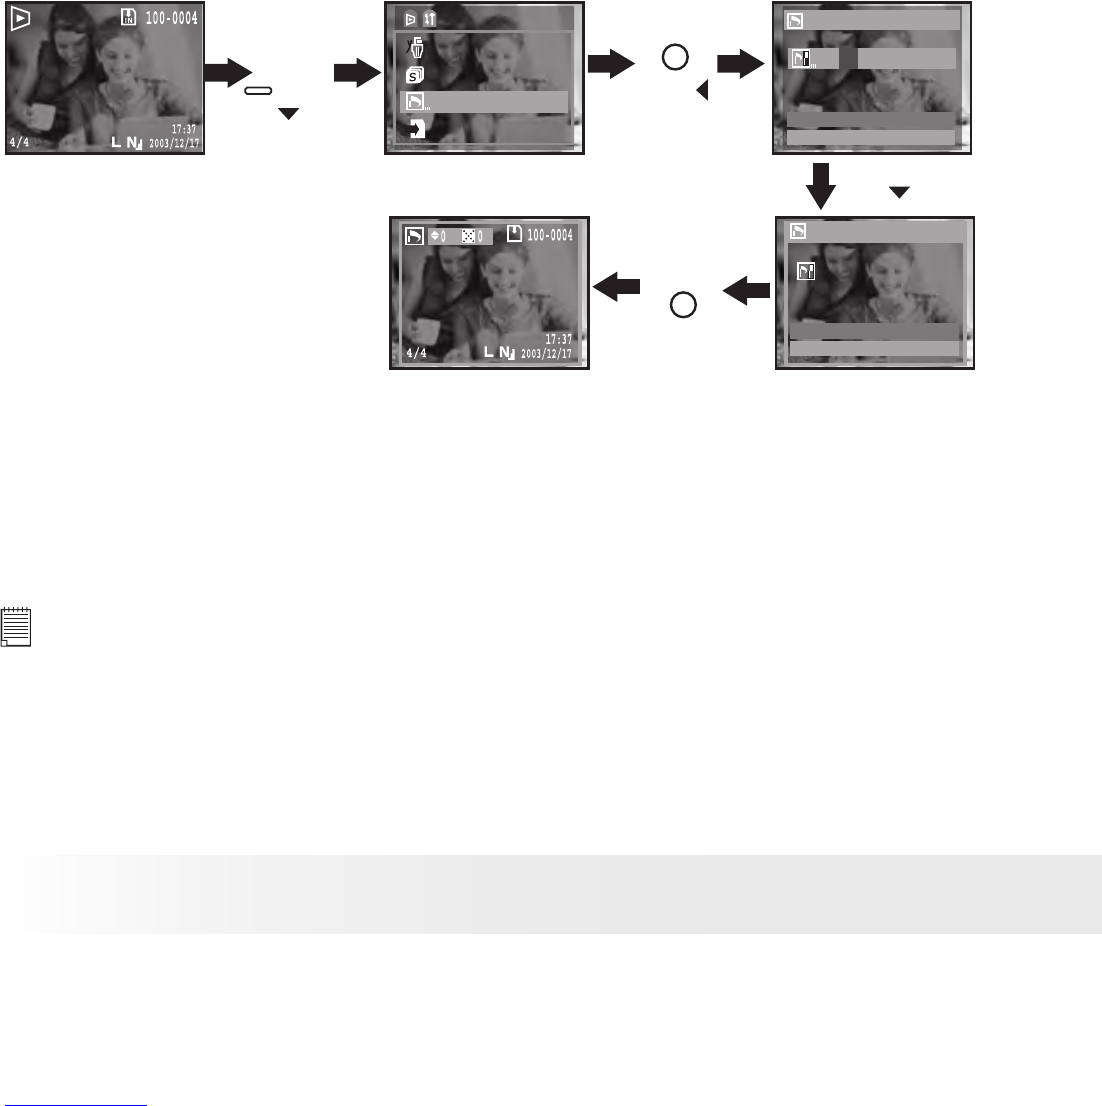
• Protect the Picture(s) or Video Clip(s) Against Deletion ................................52
• Deleting One Picture or Video Clip...............................................................52
• Deleting All Pictures and Video Clips ...........................................................53
• View Pictures and Video Clips on a TV ........................................................54
6 Using the SD (Secure Digital) Card
......................................................................56
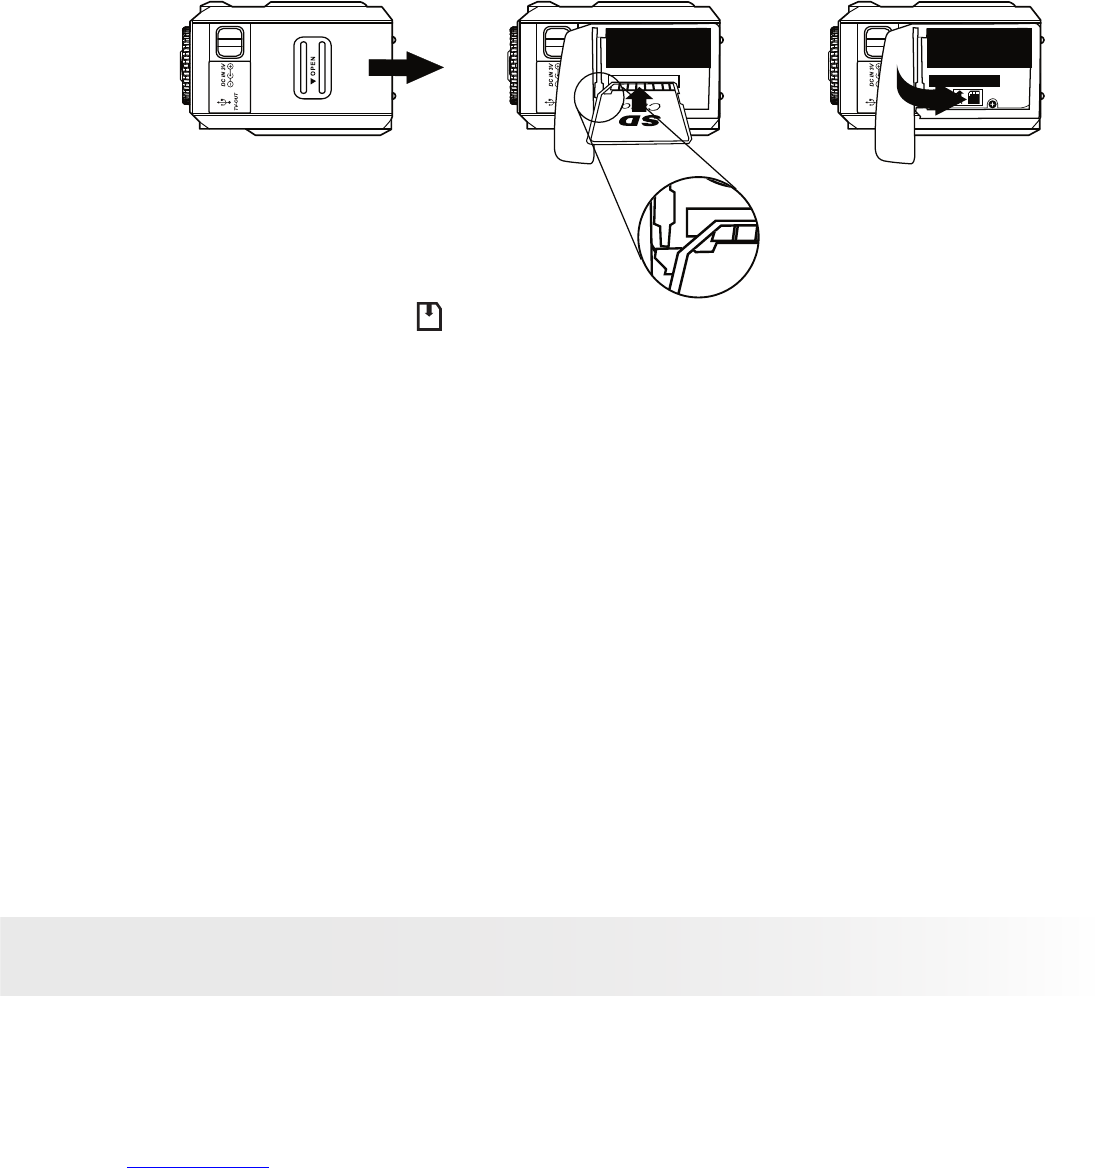
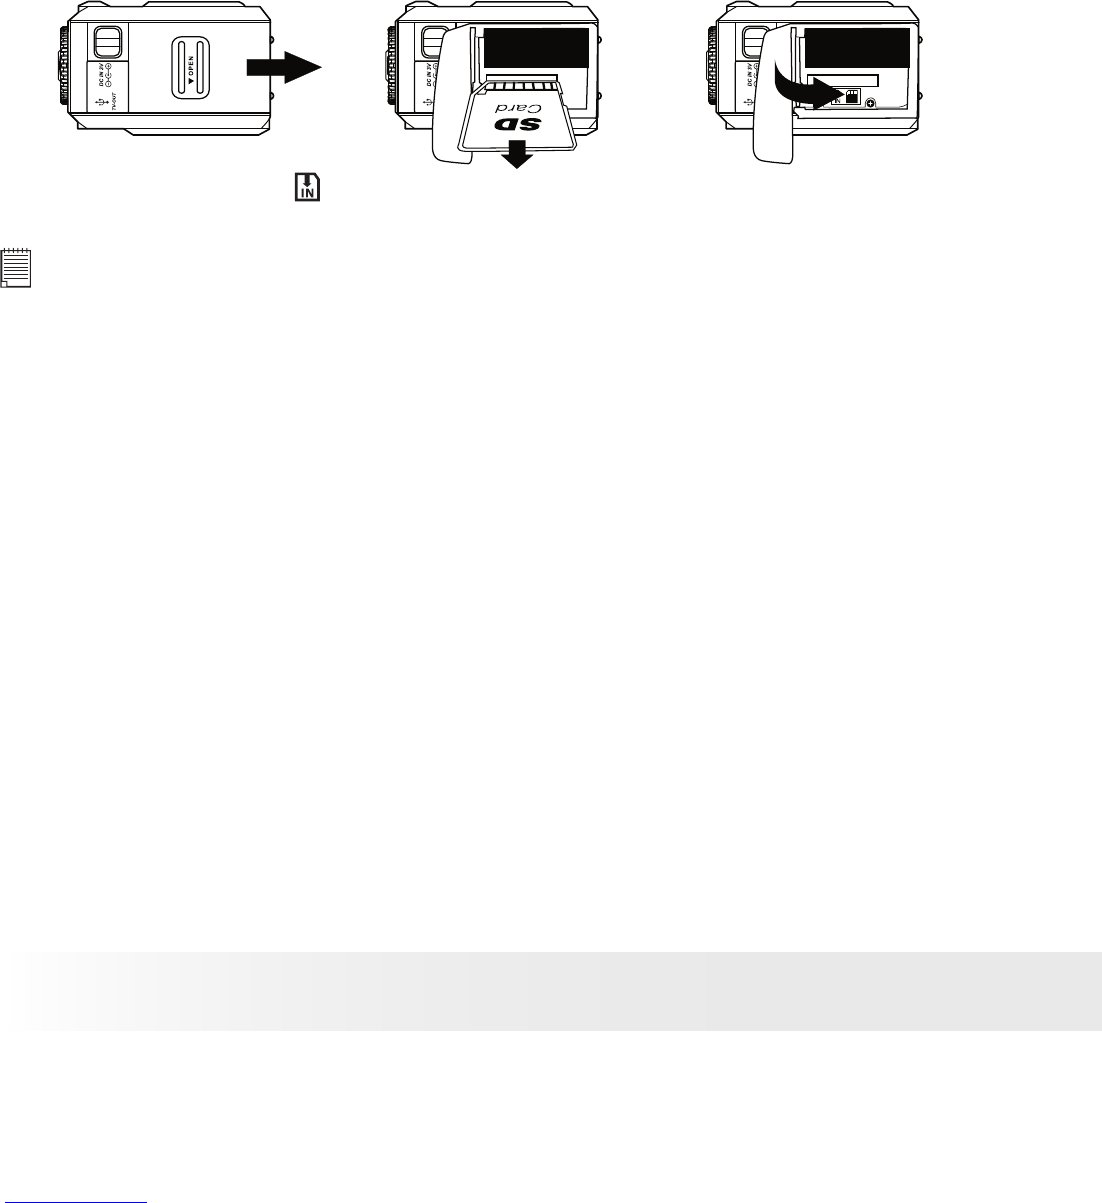
• Using the SD Card................................................................................................... 56
• Copy Pictures and Video Clips from a Memory Card to the Internal Memory
and from the Internal Memory to a Memory Card ..................................................... 59
• To Print Selected Pictures........................................................................................ 60
• DPOF (Digital Print Order Format) ...............................................................61
• P.I.M. (PRINT Image Matching) ...................................................................62
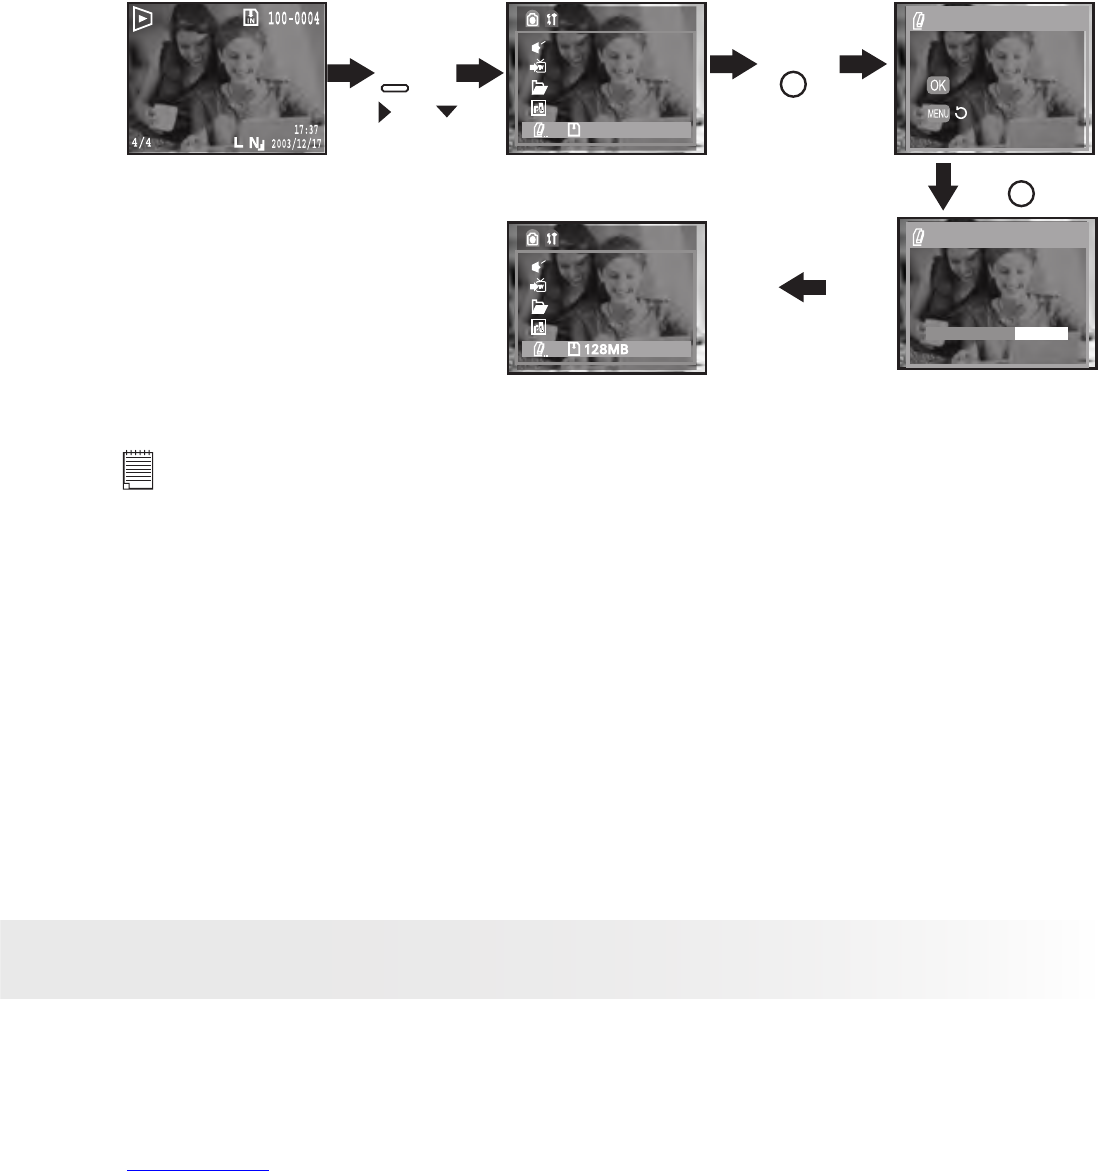
• To Format a Memory Card ..........................................................................63
7 Installing the Software Onto a Computer
............................................................64
• Installing the Software ...............................................................................64
• Software Included with Your Camera...........................................................66
• Computer System Requirements .................................................................67
8 Transferring Pictures and Video Clips to a Computer
...........................................68
• Before You Transfer Pictures .......................................................................68
• Connecting to Your Computer .....................................................................68
• Transferring Pictures/Video Clips ................................................................69
9 Troubleshooting Problems
.................................................................................70
• Troubleshooting ........................................................................................70
10 Getting Help
...................................................................................................73
• Polaroid-digital Online Services ...................................................................73
• ArcSoft Software Help ...............................................................................73
11 Appendix
.......................................................................................................74
• Technical Specications .............................................................................74
• Capacity of SD Card...................................................................................76
• Uninstalling Polaroid PDC 5350 driver .........................................................78
• Using Your Battery .....................................................................................78
• Tips, Your Safety & Maintenance ................................................................79
• Regulatory Information ...............................................................................80