489713
4
Verklein
Vergroot
Pagina terug
1/28
Pagina verder
OPERATING INSTRUCTIONS
READ THESE OPERATING INSTRUCTIONS CAREFULLY BEFORE USING THE MACHINE.
English
Register your product and get support at
www.philips.com/welcome
Type HD8836 / HD8837
SUP 037DR
02
EN
02
• 2 •
IMPORTANT SAFEGUARDS
When using electrical appliances, basic safety precautions should always be
followed, including the following:
1. Read all instructions.
2. Do not touch hot surfaces. Use handles or knobs.
3. To protect against fire, electric shock and injury to persons do not immerse
cord, plugs, or appliance in water or other liquid.
4. Close supervision is necessary when the appliance is used by or near
children.
5. Unplug from outlet when not in use and before cleaning. Allow to cool
before putting on or taking off parts, and before cleaning the appliance.
6. Do not operate any appliance with a damaged cord or plug or after the
appliance malfunctions, or has been damaged in any manner. Return
appliance to the nearest authorized service facility for examination, repair
or adjustment.
7. The use of accessory attachments not recommended by the appliance
manufacturer may result in fire, electric shock or injury to persons.
8. Do not use outdoors.
9. Do not let cord hang over edge of table or counter, or touch hot surfaces.
10. Do not place on or near a hot gas or electric burner, or in a heated oven.
11. Always attach plug to appliance first, then plug cord into wall outlet. To
disconnect, turn any control to “off”, then remove plug from wall outlet.
12. Do not use appliance for other than intended use.
13. Save these instructions.
SAVE THESE INSTRUCTIONS
• 3 •
CAUTION
This appliance is for household use only. Any servicing, other than cleaning and
user maintenance, should be performed by an authorized service center. Do not
immerse machine in water. To reduce the risk of fire or electric shock, do not
disassemble the machine. There are no parts inside the machine serviceable by
the user. Repair should be done by authorized service personnel only.
1. Check voltage to be sure that the voltage indicated on the nameplate
corresponds with your voltage.
2. Never use warm or hot water to fill the water tank. Use cold water only.
3. Keep your hands and the cord away from hot parts of the appliance during
operation.
4. Never clean with scrubbing powders or harsh cleaners. Simply use a soft
cloth dampened with water.
5. For optimal taste of your coffee, use purified or bottled water. Periodic
descaling is still recommended every 2-3 months.
6. Do not use caramelized or flavored coffee beans.
INSTRUCTIONS FOR THE POWER
SUPPLY CORD
A. A short power-supply cord (or detachable power-supply cord) is to be
provided to reduce risks resulting from becoming entangled in or tripping
over a longer cord.
B. Longer detachable power-supply cords or extension cords are available
and may used if care is exercised in their use.
C. If a long detachable power-supply cord or extension cord is used,
1. The marked electrical rating of the detachable power-supply cord or
extension cord should be at least as great as the electrical rating of the
appliance
2. If the appliance is of the grounded type, the extension cord should be a
grounding-type 3-wire cord, and
3. The longer cord should be arranged so that it will not drape over the
counter top or table top where it can be pulled on by children or tripped
over.
• 4 •
GENERAL INFORMATION
The co ee machine is suitable for preparing espresso co ee using either co ee beans or ground
co ee and is equipped with a device to dispense steam and hot water. The structure of the ma-
chine has been designed for domestic use only and is not suitable for continuous professional-
type operation.
Keep these operating instructions in a safe place and make them available to anyone
who may use the co ee machine.
For further information or in case of problems that are not included or not completely explained
in these instructions, please contact an authorized service center.
Warning. No liability is held for damage caused by:
Incorrect use not in accordance with the intended purposes;
Repairs not carried out by authorized service centers;
Tampering with the power cord;
Tampering with any parts of the machine;
Storage or use of the machine at a temperature outside the operating temperature
range (+15°C / +45°C);
The use of non-original spare parts and accessories.
In these cases, the warranty shall be deemed null and void.
SAFETY REGULATIONS
Never allow water to come into contact with any of the electrical parts of the
machine: Danger of short circuit! Steam and hot water may cause scalding!
Do not direct the steam/hot water wand towards body parts. Carefully handle the
steam/hot water wand by its grip: Danger of scalding!
Intended Use
The co ee machine is intended for domestic use only. Do not make any technical changes or use
the machine for unauthorized purposes since this would create serious hazards! The appliance is
not to be used by persons (including children) with reduced physical, mental or sensory abilities
or with limited experience and/or expertise, unless they are supervised by a person responsible
for their safety, or they are instructed by this person on how to properly use the machine.
Power Supply - Power Cord
Only connect the co ee machine to a suitable socket.
The voltage must correspond to that indicated on the machine label located on the inside of
service door.
Never use the co ee machine if the power cord is defective or damaged.
If damaged, the power cord must be replaced by the manufacturer or an authorized service
center. Do not pass the power cord around corners, over sharp edges or over hot objects and
keep it away from oil. Do not use the power cord to carry or pull the co ee machine.
Do not pull out the plug by the power cord or touch it with wet hands. Do not let the power cord
hang freely from tables or shelves.
For the Safety of Others
Keep children under control to prevent them from playing with the product. Children are not
aware of the risks related to electric household appliances. Do not leave the machine packaging
materials within the reach of children.
• 5 •
Danger of Burns
Never direct the steam/hot water wand towards yourself or others: Danger of scalding! Always
use the handles or knobs provided.
Machine Location - Suitable Location for Operation and Maintenance
For best use, it is recommended to:
Choose a safe, level surface, where there will be no danger of overturning it or being inju-
red.
Choose a location that is su ciently well-lit, clean and near an easily reachable socket.
Provide for a minimum distance from the sides of the machine as shown in the illustration.
During machine turning on/o , it is recommended to place an empty glass under the dispen-
sing spout.
Do not keep the machine at a temperature below 0°C (32°F).
Frost may damage the machine.
Do not use the co ee machine outdoors.
In order to prevent its housing from melting or being damaged, do not place the machine on
very hot surfaces and close to open  ames.
Storing the Machine - Cleaning
Before cleaning the machine, turn it o by pressing the ON/OFF button, and then switch the
power button to “0”. Remove the plug from the socket.
Wait for the machine to cool down.
Never immerse the machine in water!
It is strictly forbidden to tamper with the internal parts of the machine.
Water left in the tank for several days should not be consumed. Wash the tank and  ll it with
fresh drinking water.
If the machine will not be used for a long time, dispense water from the steam wand, and care-
fully clean the Pannarello (if supplied), then turn it o and unplug it.
Store it in a dry place, out of the reach of children.
Keep it protected from dust and dirt.
Since the machine uses natural ingredients to brew beverages (fresh ground co ee, water, milk,
etc.), some residues of co ee ground or condensed water would de nitely be present on its
supporting surface.
For this reason we recommend to periodically clean both the visible parts of the machine and
the area beneath it.
Servicing / Maintenance
In case of failure, problems or a suspected fault resulting from the falling of the machine, imme-
diately remove the plug from the socket.
Never attempt to operate a faulty machine.
Servicing and repairs may only be carried out by authorized service centers.
All liability for damages resulting from work not carried out by professionals is declined.
Fire Safety Precautions
In case of  re, use carbon dioxide (CO
2
) extinguishers. Do not use water or dry powder extin-
guishers.
• 6 •
Co ee bean hopper lid
Power cord
Pre-ground co ee scoop
Intenza water  lter
(Optional)
Brew group lubricant
LCD Display
Aroma” - Pre-ground co ee
selector button.
Strong co ee brew button
Long co ee brew button
Co ee/hot water/steam dial.
ON/OFF button
Brew group
Co ee grounds drawer
Service door
Grinder adjustment knob
Pre-ground co ee
compartment
Co ee bean hopper
Dispensing spout
Drip tray
Power button
Full drip tray indicator
Drip tray
Water tank
Steam/hot water wand
Wand protective gripper
Control panel
Water hardness test strip
• 8 •• 8 •
Red
Orange
Orange
Green
Switch the power button to “I” to turn
on the machine.
Priming the Water Circuit
To prime the water circuit, place a
container under the steam/hot water
wand (Pannarello, if supplied).
The display shows the ON/OFF icon.
Make sure the selector dial is set to the
position; if this is not the case, set
it to that position.
Press the ON/OFF button to turn the
machine on.
The display indicates that the circuit
must be primed.
Note: Before starting the
machine after long periods
of inactivity, the water circuit must
be primed.
Black
Red
Turn the selector dial clockwise to set
it to the
position. The machine
starts the automatic priming of the
circuit by letting out a preset quantity
of water through the steam/hot water
wand (Pannarello, if supplied). The bar
under the icon shows the operation
progress.
At the end of the priming process,
the display shows an icon (see fig-
ure) indicating that the selection dial
must be brought back to the central
position.
The display then shows the machine
warm-up icon, as shown in the  gure.
When warm-up is complete,
the machine performs a rinse
cycle of the internal circuits.
In this phase, this icon will be dis-
played:
When the operations described above
are complete, this icon will be dis-
played:
The machine is then ready to brew
beverages.
To brew co ee, dispense hot water or
steam, and for a proper use of the ma-
chine, carefully follow the instructions
provided.
If the machine is being used
for the  rst time or after a
long period of inactivity, follow the
operations described in the follow-
ing section.
• 9 •
Orange
Green
Green
Green
Red
Using the machine for the
first time or after a long
period of inactivity.
These simple operations will make it pos-
sible to always brew excellent co ee.
1 Place a large container under the
dispensing spout.
2 Before starting the procedure, check
that the following icon is displayed.
3 Select the pre-ground co ee function
by pressing the
“ button one or
more times.
Do not add the pre-ground
co ee to the compartment.
The icon will appear on the display.
4 Press the button to brew a long cof-
fee.
5 Wait until brewing is completed and
empty the water tank.
6 Repeat the operations from step 1 to
step 5 for 3 times; then continue with
step 7.
7 Place a container under the steam wand
(Pannarello, if supplied).
8 Turn the selector dial clockwise to set it
to the
position.
The following icon will be displayed.
9 Dispense water until the no water
signal is displayed, then turn the se-
lector dial counter-clockwise to set it
to the
position.
10 At the end, fill the water tank again.
Then the products can be brewed as
described in the following sections.
Rinse/Self-Cleaning Cycle
This cycle will rinse coffee circuits with
fresh water.
The cycle is carried out:
At machine start (with cold boiler)
After priming the water circuit (with
cold boiler)
During the stand-by mode (if a co ee
product has been brewed)
If the machine is turned o by pressing
the ON/OFF button (if a co ee product
has been brewed).
A small amount of water will be dis-
pensed to rinse and heat all the machine
components; in this phase this icon is
displayed:
Wait for the cycle to  nish automatically.
You can stop dispensing as well, by
pressing either co ee button and/or
the ON/OFF button.
• 10 •• 10 •
Intenza Water Filter
To improve the quality of the used water,
it is recommended that you install the
water  lter.
Remove the water  lter from its packag-
ing, immerse it vertically (with the open-
ings positioned upwards) in cold water
and gently press its sides so as to let the
air bubbles out.
Remove the small white filter from the
tank and store it in a dry place sheltered
from dust.
Set the Intenza Aroma System as speci ed
on the box.
A = Soft water
B = Hard water (standard)
C = Very hard water
Water hardness measurement
The water hardness measurement is very
important in order to correctly manage
the “Intenza” lter and the frequency with
which the machine must be descaled.
Immerse the water hardness test strip
provided with the machine in water for
1 second.
Note: The test strip is only
valid for one measurement.
Check how many squares change colour
and refer to the table.
The letters correspond to the references
that are located in the base of the Intenza
lter. The  lter must be adjusted based on
this measurement.
The numbers correspond to the settings
that are found for the water hardness ad-
justment that is shown in the program-
ming section.
More precisely:
1 =
(very soft water)
2 =
(soft water)
3 =
(hard water)
4 =
(very hard water)
Once this value is known, set the water
hardness value as specified in the pro-
gramming section.
Insert the filter in the empty tank. The
reference mark and the groove must
match. Push  rmly until it is completely
inserted.
Fill the tank with fresh drinking water and
re-insert it into the machine.
Dispense the water in the tank by using
the hot water function (see section “Hot
Water Dispensing”).
Fill the water tank again.
Press the ON/OFF button to change the
machine status to stand-by mode.
23 4
A
B
C
Intenza Aroma System
Machine water hardness setting
1
4

Hulp nodig? Stel uw vraag in het forum

Spelregels
1

Forum

Philips-Saeco-HD8837-Syntia
  • Groene lampje van display werkt niet. Is deze te vervangen? Gesteld op 14-9-2021 om 16:03

    Reageer op deze vraag Misbruik melden
  • Koffie komt druppelsgewijs uit de machine en heeft maar hele kleine tasjes Gesteld op 11-2-2020 om 10:49

    Reageer op deze vraag Misbruik melden
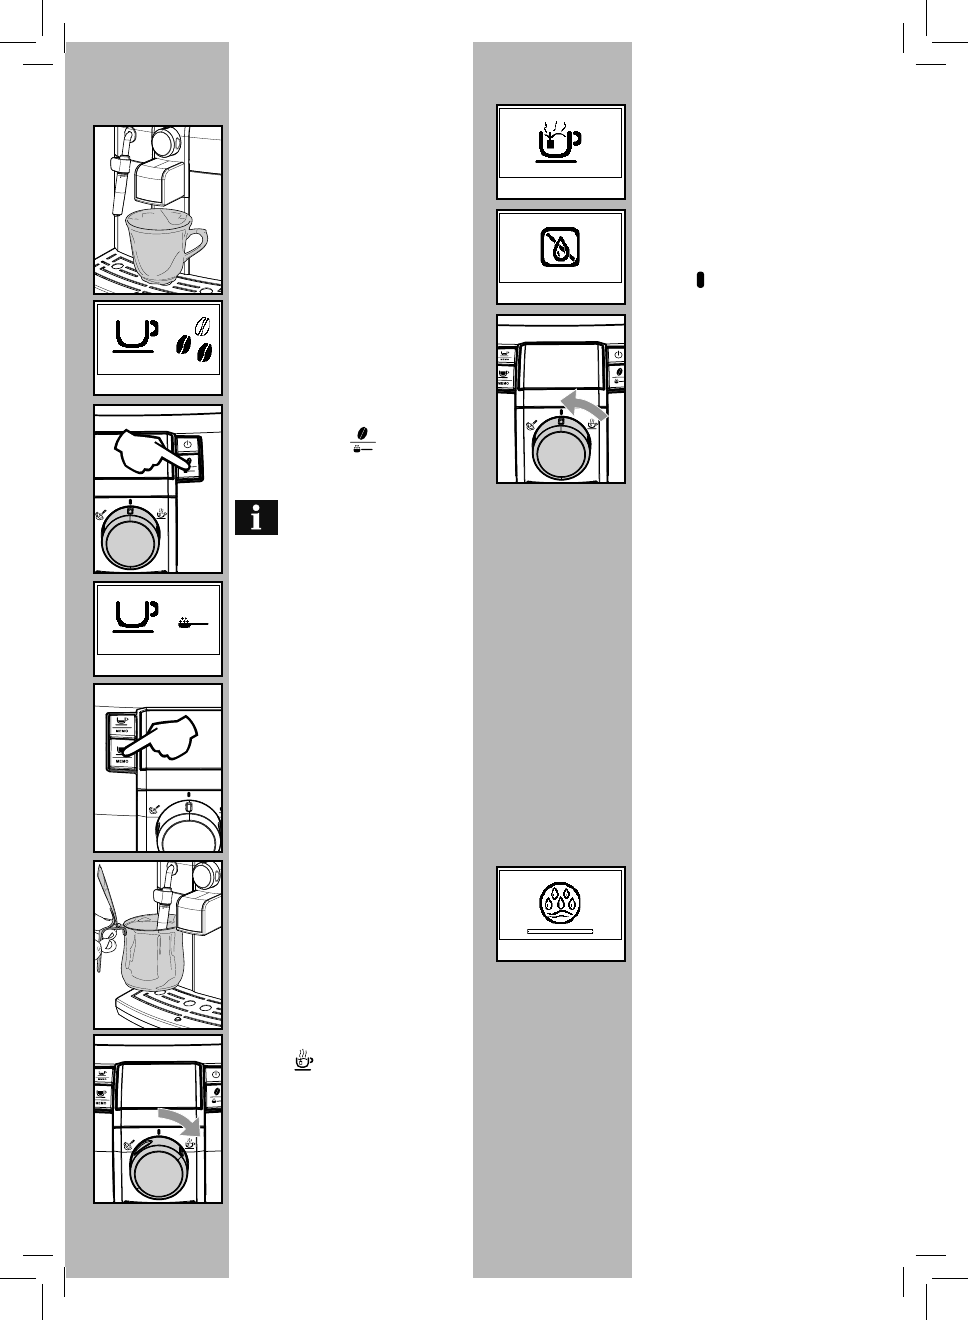
  • De centrale koffie-unit past niet meer in het toestel? Gesteld op 30-10-2014 om 08:21

    Reageer op deze vraag Misbruik melden
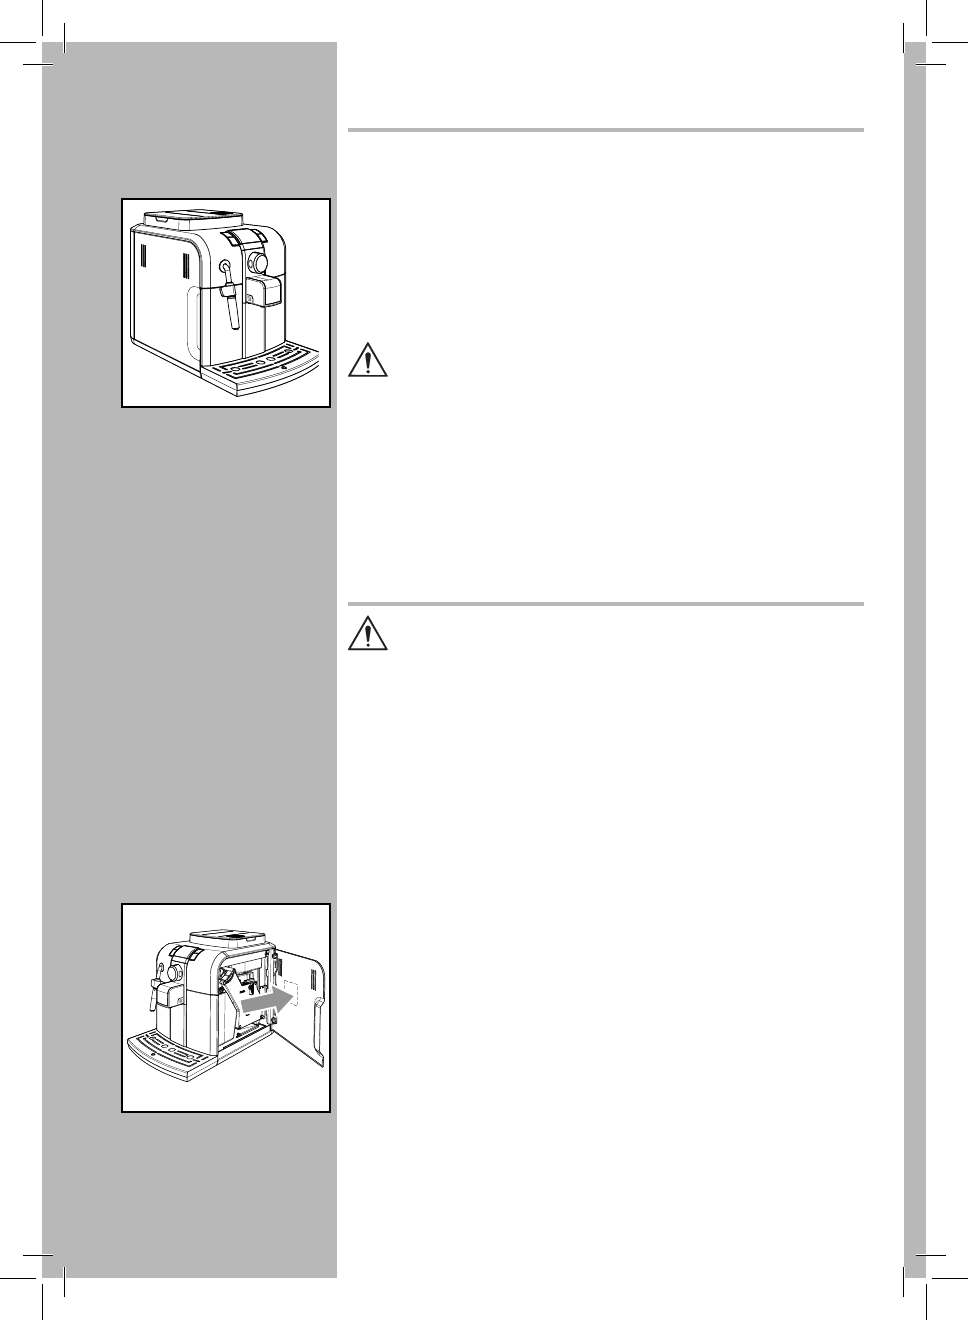
    • Volg de onderstaande instructies om de zetgroep uit de machine te verwijderen:

      Schakel de machine uit.
      Open de servicedeur en verwijder de koffiediklade.
      Verwijder de zetgroep door op de knop PUSH te drukken en de zetgroep aan het handvat naar buiten te trekken.

      De zetgroep in de ruststand zetten en weer terug in de machine schuiven.
      Belangrijk! Als de zetgroep niet in de ruststand staat, kunt u de zetgroep niet terugplaatsen.

      De hendel moet contact maken met de voet van de zetgroep. Als dat niet het geval is, duwt u de hendel omlaag naar de juiste stand.
      De twee pijltjes op de zijkant van de zetgroep wijzen nu naar elkaar.
      Zorg ervoor dat de vergrendelhaak aan de zijkant van de zetgroep in de juiste stand staat (in de bovenste stand). De vergrendelhaak staat niet goed als deze nog in de onderste stand staat. Duw de haak in de juiste stand door hem omhoog te duwen tot u een zachte klik hoort.
      Schuif de zetgroep in de machine.
      Plaats de koffiediklade terug in de machine en sluit de servicedeur.

      Probeer het volgende als u de zetgroep nog steeds niet kunt verwijderen of terugplaatsen:

      Plaats de koffiediklade terug in de machine en sluit de servicedeur. De zetgroep is niet geplaatst.
      Druk op de aan/uitknop om de machine in te schakelen. De koppelunit wordt automatisch teruggebracht naar de startpositie als deze niet in de juiste stand staat.
      Druk op de aan/uitknop om de machine uit te schakelen.
      Verwijder het lekbakje en de koffiediklade en open de servicedeur.
      Zorg ervoor dat de koppelunit in de ruststand staat (zie de bovenstaande instructies) en schuif de koppelunit terug in de machine tot deze op zijn plaats klikt. Druk niet op de knop PUSH terwijl u de zetgroep in de machine plaatst.
      Plaats de koffiediklade met het lekbakje terug in de machine en sluit de servicedeur. Geantwoord op 24-11-2014 om 15:33

      Waardeer dit antwoord (2) Misbruik melden
  • wat moetb ik gebruiken p het apparaat te ontkalken? Gesteld op 15-2-2013 om 09:56

    Reageer op deze vraag Misbruik melden

Misbruik melden

Gebruikershandleiding.com neemt misbruik van zijn services uitermate serieus. U kunt hieronder aangeven waarom deze vraag ongepast is. Wij controleren de vraag en zonodig wordt deze verwijderd.

Product:

Bijvoorbeeld antisemitische inhoud, racistische inhoud, of materiaal dat gewelddadige fysieke handelingen tot gevolg kan hebben.

Bijvoorbeeld een creditcardnummer, een persoonlijk identificatienummer, of een geheim adres. E-mailadressen en volledige namen worden niet als privégegevens beschouwd.

Spelregels forum

Om tot zinvolle vragen te komen hanteren wij de volgende spelregels:

Belangrijk! Als er een antwoord wordt gegeven op uw vraag, dan is het voor de gever van het antwoord nuttig om te weten als u er wel (of niet) mee geholpen bent! Wij vragen u dus ook te reageren op een antwoord.

Belangrijk! Antwoorden worden ook per e-mail naar abonnees gestuurd. Laat uw emailadres achter op deze site, zodat u op de hoogte blijft. U krijgt dan ook andere vragen en antwoorden te zien.

Abonneren

Abonneer u voor het ontvangen van emails voor uw Philips-Saeco HD8837 Syntia bij:


U ontvangt een email met instructies om u voor één of beide opties in te schrijven.


Ontvang uw handleiding per email

Vul uw emailadres in en ontvang de handleiding van Philips-Saeco HD8837 Syntia in de taal/talen: Engels als bijlage per email.

De handleiding is 3,01 mb groot.


U ontvangt de handleiding per email binnen enkele minuten. Als u geen email heeft ontvangen, dan heeft u waarschijnlijk een verkeerd emailadres ingevuld of is uw mailbox te vol. Daarnaast kan het zijn dat uw internetprovider een maximum heeft aan de grootte per email. Omdat hier een handleiding wordt meegestuurd, kan het voorkomen dat de email groter is dan toegestaan bij uw provider.

Stel vragen via chat aan uw handleiding

Stel uw vraag over deze PDF

Andere handleiding(en) van Philips-Saeco HD8837 Syntia

Philips-Saeco HD8837 Syntia Aanvulling / aanpassing - Nederlands - 3 pagina's

Philips-Saeco HD8837 Syntia Gebruiksaanwijzing - Nederlands - 24 pagina's

Philips-Saeco HD8837 Syntia Gebruiksaanwijzing - Deutsch - 28 pagina's

Philips-Saeco HD8837 Syntia Gebruiksaanwijzing - Français - 28 pagina's


Uw handleiding is per email verstuurd. Controleer uw email

Als u niet binnen een kwartier uw email met handleiding ontvangen heeft, kan het zijn dat u een verkeerd emailadres heeft ingevuld of dat uw emailprovider een maximum grootte per email heeft ingesteld die kleiner is dan de grootte van de handleiding.

Er is een email naar u verstuurd om uw inschrijving definitief te maken.

Controleer uw email en volg de aanwijzingen op om uw inschrijving definitief te maken

U heeft geen emailadres opgegeven

Als u de handleiding per email wilt ontvangen, vul dan een geldig emailadres in.

Uw vraag is op deze pagina toegevoegd

Wilt u een email ontvangen bij een antwoord en/of nieuwe vragen? Vul dan hier uw emailadres in.


Info