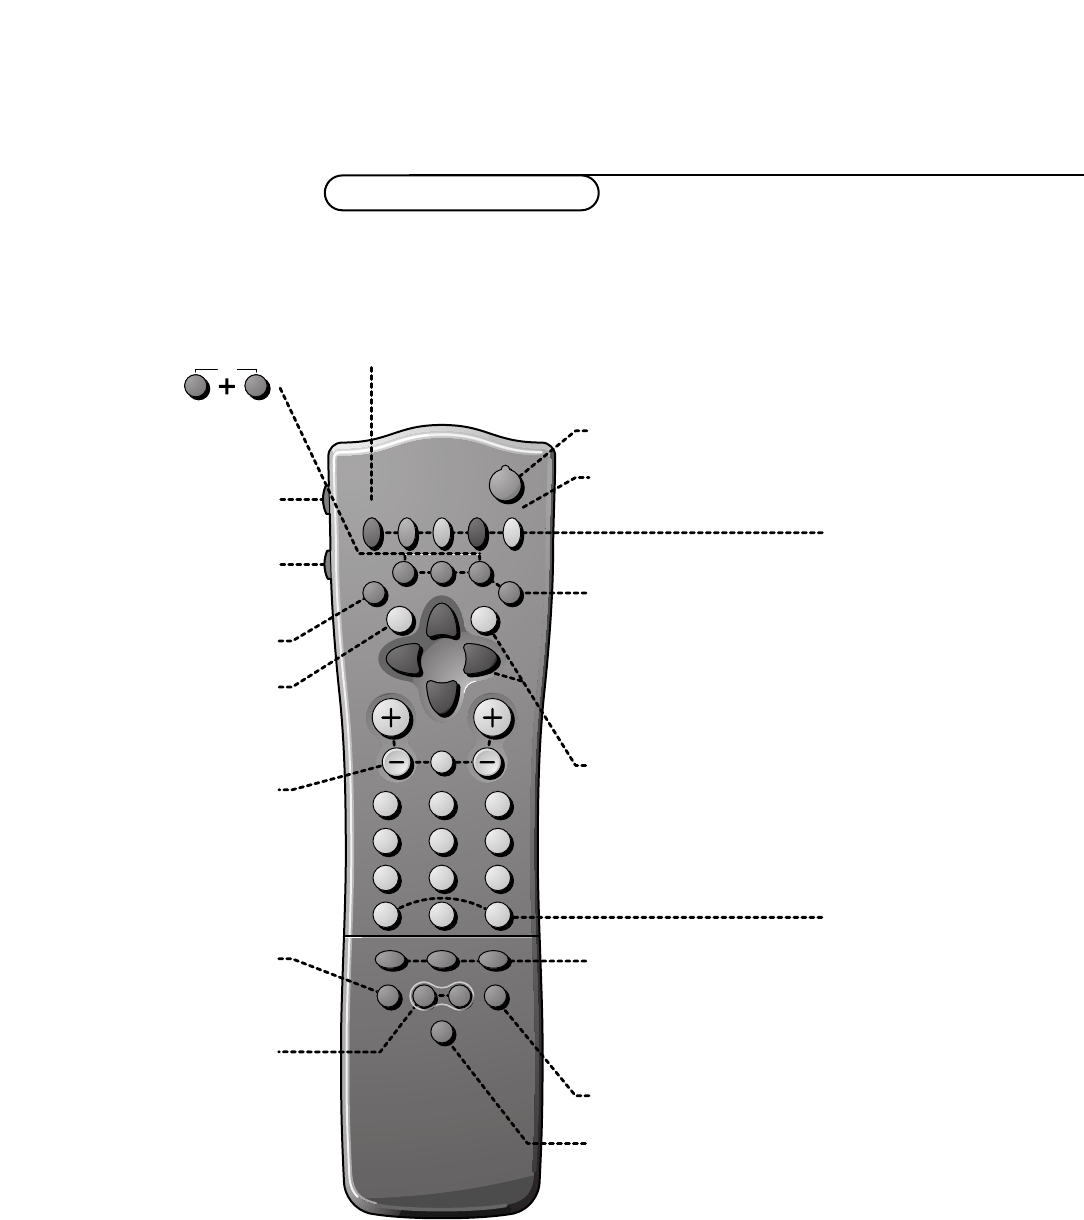
B Standby
The set is switched off.To switch the TV on
again, press - P + or the digit keys.
If your EasyLink video recorder has the
system standby function and you press the
standby key for 3 seconds, both the TV and
video recorder are switched to standby.
Your TV consumes energy in the standby mode.
Energy consumption contributes to air and water
pollution.We advise to switch off your TV
overnight instead of leaving it on standby.You
save energy.
®Ò‡π†Video recorder see p. 24
® Instant record
If your video recorder has the EasyLink
function the
INSTANT ® key for record can
be operated in the TV mode.
æ NEXTVIEW/TXT guide on/off
see p. 14
MENU Main menu on/off see p. 11
OK Press this key to activate your choice,
when in the menus.
Q Surround modes
Incredible Surround
• In MONO sound mode, this feature, when
switched on, enables you to hear a spatial
effect of sound.
• In
STEREO sound mode, when Incredible
Surround
is selected, it seems as though
the loudspeakers are spread further apart
from one another.
Virtual Dolby Surround (optimal with Dolby
Surround signals)
Virtual Dolby Surround enables you to
experience the effect of Dolby Surround
Pro Logic, reproducing a rear sound effect
i Screen information
Press for 5 seconds to activate/de-activate
the extended or reduced display of TV
channel and programme information on the
screen.
Press briefly to display information about the
selected TV channel and programme, the
sound reception, picture settings and the
remaining time set with the sleeptimer.
0/9 Digit keys
To select a TV channel.
For a two digit programme number, enter the second digit within 2
seconds.
To switch immediately to a selected one digit TV channel, keep the digit
key pressed a bit longer.
0 Previous programme
The previously selected TV channel is displayed.
The ◊ indication is only video recorder/DVD.
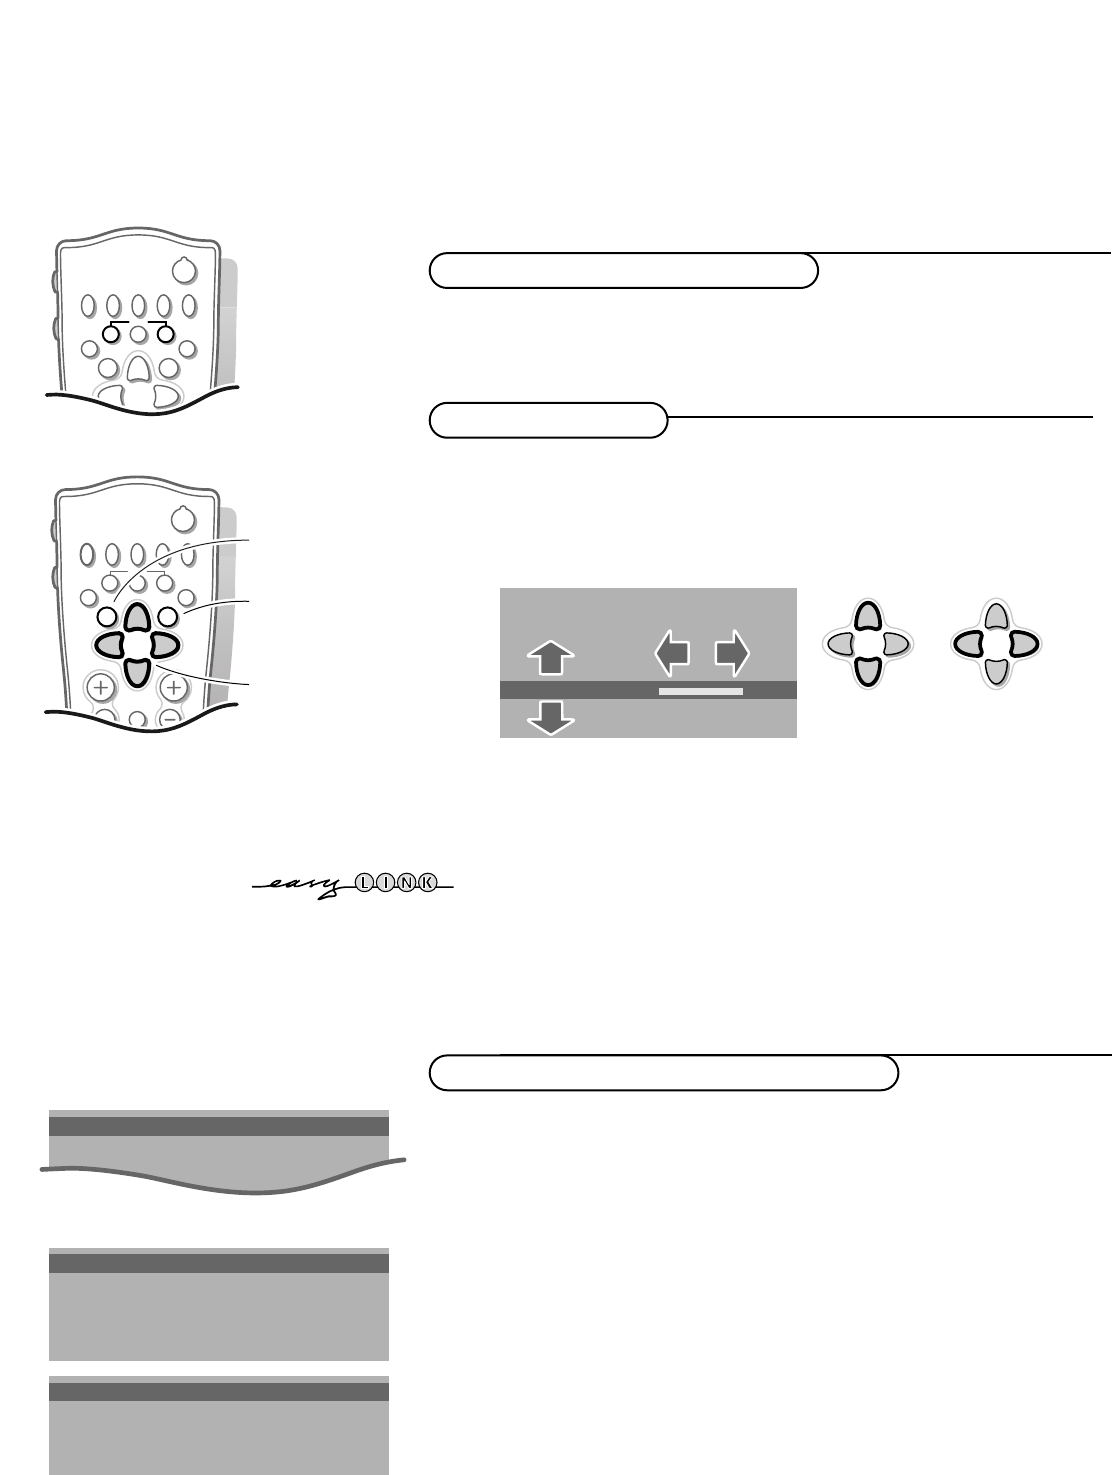
Use of the remote control
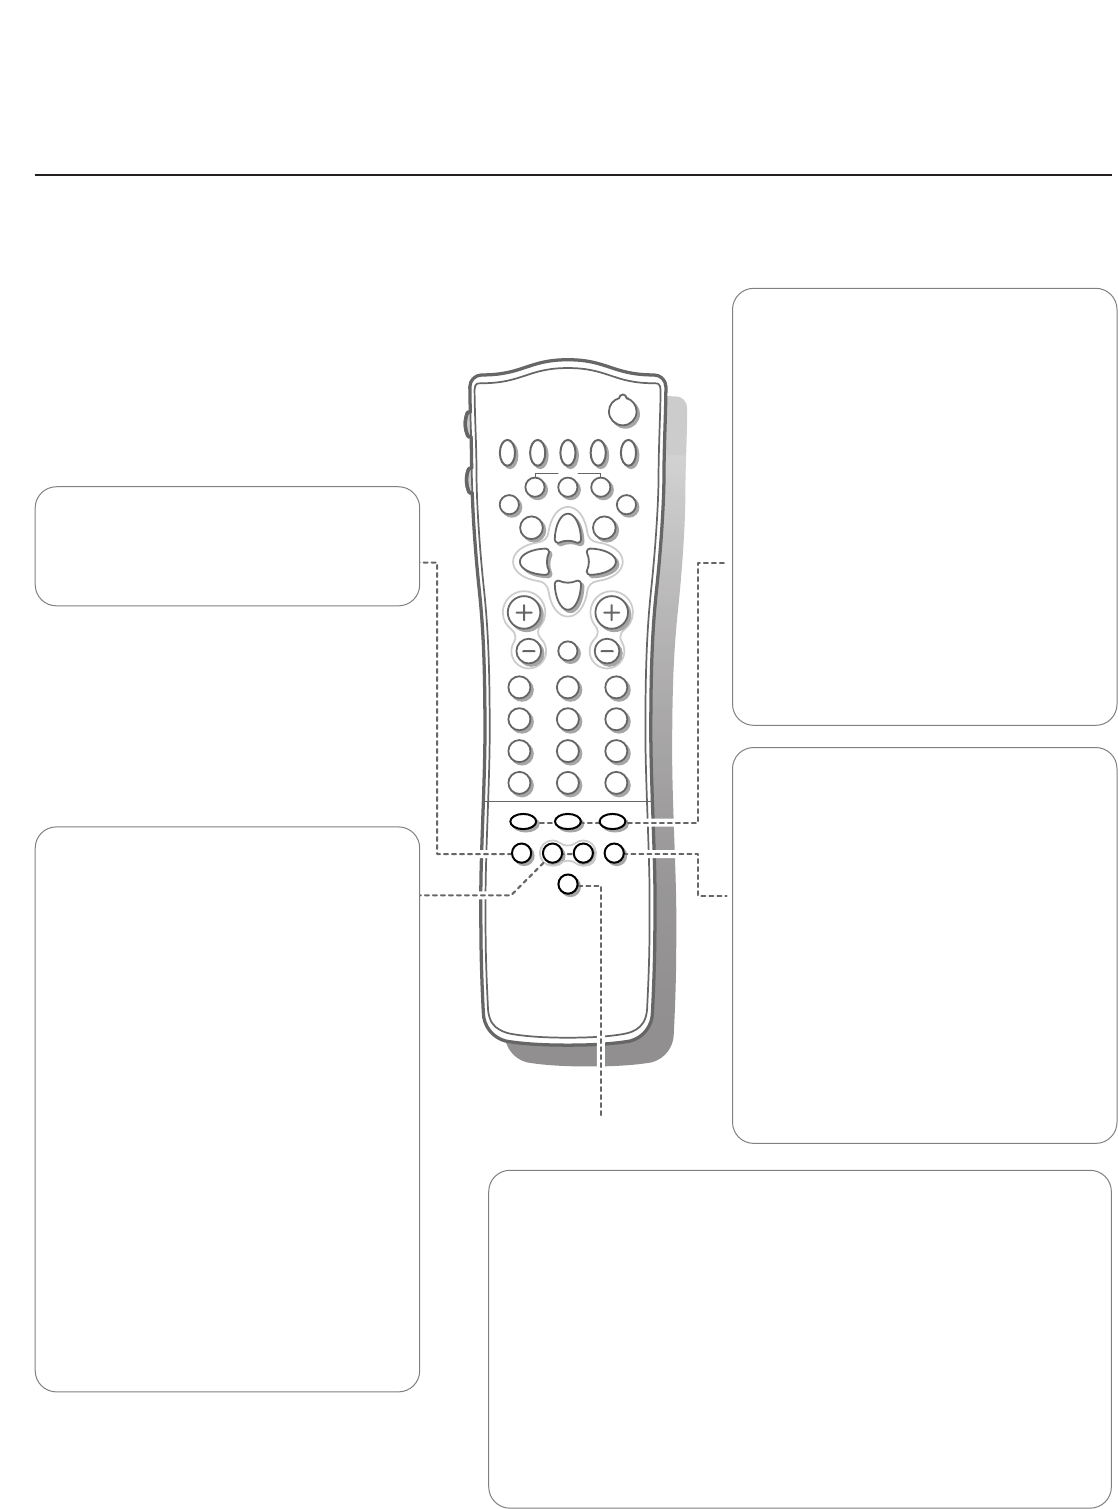
b Teletext on/off see p. 18
fh Teletext functions see p. 19
U Time display
The time, downloaded from the TV channel
(with teletext) stored on programme number
1 or the lowest favourite programme
number, is displayed on the screen.
This function is not available when continuous
subtitles have been switched on.
V Volume
Press + or - to adjust the volume.
¬ Mute
Temporarily interrupt the sound or restore
it.
P Programme selection
To browse through the TV channels
activated in the Favourite Programme menu.