Contents
Introduction
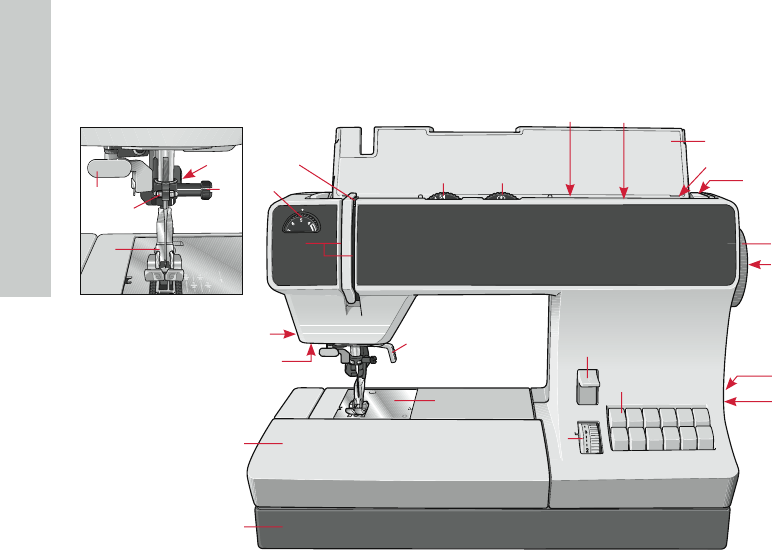
Parts of your select™ sewing machine .....4
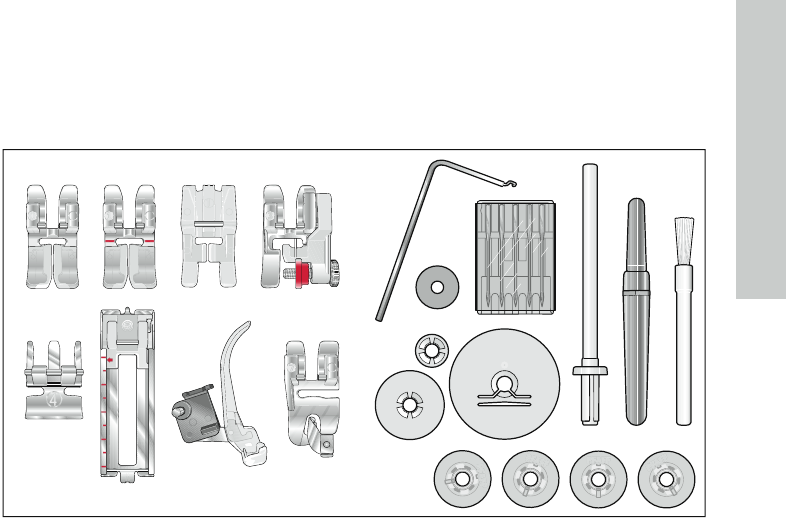
Standardaccessories ....................................5
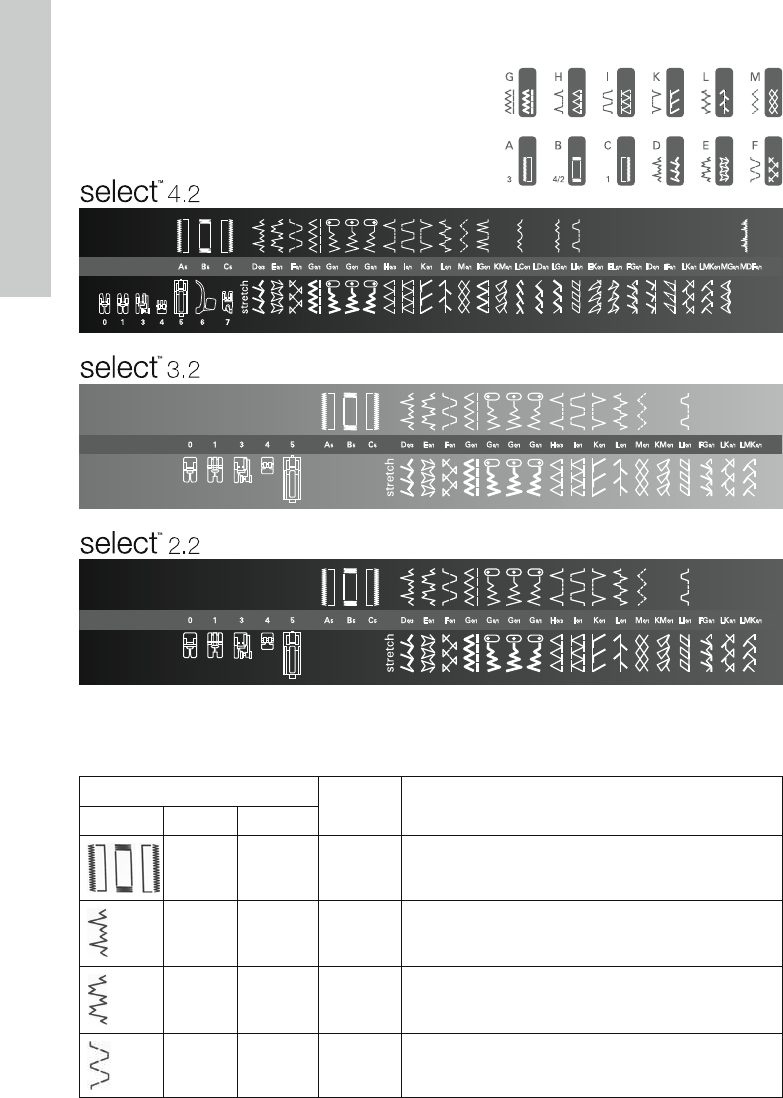
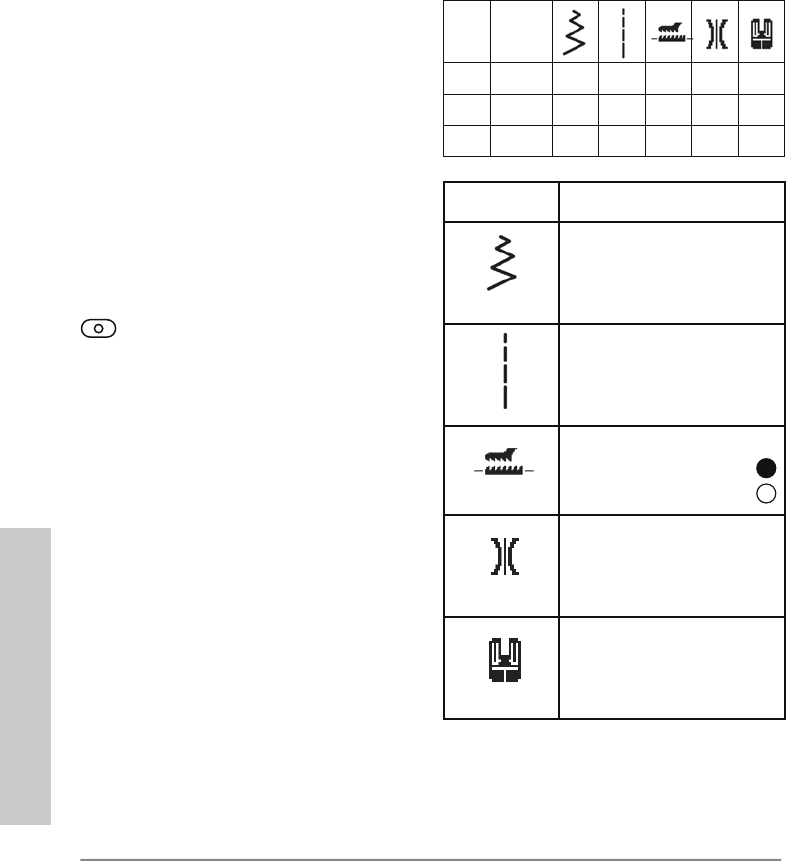
Stitchoverview .............................................6
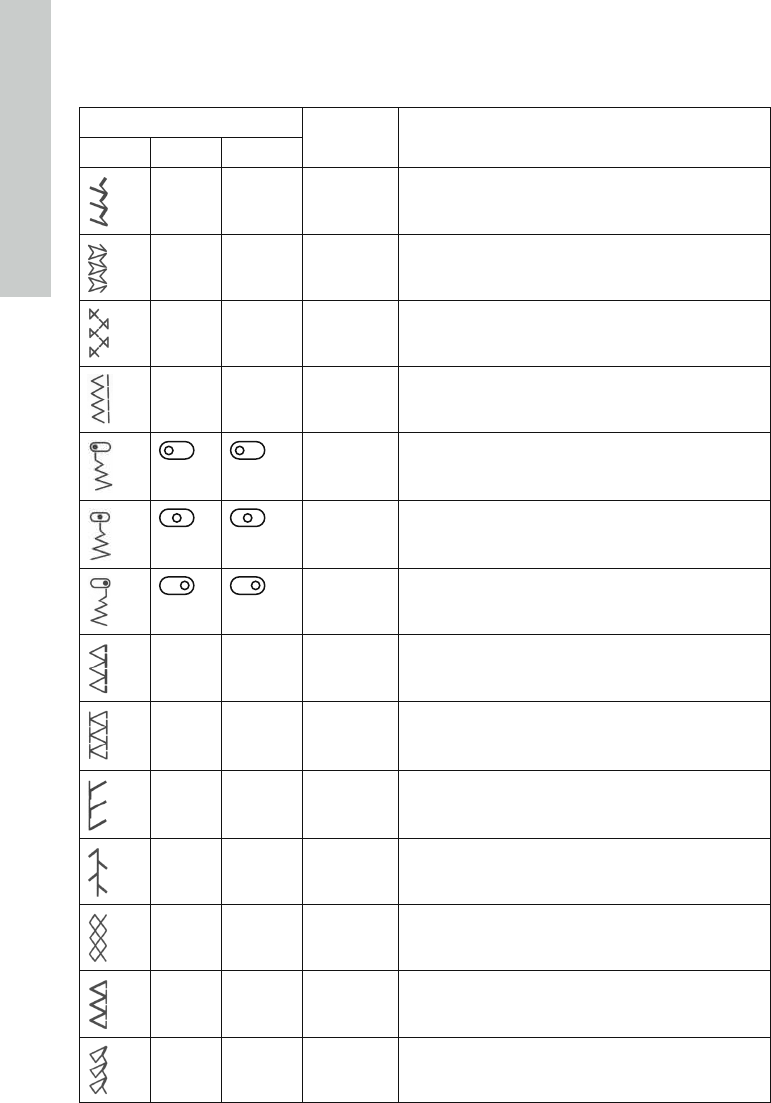
Stitchtable-Non-elastic ......................... 6-7
Stitchtable-Stretchstitches ................... 8-9
Operate your sewing machine
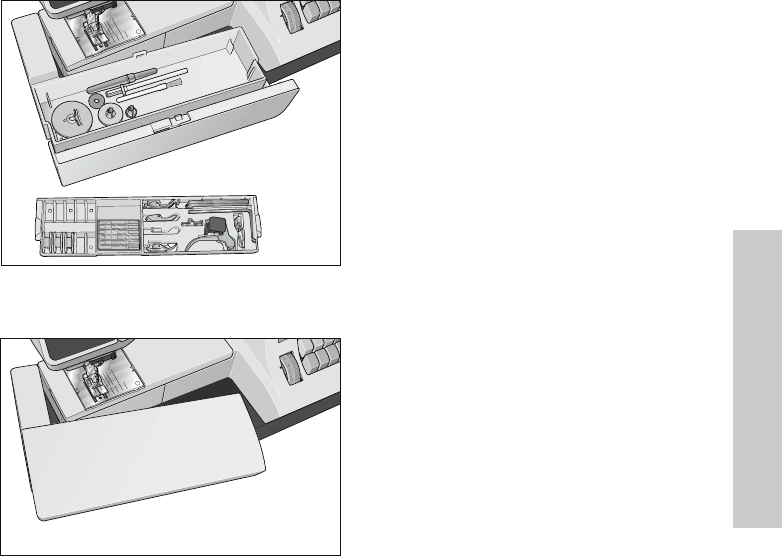
Lid ................................................................10
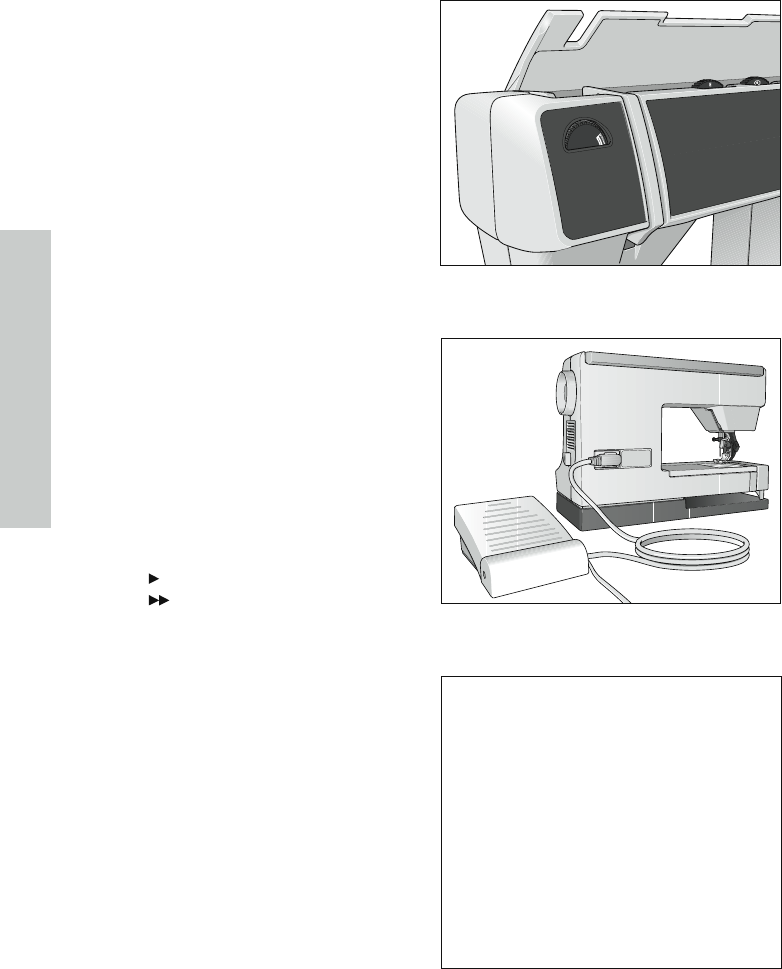
Connecting the foot control ......................10
Main switch ................................................. 10
Accessorytray ............................................11
Using the free arm ...................................... 11
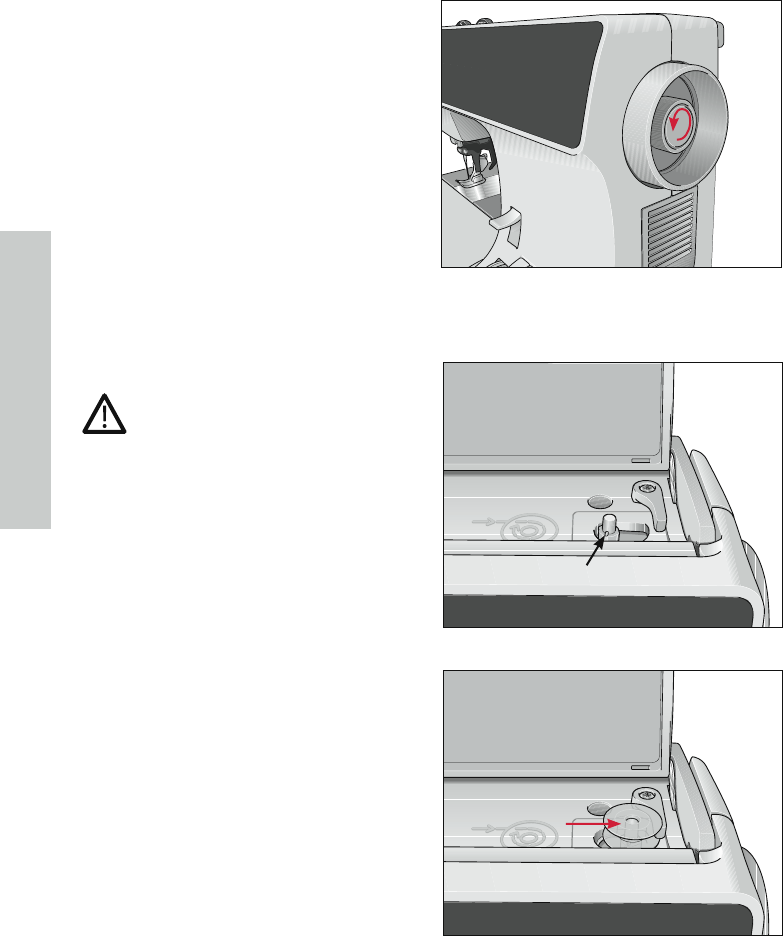
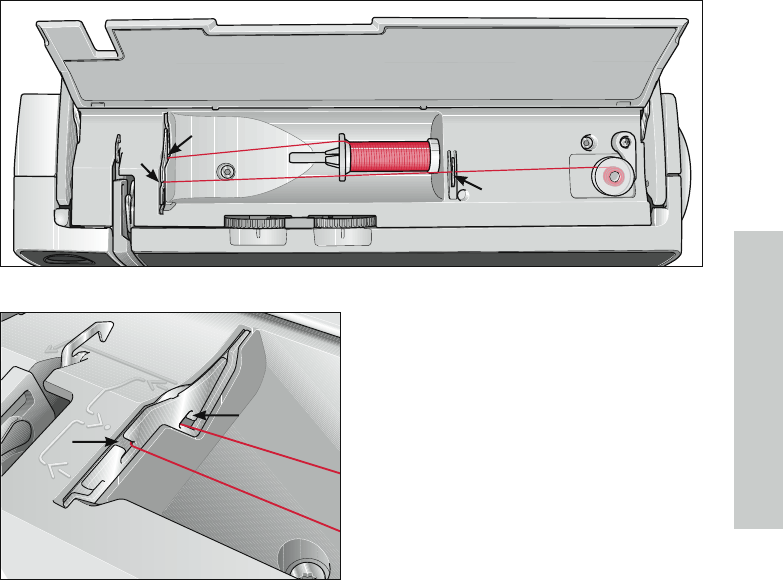
Bobbin winding .................................... 12-15
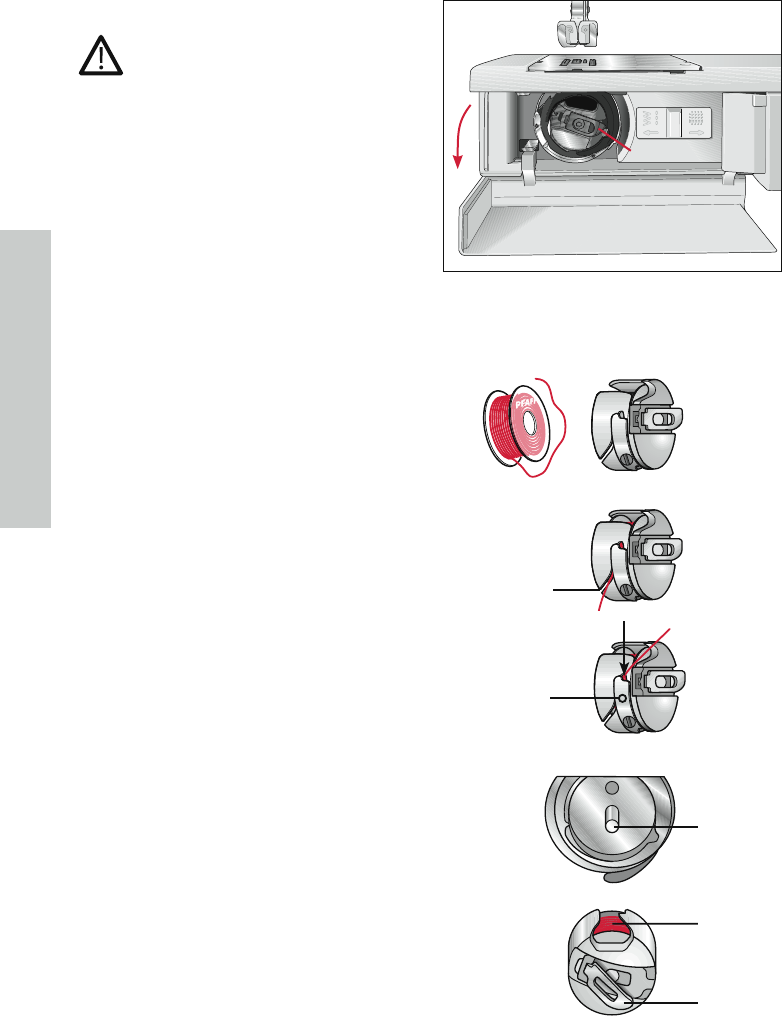
Changing the bobbin .................................16
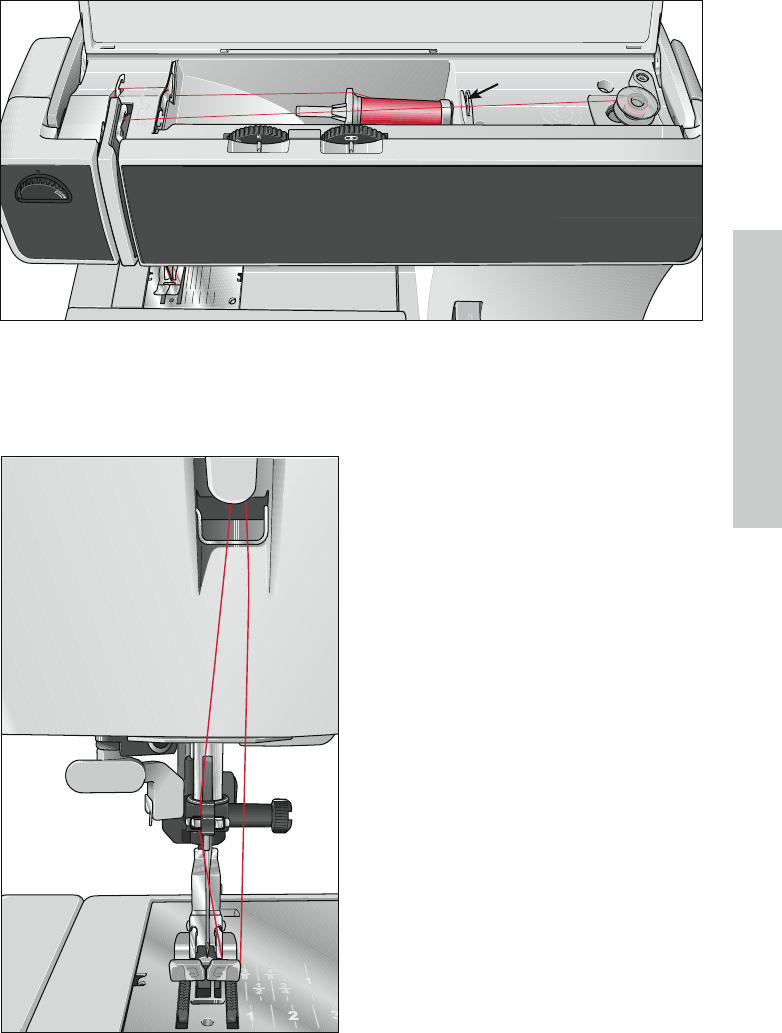
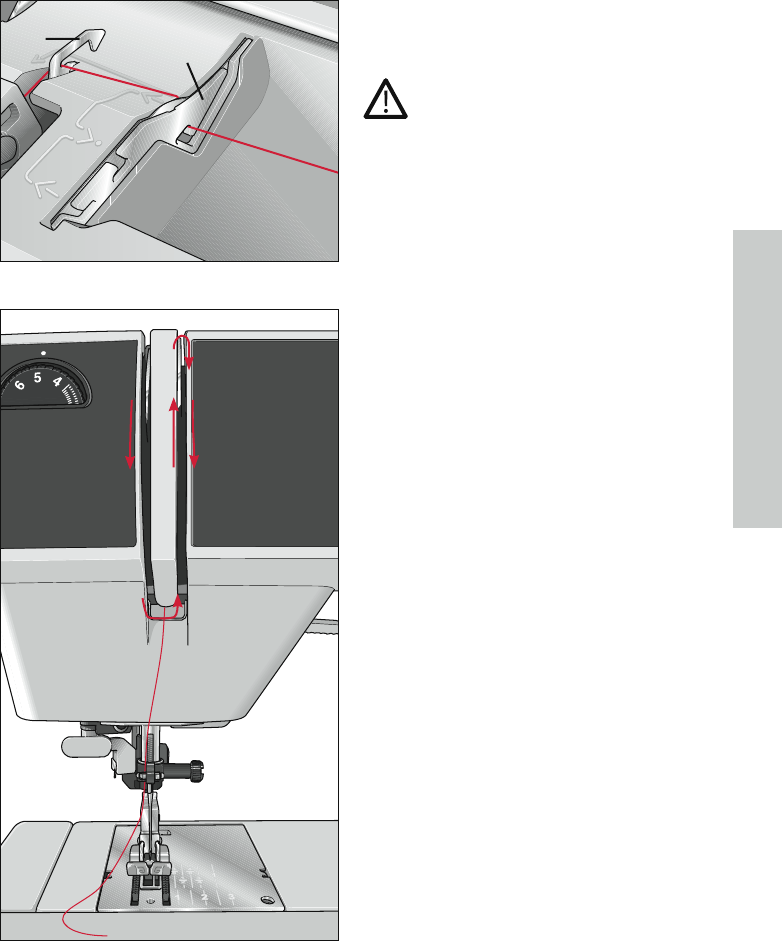
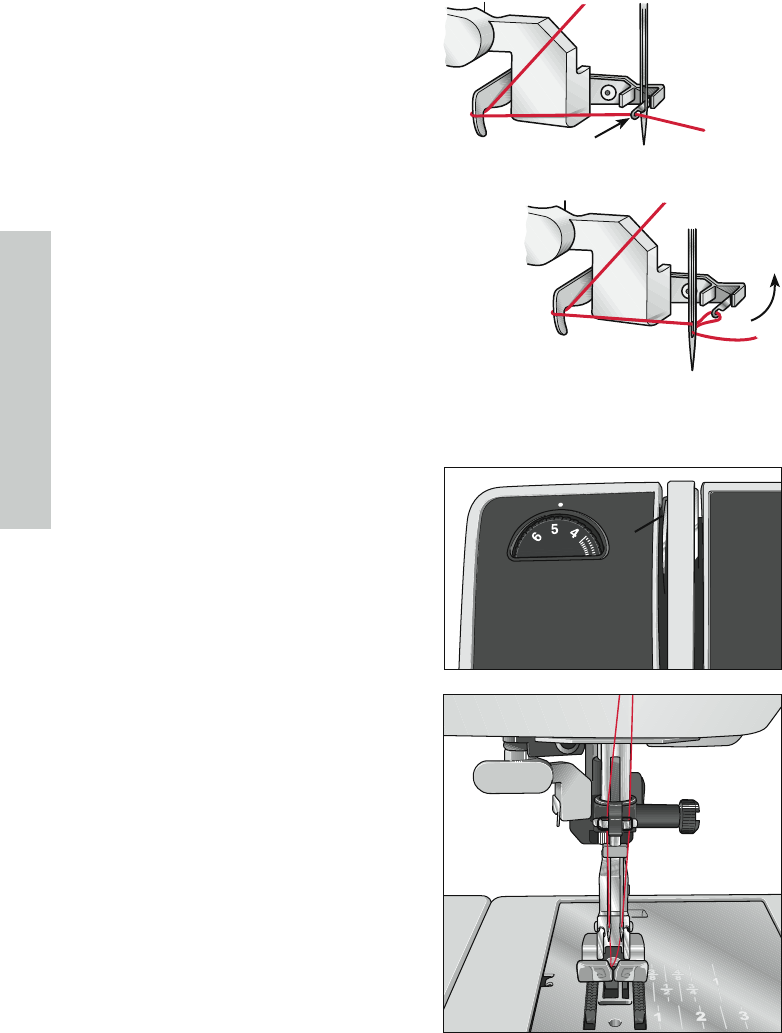
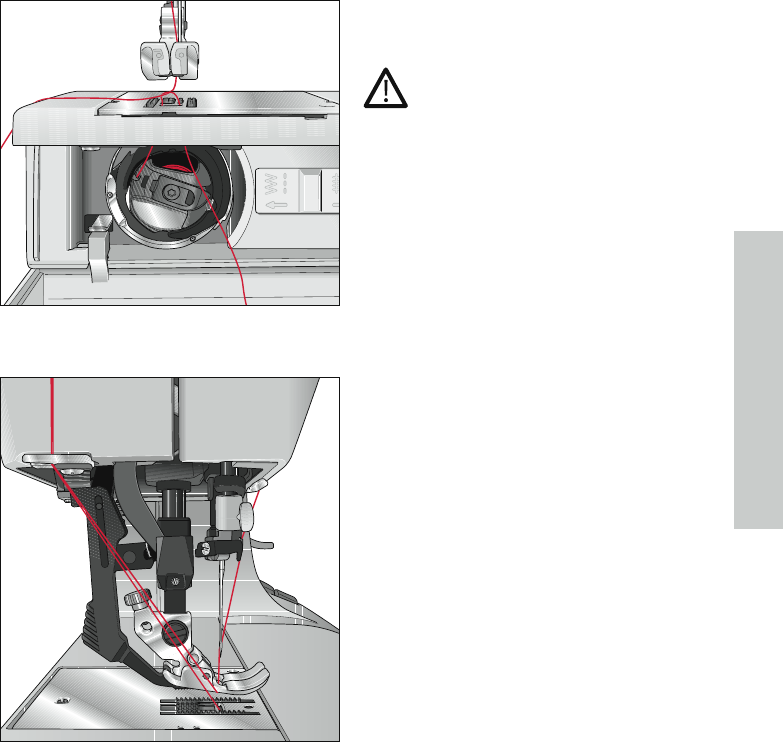
Threading .............................................. 17-18
Needle Threader (Model 4.2) ..................18
Threading the twin needle ......................18
Bringing up the bobbin thread .................19
Thread cutter...............................................19
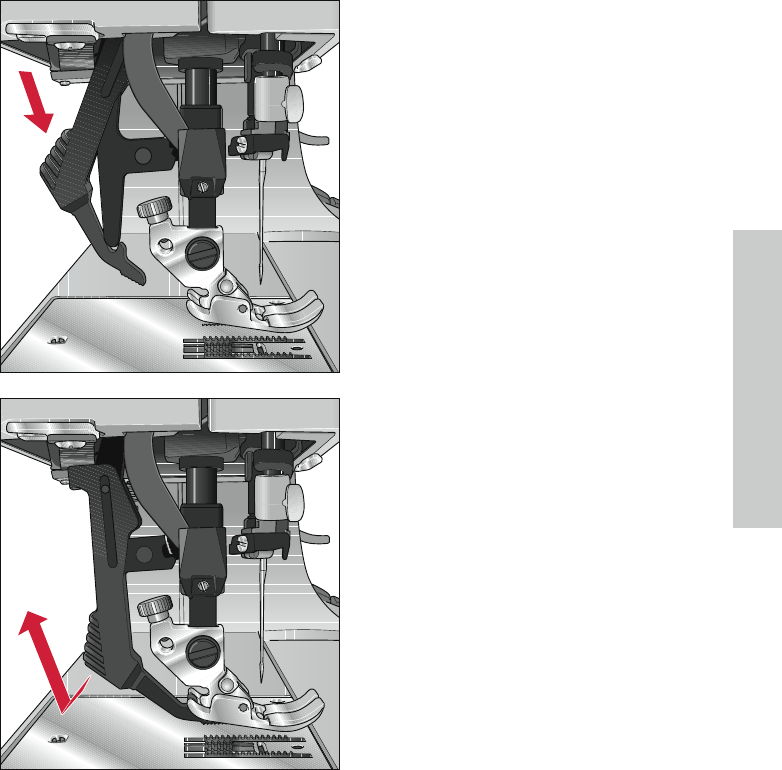
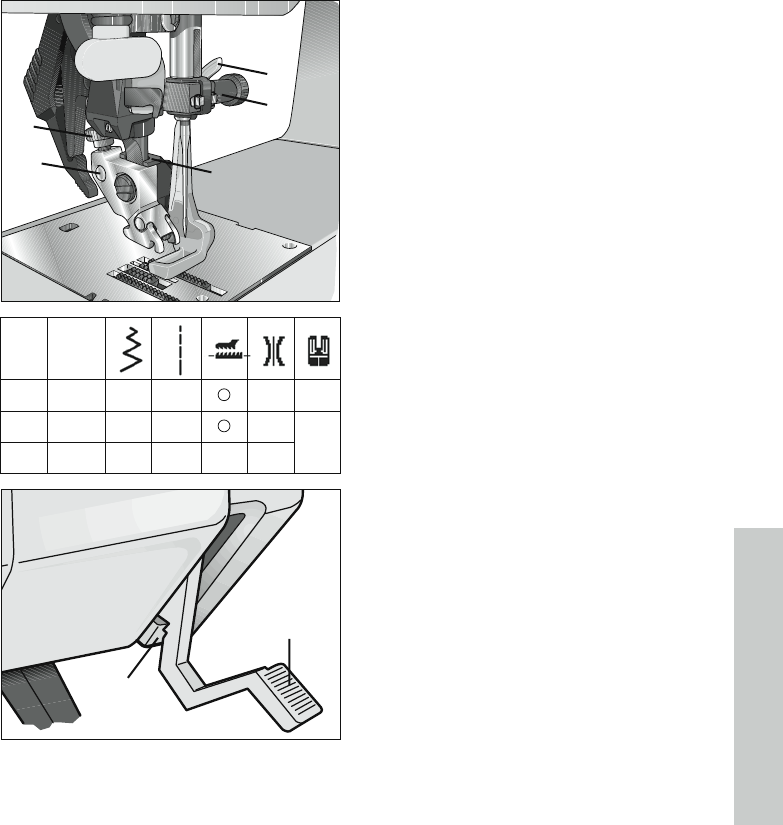
Presser foot lifter ........................................20
Changing the presser foot .........................20
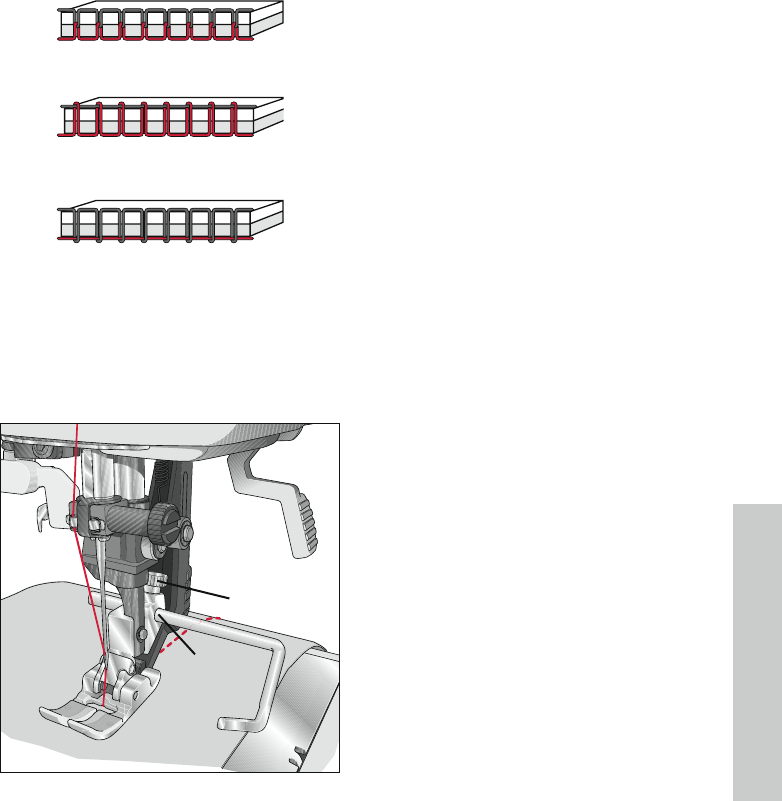
The IDT™ system (IntegratedDualFeed) 21
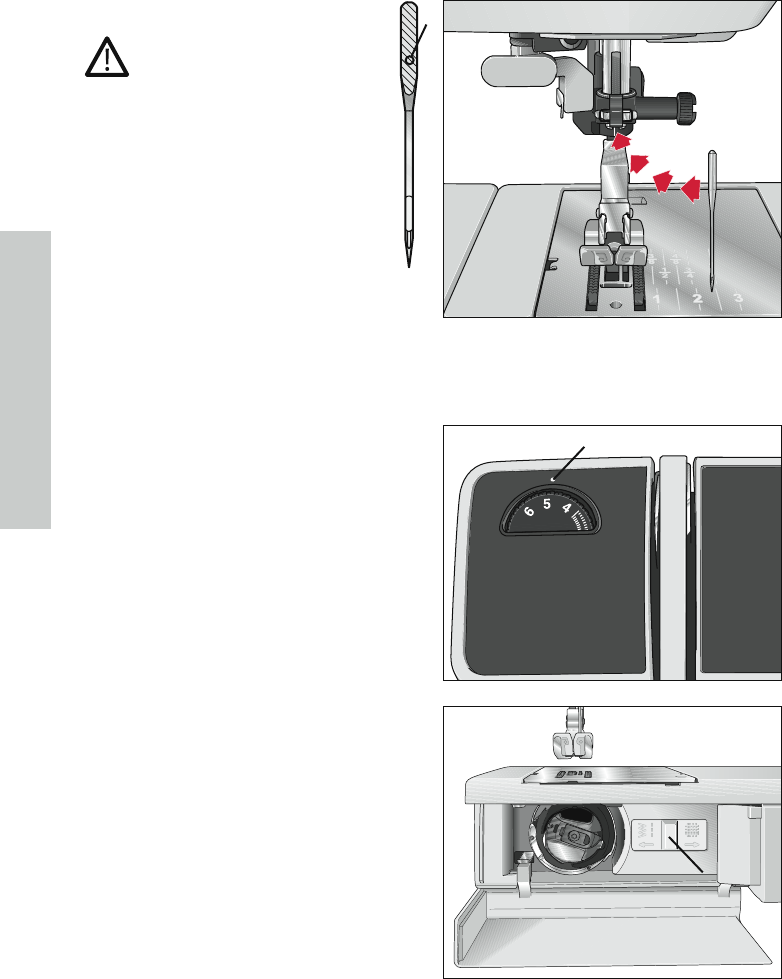
Settingtheneedlethreadtension ............22
Droppingthefeeddog ..............................22
Changing the needle ..................................22
Stitchwidthdial .........................................23
Needle position dial ................................... 23
Reversesewing ...........................................24
Stitchlengthadjustmentdial .................... 24
Adjust stitch length ................................24
Buttonhole ..............................................24
Stretch stitches........................................24
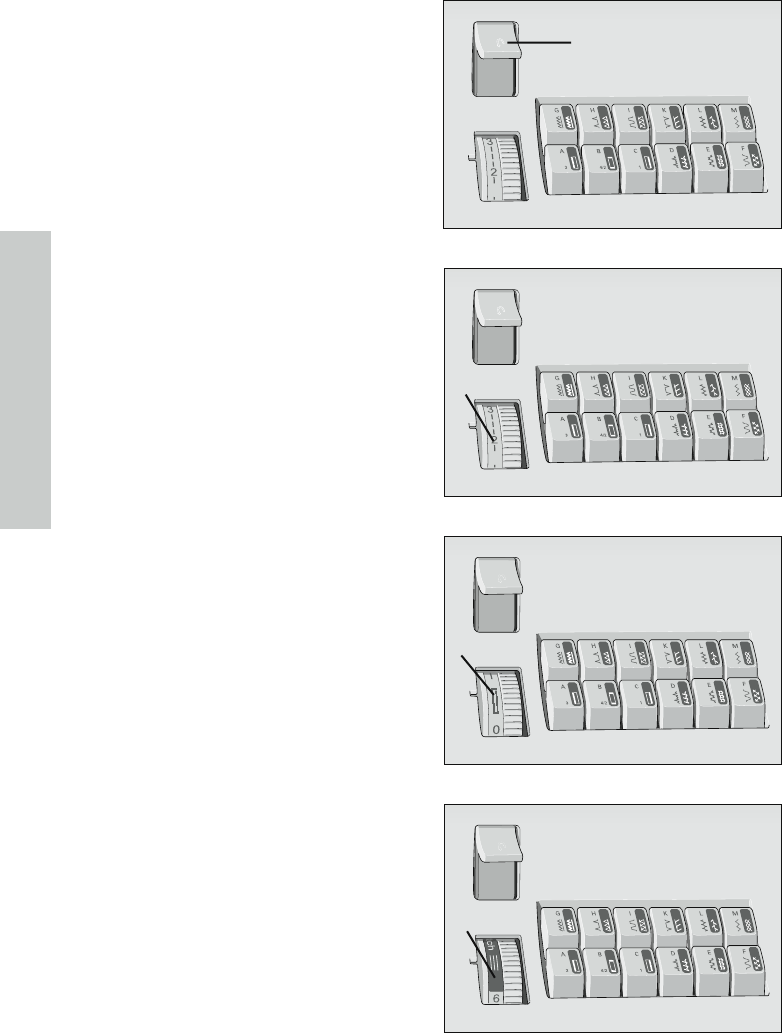
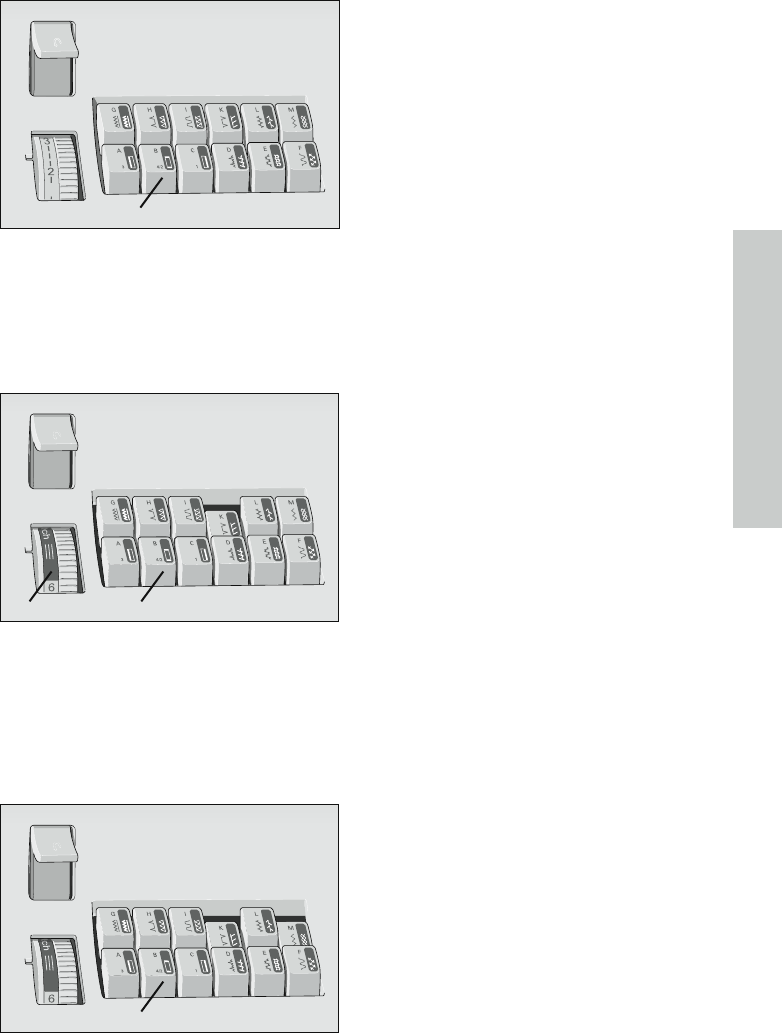
Stitchselection-EasySelectSystem .......25
Utility stitches ........................................25
Stretch stitches........................................25
Utility and stretch stitch combinations .. 25
Utility stitches and practical sewing
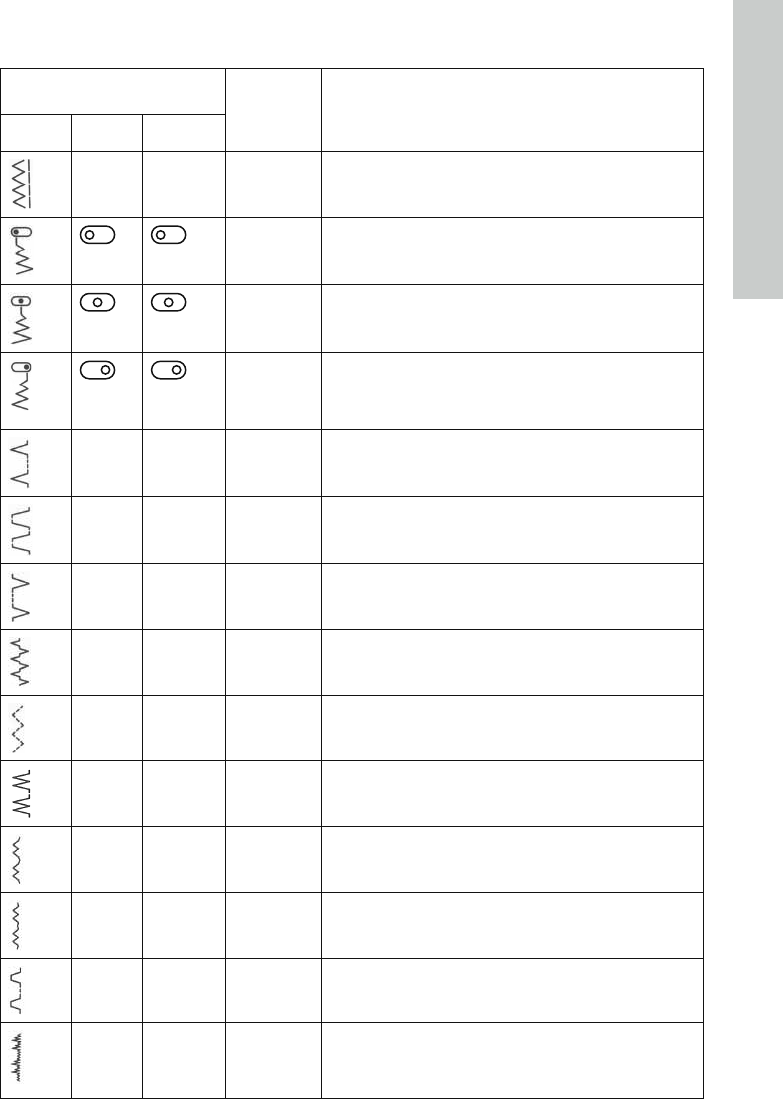
Explanation of the sewing chart ..............26
Needle thread tension ..............................27
Topstitching ................................................27
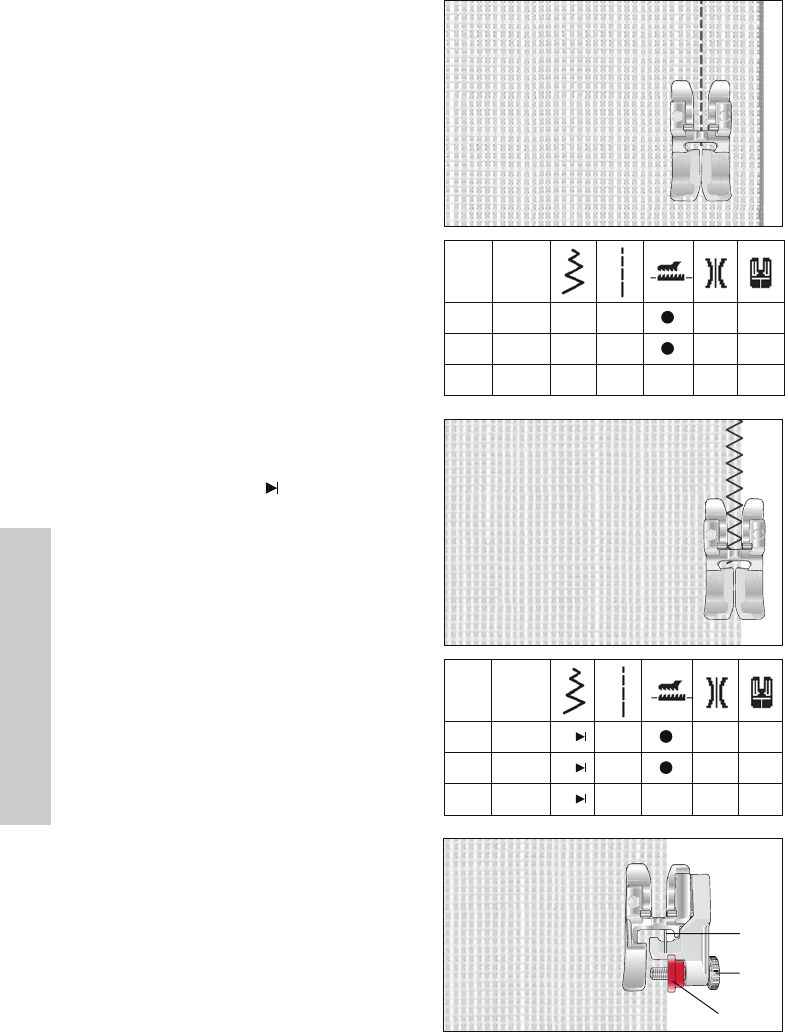
Straightstitch ..............................................28
Zigzag stitch ................................................ 28
Blindhem stitch .......................................... 29
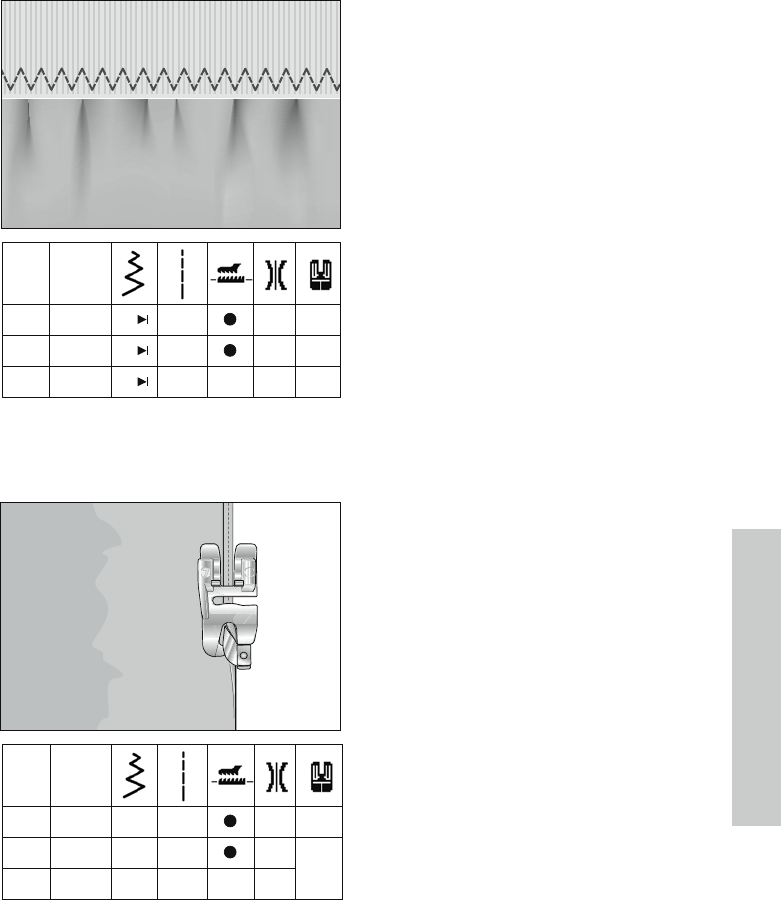
Overlockstitch ............................................ 30
Elastic stitch ................................................31
Stabilizingedges.........................................31
Hemming with the twin needle ...............32
Buttonholes ........................................... 33-34
FreeMotionSewing ...................................35
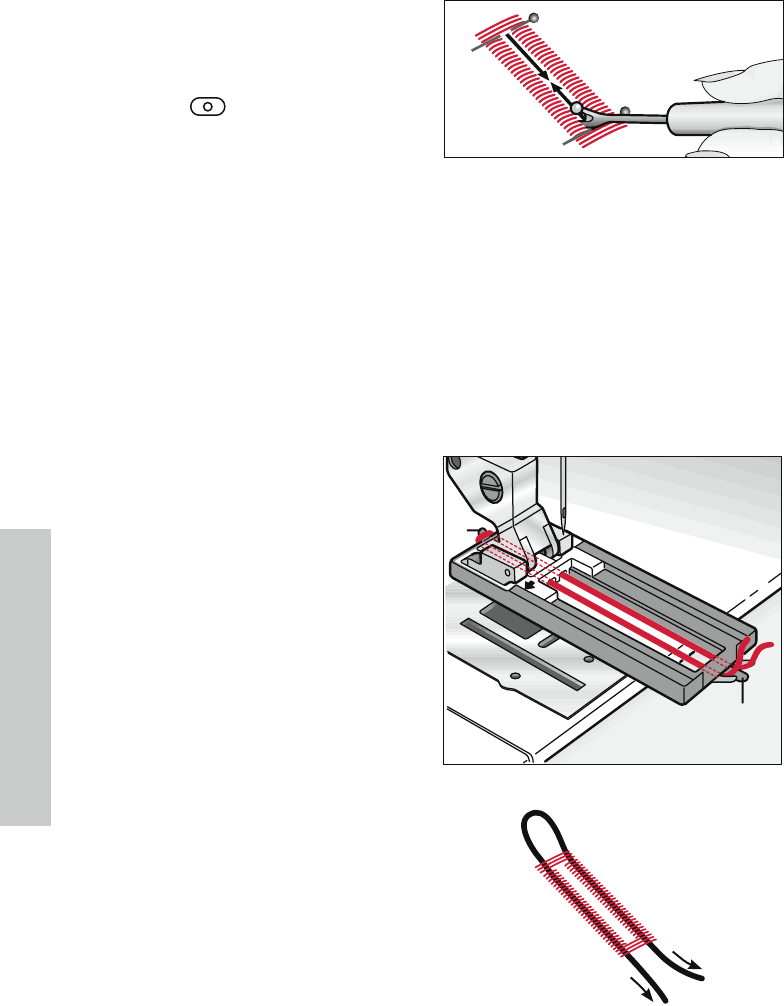
Sewingonbuttons................................ 35-36
Sewingonzippers ....................................36
Maintenance and trouble-shooting
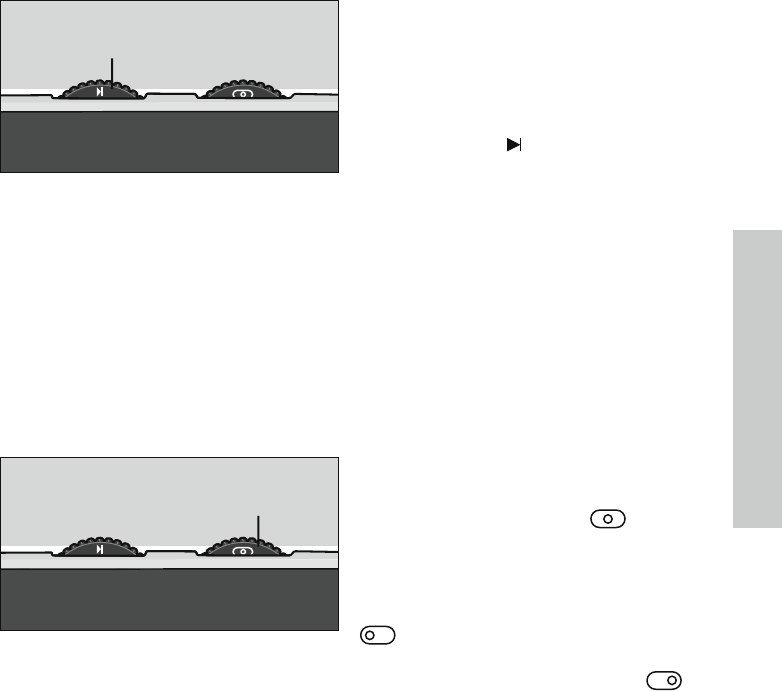
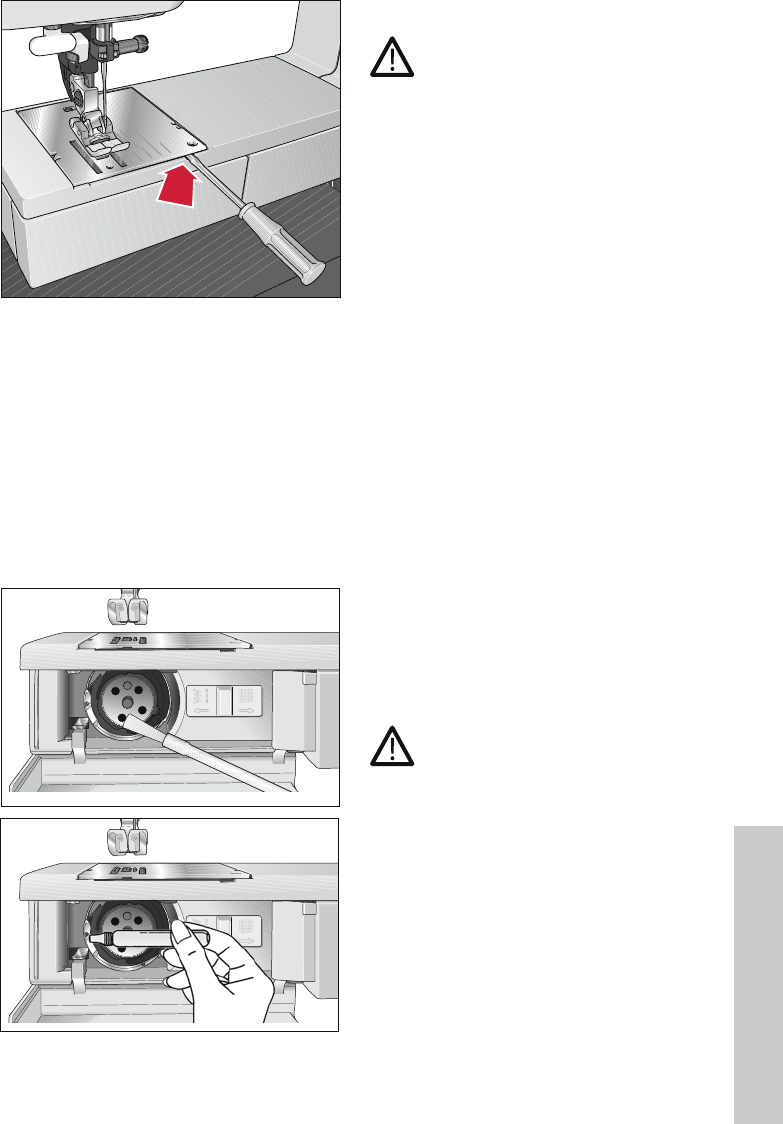
Changing the needle plate ........................37
Cleaning and oiling .................................... 37
Trouble-shooting .................................. 38-39