


-
Heb over een speld genaaid naaimachine blokkeerde uit gezet nieuwe naald er in gezet maar nu maakt hij lawaai met naaien Gesteld op 9-9-2023 om 17:59
Reageer op deze vraag Misbruik melden -
Kan spoel niet opwinden draad juist ingereden handwiel los motor draait maar spoel windt niet op Gesteld op 7-8-2023 om 17:07
Reageer op deze vraag Misbruik melden -
Opzoek naar de Nederlandse handleiding van de Pfaff Select 1540. Heeft iemand daar een pdf van?
Reageer op deze vraag Misbruik melden
Het lijkt erop dat het vrijwel een gelijke machine is als de Pfaff Select 4.0. Klopt dat?
En welk verschil zit er tussen de Pfaff Select 3.0 en Pfaff 4.0.
Ik vraag dit omdat ik beide machines bij een kringloop heb gekocht. Na een schoonmaak beurt werken ze naar behoren.
Gesteld op 11-2-2023 om 09:52 -
Hoe kan ik mijn gordijnen met blind zoomen repareren? Gesteld op 18-1-2023 om 11:34
Reageer op deze vraag Misbruik melden -
de onderdraad bij pfaff select 3.0 loopt steeds vast. Hoe kan dit ? Gesteld op 27-6-2022 om 16:37
Reageer op deze vraag Misbruik melden-
Heb ik ook, wil wel eens helpen om opnieuw in tespannen Geantwoord op 4-7-2022 om 16:15
Waardeer dit antwoord Misbruik melden
-
-
Misschien stof in het spoelhuis, even met een kwastje er door halen Geantwoord op 9-9-2023 om 18:04
Waardeer dit antwoord Misbruik melden -
Hoe zet ik de naaimachine op zigzag select 3.2
Reageer op deze vraag Misbruik melden
Gesteld op 20-9-2020 om 11:14
-
Hoe wissel ik het lampje van pfaff naaimachine festival 33082311 Gesteld op 27-7-2020 om 14:44
Reageer op deze vraag Misbruik melden-
Hoe kan ok het lampje vervangen. Geantwoord op 10-3-2021 om 10:50
Waardeer dit antwoord (34) Misbruik melden
-
-
Vwrwissel lamoje vlgs filmpje maar geen licht. Lamp is nieuw?
Waardeer dit antwoord (3) Misbruik melden
Geantwoord op 31-7-2023 om 12:42 -
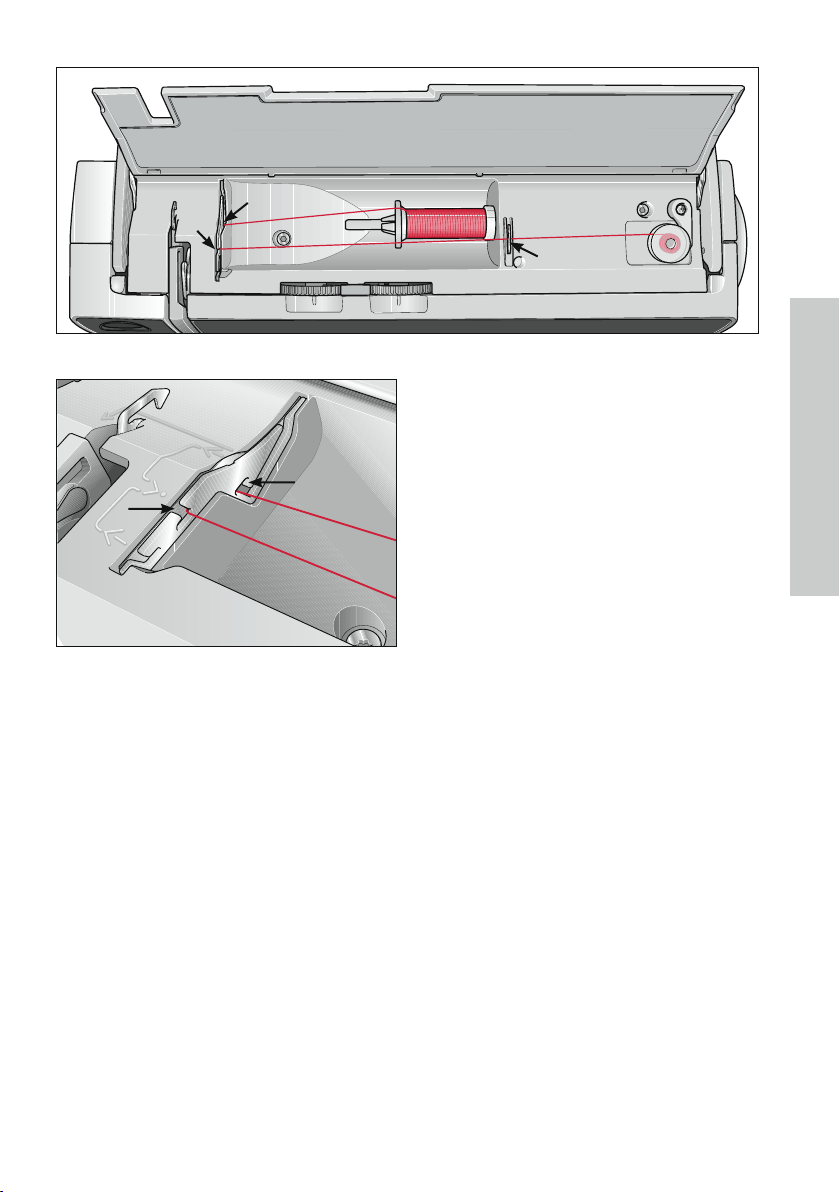
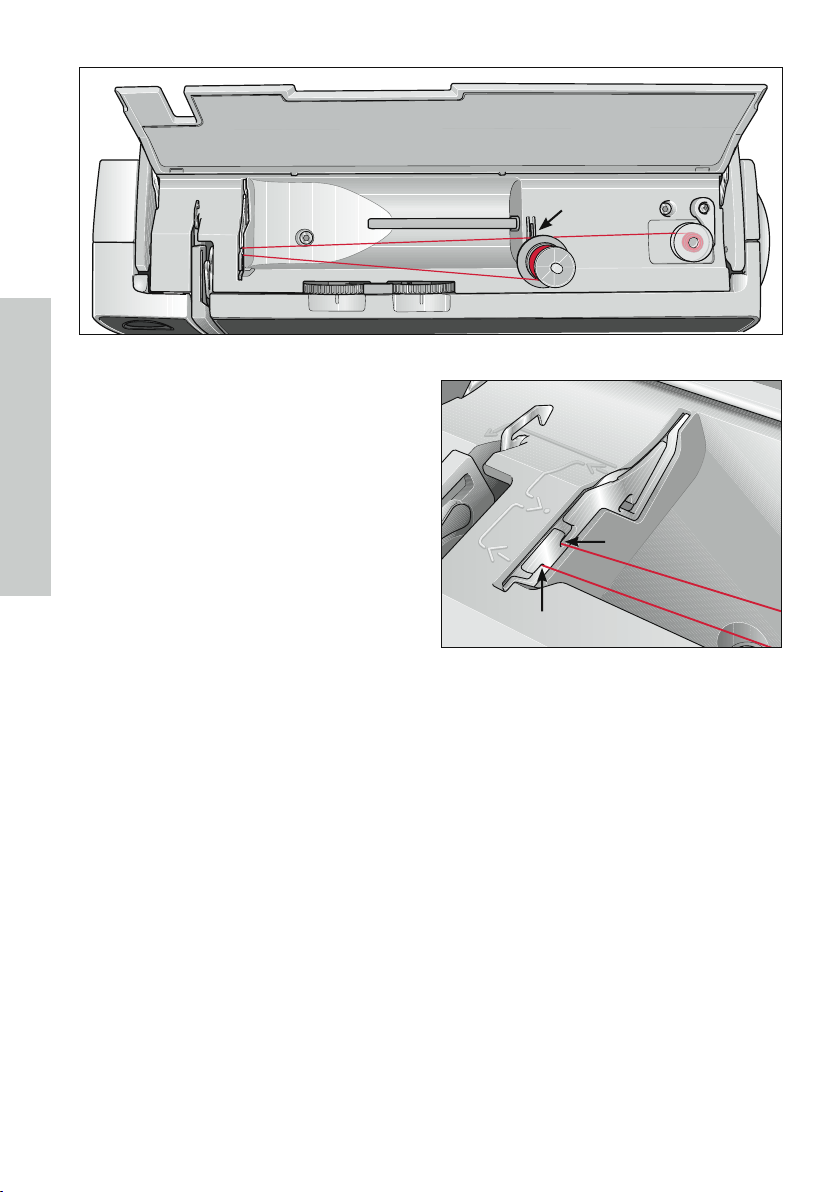
welke weg moet de draad volgen vanuit de bobijn tot bij de naald, is er een prent beschikbaar hierover ? Gesteld op 22-4-2020 om 17:14
Reageer op deze vraag Misbruik melden -
draad indoen
Reageer op deze vraag Misbruik melden
handleiding uitgelegd voor een ander type Gesteld op 22-4-2020 om 17:06 -
Ik heb de spoel er opnieuw in gedaan en nu loopt hij steeds vast met een prop draad aan de onderkant Gesteld op 12-2-2020 om 08:52
Reageer op deze vraag Misbruik melden -
Het spoelhuls is los , is die kapot , moet weer vastmaken en hoe Gesteld op 16-1-2020 om 16:13
Reageer op deze vraag Misbruik melden -
Terwijl ik probeer uit de vrije hand te quilten, met mijn Pfaff select 3.0, transporteur verzonken, bovenspanning op 2, krijg ik aan de onderzijde van mijn naaiwerk grote lussen. Wat moet ik anders doen ? Gesteld op 30-7-2018 om 16:37
Reageer op deze vraag Misbruik melden-
Ik heb de spoel er op nieuw ingedaan en nu loopt hij steeds vast proppen draad onder, weet iemand hoe ik dit op kan lossen? Geantwoord op 12-2-2020 om 08:50
Waardeer dit antwoord (13) Misbruik melden
-
-
Hoe steek ik een rits in een kleed welke voet heb ik nodig Gesteld op 20-3-2014 om 15:34
Reageer op deze vraag Misbruik melden-
een speciaal ritsvoetje. Geantwoord op 10-4-2014 om 11:43
Waardeer dit antwoord (3) Misbruik melden
-
