29
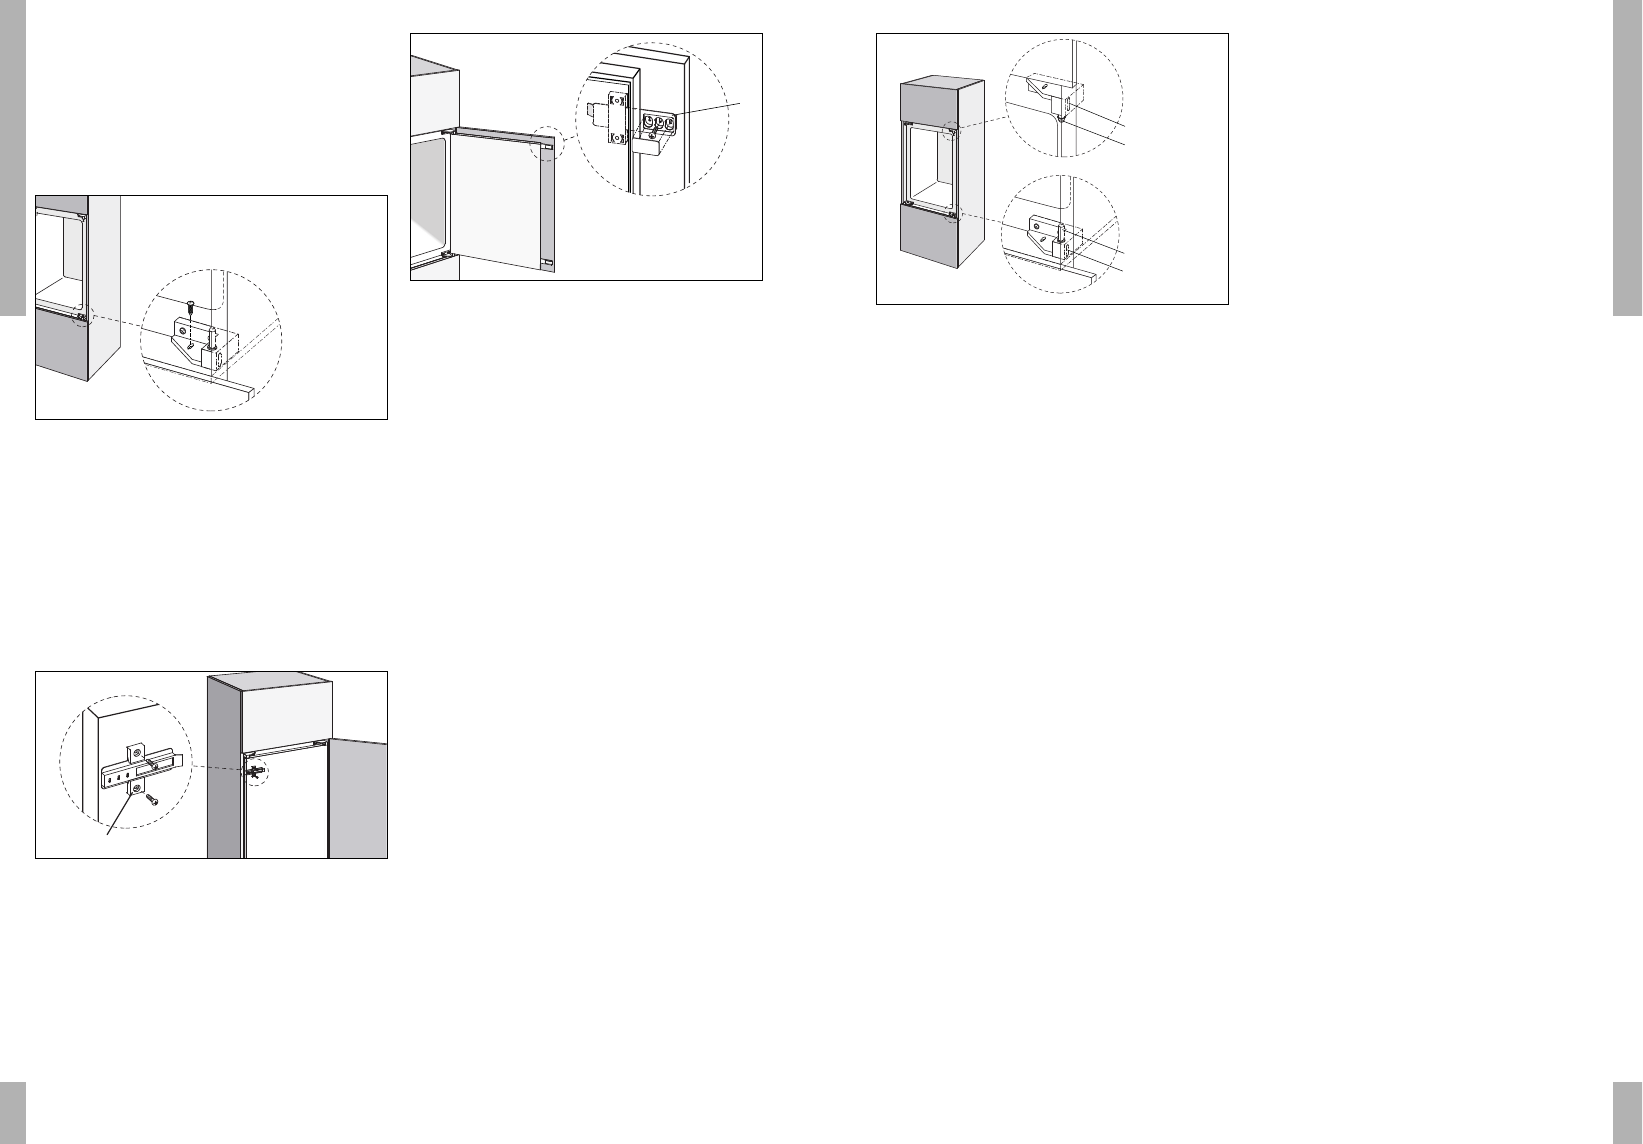
fig. 6
Using the screwdriver, slide the top locking
screw upwards. Then tighten the screw again.
Hinge pen T is now completely in the hinge
holder. Put the plastic ring that was on the top
hinge pen to one side.
Unscrew the bottom locking screw S while
holding the door firmly. Using the screwdriver,
push the screw downwards and then tighten the
screw again.
Lift the door off the refrigerator.
Put the plastic ring that was on the bottom hinge
pen to one side.
Carefully lay the door on a scratch-free surface.
Move the plastic guides for the hinge pen to the
left side of the door.
Put the caps into the holes which have been left
on the right side.
Unscrew the locking screw S on the left side and
lift the hinge pen at the bottom left up a little.
Tighten the locking screw again and put the
plastic ring on the hinge pen.
Lift the refrigerator door up and place it at the
correct position on the left hinge pen. Unscrew
the locking screw again and lift the bottom hinge
pen up further with the screwdriver and then
tighten the locking screw again.
Unscrew the locking screw at the top left and
push the top hinge pen down a bit. Slide the
plastic ring onto the pen.
Push the hinge pen all the way down and tighten
the locking screw again.
changing the direction in which the freezer-
compartment door opens (fridge/freezers only)
Open the freezer-compartment door.
Unscrew the hinge block from the bottom of the
freezer-compartment door. Remove the door.
Unscrew the closing mechanism.
On the right, at the position where the closing
mechanism is to be fitted, remove the protective
caps. Transfer the caps to the holes on the left.
Screw the closing mechanism in place on the
right.
With its front facing you, rotate the door half a
turn. Insert the hinge pin into the hole at the top
left.
Screw the hinge block at the bottom of the
freezer-compartment door in place again on the
left.
Close the freezer-compartment door.
INSTALLATION
28
Fasten the appliance to the floor of the cupboard
by screwing two screws through the holes in the
bottom hinge holders (fig. 3b). Fasten the
appliance to the roof of the cupboard by
screwing two screws through the decorative
frame.
fig. 3b
fitting the doors
Open the kitchen cupboard and fridge/freezer
doors.
First fit the brackets (fig. 4-E) to the fridge/
freezer door with the flat side against the door.
fig. 4
Open the kitchen cupboard and fridge/freezer
doors as far as possible.
Slide the door guides (fig. 5-F) into the brackets E
with the three screw holes towards the outside
of the fridge door.
fig. 5
Determine the position of the fixing holes for the
door guides F. The door guides should be fitted
at a distance of 25 mm from the edge of the
cupboard door.
Fix the door guides F to the cupboard door.
Screw the door guides in place with the wood
screws and stick the cover plates to the door
guides.
changing the direction in which the refrigerator
door opens
Using a knife or other sharp object, carefully
remove the cap from the top left of the
refrigerator door. Then remove the cap from the
bottom left of the refrigerator door. Close the
refrigerator door.
please note:
Now take a firm hold of the refrigerator door.
At the side of the refrigerator, first unscrew the
top locking screw S (fig. 6) on the hinged side of
the door.
INSTALLATION