109538
18
Verklein
Vergroot
Pagina terug
1/21
Pagina verder
Handleiding
Manual
Anleitung
Notice d’utilisation
Schouwkappen
Canopy hoods
Wandhauben
Hottes chéminées
LSK 982 / LSK 988 / LSK 1288 / LSK 996
SKE 987
RKE 905 / RKE 1205
88020310
Nederlands . . . . . . . . . . . . . . . . . . . . . . . . . . . . . . . . . . . . . . . . . . . . . . . . . . . . . . . . . . . . . . . 1 - 9
English . . . . . . . . . . . . . . . . . . . . . . . . . . . . . . . . . . . . . . . . . . . . . . . . . . . . . . . . . . . . . . . . 11 - 19
Deutsch . . . . . . . . . . . . . . . . . . . . . . . . . . . . . . . . . . . . . . . . . . . . . . . . . . . . . . . . . . . . . . . . 21 - 29
Français . . . . . . . . . . . . . . . . . . . . . . . . . . . . . . . . . . . . . . . . . . . . . . . . . . . . . . . . . . . . . . . 31 - 39
Introductie
Als u deze gebruiksaanwijzing doorleest, bent
u snel op de hoogte van alle mogelijkheden
die dit toestel u biedt. U vindt informatie voor
uw veiligheid en over het onderhoud van het
toestel.
Bewaar de gebruiksaanwijzing en het
installatievoorschrift. Een eventueel volgende
gebruiker van dit toestel kan daar zijn
voordeel mee doen.
Inhoud NL
Veiligheid . . . . . . . . . . . . . . . . . . . . . . . . . . 2
Waar u op moet letten . . . . . . . . . . . . . . . . 2
Afvoersystemen . . . . . . . . . . . . . . . . . . . . . 2
Bediening . . . . . . . . . . . . . . . . . . . . . . . . . . 3
Filters . . . . . . . . . . . . . . . . . . . . . . . . . . . . . . 4
Koolstoffilters vervangen . . . . . . . . . . . . . . 4
Onderhoud . . . . . . . . . . . . . . . . . . . . . . . . . . 5
Lampen vervangen . . . . . . . . . . . . . . . . . . . 5
Reinigen . . . . . . . . . . . . . . . . . . . . . . . . . . . . 5
Installatie . . . . . . . . . . . . . . . . . . . . . . . . . . 6
Algemeen . . . . . . . . . . . . . . . . . . . . . . . . . . . 6
Montage schouwkap . . . . . . . . . . . . . . . . . 6
Technische gegevens . . . . . . . . . . . . . . . . 9
Afvoeren verpakking en toestel . . . . . . . . 9
1 INHOUD
Doelmatig en Stijlvol
2 VEILIGHEID/AFVOERSYSTEEM
3
Waar u op moet letten
Laat het toestel aansluiten door een erkend
installateur (zie hoofdstuk "Installatie").
Bij reparatie of schoonmaakbeurten moet
het toestel stroomloos gemaakt worden.
Neem de stekker uit het stopcontact of
draai de schakelaar in de meterkast op nul.
Bij koken of braden wordt de kookplaat
heet. Kinderen moeten dus altijd uit de
buurt worden gehouden.
Vet en olie zijn bij oververhitting brandbaar.
Blijf in de buurt tijdens het bereiden van
gerechten.
Schakel, voordat u met koken begint, de
afzuigkap in. Laat na het koken de
afzuigkap nog ca. 5 minuten aan staan.
Een met vet verzadigd filter is brandbaar.
Flambeer nooit onder de afzuigkap en maak
het filter op tijd schoon.
Maak eerst het toestel stroomloos als u de
lampen wilt vervangen! Gebruik uitsluitend
dezelfde lampen met aangegeven wattage.
In verband met eventuele scherpe randen
van de ombouwkoker adviseren wij u om
tijdens de montage van de koker
werkhandschoenen te gebruiken.
Afvoersystemen
Afhankelijk van het type kan de afzuigkap op
twee manieren worden aangesloten:
Op een afvoerkanaal.
De aangezogen kookdampen worden naar
buiten afgevoerd, nadat de vetdeeltjes
gefilterd zijn. Dit is de beste manier! De
afzuigkap wordt aan de bovenzijde, met
behulp van het bijgesloten aansluitpijp-
mondje, op het afvoerkanaal aangesloten.
Als circulatiekap.
De vetdeeltjes en de geur uit de
aangezogen kookdampen worden gefilterd.
De aangezogen lucht wordt niet afgevoerd
maar circuleert via het T-stuk (B) door de
roosters (A) van de koker in de keuken. U
moet dan wel een koolstoffilter plaatsen.
BEDIENING
Bediening
Ingebruikname
Als u de afzuigkap voor de eerste keer
gebruikt, start de kap in de testfase. Aan het
eind van deze fase schakelt de kap over naar
de stand-by fase. De verlichting en de motor
worden uitgeschakeld.
Verlichting in- en uitschakelen
Druk op de toets voor de verlichting
/
.
De verlichting gaat branden.Druk nogmaals op
de toets en de verlichting gaat uit.
Ventilator inschakelen
De afzuigkap wordt ingeschakeld door op
toets
/
te drukken.
Wijzig de snelheid door op motorsnelheids-
schakelaars
/of/te drukken.
Intensiefstand
U kunt u de afzuigkap tijdelijk in de hoogste
stand inschakelen, bijvoorbeeld om snel de
geur af te voeren als er iets aangebrand is.
Druk op toets
/
om de intensiefstand in
te schakelen. De afzuigkap schakelt
gedurende 5 minuten in op de hoogste stand
(4) en keert daarna terug naar de
oorspronkelijke stand.
Timer
Druk gedurende 2 seconden op schakelaar
/, /of/.
De afzuigkap blijft nog 5 minuten ingeschakeld
op de gekozen stand, daarna worden de
afzuigkap en de verlichting automatisch
uitgeschakeld.
Uitschakelen
Schakel de kap uit door op toets
/
te
drukken. De kap schakelt over naar stand-by.
Als u de kap weer inschakelt gaat de motor
draaien met de laatst gekozen snelheid.
B
A
A
ONDERHOUD5
Lampen vervangen
Halogeenverlichting
Schuif de vergrendeling (1) in de aangegeven
richting en klap het deksel (2) naar beneden.
Trek de lamp (3) in de pijlrichting uit de houder
en plaats de nieuwe lamp. Druk het deksel
weer vast. Denk erom dat, wanneer u het
lampje vervangt, u er niet met de handen aan
komt, aangezien direct contact met de huid tot
gevolg kan hebben dat het lampje doorbrandt.
Reinigen
Afzuigkap
De afzuigkap kunt u schoonmaken met een
sopje en een zachte doek, daarna met schoon
water nabehandelen. Gebruik geen agressieve
schoonmaakmiddelen zoals bijvoorbeeld soda.
Niet behandelen met schuursponsjes of
andere schuurmiddelen. Nabehandelen met
Stahlfix en met de structuur van het
roestvrijstaal meepoetsen.
Filters
Aluminiumfilters elke week reinigen in een
sopje. Het aluminiumfilter wordt door de
reinigingsmiddelen dof; dit is normaal.
Koolstoffilters zijn niet uitwasbaar voor
hergebruik.
4
FILTERS
Koolstoffilters vervangen
Het koolstoffilter moet worden toegepast als
de afzuigkap niet op een afvoerkanaal wordt
aangesloten (zie Afvoersystemen, blz. 2).
Let op:
Het koolstoffilter moet minimaal 2x per jaar
worden vervangen, afhankelijk van het
gebruik van de afzuigkap.
Koolstoffilters zijn niet uitwasbaar voor
hergebruik.
Verzadigd koolstof is niet milieuvriendelijk.
Vervang het filter tijdig.
Filterrooster verwijderen
Schakel de netspanning uit! Neem de stekker
uit het stopcontact of zet de schakelaar in de
meterkast op nul. Trek het rooster naar u toe
en kantel het naar voren toe omlaag.
Indicatie en werking van de filterverzadiging
De verzadigingsgraad van het vetfilter wordt
aangegeven door middel van het lichtgevende
display.
Als de afzuigkap is uitgeschakeld en wanneer
toets
/ wordt ingedrukt, licht het
display op; de kleuren ervan hebben de
volgende betekenis:
groen licht: minder dan 6 bedrijfsuren
geel licht: tussen 6 - 12 bedrijfsuren
rood licht: meer dan 12 bedrijfsuren (het
vetfilter moet worden schoongemaakt of,
indien nodig, worden vervangen).
Nadat u de vetfilters gereinigd heeft kunt u
de reinigingsindicatie resetten door de
toets
/ langer dan 5 seconden
ingedrukt te houden.
Koolstoffilter aanbrengen
Klik het koolstofilter, met behulp van de
plastic klemmetjes (A), vast in de onderzijde
van het motorhuis.
Plaats de filterroosters weer in de afzuigkap.
1
3
2
A
INSTALLATIE7
Voor een correcte installatie moet de
afzuigkap met 2 schroeven (O) vanaf de
binnenkant van de kap aan de muur
worden bevestigd.
Sluit de afzuigkap aan op het
elektriciteitsnet van uw woning.
Verwijder de folie van de filters.
Afvoerpijp aansluiten
Bepaal de plaats en de afstand met
betrekking tot de ophangbeugel (B). Teken
de te boren gaten af op de wand en boor
de 2 gaten.
Bevestig de beugel aan de wand met
behulp van de 2 schroeven (A).
Wanneer het circulatiesysteem wordt
toegepast, dan moet u het T-stuk (G)
monteren, in plaats van een afvoerpijp.
Bevestig de korte buis (D) aan de
montagebeugel (C) met behulp van
2 schroeven (B).
Plaats 2 kooimoeren in de uitsparingen van
de koker (E), die aan het onderste gedeelte
van de koker te vinden zijn.
Schuif de koker (E) over de binnenste koker
(D) door de twee zijstukken iets uit elkaar
te trekken.
Draai nu 2 schroeven (Q) vanaf de
binnenkant van de afzuigkap in de
kooimoeren van de koker (E).
Elektrische aansluiting
Controleer of de op het typeplaatje
vermelde spanning overeen komt met de
spanning van de huisinstallatie.
Let op: Als u een vaste aansluiting maakt
moet u ervoor zorgen dat er een
omnipolaire schakelaar met een
contactafstand van minimaal 3 mm in de
toevoerleiding wordt aangebracht.
Kleur van de draden:
- groen/geel = aarde
- blauw = fase N
- bruin = fase L
6
INSTALLATIE
Algemeen
De aansluiting van dit apparaat op het lichtnet
moet worden uitgevoerd door een erkend
installateur die de juiste veiligheids-
voorschriften kent en toepast. Het apparaat
voldoet aan de Europese voorschriften
CEE 89/336 EMC en CEE 73/23; 93/68 LVD.
Belangrijk om te weten:
Als de afzuigkap wordt aangesloten op een
bestaand afvoerkanaal, mogen geen
andere apparaten op dat kanaal
aangesloten zijn (zoals een geiser of
kachel).
Denk aan de plaatselijk geldende
voorschriften met betrekking tot de
beluchting van gasapparaten.
Monteer de afzuigkap altijd boven het
kookgedeelte met een minimale afstand
van 650 mm.
Hoe korter de afvoerpijp en hoe minder
bochten, des te beter is de werking van de
afzuigkap.
Controleer voordat u met boren begint of er
geen installatieleiding(en) aanwezig is (zijn).
Het aansluitpijpmondje van de schouwkap
heeft een diameter van 150 mm. Hoewel er
een verloopstuk 150/125 mm beschikbaar
is, adviseren wij u een afvoerkanaal van
150 mm te plaatsen. Een kleinere diameter
heeft een lagere afzuigcapaciteit en een
hoger geluidsniveau tot gevolg.
Montage schouwkap
Bepaal de plaats en de afstand met
betrekking tot de schouwkap. Houd rekening
met de minimale afstand van 650 mm tussen
de kookplaat en de schouwkap. Teken de te
boren gaten af op de wand en boor de
2 gaten.
Bevestig de schouwkap aan de wand met
behulp van de 2 schroeven en pluggen (N).
Wanneer de kap wordt aangesloten op een
afvoerpijp met een doorsnede van 125 mm,
moet eerst het verloopstuk (H) 150/125 mm
met behulp van 2 schroeven op de
motorgroep bevestigd worden.
C
A
A
D
B
B
E
G
F
H
N
L
O
N
Q
3
2
Afvoeren verpakking en toestel
De verpakking van het toestel is recyclebaar.
Gebruikt zijn:
karton
poly-ethyleenfolie (PE)
CFK-vrij polystyreen (PS-hard-schuim)
polypropyleen banden om de doos
Deze materialen op verantwoorde wijze en
conform de overheidsbepalingen afvoeren.
De overheid kan u ook informatie verschaffen
over het op verantwoorde wijze afvoeren van
afgedankte huishoudelijke apparaten.
Technische gegevens
Zie gegevensplaatje voor technische
gegevens.
8
TECHNISCHE GEGEVENS
9
4
3
5
2
1
6
Montage eilandschouwkap
Controleer of het plafond geschikt is voor een
degelijke ophanging van de constructiekoker.
Bepaal eerst de plaats en de afstand met
betrekking tot de constructiekoker. Maak een
doorvoer in het plafond van 160 mm voor de
afvoerpijp.
Als de doorvoeropening voor het aansluit-
kabel (onderzijde constructiekoker 1) naar u
gericht is, dan zitten de bedienings-
schakelaars rechts van u.
Boor 4 gaten van 10 mm voor de pluggen en
schroef de constructiekoker tegen het
plafond.
Wanneer de kap wordt aangesloten op een
afvoerpijp met een doorsnede van 125 mm,
moet eerst het verloopstuk (2) 150/125 mm
met behulp van 2 schroeven op de
motorgroep bevestigd worden.
Schuif de binnenkoker (3) over de
kokerconstructie tot aan het plafond en
bevestig de koker met 2 schroeven (4).
Schuif dan de buitenkoker (5) er op.
Bevestig de schouwkap aan de koker-
constructie met de vier M6 schroeven (6).
Maak de elektrische aansluiting en let op
de kabeldoorvoer.
Bevestig nu de buitenkoker (5) met
2 schroefjes aan de afzuigkap. Dit doet u
vanuit de binnenzijde van de afzuigkap.
Verwijder de folie van de filters.
10
Introduction
When you have read these instructions for
use, you will quickly be aware of all the
facilities the appliance can offer you. You can
read about safety and how you should look
after the appliance. In addition you will find
environmental tips and instructions that can
help to save energy.
Keep the instructions for use and the
installation instructions. Any later user of this
appliance could benefit from them.
Table of contents
Safety . . . . . . . . . . . . . . . . . . . . . . . . . . . . . 12
Precautions you must take . . . . . . . . . . . 12
Extraction systems . . . . . . . . . . . . . . . . . .12
Use . . . . . . . . . . . . . . . . . . . . . . . . . . . . . . . 13
Filters . . . . . . . . . . . . . . . . . . . . . . . . . . . . . 14
Replacing carbon filters . . . . . . . . . . . . . . 14
Maintenance . . . . . . . . . . . . . . . . . . . . . . . 15
Changing the light bulbs . . . . . . . . . . . . . . 15
Cleaning . . . . . . . . . . . . . . . . . . . . . . . . . . . 15
Installation . . . . . . . . . . . . . . . . . . . . . . . . 16
General . . . . . . . . . . . . . . . . . . . . . . . . . . . . 16
Mounting the canopy hood . . . . . . . . . . . 16
Mounting canopy hood above an
island . . . . . . . . . . . . . . . . . . . . . . . . . . . . . 18
Technische specifications . . . . . . . . . . . 19
Disposal of packaging and appliance . . 19
TABLE OF CONTENTS11
Precautions you must take
Have the appliance connected by a
qualified fitter (see section "Installation").
The power supply must be disconnected
before the appliance is cleaned or
repaired. Remove the plug from the socket
or switch the electricity off at the mains.
When cooking, the hob becomes hot,
children should always be kept at a
distance.
Fats and oils become inflammable on
overheating. Never leave such foods
unattended during preparation.
We advise you to switch the cooker hood
on before you start cooking. Leave the
cooker hood on for another 5 minutes or so
after you have finished cooking.
A grease-saturated filter mat is
inflammable, so never flambé under the
cooker hood, and clean the filter regularly.
Switch off the electricity before replacing
the light bulbs! Only use the same sort of
light bulbs with the same Wattage.
In view of possible sharp edges on the
chimney we advise you to wear working
gloves when fitting the chimney.
Extraction systems
Depending on the type, the cooker hoods can
be connected in one of two ways:
To a duct.
To a duct, the cooking vapours extracted
by suction are carried outside, once the
grease particles have been filtered. This is
the best method. The cooker hood is
connected to the duct at the top using the
outlet flange supplied.
Recirculation hood.
As a recirculation hood, the grease
particles and the smell in the extracted
vapours are filtered. The air that has been
sucked in is not carried outside but
recirculates in the kitchen, via the T-piece
(B) and the grilles in the chimney (A). In
this case you must have a carbon filter
fitted.
12
SAFETY/EXTRACTION SYSTEMS
13
USE
B
A
A
Use
After installation
When the hood is switched on for the first
time, it runs through a phase of reset and self-
checking. At the end of this phase a stand-by
phase will be reached: motor and lamps will
be switched off.
Switching lighting on and off
Press the lighting button
/
.
The lighting comes on.
Press the button again and the lighting goes
out.
Switching on the fan
The hood is switched on by pressing
switch
/
.
Change the speed by pressing speed
switch
/or/.
Intensive setting
You can temporarily switch the extractor hood
to the highest setting – in order, for example,
to remove the odour quickly if something has
burned.
Press switch
/
to switch to the
intensive setting. The extractor hood switches
to its highest setting (4) for 5 minutes, and
then switches back to the original setting.
Timer
Press switch
/, /or/
for 2 seconds. The extractor hood remains at
the selected setting for 5 minutes, after which
the extractor hood and the lighting are
automatically switched off.
Switching off
Pressing switch
/
turns the motor off
and the hood will return to its stand-by mode.
When the hood is switched on again, the
motor resumes operation at the previously
selected speed.
15 MAINTENANCE
Changing the light bulbs
Slide the cath (1) in the direction indicated
and fold the cover (2) downwards. Pull the
bulb (3) in the direction of the arrow and out of
the holder, then fit the new bulb. Take care
not to touch the bulb with your hands when
you replace it, since direct contact with the
skin can result in the bulb burning out.
Cleaning
Cooker hood
Clean the cooker hood with soapy water and a
soft cloth, then wipe with clean water to rinse.
Do not use aggressive cleaning agents such
as soda.
Do not use any sort of scourer. Treat with
Stahlfix (supermarket) and polish with the
structure of the stainless steel.
Filters
Wash aluminium filters, every week in
soapy water. The cleaning agents will
make the aluminium filter turn dull, this is
normal.
The carbon filters cannot be cleaned to use
again.
Replacing carbon filters
The carbon filter must be used if the cooker
hood is not connected to a duct (see
extraction systems on page 12).
Note:
The carbon filter must be replaced at least
twice a year, depending on how much the
cooker hood is used.
Carbon filters cannot be cleaned to use
again.
Saturated carbon is harmful to the
environment, replace the filter regularly.
Removing the filter panel
Switch off the electricity! Remove the plug
from the socket or switch the electricity off at
the mains. Pull the grille towards you and tilt it
downwards at the front.
Display and functioning of the filter
saturation indicator
The degree of saturation of the grease filter is
indicated by means of a luminous display. If
button
/ is pressed when the extractor
hood is switched off, the display lights up; the
colours displayed have the following
meanings:
green light: in use for less than 6 working
hours
yellow light: in use for 6 to 12 working
hours
red light: in use for more than 12 working
hours (the grease filter should be cleaned
or, if necessary, replaced).
Once you have cleaned the grease filters, you
can reset the cleaning indication by pressing
the button
/ for longer than 5 seconds.
Fitting the carbon filter
Fix the carbon filter into the underneath of the
motor housing with the plastic clips (A).
Replace the filter grids in the extractor hood.
14
FILTERS
1
3
2
A
16
17 INSTALLATION
To install the extractor hood correctly, fix
the hood to the wall from the inside with
2 screws (O).
Now connect the extractor hood to the
electricity supply in your home.
Remove the film from the filters.
Connect the duct
First determine the position and distance
with regard to the fixing bracket (B). Mark
the holes that must be drilled and drill the
2 holes.
Fix the bracket to the wall with the
screws (A) provided.
If the recirculation system is to be applied,
mount the T-piece (G) instead of a duct.
Fix the short pipe (D) to the mounting
bracket (C) using 2 screws (B).
Place 2 cage nuts in the openings of the
duct (E), which can be found on the bottom
part of the duct.
Place duct (E) over the inner duct (D) by
pulling the two side pieces slightly apart.
Now screw 2 screws (Q) into the cage nuts
of the duct (E) from the inside of the
extractor hood.
Electrical connection
Make sure the supply voltage ratings
correspond with those stated on the
appliance data plate.
Attention: If you want to make a fixed
connection, ensure that a multi-pole switch
with a distance between contacts of 3 mm
is installed in the supply cable.
The appliance must be connected to a
system equipped with earth or ground
plate.
Colour of the wires:
- green/yellow = earth
- blue = phase N
- brown = phase L
INSTALLATION
General
This appliance should be connected to the
power supply by a recognized fitter who is
familiar with, and works according to the
correct safety regulations. This appliance
meets the European requirements CEE 89/336
EMC and CEE 73/23; 93/68 LVD.
Important that you know
If the cooker hood is to be fitted to an
existing duct no other appliances, such as
a geyser or heater, may be connected to
that same duct.
n Consider local regulations with respect to
the ventilation of gas appliances!
The cooker hood should be mounted at
least 650 mm above the hob.
The shorter the duct, and the fewer the
bends in it, the better the cooker hood will
work.
Before you start drilling check that there
are no installation cables present.
The diameter of the outlet flange is 150 mm.
Although an adapter 150/125 mm is
available, we recommend that an extractor
duct measuring 150 mm be installed.
A smaller diameter results in a lower
extracting capacity and a higher noise
level.
Mounting the canopy hood
First determine the position and distance
with regard to the canopy hood. Consider
the minimum distance of 650 mm between
the cooking area and the hood. Mark the
holes that must be drilled and drill the
4 holes.
Fix the hood to the wall with the 2 plugs
and screws (N) provided.
If the hood is to be connected to a 125 mm
diameter flue pipe, the 150/125 mm
adapter (H) must first be attached to the
motor group using 2 screws.
C
A
A
D
B
B
E
G
F
H
N
L
O
N
Q
3
2
Recommandations
Faites raccorder votre appareil par un
installateur agréé (voir chapitre
"Installation").
Avant de réparer ou de nettoyer l'appareil,
coupez le courant. Débrancher la fiche de
prise de courant ou mettre le disjoncteur
en position d'interruption du courant.
Lorsque vous faites cuire des aliments, la
plaque de cuisson chauffe, il faut donc
toujours en tenir les enfants éloignés.
Les matières grasses animales et l'huile
sont inflammables en cas de surchauffe.
Ne pas vous éloigner de la plaque de
cuisson lors de la préparation des plats.
Il est recommandé de mettre la hotte en
marche avant le début d'une cuisson.
Laisser fonctionner la hotte pendant
environ 5 minutes après la fin d'une
cuisson.
Un filtre saturé de graisses est
inflammable. Ne pas faire flamber
d'aliments sous la hotte et nettoyer
fréquemment le filtre à graisses.
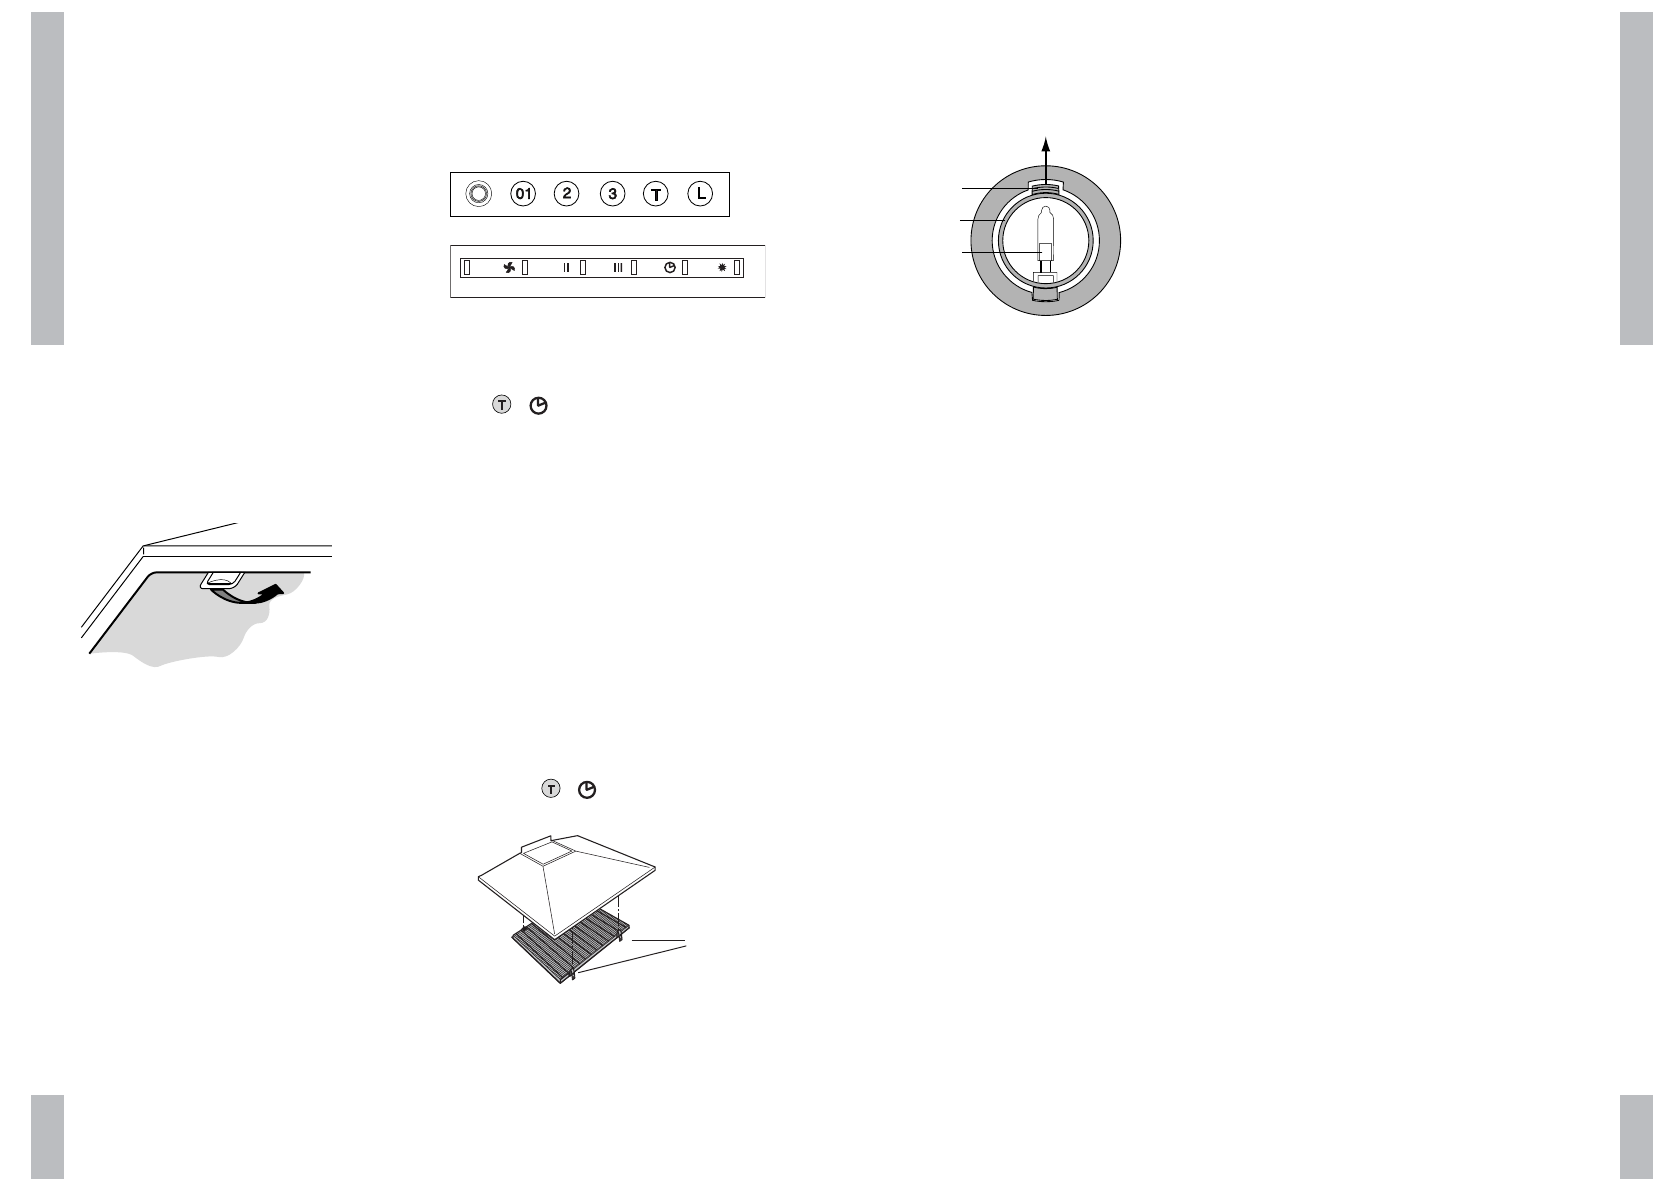
Avant de changer une ampoule, toujours
débrancher l'appareil ! N'utiliser que des
ampoules semblables à celles d'origine et
avec le même voltage.
Les bords de l'encadrement du filtre
peuvent être tranchants. Recouvrez-les
des bandes de protection fournies.
Les bords de la gaine pouvant être pointus,
nous vous conseillons de mettre des gants
de travail avant de procéder au montage
de la gaine.
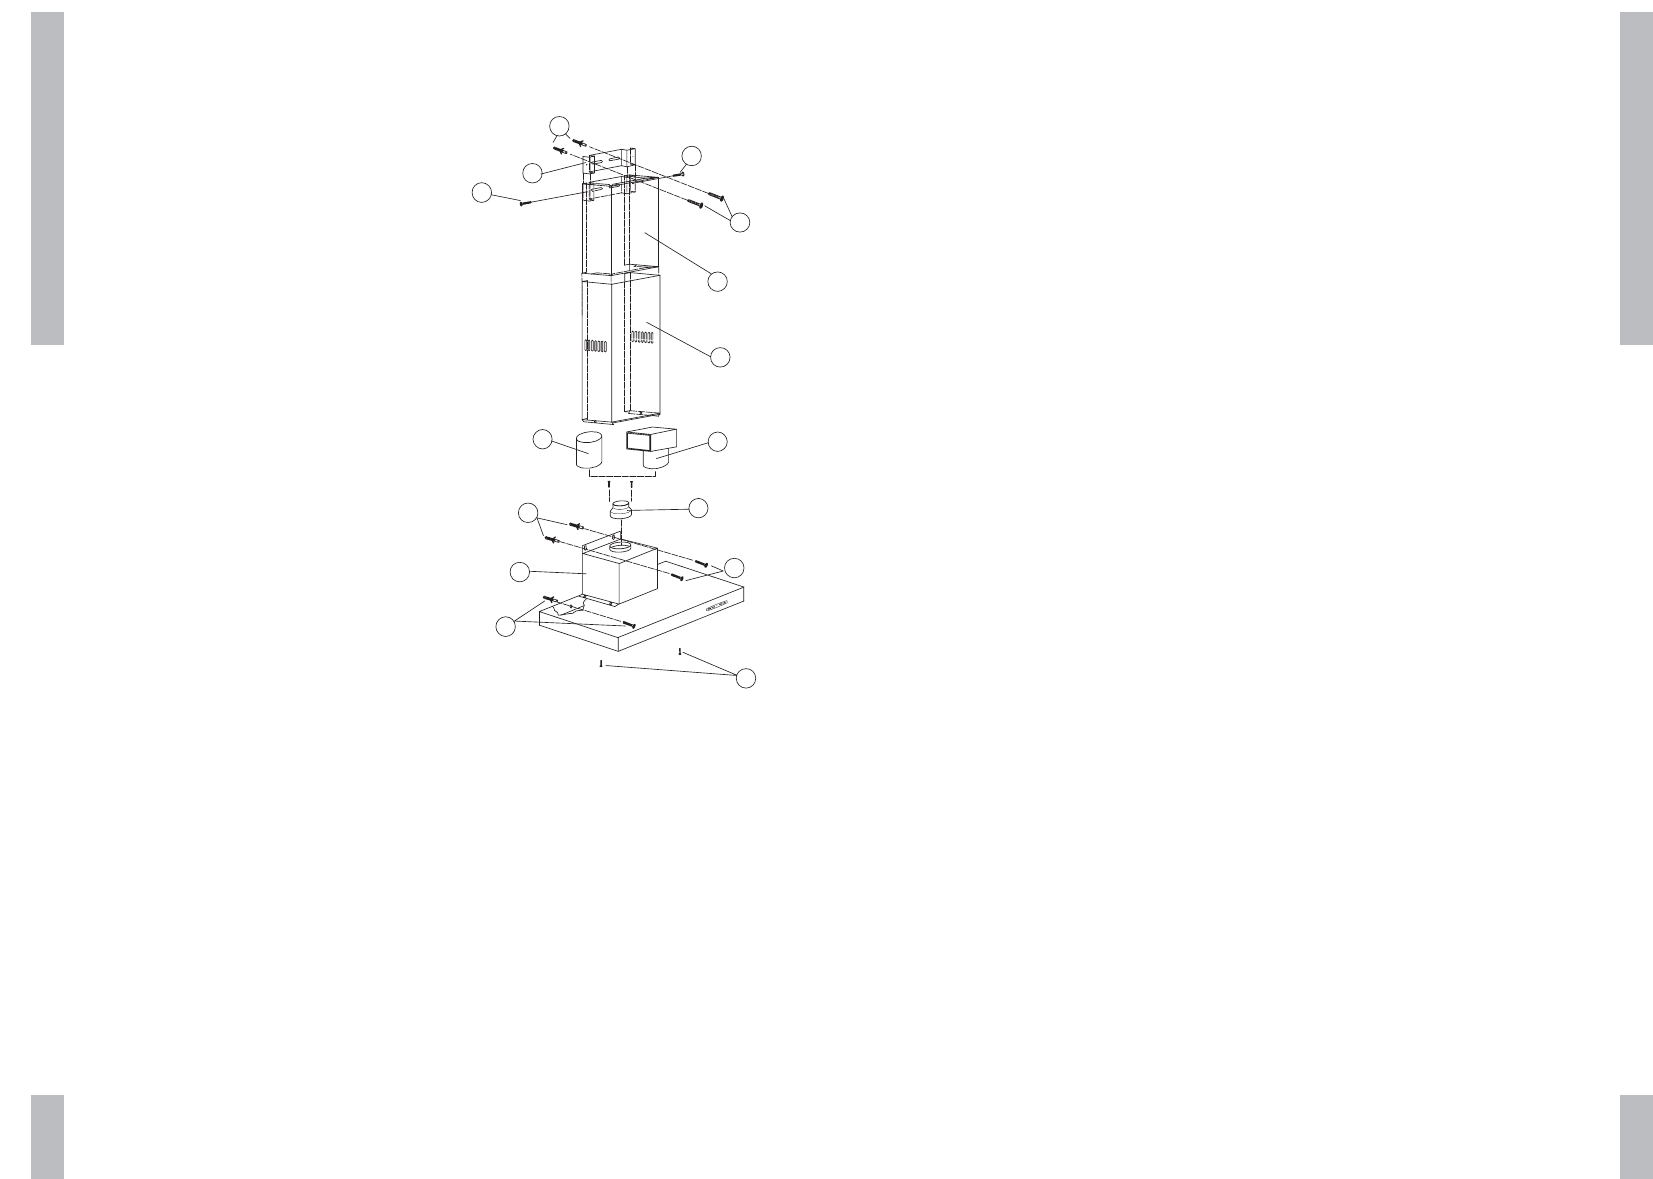
Systèmes d'évacuation
En fonction du modèle les hottes peuvent être
raccordées de 2 façons :
Version évacuation :
la hotte est raccordée à un conduit
d'évacuation, les vapeurs de cuisson
aspirées sont évacuées dehors après la
filtration des particules de graisse. Cette
version est la meilleure. Le raccordement
au conduit d'évacuation se fait au dessus
de la hotte à l'aide de la buse livrée
simultanément.
Version recyclage :
Les particules de graisse et les odeurs
contenues dans les vapeurs de cuisson
aspirées sont filtré. Après avoir été filtrées,
elles sont renvoyées dans la cuisine par la
pièce en T (B) et les grilles d'aération (A)
de la gaine. En version recyclage, il faut
placer un filtre à charbon actif dans la
hotte.
32 SECURITE/SYSTEMES D’EVACUATION
33
Utilisation
Après installation
Quand l’appareil est employé pour la première
fois il a une phase de reset. A la fin de cette
phase il y a le “stand-by” : moteur et lumière
étients.
Mise en/horst service de l'électricité
Appuyez sur la touche
/
pour
l'éclairage. L'éclairage va s'enclencher.
Appuyez encore une fois sur la touche pour
éteindre la lumière. Le témoin lumineux sur la
touche va s'éteindre.
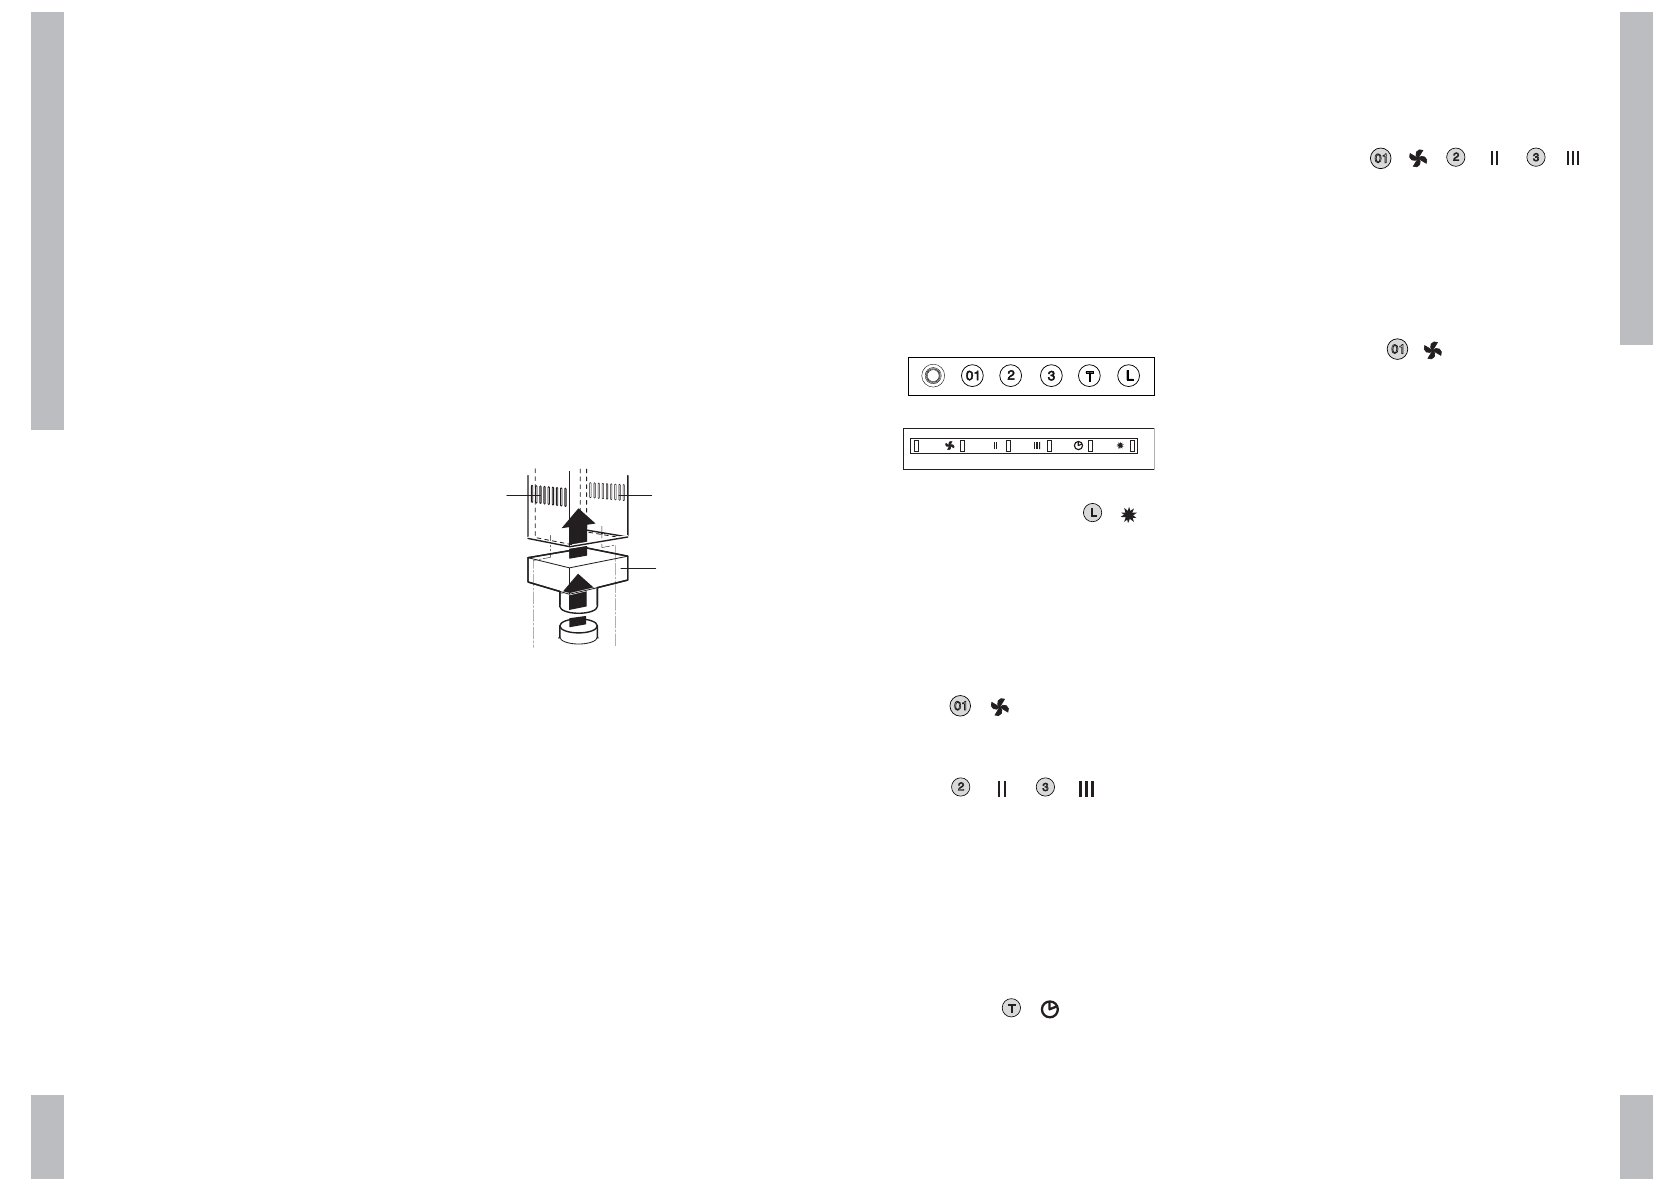
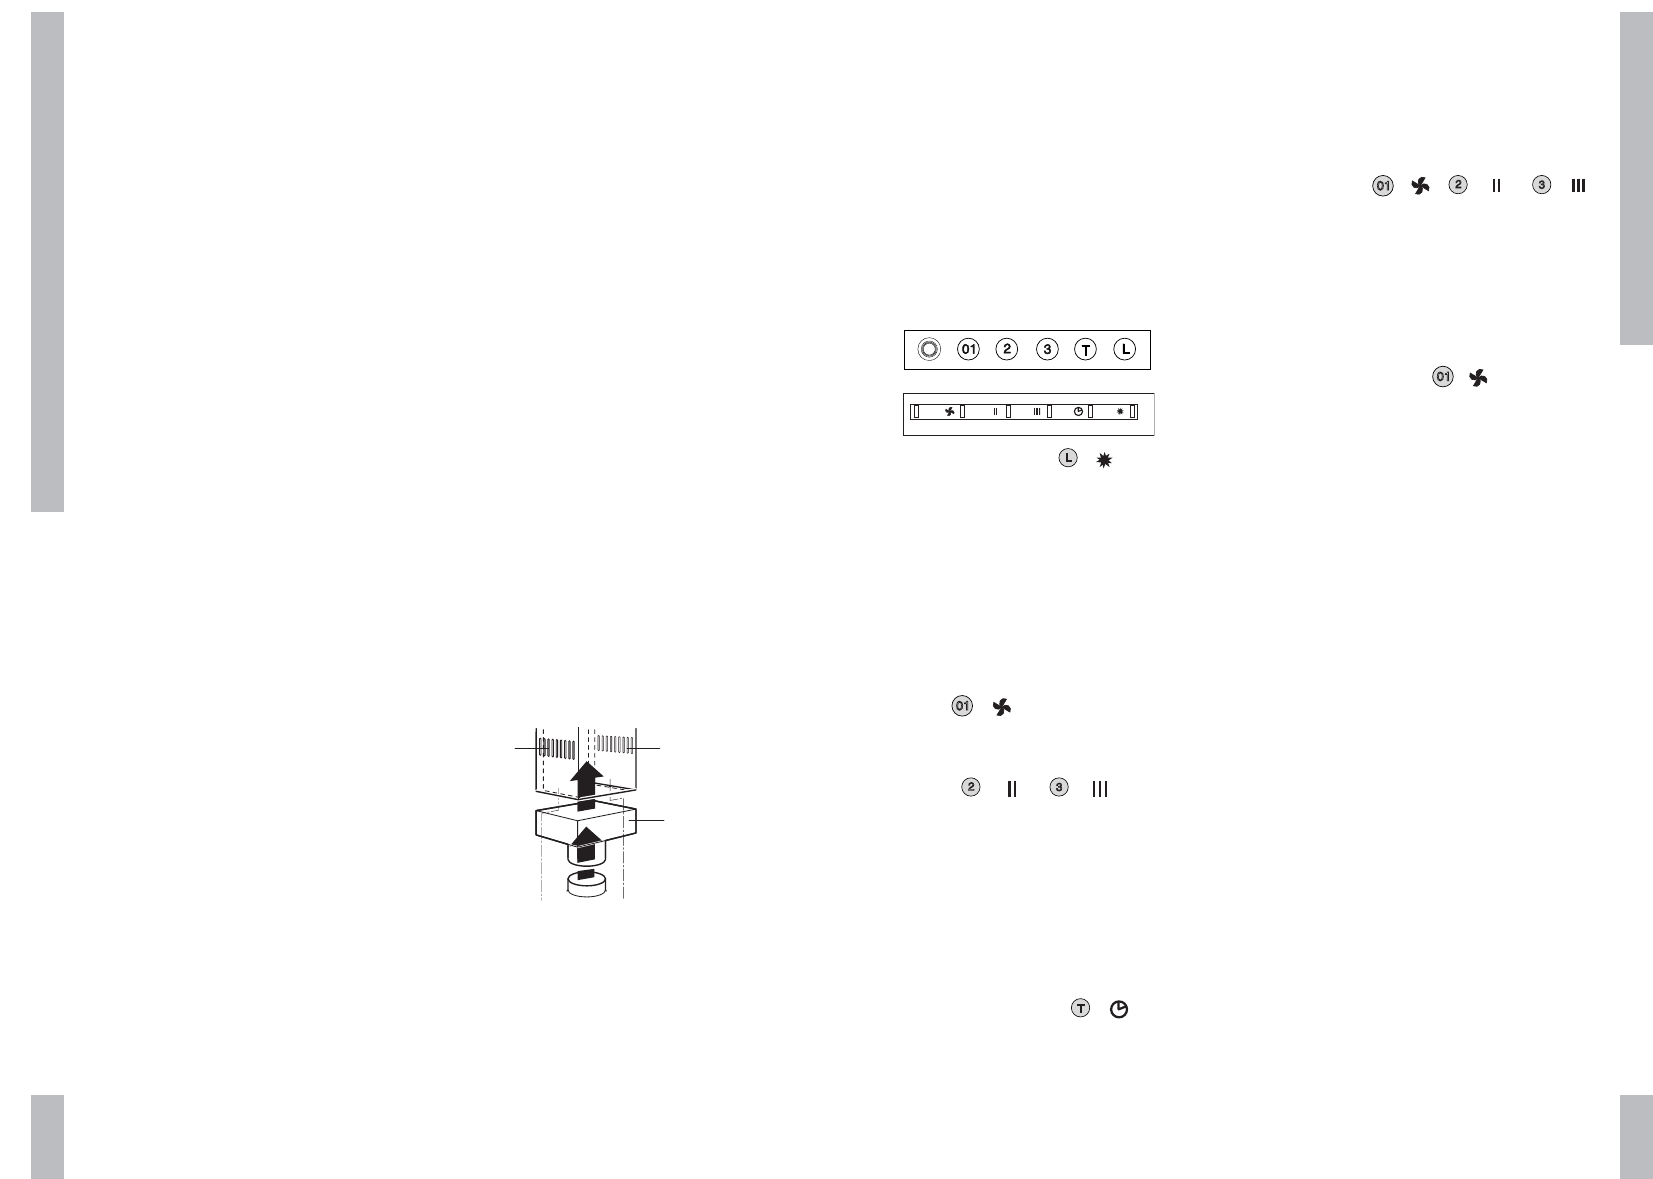
Mise en service du ventilateur
La hotte se met en marche avec le
bouton
/
.
Le changement de vitesse s’effectué avec les
boutons
/ou/
.
Position intensité
Vous pouvez enclencher temporairement la
hotte sur la position la plus élevée, par
exemple, pour évacuer rapidement des odeurs
de brûlé.
Appuyez sur la touche
/
pour
enclencher la position intensive. La hotte
fonctionnera pendant 5 minutes sur la position
la plus élevée (4) pour revenir ensuite sur la
position d'origine.
Minuterie
Appuyez pendant 2 secondes sur
l'interrupteur
/, /ou/.
La hotte va encore fonctionner pendant 5
minutes sur la position sélectionnée. La mise
hors service de la hotte et de l'éclairage se
fera ensuite automatiquement.
Etiendre la hotte
En poussant la bouton
/
la hotte s’étient
en obtenant la phase de stand-by. En le
repoussant la hotte se rallume à la vitesse en
mémoire.
UTILISATION
B
A
A
18

Hulp nodig? Stel uw vraag in het forum

Spelregels

Misbruik melden

Gebruikershandleiding.com neemt misbruik van zijn services uitermate serieus. U kunt hieronder aangeven waarom deze vraag ongepast is. Wij controleren de vraag en zonodig wordt deze verwijderd.

Product:

Bijvoorbeeld antisemitische inhoud, racistische inhoud, of materiaal dat gewelddadige fysieke handelingen tot gevolg kan hebben.

Bijvoorbeeld een creditcardnummer, een persoonlijk identificatienummer, of een geheim adres. E-mailadressen en volledige namen worden niet als privégegevens beschouwd.

Spelregels forum

Om tot zinvolle vragen te komen hanteren wij de volgende spelregels:

Belangrijk! Als er een antwoord wordt gegeven op uw vraag, dan is het voor de gever van het antwoord nuttig om te weten als u er wel (of niet) mee geholpen bent! Wij vragen u dus ook te reageren op een antwoord.

Belangrijk! Antwoorden worden ook per e-mail naar abonnees gestuurd. Laat uw emailadres achter op deze site, zodat u op de hoogte blijft. U krijgt dan ook andere vragen en antwoorden te zien.

Abonneren

Abonneer u voor het ontvangen van emails voor uw Pelgrim LSK 982 bij:


U ontvangt een email met instructies om u voor één of beide opties in te schrijven.


Ontvang uw handleiding per email

Vul uw emailadres in en ontvang de handleiding van Pelgrim LSK 982 in de taal/talen: Nederlands, Duits, Engels, Frans als bijlage per email.

De handleiding is 0,58 mb groot.


U ontvangt de handleiding per email binnen enkele minuten. Als u geen email heeft ontvangen, dan heeft u waarschijnlijk een verkeerd emailadres ingevuld of is uw mailbox te vol. Daarnaast kan het zijn dat uw internetprovider een maximum heeft aan de grootte per email. Omdat hier een handleiding wordt meegestuurd, kan het voorkomen dat de email groter is dan toegestaan bij uw provider.

Stel vragen via chat aan uw handleiding

Stel uw vraag over deze PDF

Uw handleiding is per email verstuurd. Controleer uw email

Als u niet binnen een kwartier uw email met handleiding ontvangen heeft, kan het zijn dat u een verkeerd emailadres heeft ingevuld of dat uw emailprovider een maximum grootte per email heeft ingesteld die kleiner is dan de grootte van de handleiding.

Er is een email naar u verstuurd om uw inschrijving definitief te maken.

Controleer uw email en volg de aanwijzingen op om uw inschrijving definitief te maken

U heeft geen emailadres opgegeven

Als u de handleiding per email wilt ontvangen, vul dan een geldig emailadres in.

Uw vraag is op deze pagina toegevoegd

Wilt u een email ontvangen bij een antwoord en/of nieuwe vragen? Vul dan hier uw emailadres in.


Info