


-
App geeft aan dat de batterij van de drone leeg is, terwijl dat niet zo is. Volgens mij herkent de drone de batterij niet, terwijl het originele batterij is en volledig opgeladen. Gesteld op 8-4-2017 om 12:19
Reageer op deze vraag Misbruik melden-
heb net hetzelfde probleem, heb je hier meer info over gevonden? Geantwoord op 22-1-2019 om 09:46
Waardeer dit antwoord Misbruik melden
-
-
Hallo,
Reageer op deze vraag Misbruik melden
Ik heb een parrot ar.drone 2.0, mijn drone is binnen 3 minuten leeg dacht dat het eerst aan mijn accu lag en heb toen een nieuwe gekocht met 2000mah. Dit heeft niet geholpen. Mijn drone gaat nog steeds super snel leeg heeft iemand misschien een idee hoe ik dit kan verhelpen heb me drone al gereset.
Gesteld op 20-12-2016 om 09:11-
Heb precies het zelfde Geantwoord op 3-3-2017 om 22:57
Waardeer dit antwoord (2) Misbruik melden
-
-
Hoi allemaal,
Reageer op deze vraag Misbruik melden
tot gisteren geen problemen, nu zie ik op mijn iPhone ene iPad wel het wifi sgnaal als ik dan vervolgens aanklik om verbinding te maken dan valt wifi weg. Weet iemand een oplossing voor dit probleem?
Alvast bedankt.
Groeten
Ron Gesteld op 5-7-2016 om 11:08-
Ik zou het niet weten want ik heb het zelfde probleem. Geantwoord op 21-4-2018 om 22:06
Waardeer dit antwoord Misbruik melden
-
-
Weet iemand waneer de accu vol is !
Reageer op deze vraag Misbruik melden
Als u blieft Gesteld op 13-5-2016 om 12:34-
Ongeveer binnen 90 min is de accu van de partot drone 2.0 opgeladen Geantwoord op 30-12-2016 om 12:05
Waardeer dit antwoord Misbruik melden
-
-
Hallo, heb een parrot ar 2.0 gekregen. Maar als ik hem wil starten gast hij meteen schuin en stijgt niet op. Ook kan ik hem niet calibreren. Iemand een idee wat te doen? Gesteld op 27-2-2016 om 12:52
Reageer op deze vraag Misbruik melden-
Dan heb je je props er niet goed opzitten is a b c d
Waardeer dit antwoord (4) Misbruik melden
Ff Googlen voor afbeelding Geantwoord op 15-6-2016 om 17:17
-
-
Wij hebben hetzelfde voor gehad, maar dan met 1 hoek die niet mee omhoog ging. Blijkt achteraf dat deze schroef op een hoekje minimaal beschadigd was. Het is maw. Zeer belangrijk te checken of ze goed bevestigd zijn en of ze in goede staat verkeren. De kleinste afwijking maakt dat het toestel niet omhoog gaat. Geantwoord op 15-6-2016 om 17:22
Waardeer dit antwoord Misbruik melden -
Wanneer kleurt de oplader Groen en wanneer blijft hij rood? Bij mij was de batterij leeg en sprong hij van het rood direct naar groen binnen 10 sec. Gesteld op 7-12-2015 om 13:59
Reageer op deze vraag Misbruik melden-
De parrot drone is ongeveer binnen 90 min klaar de lader kan af en toe een beetje door slaan vandaar dat hij op groen gaat Geantwoord op 30-12-2016 om 12:07
Waardeer dit antwoord Misbruik melden
-
-
Mijn parrot ar drone 2.0 wil geen verbinding maken met mijn I phone Gesteld op 4-12-2015 om 20:23
Reageer op deze vraag Misbruik melden-
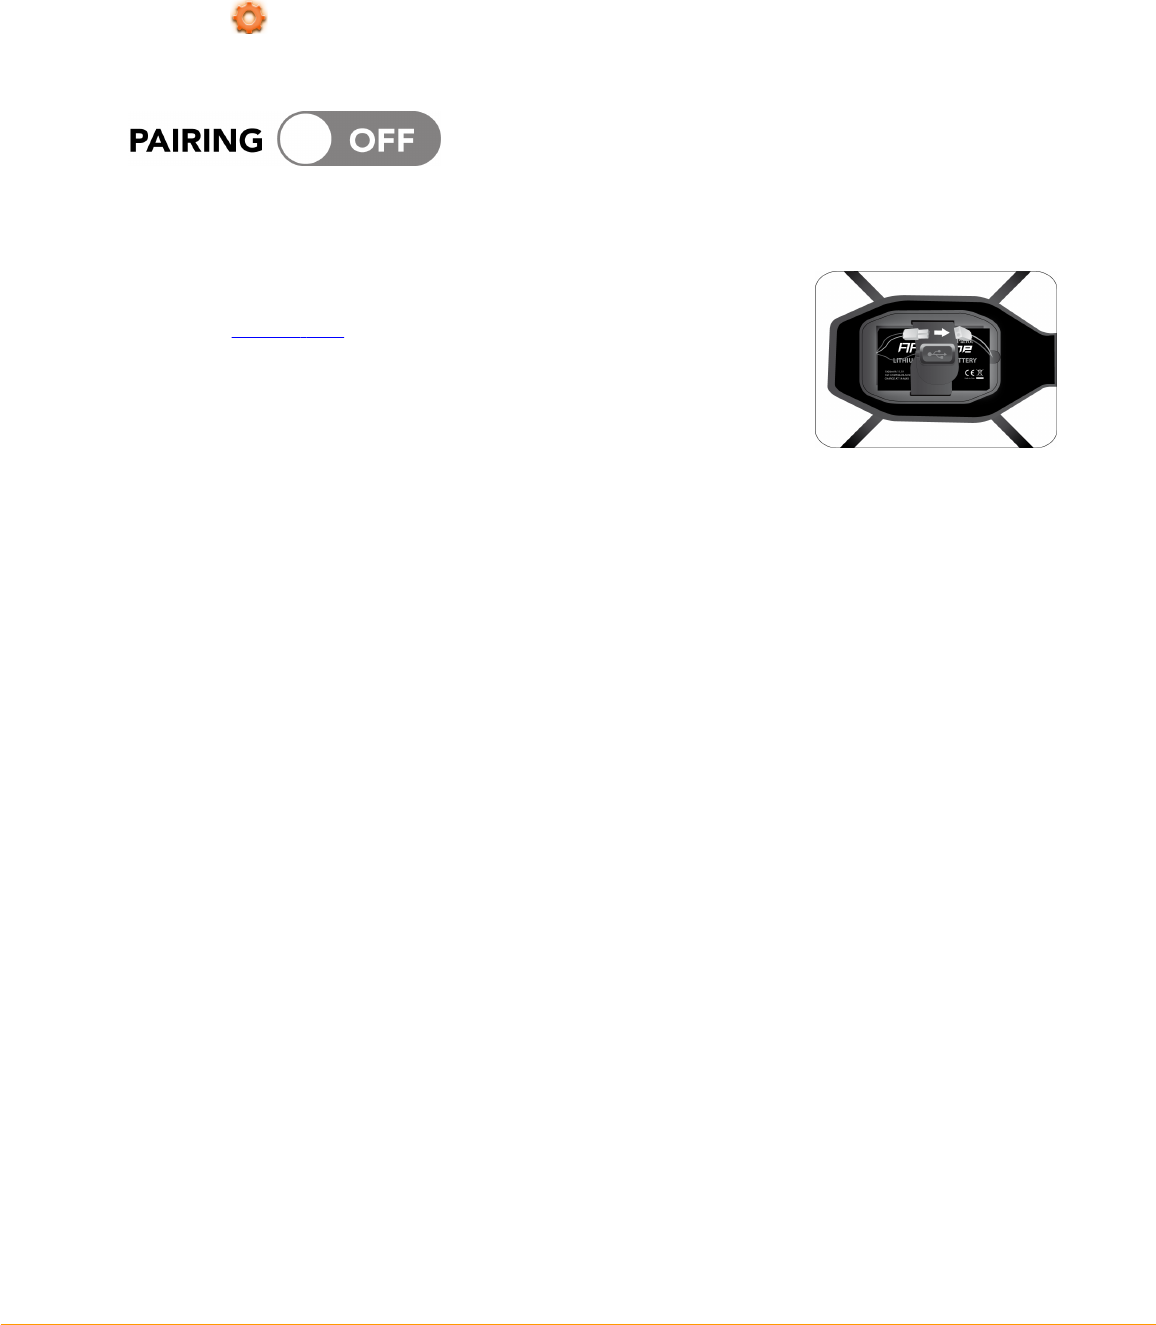
Probeer de reset knop op de drone hij zit onder de accu en u kan hem met een naald de reset knop aan zetten Geantwoord op 30-12-2016 om 12:08
Waardeer dit antwoord (3) Misbruik melden
-
-
bij mij precies het zelfde, ook de resetbutton doet het niet, heeft iemand andere oplossingen Geantwoord op 6-4-2024 om 19:49
Waardeer dit antwoord Misbruik melden -
Hallo
Reageer op deze vraag Misbruik melden
Ik heb geen geluid bij film opname
Is er geen geluid opname mogelijk? ?
Of moet ik dat ergens aanzetten ?? Gesteld op 2-8-2015 om 12:03-
er is geen geluid bij ander hoor je alleen maar de motoren en dat is een storend geluid Geantwoord op 6-10-2015 om 17:51
Waardeer dit antwoord Misbruik melden
-
-
mijn drone 2.0 blijft laden bij met koppelen met wifi
Reageer op deze vraag Misbruik melden
Gesteld op 18-2-2015 om 20:03-
Ik heb hetzelfde probleem! Weet iemand wat te doen?
Waardeer dit antwoord (9) Misbruik melden
Heb de apps verwijderd, opnieuw geladen, iPad herstart... Geantwoord op 1-7-2015 om 20:35
-
-
Accu aan sluiten op reset drukken onder de accu houder
Waardeer dit antwoord (6) Misbruik melden
Toen werkte hij bij mij prima had 3 uur ruzie met dat ding Geantwoord op 3-8-2015 om 23:39 -
Goede avond,
Reageer op deze vraag Misbruik melden
Hoe converteer je de MOV file naar een file die door windows gezien wordt? Gesteld op 8-2-2015 om 18:57-
Beste zet er eerst een geheugenstick in je drone zet hem op filmen en steek na de vlucht het in je computer. Geantwoord op 28-6-2015 om 11:08
Waardeer dit antwoord (3) Misbruik melden
-
-
Ik laad mijn parrot 1 1/2uur maar als ik wil starten is het battery 32% .
Reageer op deze vraag Misbruik melden
Blijkbaar niet genoeg.
hoelang moet ik nou laden of hoe weet ik dat het laden klaar is?? Gesteld op 9-8-2014 om 19:19-
Als hij aan het laden is word het lampje van de lader rood en als hij klaar is word hij groen en als hij groen is en nogsteeds 32% is dan is er iets mis met de lader of accu maar normaal is hij wel klaar na 1 1/2 . Geantwoord op 11-5-2015 om 16:48
Waardeer dit antwoord Misbruik melden
-
-
Parrot gekocht op internet , bij thuis komst probeer ik de parrot, bij opstijgen kantelt hij direct ,
Reageer op deze vraag Misbruik melden
Niets aan de propellers , volgens mij werken de 4 motors perfect , ....iemand enig idee hoe dit komt ? Mijn email is ivan.devolder@telenet.be alvast bedankt Gesteld op 15-6-2014 om 19:18-
Hallo
Waardeer dit antwoord (2) Misbruik melden
Ik heb het zelfde probleem
Heb je al een oplossing gevonden ??
Ik hoor het graag.
Mvg Patrick Geantwoord op 29-7-2014 om 22:13
-
-
die vraag heb ik ook :(
Waardeer dit antwoord Misbruik melden
Geantwoord op 1-3-2015 om 19:24 -
Beste ik had hetzelfde probleem, start hem helemaal opnieuw op en sluit alle draden goed aan dan moet alles vlot werken! Nog een vraag ik weet ik ben een expert met drones ;) Geantwoord op 28-6-2015 om 11:06
Waardeer dit antwoord (2) Misbruik melden -
In de instellingen staat iets over kompas kalibratie deze effe uit voeren Geantwoord op 3-8-2015 om 23:37
Waardeer dit antwoord Misbruik melden -
Probeer de reset knop of om de kijken of de propellers goed zitten Geantwoord op 30-12-2016 om 12:11
Waardeer dit antwoord Misbruik melden -
Mijn ar drone2.0 helt naar links kalibreren helpt niet wat kan ik doen? Gesteld op 1-9-2013 om 19:03
Reageer op deze vraag Misbruik melden-
Gewoon 12 uur laten staan en de app verwijderen en terug zetten dan zou het moeten opgelost zijn Geantwoord op 3-1-2014 om 19:11
Waardeer dit antwoord Misbruik melden
-
-
mijn drone is van de ene dag op de andere dag zeer instabiel blijft wiebelen en zoeken Gesteld op 31-5-2013 om 11:20
Reageer op deze vraag Misbruik melden-
Dit is omdat er een as van een vleugeltje beetje krom staat Geantwoord op 3-1-2014 om 19:13
Waardeer dit antwoord (8) Misbruik melden
-
