4
Paradigm
®
Reference in-wall LCR speakers are designed for use as front
Left, Right and Center speakers in a high-end in-wall home theater or music
listening application. For homeowners who wish to expand their system to
incorporate Surround/Rear speakers, Paradigm
®
Reference offers a number
of state-of-the-art options
(see Dealer for more information)
.
Following are a few guidelines to achieve optimal sound in any room:
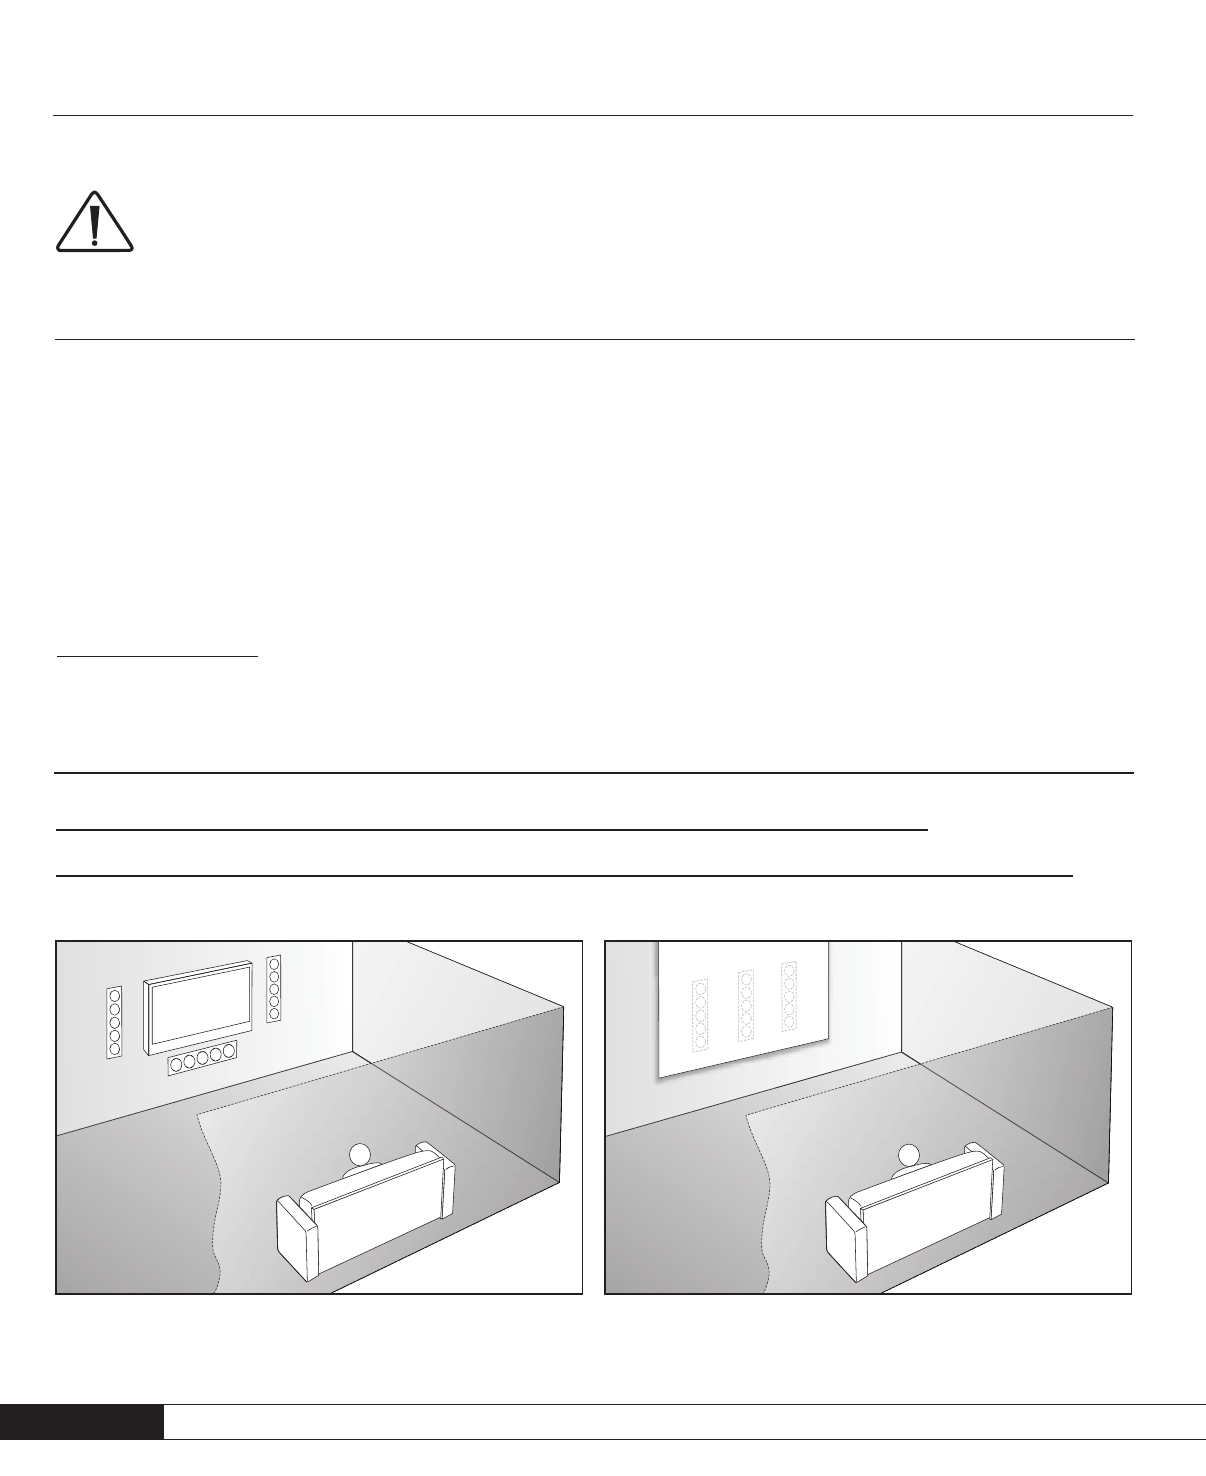
PLACING SPEAKERS
AROUND AN ON-WALL DISPLAY
Front Speakers (Left and Right)
For the most accurate timbre and imaging, determine the exact location of
the on-wall display/screen, then position the backboxes an equal distance
apart on either side (Fig. 1). Make sure the location will allow sound to
reach the listening area unobstructed. The center of the backbox should
be positioned so that the speaker’s tweeter/midrange assembly delivers
sound as close to ear height as possible when the listener is seated. Since
on-wall displays/screens often sit higher, these speakers are designed to
accommodate higher-than-usual placement.
Center Channel – Horizontal Orientation
IMPORTANT! When installing the speaker horizontally, the tweeter/midrange
assembly must be rotated 90° to ensure optimal sound dispersion and timbre
matching. See Fig. 5 or Fig. 6 for details on your model.
As the center-channel, a Paradigm
®
Reference in-wall LCR speaker will
allow listeners throughout the room to hear dialog, sound effects and
music with unprecedented clarity and intelligibility. Position the backbox
directly above or below the display/screen, whichever position will allow the
tweeter/midrange assembly to deliver sound closer to ear height when the
listener is seated (Fig. 1). This will ensure uniform timbral response with
the rest of the system.
PLACING SPEAKERS
BEHIND A PERFORATED SCREEN
Paradigm
®
Reference in-wall LCR speakers can be used in the wall behind a
perforated screen. For best sound, position backboxes vertically. The center
backbox should sit directly behind and in the middle of the screen with the
left and right backboxes an equal distance apart on either side (Fig. 2). All
boxes should be positioned so that the unified tweeter/midrange assembly
delivers sound as close as possible to ear height when the listener is seated.
Since perforated screens typically sit slightly higher, the design of these
speakers will accommodate higher-than-usual placement.
POSITIONING TIP: The measurements provided in Figs. 3 and 4 will help
you determine where backboxes should be positioned in the wall so that
the tweeter/midrange assembly delivers sound as close as possible to ear
height when listeners are seated.
PLACEMENT GUIDELINES
(continued)
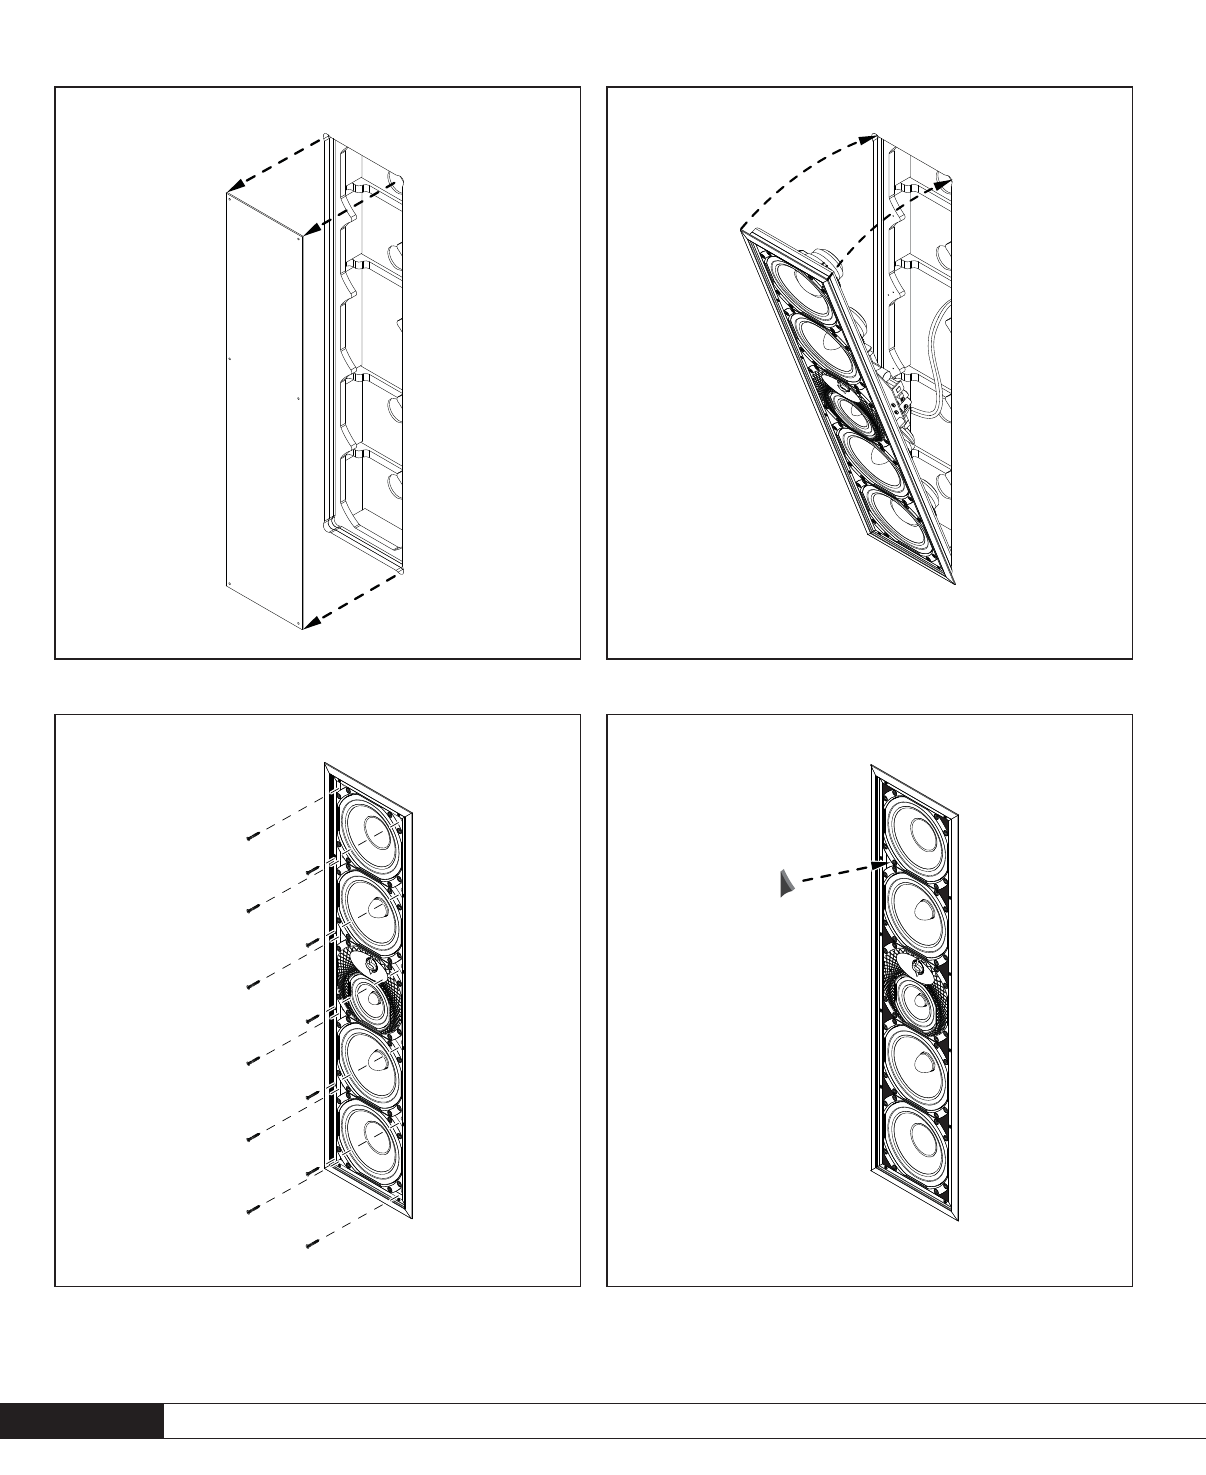
Installing these speakers into the corresponding Paradigm
®
backbox serves
a number of purposes:
• The backbox is required support
for the speaker mounting frame and
baffle assembly;
• The box is designed to provide optimum volume—improving overall
sound quality and reducing distortion;
• The box will provide a moderate reduction in the amount of acoustic
bleed-through to adjacent rooms.
WHY A BACKBOX IS AN INTEGRAL PART OF THE DESIGN
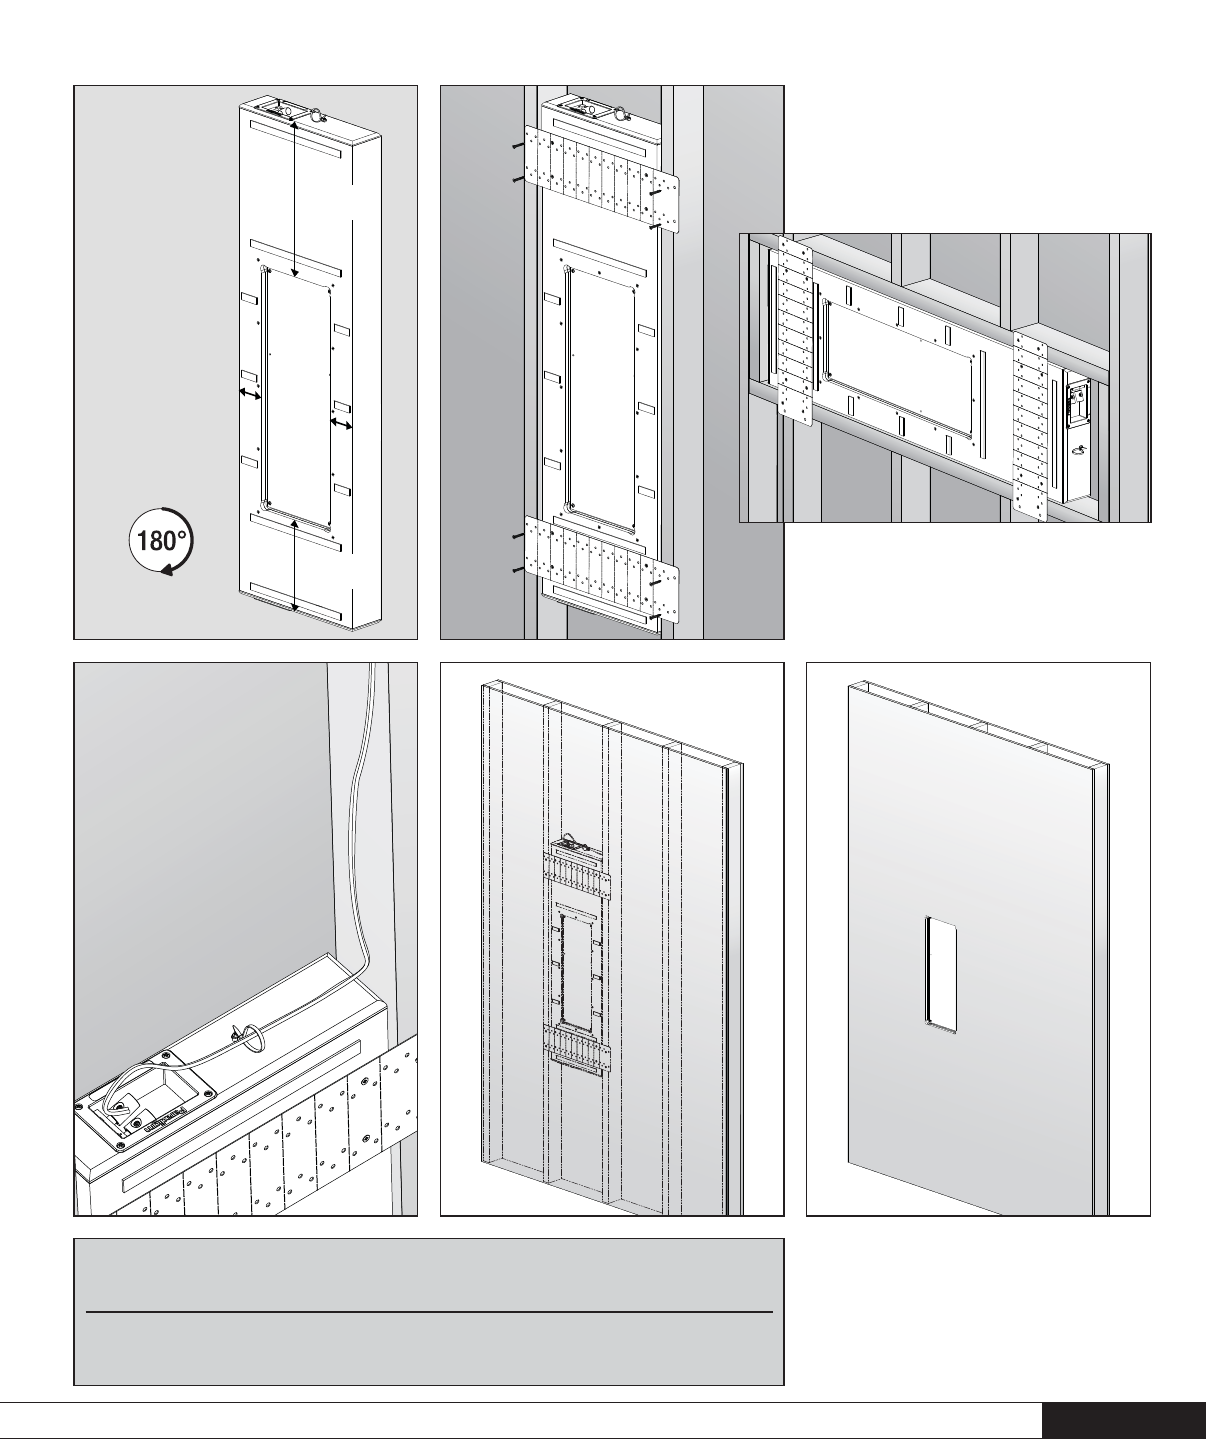
IMPORTANT! READ BEFORE COMMENCING INSTALLATION
• Speakers covered by this manual MUST be installed into the
corresponding Paradigm
®
Backbox
(sold separately).
• Backbox MUST be installed at the pre-construction stage.
• The required amount of acoustic damping material is already included
and correctly positioned in the backbox. DO NOT remove or compact
this material. DO NOT add additional damping material. DO NOT add
damping material to the wall directly behind the backbox
. See the
section on “Insulating the Cavity Behind the Wall” for more information.
• At the framing stage, determine whether the backbox will be wired from
the top or bottom, then leave sufficient space to accommodate wiring
.
Binding posts are available at either end of box.
• When installing box, keep the front edge even with the front edge of
the studs. Position of backbox cannot be adjusted later
, and if not
plumb, could affect clarity of sound.
INSTALLING THE BACKBOX
BASS PERFORMANCE
Placing speakers near corners will emphasize bass. For more balanced sound,
avoid corners when considering speaker placement.