492233
1
Verklein
Vergroot
Pagina terug
1/67
Pagina verder
TABLE OF CONTENTS
1
Chapter 1
Chapter 2
Chapter 3
Chapter 4
CHAPTER 1. BEFORE USING YOUR PHONE .................................5
INSIDE THE PACKAGE .....................................................................................6
HANDSET DESCRIPTION.................................................................................7
THE FUNCTION KEYS.............................................................................................8
DISPLAY INDICATORS ...........................................................................................9
BATTERY USAGE...........................................................................................10
BATTERY INSTALLATION ....................................................................................10
BATTERY REMOVAL.............................................................................................10
BATTERY CHARGING ...........................................................................................11
POWER CONNECTION ......................................................................................11
BATTERY TALK TIMES .......................................................................................11
BATTERY STANDBY TIMES ...............................................................................11
BATTERY HANDLING INFORMATION..........................................................12
DOs.........................................................................................................................12
DON’Ts...................................................................................................................12
CHAPTER 2. BASIC OPERATION ..................................................13
TURNING THE PHONE ON / OFF ..................................................................14
TURNING THE PHONE ON...................................................................................14
TURNING THE PHONE OFF..................................................................................14
ACCESSING THE MENU................................................................................15
MENU SUMMARY .........................................................................................16
BASIC FUNCTIONS ........................................................................................19
MAKING A CALL ...................................................................................................19
SPEAKER PHONE..................................................................................................20
PAUSE FEATURE ..................................................................................................20
ANSWERING A CALL............................................................................................21
CALLER ID FUNCTION..........................................................................................21
CALL WAITING FUNCTION ..................................................................................21
ADJUSTING VOLUME ..........................................................................................22
ETIQUETTE ............................................................................................................22
LOCK ......................................................................................................................22
DURING A CALL .............................................................................................23
MESSAGING .........................................................................................................23
MUTE(UNMUTE)...................................................................................................23
SCRATCHPAD .......................................................................................................23
SEND MY PHONE # ..............................................................................................23
MY PHONE NUMBER ...........................................................................................24
VOICE PRIVACY.....................................................................................................24
PHONE INFO..........................................................................................................24
MAKING AN EMERGENCY CALL..................................................................25
EMERGENCY NUMBER IN LOCK MODE.............................................................25
EMERGENCY NUMBER USING ANY AVAILABLE SYSTEM..............................25
CHAPTER 3. MEMORY FUNCTION...............................................27
STORING A PHONE NUMBER ......................................................................28
ENTERING LETTERS, NUMBERS & SYMBOLS ...........................................29
STANDARD INPUT MODE....................................................................................30
T9 INPUT MODE....................................................................................................31
NUMERIC MODE...................................................................................................32
SYMBOL MODE ....................................................................................................32
MAKING A CALL THROUGH THE PHONE BOOK ........................................33
SPEED DIALING ....................................................................................................33
CHAPTER 4. MENU FUNCTION ....................................................35
PHONE BOOK .................................................................................................36
FIND .......................................................................................................................36
BY NAME............................................................................................................36
BY NUMBER.......................................................................................................37
ADD NEW ..............................................................................................................38
GROUP...................................................................................................................38
ADD NEW GROUP .............................................................................................38
CHANGE GROUP NAME ....................................................................................39
ERASE GROUP ...................................................................................................39
SPEED DIAL ...........................................................................................................40
MSG. GROUP ........................................................................................................40
ADD NEW MSG. GROUP ...................................................................................40
WELCOME
Thank you for choosing the up-to-date TX-95C, our new
model, developed by top researchers to support the
CDMA2000 1X system through Qualcomm-manufactured
MSM6050 chips and CDMA technologies. This product
allows for high speed communication services, such as web
browsing, data & fax services, and a GUI animation menu.
Among its many advanced features, the T9 input mode
makes it much easier to enter letters. In addition, the VR
(Voice Recognition) makes it more user friendly, with proven
technologies including:
Full graphic display of 9 text input line and 1 icon line with
variable font size.
Easy to dial through the VR feature.
Easy to enter letters through the T9 text input mode.
Enhanced for web browsing & data services (i.e.; wireless
internet access, wireless fax send/receive, Openwave, UP
browser)
GUI & Animation display compliant with CDMA2000 1X.
Full graphic main display - 65K color TFT
Mobile Camera.(VGA 33Frames)
Navigation key and 25 keys aligned for more convenience.
Sophisticated features of speaker phone, and voice
recognition.
Additional services of text messaging and Web browsing
on top of authentication, call forwarding, call transfer, call
waiting.
IMPORTANT INFORMATION
This TX-95C user guide contains very important information
about how to handle and use the product. So please read
this manual thoroughly, pay attention to the warranty on the
back page and be alert to the exclusions and limitations of
your warranty, which are related with the unauthorized use
of components.
TABLE OF CONTENTS TABLE OF CONTENTS
3
2
Chapter 4
Chapter 6
Chapter 5
Chapter 4
VIEW MEMO ......................................................................................................74
SETTINGS ...........................................................................................................74
CALCULATOR........................................................................................................75
WORLD CLOCK .....................................................................................................75
STOPWATCH.........................................................................................................76
CAMERA .........................................................................................................77
TAKE A PHOTO .....................................................................................................77
TAKING A PICTURE FROM THE MENU.............................................................77
TAKING A PICTURE IN IDLE MODE...................................................................77
CAMERA MODE OPTIONS ................................................................................78
PHOTO GALLERY..................................................................................................79
PHOTO MESSAGE ................................................................................................79
HELP.......................................................................................................................80
FLASH (SOLD SEPARATELY) .............................................................................81
CHAPTER 5. VOICE SERVICE ........................................................83
VOICE RECOGNITION MODE ........................................................................84
NAME.....................................................................................................................84
VOICE SERVICE MENU ..................................................................................85
VOICE MEMO ........................................................................................................85
VOICE DIAL............................................................................................................86
TRAIN WORDS ......................................................................................................87
YES .....................................................................................................................87
NO.......................................................................................................................87
WAKE-UP............................................................................................................88
UNDO TRAIN ALL...............................................................................................88
VOICE SETTING ....................................................................................................89
SET ACTIVE ........................................................................................................89
HFK MODE .........................................................................................................89
CHAPTER 6. VOICE MAIL AND TEXT MESSAGE ........................91
WHEN A NEW MESSAGE ARRIVES .............................................................92
VOICE MAIL ....................................................................................................92
NEW TEXT MSG .......................................................................................................93
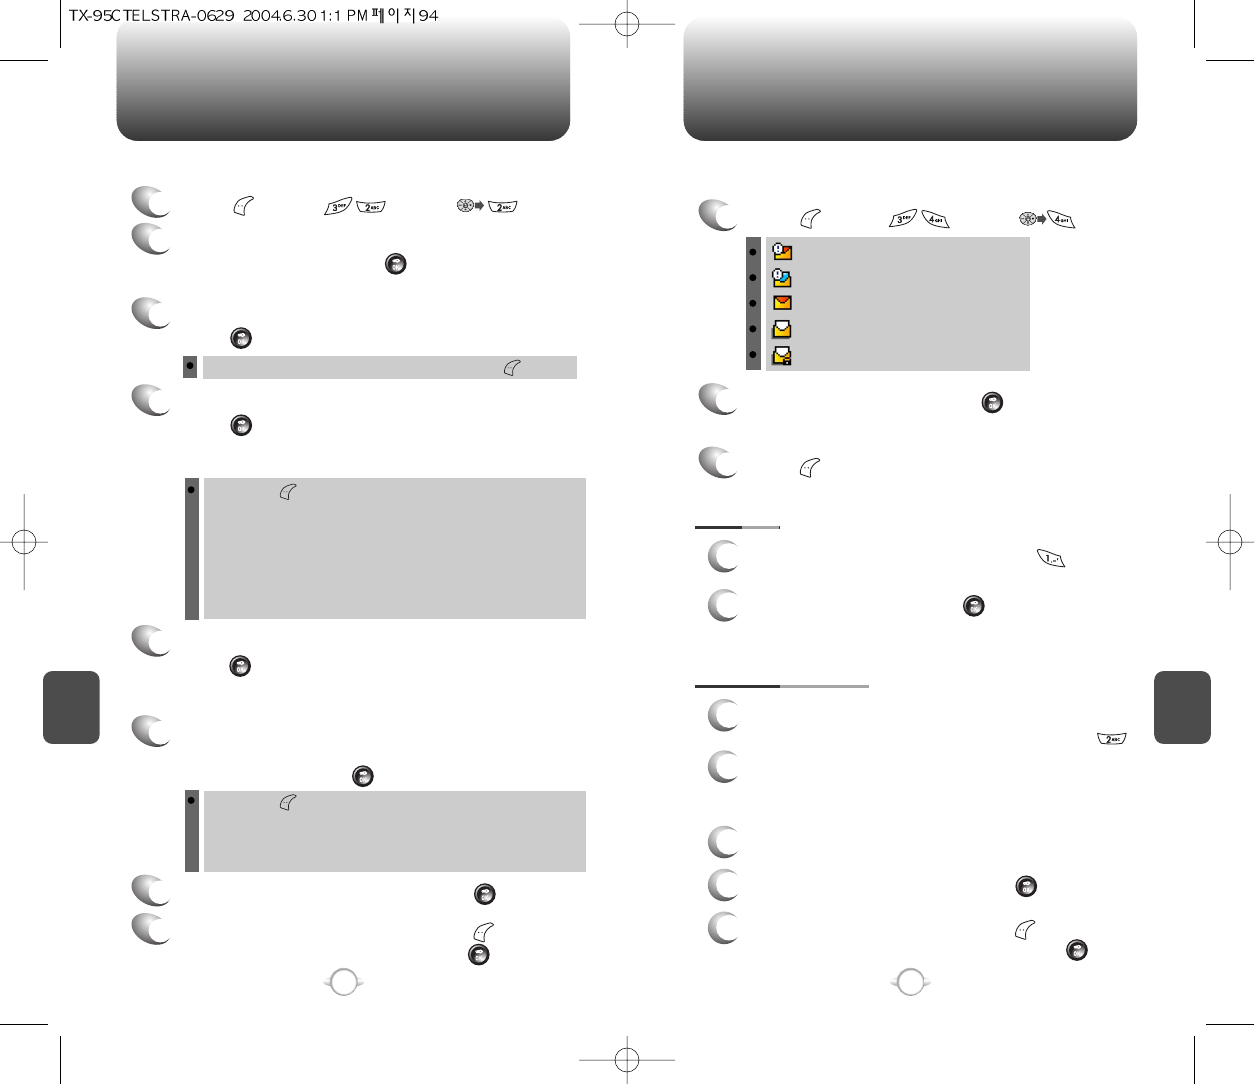
NEW PHOTO MSG....................................................................................................94
INBOX ........................................................................................................................95
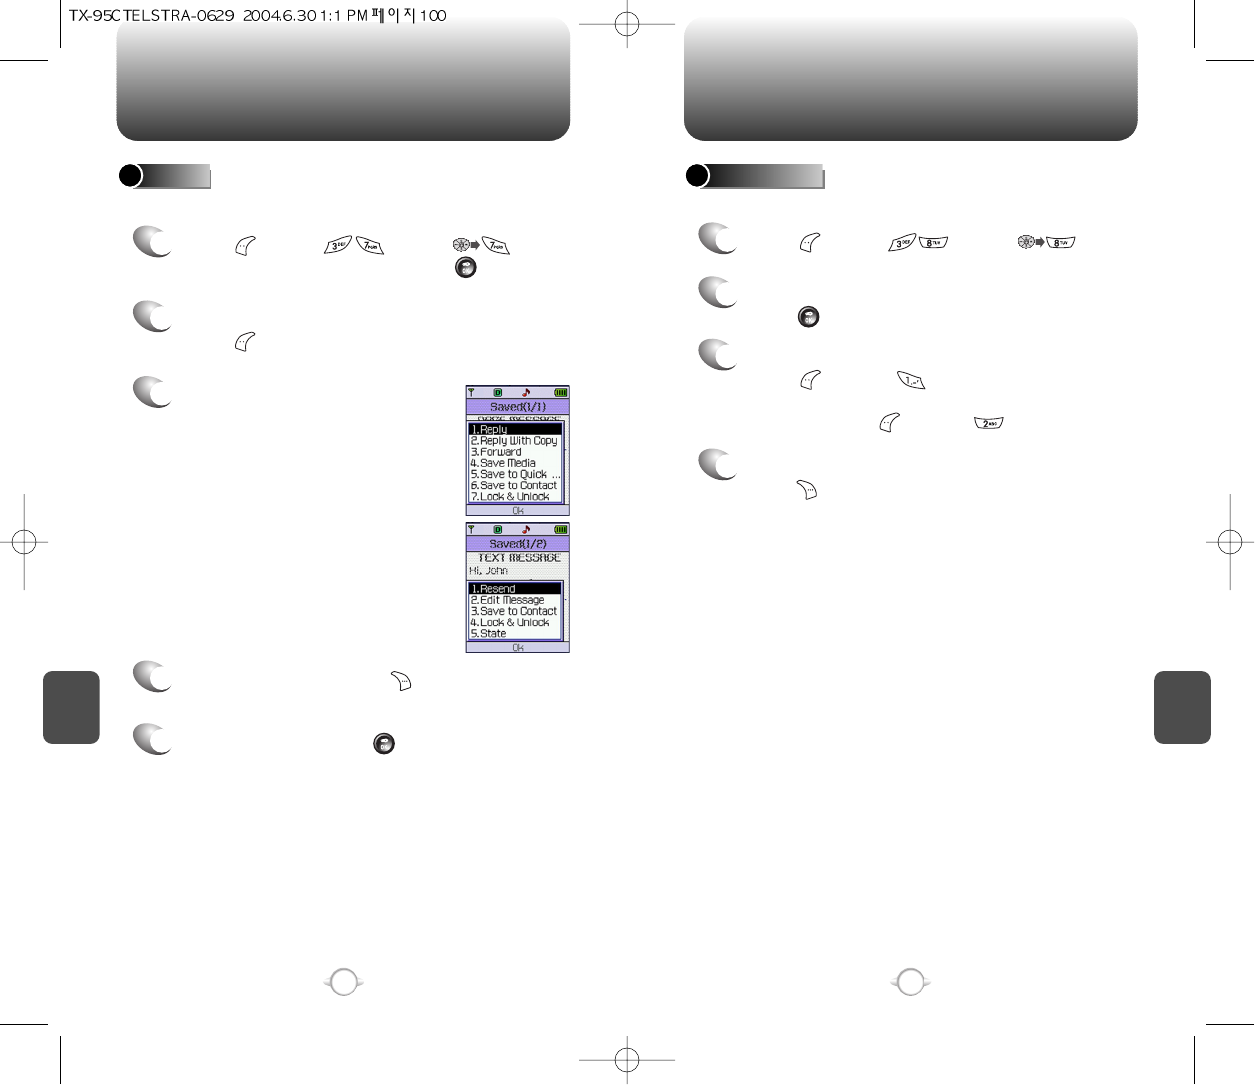
REPLY .................................................................................................................95
REPLY WITH COPY ............................................................................................95
FORWARD..........................................................................................................96
SAVE TO CONTACT............................................................................................96
SAVE MEDIA ......................................................................................................96
SAVE TO SAVED.................................................................................................96
SAVE TO QUICK TEXT........................................................................................96
LOCK & UNLOCK ...............................................................................................96
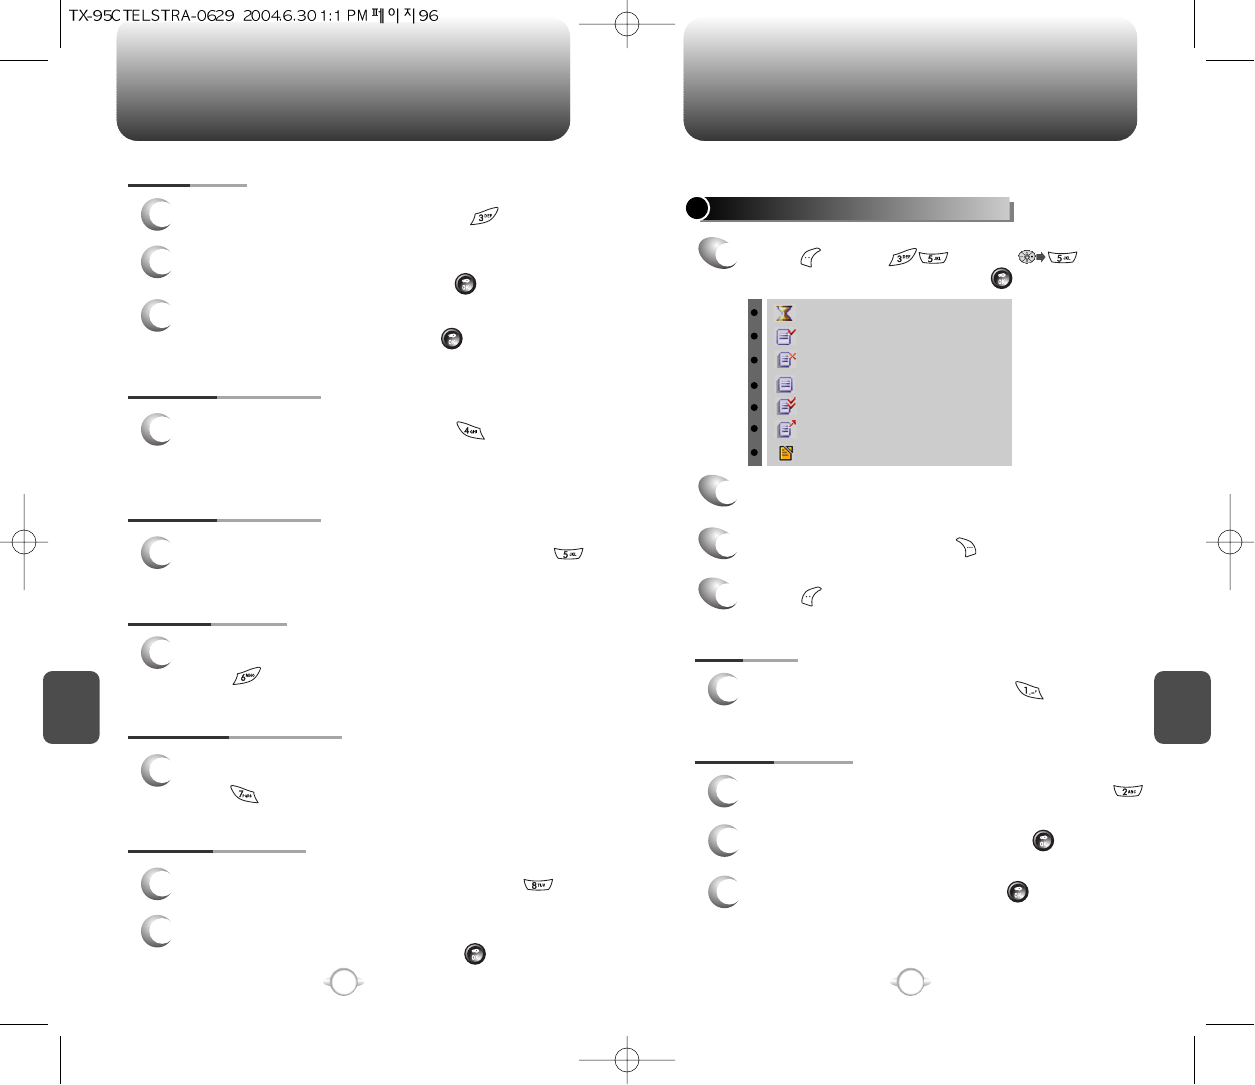
OUTBOX ....................................................................................................................97
CHECKING SENT TEXT MESSAGES ...................................................................97
RESEND..............................................................................................................97
EDIT MESSAGE ..................................................................................................97
SAVE TO CONTACT............................................................................................98
SAVE TO SAVED.................................................................................................98
LOCK & UNLOCK ...............................................................................................98
STATE .................................................................................................................98
WEB ALERTS.............................................................................................................99
SAVED .....................................................................................................................100
QUICK TEXT ............................................................................................................101
ERASE ALL ..............................................................................................................102
ERASE MESSAGES.............................................................................................102
SETTINGS................................................................................................................103
AUTO SAVE.........................................................................................................103
SAVE SENT MSG..............................................................................................103
PHOTO RECEIVE ..............................................................................................103
AUTO ERASE.......................................................................................................103
AUTO ERASE INBOX........................................................................................103
AUTO ERASE OUTBOX ....................................................................................104
DEFAULT CALL BACK.........................................................................................104
ALERT ..................................................................................................................104
EDIT SIGNATURE................................................................................................105
CHANGE MSG. GROUP NAME..........................................................................41
SEND MSG. GROUP...........................................................................................41
ERASE GROUP ...................................................................................................42
MY PHONE # .........................................................................................................42
RECENT CALLS ..............................................................................................43
ALL CALLS.............................................................................................................43
MISSED CALLS .....................................................................................................44
RECEIVED CALLS ..................................................................................................45
DIALED CALLS ......................................................................................................46
CALL TIMERS ........................................................................................................47
LAST CALL..........................................................................................................47
ALL CALLS..........................................................................................................47
HOME CALLS .....................................................................................................47
ROAM CALLS .....................................................................................................48
CUMULATIVE CALLS .........................................................................................48
MOBILE WEB ..................................................................................................49
CONNECT WEB .....................................................................................................49
MEDIA GALLERY............................................................................................50
IMAGES .................................................................................................................50
GRAPHICS ..........................................................................................................50
ANIMATIONS......................................................................................................50
PHOTOS.................................................................................................................51
TONES ...................................................................................................................51
SETTINGS .......................................................................................................52
SOUNDS ................................................................................................................52
RINGER TYPE .....................................................................................................52
VOLUME.............................................................................................................53
ALERT .................................................................................................................54
ROAM RINGER...................................................................................................55
TONE LENGTH ...................................................................................................55
ETIQUETTE .........................................................................................................55
DISPLAY.................................................................................................................56
MENU STYLE......................................................................................................56
GRAPHICS ..........................................................................................................56
SUB SCREEN......................................................................................................58
GREETING MESSAGE ........................................................................................58
CONTRAST .........................................................................................................59
BACKLIGHT ........................................................................................................59
DATA SVC..............................................................................................................60
CONNECTION.....................................................................................................60
SECURITY ..............................................................................................................61
PHONE LOCK .....................................................................................................61
RESTRICT ...........................................................................................................61
CHANGE CODE ..................................................................................................64
SPECIAL #’S .......................................................................................................64
ERASE ALL .........................................................................................................65
RESET PHONE....................................................................................................65
OTHERS .................................................................................................................66
ANSWER OPTIONS ............................................................................................66
AUTO RETRY ......................................................................................................67
LANGUAGE.........................................................................................................68
VOICE PRIVACY..................................................................................................68
TTY MODE..........................................................................................................68
SYSTEM.................................................................................................................69
SET MODE..........................................................................................................69
PRL ID.................................................................................................................69
PHONE INFO..........................................................................................................70
S/W VERSION.....................................................................................................70
H/W VERSION ....................................................................................................70
BREW VERSION .................................................................................................70
UTILITIES ........................................................................................................71
EVENT ....................................................................................................................71
ADD PLAN ..........................................................................................................71
VIEW EVENT LIST...............................................................................................72
ALARM...................................................................................................................72
MEMO PAD............................................................................................................74
ADD MEMO........................................................................................................74
BEFORE USING
YOUR PHONE
C
H
.
1
5
This chapter provides important information about using the
TX-95C including:
Chapter 1
INSIDE THE PACKAGE
HANDSET DESCRIPTION
BATTERY USAGE
BATTERY HANDLING INFORMATION
TABLE OF CONTENT
4
Chapter 7
Chapter 8
DIRECT VIEW.......................................................................................................105
ENTRY MODE......................................................................................................106
ACKNOWLEDGEMENT.......................................................................................106
PHOTO DELIVERY REPORT.............................................................................106
PHOTO READ REPORT ....................................................................................106
CHAPTER 7. WEB BROWSING....................................................107
START INTERNET BROWSER .....................................................................108
ACCESSING THE MOBILE LOOP .......................................................................108
ACCESS THE INTERNET.....................................................................................108
BROWSER MENU.........................................................................................109
BACK ....................................................................................................................109
HOME...................................................................................................................109
EXIT......................................................................................................................109
MARK SITE ..........................................................................................................109
BOOKMARKS ......................................................................................................109
INBOX ..................................................................................................................110
SAVE IMAGE .......................................................................................................110
RELOAD ...............................................................................................................110
SETTINGS............................................................................................................110
HOMEPAGE......................................................................................................110
PROXY ..............................................................................................................110
CIRCUIT PROMPT ............................................................................................110
CIRCUIT LINGER ..............................................................................................111
SCROLL MODE ................................................................................................111
SCROLL SPEED................................................................................................111
KEY PRESS TIMEOUT ......................................................................................111
SECURITY .........................................................................................................111
ADVANCED.......................................................................................................111
CHAPTER 8. SAFETY AND WARRANTY ....................................113
SAFETY INFORMATION FOR WIRELESS HANDHELD PHONES ..............114
DRIVING SAFETY ................................................................................................115
ELECTRONIC DEVICES .......................................................................................116
OTHER SAFETY GUIDELINES ............................................................................117
PRECAUTIONS ....................................................................................................118
SAFETY INFORMATION FOR FCC RF EXPOSURE ....................................119
CAUTIONS...........................................................................................................119
SAR INFORMATION.....................................................................................120
FDA CONSUMER UPDATE ..........................................................................122
PROTECT YOUR WARRANTY .....................................................................126
12 MONTHS LIMITED WARRANTY ............................................................127
“Licensed by QUALCOMM Incorporated under one or more of the following Patents : U.S.Patent No.
4,901,307 U.S.Patent No. 5,056,109 U.S.Patent No. 5,099,204 U.S. Patent No. 5,101,501 U.S. Patent No.
5,103,459 U.S. Patent No. 5,107,225 U.S.Patent No. 5,109,390.”
HANDSET DESCRIPTION
C
H
1
This package should include all items pictured below.
If any are missing or different, immediately contact the retailer where
you purchased the phone.
7
INSIDE THE PACKAGE
C
H
1
6
Data Cable
User Manual
AC Charger
Handstrap
Data CD
Handset
Standard Battery
This phone is a tri mode CDMA2000 1X digital phone with Camera
capabilities. The TX-95C weighs 3.89 oz. and the dimensions are
1.82” x 3.56” x 0.92”.
Antenna
Earjack
Camera
Lens
LCD Screen
Function Keys
Send Key
END/
Power Key
Microphone
Earpiece
Camera
Key
Loop & OK
Button
Camera Button
Volume Key
C
H
1
DISPLAY INDICATORS
9
C
H
1
THE FUNCTION KEYS
8
Press to make or receive a call.
Press and hold to turn on VR mode.
Press to access Mobile Web service.
Press to clear a digit from the display, to return
to the previous page, Press and hold to enable
speaker phone mode.
Press and hold to enter lock mode.
Press and hold to enter etiquette mode.
Press to turn the phone on, to terminate a call or
to return to the initial page. Press and hold to
turn the phone off.
Signal Strength - Current signal strength -
the more lines, the stronger the signal.
Service Indicator
Indicates call is in progress, indicates the
phone cannot receive a signal from the system.
Battery - Battery charging level -
the more blocks, the stronger the charge.
Roaming
Phone is out of home area.
Message
New text or voice message.
Digital mode
Phone is operating in digital mode.
Mute
Phone is mute during a call.
Silent
Appears when Silent is selected as the ring mode.
Emergency Call
Blinks when an emergency call is in progress.
Auto Answer
Phone is in answering machine mode.
Etiquette
Phone will vibrate when call is received.
Schedule
Appears when either an event or an alarm is set.
In Idle Mode
- Press up to access the Recent Call
Logs, down to access Camera, right
for Messaging and left for Mobile Web.
Inside the menu
- Within a menu, use to scroll through
menu options, or to select a function
displayed on the screen.
(Left Soft Key) Press to access the menu or
function displayed on bottom line.
(Right Soft Key) Press to access your phone book.
HANDSET DESCRIPTION HANDSET DESCRIPTION
Icons
Displays various icons.
Soft Key Indications
Show the functions currently
assigned to each soft key and
displays some icons.
Text & Graphic area
Displays instructions and messages.
Loop / OK
Menu
Camera
MessagingMobile Web
Recent calls
Ring Mode
Appears when a ringer is set as a ringer
mode.
Dormant
Indicates the phone is in disconnection condition
while on “Server Connection”.
Fax Only
Receives a fax call as a voice call.
Data Only
Receives an async. call as a voice call.
Contacts
1X
Phone is in the 1x service area.
C
H
1
1
Plug the AC charger into a standard outlet.
BATTERY CHARGING
POWER CONNECTION
11
C
H
1
BATTERY INSTALLATION
1
u
Place the battery on the back of the handset
and slide into place.
v
Push the battery down
until it locks into place.
BATTERY REMOVAL
1
u
Pull down the release latch, lift up the battery
and
v
remove the battery from the handset.
If the battery is not correctly placed in the compartment, the
handset will not turn on and/or the battery may detach during use.
10
BATTERY USAGE BATTERY USAGE
Fully charge the battery before using – it is not charged when
purchased.
It is more efficient to charge the battery with the phone turned off.
These times are for a new battery. Talking and Standby times may
decrease over time.
Actual battery Talk and Standby times obtained will depend on
network signal strength and condition, network and product features
and settings used, individual level and pattern of use, battery age and
condition, environmental temperature, etc.
up to 270 min
up to 460 min
up to 200 min
up to 340 min
STD 1000 mAh
Battery Capacity CDMA MODE
1X-RTT MODE
EXT 1700 mAh
up to 140 hrs
up to 240 hrs
up to 170 hrs
up to 290 hrs
STD 1000 mAh
Battery Capacity CDMA MODE
1X-RTT MODE
EXT 1700 mAh
BATTERY TALK TIMES
The operating time is subject to your handset usage and configuration.
BATTERY STANDBY TIMES
The operating time is subject to your handset usage and configuration.
Scratch Pad
Displays when scratchpad is in use during a call.
Unread Web Message
Web Message, Text Message,
Voice Message
UP Browser
Phone is in the progress of UP Browser.
Speaker Phone
Phone is in speaker phone mode.
BATTERY HANDLING INFORMATION
BASIC OPERATION
This chapter addresses and explains the basic features of your phone
including.
Chapter 2
C
H
2
13
C
H
1
12
TURNING THE PHONE ON / OFF
ACCESSING THE MENU
MENU SUMMARY
BASIC FUNCTIONS
DURING A CALL
MAKING AN EMERGENCY CALL
l Only use the battery and charger approved by the
manufacturer.
l Only use the battery for its original purpose.
l Try to keep batteries in a temperature between 41ºF
(5ºC ) and 95ºF (35ºC).
l If the battery is stored in temperatures above or below
the recommended range, give it time to warm up or
cool down before using.
l Completely drain the battery before recharging. It may
take one to four days to completely drain.
l Store the discharged battery in a cool, dark, and dry
place.
l Purchase a new battery when its operating time
gradually decreases after fully charging.
l Properly dispose of the battery according to local laws.
l Don’t attempt to disassemble the battery – it is a
sealed unit with no serviceable parts.
l Don’t accidentally short circuit the battery by carrying it
in your pocket or purse with other metallic objects such
as coins, clips and pens. This may critically damage
the battery.
l Don’t leave the battery in hot or cold temps. Otherwise,
it could significantly reduce the capacity and lifetime of
the battery.
l Don’t dispose of the battery into a fire.
DOs
DON’Ts
ACCESSING THE MENU
C
H
2
Your phone can be customized via the menu. Each function can be
accessed by scrolling with the Navigation Key or by pressing the
number that corresponds with the menu item.
1
To access the menu in idle mode,
press [MENU].
2
Press the Navigation Key up and down to scroll
through the menu.
3
To return to the previous page, press [BACK].
To exit the current menu and return to the idle
mode, press .
4
Press [OK] to enter a function when its main
page is displayed.
15
C
H
2
TURNING THE PHONE ON
1
Press and hold , until your “Power On” logo
appears and the tone sounds.
If “Password” appears on the display enter your 4-digit
password to unlock your phone.
The default password is “0000”.
14
TURNING THE PHONE OFF
1
Press and hold , until “Power Off” logo
appears.
Immediately change or recharge the battery when “Low
Battery Warning Power Off” appears on the display.
Memory may possibly be damaged if the phone turns off
due to the battery completely draining.
Turn the phone off before removing or replacing the battery.
If the phone is on, data may be lost.
Hotkey
In idle mode, move the Navigation Key as follows to access these
functions:
Upward movement: Recent Call Logs
Downward movement: Camera
Rightward movement: Messaging
Leftward movement: Mobile Web
TURNING THE PHONE ON / OFF
Phone Book
Recent Calls
Messaging
Tools
Utilities
Camera
Settings
Mobile Web
Media Gallery
MENU SUMMARY MENU SUMMARY
C
H
2
17
C
H
2
16
1. Phone Book
2. Recent Calls
3. Messaging
4. Mobile Web
1. Find
2. Add New
3. Group
4. Speed Dial
5. Msg. Group
6. My Phone #
1. All Calls
2. Missed Calls
3. Received Calls
4. Dialed Calls
5. Call Timers
1. New Text MSG
2. New Photo MSG
3. Voice Mail
4. Inbox
5. Outbox
6. Web Alerts
7. Saved
8. Quick Text
9. Erase All
10. Settings
1. Connect Web
1. By Name
2. By Number
1. Last Call
2. All Calls
3. Home Calls
4. Roam Calls
5. Cumulative Calls
1. Inbox
2. Outbox
3. Saved
1. Auto Save
2. Auto Erase
3. Default Callback
4. Alert
5. Edit Signature
6. Direct View
7. Entry Mode
8. Acknowledgement
1. Old Inbox
2. Entire Inbox
1. Save sent MSG
2. Photo receive
1. Inbox
2. Outbox
1. Voice Mail
2. Messages
3. Remind
1. Photo Delivery
Report
2. Photo Read
Report
5. Media Gallery
6. Settings
1. Images
2. Photos
3. Tones
1. Sounds
2. Display
3. Data Svc.
4. Security
5. Others
1. Graphics
2. Animations
1. Ringer Type
2. Volume
3. Alert
4. Roam Ringer
5. Tone Length
6. Etiquette
1. Menu Style
2. Graphics
3. Sub Screen
4. Greeting Message
5. Contrast
6. Backlight
1. Connection
1. Phone Lock
2. Restrict
3. Change Code
4. Special #’s
5. Erase All
6. Reset Phone
1. Answer Options
2. Auto Retry
3. Language
4. Voice Privacy
5. TTY Mode
1. Ringer
2. Messages
3. Voice Mail
1. Ringer
2. Key Tone
3. Voice Call
4: Speaker Phone
1. Minute
2. Roam
3. Connect
4. Fade
1. Wallpaper
2. Power On
3. Power Off
4. Received
5. Dialed
6. Screen Saver
1. Dialed
2. Recent Calls
3. Phone Book
4. Camera
5. Data Call
6. 900#s
7. Long Distance
1. Special #1
2. Special #2
3. Special #3
4. Special #4
1. Call Answer
2. Active Flip
3. Auto Answer
MENU SUMMARY
C
H
2
19
C
H
2
18
7. Tools
8. Utilities
9. Camera
6. System
7. Phone Info.
1. Voice Memo
2. Voice Dial
3. Train Words
4. Voice Setting
1. Event
2. Alarm
3. Memo Pad
4. Calculator
5. World Clock
6. Stop Watch
1. Take a Photo
2. Photo Gallery
3. Photo Message
4. Help
1. Set Mode
2. PRL ID
1. S/W Version
2. H/W Version
3. BREW version
1. Record
2. Play
3. Play Speaker
4. Erase All
1. Record
2. Play
3. Play Speaker
4. Erase All
1. Yes
2. No
3. Wake-Up
4. Undo Train All
1. Set Active
2. HFK Mode
1. Add Plan
2. View Event List
1. Item 1
2. Item 2
3. Item 3
1. Add Memo
2. View Memo
3. Settings
1. New Photo
2. Saved Photo
BASIC FUNCTIONS
MAKING A CALL
1
Enter a phone number.
To modify the phone number you have entered :
• To erase one digit at a time press .
• To erase the entire number, press and hold .
2
Press .
The indicator , appears on the display.
• If “CALL FAILED” appears on the display or the line is busy,
press or .
• If you activate the “AUTO RETRY” function, the phone will
automatically retry for the number of times you have selected.
(refer to page 67).
• If the number you’re calling is stored in the phone book, the
name and number will appear when the call is placed.
• There is another way to make a call through the VR mode,
which is called “VAD (Voice Activated Dialing)”. Please refer to
page 86 (Voice Service) for details on making calls using VAD.
3
To end a call, press .
(Please refer to page 28 for more details about storing a
phone number.)
BASIC FUNCTIONS BASIC FUNCTIONS
C
H
2
You can dial or save a phone number with pauses for use in the
automated systems where you need to enter a credit card number,
a social security number, and so on. This feature will be convenient
when you are linked to ARS (Advanced Record System).
PAUSE FEATURE
1
To insert a pause, enter a phone number then
press [MENU]. Select either a Hard Pause
(“P” appears) or a Timed Pause (“T” appears).
2
Press to dial or [SAVE] to store.
(Please refer to page 28 for more details about storing a
phone number.)
21
C
H
2
SPEAKER PHONE
1
To activate the speaker phone when the phone is
in idle mode, answering mode, and calling mode
press and hold .
2
The phone returns to normal (Speaker phone off)
after ending or call or when the phone is turned
off and back on.
20
ANSWERING A CALL
1
To answer a call, press any key except , ,
or .
2
To end the call, press .
In Auto Answer Mode, a call is automatically answered after a
preset number of ring tones. See page 67 for more details.
Identifies caller by displaying their phone number. If the caller’s name
and number are already stored in your phone book, they both will
appear. This feature is system dependent. Please contact your
service provider for details.
CALLER ID FUNCTION
The caller ID is stored in the call history.
Call Waiting is a system dependent feature. Please contact
your service provider for details.
l See page 66 for more information on setting Any Key Answer
or Send Key Answer.
Notifies you of an incoming call when you are on the phone by
sounding a beep and displaying the caller’s phone number on
the screen.
CALL WAITING FUNCTION
1
To answer another call while on the phone,
press . This places the first call on hold.
To switch back to the first caller, press
again.
BASIC FUNCTIONS DURING A CALL
C
H
2
23
C
H
2
22
Adjusts the volume of the ringer, key beep and speaker.
ADJUSTING VOLUME
1
Press [MENU] and select one
of the following.
2
Adjust volume and press [OK] to save it.
Mutes key tones and activates the vibration mode to alert you of an
incoming call or message.
Locks your phone and prevents unauthorized use.
Phone can only be used after inputting the password.
ETIQUETTE
1
To turn etiquette mode on/off,
press and hold .
Ringer: Controls the ringer volume.
Key Tone: Controls the keypad tone.
Voice Call: Controls earpiece volume.
Speaker Phone: Controls the speaker phone volume.
l
l
l
l
Press the volume keys on the side of the phone to adjust
volume of earpiece during a call.
Lock feature will deactivate when the phone is powered
off. Upon next power up, you will need to press to
lock phone again.
The default password is “0000”.
LOCK
1
To lock the phone, press and hold .
2
To unlock the phone, press then input the
password.
l
Enables you to send a message (SMS) during a call.
To display menu options during a call, press [MENU].
MESSAGING
1
Press [MENU] .
Allows you to enter a phone number during a call so it can be dialed
later. The other party cannot hear the key presses.
SCRATCHPAD
1
Press [MENU] .
Automatically transmits your phone number to a pager during a call
without manually entering the number.
SEND MY PHONE #
1
To transmit your phone number during a call,
press [MENU] .
Press [MENU] to deactivate it.
Mutes any sounds from your side of the call.
MUTE (UNMUTE)
1
Press [MENU] .
To deactivate, press [MENU] .
The phone will automatically un-mute in Emergency
Call or Callback mode.
l
l
l
DURING A CALL
MAKING AN EMERGENCY CALL
C
H
2
25
C
H
2
24
Enables you to view handset information while on a call.
Please see page 70 for more details.
PHONE INFO.
1
Press [MENU] .
Enhances voice privacy during a call.
VOICE PRIVACY
1
Press [MENU] .
Enables you to see your phone number while on a call.
Please see page 42 for more details.
MY PHONE NUMBER
1
Press [MENU] .
The Emergency Call feature puts your phone in the Emergency Call
Mode when you dial the preprogrammed emergency numbers, 000,
106, 112, *911. It also operates in the lock mode and out of the
service area.
The Emergency number call service is available even in the lock mode.
EMERGENCY NUMBER IN LOCK MODE
1
Enter Emergency number and press .
When the call ends, the phone returns to the Lock Mode.
2
The call connects.
3
The phone exits the Lock Mode for 5 minutes.
EMERGENCY NUMBER USING ANY AVAILABLE SYSTEM
1
Enter Emergency number and press .
When the call ends, the phone returns to the Lock Mode.
The phone continuously attempts to receive service from
any available system. However, it can’t make a call.
2
The call connects.
3
The phone maintains the Emergency Mode
for 5 minutes.
l
l
l
MEMORY FUNCTION
This chapter addresses memory functions including:
Chapter 3
C
H
3
27
MEMO
C
H
2
26
STORING A PHONE NUMBER
ENTERING LETTERS, NUMBERS & SYMBOLS
MAKING A CALL THROUGH THE PHONE BOOK
Enter a name and press [OK].
Follow instructions for entering text on page 29.
To change the input mode, press [Abc].
Use the Navigation key to scroll through more
options for the entry (group, other numbers,
ringer).
Input mode indicator
T9Word : T9 mode
Abc : Abc mode
NUM : Number mode
Symbols : Symbol mode
STORING A PHONE NUMBER
ENTERING LETTERS, NUMBERS & SYMBOLS
C
H
3
The input mode will be automatically activated when necessary to
enter letters and numbers. As shown below, there are 4 available
modes ; Standard input mode (Abc), T9 input mode (T9Word),
Numeric mode (NUM), and Symbol mode (Symbols).
The following illustrates the function assigned to each key in the input
mode.
29
C
H
.
3
The phone book stores up to 300 entries.
1
Enter phone # and press [SAVE].
2
Choose “New Contact” or “Existing Contact”.
Press [OK] to select.
The input mode indicator appears on the lower right of
the display when letters and numbers are entered.
To select the desired input mode among the 4 modes
below, press [MODE], then enter letters and
numbers.
3
The Phone # will appear above a list of icons.
The name of the icon is displayed below the list.
Use the Navigation key to choose the type of #
you’re adding, as indicated by the icon.
Press [OK] to select.
4
5
To store the entry, press [SAVE].
“New contact added!” or “Contact edited!” will
be displayed.
28
Mode
Next
Space
Caps Lock
Clear
Save
Press to change mode.
[T9Word][Abc][NUM][Symbols]
Press to view the next matching word if
the highlighted word is not the word you
intended.
Press to accept a word and add a space.
Press to select a letter case of the
standard text input or T9 text input mode.
[Abc], [ABC], and [abc] indicate the
standard text input.
[T9Word], [T9WORD], and [T9word]
indicate the predictive text input.
Press to delete a character to the left of
the cursor.
Store the letters and numbers you enter.
KEY FUNCTION
Group : Personal, Business, Etc.
Graphic.
Set Secret : Lock, Unlock.
l
l
l
l
l
l
The other fields are set to Numeric mode as a default.
Msg.Ringer.
Ringer.
ENTERING LETTERS, NUMBERS & SYMBOLS
C
H
3
The T9 input mode incorporates a built-in-dictionary to determine a
word based on the entered characters. A word can be entered more
quickly by pressing a key once per character.
T9 INPUT MODE
1
Select the “T9Word” mode with [Abc].
2
Press a digit key once to enter the character
you want and enter all the characters to input
the word you want.
3
To view the next matching word, press .
To enter a compound word.
l Enter the first part of the word and press [ ] to accept it.
l Enter the last part of the word and press [ ] to enter the
word.
Select Abc mode, by pressing [ ][Abc].
When you select this mode, the Abc icon appears as a visual
confirmation.
- “Find the key that corresponds to the letter you want to enter.”
- Press it as many times as needed for the letter to appear on the
screen.
- To enter the name “John”:
Press [ ] J
Press [ ] o
Press [ ] h
Press [ ] n
31
C
H
3
Use the digit keys to enter letters, numbers and characters.
STANDARD INPUT MODE
1
Enter letters using the keypad as follows:
2
To enter a space, press . After two seconds,
the cursor will automatically move to the next
column.
3
Repeat until letters are entered.
There is a 16-letter limit.
4
To delete one digit, press . To delete the
entire entry, press and hold .
To change the input mode, press [Abc].
30
Keypad
1
2ABC
3DEF
4GHI
:
9WXYZ
1
A
D
G
:
W
.
B
E
H
:
X
@
C
F
I
:
Y
-
2
3
4
:
Z
A
D
G
:
9
1
Time
Repetitions
2 times
Repetitions
3 times
Repetitions
4 times
Repetitions
5 times
4
To accept matching word and enter a space,
press .
5
To change from lowercase to uppercase,
press .
To enter “phone book” in the T9 input mode.
- Press [ ][Abc] to select the T9 input mode and [ ] to choose
the small letter case (T9Word).
- Press [ ] and you will see “phone” highlighted.
Press [ ] to see the next matching word and [ ] to select it.
- Press [ ] and you will see “book” highlighted.
Press [ ] to move to the next matching word and [ ] to
select the compound word and enter a space.
ENTERING LETTERS, NUMBERS & SYMBOLS MAKING A CALL THROUGH THE PHONE BOOK
C
H
3
NUMERIC MODE
1
Press [Abc] until the
“Symbols (Symbol mode)” appears.
33
C
H
3
32
1
Press [Abc] until the current input mode
changes to the “NUM (Numeric mode)”.
2
To enter a number, press a digit key.
Press [ ],
or
Press [ ],
2
Select symbol you want to enter with the
Navigation key.
l Use the Navigation key to view a different line of symbols.
SYMBOL MODE
Allows you to enter numbers.
Allows you to enter symbols.
Dials a number simply by pressing and holding its Speed Dial location
number. For a 2-digit location number, press the first number then
press and hold the second number. To store a number in Speed Dial:
SPEED DIALING
• “Unassigned” appears if the location pressed is available.
• A phone number that is set as secret will not be displayed.
• A call can be made by pressing its entry number and .
1
Press [MENU] .
2
To assign a phone number to a location, select
the location and press [SET].
3
The phone book list will be displayed
alphabetically. Select a name and press [OK].
4
“Speed dial # X edited” will be displayed.
If a phone number is already assigned to the location,
press [ERASE] and [OK] to delete.
l
MEMO
MENU FUNCTION
This chapter addresses accessing the menu and using its functions
and features to customize your phone.
Chapter 4
C
H
4
35
C
H
3
34
PHONE BOOK
RECENT CALLS
MOBILE WEB
MEDIA GALLERY
SETTINGS
UTILITIES
CAMERA
C
H
4
37
C
H
4
36
Stores up to 300 entries, each of which can be assigned to a group.
Entries can be retrieved by name, phone number or group.
Retrieves an entry by name or number, and calls the number by
simply pressing .
FIND
PHONE BOOK
1
Press [MENU] .
3
Enter a name or its character string or scroll
through the list with the Navigation Key.
(Please refer to page 29 for instructions on entering letters,
numbers and symbols.)
2
The list of names in your phone book is
displayed alphabetically.
Use Navigation key to select the name.
4
All matching entries will be displayed. Highlight an
entry. Press [OK] to edit the entry. Press
[MENU] to 1. Send Text Msg, 2. Send Photo Msg,
3. Erase, 4. Prefix.
5
To call the selected number, press .
BY NAME
If the entry is set to secret, you will be asked for
your password.
PHONE BOOK
1
Press [MENU] .
3
Enter a part of the phone number or scroll
through the list with the Navigation Key.
The name associated with that number will be
displayed at the bottom of the screen.
2
The list of phone numbers saved in your phone
book will be displayed in numeric order.
4
All matching entries will be displayed. Highlight
an entry and press [OK] to edit the entry.
Press [MENU] to 1. Erase or 2. Prefix.
5
To call the selected number, press .
BY NUMBER
Secret # may not be appeared on List.
l
l
C
H
4
C
H
4
38
PHONE BOOK PHONE BOOK
To add a new entry to the phone book,
press [MENU] .
Adds a new entry to the phone book. Please refer to page 28 for
alternate way to add an entry to the phone book.
ADD NEW
The first field highlighted is Name. Enter the
name for the entry, then press [OK].
When all information for the entry is entered,
press [SAVE] to save the entry.
PHONE BOOK FIELD :
Name/Group/Mobile/Home/Office/Pager/Fax/E-mail/
Wireless Addr./Ringer/Msg.Ringer/Graphic/Memo/ Set
Secret.
Press the Navigation Key down to enter all the
other information (group, phone number, etc.).
(Please refer to page 29 for more detatils on entering letters,
numbers & symbols.)
39
GROUP
Allows you to classify phone entries into groups. Existing groups
include Personal, Business, Etc. and All. A maximum of seven
groups is allowed.
1
3
To add a new group, press [MENU] .
A maximum of seven groups is allowed.
ADD NEW GROUP
Input a new group name.
(Please refer to page 29 for more detatils on entering letters,
numbers & symbols.)
4
Press [SAVE] to save it.
2
Press [MENU] then select “Add Group”.
1
3
Press [MENU] .
Select an existing group name.
Input a new group name.
4
Press [OK] to save it.
1
Press [MENU] .
Select an existing group name.
2
Press [MENU] then select “Rename”.
CHANGE GROUP NAME
ERASE GROUP
2
Press [ERASE] to delete it.
“Erase this group?” will be displayed.
3
Press [OK] again to confirm it.
The default group names (All, Personal, Business, Etc.)
cannot be changed.
The default group names (All, Personal, Business, Etc.)
cannot be erased.
l
1
2
3
4
C
H
4
41
C
H
4
40
PHONE BOOK PHONE BOOK
Calls can be placed to numbers stored in speed dial by pressing its
location number on the keypad.
SPEED DIAL
1
Press [MENU] .
2
To assign a phone number to a location, select
the location and press [SET].
3
The phone book list will be displayed
alphabetically. Select a name and press [OK].
4
“Speed dial # X edited” will be displayed.
If a phone number is already assigned to the location,
press [Erase] and [OK] to delete.
If the entry is set to secret, you will be asked for your
password.
MSG. GROUP
Allows the user to group up to 10 phone number. The user can add,
change, and delete Msg.Group.
1
3
To add a new group, press [MENU] .
A maximum of five groups is allowed.
ADD NEW MSG. GROUP
Input a new group name.
4
Press [OK] to save it.
2
Press [MENU] to add a group.
1
3
Press [MENU] .
Highlight an existing group name.
Input a new group name.
4
Press [OK] to save it.
2
Press [MENU] to rename the group.
CHANGE MSG. GROUP NAME
l
l
SEND MSG. GROUP
1
Select an existing group name with the
Navigation Key.
3
To Access the “New Text Msg” see “New Text
Msg” on page 93.
4
Press [SEND] to send it.
2
Press [MENU] to select “Send Text Msg”.
SEND TEXT MSG
1
Select an existing group name with the
Navigation Key.
3
To Access the “New Photo Msg” see “New Photo
Msg” on page 94.
4
Press [SEND] to send it.
2
Press [MENU] to select “Send Photo Msg”.
SEND PHOTO MSG
C
H
4
43
C
H
4
42
PHONE BOOK RECENT CALLS
To display your phone number and service provider:
MY PHONE #
1
Press [MENU] .
2
To return to the previous page, press [OK].
Call details include date, time, and phone number.
After 20 received, dialed or missed calls, the oldest call will
automatically be erased from the history.
Displays information about the 60 most recent numbers dialed, missed
and received. Places a call to a selected number by simply pressing .
Access the recent call logs by pressing [MENU] .
ALL CALLS
1
To see a list of the 60 most recent numbers,
press [MENU] .
If the number is already stored in your phone
book, only the name appears. If the number is
not stored, only the phone number appears.
2
3
Press [MENU] [SAVE] to save the number
or press [ERASE] to delete it.
To view call details, press [OK].
1
Press [MENU] .
Highlight the group name to be deleted.
ERASE GROUP
2
Press [ERASE] to delete it.
“Erase this message group?” will be displayed.
3
Press [OK]. “This message group erased”
will be displayed.
C
H
4
45
C
H
4
44
RECENT CALLS RECENT CALLS
Displays information of the 20 most recently missed calls.
Place a call to a missed call number by simply pressing .
To see a list of the 20 most recently missed
calls, press [MENU] .
If the number is already stored in your phone
book, only the name appears. If the number is
not stored, only the phone number appears.
MISSED CALLS
1
2
To view missed call details, press [OK].
3
Press [MENU] [SAVE] to save the
number or press [ERASE] to delete it.
Call details include date, time and phone number.
After the 20th missed call, the oldest call will automatically
be erased from the history.
3
Press [MENU] [SAVE] to save the
number or press [ERASE] to delete it.
Call details include date, time and phone number.
After the 20th received call, the oldest call will automatically
be erased from the history.
Displays information of the 20 most recently answered calls.
Place a call to a received number by simply pressing .
RECEIVED CALLS
1
To see a list of the 20 most recently answered
calls, press [MENU] .
If the number is already stored in your phone
book, only the name appears. If the number
is not stored, only the phone number appears.
2
To view received call details, press [OK].
C
H
4
4746
C
H
4
RECENT CALLSRECENT CALLS
Call details include type of call, date, time and phone number.
After the 20th dialed call, the oldest call will automatically
be erased from the history.
Displays information of the 20 most recently dialed calls.
Place a call to a received number by simply pressing .
DIALED CALLS
1
To see a list of the 20 most recently answered
calls, press [MENU] .
If the number is already stored in your phone
book, only the name appears. If the number is
not stored, only the phone number appears.
2
To view dialed call details, press [OK].
3
Press [MENU] [SAVE] to save the number
or press [ERASE] to delete it.
Checks the talk time and manages your calls within the limit you set.
The five timers include:
Displays talk time of last call.
CALL TIMERS
1
Press [MENU] .
2
To return to the previous page, press [OK].
LAST CALL
Displays talk time of all calls made within Home area.
HOME CALLS
1
Press [MENU] .
2
The time of the following items is displayed:
3
To reset the timer, press [RESET].
To return to the previous page, press [OK].
- Voice Call
- Data/Fax Call
Displays talk time of all incoming and outgoing calls, excluding web
access calls.
ALL CALLS
1
Press [MENU] .
2
The time of the following items is displayed:
3
To return to the previous page, press [OK].
l
l
- Voice Call
- Data/Fax Call
l
l
C
H
4
49
C
H
4
48
RECENT CALLS
48
MOBILE WEB
Displays talk time of all incoming and outgoing calls, excluding web
access calls.
1
2
The time of the following items is displayed:
Press [MENU] .
CUMULATIVE CALLS
3
To reset the timer, press [RESET].
To return to the previous page, press [OK].
- Voice Call
- Data/Fax Call
Displays talk time of roaming calls.
ROAM CALLS
1
Press [MENU] .
2
The time of the following items is displayed:
3
To reset the timer, press [RESET].
To return to the previous page, press [OK].
- Voice Call
- Data/Fax Call
l
l
l
l
You can use your phone to browse the Internet if you have obtained
Internet service from your service provider and if over-the air
Internet access is available in your area.
1
Press [MENU] or .
2
Follow the procedures in “Chapter 7 WEB
BROWSING” on page 107.
CONNECT WEB
C
H
4
51
C
H
4
50
MEDIA GALLERY
50
MEDIA GALLERY
1
Press [MENU] .
PHOTOS
1
Press [MENU] .
TONES
IMAGES
1
Press [MENU] .
GRAPHICS
1
Press [MENU] .
ANIMATIONS
2
Scroll through the captured pictures to display the
picture you want to send and press [SEND].
3
To access the “New Photo Msg” editor,
see “New Photo Msg” on page 94.
4
4.1 To send MMS message, press [SEND].
4.2 To save MMS message, press [MENU]
then select “Save to Outbox” and
press [OK].
2
Scroll the saved voice memo you want to send
then press [SEND].
3
To access the “New Photo Msg” editor,
see “New Photo Msg” on page 94.
4
4.1 To send MMS message, press [SEND].
4.2 To save MMS message, press [MENU]
then select the “Save to Outbox” and
press [OK].
Press [MENU] to select 1.Erase, 2.Erase All, 3.Change Title.
2
Scroll through the captured pictures to display the
picture you want to send and press [SEND].
3
To access the “New Photo Msg” editor,
see “New Photo Msg” on page 94.
4
4.1 To send MMS message, press [SEND].
4.2 To save MMS message, press [MENU]
then select “Save to Outbox” and
press [OK].
2
Scroll through the captured pictures to display the
picture you want to send and press [SEND].
3
To access the “New Photo Msg” editor,
see “New Photo Msg” on page 94.
4
4.1 To send MMS message, press [SEND].
4.2 To save MMS message, press [MENU]
then select “Save to Outbox” and
press [OK].
Press [MENU] to select 1.Erase, 2.Erase All, 3.Change Title.
SETTINGS SETTINGS
C
H
4
53
C
H
4
52
Sets Ringer Type, Volume, Alert, Roam Ringer, Tone Length and
Etiquette Mode.
To select a ringer type for incoming calls:
Customizes your phone and optimizes performance through a variety
of settings.
SOUNDS
RINGER TYPE
Controls the Ringer, Key Tone and Voice Call volume and alerts you
to incoming calls in a variety of modes.
Controls the Ringer volume and alerts you to incoming calls in the
following modes.
VOLUME
RINGER
1
Press [MENU] .
2
Select one of the following options:
3
To confirm, press [OK].
1
Press [MENU] .
Silent – Mute the ringer, press [Min].
Ringer Off
Vibrate On
Ringer Mode – Volume Levels 1-5.
High & Vib – The ringer sounds after vibration,
press [Max].
Off/Level1-5 [Min- , Max- ].
To adjust keypad tone:
KEY TONE
2
Adjust the keypad tone.
3
To save, press [OK].
1
Press [MENU] .
To adjust earpiece volume:
VOICE CALL
2
Adjust the earpiece volume.
3
To save, press [OK].
Level1-5 [Min- , Max- ].
1
Press [MENU] .
2
Select one of the pre-installed 10 music bells and
5 ring tones.
3
To confirm, press [SELECT].
RINGER
2
Select a tone (1-5).
3
To confirm, press [SELECT].
2
Select a tone (1-5).
3
To confirm, press [SELECT].
1
Press [MENU] .
MESSAGES
1
Press [MENU] .
VOICE MAIL
SETTINGS SETTINGS
C
H
4
55
C
H
4
54
Allows you to set an alert that sounds when the following handset
changes occur.
Sounds an alert every minute of a phone call.
ALERT
MINUTE
2
Select “Off” or “On” and press [OK] to save it.
1
Press [MENU] .
Sounds an alert when leaving a service area and entering a roaming
service area.
ROAM
2
Select “Off” or “On” and press [OK] to save it.
1
Press [MENU] .
Notifies you that a call has been successfully placed.
CONNECT
2
Select “Off” or “On” and press [OK] to save it.
1
Press [MENU] .
Sounds an alert when you are entering an area where calls cannot be
made due to weak signal strength. The alert sounds in standby mode.
FADE
2
Select “Off” or “On” and press [OK] to save it.
1
Press [MENU] .
Sounds a different ringer when you are in a roaming service area.
ROAM RINGER
1
Press [MENU] .
2
Select “Distinctive” or “Normal” and press
[OK] to save it.
Normal – Sounds the same ringer type as used in Home area.
Distinctive – Sounds a different ringer type.
l
l
Shortcut – Press and hold to activate/deactivate this
feature.
l
To adjust tone length:
To place the phone in Etiquette Mode so all phone sounds are muted:
TONE LENGTH
1
Press [MENU] .
2
Select “Normal” or “Long” and press [OK]
to save it.
ETIQUETTE
1
Press [MENU] .
2
Select “On” or “Off” and press [OK]
to save it.
1
Press [MENU] .
To adjust speaker phone volume :
SPEAKER PHONE
2
Adjust the speaker phone volume.
3
To save, press [OK].
Level1-5 [Min- , Max- ].
C
H
4
57
C
H
4
56
SETTINGS SETTINGS
Allows you to customize the display.
To select an display menu style:
DISPLAY
MENU STYLE
WALLPAPER
1
Press [MENU] .
2
Select “Fold”, “Grid” or “List” and press [OK]
to save it.
GridFold List
1
Press [MENU] .
To select an LCD display:
GRAPHICS
2
Select “Loop”, “Digital Clock1,2”, “Analog Clock
1,2”, or “Picture (Photo #)”.
3
Press [SELECT] to save it.
1
Press [MENU] .
POWER ON
2
Select “Loop On” with the Navigation key.
3
Select a display from the Animation list using
the navigation key and press [SELECT] to
save it.
1
Press [MENU] .
POWER OFF
1
Press [MENU] .
RECEIVED
1
Press [MENU] .
DIALED
2
Select “Loop Off” with the Navigation key.
3
Select a display from the Animation list using
the navigation key and press [SELECT] to
save it.
2
Select “Default” or “Picture (Photo #)” with
the Navigation key.
3
Select a display from the Animation list using
the navigation key and press [SELECT] to
save it.
2
Select “Default” with the Navigation key.
3
Select a display from the Animation list using
the navigation key and press [SELECT] to
save it.
C
H
4
59
SETTINGS
C
H
4
58
SETTINGS
To adjust the display contrast:
CONTRAST
1
Press [MENU] .
MAIN LCD/SUB LCD
To save, press [OK].
2
3
Select “Main LCD” or “Sub LCD”.
Main LCD: Level 1~5.
Sub LCD: Level 1~5.
l
l
Backlights the display and keypad for easy viewing in dark places.
BACKLIGHT
3
To save, press [OK].
1
Press [MENU] .
LCD/KEYPAD
2
Select “LCD” or “Keypad”.
LCD: 5s/15s/30s/60s/Always On.
Keypad: 5s/15s/30s/60s/Always On/Always Off.
l
l
SUB SCREEN
1
Press [MENU] .
2
Select “Digital” or “Analog”.
3
Press [OK] to save it.
To input a personal greeting:
GREETING MESSAGE
1
Press [MENU] .
2
Select “Msg”, “Font”, “Bg” or “Entry Message”
to personalize your greeting.
Press [OK].
To save, press [SAVE].
3
Msg: On/Off.
Font: White, Blue, Dark Blue, Magenta, Gray, Black.
Bg: Transparent, White, Blue, Yellow, Gray, Black.
Entry Message: Enter message (Default-Telstra CDMA).
l
l
l
l
1
Press [MENU] .
SCREEN SAVER
2
Select “Time Setting” or “Screen Saver” with
the Navigation key.
3
Press [SELECT] to save it.
Time Setting: Off, 5 Secs, 10 Secs, 20 Secs, 30 Secs.
Screen Saver: Select picture image.(Photo/Multimedia/Images).
l
l
C
H
4
61
SETTINGS
C
H
4
60
SETTINGS
Allows you to transfer data when your phone is connected to a PC.
CONNECTION
1
Press [MENU] .
2
Select one of the following connection modes:
3
Press [OK] to save.
Voice Call: To receive a voice call.
Data Only: To receive data when connected to PC.
Fax Only: To function as a fax when connected to PC.
l
l
l
This function is available only when the phone is connected
to data cable.
Select a connection mode based on the handset usage.
Prevents others from using the phone without permission and allows
access to security features only after inputting a password.
SECURITY
Prevents others from using your phone without permission.
When locked, calls cannot be made and the menu cannot be
accessed without password.
1
Press [MENU] and enter “Password”.
PHONE LOCK
3
To save, press [OK].
2
Press and select “Unlock”, “Lock Now” or
“Lock On Power Up”.
Lock Now: Lock the phone now.
Lock On Power Up:
Lock the phone whenever it is turned on.
Unlock: Do not lock the phone.
l
l
l
The default password is “0000”.
When you attempt to make a restricted call, “This phone is restricted”
appears on the screen.
RESTRICT
Blocks all dialed calls – except emergency calls – but allows incoming
calls to be answered.
1
Press [MENU] and enter “Password”.
2
Press and select “Allow” or “Restrict”.
3
To save, press [OK].
DIALED
Allow: Allows dialed calls.
Restrict: Restricts dialed calls.
l
l
DATA SVC.
C
H
4
63
SETTINGS
C
H
4
62
SETTINGS
1
Press [MENU] and enter “Password”.
2
Press and select “Allow” or “Restrict”.
3
To save, press [OK].
Allow: Allows access to the recent calls menu.
Restrict: Restricts access to the recent calls menu.
l
l
RECENT CALLS
Blocks access to, and protects data in your phone book.
Blocks access to Recent Call List.
3
To save, press [OK].
PHONE BOOK
Allow: Allows access to the phone book.
Restrict: Restricts access to the phone book.
l
l
1
Press [MENU] and enter “Password”.
2
Press and select “Allow” or “Restrict”.
1
Press [MENU] and enter “Password”.
2
Press and select “Allow” or “Restrict”.
Restricts access to camera mode.
3
To save, press [OK].
CAMERA
Allow: Allows access to the camera.
Restrict: Restricts access to the camera.
l
l
1
Press [MENU] and enter “Password”.
2
Press and select “Allow” or “Restrict”.
Restricts data calls from being placed.
3
To save, press [OK].
DATA CALL
Allow: Allows data calls.
Restrict: Restricts data calls.
l
l
Restricts calling 900 dial service numbers.
3
To save, press [OK].
900 #’S
Allow: Allows calls to 900-dial services.
Restrict: Restricts calls to 900-dial services.
l
l
1
Press [MENU] and enter “Password”.
2
Press and select “Allow” or “Restrict”.
Restricts calling long distance numbers – the phone is limited to
calling numbers within the area.
3
To save, press [OK].
LONG DISTANCE
Allow: Allows a long distance call.
Restrict: Restricts a long distance call.
l
l
1
Press [MENU] and enter “Password”.
2
Press and select “Allow” or “Restrict”.
C
H
4
65
SETTINGS
C
H
4
64
SETTINGS
Changes your 4-digit password.
CHANGE CODE
2
Press .
3
Enter a new password and press [OK].
4
Enter the new password again and
press [OK].
The default password is “0000”.
1
Press [MENU] and enter “Password”.
Stores 4 phone numbers that can be called even in the lock mode.
2
Press and select a location.
3
Press [OK] and input a phone number,
press [OK] again to save.
SPECIAL #’S
The default password is “0000”.
You can delete a special number by selecting it, pressing
[ERASE], then [OK].
To insert pauses into a number, press [PAUSE].
1
Press [MENU] and enter “Password”.
The default password is “0000”.
1
Press [MENU] and enter “Password”.
Clears all phone book, downloads, and photo gallery entries.
2
Press .
ERASE ALL
3
Select “Phone Book”, “Downloads” or “Photo
Gallery” and press [OK] to erase all the items
in those categories.
Resets phone to default settings.
RESET PHONE
3
Select “Yes” or “No”, then press [OK].
When you select “yes” you will see “Phone will restore default
settings and power cycle” on the display.
Press [OK] to begin Reset process.
The default password is “0000”.
1
Press [MENU] and enter “Password”.
2
Press .
4
To reset the phone, press [OK].
l
l
C
H
4
67
SETTINGS
C
H
4
66
SETTINGS
OTHERS
1
Press [MENU] .
2
Select “Any Key” or “Send Key”.
3
To save, press [OK].
ANSWER OPTIONS
Any Key: Press any key to answer an incoming call except
, , , and .
Send Key: Press only to answer a call.
l
l
To select an answer mode:
CALL ANSWER
Selects an Active Flip Answer mode as follows.
1
Press [MENU] .
2
Select “On” or “Off”.
3
To save, press [OK].
ACTIVE FLIP
When Active Flip On is selected, an incoming phone call can
be answered simply by opening the phone.
When Active Flip Off is selected, you will need to open the
phone and follow the Answer mode you have selected.
l
l
Press [MENU] .
Automatically answers a call after a preset number of rings. An ideal
setting for the hands-free car kit. Auto Answer only works when the
phone is open.
1
2
Select one of the following:
3
To save, press [OK].
AUTO ANSWER
Off, 5Secs, 10 Secs, 18 Secs.
l
This function will not be active when you select Vibrate, Silent,
Etiquette or Ringer after Vib as a ringer mode.
1
Press [MENU] .
Automatically redial a call up to 5 times after a set time interval.
2
3
Under Retry Time, select a time interval option
(Off, 3, 5, 7, 10 seconds). The Repeat Category
will appear when a time frame is chosen.
To save, press [OK].
AUTO RETRY
SETTINGS SETTINGS
C
H
4
69
C
H
4
68
1
Press [MENU] .
2
Select either “English” or “Spanish”.
3
To save, press [OK].
LANGUAGE
Selects the language in which letters are displayed on screen.
3
To save, press [OK].
“Enhanced”: Makes it more difficult to wire tap.
l
Enhances voice privacy and avoids tapping during a call.
1
Press [MENU] .
2
Select “Standard” or “Enhanced”.
VOICE PRIVACY
TTY Off
TTY+TALK
TTY+HEAR
TTY Full
l
l
l
l
Your phone is able to operate with a TTY (Teletypewriter) device in
digital modes. This feature is system dependent and may not be
available in all areas.
1
Press [MENU] .
2
Select one of the following options then
press [OK].
TTY MODE
Selects the Preferred System.
SYSTEM
Press [MENU] .
Select one of the following options:
Automatic B, Automatic A, Home only, Standard.
Press [OK].
Automatic B: Scan the radio channels based on the Automatic
B setting.
Automatic A: Scan the radio channels based on the Automatic
A setting.
Home only: Only within your home area or home affiliated area.
Standard: Home preferred.
SET MODE
1
2
l
l
l
l
Displays the phone’s PRL (Preferred Roaming List).
1
2
Press [MENU] .
To return to the previous page, press [OK].
PRL ID
Not currently supported on Telstra's Network.
C
H
4
71
UTILITIES
C
H
4
70
SETTINGS
To display the version of your phone:
PHONE INFO.
1
Press [MENU] .
2
The software version appears.
3
Press [OK].
S/W VERSION
1
Press [MENU] .
2
The hardware version appears.
3
Press [OK].
H/W VERSION
1
Press [MENU] .
2
The BREW version appears.
3
Press [OK].
BREW VERSION
EVENT
ADD PLAN
Sets an event and reminds you of that event.
1
Press [MENU] .
2
3
Move the Navigation key left, right, up or down to
choose a date in the calendar and press [OK].
Use the keypad to change or enter the date
then press [OK].
Default : To set default ringer type.
Change : To set custom ringer type.
DATE SETTING
Use the keypad to set a time and to select
AM or PM then press [OK].
TIME SETTING
Select an alert time interval option (On Time, 10 Min
Before, 30 Min Before, 1 Hour Before, No Alarm)
using the navigation key.
SETTING
To set a Ringer, press [MENU], then select
“Default” or “Change” using the Navigation key.
To save it press [SELECT].
RINGER SETTING
Use the keypad to input a plan message then
press [OK].
PLAN SETTING
To select alarm options press the Navigation key
downwards.
C
H
4
73
UTILITIES
C
H
4
72
UTILITIES
To delete the existing one, press [ERASE].
You can set up to 3 alarms.
ALARM
To display alarm entries, press [MENU] .
1
2
Move the Navigation key to choose an event
and press [OK] or [ERASE].
Press [MENU], then select “Erase All” using
the Navigation key.
4
Press [SAVE] to save it or [BACK] to
return to the calendar.
5
The date of the event will be marked on your
calendar.
1
Press [MENU] .
VIEW EVENT LIST
Select one of the entries using the navigation key.
To set a new alarm, choose item 1, 2 or 3.
To edit an existing alarm, select that alarm.
Press [OK].
2
Press the navigation key down to select alarm
options.
3
Use the keypad to change or enter the date for
the alarm then press [OK].
DATE SETTING
Use the keypad to set a time for the event and
the to select “AM” or “PM” then press [OK].
TIME SETTING
To save an alarm setting press [SAVE].
4
Default : To set default ringer type.
Change : To set custom ringer type.
Use the Navigation key to select a setting for the
alarm (Once, Daily, Weekly, Monthly, Off).
SETTING
To set a “Ringer” press [MENU], then select
“Default” or “Change” using the Navigation key.
To save it press [SELECT] to save it.
RINGER SETTING
Use the Navigation key to select a Snooze setting
(Off, 1 time after 5 min, 1 time after 10 min, 3 times
by 5 min).
SNOOZE SETTING
Using the keypad input an alarm message then
press [OK].
PLAN SETTING
C
H
4
75
UTILITIES
C
H
4
74
UTILITIES
1
Press [MENU] .
2
Follow the instructions below to calculate
8*6
Ö4-2.5
3
To reset, press [RESET].
1
Press [MENU] .
2
Select a city with Navigation key.
3
The world map appears with the city, its date
and time.
4
To return to the previous page, press [OK].
To access the calculator:
CALCULATOR
To display the time and date in pre-programmed cities:
WORLD CLOCK
Input 8.
Move the Navigation key to the right.
Input 6 and press the Navigation key to the left.
Input 4 and press the Navigation key down.
Input 2 and press the to input (.).
Press 5, [OK].
Use the Navigation key to select another city.
Your phone includes an internal memo pad that can be used to
compose and store reminders and notes.
MEMO PAD
1
Press [MENU] .
ADD MEMO
2
Input a new text memo and press [OK].
3
Press [SAVE] to save memo.
(Please refer to page 29 for more details on entering letters,
numbers and symbols.)
1
VIEW MEMO
2
The list of all memos, in saved order, is displayed.
Select a memo and press [OK].
3
The selected memo will appear. To edit it,
press [MENU], select “Edit” and input a
new text memo.
1
Press [MENU] .
SETTINGS
2
Select “Paper”, “Pattern”, “Sea”, “Sky”, or
“Flower”, then press [OK].
To compose a memo (there is an 80-letter limit):
To view a saved memo:
To select memo pad background image:
1.1. Press [MENU] .
1.2. To erase a memo, press [ERASE].
1.3. To add a new memo, press [MENU]
“Add New”.
1.4. To erase all memos, press [MENU]
“Erase All”.
As the daylight saving time is not applied, it may be different from
the actual time during DST.
76
UTILITIES
C
H
4
Taking pictures with your phone’s built-in camera is as simple as
choosing a subject, pointing the lens, and pressing a button.
You can activate the Camera Mode and take pictures when the phone
is open.
C
H
4
77
CAMERA
TAKE A PHOTO
Press [MENU] .
Point the camera lens at your subject.
You can check the picture framing through the
main display screen.
Press [OK] or the Side Camera button to
take the picture.
To save the picture, press [SAVE]. To go
back to idle mode without saving the picture,
press . To send the picture to someone,
press [SEND].
You cannot place or receive calls while in Camera Mode.
All incoming voice calls will be forwarded to voicemail.
TAKING A PICTURE FROM THE MENU
Press the Side Camera button or to press to
activate Camera Mode.
Point the camera lens at your subject.
You can check the picture framing through the
main display screen.
Press the Side Camera button to take the
picture.
TAKING A PICTURE IN IDLE MODE
1
2
3
4
1
2
3
To save the picture, press [SAVE]. To go
back to idle mode without saving the picture,
press . To send the picture to someone,
press [SEND].
4
1
Press [MENU] .
2
To measure a time period.
1. To start the stopwatch, press [START].
2. To pause it, press [STOP].
3. To resume it or [RESET] to return
to the previous page, press [EXIT].
3
To time up to six events at once:
1. To start, press [START].
2. To stop a time period and continue
measuring another one, press [CONT].
3. To stop the second and continue measuring
a third one, press [CONT].
4. To measure up to six time periods, repeat the
above steps.
5. To review the results, press [VIEW].
6. To return to the stopwatch, press [OK].
7. To reset it, press [RESET].
Simultaneously times up to six different events. To operate the
stopwatch:
STOPWATCH
C
H
4
79
CAMERA
C
H
4
78
CAMERA
PHOTO GALLERY
1
Press [MENU] .
PHOTO MESSAGE
Once you’ve taken a picture, you can use the messaging capabilities of
your phone to instantly share it with family and friends. To send a picture
to a recipient’s email address or to their wireless phone:
In Review Mode you can view all the pictures you have taken,
store selected images in your phone, send pictures to the
Pictures Web site, delete images and access additional picture
options.
Press [MENU] to display the following options :
1. Edit Title: Edit the picture’s title.
2. Send Photo: Upload the current picture to the send
message.
3. Assign Picture: To assign the selected picture to display
for specific tasks (Wallpaper/Screen
Saver/Picture Caller ID/Incoming Call).
4. Erase: Erase the current picture from your phone.
5. Erase All: Erase all captured pictures from your phone.
6. View Lists: Display pictures title name.
7. Photo Info: Display information on the selected picture,
such as title, date/time, size, etc.
1
Press [MENU] .
2
Press for “New Photo” and for a “Saved
Photo”. If you are looking for a saved photo,
scroll through the captured pictures to display
the picture you want to send.
3
Highlight the picture and press [OK].
4
Under Send To, enter the email address or mobile
phone number and press [OK].
CAMERA MODE OPTIONS
When the phone is open and in Camera Mode, several user options
are available.
Press [GALLERY] to enter Review Mode. From there you can view
the captured pictures, view a running count of stored pictures and more.
GALLERY
Press the navigation key up or down to adjust the picture size from
High (640x480 pixels) to Med (320x240 pixels) to Low (160x120 pixels).
The current picture size appears at the bottom of the display screen.
RESOLUTION
Press the navigation key right (increase) or left (decrease) for the
brightness level.
BRIGHTNESS
Press [MENU] . Select Flash to turn the camera’s flash on or off
then [OK] to save it. This is for use with the CKP8900 optional flash kit.
FLASH
Press [MENU] . Select High, Normal, Low picture quality then
[OK] to save it. Fewer pictures can be stored when using the High setting,
which requires more memory. (Default setting is High.)
QUALITY
Press [MENU] . Select Shutter 1, Shutter 2, or Shutter 3 then [OK]
to save it. Due to the proviace protection, Shutter Sound always works. (On
Etiquette Mode as well.)
SHUTTER SOUND
Press [MENU] . Select Hi, Normal, Low then [OK] to save it.
CONTRAST
Press [MENU] . The sub LCD will show a representation of the picture
to be taken. Use the sub LCD to help frame yourself for a self portrait.
You can also use the round mirror next to the camera lens for self portraits.
SUB LCD
UNDER [MENU]
Do not use the flash close to eyes as it may cause visual impairment.
81
80
C
H
5
81
CAMERA CAMERA
C
H
4
FLASH (SOLD SEPARATELY)
1. Remove the protective cap.
- Hold the flash unit securely between thumb and
pointer finger. With other hand, place thumb over
plastic protective cap and press downward.
(Similar to if you were breaking in half,
see figure 1).
2. Open the earphone microphone terminal cap
to expose the port.
3. Insert the flash into the earphone microphone port.
The front of the flash should be facing the object
of photography.
4. Set up the flash on the camera menu.
(See page 78. When in camera mode,
press [MENU], then flash.)
5. Press camera button. The flash will light when the picture is
taken.
Install the protective cap. The protective cap has
securing feet on either side. Place (1) securing foot
in one end of groove then press other foot (2) upwards
into groove.
TO USE THE FLASH KIT
You should be at least 2 feet (about 60cm) away from object
of photography to ensure proper lighting. If you are too close
the picture will come out white.
HELP
1
Press [MENU] .
The following will be displayed:
Use up/down keys to change photo size and left/right keys
to change brightness. Camera menu provides more settings:
1. SUB LCD: Enable previewing on external LCD.
2. FLASH: Turn on/off flashing if attached.
3. CONTRAST: Set photo contrast.
4. QUALITY: Set photo quality.
Higher quality generates bigger size photo.
5. SHUTTER SOUND: Select a sound to use for shutter.
7
8
If you want to send the picture to any additional
recipients, enter their information under “CC:” or
“BCC:”.
Press [MENU] to 1. Find, 2. Save or 3. Msg.
Group.
To send picture, Press [SEND],
Press [MENU] to 1. Preview, 2. Save to
Outbox, 3. Priority, 4. Expiration.
(Please refer to page 94 for more datails on “New Photo Msg”.)
6
Under Subject, enter a subject line for the
message. Press [OK].
5
Under Message, press . The picture will
come up with the flashing cursor underneath.
Enter the message and press [OK].
Press [MENU] to 1. Voice Record,
2. Insert Q.Text, 3. Delete Photo, 4. Insert Sound,
5. Insert Slide or 6. Slide Duration.
VOICE SERVICE
This chapter addresses Voice Service, an advanced feature that
allows you to place calls using your voice. With Voice Memo (VM)
you can record voice messages.
Topics include:
VOICE RECOGNITION MODE
VOICE SERVICE MENU
Chapter 5
83
82
C
H
5
83
CAMERA
C
H
4
HINTS FOR USING FLASH
To prevent and protect the user, others and their property,
carefully read the following hints for safely using the flash.
l Use the flash at room temperature. It may not light or charge in
temperatures under 5°C or above 35°C.
l Do not use in a damp area.
l Use in a high or low temperature area may cause the flash life to shorten
or extend the charging time.
l Clean the plug with a cotton stick. Dust in the plug may cause irregular
charging.
l If the flash repeats to radiate, the intensity of the radiation will shorten
and the images will become darker. If the intensity of radiation
decreases, buy another flash.
l Remove the terminal of the flash from the ear phone jack during a call.
It may cause some noise while using phone.
l Do not use while driving a car. It may cause a car accident.
l Do not flash near your eyes.
l Do not leave out in the reach of children. They may receive an electric
shock by putting it in their mouths.
l If internal parts are exposed, do not touch the exposed parts. You may
receive an electric shock.
l If it generates heat, smells bad, or is damaged, remove it from the
phone immediately. There is a risk of fire or explosion.
l Do not disassemble, reconstruct or repair. The flash contains a high
voltage circuit inside. Visit a nearby service center for repair.
l Do not use or put the flash near fire, open flame or high temperature
area. There is a risk of fire or explosion.
l Do not wet it by sweat, water or salt water. If the substrate gets wet, it
may cause the heat, explosion or firing. When it wets, turn off the power
and visit near service center.
l Do not allow any liquids to spill on the flash or expose it to rain, water or
moisture. Do not place it in the damp area like bathroom.
l Do not heat or dry it with drier if it gets wet.
l Do not place a cup or vase near it. Spilling liquid on it may cause the
heat, explosion or firing.
l Do not drop or shock it.
l Do not allow any metal objects to touch the flash’s plug (metal part).
There is a risk of fire or explosion.
l Use only with the TX-95C phone.
C
H
5
85
VOICE SERVICE MENU
C
H
5
84
VOICE RECOGNITION MODE
NAME
Voice Recognition (VR) enables you to place calls using your voice
and to record voice memos.
1
Press and hold until your phone turns to Voice
Recognition mode.
2
“Please say the name after the prompt tone” will
be displayed and you will hear “Name please”.
1
Press and hold until your phone turns to Voice
Recognition mode.
2
Say a name or tag that is already in the phone
book. The number and name will appear on the
display and you will hear “Calling (name)”.
1
Press [MENU] to start Tools menu.
2
To enter a voice memo, press .
3
1.To record a voice memo, press .
Instructions will be displayed and you will
hear “Please record at the tone.”
1.2. To stop recording a memo, press [STOP] or
[PAUSE].
1.3. Press [MENU] after recording a voice memo
to “Review” or “Re-record.”
1.4. Press [SAVE] to input a “Voice Memo” title,
then press [OK].
(See page 29 for more
information on entering letters, numbers and symbols.)
2.To play voice memos, press . Highlight the
message you want to play then press [PLAY]
press [MENU] or press [ERASE].
3.To play voice memos in speaker mode, press .
Highlight the message you want to play then
press [PLAY], press [MENU] or press
[ERASE].
4.To erase all voice memos, press . “Erase all
voice memos” will be displayed.
Press [OK] to erase all voice memos.
VOICE MEMO
Voice Memo allows you to record a reminder message that can be up
to 60 seconds. To record a memo:
C
H
5
86
VOICE SERVICE MENU
C
H
5
87
VOICE SERVICE MENU
1
Press [MENU] to start Voice Tools menu.
2
To enter Voice Dial, press .
3
VOICE DIAL TRAIN WORDS
2
“Please listen closely to hear instructions”
will be displayed and you will hear “Now
training control words. Please say the word
yes”.
3
Say “Yes”. You will hear “Again”. Say “Yes”
again. You will hear “Training word successful”.
Use to train or untrain the Voice Recognition with the control words,
“Yes”.
Train allows you to use Control words to make a call without using
the keypad.
YES
1
Press [MENU] .
2
“Please listen closely to hear instructions” will
be displayed and you will hear “Now training
control words. Please say the word no”.
3
Say “No”. You will hear “Again”. Say “No” again.
You will hear “Training word successful”.
Use to train or untrain the Voice Recognition with the control words,
“No”.
NO
1
Press [MENU] .
1.1. To record a voice dial, press .
The phone book list will be displayed
alphabetically. Select a name and press
[OK]. Instructions will be displayed and you
will hear “Name Please”.
1.2. Say the name for the voice tag and repeat the
name when prompted. You will hear “Added”.
1.3. Enter the phone number for the voice tag
then [OK]. Press [PAUSE] to insert
“Hard Pause” or “Timed Pause”.
2. To play a voice dial, press .
Highlight the message you want to play then
press [PLAY] or press [ERASE].
3. To play speaker mode, press .
Highlight the message you want to play then
press [PLAY] or press [ERASE].
4. To erase all voice dials, press .
“Removing all voice tags Proceed?” will be
displayed.
Press [OK] to erase all voice dials.
C
H
5
89
VOICE SERVICE MENU
C
H
5
88
VOICE SERVICE MENU
WAKE-UP
1
Press [MENU] .
UNDO TRAIN ALL
2
“Undo voice recognition for all procedures?” will
be displayed. Press [OK] to undo all trained
words.
Press [MENU] .
1
Use to train or untrain the Voice Recognition with the control words,
“Wake-Up”.
Undo Train All erases all “trained” words.
2
“Please listen closely to hear instructions” will
be displayed and you will hear “Now training
control words. Please say the word Wake-Up”.
3
Say “Wake-Up”. You will hear “Again”.
Say “Wake-Up” again. You will hear “Training
word successful”.
VOICE SETTING
1
Press [MENU] .
1
Press [MENU] .
SET ACTIVE
HFK MODE
2
Select “Active Flip” or “Send Key” by
pressing the Navigation Key left or right.
3
To save, press [OK].
2
Scroll to HFK Mode. Select “On” or “Off” by
pressing the Navigation Key left or right.
3
To save, press [OK].
Allows the user to activate or deactivate voice dial service.
While using the Hands Free Kit, activates or deactivates the voice
recognition function.
VOICE MAIL AND TEXT
MESSAGE
This chapter addresses Voice Mail and Text Messaging functions
including:
WHEN A NEW MESSAGE ARRIVES
VOICE MAIL
NEW TEXT MSG
NEW PHOTO MSG
INBOX
OUTBOX
WEB ALERTS
SAVED
QUICK TEXT
ERASE ALL
SETTINGS
Chapter 6
91
90
C
H
6
91
MEMO
C
H
5
1
To access your voice mail,
press [MENU] or
press .
Displays the number of voice mails and accesses them by pressing .
VOICE MAIL
C
H
6
93
C
H
6
92
WHEN A NEW MESSAGE ARRIVES NEW TEXT MSG
1
The following display appears
when a new message arrives.
2
To display the message,
press [READ].
1
Press [MENU] or press .
2
Under Send To, input the phone number and
press [OK].
3
Under Message, input a new text message and
press [OK].
To send a new message:
(Please refer to page 29 for more details on entering letters,
numbers and symbols.)
4
The default call back number is automatically
inputted into the Default CB# field. You can scroll
to the number and edit it or simply press .
7
To send the text message, press [SEND].
8
To save the text message, press [MENU] and
select the “Save to Outbox” then press [OK].
5
Press the Navigation Key down for more fields.
Under Priority, select “Normal” or “Urgent”.
6
Under Insert Signature option, select “On” or “Off”.
: Inbox photo read normal
: Inbox photo unread normal
: Inbox read normal
: Inbox unread normal
: Outbox failed
: Outbox photo
: Sent photo
: Outbox read
: Outbox sent
: Outbox not sent
By pressing [MENU], the user can choose from the
following:
1. Find : Allows the user to search the phone number which is
stored in the phone book.
2. Save : Stores the phone number the message was sent to.
3. Msg. Group : Allows to select all the phone numbers in a
group.
By pressing [MENU], the user can choose from the
following:
1. Insert Quick Text : Insert Quick Text function brings the
saved already- sentences.
2. Save to Quick Text : Save to Quick Text function saves the
written sentences on Quick Text.
NEW PHOTO MSG INBOX
C
H
6
95
C
H
6
94
1
Press [MENU] or press .
2
Select a message and press [OK].
The message is displayed.
Press [MENU].
3
: Urgent New Msg (not read)
: Urgent Read Msg
: New Msg (not read)
: Old Msg (already read)
: Lock (already read and locked)
1. REPLY
1
To reply to the text message, press .
2
Type your reply and press [OK].
(Please refer to page 29 for more details on entering
letters, numbers and symbols.)
The Inbox manages received text messages. To access:
1
Press [MENU] or press .
3
Under Send To, input the phone number and
press [OK].
4
Under Message, input a new text message and
press [OK].
You can look it up from the phone book by pressing [MENU].
To send a new picture message:
(Please refer to page 29 for more details on entering letters,
numbers and symbols.)
(Please refer to page 77 for more details on taking a photo.)
5
Under Subject, input a message subject and
press [OK].
(Please refer to page 29 for more details on entering letters,
numbers and symbols.)
6
To send a message to another person, select
the “CC” or “BCC” and input the phone
numbers, then press [OK].
7
To send the picture message, press [SEND].
8
To save the picture message, press [MENU] and
select “Save to Outbox” then press [OK].
2
Phone goes into camera mode automatically.
Take a picture and press [OK].
2. REPLY WITH COPY
By pressing [MENU], the user can choose from the following:
1. Voice Record : To record a voice memo.
2. Insert Q.Text : Insert Quick Text function brings the saved
already sentences.
3. Insert/Delete Photo : To Insert/delete a taked picture.
4. Insert/Delete Sound : To Insert/delete a sound in Photo Msg.
5. Insert/Delete Slide : To Insert/delete a another picture in
Photo Msg.
6. Slide Duration : To select a slide duration time.
By pressing [MENU], the user can choose from the following:
1. Find : Allows the user to search the phone number which is
stored in the phone book.
2. Save : Stores the phone number the message was sent to.
3. Msg. Group : Allows to select all the phone numbers in a group.
1
2
3
4
5
To reply to a received message and include the
received message into the message, press .
The default call back number is automatically
inputted into the Default CB# field.
You can scroll to the number and edit it.
To send the text message, press [SEND].
To save the text message, press [MENU] and
select the “Save to Outbox” then press [OK].
Under Insert Signature, select On or Off.
INBOX OUTBOX
C
H
6
97
C
H
6
96
: Auto resend
: Delivered
: Fail
: Not send
: Read
: Sent
: Canceled
CHECKING SENT TEXT MESSAGES
1
Press [MENU] or press .
Select a message, then press [OK].
2
The text message is displayed.
Press [MENU].
4
1. RESEND
1
To resend a text message, press .
To Erase Message, press [ERASE].
3
Manages sent text messages or messages waiting to be sent.
2. EDIT MESSAGE
1
2
Input the phone number and press [OK].
3
Input a text message and press [OK].
6. SAVE TO SAVED
1
To save the text message in your phone,
press .
7. SAVE TO QUICK TEXT
8. LOCK & UNLOCK
1
To lock or unlock the text message, press .
2
Select “Lock” to lock the message or “Unlock”
to unlock the message, then press [OK].
1
To save received text msg to “Quick text”,
press .
4. SAVE TO CONTACT
1
To save number to contact, press .
5. SAVE MEDIA
1
To object saved to media gallery folder, press .
To send a message to another person, press .
3. FORWARD
1
To forward the text message, press .
2
Input the phone number of the person you are
sending the message, then press [OK].
3
Input any text message to go along with the
forwarded message, then press [OK].
(Please refer to page 28 for more datails on “Save to Contact”.)
C
H
6
99
C
H
6
98
WEB ALERTSOUTBOX
WEB ALERTS
1
Press [MENU] or press .
2
To select GoTo, press .
To select Erase Message, press [ERASE].
3
The text message will be displayed.
6. STATE
1
To display the status of an outbox message,
press .
• [ ] : Read Message.
• [ ] : Unread Message.
• [ ] : Displays that text remains.
• GoTo : Connecting Selected Site.
• Erase : Erase Selected Message.
V
4. SAVE TO SAVED
1
To save the text message in your phone,
press .
5. LOCK & UNLOCK
1
To lock or unlock the text message, press .
2
Select “Lock” to lock the message or “Unlock”
to unlock the message, then press [OK].
3. SAVE TO CONTACT
1
To save number to contact, press .
(Please refer to page 28 for more datails on “Save to Contact”.)
Not currently supported on Telstra's Network.
C
H
6
101
C
H
6
100
QUICK TEXTSAVED
Manages saved messages from the Inbox/Outbox.
SAVED
1
Press [MENU] or press .
Select a text message then press [OK].
2
The text message is displayed.
Press [MENU].
3
If the text message is saved
from the “Inbox” menu, this
screen will be displayed.
4
To Erase Message, press [ERASE].
If the text message is saved
from the “Outbox” menu, this
screen will be displayed.
5
Select one by pressing [OK].
1
Press [MENU] or press .
To view/edit the quick text messages:
QUICK TEXT
2
Select a message from the list.
Press [OK].
3
To add a new quick text message,
press [MENU], [ADD NEW].
To edit the quick text message you have
selected, press [MENU], [EDIT].
4
To erase the quick text message,
press [ERASE].
C
H
6
103
C
H
6
102
SETTINGSERASE ALL
ERASE MESSAGES
1
Press [MENU] or press .
2
1. To erase all the inbox messages, press .
3
Select “OK” or “Cancel” with [OK]
or [CANCEL].
2. To erase all the outbox messages, press .
3. To erase the saved messages, press .
Entire inbox : To erase all messages.
Old inbox : To erase all messages already read.
(However, the locked Message(s) will not be deleted).
Press [MENU] or press .
Then press for “Auto Erase”.
AUTO SAVE
Press [MENU] or press .
Then press for “Auto Save”.
Press . Select “Off”, “On”, or “Prompt”.
Press [OK].
SAVE SENT MSG
Press [MENU] or press .
Then press for “Auto Save”.
Press . Select “Automatic” or “Prompt”.
Press [OK].
PHOTO RECEIVE
Manages messaging features through various features.
1
2
3
1
2
3
AUTO ERASE
Press . Select “Disable” or “Enable”.
Automatically erases inbox/outbox messages when new messages
arrive.
Saves every sent message or received photo file.
Press [OK].
AUTO ERASE INBOX
1
2
3
Erases all the messages from the “Inbox”, “Outbox”, or “Saved”
folder.
C
H
6
105
C
H
6
104
SETTINGSSETTINGS
DEFAULT CALL BACK
1
Press [MENU] or press .
Then press for “Default Callback”.
2
Input a call back number, then press [OK].
ALERT
1
Press [MENU] or press .
Then press for “Alert”.
2
Select Voice Mail, Messages or Remind.
For Voice Mail and Messages, select tone 1-5.
For Remind, select “On” or “Off”.
3
Press [OK].
Edits a default call back number so that the recipient can call
back or reply.
Enables phone to alert you of an incoming message.
3
Press [FIND] to find a number from the
phone book.
Press [MENU] or press .
Then press for “Auto Erase”.
Press . Select “Disable” or “Enable”.
Press [OK].
AUTO ERASE OUTBOX
1
2
3
DIRECT VIEW
2
Select “On” or “Off”.
ON : Set to read msg without entering inbox in SMS menu.
OFF : Set to read msg after entering inbox in SMS menu.
EDIT SIGNATURE : Edit user's signature.
INSERT SIGNATURE : Select whether the signature will be
included into sending message.
3
Press [OK].
Create a signature that can be automatically inserted at the end of a
message.
If the Direct View is set to on, the user will be able to view the
message by pressing the read key. If the Direct View is set to off,
the user can view the message by entering SMS Menu-> Inbox.
EDIT SIGNATURE
1
Press [MENU] or press .
Then press for “Edit Signature”.
2
Select “Edit Signature” or “Insert Signature”.
3
Press [OK].
1
Press [MENU] or press .
Then press for “Direct View”.
WEB BROWSING
This chapter addresses Internet services and web browsing.
For more detailed information contact your service provider.
START INTERNET BROWSER
BROWSER MENU
Chapter 7
C
H
7
107
C
H
6
106
SETTINGS
ACKNOWLEDGEMENT
Press [MENU] or press .
Then press for “Photo Delivery Report”.
Select “On” or “Off”.
Press [OK].
PHOTO DELIVERY REPORT
1
2
3
ON : Set to receive photo delivery report.
OFF : Set not to receive photo delivery report.
Press [MENU] or press .
Then press for “Photo Read Report”.
Select “On” or “Off”.
Press [OK].
PHOTO READ REPORT
1
2
3
ON : Set to receive photo read report.
OFF : Set not to receive photo read report.
ENTRY MODE
2
Select “T9 Mode” or “Alpha Mode”.
3
Press [OK].
Sets an Entry Mode as a default. The T9 mode indicator will appear
whenever the input mode is activated if the T9 mode is the default.
1
Press [MENU] or press .
Then press for “Entry Mode”.
Not currently supported on Telstra's Network.
START INTERNET BROWSER BROWSER MENU
C
H
7
109
C
H
7
108
ACCESS THE INTERNET
1
To start your Internet browser and access
websites through your wireless handset,
press [MENU] or press .
ACCESSING THE MOBILE LOOP
1
To access the Mobile Loop in idle
mode, press .
2
Press the Navigation Key up and
down to scroll through the Mobile
Loop menu.
3
To return to the previous page,
press .
To exit the current menu and return to the
idle mode, press .
4
Press to enter a function.
BACK
1
To return previous page, press .
HOME
1
To display the homepage, press .
The browser menu lists the actions necessary to operate the browser.
Press [MENU] or press to access the browser menu.
EXIT
1
To exit browser, press .
BOOKMARKS
1
MARK SITE
1
To add the current page to your bookmark
list, press .
“No bookmark service site” is displayed when the
Internet site cannot support the bookmark service.
To view your bookmark list, press .
This provides easy website access without
entering its URL.
BROWSER MENU BROWSER MENU
C
H
7
111
C
H
7
110
1
To select “Proxy”, press .
PROXY
Enables you to select another WAP PROXY.
1
To select “Circuit Prompt” timer, press .
CIRCUIT PROMPT
RELOAD
1
To select Reload, press .
Reloads current page.
1
To select “Homepage”, press .
HOMEPAGE
SETTINGS
1
To select Settings, press .
Displays Browser Menu Settings.
Enables you to change the homepage.
Displays inbox list.
INBOX
1
To select Inbox, press .
Displays inbox list.
SAVE IMAGE
1
To select Save Image, press .
1
To select “Scroll Mode”, press .
SCROLL MODE
1
To select “Scroll Speed”, press .
SCROLL SPEED
1
To select “Key Press Timeout”, press .
KEY PRESS TIMEOUT
1
To select “Security”, press .
SECURITY
Displays Security Menu Options.
1
To select “Advanced”, press .
ADVANCED
Displays Advanced Menu options.
SHOW URL
Displays the URL (Uniform Resource Locator) of the current
page.
1. To select Show URL, press .
RESTART BROWSER
Causes the deck history and deck cache to be cleared and
starts a new session with the UP.Link.
1. To select Restart Browser, press .
1
To select “Circuit Linger” timer, press .
CIRCUIT LINGER
MEMO
SAFETY AND
WARRANTY
This chapter addresses the safety guidelines and precautions to
follow when operating your phone. Please make sure to be aware of
all the details about the safety to operate your phone in the way that
you are supposed to.
Before operating your phone, please be aware of all the safety details.
SAFETY INFORMATION FOR WIRELESS
HANDHELD PHONES
SAFETY INFORMATION FOR FCC RF EXPOSURE
SAR INFORMATION
FDA CONSUMER UPDATE
PROTECT YOUR WARRANTY
12 MONTHS LIMITED WARRANTY
Chapter 8
113
C
H
7
C
H
8
112
SAFETY INFORMATION FOR WIRELESS
HANDHELD PHONES
SAFETY INFORMATION FOR WIRELESS
HANDHELD PHONES
115
C
H
8
C
H
8
114
Your wireless handheld portable telephone is a low power radio
transmitter and receiver. When it is ON, it receives and also sends out
radio frequency (RF) signals.
In August 1996, the Federal Communications Commissions (FCC)
adopted RF exposure guidelines with safety levels for handheld wireless
phones. Those guidelines are consistent with the safety standards
previously set by both U.S. and international standards bodies:
ANSI C95.1 (1992) *
NCRP Report 86 (1986) *
ICNIRP (1996) *
Those standards were based on comprehensive and periodic evaluations
of the relevant scientific literature. For example, over 120 scientists,
engineers, and physicians from universities, government health agencies,
and industry reviewed the available body of research to develop the ANSI
Standard (C951).
The design of your phone complies with the FCC guidelines (and those
standards).
EXPOSURE TO RADIO FREQUENCY SIGNALS
Use only the supplied or an approved replacement antenna.
Unauthorized antennas, modifications, or attachments could damage
the phone and may violate FCC regulations.
ANTENNA CARE
Read This Information Before Using Your Handheld
Portable Cellular Telephone
Talking on the phone while driving is extremely dangerous and is illegal in
some states. Remember, safety comes first. Check the laws and
regulations on the use of phones in the areas where you drive.
Always obey them.
Also, if using your phone while driving, please:
l Give full attention to driving. Driving safely is your first responsibility.
l Use hands-free operation, if available.
l Pull off the road and park before making or answering a call, if
driving conditions so require.
If you must use the phone while driving, please use one-touch, speed
dialing, and auto answer modes.
An airbag inflates with great force. DO NOT place objects, including both
installed or portable wireless equipment, in the area over the airbag or in
the air bag deployment area. If in-vehicle wireless equipment is
improperly installed and the air bag inflates, serious injury could result.
DRIVING SAFETY
WARNING: Failure to follow these instructions may lead to serious
personal injury and possible property damage.
1* : American National Standards Institute.
2* : National Council on Radiation protection and measurements.
3* : International Commission on Nonionizing Radiation Protection.
SAFETY INFORMATION FOR WIRELESS
HANDHELD PHONES
SAFETY INFORMATION FOR WIRELESS
HANDHELD PHONES
117
C
H
8
C
H
8
116
The Health Industry Manufacturers Association recommends that a
minimum separation of six (6”) inches be maintained between a handheld
wireless phone and a pacemaker to avoid potential interference with the
pacemaker. These recommendations are consistent with the independent
research by and recommendations of Wireless Technology Research.
Persons with pacemakers :
l ALWAYS keep the phone more than six inches from your
pacemaker when the phone is turned on.
l Do not carry the phone in a breast pocket.
l Use the ear opposite the pacemaker to minimize the potential for
interference.
l If you have any reason to suspect that interference is taking place,
turn your phone OFF immediately.
PACEMAKERS
If you use any other personal medical device, consult the manufacturer of
your device to determine if they are adequately shielded from external RF
energy Your physician may be able to assist you in obtaining this
information.
Turn your phone OFF in healthcare facilities when any regulations posted
in these areas instruct you to do so. Hospitals or healthcare facilities may
be using equipment that could be sensitive to external RF energy.
OTHER MEDICAL DEVICES
Turn your phone OFF where posted notices so require.
POSTED FACILITIES
ELECTRONIC DEVICES
Most modern electronic equipment is shielded from RF energy.
However, certain electronic equipment may not be shielded against
the RF signals from your wireless phone.
OTHER SAFETY GUIDELINES
FCC and Transport Canada Regulations prohibit using your phone while
in the air. Turn your phone OFF before boarding an aircraft.
AIRCRAFT
To avoid interfering with blasting operations, turn your phone OFF when in
a “blasting area” or in areas posted: “Turn off two-way radio.” Obey all
signs and instructions.
BLASTING AREAS
Turn your phone OFF when in any area with a potentially explosive
atmosphere and obey all signs and instructions. Sparks in such areas
could cause an explosion or fire resulting in bodily injury or even death.
Areas with a potentially explosive atmosphere are often, but not always,
clearly marked. They include fueling areas such as gas stations; below
deck on boats; fuel or chemical transfer or storage facilities; vehicles using
liquefied petroleum gas (such as propane or butane); areas where the air
contains chemicals or articles, such as grain, dust, or metal powders; and
any other area where you would normally be advised to turn off your
vehicle’s engine.
POTENTIALLY EXPLOSIVE ATMOSPHERES
SAFETY INFORMATION FOR WIRELESS
HANDHELD PHONES
SAFETY INFORMATION FOR
FCC RF EXPOSURE
119
C
H
8
C
H
8
118
PRECAUTIONS
Your Handheld Portable Telephone is a high quality piece of
equipment. Before operating, read all instructions and cautionary
markings on (1) AC Adaptor (2) Battery and (3) Product Using Battery.
DO NOT use this equipment in an extreme environment where
high temperature or high humidity exists.
DO NOT abuse the equipment. Avoid striking, shaking or
shocking. When not using, lay down the unit to avoid possible
damage due to instability.
DO NOT expose this equipment to rain or spilled beverages.
DO NOT use unauthorized accessories.
DO NOT disassemble the phone or its accessories. If service
or repair is required, return unit to an authorized Hyundai
cellular service center. If unit is disassembled, the risk of
electric shock or fire may result.
DO NOT short-circuit the battery terminals with metal items etc.
In August 1996 the Federal Communications Commission (FCC) of the
United States with its action in Report and Order FCC 96-326 adopted an
updated safety standard for human exposure to radio frequency
electromagnetic energy emitted by FCC regulated transmitters. Those
guidelines are consistent with the safety standard previously set by both
U.S. and international standards bodies. The design of this phone
complies with the FCC guidelines and these international standards.
Use only the supplied or an approved antenna. Unauthorized antennas,
modifications, or attachments could impair call quality, damage the
phone, or result in violation of FCC regulations.
Do not use the phone with a damaged antenna. If a damaged antenna
comes into contact with the skin, a minor burn may result. Please contact
your local dealer for replacement antenna.
This device was tested for typical body-worn operations with the
back of the phone kept 2.0 cm. from the body. To maintain
compliance with FCC RF exposure requirements, use only belt-clips,
holsters or similar accessories that maintain a 2.0 cm. separation
distance between the user’s body and the back of the phone,
including the antenna. The use of belt-clips, holsters and similar
accessories should not contain metallic components in its assembly.
The use of accessories that do not satisfy these requirements may
not comply with FCC RF exposure requirements, and should be
avoided.
BODY-WORN OPERATION
A minimum separation distance of 7.9 inches (20cm) must be
maintained between the user/bystander and the vehicle mounted
external antenna to satisfy FCC RF exposure requirements.
VEHICLE MOUNTED EXTERNAL ANTENNA
(OPTIONAL, IF AVAILABLE)
WARNING! Read this Information before using
CAUTIONS
For more information about RF exposure, please visit the FCC
website at www.fcc.gov
SAR INFORMATION SAR INFORMATION
121
C
H
8
C
H
8
120
THIS MODEL PHONE MEETS THE GOVERNMENT’S
REQUIREMENTS FOR EXPOSURE TO RADIO WAVES.
Your wireless phone is a radio transmitter and receiver. It is designed
and manufactured not to exceed the emission limits for exposure to
radiofrequency (RF) energy set by the Federal Communications
Commission of the U.S. Government. These limits are part of
comprehensive guidelines and establish permitted levels of RF
energy for the general population. The guidelines are based on
standards that were developed by independent scientific
organizations through periodic and thorough evaluation of scientific
studies. The standards include a substantial safety margin designed
to assure the safety of all persons, regardless of age and health.
The exposure standard for wireless mobile phones employs a unit of
measurement known as the Specific Absorption Rate, or SAR. The
SAR limit set by the FCC is 1.6 W/kg. * Tests for SAR are conducted
with the phone transmitting at its highest certified power level in all
tested frequency bands. Although the SAR is determined at the
highest certified power level, the actual SAR level of the phone while
operating can be well below the maximum value. This is because the
phone is designed to operate at multiple power levels so as to use
only the power required to reach the network. In general, the closer
you are to a wireless base station antenna, the lower the power
output.
Before a phone model is available for sale to the public, it must be
tested and certified to the FCC that it does not exceed the limit
established by the government adopted requirement for safe
exposure. The tests are performed in positions and locations (e.g., at
the ear and worn on the body) as required by the FCC for each
model. The highest SAR value for this model phone when tested for
use at the ear is 1.15 W/Kg and when worn on the body, as described
in this user guide, is 0.393W/Kg. (Body-worn measurements differ
among phone models, depending upon available accessories and
FCC requirements). While there may be differences between the SAR
levels of various phones and at various positions, they all meet the
government requirement for safe exposure.
The FCC has granted an Equipment Authorization for this model
phone with all reported SAR levels evaluated as in compliance with
the FCC RF exposure guidelines. SAR information on this model
phone is on file with the FCC and can be found under the Display
Grant section of http://www.fcc.gov/ oet/fccid after searching on
PP4TX-95C.
Additional information on Specific Absorption Rates (SAR) can be
found on the Cellular Telecommunications Industry Asso-ciation
(CTIA) web-site at http://www.wow-com.com.
* In the United States and Canada, the SAR limit for mobile phones
used by the public is 1.6 watts/kg (W/kg) averaged over one gram of
tissue. The standard incorporates a sub-stantial margin of safety to
give additional protection for the public and to account for any
variations in measurements.
123122
FDA CONSUMER UPDATE FDA CONSUMER UPDATE
1. Do wireless phones pose a health hazard?
The available scientific evidence does not show that any health problems are
associated with using wireless phones. There is no proof, however, that wireless
phones are absolutely safe. Wireless phones emit low levels of radiofrequency
energy (RF) in the microwave range while being used. They also emit very low
levels of RF when in the stand-by mode. Whereas high levels of RF can produce
health effects (by heating tissue), exposure to low level RF that does not produce
heating ef-fects causes no known adverse health effects. Many studies of low level
RF exposures have not found any biological ef-fects. Some studies have
suggested that some biological ef-fects may occur, but such findings have not
been confirmed by additional research. In some cases, other researchers have had
difficulty in reproducing those studies, or in determining the reasons for
inconsistent results.
2. What is FDA’s role concerning the safety of wireless phones?
Under the law, FDA does not review the safety of radiation-emitting consumer
products such as wireless phones before they can be sold, as it does with new
drugs or medical de-vices. However, the agency has authority to take action if
wire-less phones are shown to emit radiofrequency energy (RF) at a level that is
hazardous to the user. In such a case, FDA could require the manufacturers of
wireless phones to notify users of the health hazard and to repair, replace or recall
the phones so that the hazard no longer exists. Although the existing scientific data
do not justify FDA regula-tory actions, FDA has urged the wireless phone industry
to take a number of steps, including the following:
• Support needed research into possible biological effects of RF of the type
emitted by wireless phones;
• Design wireless phones in a way that minimizes any RF ex-posure to the user
that is not necessary for device function;
and
• Cooperate in providing users of wireless phones with the best possible
information on possible effects of wireless phone use on human health.
FDA belongs to an interagency working group of the federal agencies that have
responsibility for different aspects of RF safety to ensure coordinated efforts at the
federal level. The following agencies belong to this working group:
• National Institute for Occupational Safety and Health
• Environmental Protection Agency
• Federal Communications Commission
• Occupational Safety and Health Administration
• National Telecommunications and Information Administration
The National Institutes of Health participates in some inter-agency working group
activities, as well. FDA shares regulatory responsibilities for wireless phones with
the Federal Communications Commission (FCC). All phones that are sold in the
United States must comply with FCC safety guidelines that limit RF exposure. FCC
relies on FDA and other health agencies for safety questions about wireless
phones. FCC also regulates the base stations that the wireless phone networks
rely upon. While these base stations operate at higher power than do the wireless
phones themselves, the RF expo-sures that people get from these base stations
are typically thousands of times lower than those they can get from wire-less
phones. Base stations are thus not the subject of the safety questions discussed in
this document.
3. What kinds of phones are the subject of this update?
The term “wireless phone” refers here to hand-held wireless phones with built-in
antennas, often called “cell,” “mobile,” or “PCS” phones.
U.S. Food and Drug Administration -Center for Devices and
Radiological Health Consumer Update on Wireless Phones
These types of wireless phones can expose the user to measurable radiofrequency
energy (RF) because of the short distance between the phone and the user’s head.
These RF exposures are limited by Federal Communications Commission safety
guidelines that were developed with the advice of FDA and other federal health and
safety agencies. When the phone is located at greater distances from the user, the
exposure to RF is drastically lower because a person’s RF exposure decreases
rapidly with increasing distance from the source. The so-called “cordless phones,”
which have a base unit connected to the telephone wiring in a house, typically
operate at far lower power levels, and thus produce RF expo-sures far below the
FCC safety limits.
4. What are the results of the research done already?
The research done thus far has produced conflicting results, and many studies
have suffered from flaws in their research methods. Animal experiments
investigating the effects of radiofrequency energy (RF) exposures characteristic of
wire-less phones have yielded conflicting results that often cannot be repeated in
other laboratories. A few animal studies, how-ever, have suggested that low levels
of RF could accelerate the development of cancer in laboratory animals. However,
many of the studies that showed increased tumor develop-ment used animals that
had been genetically engineered or treated with cancer-causing chemicals so as to
be pre-dis-posed to develop cancer in the absence of RF exposure. Other studies
exposed the animals to RF for up to 22 hours per day. These conditions are not
similar to the conditions under which people use wireless phones, so we don’t
know with certainty what the results of such studies mean for human health. Three
large epidemiology studies have been published since December 2000. Between
them, the studies investigated any possible association between the use of
wireless phones and primary brain cancer, glioma, meningioma, or acoustic neu-
roma, tumors of the brain or salivary gland, leukemia, or other cancers. None of the
studies demonstrated the existence of any harmful health effects from wireless
phone RF exposures. However, none of the studies can answer questions about
long-term exposures, since the average period of phone use in these studies was
around three years.
5. What research is needed to decide whether RF expo-sure from wireless
phones poses a health risk?
A combination of laboratory studies and epidemiological stud-ies of people
actually using wireless phones would provide some of the data that are needed.
Lifetime animal exposure studies could be completed in a few years. However,
very large numbers of animals would be needed to provide reliable proof of a
cancer promoting effect if one exists. Epidemiological stud-ies can provide data
that is directly applicable to human popu-lations, but 10 or more years’ follow-up
may be needed to pro-vide answers about some health effects, such as cancer.
This is because the interval between the time of exposure to a can-cer- causing
agent and the time tumors develop - if they do -may be many, many years. The
interpretation of epidemiologi-cal studies is hampered by difficulties in measuring
actual RF exposure during day-to-day use of wireless phones. Many fac-tors affect
this measurement, such as the angle at which the phone is held, or which model of
phone is used.
6. What is FDA doing to find out more about the possible health effects of
wireless phone RF?
FDA is working with the U.S. National Toxicology Program and with groups of
investigators around the world to ensure that high priority animal studies are
conducted to address impor-tant questions about the effects of exposure to
radiofrequency energy (RF). FDA has been a leading participant in the World Health
Orga-nization International Electromagnetic Fields (EMF) Project since its inception
in 1996. An influential result of this work has been the development of a detailed
agenda of research needs that has driven the establishment of new research pro-
grams around the world.
C
H
8
C
H
8
125124
FDA CONSUMER UPDATE FDA CONSUMER UPDATE
C
H
8
C
H
8
Again, the scientific data do not demonstrate that wireless phones are harmful. But
if you are concerned about the RF exposure from these products, you can use
measures like those described above to reduce your RF exposure from wire-less
phone use.
10.What about children using wireless phones?
The scientific evidence does not show a danger to users of wireless phones,
including children and teenagers. If you want to take steps to lower exposure to
radiofrequency energy (RF), the measures described above would apply to children
and teenagers using wireless phones. Reducing the time of wire-less phone use
and increasing the distance between the user and the RF source will reduce RF
exposure. Some groups sponsored by other national governments have advised
that children be discouraged from using wireless phones at all. For example, the
government in the United King-dom distributed leaflets containing such a
recommendation in December 2000. They noted that no evidence exists that us-
ing a wireless phone causes brain tumors or other ill effects. Their
recommendation to limit wireless phone use by children was strictly precautionary;
it was not based on scientific evi-dence that any health hazard exists.
11.What about wireless phone interference with medical equipment?
Radiofrequency energy (RF) from wireless phones can inter-act with some
electronic devices. For this reason, FDA helped develop a detailed test method to
measure electromagnetic interference (EMI) of implanted cardiac pacemakers and
defibrillators from wireless telephones. This test method is now part of a standard
sponsored by the Association for the Ad-vancement of Medical instrumentation
(AAMI). The final draft, a joint effort by FDA, medical device manufacturers, and
many other groups, was completed in late 2000. This standard will allow
manufacturers to ensure that cardiac pacemakers and defibrillators are safe from
wireless phone EMI. FDA has tested hearing aids for interference from handheld
wireless phones and helped develop a voluntary standard sponsored by the
Institute of Electrical and Electronic Engi-neers (IEEE). This standard specifies test
methods and per-formance requirements for hearing aids and wireless phones so
that that no interference occurs when a person uses a “com-patible” phone and a
“compatible” hearing aid at the same time. This standard was approved by the
IEEE in 2000. FDA continues to monitor the use of wireless phones for pos-sible
interactions with other medical devices. Should harmful interference be found to
occur, FDA will conduct testing to assess the interference and work to resolve the
problem.
12.Where can I find additional information?
For additional information, please refer to the following re-sources:
• FDA web page on wireless phones (http://www.fda.gov/cdrh/ phones/index.html)
• Federal Communications Commission (FCC) RF Safety Pro-gram
(http://www.fcc.gov/oet/rfsafety)
• International Commission on Non-Ionizing Radiation Protec-tion
(http://www.icnirp.de)
• World Health Organization (WHO) International EMF Project
(http://www.who.int/emf)
• National Radiological Protection Board (UK) (http://www.nrpb.org.uk/)
The Project has also helped develop a series of public information documents on
EMF issues. FDA and the Cellular Telecommunications & Internet Asso-ciation
(CTIA) have a formal Cooperative Research and De-velopment Agreement
(CRADA) to do research on wireless phone safety. FDA provides the scientific
oversight, obtaining input from experts in government, industry, and academic or-
ganizations. CTIA-funded research is conducted through con-tracts to
independent investigators. The initial research will include both laboratory studies
and studies of wireless phone users. The CRADA will also include a broad
assessment of additional research needs in the context of the latest research
developments around the world.
7. How can I find out how much radiofrequency energy exposure I can get by
using my wireless phone?
All phones sold in the United States must comply with Federal Communications
Commission (FCC) guidelines that limit radiofrequency energy (RF) exposures. FCC
established these guidelines in consultation with FDA and the other federal health
and safety agencies. The FCC limit for RF exposure from wire-less telephones is
set at a Specific Absorption Rate (SAR) of 1.6 watts per kilogram (1.6 W/kg). The
FCC limit is consistent with the safety standards developed by the Institute of
Electri-cal and Electronic Engineering (IEEE) and the National Council on Radiation
Protection and Measurement. The exposure limit takes into consideration the
body’s ability to remove heat from the tissues that absorb energy from the wireless
phone and is set well below levels known to have effects. Manufacturers of
wireless phones must report the RF expo-sure level for each model of phone to the
FCC. The FCC website (http://www.fcc.gov/oet/rfsafety) gives directions for
locating the FCC identification number on your phone so you can find your
phone’s RF exposure level in the online listing.
8. What has FDA done to measure the radiofrequency en-ergy coming from
wireless phones ?
The Institute of Electrical and Electronic Engineers (IEEE) is developing a technical
standard for measuring the radiofrequency energy (RF) exposure from wireless
phones and other wireless handsets with the participation and leader-ship of FDA
scientists and engineers. The standard, “Recom-mended Practice for Determining
the Spatial-Peak Specific Absorption Rate (SAR) in the Human Body Due to
Wireless Communications Devices: Experimental Techniques,” sets forth the first
consistent test methodology for measuring the rate at which RF is deposited in the
heads of wireless phone users. The test method uses a tissue-simulating model of
the human head. Standardized SAR test methodology is expected to greatly
improve the consistency of measurements made at different laboratories on the
same phone. SAR is the mea-surement of the amount of energy absorbed in
tissue, either by the whole body or a small part of the body. It is measured in
watts/kg (or milliwatts/g) of matter. This measurement is used to determine
whether a wireless phone complies with safety guidelines.
9. What steps can I take to reduce my exposure to radiofrequency energy
from my wireless phone?
If there is a risk from these products—and at this point we do not know that there
is—it is probably very small. But if you are concerned about avoiding even
potential risks, you can take a few simple steps to minimize your exposure to
radiofrequency energy (RF). Since time is a key factor in how much exposure a
person receives, reducing the amount of time spent using a wireless phone will
reduce RF exposure.
• If you must conduct extended conversations by wireless phone every day, you
could place more distance between your body and the source of the RF, since
the exposure level drops off dramatically with distance. For example, you could
use a headset and carry the wireless phone away from your body or use a
wireless phone connected to a remote an-tenna.
PROTECT YOUR WARRANTY 12 MONTHS LIMITED WARRANTY
C
H
8
127
C
H
8
126
Read your Warranty carefully, with the special consider-ation to
paragraph seven of the Limited Warranty for your unit.
“Warranty does not apply to... or to any product or part
there of which has suffered through alteration...
mishanding misuse, neglect or accident”.
Many companies are making look alike accessories and in some
cases, promoting that their product is equal to or better than the
product Be careful. Some of these products may not be compatible
to use with your prod-uct and may damage the unit or cause it to
malfunction.
It service is required on your unit and it is determined that a non-
Hyundai accessory has created the problem with your unit the
Warranty with not apply. In addition if the unit has already suffered
irreversible damage by rea-son of a non-compatible accessory the
Warranty will be voided. To protect your Warranty use only
compatible accessories which cannot damage or interfere with the
functioning of your product.
HYUNDAI HELP LINE : 1800 224 537
HYUNDAI COMMUNICATIONS CORP. (the Company). war-rants
to the original retail purchaser of this HYUNDAI Portable Cellular
Telephone, that should this product or any part there of (except the
items listed below), under normal use and condi-tions, be proven
defective in material or workmanship within the first twelve (12)
month period from the date of purchase, such defect(s) will be
repaired or replaced (with new or rebuilt parts) at the Company’s
option, without charge for parts or labor directly related to the
defect(s).
The accessories consisting of antenna, rechargeable battery pack
and mains charger have a six (6) months warranty from original
purchase date.
This Warranty does not apply to batteries, fuses, or costs incurred
for testing or checking, or to any product or part here-of which has
suffered through alteration, serial number deface-ment, improper
installation, excessive temperature or humidity, environmental
conditions, mishandling misuse, neglect or acci-dent. This Warranty
is not assignable or transferable.
To obtain repairs or replacement within the terms of this Warranty,
the product should be delivered with proof of warranty coverage
and specification of defect(s) to the nearest Authorised Service
Centre.
HYUNDAI Help Line : 1800 224 537
THE EXTENT OF THE COMPANY’S LIABILITY UNDER THIS
WARRANTY IS LIMITED TO THE REPAIR OR REPLACE-MENT
PROVIDED ABOVE AND, IN NO EVENT, SHALL THE COMPANY’S
LIABILITY EXCEED THE PURCHASE PRICE PAID BY PURCHASER
FOR THE PRODUCT.
The Company disclaims liablity for geographic coverage, inade-
quates signal to antenna, communications range or operation of
the Cellular System as a whole.
For your nearest Authorised Service Centre please contact Hyundai
Customer Service on 1 800 224 537 (Australia only) or visit our
website www.curitel.com.
129
MEMO12 MONTHS LIMITED WARRANTY
C
H
8
128
ANY IMPLIED WARRANTIES, INCLUDING ANY IMPLIED WARRANTY
OF MERCHANTABILITY SHALL BE LIMITED TO THE DURATION OF
THIS WRITTEN WARRANTY. ANY ACTION FOR BREACH OF ANY
WARRANTY HEREUNDER INCLUDING ANY IMPLIED WARRANTY
OF MECHANTABILITY MUST BE BROUGHT WITHIN A PERIOD OF
24 MONTHS FROM DATE OF ORIGINAL PURCHASE IN NO CASE
SHALL THE COMPANY BE LIABLE FOR ANY CONSEQUENTIAL OR
INCIDENTAL DAMAGES FOR BREACH OF THIS OR ANY OTHER
WARRANTY, EXPRESS OR IMPLIED, WHATSOEVER.
No person or representative is authorized to assume for the Company
any liability other than expressed herein in connection with the sale of
this product.
Some states do not allow limitations on how long an implied warranty
lasts or the exclusion or limitation of incidental or consaquential
damage so the above limitation or exclusions may not apply to you.
This Warranty gives you specific legal rights, and you may also have
other rigths which vary from state to state.
HYUNDAI Help Line : 1800 224 537
C
H
8
131
MEMO
130
MEMO
C
H
8
C
H
8
132
MEMO
C
H
8
1

Hulp nodig? Stel uw vraag in het forum

Spelregels

Misbruik melden

Gebruikershandleiding.com neemt misbruik van zijn services uitermate serieus. U kunt hieronder aangeven waarom deze vraag ongepast is. Wij controleren de vraag en zonodig wordt deze verwijderd.

Product:

Bijvoorbeeld antisemitische inhoud, racistische inhoud, of materiaal dat gewelddadige fysieke handelingen tot gevolg kan hebben.

Bijvoorbeeld een creditcardnummer, een persoonlijk identificatienummer, of een geheim adres. E-mailadressen en volledige namen worden niet als privégegevens beschouwd.

Spelregels forum

Om tot zinvolle vragen te komen hanteren wij de volgende spelregels:

Belangrijk! Als er een antwoord wordt gegeven op uw vraag, dan is het voor de gever van het antwoord nuttig om te weten als u er wel (of niet) mee geholpen bent! Wij vragen u dus ook te reageren op een antwoord.

Belangrijk! Antwoorden worden ook per e-mail naar abonnees gestuurd. Laat uw emailadres achter op deze site, zodat u op de hoogte blijft. U krijgt dan ook andere vragen en antwoorden te zien.

Abonneren

Abonneer u voor het ontvangen van emails voor uw Pantech TX95C bij:


U ontvangt een email met instructies om u voor één of beide opties in te schrijven.


Ontvang uw handleiding per email

Vul uw emailadres in en ontvang de handleiding van Pantech TX95C in de taal/talen: Engels als bijlage per email.

De handleiding is 3,8 mb groot.


U ontvangt de handleiding per email binnen enkele minuten. Als u geen email heeft ontvangen, dan heeft u waarschijnlijk een verkeerd emailadres ingevuld of is uw mailbox te vol. Daarnaast kan het zijn dat uw internetprovider een maximum heeft aan de grootte per email. Omdat hier een handleiding wordt meegestuurd, kan het voorkomen dat de email groter is dan toegestaan bij uw provider.

Stel vragen via chat aan uw handleiding

Stel uw vraag over deze PDF

Uw handleiding is per email verstuurd. Controleer uw email

Als u niet binnen een kwartier uw email met handleiding ontvangen heeft, kan het zijn dat u een verkeerd emailadres heeft ingevuld of dat uw emailprovider een maximum grootte per email heeft ingesteld die kleiner is dan de grootte van de handleiding.

Er is een email naar u verstuurd om uw inschrijving definitief te maken.

Controleer uw email en volg de aanwijzingen op om uw inschrijving definitief te maken

U heeft geen emailadres opgegeven

Als u de handleiding per email wilt ontvangen, vul dan een geldig emailadres in.

Uw vraag is op deze pagina toegevoegd

Wilt u een email ontvangen bij een antwoord en/of nieuwe vragen? Vul dan hier uw emailadres in.


Info