22
23
Advanced OperationsAdvanced Operations
Advanced Operations
RQT5900 RQT5900
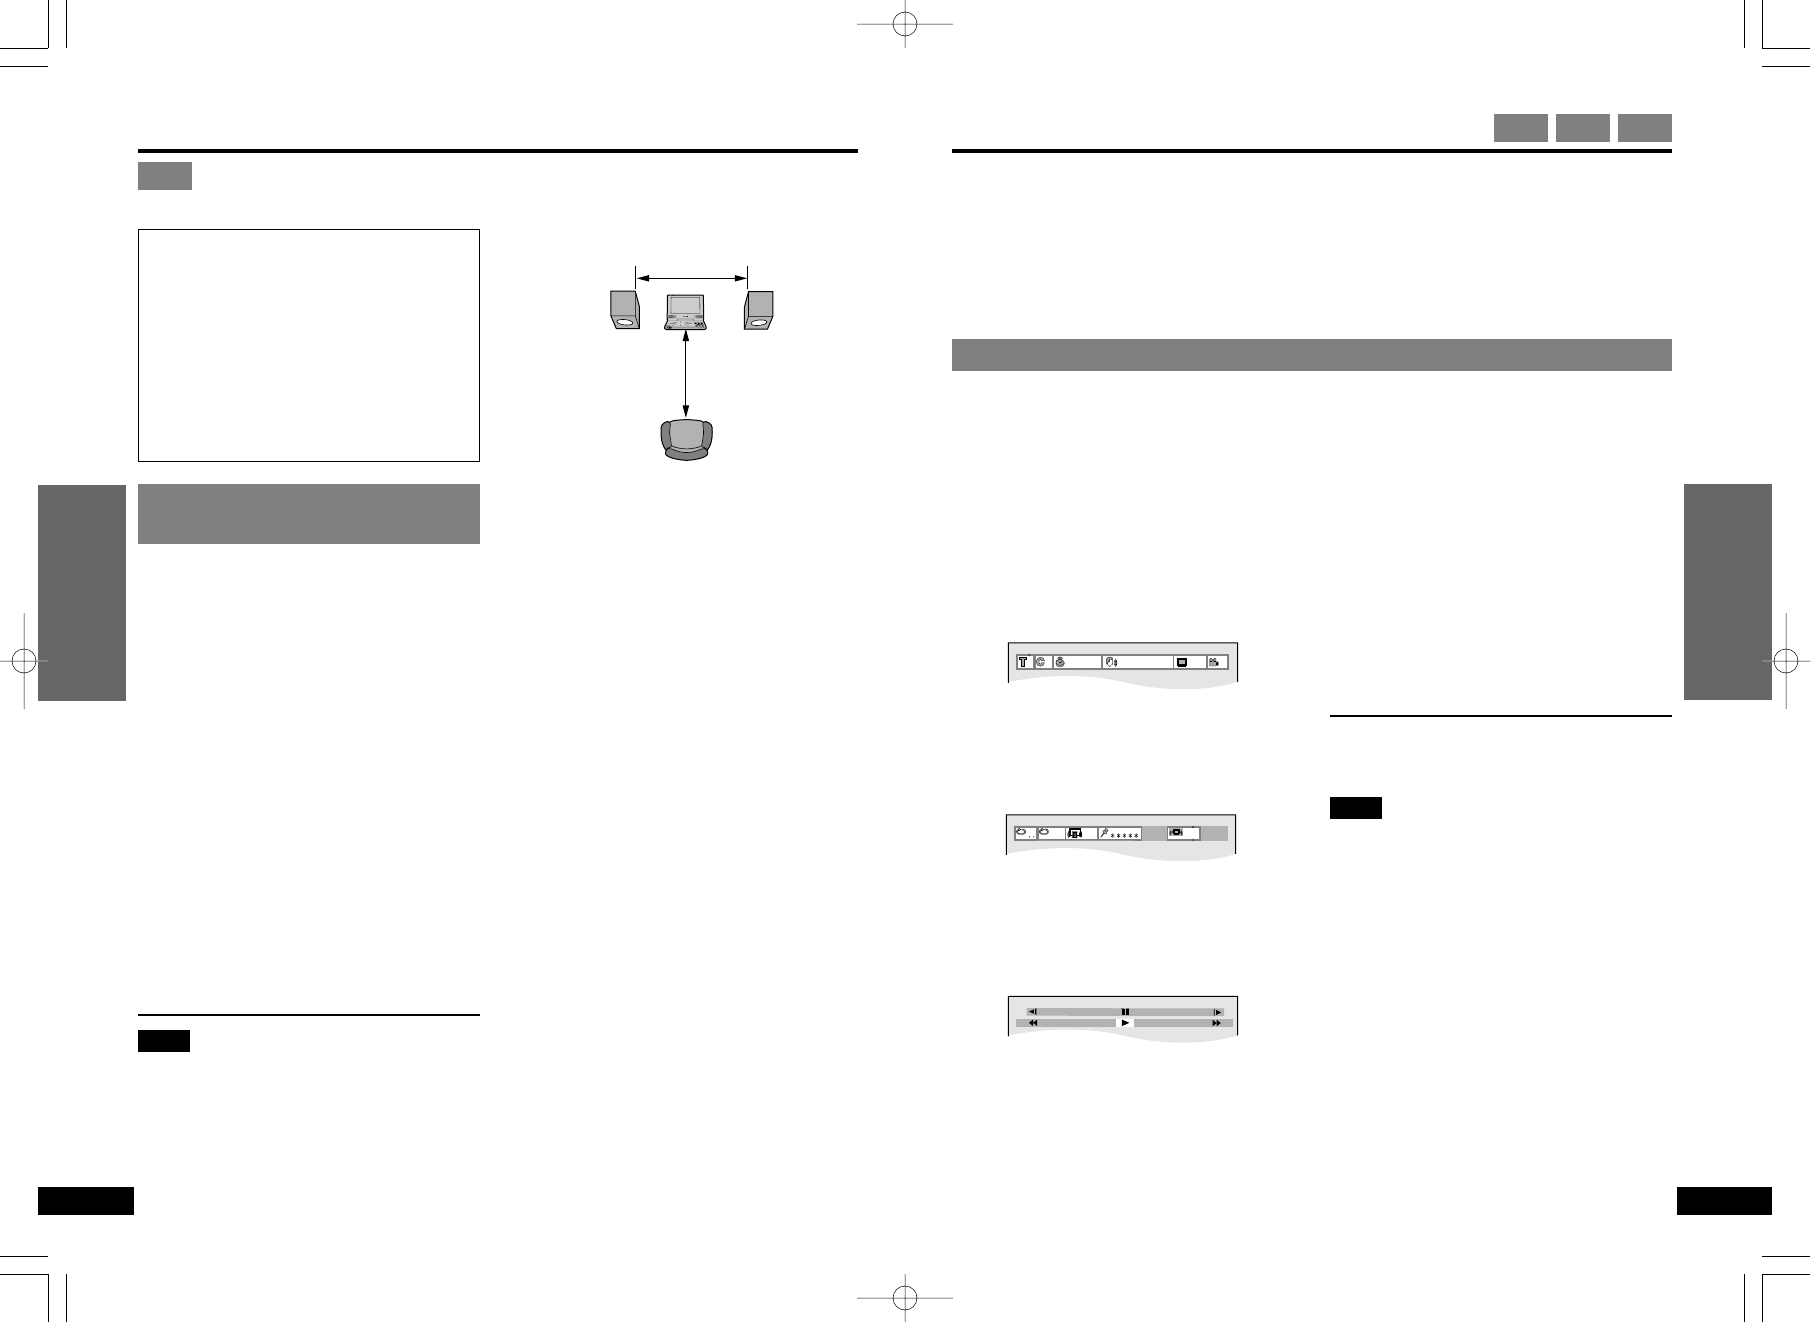
Enjoying Virtual Surround Sound (V.S.S.)
DVD
Enjoying surround effects
through 2 speakers
The speakers on this unit will not produce
any discernible effect. Speakers must be
connected to enjoy this feature. Ensure
surround effects on connected equipment
are off.
During play
Press [V.S.S.] to select the V.S.S.
level.
The level changes each time you press the
button. The level is shown on the unit’s dis-
play.
1 (Natural effect)>2 (Emphasized
e effect)
{ ------ OFF (Cancel)( ---}
≥You can also use the GUI screens to per-
form this operation.
≥(➡ page 25, “V.S.S. level”)
Note
≥V.S.S. will not work, or will have less ef-
fect, with some discs.
≥V.S.S. may cause distortion with some
discs. Turn V.S.S. off if this occurs.
To get the most from V.S.S.
(Dolby Digital, 2 or more channels)
Virtual Surround Sound
V.S.S. adds breadth to sound, allowing
you to enjoy a surround-like effect even
if you are using only 2 front speakers.
If the disc has surround signals
recorded on it
As well as enjoying sound with more
breadth, surround sound will also seem
to come from non-existent speakers.
Using GUI screens
GUI: Graphic User Interface
GUI screens are menus that contain information about the disc or unit. These menus allow
you to perform operations by changing this information.
∫ Operations available only with GUI screens
Time, A-B repeat play, Repeat play, Dialogue Enhancer, Marker
(For details, ➡ pages 24 and 25)
Basic operation
While stopped or playing
1 Press [DISPLAY] to select the
GUI screens.
The screen changes each time you
press the button.
Example: DVDs
[)Screen for disc information:
l (➡ page 24)
l You can change items like the track or
l chapter and audio.
l
l
l
l;
l Screen for unit information:
l (➡ page 25)
l You can start repeat play or mark parts
l you want to play again.
l
l
l
l;
l Shuttle screen:
l (➡ page 26)
l You can fast forward, rewind, or start
l slow motion play.
l
l
l
l;
{----GUI screens cleared
2 Use the cursor jockey [3, 4, 2,
1] to select the item.
The item is highlighted in yellow.
3 Use the cursor jockey [3, 4] to
change the setting.
≥Step 3 is not necessary when using
the shuttle screen.
≥If numbers are used, you can change
with the numeric buttons.
≥If the change doesn’t take effect,
press [ENTER] or [1].
∫ To clear the on-screen display
Press [RETURN] or [CANCEL].
Note
≥If part of the GUI screens is cut off or fails
to appear, go to the initial settings menu
to change the position of On-Screen
Messages. The colour of the GUI screens
can also be changed (➡ page 30, “4 On-
Screen Messages”).
≥Items displayed depend on how the disc
is being played and the type of disc.
≥Functions that can be operated depend
on how the disc is being played and the
type of disc.
≥Some items can not be changed while the
disc is stopped.
≥“#, $” around the on-screen icon means
that the item can be changed using the
cursor jockey [3, 4].