645199
4
Verklein
Vergroot
Pagina terug
1/80
Pagina verder
Operating Instructions
Link-to-Cell Cellular Convergence Solution
Model shown is KX-TG7622.
Model No. KX-TG7652AZ
KX-TG7653AZ
Before initial use, see “Getting
Started” on page 9.
Thank you for purchasing a Panasonic product.
Please read these operating instructions before using the unit and save
them for future reference.
This unit is compatible with Caller ID. You must subscribe to the appropriate
service offered by your service provider/telephone company.
To use this unit in your country, first change the unit’s region setting
to match your country (page 38).
Please access our online customer survey:
http://panasonic.net/pcc/tel/q
TG765xAZ(en)_1215_ver001-2.pdf 1 2011/12/15 14:29:32
Introduction
Model composition ..............................3
Accessory information .........................3
Important Information
For your safety ....................................5
Important safety instructions ...............6
For best performance ..........................7
Other information ................................7
Specifications ......................................7
Getting Started
Setting up ............................................9
Note when setting up ........................10
Intelligent eco mode ..........................11
Controls .............................................12
Initial settings ....................................15
Link to Cell
Link to cell feature .............................16
Registering a cellular phone .............16
Link to cell settings ............................17
Making/Answering Calls
Making cellular calls ..........................21
Making landline calls .........................21
Answering calls .................................22
Useful features during a call .............23
Shared Phonebook
Shared phonebook ............................26
Programming
Programmable settings .....................29
Special programming ........................36
Registering a unit ..............................38
Caller ID Service
Using Caller ID service ......................40
Caller list ...........................................42
Using Bluetooth Devices
Copying phonebook from a cellular
phone (phonebook transfer) ..............45
Using a Bluetooth wireless headset
(optional) for landline calls ................46
Answering System for
Landline
Answering system for landline ..........48
Turning the answering system on/
off ......................................................48
Greeting message .............................49
Listening to messages using the base
unit ....................................................49
Listening to messages using the
handset .............................................50
Remote operation .............................51
Answering system settings ...............52
Voice mail Service for
Landline
Voice mail service for landline ..........54
Intercom/Locator
Intercom ............................................56
Handset locator .................................56
Transferring calls, conference
calls ...................................................56
DECT repeater
Installation for DECT repeater ..........57
Useful Information
Wall mounting ...................................60
Error messages .................................63
Troubleshooting ................................64
Warranty (for New Zealand) ..............75
Index
Index..................................................76
2
Table of Contents
TG765xAZ(en)_1215_ver001-2.pdf 2 2011/12/15 14:29:32
Model composition
Series Model No.
Base unit Handset
Part No. Part No. Quantity
KX-TG7651 series KX-TG7652 KX-TG7621 KX-TGA410 2
KX-TG7653 KX-TG7621 KX-TGA410 3
R The suffix (AZ) in the following model numbers will be omitted in these instructions:
KX-TG7652AZ/KX-TG7653AZ
Accessory information
Supplied accessories
No. Accessory item/Part number
Quantity
KX-TG7652 KX-TG7653
A AC adaptor for base unit and charger/
PNLV226AL
2 3
B
Telephone line cord (for Australia)
*1
1 1
C Telephone line cord (for New Zealand) 1 1
D
Rechargeable batteries
*2
4 6
E
Handset cover
*3
2 3
F Charger 1 2
G Wall mounting adaptor 1 1
H DECT repeater 1 1
I AC adaptor for DECT repeater/
PQLV219AL
1 1
*1 The telephone line cord comes connected with the telephone plug.
*2 See page 4 for replacement battery information.
*3 The handset cover comes attached to the handset.
AI B C D
E F G
3
Introduction
TG765xAZ(en)_1215_ver001-2.pdf 3 2011/12/15 14:29:32
Additional/replacement accessories
Please contact your nearest Panasonic dealer for sales information.
Accessory item Order number
Rechargeable
batteries
HHR-4MRT/2B
*1
Battery type:
Nickel metal hydride (Ni-MH)
2 x AAA (R03) size for each handset
*1 Replacement batteries may have a different capacity from that of the supplied
batteries.
Expanding your phone system
Handset (optional): KX-TGA410AZ
You can expand your phone system by
registering optional handsets (6 max.) to
a single base unit.
R Optional handsets may be a different
colour from that of the supplied
handsets.
Bluetooth
®
devices
You can expand your phone system by registering the following units to a single
base unit.
Your Bluetooth cellular phone
*1
: 2 max.
(for cellular calls: page 16)
Your Bluetooth headset
*1
: 1 max.
(for a wireless hands-free conversation: page 46)
*1 Your cellular phone and headset must be Bluetooth wireless technology
compatible.
4
Introduction
TG765xAZ(en)_1215_ver001-2.pdf 4 2011/12/15 14:29:32
For your safety
To prevent severe injury and loss of life/
property, read this section carefully before
using the product to ensure proper and safe
operation of your product.
WARNING
Power connection
R Use only the power source marked on the
product.
R Do not overload power outlets and
extension cords. This can result in the risk
of fire or electric shock.
R Completely insert the AC adaptor/power
plug into the power outlet. Failure to do so
may cause electric shock and/or excessive
heat resulting in a fire.
R Regularly remove any dust, etc. from the
AC adaptor/power plug by pulling it from
the power outlet, then wiping with a dry
cloth. Accumulated dust may cause an
insulation defect from moisture, etc.
resulting in a fire.
R Unplug the product from power outlets if it
emits smoke, an abnormal smell, or makes
an unusual noise. These conditions can
cause fire or electric shock. Confirm that
smoke has stopped emitting and contact an
authorised service centre.
R Unplug from power outlets and never touch
the inside of the product if its casing has
been broken open.
R Never touch the plug with wet hands.
Danger of electric shock exists.
Installation
R To prevent the risk of fire or electrical
shock, do not expose the product to rain or
any type of moisture.
R Do not place or use this product near
automatically controlled devices such as
automatic doors and fire alarms. Radio
waves emitted from this product may cause
such devices to malfunction resulting in an
accident.
R Do not allow the AC adaptor or telephone
line cord to be excessively pulled, bent or
placed under heavy objects.
R It is advised not to use the equipment at a
refuelling point. Users are reminded to
observe restrictions on the use of radio
equipment in fuel depots, chemical plants
or where blasting operations are in
progress.
Operating safeguards
R Unplug the product from power outlets
before cleaning. Do not use liquid or
aerosol cleaners.
R Do not disassemble the product.
R Do not spill liquids (detergents, cleansers,
etc.) onto the telephone line cord plug, or
allow it to become wet at all. This may
cause a fire. If the telephone line cord plug
becomes wet, immediately pull it from the
telephone wall socket, and do not use.
Medical
R Consult the manufacturer of any personal
medical devices, such as pacemakers or
hearing aids, to determine if they are
adequately shielded from external RF
(radio frequency) energy. (The product
operates in the frequency range of
1.88 GHz to 1.90 GHz, and the RF
transmission power is 115 mW (max.).)
R Do not use the product in health care
facilities if any regulations posted in the
area instruct you not to do so. Hospitals or
health care facilities may be using
equipment that could be sensitive to
external RF energy.
CAUTION
Installation and location
R Never install telephone wiring during an
electrical storm.
R Never install telephone line sockets in wet
locations unless the socket is specifically
designed for wet locations.
R Never touch uninsulated telephone wires or
terminals unless the telephone line has
been disconnected at the network interface.
R Use caution when installing or modifying
telephone lines.
R The AC adaptor is used as the main
disconnect device. Ensure that the AC
outlet is installed near the product and is
easily accessible.
R This product is unable to make calls when:
the handset batteries need recharging or
have failed.
there is a power failure.
Battery
R We recommend using the batteries noted
on page 4. USE ONLY rechargeable
Ni-MH batteries AAA (R03) size.
R Do not mix old and new batteries.
5
Important Information
TG765xAZ(en)_1215_ver001-2.pdf 5 2011/12/15 14:29:32
R Do not open or mutilate the batteries.
Released electrolyte from the batteries is
corrosive and may cause burns or injury to
the eyes or skin. The electrolyte is toxic and
may be harmful if swallowed.
R Exercise care when handling the batteries.
Do not allow conductive materials such as
rings, bracelets, or keys to touch the
batteries, otherwise a short circuit may
cause the batteries and/or the conductive
material to overheat and cause burns.
R Charge the batteries provided with or
identified for use with this product only, in
accordance with the instructions and
limitations specified in this manual.
R Only use a compatible base unit (or
charger) to charge the batteries. Do not
tamper with the base unit (or charger).
Failure to follow these instructions may
cause the batteries to swell or explode.
General notices
R This equipment will be inoperable when
mains power fails.
R When a failure occurs which results in the
internal parts becoming accessible,
disconnect the power supply cord
immediately and return this unit to an
authorised service centre.
R To minimise the possibility of lightning
damage, when you know that a
thunderstorm is coming, we recommend
that you:
Unplug the telephone line cord from the
phone socket.
Unplug the AC adaptor from the AC
power outlet.
R No “000” (for Australia), “111” (for New
Zealand), and/or other calls can be made
from this device during a mains power
failure.
R The earpiece on the handset is magnetised
and may retain small metallic objects.
Important notice:
R Under power failure conditions, this
telephone may not operate. Please ensure
that a separate telephone, not dependent
on local power, is available for emergency
use.
For New Zealand
R Disconnect the telecom connection before
disconnecting the power connection prior to
relocating the equipment, and reconnect
the power first.
R This equipment shall not be set to make
automatic calls to the Telecom “111
Emergency Service.
R The unit’s answering system only responds
to Distinctive Alert cadence(s) DA1 and
DA3.
R Not all telephones will respond to incoming
ringing when connected to the extension
socket.
R This equipment may not provide for the
effective hand-over of a call to another
device connected to the same line.
R The grant of a Telepermit for any item of
terminal equipment indicates only that
Telecom has accepted that the item
complies with minimum conditions for
connection to its network. It indicates no
endorsement of the product by Telecom,
nor does it provide any sort of warranty.
Above all, it provides no assurance that any
item will work correctly in all respects with
another item of Telepermitted equipment of
a different make or model, nor does it imply
that any product is compatible with all of
Telecom’s network services.
Important safety
instructions
When using your product, basic safety
precautions should always be followed to
reduce the risk of fire, electric shock, and
injury to persons, including the following:
1. Do not use this product near water for
example, near a bathtub, washbowl,
kitchen sink, or laundry tub, in a wet
basement or near a swimming pool.
2. Avoid using a telephone (including a
cordless type) during an electrical storm.
There may be a remote risk of electric
shock from lightning.
3. Do not use the telephone to report a gas
leak in the vicinity of the leak.
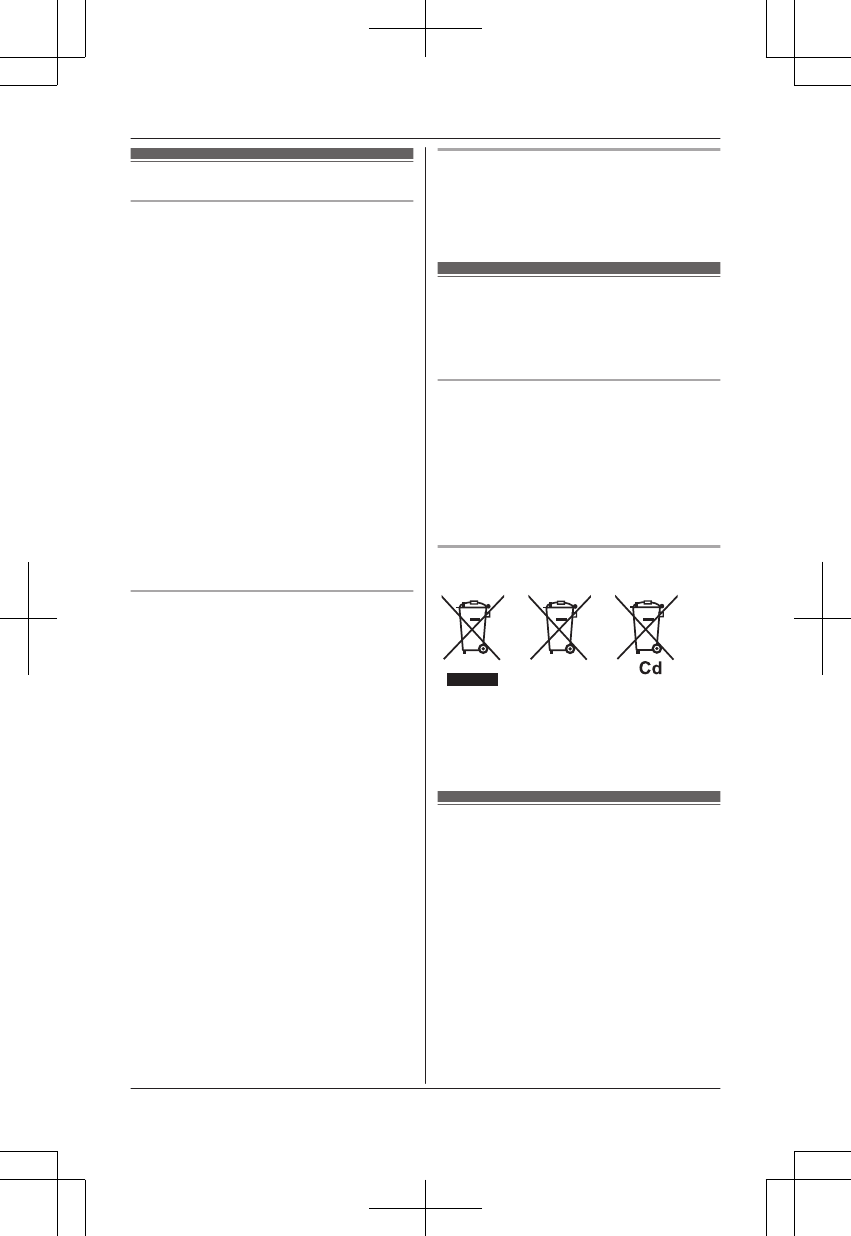
4. Use only the power cord and batteries
indicated in this manual. Do not dispose of
batteries in a fire. They may explode.
Check with local codes for possible special
disposal instructions.
SAVE THESE INSTRUCTIONS
6
Important Information
TG765xAZ(en)_1215_ver001-2.pdf 6 2011/12/15 14:29:32
For best performance
Base unit location/avoiding noise
The base unit and other compatible Panasonic
units use radio waves to communicate with
each other.
R For maximum coverage and noise-free
communications, place your base unit:
at a convenient, high, and central
location with no obstructions between
the handset and base unit in an indoor
environment.
away from electronic appliances such as
TVs, radios, personal computers,
wireless devices, or other phones.
facing away from radio frequency
transmitters, such as external antennas
of mobile phone cell stations. (Avoid
putting the base unit on a bay window or
near a window.)
R Coverage and voice quality depends on the
local environmental conditions.
R If the reception for a base unit location is
not satisfactory, move the base unit to
another location for better reception.
Environment
R Keep the product away from electrical noise
generating devices, such as fluorescent
lamps and motors.
R The product should be kept free from
excessive smoke, dust, high temperature,
and vibration.
R The product should not be exposed to
direct sunlight.
R Do not place heavy objects on top of the
product.
R When you leave the product unused for a
long period of time, unplug the product from
the power outlet.
R The product should be kept away from heat
sources such as heaters, kitchen stoves,
etc. It should not be placed in rooms where
the temperature is less than 0 °C or greater
than 40 °C. Damp basements should also
be avoided.
R The maximum calling distance may be
shortened when the product is used in the
following places: Near obstacles such as
hills, tunnels, underground, near metal
objects such as wire fences, etc.
R Operating the product near electrical
appliances may cause interference. Move
away from the electrical appliances.
Routine care
R Wipe the outer surface of the product
with a soft moist cloth.
R Do not use benzine, thinner, or any
abrasive powder.
Other information
CAUTION: Risk of explosion if battery is
replaced by an incorrect type. Dispose of used
batteries according to the instructions.
Notice for product disposal, transfer, or
return
R This product can store your private/
confidential information. To protect your
privacy/confidentiality, we recommend that
you erase information such as phonebook
or caller list entries from the memory before
you dispose of, transfer, or return the
product.
Information on Disposal in other Countries
outside the European Union
These symbols are only valid in the European
Union. If you wish to discard these items,
please contact your local authorities or dealer
and ask for the correct method of disposal.
Specifications
n Standard:
Bluetooth wireless technology 2.0
n Frequency range:
1.88 GHz to 1.90 GHz (DECT)
2.402 GHz to 2.48 GHz (Bluetooth)
n RF transmission power:
115 mW (max.)
n Power source:
220-240 V AC, 50/60 Hz
7
Important Information
TG765xAZ(en)_1215_ver001-2.pdf 7 2011/12/15 14:29:32
n Power consumption:
Base unit:
Standby: Approx. 1.5 W
Maximum: Approx. 4.8 W
Charger:
Standby: Approx. 0.1 W
Maximum: Approx. 2.0 W
DECT repeater:
Standby: Approx. 1.0 W
Maximum: Approx. 1.8 W
n Operating conditions:
0 °C – 40 °C, 20 % – 80 % relative air
humidity (dry)
Note:
R Design and specifications are subject to
change without notice.
R The illustrations in these instructions may
vary slightly from the actual product.
8
Important Information
TG765xAZ(en)_1215_ver001-2.pdf 8 2011/12/15 14:29:32
Setting up
Connections
R Use only the supplied Panasonic AC
adaptor PNLV226AL.
R If you do not connect the telephone
line cord and use only cellular lines,
set the cellular line only mode to use
this unit more conveniently
(page 18).
n Base unit (for Australia)
Hook
Hooks
“Click”
Press plug
firmly.
(220-240 V AC,
50/60 Hz)
Correct Wrong
To socket
DSL/ADSL filter*
“Click”
*DSL/ADSL filter (not supplied) is
required if you have DSL/ADSL service.
n Base unit (for New Zealand)
To single-line
telephone socket
DSL/ADSL filter*
“Click”
Hook
Hooks
“Click”
Press plug
firmly.
(220-240 V AC,
50/60 Hz)
Correct Wrong
*DSL/ADSL filter (not supplied) is
required if you have DSL/ADSL service.
n Charger
(220-240 V AC,
50/60 Hz)
Hooks
9
Getting Started
TG765xAZ(en)_1215_ver001-2.pdf 9 2011/12/15 14:29:32
Battery installation
R USE ONLY Ni-MH batteries AAA
(R03) size.
R Do NOT use Alkaline/Manganese/
Ni-Cd batteries.
R Confirm correct polarities (
, ).
Rechargeable Ni-MH ONLY
R When the region setting is
displayed, see page 38.
Battery charging
Charge for about 7 hours.
R When the batteries are fully charged,
the charge indicator goes off and
Fully charged is displayed.
Confirm "Charging" is displayed.
Charge indicator
Note when setting up
Note for connections
R The AC adaptor must remain
connected at all times. (It is normal for
the adaptor to feel warm during use.)
R The AC adaptor should be connected
to a vertically oriented or
floor-mounted AC outlet. Do not
connect the AC adaptor to a
ceiling-mounted AC outlet, as the
weight of the adaptor may cause it to
become disconnected.
R The unit is not designed to be used
with rotary/pulse dialling services.
R The unit’s answering system will not
answer incoming calls on your
FaxAbility number. (for New Zealand)
During a power failure
The unit will not work during a power
failure. We recommend connecting a
corded-type telephone (without AC
adaptor) to the same telephone line or to
10
Getting Started
TG765xAZ(en)_1215_ver001-2.pdf 10 2011/12/15 14:29:32
the same telephone line socket using a
telephone double adaptor (for Australia)/
a BT double adaptor (for New Zealand).
Note for battery installation
R Use the supplied rechargeable
batteries. For replacement, we
recommend using the Panasonic
rechargeable batteries noted on
page 4, 5.
R Wipe the battery ends (
, ) with a
dry cloth.
R Avoid touching the battery ends (
,
) or the unit contacts.
Note for battery charging
R It is normal for the handset to feel
warm during charging.
R Clean the charge contacts of the
handset, base unit, and charger with a
soft and dry cloth once a month.
Clean more often if the unit is
exposed to grease, dust, or high
humidity.
Battery level
Icon Battery level
High
Medium
Low
Needs charging.
Empty
Panasonic Ni-MH battery
performance (supplied batteries)
Operation Operating time
In continuous use
13 hours max.
*1
Not in use
(standby)
11 days max.
*1
*1 If Eco mode is on.
Note:
R Actual battery performance depends
on usage and ambient environment.
R Even after the batteries are fully
charged, the handset can be left on
the base unit or charger without any ill
effect on the batteries.
R The battery level may not be
displayed correctly after you replace
the batteries. In this case, place the
handset on the base unit or charger
and let it charge for at least 7 hours.
Intelligent eco mode
This feature automatically reduces
handset power consumption by
suppressing handset transmission
power when the handset is close to the
base unit.
R When this feature is activated,
is
displayed. However, during a cellular
call,
is not displayed even though
this feature is activated.
11
Getting Started
TG765xAZ(en)_1215_ver001-2.pdf 11 2011/12/15 14:29:32
Controls
Base unit
A CB E FD
G H I LJ K
Charge contacts
HEADSET indicator
Speaker
Message counter
CELL 1 indicator
CELL 2 indicator
MERASEN
MnN (STOP)
MjN/MkN (Volume up/down)
M N/M N (Repeat/Skip)
M N (PLAY)
Message indicator
MLOCATORN
MANSWER ON/OFFN
ANSWER ON/OFF indicator
Handset
B C
L
A
F
D
E
I
J
H
G
K
A
B
Charge indicator
Ringer indicator
Message indicator
Nonslip pad
R Nonslip pad offers support when
you cradle the handset between
your shoulder and ear.
Speaker
M N (TALK)
M N (SP-PHONE: Speakerphone)
Dial keypad
Receiver
Display
MOFFN
MRECALLN MCALL WAITN
12
Getting Started
TG765xAZ(en)_1215_ver001-2.pdf 12 2011/12/15 14:29:33
Microphone
Charge contacts
n Control type
Soft keys
The handset features 3 soft keys. By
pressing a soft key, you can select
the feature shown directly above it on
the display.
Navigator key
MDN, MCN, MFN, or MEN: Scroll
through various lists and items.
VOL. (Volume: MDN or MCN):
Adjust the receiver or speaker
volume while talking.
MFN CID (Caller ID): View the
caller list.
MEN REDIAL: View the redial list.
Display/Indicators
Handset display items
Item Meaning
Within base unit range
Out of base unit range
The landline is in use.
R When flashing:
The call is put on hold.
R When flashing rapidly:
An incoming call is now
being received.
A cellular line is in use.
R When flashing:
The cellular call is put on
hold.
R When flashing rapidly:
A cellular call is being
received.
Item Meaning
1
A cellular phone is
connected.
*1
Ready to
make/receive cellular calls.
R When turned off:
A cellular phone is not
connected to the base
unit (page 18).
The cellular line is
selected for the ringer
setting.
A cellular call is being
received on that line.
Eco mode is on.
*2
(page 11)
Equalizer is set.
(page 23)
Speakerphone is on.
(page 21)
Ringer volume is off.
*3
(page 31, 33)
Night mode is on.
(page 36)
Privacy mode is on.
(Page 24)
Alarm is on. (page 36)
Handset number
Battery level
Blocked call (page 37)
In use
Answering system is being
used by another handset
or the base unit.
Cell1
in use
Someone is using the
cellular line.
Cell2
in use
Line
in use
Someone is using the
landline.
*1 Corresponding cellular line(s) is
indicated next to the item.
13
Getting Started
TG765xAZ(en)_1215_ver001-2.pdf 13 2011/12/15 14:29:33
*2 During a cellular call, the item is not
displayed even though the feature is
activated.
*3 Corresponding lines (1, 2: cellular
line, L: landline) are indicated next to
the item. If all lines are turned off, no
line is indicated.
Base unit display item
Item Meaning
Answering system
answers calls with a
greeting message and
caller messages are not
recorded. (“Selecting
Greeting only”,
page 53)
CELL 1/CELL 2 indicators on the
base unit
The CELL 1/CELL 2 indicators show
each cellular line status.
Status Meaning
Green
(On)
A cellular phone is
connected. Ready to
make/receive cellular calls.
Green
(Flashing)
The cellular line is in
use.
Phonebook entries are
being copied from a
cellular phone
(page 45).
Green
(Flashing
rapidly)
A cellular call is being
received.
Amber
(On)
A cellular phone is not
connected to the base unit
(page 18).
Amber
(Flashing
rapidly)
The base unit is searching
for the registered cellular
phone.
Status Meaning
Red
(Flashing)
The base unit is
registering a cellular
phone.
A cellular call is put on
hold.
Light off A cellular phone is not
registered to the base unit.
HEADSET indicator on the base unit
The HEADSET indicator shows the
Bluetooth headset status.
Status Meaning
Green
(On)
A Bluetooth headset is
connected to the base
unit. Ready to use it.
Green
(Flashing)
A Bluetooth headset is in
use.
Green
(Flashing
rapidly)
A landline call is being
received.
Amber
(On)
The Bluetooth headset is
not connected to the base
unit.
Amber
(Flashing
rapidly)
The base unit is searching
for the registered
Bluetooth headset.
Red
(Flashing)
The base unit is
registering a headset.
Light off A Bluetooth headset is not
registered to the base unit.
14
Getting Started
TG765xAZ(en)_1215_ver001-2.pdf 14 2011/12/15 14:29:33
Initial settings
n Direct command code:
Programmable settings can be
accessed by pressing MMENUN, #
and then the corresponding code on
the dial keypad (page 29).
Example: Press MMENUN#101.
n Symbol meaning:
Symbol Meaning
Perform with the
handset.
Perform with the base
unit.
Example:
MbN:Off
Press MCN or MDN to
select the words in
quotations.
Date and time
1 MMENUN#101
2 Enter the current date, month, and
year by selecting 2 digits for each.
Example: 15 July, 2011
15 07 11
3 MOKN
4 Enter the current hour and minute
(12-hour clock format) by selecting 2
digits for each.
Example: 9:30
09 30
5 MAM/PMN: Select AM or PM.
6 MSAVEN a MOFFN
Note:
R The date and time may be incorrect
after a power failure. In this case, set
the date and time again.
15
Getting Started
TG765xAZ(en)_1215_ver001-2.pdf 15 2011/12/15 14:29:33
Link to cell feature
To use this feature, you must first
register and connect your cellular
phones to the base unit (page 16).
Your cellular phones must have
Bluetooth wireless technology that is
compatible with this product.
This feature allows you to:
make or answer cellular calls using
your home phone (handset or base
unit) with better reception.
maximise the benefits of cellular
services (such as free night and
weekend calls, or cellular to cellular
call plans) by utilising unused peak
minutes with your home phone.
conserve the battery power of your
cellular phone while the unit is on a
cellular call. (We recommend
charging your cellular phone during
the cellular call as your cellular phone
battery is being consumed.)
Important:
R Up to 2 cellular phones can be
registered. However, only one
Bluetooth device (cellular phone or
headset) can be connected to the
base unit at a time.
R Locate your cellular phone near the
base unit. If the cellular phone is too
close to the base unit during a cellular
call, you may hear noise. For best
performance, we recommend placing
the cellular phone between 0.6 m to
3 m away from the base unit.
Trademarks
R The Bluetooth
®
word mark and logos
are owned by the Bluetooth SIG, Inc.
and any use of such marks by
Panasonic Corporation is under
licence. All other trademarks identified
herein are the property of their
respective owners.
Registering a cellular
phone
Important:
R Before registering a Bluetooth
enabled cellular phone to the base
unit:
we recommend you change the
PIN (page 19).
make sure that no Bluetooth device
such as a Bluetooth headset is
connected to your cellular phone.
1 Handset:
MMENUN
For CELL 1: #6241
For CELL 2: #6242
R After the CELL 1 or CELL 2
indicator on the base unit starts
flashing red, the rest of the
procedure must be completed
within 5 minutes.
2 Your cellular phone:
While the CELL 1 or CELL 2
indicator is flashing red, follow the
instructions of your cellular phone to
enter the registration mode.
R Depending on your cellular
phone, it may ask you to enter the
base unit PIN (default: 0000).
3 Handset:
Wait until a long beep sounds.
R It may take more than 10 seconds
to complete registration.
R When the CELL 1 or CELL 2
indicator lights green, the cellular
phone is connected to the base
unit. You are ready to make
cellular calls.
4 To select which unit receives calls
for the cellular line, press MOKN then
continue from step 3, “Selecting
which unit receives cellular calls”,
page 17.
R If not required, go to step 5.
16
Link to Cell
TG765xAZ(en)_1215_ver001-2.pdf 16 2011/12/15 14:29:33
5 MOFFN
Note:
R Make sure that your cellular phone is
set to connect to this product
automatically. Refer to your cellular
phone’s operating instructions.
R Make sure you cancel your cellular
phone’s current registration if you
want to register it to the other line
(page 19).
Link to cell settings
Selecting which unit receives
cellular calls
You can select which unit rings and
receives calls for a cellular line. When
All is selected, all handsets and the
base unit ring.
1 MMENUN
2 For CELL 1: #6271
For CELL 2: #6272
3 MbN: Select the desired handset or
All.
4 MSAVEN a MOFFN
Note:
R When you select a specific handset to
receive calls for a cellular line, other
handsets cannot answer the calls.
R When you change the setting to
All, the base unit ringer volume
also returns to the lowest level even if
the ringer volume has been changed.
Ring as cell mode
Once this feature is turned on, the
handset and base unit ring using the
same ringer tone as your cellular phone.
The following settings are available:
Off: Turn this feature off to use the
ringer tones of the handset and base
unit. Caller information is announced
depending on the Talking Caller ID
setting (page 33).
On (with Talking CID)
(default): The handset and base unit
use your cellular phone’s ringer tone.
Caller information is announced even
if the Talking Caller ID is turned off.
On (without Talking CID):
The handset and base unit use your
cellular phone’s ringer tone. Caller
information is not announced even if
the Talking Caller ID is turned on.
Important:
R To use this feature, your cellular
phone must support Bluetooth in-band
ringtone. Refer to your cellular
phone’s operating instructions.
1 MMENUN
2 For CELL 1: #6141
For CELL 2: #6142
3 MbN: Select the desired setting.
4 MSAVEN a MOFFN
Note:
R The units use the preset ringer tones
(page 33) instead of your cellular
phone’s ringer tone when a cellular
call is being received if:
your cellular phone is in night mode
(depending on your cellular phone).
the base unit is in use.
2 handsets are sharing a landline
call.
R If your cellular phone is in night mode
with On (with Talking CID)
set, the unit announces caller
information even when Talking Caller
ID is turned off (page 33).
To use the handset ringer tone
instead of your cellular phone’s
ringer tone
Select Off in step 3, “Ring as cell
mode”, page 17.
17
Link to Cell
TG765xAZ(en)_1215_ver001-2.pdf 17 2011/12/15 14:29:33
To change the handset ringer tone for a
cellular line, see page 31.
Auto connection to the
cellular phone
After registration, your cellular phone is
connected to the base unit. If you move
the cellular phone out of base unit
range, the cellular phone is
disconnected from the base unit. This
feature allows the base unit to try to
reconnect the cellular phone at regular
intervals when it returns within base unit
range. You can set the interval. The
default setting is 1 min.
Important:
R When you are using a cellular line or
a Bluetooth headset, the base unit
loses its connection from other
Bluetooth devices (cellular phone or
headset). To automatically resume
the connection to cellular phones,
leave the auto connection on.
R Some cellular phones lose connection
after usage, please check the
specification of your cellular phone for
more details.
1 MMENUN#632
2 MbN: Select the desired setting.
3 MSAVEN a MOFFN
Note:
R Some cellular phone may ask you if
you accept the connection
requirement from the base unit. In that
case, select Off in step 2. Check
the specification of your cellular
phone.
Connecting/disconnecting the
cellular phone manually
When you make or answer calls with
your cellular phone, we recommend
disconnecting it from the base unit,
otherwise received audio may not be
heard on your cellular phone.
You can also manually reconnect the
cellular phone to the base unit without
waiting for the auto connection feature to
resume the connection.
1 MMENUN
2 To connect/disconnect:
For CELL 1: #6251
For CELL 2: #6252
R A long beep sounds.
3 MOFFN
Cellular line only mode (If you
do not use the landline)
If you do not use the landline, we
recommend setting the unit to the
cellular line only mode.
1 MMENUN#157
2 To turn on:
MbN: On a MSELECTN a
MbN: Yes a MSELECTN
To turn off:
MbN: Off a MSELECTN
Note:
R Once you set this mode, you can use
M
N or M N instead of MCELLN
(page 21).
R Once you set this mode, the following
features cannot be used:
Landline features (page 34)
Answering system (page 48)
Voice mail features (page 54)
R After this mode is turned on or off, the
base unit reboots.
Bluetooth connections from cellular
phones or headset are
disconnected. If the auto
connection is turned on (page 18),
the cellular phones are
reconnected.
will be displayed on the handset
momentarily. The handset can be
used once is displayed.
18
Link to Cell
TG765xAZ(en)_1215_ver001-2.pdf 18 2011/12/15 14:29:33
When you use the landline again
Before connecting the telephone line to
the base unit, select Off in step 2,
“Cellular line only mode (If you do not
use the landline)”, page 18.
Cellular line selection
This feature determines which cellular
line is selected to make cellular calls
when:
you press MCELLN on the handset.
you press M
N or M N on the
handset while the cellular line only
mode is turned on.
The following settings are available:
Manual (default): You can select
the desired cellular line when making
a call.
“Cellular phone 1”: CELL 1 is selected.
“Cellular phone 2”: CELL 2 is selected.
1 MMENUN#634
2 MbN: Select the desired setting.
3 MSAVEN a MOFFN
Storing your area code (for
local call)
You need to add your area code when
making cellular calls to a phone number
in your area. Once you store your area
code, it is automatically added to the
beginning of the 8-digit (for Australia)/
7-digit (for New Zealand) phone number
when making cellular calls.
1 MMENUN#633
2 Enter the 3-digit area code.
R To correct a digit, press MCLEARN.
3 MSAVEN a MOFFN
Changing the Bluetooth PIN
(Personal Identification
Number)
The PIN is used to register cellular
phones to the base unit. The default PIN
is 0000. To prevent unauthorised
access to this product, we recommend
that you change the PIN, and keep it
confidential.
Important:
R Please make note of your new PIN.
The unit does not reveal the PIN to
you. If you forget your PIN, see
page 72.
1 MMENUN#619
2 Enter the new 4-digit PIN. a MOKN
3 Enter the new 4-digit PIN again. a
MSAVEN
4 MOFFN
Changing the PIN for the second time
Follow step 1, “Changing the Bluetooth
PIN (Personal Identification Number)”,
page 19. Enter the current 4-digit PIN,
then continue from step 2.
Deregistering Bluetooth
devices
A handset can cancel the registration of
another Bluetooth device (cellular phone
or headset) that is stored to the base
unit.
1 MMENUN#134
2 MbN: Select the desired device. a
MSELECTN
R
indicates a cellular phone, and
indicates a headset.
3 MbN: Yes a MSELECTN
R When the cellular phone is
deregistered, the CELL 1 or CELL
2 indicator is turned off.
19
Link to Cell
TG765xAZ(en)_1215_ver001-2.pdf 19 2011/12/15 14:29:33
R When the headset is
deregistered, the HEADSET
indicator is turned off.
4 MOFFN
20
Link to Cell
TG765xAZ(en)_1215_ver001-2.pdf 20 2011/12/15 14:29:33
Making cellular calls
Important:
R Only 1 cellular line can be used at a
time.
R Before making calls, confirm that the
CELL 1 or CELL 2 indicator lights
green (page 14).
1 Lift the handset and dial the phone
number.
R To correct a digit, press MCLEARN.
2 MCELLN
R The unit starts dialling when:
only 1 cellular phone is
registered.
a specific line is set to make
cellular calls (page 19).
Go to step 4.
3 MbN: Select the desired cellular
phone. a MSELECTN
4 When you finish talking, press
MOFFN or place the handset on the
base unit or charger.
Note:
R To switch to the speaker, press M
N.
To switch back to the receiver, press
M N/M N.
Adjusting the receiver or speaker
volume
Press M
N or M N repeatedly while talking.
Making a cellular call using the redial
list
The last 5 phone numbers dialled are
stored in the redial list (each 48 digits
max.).
1 MEN REDIAL
2 MbN: Select the desired phone
number.
3 MCELLN
R The unit starts dialling when:
only 1 cellular phone is
registered.
a specific line is set to make
cellular calls (page 19).
4 MbN: Select the desired cellular
phone. a MSELECTN
Erasing a number in the redial list
1 MEN REDIAL
2 MbN: Select the desired phone
number. a MERASEN
3 MbN: Yes a MSELECTN
4 MOFFN
Making landline calls
1 Lift the handset and dial the phone
number.
R To correct a digit, press MCLEARN.
2 M
N
3 When you finish talking, press
MOFFN or place the handset on the
base unit or charger.
Using the speakerphone
1 Dial the phone number and press
M N.
R Speak alternately with the other
party.
2 When you finish talking, press
MOFFN.
Note:
R For best performance, use the
speakerphone in a quiet environment.
R To switch back to the receiver, press
M
N/M N.
Making a call using the redial list
1 MEN REDIAL
2 MbN: Select the desired phone
number.
3 M
N
21
Making/Answering Calls
TG765xAZ(en)_1215_ver001-2.pdf 21 2011/12/15 14:29:33
Pause (for PBX/long distance service
users)
A pause is sometimes required when
making calls using a PBX or long
distance service. When storing a calling
card access number and/or PIN in the
phonebook, a pause is also needed
(page 28).
Example: If you need to dial the line
access number “9” when making outside
calls with a PBX:
1 9 a MPAUSEN
2 Dial the phone number. a M
N
Note:
R A 3 second pause is inserted each
time MPAUSEN is pressed. Repeat as
needed to create longer pauses.
Answering calls
When a call is being received, the ringer
indicator flashes rapidly.
1 Lift the handset and press M
N or
M N when the unit rings.
R To answer a cellular call, you can
also press MCELLN.
R You can also answer the call by
pressing any dial key from 0 to
9, *, or #. (Any key answer
feature)
2 When you finish talking, press
MOFFN or place the handset on the
base unit or charger.
Auto talk
You can answer calls simply by lifting
the handset off the base unit or charger.
You do not need to press M
N. To turn
this feature on, see page 34.
Adjusting the handset ringer volume
n While the handset is ringing for an
incoming call:
Press MDN or MCN repeatedly to select
the desired volume.
n Programming the volume
beforehand:
1 To change the cellular line
ringer volume:
For CELL 1:
MMENUN#6281
For CELL 2:
MMENUN#6282
To change the landline ringer
volume:
MMENUN#160
2 MbN: Select the desired volume.
3 MSAVEN a MOFFN
Temporary handset ringer off
While the handset is ringing for a call,
you can turn the ringer off temporarily by
pressing M
N.
Adjusting the base unit ringer volume
n While the base unit is ringing for an
incoming call:
Press MjN or MkN repeatedly to
select the desired volume.
R To turn the ringer off, press and
hold MkN until the unit beeps.
n Programming the volume
beforehand:
1 To change the cellular line
ringer volume:
For CELL 1:
MMENUN#*6281
For CELL 2:
MMENUN#*6282
To change the landline ringer
volume:
MMENUN#*160
22
Making/Answering Calls
TG765xAZ(en)_1215_ver001-2.pdf 22 2011/12/15 14:29:33
2 MbN: Select the desired volume.
3 MSAVEN a MOFFN
Useful features during
a call
Hold
This feature allows you to put an outside
call on hold.
1 Press MMENUN during an outside
call.
2 MbN: Hold a MSELECTN
3 To release hold on the cellular
line:
Press MCELLN.
R Another handset user can take
the call: MCELLN
*1
a MSELECTN
*1
The call is taken when:
only 1 cellular phone is
registered.
the line is set to make
cellular calls (page 19).
To release hold on the landline:
Press M
N.
R Another handset user can take
the call by pressing M N.
Note:
R If a call is kept on hold for more than 9
minutes, an alarm tone starts to
sound and the ringer indicator flashes
rapidly. After 1 additional minute on
hold, the call is disconnected.
R If another phone is connected to the
same line, you can also take the call
by lifting its handset.
Mute
While mute is turned on, you can hear
the other party, but the other party
cannot hear you.
1 Press MMUTEN during conversation.
R MMUTEN flashes.
2 To return to the conversation, press
MMUTEN again.
Note:
R MMUTEN is a soft key visible on the
handset display during a call.
Recall for landline calls
MRECALLN allows you to use the special
features of your host PBX such as
transferring an extension call, or
accessing optional telephone services.
Note:
R To change the recall time, see
page 34.
Handset equalizer
This feature clarifies the voice of the
person you are talking to, producing a
more natural-sounding voice that is
easier to hear and understand.
1 Press MMENUN while talking.
2 MbN: Equalizer a MSELECTN
3 MbN: Select the desired setting.
4 Press MOKN to exit.
Note:
R When this feature is activated,
is
displayed while talking.
R Depending on the condition and
quality of your telephone line, this
feature may emphasise existing line
noise. If it becomes difficult to hear,
turn this feature off.
R This feature is not available while
using the speakerphone.
Call share
You can join an existing outside call.
23
Making/Answering Calls
TG765xAZ(en)_1215_ver001-2.pdf 23 2011/12/15 14:29:33
Important:
R When the privacy mode is on, you
cannot join the conversation. Turn it
off.
n While another unit is on a cellular
call:
1 To join the conversation, press
MCELLN.
R You can join the conversation
when:
only 1 cellular phone is
registered.
the line is set to make
cellular calls (page 19).
2 MbN: Select the desired cellular
phone. a MSELECTN
n While another unit is on a landline
call:
To join the conversation, press M
N.
Note:
R A maximum of 3 parties (including 1
outside party) can join a conversation
using 2 extensions. (3-way
conference)
Privacy mode
When the privacy mode is On, the unit
prevents other users from joining your
conversations with outside callers. To
allow other users to join your
conversations (call share), leave this
feature off. The default setting is Off.
1 MMENUN#194
2 MbN: Select On or Off.
3 MSAVEN a MOFFN
R When the privacy mode is turned
on,
is displayed during an
outside call.
Transferring a cellular call
between the handset and a
cellular phone
Transferring a cellular call from the
handset to a cellular phone
1 Press MMENUN during a cellular call.
2 MbN: Transfer to cell a
MSELECTN
R The cellular call is transferred to
the cellular phone.
Note:
R Depending on your cellular phone
type, you may need to set the cellular
phone to be ready to talk before
transferring. For example, if your
cellular phone has a top cover, open it
beforehand.
Transferring a cellular call from a
cellular phone to the handset
During a conversation using a cellular
phone, the call cannot be transferred to
the handset by the cellular phone.
Perform the following with the handset.
1 During a conversation using a
cellular phone, press MCELLN.
R The call is transferred to the
handset when:
only 1 cellular phone is
registered.
the line is set to make cellular
calls (page 19).
2 MbN: Select the desired cellular
phone. a MSELECTN
R The call is transferred to the
handset.
Using the other line during a
conversation
You can handle a cellular call and a
landline call at the same time. When
another call is being received during a
24
Making/Answering Calls
TG765xAZ(en)_1215_ver001-2.pdf 24 2011/12/15 14:29:33
conversation, the interrupt tone sounds
(page 33), and the 2nd caller’s
information is displayed if you subscribe
to Caller ID(page 40). You can answer
the 2nd call while holding the 1st call.
Making/answering a cellular call
during a conversation on the landline
1 Press MMENUN during a landline call.
2 MbN: Hold a MSELECTN
3 To make a 2nd call:
Dial the phone number. a
MCELLN
*1
a MbN: Select the desired
cellular phone. a MSELECTN
*1
The unit starts dialling when:
only 1 cellular phone is
registered.
a specific line is set to make
cellular calls (page 19).
To answer a 2nd call:
MCELLN
R To hold the 2nd call: MMENUN a
MbN: Hold a MSELECTN
4 To hang up the 2nd call and return
to the 1st call (landline call), press
MOFFN, then press M
N.
Making/answering a landline call
during a conversation on a cellular line
1 Press MMENUN during a cellular call.
2 MbN: Hold a MSELECTN
3 To make a 2nd call:
Dial the phone number. a M
N
To answer a 2nd call:
M N
R To hold the 2nd call: MMENUN a
MbN: Hold a MSELECTN
4 To hang up the 2nd call and return
to the 1st call (cellular call), press
MOFFN, then press MCELLN.
25
Making/Answering Calls
TG765xAZ(en)_1215_ver001-2.pdf 25 2011/12/15 14:29:33
Shared phonebook
The shared phonebook allows you to
make calls without having to dial
manually. Any handset registered to the
base unit can use the shared
phonebook. You can add 3,050 names
and phone numbers to the shared
phonebook, and assign each phonebook
entry to the desired group (Home,
Cell 1, Cell 2).
Important:
R Only 1 person can access the shared
phonebook at a time.
R Caller ID subscribers can use group
ringer tone features (page 42).
R You can copy phonebook entries from
a Bluetooth cellular phone to the unit’s
shared phonebook (page 45).
Adding entries
1 M
N a MADDN
2 Enter the party’s name (16
characters max.). a MOKN
3 Enter the party’s phone number (24
digits max.). a MOKN
4 MbN: Select the desired group. a
MSELECTN 2 times
R To add other entries, repeat from
step 2.
5 MOFFN
Note for New Zealand:
R Your service provider/telephone
company may charge you for a local
call if the number dialled has the area
code prefix included. If this is
unacceptable, dial only the 7-digit
local number. Do not dial the “0” prefix
or the area code.
Character table for entering names
While entering characters, you can
switch between uppercase and
lowercase by pressing * (A®a).
Key Character
1 & ( ) H ,
. / 1
2 A B C 2
a b c 2
3 D E F 3
d e f 3
4 G H I 4
g h i 4
5 J K L 5
j k l 5
6 M N O 6
m n o 6
7 P Q R S 7
p q r s 7
8 T U V 8
t u v 8
9 W X Y Z 9
w x y z 9
0 0
# #
R To enter another character that is
located on the same dial key, first
press MEN to move the cursor to the
next space.
R If you do not press any dial key within
5 seconds after entering a character,
the character is fixed and the cursor
moves to the next space.
R in the above table represents a
single space.
Erasing the character or number
Press MFN or MEN. a MCLEARN
26
Shared Phonebook
TG765xAZ(en)_1215_ver001-2.pdf 26 2011/12/15 14:29:33
R Press and hold MCLEARN to erase all
characters or numbers.
Groups
Groups can help you find entries in the
phonebook quickly and easily. When
adding an entry to the phonebook, you
can assign it to one of 3 groups. You
can search for phonebook entries by
group. The group ringer tone feature is
available for Caller ID subscribers
(page 42).
Finding and calling from a
phonebook entry
Scrolling through all entries
n Using a cellular line
1 M
N
2 MbN: Select the desired entry.
3 MCELLN
R The unit starts dialling when:
only 1 cellular phone is
registered.
a specific line is set to make
cellular calls (page 19).
4 MbN: Select the desired cellular
phone. a MSELECTN
n Using the landline
1 M
N
2 MbN: Select the desired entry.
3 M
N
Searching by first character
1 M N
2 Press the dial key (0 9 or #)
which contains the character you
are searching for (page 26).
R Press the same dial key
repeatedly to display the first
entry corresponding to each
character located on that dial key.
R If there is no entry corresponding
to the character you selected, the
next entry is displayed.
3 MbN: Scroll through the phonebook if
necessary.
4 To make a cellular/landline call,
continue from step 3, “Scrolling
through all entries”, page 27.
Searching by query
You can narrow down the search to
enter the first characters of a name.
1 M
N a *
2 To search for the name, enter the
first characters (up to 4) in
uppercase (page 26).
R Characters cannot be entered in
lowercase.
R If there is no entry corresponding
to the characters you selected,
the next entry is displayed.
3 MOKN
4 MbN: Scroll through the phonebook if
necessary.
5 To make a cellular/landline call,
continue from step 3, “Scrolling
through all entries”, page 27.
Searching by group
1 M
N a MGROUPN
2 MbN: Select the group you want to
search. a MSELECTN
R If you select All, the unit ends
the group search.
3 MbN: Select the desired entry.
4 To make a cellular/landline call,
continue from step 3, “Scrolling
through all entries”, page 27.
Editing entries
1 Find the desired entry (page 27). a
MMENUN
2 MbN: Edit a MSELECTN
27
Shared Phonebook
TG765xAZ(en)_1215_ver001-2.pdf 27 2011/12/15 14:29:33
3 Edit the name if necessary (16
characters max.; page 26). a MOKN
4 Edit the phone number if necessary
(24 digits max.). a MOKN
5 MbN: Select the desired group
(page 27). a MSELECTN 2 times
6 MOFFN
Erasing entries
Erasing an entry
1 Find the desired entry (page 27). a
MERASEN
2 MbN: Yes a MSELECTN
3 MOFFN
Erasing all entries in a group
1 M N a MMENUN
2 MbN: Erase all a MSELECTN
3 MbN: Select the desired group. a
MSELECTN
4 MbN: Yes a MSELECTN
5 MbN: Yes a MSELECTN
6 MOFFN
Chain dial
This feature allows you to dial phone
numbers in the phonebook while you are
on a call. This feature can be used, for
example, to dial a calling card access
number or bank account PIN that you
have stored in the phonebook, without
having to dial manually.
1 During an outside call:
MMENUN a MbN: Phonebook
a MSELECTN
2 MbN: Select the desired entry.
3 Press MCALLN to dial the number.
Note:
R When storing a calling card access
number and your PIN in the
phonebook as one phonebook entry,
press MPAUSEN to add pauses after
the number and PIN as necessary
(page 22).
28
Shared Phonebook
TG765xAZ(en)_1215_ver001-2.pdf 28 2011/12/15 14:29:33
Programmable settings
You can customise the unit by programming the following features using the handset.
To access the features, there are 2 methods:
n Scrolling through the display menus
1 MMENUN
2 Press MCN or MDN to select the desired main menu. a MSELECTN
3 Press MCN or MDN to select the desired item from the next sub-menus. a
MSELECTN
4 Press MCN or MDN to select the desired setting. a MSAVEN
R This step may vary depending on the feature being programmed.
R To exit the operation, press MOFFN.
n Using the direct command code
1 MMENUN a Enter the desired code.
Example: Press MMENUN#101.
2 Select the desired setting. a MSAVEN
R This step may vary depending on the feature being programmed.
R To exit the operation, press MOFFN.
Note:
R In the following table, < > indicates the default settings.
R In the following table,
indicates the reference page number.
R Display menu order and sub-menu may vary depending on your model.
Display the menu tree and direct command code table
Main menu:
Caller list
Operation Code
Viewing the caller list. #213 42
Main menu: Answering device
Sub-menu 1 Sub-menu 2 Settings Code
Play new msg.
(msg.: message)
#323 50
Play all msg.
#324 50
Erase all
msg.
*1
#325 51
29
Programming
TG765xAZ(en)_1215_ver001-2.pdf 29 2011/12/15 14:29:34
Sub-menu 1 Sub-menu 2 Settings Code
Greeting
Record greeting
*1
#302 49
Check greeting
#303 49
Pre-recorded
*1
(Reset to pre-recorded
greeting)
#304 49
Settings
Ring count
*1
2–9: 2-9 rings
<5 rings>
0: Toll saver
#211 52
Recording time
*1
1: 1 min
3: <3 min>
0: Greeting
only
*2
#305 53
Remote code
*1
<111> #306 51
Screen call
1: <On> 0: Off #310 48
Answer on
*1
#327 48
Answer off
*1
#328 48
Main menu: V.M. access
*3
(V.M.: Voice mail)
Operation Code
Listening to voice mail messages. #330 54
Main menu: Intercom
Operation Code
Paging the desired unit. #274 56
30
Programming
TG765xAZ(en)_1215_ver001-2.pdf 30 2011/12/15 14:29:34
Main menu: Bluetooth
Sub-menu 1 Sub-menu 2 Settings Code
Link to cell
1: Add new
device
*4
(for CELL 1)
2: Add new
device
*4
(for CELL 2)
Connect
*1
/
Disconnect
*1
#6251
*5
18
#6252
*6
Ringer volume
Handset
*7
0–6: Off–6 <6>
#6281
*5
22
#6282
*6
Ringer volume
Base unit
*1, *7
0–6: Off–6 <3>
#G6281
*5
22
#G6282
*6
Ringer tone
*8, *9
1–5: Tone 1-5
<Tone 2>
*5
<Tone 4>
*6
6–0: Melody 1-5
#6291
*5
#6292
*6
Select unit to
ring
*1
1–6: Handset 1-6
G: <All>
#6271
*5
17
#6272
*6
Ring as cell
(limited)
*1
1: <On (with
Talking CID)>
2: On (without
Talking CID)
0: Off
#6141
*5
17
#6142
*6
Registration
#6241
*5
16
#6242
*6
Phonebook
transfer
#618 45
Headset Add new
device
*4
#621 46
Connect
*1
/
Disconnect
*1
#622 46
Registration
#621 46
31
Programming
TG765xAZ(en)_1215_ver001-2.pdf 31 2011/12/15 14:29:34
Sub-menu 1 Sub-menu 2 Settings Code
Settings
Auto connect
*1
1: <1 min>
2: 3 min
3: 5 min
4: 10 min
0: Off
#632 18
Cell area
code
*1
#633 19
Cell line only
mode
*1
1: On 0: <Off> #157 18
Cell line
select
1: Cellphone 1
*4
2: Cellphone 2
*4
0: <Manual>
#634 19
Set PIN
*1
<0000> #619 19
Deregistration
*2
#134 19
Main menu: Set date & time
Sub-menu 1 Sub-menu 2 Settings Code
Date and time
*1
#101 15
Alarm
1: Once
2: Daily
0: <Off>
#720 36
Time
adjustment
*1, *10
1: <Caller ID
auto>
0: Manual
#226
32
Programming
TG765xAZ(en)_1215_ver001-2.pdf 32 2011/12/15 14:29:34
Main menu: Initial setting
Sub-menu 1 Sub-menu 2 Settings Code
Ringer setting
Ringer volume
Handset
*3, *7
0–6: Off–6 <6> #160 22
Ringer volume
Base unit
*1, *3, *7
0–6: Off–6 <3> #G160 22
Ringer tone
*3, *8, *9
(Handset)
1–5: Tone 1-5
<Tone 1>
6–0: Melody 1-5
#161
Interrupt tone
*11
1: <On> 0: Off #201 24
Night mode
On/Off
1: On 0: <Off> #238 36
Night mode
Start/End
<11:00 PM/06:
00 AM>
#237 36
Set date & time
Date and time
*1
#101 15
Alarm
1: Once
2: Daily
0: <Off>
#720 36
Time
adjustment
*1, *10
1: <Caller ID
auto>
0: Manual
#226
Talking Caller
ID
(Talking Caller ID)
Handset
1: <On> 0: Off #162 41
Base unit
*1
1: <On> 0: Off #G162
Handset name
#104 37
Caller barred
*1
#217 37
Block w/o num
*1, *2
(Block calls without
phone number)
1: On 0: <Off> #240 37
Voice mail
*3
Store VM
access#
*1
(VM: Voice mail)
#331 54
Message alert
1: <On> 0: Off #340 53
LCD contrast
(Display contrast)
1–6: Level 1–6 <3> #145
Key tone
*12
1: <On> 0: Off #165
Landline area
code
*1
#255 43
33
Programming
TG765xAZ(en)_1215_ver001-2.pdf 33 2011/12/15 14:29:34
Sub-menu 1 Sub-menu 2 Settings Code
Auto talk
*13
1: On 0: <Off> #200 22
Set tel line
*3
Set recall
time
*1, *14
,
*15
0: 900 ms
1: 700 ms
2: 600 ms
3: 400 ms
4: 300 ms
5: 250 ms
G: 200 ms
#: 160 ms
6: 110 ms
7: <100 ms>
8: 90 ms9: 80 ms
#121 23
Set line mode
*1, *16
1: A 2: <B> #122
Privacy mode
*1
1: On 0: <Off> #194 23
Repeater mode
*1
1: <On> 0: Off #138 58
Registration Register handset
#130 39
Deregistration
*2
#131 39
Country
*1
1: <Australia>
2: Newzealand
#136 38
*1 If you program these settings using one of the handsets, you do not need to
program the same item using another handset.
*2 This menu is not displayed when scrolling through the display menus. It is only
available in direct command code.
*3 When the cellular line only mode is turned on, these menus are not displayed
(page 18).
*4 After the Bluetooth device is registered, the device name is displayed.
*5 For CELL 1
*6 For CELL 2
*7 Ringer volume cannot be turned off for alarm, intercom calls, and paging.
*8 If you select one of the melody ringer tones, the ringer tone continues to play for
several seconds even if the caller has already hung up. You may either hear a
dial tone or no one on the line when you answer the call.
*9 The preset melodies in this product are used with permission of © 2009
Copyrights Vision Inc.
*10 This feature allows the unit to automatically adjust the date and time each time
caller information including date and time is received.
To turn this feature on, select Caller ID auto. To turn this feature off,
select Manual. (Caller ID subscribers only)
To use this feature, set the date and time first (page 15).
*11 This tone lets you know when you receive an outside call while you are on
another line or an intercom call. If you select On, the tone sounds 2 times.
34
Programming
TG765xAZ(en)_1215_ver001-2.pdf 34 2011/12/15 14:29:34
*12 Turn this feature off if you prefer not to hear key tones while you are dialling or
pressing any keys, including confirmation tones and error tones.
*13 If you subscribe to a Caller ID service and want to view the caller’s information
after lifting up the handset to answer a call, turn off this feature.
*14 The recall time depends on your telephone exchange or host PBX. Contact your
PBX supplier if necessary.
You can access your service provider/telephone company “call waiting” service
by having the recall time set at 100 ms, and then follow your service provider/
telephone company “call waiting” instructions to operate this service. (for
Australia)
*15 The default setting will be as follows if you select the following regional code
when changing the unit’s region setting (page 38):
Newzealand = 600 ms
*16 Generally, the line mode setting should not be changed. This setting
automatically maintains receiver volume at the proper level depending on the
current telephone line condition. Set the line mode to A if telephone line
condition is not good.
35
Programming
TG765xAZ(en)_1215_ver001-2.pdf 35 2011/12/15 14:29:34
Special programming
Alarm
An alarm sounds at the set time for 3
minutes once or daily. Alarm can be set
for each handset.
Important:
R Set the date and time beforehand
(page 15).
1 MMENUN#720
2 MbN: Select the desired alarm option.
a MSELECTN
Off
Turns alarm off. Go to
step 7.
Once
An alarm sounds once at
the set time.
Daily
An alarm sounds daily at
the set time. Go to step 4.
3 Enter the desired month and date.
a MOKN
4 Set the desired time.
5 MAM/PMN: Select AM or PM. a
MOKN
6 MbN: Select the desired alarm tone.
a MSELECTN
R We recommend selecting a
different ringer tone from the one
used for outside calls.
7 MSELECTN a MOFFN
R When the alarm is set,
is
displayed.
Note:
R To stop the alarm, press MOFFN or
place the handset on the base unit or
charger.
R When the handset is in use, the alarm
will not sound until the handset is in
standby mode.
Night mode
Night mode allows you to select a period
of time during which the handset will not
ring for outside calls. This feature is
useful for time periods when you do not
want to be disturbed, for example, while
sleeping. Night mode can be set for
each handset.
Important:
R Set the date and time beforehand
(page 15).
R We recommend turning the base unit
ringer off (page 31, 33) in addition to
turning the night mode on.
R If you have set the alarm, the alarm
sounds even if the night mode is
turned on.
Turning night mode on/off
1 MMENUN#238
2 MbN: Select the desired setting. a
MSAVEN
R If you select Off, press MOFFN
to exit.
3 Enter the desired hour and minute
you wish to start this feature.
4 MAM/PMN: Select AM or PM. a
MOKN
5 Enter the desired hour and minute
you wish to end this feature.
6 MAM/PMN: Select AM or PM.
7 MSAVEN a MOFFN
R When the night mode is set,
is
displayed.
Changing the start and end time
1 MMENUN#237
2 Continue from step 3, “Turning night
mode on/off”, page 36.
36
Programming
TG765xAZ(en)_1215_ver001-2.pdf 36 2011/12/15 14:29:34
Changing the handset name
Each handset can be given a
customised name (“Bob”, “Kitchen”,
etc.). This is useful when you make
intercom calls between handsets. You
can also select whether or not the
handset name is displayed in standby
mode. The default setting is No. If you
select Yes without entering any
handset name, Handset 1 to
Handset 6 is displayed.
1 MMENUN#104
2 Enter the desired name (max. 10
characters; see the character table,
page 26).
R If not required, go to step 3.
3 MSAVEN
4 MbN: Select the desired setting. a
MSELECTN 2 times
5 MOFFN
Incoming call barring (Caller
ID subscribers only)
This feature allows the unit to reject calls
when:
the unit receives a call from a phone
number stored in the call barred list as
unwanted (“Storing unwanted callers”,
page 37).
the unit receives a call without phone
number (“Call barring incoming calls
without phone number”, page 37).
When a call is received, the unit rings for
a short time while the caller is being
identified. If the phone number matches
an entry in the call barred list:
cellular calls are rejected.
landline calls are disconnected after
the unit first sends out a busy tone to
the caller.
Important:
R When the unit receives a call from a
number that is stored in the call
barred list or a call without a
recognised phone number, the call is
logged in the caller list (page 42)
with
after the call is disconnected.
Storing unwanted callers
You can store up to 30 phone numbers
in the call barred list.
Important:
R You must store the phone number
with an area code in the call barred
list.
n From the caller list:
1 MFN CID
2 MbN: Select the entry to be barred.
3 MSAVEN
4 MbN: Caller barred a
MSELECTN
5 MbN: Yes a MSELECTN
6 Edit the phone number if
necessary (24 digits max.).
7 MSAVEN a MOFFN
n By entering phone numbers:
1 MMENUN#217 a MADDN
2 Enter the phone number (24
digits max.).
R To erase a digit, press
MCLEARN.
3 MSAVEN a MOFFN
Call barring incoming calls without
phone number
You can reject a call when no phone
number is provided, such as a call just
showing Out of area.
1 MMENUN#240
2 MbN: Select the desired setting. a
MSAVEN a MOFFN
37
Programming
TG765xAZ(en)_1215_ver001-2.pdf 37 2011/12/15 14:29:34
Viewing/editing/erasing bar call
numbers
1 MMENUN#217
2 MbN: Select the desired entry.
R To exit, press MOFFN.
3 To edit a number:
MEDITN a Edit the phone number.
a MSAVEN a MOFFN
To erase a number:
MERASEN a MbN: Yes a
MSELECTN a MOFFN
Note:
R When editing, press the desired dial
key to add, MCLEARN to erase.
R When viewing, Block w/o num is
displayed if the barring incoming calls
without phone number feature is
turned on. To turn the feature off:
MERASEN a MCN a MSAVEN a
MOFFN
Changing the unit’s region
setting/Resetting the base unit
Important:
When you install the batteries for the
first time, the handset may prompt you
to set region setting. First press
MSELECTN, then proceed to step 2.
1 MMENUN#136
2 MbN: Select the desired country. a
MSELECTN
Australia = Australia
Newzealand = New Zealand
3 MbN: Yes a MSELECTN a MOFFN
Note:
R The following items will be deleted or
reset to their default settings:
Answering system settings
(page 29)
Time adjustment
Base unit ringer volume
Landline area code
Line mode
Privacy mode
Block calls without phone number
Bluetooth PIN
Group ringer tone
Talking Caller ID
Caller list
Voice mail messages and access
number
Cellular phone settings (page 31)
Headset settings (page 31)
R The following items will be retained:
Date and time
Shared phonebook
Handset name
Repeater mode
Recordings, including your greeting
message, and caller messages
Call screening
Call barred list
Cellular phone registration
Headset registration
R If you select the desired country in
step 2, the following default setting will
be changed for the selected country’s
default setting:
Recall time (page 34)
R After changing the unit’s region
setting/resetting the base unit, is
displayed on the handset
momentarily. This is normal and the
handset can be used once is
displayed.
Registering a unit
Operating additional units
Additional handsets
Up to 6 handsets can be registered to
the base unit.
Important:
R See page 4 for information on the
available model.
38
Programming
TG765xAZ(en)_1215_ver001-2.pdf 38 2011/12/15 14:29:34
Registering a handset to the
base unit
The supplied handset and base unit are
pre-registered. If for some reason the
handset is not registered to the base
unit, re-register the handset.
1 Handset:
MMENUN#130
2 Base unit:
Press and hold MLOCATORN for
about 5 seconds until the
registration tone sounds.
R If all registered handsets start
ringing, press MLOCATORN again
to stop, then repeat this step.
R The next step must be completed
within 90 seconds.
3 Handset:
Press MOKN, then wait until a long
beep sounds.
Note:
R While registering, Base in
registering is displayed on all
registered handsets.
R When you purchase an additional
handset, refer to the additional
handset’s installation manual for
registration.
Deregistering a handset
A handset can cancel its own
registration to the base unit, or other
handsets registered to the same base
unit. This allows the handset to end its
wireless connection with the system.
1 MMENUN#131
R All handsets registered to the
base unit are displayed.
2 MbN: Select the handset you want to
cancel. a MSELECTN
3 MbN: Yes a MSELECTN
4 MOFFN
39
Programming
TG765xAZ(en)_1215_ver001-2.pdf 39 2011/12/15 14:29:34
Using Caller ID service
Important:
R This unit is Caller ID compatible. To
use Caller ID features (such as
displaying caller phone numbers), you
must subscribe to a Caller ID service.
Contact your service provider/
telephone company for details.
For New Zealand:
R For all local and national incoming
calls, your display will show the area
code (e.g. 09 for Auckland) or the
cellular prefix (e.g. 0274 for Telecom
Cellular) followed by the caller’s
telephone number. An Auckland caller’
s number will be displayed as
09XXXXXXX. The seven X’s
represent the seven digits of the
caller’s telephone number. A caller
from a 6-digit Telecom Cellular
number will be displayed as
0274XXXXXX. For incoming
international calls, your display may
only show “0000”. For business users
on a Centrex line, your display will
show Centrex extension numbers in
the shorter extension number format
used within your company.
R The Caller ID information will not be
presented on incoming fax calls if
Telecom FaxAbility is used.
Using toll services from Telecom or
another company (for New Zealand)
Your telephone company may charge
you for a local call if the number dialled
has the area code prefix included. If this
is unacceptable, dial only the 7-digit
local number. Do not dial the “0” prefix
or the area code.
Caller ID features
When an outside call is being received,
the caller’s phone number is displayed.
Caller information for the last 50 callers
is logged in the caller list from the most
recent call to the oldest.
R If the unit cannot receive caller
information, the following is displayed:
Out of area: The caller dials
from an area which does not
provide a Caller ID service.
Private caller: The caller
requests not to send caller
information.
R If the unit is connected to a PBX
system, caller information may not be
properly received. Contact your PBX
supplier.
R If the name display service is
available in your area, the display
shows caller names. For further
information, please contact your
service provider/telephone company.
Missed calls
If a call is not answered, the unit treats it
as a missed call. The display shows
Missed call. This lets you know if
you should view the caller list to see who
called while you were away.
Note:
R Even when there are unviewed
missed calls, Missed call
disappears from the standby display if
the following operation is performed
by one of the units:
A handset is replaced on the base
unit or charger.
Pressing MOFFN on a handset.
Phonebook name display
When caller information is received and
it matches a phone number stored in the
phonebook, the stored name in the
phonebook is displayed and logged in
the caller list.
40
Caller ID Service
TG765xAZ(en)_1215_ver001-2.pdf 40 2011/12/15 14:29:34
Call waiting and Caller ID
compatible (for Australia)
If you subscribe to Caller ID service,
your handset displays the 2nd caller’s
information while talking. After you hear
a call waiting tone, the caller’s phone
number will be displayed.
You can answer the 2nd call, keeping
the 1st call on hold. Follow your service
provider/telephone company instructions
using MRECALLN.(Recall function)
R If the phone number is stored in the
phonebook with its name, the caller’s
name will also be displayed.
R Please contact your service provider/
telephone company for details and
availability in your area.
For Caller ID Type II users
When you receive a 2nd call during a
conversation, you will hear a signal tone
following the call waiting tone and the
conversation will be interrupted or
muted for a short period of time. This
is not a fault of the product as these
events are normal.
R The tones are generated by your
service provider/telephone company.
For Call Waiting or Call
Waiting Caller ID service
users (for New Zealand)
To use call waiting or Call Waiting Caller
ID, you must first subscribe with your
service provider/telephone company.
This feature allows you to receive calls
while you are already talking on the
phone. If you receive a call while on the
phone, you will hear a call waiting tone.
If you subscribe to both Caller ID and
Call Waiting with Caller ID services,
the 2nd caller’s information is displayed
after you hear the call waiting tone on
the handset.
1 Press MRECALLN to answer the 2nd
call.
2 To switch between calls, press
MRECALLN.
Note:
R Please contact your service provider/
telephone company for details and
availability of this service in your area.
Talking Caller ID
This feature lets you know who is calling
without looking at the display.
To use this feature, you must:
subscribe to a Caller ID service of
your service provider/telephone
company.
turn this feature on (page 33).
When caller information is received, the
handsets and base unit announce the
caller’s phone number received from
your service provider/telephone
company following every ring.
R The announcement is heard at the
same level as the ringer volume
(page 31, 33).
R If you turn on the answering system
and set the number of rings 2
rings (page 52), the unit does not
announce the caller information from
the landline. If Toll saver is
selected and there is a new message,
the unit does not announce the caller
information from the landline.
R When you receive a call while on the
phone, the 2nd caller’s name is not
announced even if you subscribe to
both Caller ID and Call Waiting Caller
ID services.
Phonebook name announcement
When caller information is received and
it matches a phone number stored in the
phonebook, the stored name in the
phonebook is announced.
41
Caller ID Service
TG765xAZ(en)_1215_ver001-2.pdf 41 2011/12/15 14:29:34
R Name pronunciation may vary. This
feature may not pronounce all names
correctly.
R Your unit may mute one or more rings
in order to announce the caller’s
information. Talking Caller ID takes
precedence over ringing.
Note:
R For users in name display service
available areas:
the unit announces the Caller ID
name provided by your service
provider/telephone company.
the unit announces the customised
phonebook name if it matches a
phone number stored in the
phonebook.
Caller ID service has a limit of how
many characters can be displayed.
If a caller’s name is too long, the
handset may not be able to display
or announce the entire name.
Ringer ID
You can select the desired ringer tone to
a group that each phonebook entry is
assigned (page 27). When a call is
received from a caller assigned to a
group, the ringer tone you selected for
that group rings instead of the called
line’s ringer tone (page 17, 31, 33) after
caller information is displayed. If you
select Current ringer (default),
the unit uses the called line’s ringer tone
when calls from this group are received.
R The ringer may be changed after the
2nd ring.
1 M
N a MMENUN
2 MbN: Group a MSELECTN
3 MbN: Select the desired group. a
MSELECTN
4 MbN: Select the desired ringer tone.
a MSAVEN
5 MOFFN
Caller list
Important:
R Only 1 person can access the caller
list at a time.
R Make sure the unit’s date and time
setting is correct (page 15).
Viewing the caller list and
calling back
n Using a cellular line
1 MFN CID
2 Press M N to search from the most
recent call, or M
N to search from the
oldest call.
3 To call back, press MSELECTN.
To exit, press MOFFN.
4 MCELLN
R The unit starts dialling when:
only 1 cellular phone is
registered.
a specific line is set to make
cellular calls (page 19).
5 MbN: Select the desired cellular
phone. a MSELECTN
n Using the landline
1 MFN CID
2 Press MCN to search from the most
recent call, or MDN to search from the
oldest call.
3 To call back, press M
N.
To exit, press MOFFN.
Note:
R If the entry has already been viewed
or answered, “ ” is displayed, even if
it was viewed or answered using
another unit.
R In step 2, if is displayed, not all of
the information is shown. To see the
remaining information:
Press MEN. To return to the previous
screen, press MFN.
42
Caller ID Service
TG765xAZ(en)_1215_ver001-2.pdf 42 2011/12/15 14:29:34
R or indicates the caller
information was received from the
cellular line.
R If you do not want to dial the area
code when making calls from the
caller list, you can store the area code
which you want the unit to delete
automatically (page 43).
Storing an area code to be
deleted automatically (for
landline call)
In some situations, phone numbers
stored automatically in the caller list
(page 42) will include area codes. If you
do not want to dial the area code when
making landline calls from the caller list,
you can store the area code which you
want the unit to delete automatically.
Example: You have stored the area code
“09”. If you make a landline call from the
caller list to the phone number
“09-456-7890”, the unit dials “456-7890”.
1 MMENUN#255
2 Enter an area code (5 digits max.).
a MSAVEN a MOFFN
Note:
R This feature does not affect a Voice
Mail access number with an area
code (page 54).
Note for New Zealand:
R The use of this feature can prevent a
National Call from being dialled. E.g.,
in the case of the South Island, the
“03” will be omitted and will therefore
prevent a National Call to other areas
of the SouthIsland.
To erase your area code
1 MMENUN#255
2 Press and hold MCLEAR N until all
digits erased. a MSAVEN a MOFFN
Editing a caller’s phone
number before calling back
The caller’s telephone number, which is
sent to your telephone from your local
telephone exchange, includes “0” and
an area code prefix. For local calls, “0”
and the area code prefix can be omitted.
(for New Zealand)
1 MFN CID
2 MbN: Select the desired entry.
3 MSELECTN
*1
a MEDITN a Add or
erase digits to the beginning of the
number as necessary.
R To add a digit, press the desired
dial key.
R To erase a digit, press MCLEARN.
*1
You need to press MSELECTN if
the cellular phone is registerd.
4 Using a cellular line:
To make a cellular call, continue
from step 4, “Viewing the caller list
and calling back”, page 42.
Using the landline:
M
N
Note:
R The edited phone number is not
saved in the caller list.
Erasing selected caller
information
1 MFN CID
2 MbN: Select the desired entry.
3 MERASEN a MbN: Yes
4 MSELECTN a MOFFN
Erasing all caller information
1 MFN CID
2 MERASEN a MbN: Yes
3 MSELECTN a MOFFN
43
Caller ID Service
TG765xAZ(en)_1215_ver001-2.pdf 43 2011/12/15 14:29:34
Storing caller information to
the phonebook
1 MFN CID
2 MbN: Select the desired entry.
3 MSAVEN
4 MbN: Phonebook a MSELECTN
5 Continue from step 3, “Editing
entries”, page 27.
44
Caller ID Service
TG765xAZ(en)_1215_ver001-2.pdf 44 2011/12/15 14:29:34
Copying phonebook
from a cellular phone
(phonebook transfer)
You can copy phonebook entries from
the registered cellular phones or other
cellular phones (not registered) to the
unit’s shared phonebook. A cellular
phone must be Bluetooth wireless
technology compatible.
Important:
R If a copied entry has 2 or more phone
numbers, each phone number (6
max.) is stored as a separate entry
with the same name.
R If a phonebook entry includes
additional data such as a picture, that
entry may fail to copy to the base unit.
R The stored phonebook entries with
the international prefix “+” in the
cellular phone are copied in the base
unit without the prefix “+”. Edit such
entries after completing copying to
add an international prefix other than
“+”(page 26).
1 Handset:
MMENUN#618
2 Handset:
To copy from registered cellular
phones:
MbN: Select the desired cellular
phone. a MSELECTN
R Copied items are stored to the
group (Cell 1 or Cell 2)
which the cellular phone is
registered to.
To copy from other cellular
phones (not registered):
MbN: Other cell a MSELECTN
a MbN: Select the group you want
to copy to. a MSELECTN
3 WhenTransfer phonebook
from cell.” is displayed:
Go to step 4.
WhenSelect modemenu is
displayed:
MbN: Select Auto or Manual.
a MSELECTN
Auto: Download all entries from
the cellular phone automatically. Go
to step 5.
Manual: Copy entries you
selected.
R Select mode menu is
displayed only when the cellular
phone supports PBAP (Phone
Book Access Profile) for Bluetooth
connection.
4 Cellular phone:
Follow the instructions of your
cellular phone to copy phonebook
entries.
R For other cellular phones (not
registered), you need to search
for and select the base unit. The
base unit PIN (default: 0000)
may be required.
R The entries being copied are
displayed on the handset.
5 Handset:
Wait until Completed is
displayed.
R You can continue copying other
entries if necessary.
6 Handset: MOFFN
Note:
R Some copied entries may have
characters which do not exist in the
character table (page 26). These
characters can be displayed but
cannot be entered when editing an
entry.
R The unit does not support some
characters. If a copied entry includes
those characters, they are replaced
with other available characters orH”.
R If you receive a call while copying
phonebook entries, the copying
45
Using Bluetooth Devices
TG765xAZ(en)_1215_ver001-2.pdf 45 2011/12/15 14:29:34
procedure stops. Try again after
finishing the call.
Using a Bluetooth
wireless headset
(optional) for landline
calls
By registering a Bluetooth headset to the
base unit, you can have a hands-free
conversation wirelessly for landline calls.
Important:
R 1 headset can be registered to the
base unit. However, only one
Bluetooth device (cellular phone or
headset) can be connected to the
base unit at a time.
R For best performance, we
recommend using a Bluetooth
headset within 1 m of the base unit. A
headset can communicate with the
base unit within a range of
approximately 10 m.
Registering a headset to the
base unit
Important:
R Make sure that the Bluetooth headset
is not connected to any other
Bluetooth device.
1 Your headset:
Set your headset to registration
mode.
R Refer to the headset operating
instructions.
2 Handset:
MMENUN#621
3 Enter your headset PIN.
R Typically, default PIN is 0000.
Refer to the headset operating
instructions.
4 Press MOKN, then wait until a long
beep sounds.
5 MOFFN
R When the HEADSET indicator on
the base unit lights green, you are
ready to use the headset.
Connecting/disconnecting a headset
If you cannot connect the headset and
base unit using the headset, you can
connect using the unit.
To use your headset with another
Bluetooth device such as a cellular
phone, you may need to disconnect it
from the base unit.
Important:
R Make sure that the headset is turned
on.
1 To connect/disconnect:
MMENUN#622
R A long beep sounds.
2 MOFFN
Deregistering a headset
You can cancel a registration of the
headset that is stored to the base unit.
See “Deregistering Bluetooth devices”,
page 19.
Operating a Bluetooth
wireless headset using a
landline
Important:
R Refer to your headset operating
instructions for headset operations.
Answering landline calls with your
headset
To answer a landline call, turn on your
headset referring to your headset
operating instructions.
46
Using Bluetooth Devices
TG765xAZ(en)_1215_ver001-2.pdf 46 2011/12/15 14:29:34
When you finish talking, turn off your
headset referring to your headset
operating instructions.
Note:
R If you cannot hang up the call using
your headset, press MnN (STOP) on
the base unit.
Switching from the base unit to your
headset
While listening to messages recorded on
the base unit answering system, you
can only switch from the base unit to
your headset. Turn on the headset
referring to your headset operating
instructions.
Call sharing between your headset
and the handset
Important:
R To activate this feature, you should
set privacy mode to off beforehand
(page 34).
n While the handset is on a landline
call:
To join the conversation with your
headset, turn on the headset
referring to your headset operating
instructions.
n While your headset is on a landline
call:
To join the conversation with the
handset, press M
N.
Adjusting your headset receiver
volume
Base unit
Press MjN or MkN repeatedly while
using your headset.
47
Using Bluetooth Devices
TG765xAZ(en)_1215_ver001-2.pdf 47 2011/12/15 14:29:35
Answering system for
landline
The answering system can answer and
record calls for you when you are
unavailable to answer the phone.
You can also set the unit to play a
greeting message but not to record
caller messages by selecting
Greeting only as the recording
time setting (page 53).
Important:
R Only 1 person can access the
answering system (listen to
messages, record a greeting
message, etc.) at a time.
R When callers leave messages, the
unit records the day and time of each
message. Make sure the date and
time have been set correctly
(page 15).
R When the cellular line only mode is
set (page 18), the answering system
cannot be used and any messages
are not received.
R The unit’s answering system will not
answer incoming calls on your
FaxAbility number. (for New Zealand)
Memory capacity (including
your greeting message)
The total recording capacity is about 18
minutes. A maximum of 64 messages
can be recorded.
Note:
R When message memory becomes full:
Messages full is shown on
the handset display.
The ANSWER ON/OFF indicator
on the base unit flashes rapidly if
the answering system is turned on.
The message counter on the base
unit flashes if the answering system
is turned on.
If you use the pre-recorded greeting
message, the unit automatically
switches to another pre-recorded
greeting message asking callers to
call again later.
If you recorded your own greeting
message, the same message is still
announced to callers even though
their messages are not recorded.
Turning the answering
system on/off
Base unit
Press MANSWER ON/OFFN to turn on/
off the answering system.
Handset
1 To turn on:
MMENUN#327
To turn off:
MMENUN#328
2 MOFFN
Note for base unit and handset:
R When the answering system is turned
on:
The ANSWER ON/OFF indicator
on the base unit lights up.
The message counter on the base
unit displays the total number of
messages (old and new).
Call screening
While a caller is leaving a message, you
can listen to the call through the unit’s
speaker.
To adjust the speaker volume, press MDN
or MCN repeatedly. You can answer the
call by pressing M
N. Call screening
48
Answering System for Landline
TG765xAZ(en)_1215_ver001-2.pdf 48 2011/12/15 14:29:35
can be set for each handset. The default
setting is On.
1 MMENUN#310
2 MbN: Select the desired setting. a
MSAVEN a MOFFN
Greeting message
When the unit answers a call, a greeting
message is played to callers.
You can use either:
your own greeting message
a pre-recorded greeting message
Recording your greeting
message
1 MMENUN#302
2 MbN: Yes a MSELECTN
3 After a beep sounds, hold the
handset about 20 cm away and
speak clearly into the microphone (2
minutes and 30 seconds max.).
4 Press MSTOPN to stop recording.
5 MOFFN
Using a pre-recorded greeting
message
The unit provides 2 pre-recorded
greeting messages:
If you erase or do not record your own
greeting message, the unit plays a
pre-recorded greeting asking callers
to leave a message.
If the message recording time
(page 53) is set to Greeting
only, callers’ messages are not
recorded and the unit plays a different
pre-recorded greeting message
asking callers to call again.
Resetting to a pre-recorded greeting
message
If you want to use a pre-recorded
greeting message once you record your
own greeting message, you need to
erase your own greeting message.
1 MMENUN#304
2 MYESN a MOFFN
Playing back the greeting
message
1 MMENUN#303
2 MOFFN
Listening to messages
using the base unit
When new messages have been
recorded:
M
N on the base unit flashes.
Press M N.
R If new messages have been recorded,
the base unit plays back new
messages.
R If there are no new messages, the
base unit plays back all messages.
Operating the answering
system during playback
Key Operation
MjN or MkN Adjust the speaker
volume
M N
Repeat message
*1
M N Skip message
MnN (STOP) Stop playback
MERASEN Erase currently playing
message
49
Answering System for Landline
TG765xAZ(en)_1215_ver001-2.pdf 49 2011/12/15 14:29:35
*1 If pressed within the first 5 seconds
of a message, the previous
message is played.
Erasing all messages
Press MERASEN 2 times while the unit is
not in use.
Listening to messages
using the handset
When new messages have been
recorded:
New message is displayed.
The message indicator on the
handset flashes slowly if the message
alert feature is turned on (page 53).
1 To listen to new messages:
MMENUN#323
To listen to all messages:
MMENUN#324
2 When finished, press MOFFN.
Note:
R To switch to the receiver, press M
N.
Operating the answering
system
MMENUN a MbN: Answering
device a MSELECTN
Key Operation
MDN or MCN Adjust the receiver/
speaker volume
(during playback)
1 or MFN Repeat message
(during playback)
*1
2 or MEN Skip message
(during playback)
3 Enter the “Settings
menu
4 Play new messages
Key Operation
5 Play all messages
6 Play greeting message
76 Record greeting message
8 Turn answering system on
MPAUSEN
Pause message
*2
9 or
MSTOPN
Stop recording
Stop playback
0 Turn answering system off
*4
*3
Erase currently playing
message
*5 Erase all messages
*6 Reset to a pre-recorded
greeting message
*1 If pressed within the first 5 seconds
of a message, the previous
message is played.
*2 To resume playback:
MbN: Playback a MSELECTN
*3 You can also erase as follows:
MERASEN a MbN: Yes a
MSELECTN
Calling back (Caller ID
subscribers only)
If caller information is received for the
call, you can call the caller back while
listening to a message.
1 Press MPAUSEN during playback.
2 MbN: Call back a MSELECTN
Editing the number before calling back
1 Press MPAUSEN during playback.
2 MbN: Edit & Call a MSELECTN
3 Edit the number.a M
N
R To call back using a cellular line,
continue from step 2, “Making
cellular calls”, page 21.
50
Answering System for Landline
TG765xAZ(en)_1215_ver001-2.pdf 50 2011/12/15 14:29:35
Erasing all messages
1 MMENUN#325
2 MbN: Yes a MSELECTN a MOFFN
Remote operation
Using a touch-tone phone, you can call
your phone number from outside and
access the unit to listen to messages or
change answering system settings. The
unit’s voice guidance prompts you to
press certain dial keys to perform
different operations.
Remote access code
A 3-digit remote access code must be
entered when operating the answering
system remotely. This code prevents
unauthorised parties from listening to
your messages remotely.
Important:
R In order to operate the answering
system remotely, you must first set a
remote access code.
1 MMENUN#306
2 Enter the desired 3-digit remote
access code.
3 MSAVEN a MOFFN
Deactivating remote operation
Press * in step 2 on “Remote access
code”, page 51.
R The entered remote access code is
deleted.
Using the answering system
remotely
1 Dial your landline phone number
from a touch-tone phone.
2 After the greeting message starts,
enter your remote access code.
3 Follow the voice guidance prompts
as necessary or control the unit
using remote commands
(page 51).
4 When finished, hang up.
Voice guidance
During remote operation, the unit’s voice
guidance starts and prompts you to
press 1 to perform a specific operation,
or press 2 to listen to more available
operations.
Note:
R If you do not press any dial keys
within 10 seconds after a voice
guidance prompt, the unit disconnects
your call.
Remote commands
You can press dial keys to access
certain answering system functions
without waiting for the voice guidance to
prompt you.
Key Operation
1 Repeat message
(during playback)
*1
2 Skip message
(during playback)
4 Play new messages
5 Play all messages
9 Stop playback
0 Turn answering system off
*4 Erase currently playing
message
*5 Erase all messages
*# End remote operation
(or hang up)
*1 If pressed within the first 5 seconds
of a message, the previous
message is played.
51
Answering System for Landline
TG765xAZ(en)_1215_ver001-2.pdf 51 2011/12/15 14:29:35
Turning on the answering
system remotely
If the answering system is off, you can
turn it on remotely.
1 Dial your phone number from a
touch-tone phone.
2 Let the phone ring 15 times.
R A long beep is heard.
3 Enter your remote access code
within 10 seconds after the long
beep.
R The greeting message is played
back.
R You can either hang up, or enter
your remote access code again
and begin remote operation
(page 51).
Answering system
settings
Number of rings before the
unit answers a call
You can change the number of times the
phone rings Ring count before the
unit answers calls. You can select 2 to 9
rings, or Toll saver.
The default setting is 5 rings.
Toll saver: The unit’s answering
system answers at the end of the 2nd
ring when new messages have been
recorded, or at the end of the 5th ring
when there are no new messages. If you
call your phone from outside to listen to
new messages (page 51), you know that
there are no new messages when the
phone rings for the 3rd time. You can
then hang up without being charged for
the call.
1 MMENUN#211
2 MbN: Select the desired setting. a
MSAVEN a MOFFN
For service provider voice mail
subscribers (for Australia)
To receive voice mail and use the
answering system properly, please note
the following:
R “Voice mail” is a service provided by
your service provider/telephone
company (page 54). You will need
to first subscribe or activate this
service through your service provider/
telephone company. Contact your
service provider/telephone company
on how to operate this service and
how you will be notified that you have
messages on your voice mail.
To use this service you will be
required to leave your answering
machine off on your unit.
This will allow the voice mail to
receive any messages.
R To use the unit’s answering machine
rather than the voice mail service
provided by your service provider/
telephone company, please contact
your service provider/telephone
company to have it removed or
deactivated permanently or
temporarily. Alternatively you can
leave this service connected and
change the Ring count to a
shorter duration on your unit so your
unit’s answering machine can pick up
the call prior to the voice mail
provided by your service provider/
telephone company.
For Telecom Call Minder or
TelstraClear Message Mailbox service
subscribers (for New Zealand)
To receive Call Minder or Message
Mailbox messages and use the unit’s
answering system properly, please note
the following:
R “Call Minder” and “Message Mailbox”
are services provided by your service
provider/telephone company
(page 54). You will need to first
52
Answering System for Landline
TG765xAZ(en)_1215_ver001-2.pdf 52 2011/12/15 14:29:35
subscribe or activate this service
through your service provider/
telephone company.
Contact your service provider/
telephone company on how to
operate this service and how you will
be notified that you have messages.
To use this service you will be
required to leave your answering
machine off on your unit (page 48).
This will allow the service to receive
any messages.
R To use the unit’s answering machine
rather than the service provided by
your service provider/telephone
company, please contact your service
provider/telephone company to have it
removed or deactivated permanently
or temporarily. Alternatively you can
leave this service connected and
change the Ring count to a
shorter duration on your unit so your
unit’s answering machine can pick up
the call prior to the service provided
by your service provider/telephone
company.
Caller’s recording time
You can change the maximum message
recording time allowed for each caller.
The default setting is 3 min.
1 MMENUN#305
2 MbN: Select the desired setting. a
MSAVEN a MOFFN
Selecting Greeting only
You can select Greeting only
which sets the unit to announce a
greeting message to callers but not
record messages.
Select Greeting only in step 2 on
“Caller’s recording time”, page 53.
Note:
R When you select Greeting only:
If you do not record your own
message, the unit will play the
pre-recorded greeting-only
message asking callers to call
again later.
If you use your own message,
record the greeting-only message
asking callers to call again later
(page 49).
Message alert
You can select whether or not the
message indicator on the handset
flashes slowly when new messages are
recorded. The default setting is On.
Important:
R If you stored the voice mail access
number (page 54), the message
indicator also flashes for newly
recorded voice mail messages from
the landline (page 54).
1 MMENUN#340
2 MbN: Select the desired setting. a
MSAVEN a MOFFN
Note:
R While message alert is on, battery
operating time is shortened (page 11).
53
Answering System for Landline
TG765xAZ(en)_1215_ver001-2.pdf 53 2011/12/15 14:29:35
Voice mail service for
landline
For Australia
Voice mail is an automatic answering
service offered by your service provider/
telephone company.
For New Zealand
To receive Call Minder or Message
Mailbox messages, please note the
following:
“Call Minder” and “Message Mailbox”
are automatic answering services
offered by your service provider/
telephone company.
For Australia and New Zealand
After you subscribe to this service, your
service provider/telephone companys
voice mail system answers calls for you
when you are unavailable to answer the
phone or when your line is busy.
Messages are recorded by your service
provider/telephone company, not your
telephone.
Please contact your service provider/
telephone company for details of this
service.
Important:
R To use the voice mail service
provided by your service provider/
telephone company rather than the
unit’s answering system, turn off the
answering system (page 48). For
details, see page 52.
R You need to store the voice mail
access number to activate the
message alert feature (page 53) for
voice mail service.
Storing the voice mail (VM)
access number
In order to listen to your voice mail
messages, you must dial your service
provider/telephone company’s voice
mail access number. Once you have
stored your voice mail access number,
you can dial it automatically (page 54).
1 MMENUN#331
2 Enter your access number (24 digits
max.). a MSAVEN a MOFFN
Note:
R When storing your voice mail access
number and your mailbox password,
press MPAUSEN to add pauses
(page 22) between the access
number and the password as
necessary. Contact your service
provider/telephone company for the
required pause time.
Example:
To erase the voice mail access
number
1 MMENUN#331
2 Press and hold MCLEARN until all
digits are erased. a MSAVEN a
MOFFN
Listening to voice mail
messages
If compatible with message indication
signals provided by your service
provider/telephone company, the unit
lets you know that you have new voice
mail messages in the following ways:
New Voice Mail is displayed on
the handset if message indication
service is available.
The message indicator on the
handset flashes slowly if the message
alert feature is turned on (“Message
alert”, page 53).
54
Voice mail Service for Landline
TG765xAZ(en)_1215_ver001-2.pdf 54 2011/12/15 14:29:35
1 MMENUN#330
R The speakerphone turns on.
2 Follow the pre-recorded instructions.
3 When finished, press MOFFN.
Note:
R If the handset still indicates there are
new messages even after you have
listened to all new messages, turn it
off by pressing and holding # until
the handset beeps.
55
Voice mail Service for Landline
TG765xAZ(en)_1215_ver001-2.pdf 55 2011/12/15 14:29:35
Intercom
Intercom calls can be made between
handsets.
Note:
R If you receive an outside call while
talking on the intercom, you hear 2
tones. To answer the call, press
MOFFN, then press M
N.
R When paging the handset, the paged
handset beeps for 1 minute.
Making an intercom call
1 MMENUN a MINTN
2 MbN: Select the desired unit. a
MSELECTN
R To stop paging, press MOFFN.
3 When you finish talking, press
MOFFN.
Answering an intercom call
1 Press M
N to answer the page.
2 When you finish talking, press
MOFFN.
Handset locator
You can locate a misplaced handset by
paging it.
1 Base unit:
Press MLOCATORN.
R All registered handsets beep for 1
minute.
2 To stop paging:
Base unit:
Press MLOCATORN.
Handset:
Press MOFFN.
Transferring calls,
conference calls
Outside calls can be transferred or a
conference call with an outside party can
be made between 2 handsets.
1 During an outside call, press MINTN
to put the call on hold.
2 MbN: Select the desired unit. a
MSELECTN
3 Wait for the paged party to answer.
R If the paged party does not
answer, press M
N to return to
the outside call.
4 To complete the transfer:
Press MOFFN.
R The outside call is being routed to
the destination unit.
To establish a conference call:
MMENUN a MbN: Conference
a MSELECTN
R To leave the conference, press
MOFFN. The other 2 parties can
continue the conversation.
R To put the outside call on hold:
MMENUN a MbN: Hold a
MSELECTN
To resume the conference:
MMENUN a MbN: Conference
a MSELECTN
Answering a transferred call
Press M
N to answer the page.
56
Intercom/Locator
TG765xAZ(en)_1215_ver001-2.pdf 56 2011/12/15 14:29:35
Installation for DECT
repeater
By installing this unit, you can extend the
range of your phone system to include
areas where reception was previously
not available.
The unit extends the range in all
directions, allowing several floors to be
covered.
Important:
R This unit is an accessory unit for use
with Panasonic Digital Cordless
phones.
R This unit is pre-registered to the base
unit.
For best performance
Placement
R Install the unit within base unit range
in an indoor environment. We
recommend installing the unit in a
raised position (such as on a wall).
R Avoid positioning the unit close to
objects that will interfere with
reception, such as thick walls,
radiators, metal shelving, etc.
R For maximum distance noise-free
operation, place the unit away from
electrical appliances such as TV,
radio, personal computer, or other
telephone equipment.
R Keep an appropriate distance from
the base unit to maximise the range of
your phone system. Find the
appropriate location by checking the
indicator. If the indicator lights
red or amber, re-position this unit in a
place where the indicator lights
green.
Base unit
Handset
DECT
repeater
DECT repeater range
Base unit range
Controls
B
A
C
indicator
indicator
ID indicator
MPROGRAMN
indicator and indicator
indicator
Status Meaning
Green
(On)
Within base unit range.
The unit is ready for use.
Green
(Flashing)
Handsets are
communicating with the
base unit through this unit.
Red
(On)
Out of base unit range.
Red
(Flashing)
The unit is not registered
to the base unit.
57
DECT repeater
TG765xAZ(en)_1215_ver001-2.pdf 57 2011/12/15 14:29:35
Status Meaning
Off The power is off. (AC
adaptor is not connected
properly.)
indicator
Status Meaning
Green
(On)
Signal strength of the
base unit is strong.
Amber
(On)
Signal strength of the
base unit is weak.
Red
(On)
Out of base unit range.
Off R The unit is not being
used.
R The power is off.
Installation
1 Connect the unit.
R Use only the supplied Panasonic
AC adaptor PQLV219AL.
Press plug firmly.
Hook
(220-240 V AC, 50/60 Hz)
R When the unit is turned on, the
indicator and indicator light
amber for about 2 seconds.
2 Confirm that the
indicator and
indicator light green. (The unit
is ready for use.)
R If the indicators do not light green,
re-position the unit in a place
where the indicators light green.
Note:
R The AC adaptor must remain
connected at all times. (It is normal for
the adaptor to feel warm during use.)
R The AC adaptor should be connected
to a vertically oriented or
floor-mounted AC outlet. Do not
connect the AC adaptor to a
ceiling-mounted AC outlet, as the
weight of the adaptor may cause it to
become disconnected.
R The unit can support a maximum of 3
handsets at a time.
Setting the repeater mode
This repeater is pre-registered to the
base unit and the default setting of
repeater mode is On. You do not need
to change this setting for initial use.
1 MMENUN #138
2 MbN: Select the desired setting. a
MSAVEN a MOFFN
Note:
R After turning the repeater mode on or
off,
is displayed on the handset
momentarily. This is normal and the
handset can be used once is
displayed.
Wall mounting
Note:
R Make sure that the wall and the fixing
method are strong enough to support
the weight of the unit.
37 mm
(Not supplied)
Screws
58
DECT repeater
TG765xAZ(en)_1215_ver001-2.pdf 58 2011/12/15 14:29:35
Wall mounting template
37 mm
59
DECT repeater
TG765xAZ(en)_1215_ver001-2.pdf 59 2011/12/15 14:29:35
Wall mounting
Note:
R Make sure that the wall and the fixing
method are strong enough to support
the weight of the unit.
Base unit
1 Lead the AC adaptor cord and
telephone line cord through the hole
in the wall mounting adaptor in the
direction of the arrow.
2 Tuck the telephone line cord inside
the wall mounting adaptor (A).
Connect the AC adaptor cord and
telephone line cord (B).
Hooks
A
B
AC adaptor cord
3 Insert the hooks on the wall
mounting adaptor into holes
and
on the base unit.
2
1
2
1
4 Adjust the adaptor to hold the base
unit, then push it in the direction of
the arrow until it clicks into place.
60
Useful Information
TG765xAZ(en)_1215_ver001-2.pdf 60 2011/12/15 14:29:35
5 Mount the unit on a wall then slide
down to secure in place.
83 mm
or
102 mm
AC adaptor cord
Screws
(Not supplied)
To remove the wall mounting adaptor
While pushing down the release levers
(A), remove the adaptor (B).
B
A
A
Charger
Drive the screws (not supplied) into the
wall.
25 mm
Screws
Hooks
Wall mounting template
n Base unit
83 mm
61
Useful Information
TG765xAZ(en)_1215_ver001-2.pdf 61 2011/12/15 14:29:35
102 mm
n Charger
25 mm
62
Useful Information
TG765xAZ(en)_1215_ver001-2.pdf 62 2011/12/15 14:29:35
Error messages
Display message Cause/solution
Access # to VM service
is not stored
R You have not stored the voice mail access
number. Store the number (page 54).
Base no power
or
No link. Re-connect
base AC adaptor.
R The handset has lost communication with the
base unit. Move closer to the base unit and try
again.
R Unplug the base unit’s AC adaptor to reset the
unit. Reconnect the adaptor and try again.
R The handset’s registration may have been
cancelled. Re-register the handset (page 39).
Busy
R No cellular phone is registered to the base
unit. Register a cellular phone (page 16).
R The called unit is in use.
R Other units are in use and the system is busy.
Try again later.
R The handset you are using is too far from the
base unit. Move closer and try again.
Check tel line
R The supplied telephone line cord has not been
connected yet or not connected properly.
Check the connections (page 9).
R If you do not connect the telephone line cord
and use only cellular lines, set the cellular line
only mode (page 18).
Error!!
R Recording was too short. Try again.
R Someone is using a cellular line or headset.
Try again later.
R The phonebook copy is incomplete (page 45).
The cellular phone is disconnected from the
base unit. Make sure that other Bluetooth
devices are not connected to the cellular
phone and try again.
Failed
R Although the unit tried to connect to the
cellular phone or headset, the connection has
failed.
Someone is using a cellular line or headset.
Try again later.
Make sure that the cellular phone or
headset is not connected to other Bluetooth
devices.
63
Useful Information
TG765xAZ(en)_1215_ver001-2.pdf 63 2011/12/15 14:29:35
Display message Cause/solution
Invalid
R There is no handset registered to the base
unit matching the handset number you
entered.
R The handset is not registered to the base unit.
Register the handset (page 39).
Requires subscription
to Caller ID.
R You must subscribe to a Caller ID service.
Once you receive caller information after
subscribing to a Caller ID Display service, this
message will not be displayed.
Use rechargeable
battery.
R A wrong type of battery such as Alkaline or
Manganese was inserted. Use only the
rechargeable Ni-MH batteries noted on
page 4, 5.
Troubleshooting
If you still have difficulties after following the instructions in this section, disconnect
the base unit’s AC adaptor, then reconnect the base unit’s AC adaptor. Remove the
batteries from the handset, and then insert the batteries into the handset again.
General use
Problem Cause/solution
The handset does not turn
on even after installing
charged batteries.
R Place the handset on the base unit or charger to
turn on the handset.
The unit does not work. R Make sure the batteries are installed correctly
(page 10).
R Fully charge the batteries (page 10).
R Check the connections (page 9).
R Unplug the base unit’s AC adaptor to reset the
unit. Reconnect the adaptor and try again.
R The handset has not been registered to the base
unit. Register the handset (page 39).
64
Useful Information
TG765xAZ(en)_1215_ver001-2.pdf 64 2011/12/15 14:29:35
Problem Cause/solution
I cannot register a cellular
phone to the base unit.
R Depending on the compatibility of the cellular
phone, you may not be able to register it to the
base unit. Confirm that your cellular phone
supports the hands-free profile (HFP) specification.
R Confirm that the Bluetooth feature of your cellular
phone is turned on. You may need to turn this
feature on depending on your cellular phone.
R The Bluetooth technology on your cellular phone
may not be functioning normally. Turn off and on
your cellular phone.
R If your cellular phone is already connected to
another Bluetooth device such as a Bluetooth
headset, turn it off or disconnect it from your
cellular phone.
R Some cellular phones may require you to enter the
base unit PIN to register. Confirm that you entered
the correct PIN.
I cannot connect a cellular
phone to the base unit.
R Confirm that your cellular phone is turned on.
R Confirm that your cellular phone is within base unit
range (page 13).
R Depending on the state of the wireless
environment, such as the presence of any
electrical interference, there may be a delay even
if the auto connection feature is turned on. You
can connect to the base unit manually (page 18).
R The cellular phone has not been registered to the
base unit. Register the cellular phone (page 16).
I cannot hear a dial tone. R Make sure the base unit’s AC adaptor is
connected properly (page 9).
R Make sure that the CELL 1 or CELL 2 indicator
lights green (page 14).
R Make sure the telephone line cord is connected
properly (page 9).
R Disconnect the base unit from the telephone line
and connect the line to a known working
telephone. If the working telephone operates
properly, contact our service personnel to have the
unit repaired. If the working telephone does not
operate properly, contact your service provider/
telephone company.
The indicator on the
handset flashes slowly.
R New messages have been recorded. Listen to the
new messages (page 50).
R New voice mail messages have been recorded.
Listen to the new voice mail messages (page 54).
65
Useful Information
TG765xAZ(en)_1215_ver001-2.pdf 65 2011/12/15 14:29:36
Programmable settings
Problem Cause/solution
I cannot register a handset
to a base unit.
R The maximum number of handsets (6) is already
registered to the base unit. Cancel unused
handset registrations from the base unit (page 39).
Battery recharge
Problem Cause/solution
The handset beeps and/or
flashes.
R Battery charge is low. Fully charge the batteries
(page 10).
I fully charged the batteries,
but
still flashes,
is displayed, or
the operating time
seems to be shorter.
R Clean the battery ends ( , ) and the charge
contacts with a dry cloth and charge again.
R It is time to replace the batteries (page 10).
Making/answering calls, intercom
Problem Cause/solution
is displayed. R The handset is too far from the base unit. Move
closer.
R The base unit’s AC adaptor is not properly
connected. Reconnect AC adaptor to the base unit.
R The handset is not registered to the base unit.
Register it (page 38).
Noise is heard, sound cuts
in and out.
R You are using the handset or base unit in an area
with high electrical interference. Re-position the
base unit and use the handset away from sources
of interference.
R Move closer to the base unit.
R If you use a DSL/ADSL service, we recommend
connecting a filter (contact your DSL/ADSL service
provider) to the telephone line between the base
unit and the telephone line socket. Contact your
DSL/ADSL provider for details. (for Australia)
R If you use a DSL/ADSL (JetStream) service, we
recommend that you contact your DSL/ADSL
service provider to have a DSL/ADSL Splitter
installed. We do not recommend the use of
generic DSL/ADSL filters.Contact your DSL/ADSL
service provider for details. (for New Zealand)
66
Useful Information
TG765xAZ(en)_1215_ver001-2.pdf 66 2011/12/15 14:29:36
Problem Cause/solution
The handset or base unit
does not ring.
R The ringer volume is turned off. Adjust the ringer
volume (page 31, 33).
R When one handset is selected to ring for cellular
calls, other units do not ring. To change the
selection, see page 17.
R Night mode is turned on for the handset. Turn it off
(page 36).
I cannot make local calls
with the handset or base
unit using a cellular line.
R You need to add your area code when making
cellular calls. Store your area code in order to
automatically add it to the beginning of the 8-digit
(for Australia)/7-digit (for New Zealand) phone
number when making cellular calls (page 19).
I cannot make or answer
cellular calls with the
handset or base unit.
R Depending on the cellular phone’s compatibility,
you may not be able to make or answer cellular
calls even if the cellular phone is connected to the
base unit.
R Make sure that the CELL 1 or CELL 2 indicator
lights green and the cellular phone is connected to
the base unit (page 18).
R If someone is talking on a cellular call or using the
headset, you cannot use the cellular feature.
There can be only one active Bluetooth connection
at a time.
R The cellular phone is being used separately from
your system.
I can make and answer
cellular calls but cannot
hear a sound.
R The Bluetooth technology on your cellular phone
may not be functioning normally. Turn off and on
your cellular phone.
R Disconnect and reconnect the base unit AC
adaptor and try again.
I cannot switch cellular
calls from the unit to the
cellular phone.
R Your cellular phone may not support this feature.
Refer to the operating instructions of your cellular
phone.
I cannot make a call using
the landline.
R The handset is too far from the base unit. Move
closer and try again.
R The cellular line only mode is turned on. Turn it off
(page 18).
R If you are using a BT double adaptor to connect
the unit, remove the adaptor and connect the unit
to the phone wall socket directly. If the unit
operates properly, check or replace the adaptor.
(for New Zealand)
R The unit is not designed to be used with rotary/
pulse dialling services.
67
Useful Information
TG765xAZ(en)_1215_ver001-2.pdf 67 2011/12/15 14:29:36
Caller ID/Talking Caller ID
Problem Cause/solution
Caller information is not
displayed.
R You must subscribe to Caller ID service. Contact
your service provider/telephone company for
details.
R If your unit is connected to any additional
telephone equipment such as a Caller ID box or
cordless telephone line socket, plug the unit
directly into the wall socket.
R If you use a DSL/ADSL service, we recommend
connecting a filter (contact your DSL/ADSL service
provider) to the telephone line between the base
unit and the telephone line socket. Contact your
DSL/ADSL provider for details. (for Australia)
R If you use a DSL/ADSL (JetStream) service, we
recommend that you contact your DSL/ADSL
service provider to have a DSL/ADSL Splitter
installed. We do not recommend the use of
generic DSL/ADSL filters. Contact your DSL/ADSL
service provider for details. (for New Zealand)
R Other telephone equipment may be interfering with
this unit. Disconnect the other equipment and try
again. (for Australia)
R Other telephone equipment such as a monitored
Burglar Alarm or the modem in the SKY Digital
decoder may be interfering with this unit.
Disconnect the other equipment and try again. (for
New Zealand)
Caller information is
displayed or announced
late.
R Depending on your service provider/telephone
company, the unit may display or announce the
caller’s information at the 2nd ring or later.
R Move closer to the base unit.
68
Useful Information
TG765xAZ(en)_1215_ver001-2.pdf 68 2011/12/15 14:29:36
Problem Cause/solution
Caller information is not
announced.
R The handset or base unit’s ringer volume is turned
off. Adjust it (page 31, 33).
R When one handset is selected to ring for cellular
calls, other units do not announce caller
information. To change the selection, see page 17.
R The Talking Caller ID feature is turned off. Turn it
on (page 33).
R The ring as cell mode is set to “On (without
Talking CID). To change the mode, see
page 17.
R The number of rings for the answering system is
set to 2 rings or Toll saver. Select a
different setting (page 52).
R Your unit does not announce caller information if
the base unit or 2 or more handsets are on a
call.
a headset is in use.
Time on the unit has
shifted.
R Incorrect time information from incoming Caller ID
changes the time. Set the time adjustment to
Manual” (off) (page 32).
Using Bluetooth devices
Problem Cause/solution
I cannot copy phonebook
entries from a cellular
phone.
R Confirm that the cellular phone supports Bluetooth
wireless technology.
R Confirm that the cellular phone supports the
Phone Book Access Profile (PBAP) or Object
Push Profile (OPP) specification.
R If the cellular phone is already connected to
another Bluetooth device such as a Bluetooth
headset, turn it off or disconnect it from the cellular
phone.
R Someone is using a cellular line or headset. Try
again later.
R Turn the cellular phone off, then turn it on and try
again.
R If an entry is already stored in the unit’s shared
phonebook, the entry cannot be copied even by
selecting another group.
I cannot have a
conversation using the
headset.
R Your Bluetooth headset is not registered. Register
it (page 46).
R Turn your headset off, then turn it on and try again.
69
Useful Information
TG765xAZ(en)_1215_ver001-2.pdf 69 2011/12/15 14:29:36
Problem Cause/solution
Noise is heard during a call
on the headset.
R A Bluetooth headset can communicate with the
base unit within a range of approximately 10 m.
The connection may be subject to interference
from obstructions such as walls or electronic
devices. Move closer to the base unit.
I cannot connect my
headset to the base unit.
R Confirm that your headset is turned on.
R If your headset is already connected to another
Bluetooth device such as your cellular phone,
disconnect the headset from your cellular phone,
then perform the connecting procedure from the
base unit.
R If someone is using a cellular line, you cannot
connect the headset. There can be only one active
Bluetooth connection at a time.
R The headset has not been registered to the base
unit. Register the headset (page 46).
Some headset enhanced
features are not available.
R The base unit does not support enhanced features
such as Last number redial or Call reject.
An error tone is heard
when I try to program the
Bluetooth feature.
R The Bluetooth feature cannot be accessed
immediately after connecting the AC adaptor to
the base unit. Wait a few seconds and try again.
R The headset has not connected to the base unit
yet, even though you performed the connecting
procedure setting. Wait a few seconds and try
again.
70
Useful Information
TG765xAZ(en)_1215_ver001-2.pdf 70 2011/12/15 14:29:36
Answering system
Problem Cause/solution
The unit does not record
new messages.
R The answering system is turned off. Turn it on
(page 48).
R The answering system does not answer or record
calls from cellular lines.
R The message memory is full. Erase unnecessary
messages (page 49).
R The recording time is set to “Greeting only”.
Change the setting (page 53).
R If you subscribe to a voice mail service, messages
are recorded by your service provider/telephone
company, not your telephone. Change the unit’s
number of rings setting or contact your service
provider/telephone company (page 52).
R The answering system will not answer incoming
calls while:
the base unit or 2 or more handsets are on a
cellular call or an intercom call.
a headset is in use.
Caller information is recorded in the caller list.
I cannot operate the
answering system.
R Someone is using the unit. Wait for the other user
to finish.
R A caller is leaving a message. Wait for the caller to
finish.
R The handset is too far from the base unit. Move
closer.
I cannot operate the
answering system remotely.
R The remote access code is not set. Set the remote
access code (page 51).
R You are entering the wrong remote access code. If
you have forgotten your remote access code,
enter the remote access code setting to check
your current code (page 51).
R Press each key firmly.
R The answering system is turned off. Turn it on
(page 52).
R You cannot operate the answering system when
calling a cellular phone registered to the base unit.
71
Useful Information
TG765xAZ(en)_1215_ver001-2.pdf 71 2011/12/15 14:29:36
Bluetooth PIN
Problem Cause/solution
I cannot remember the PIN. R Change the PIN using the following method.
1 MMENUN#619
2 *7000
3 Enter the new 4-digit PIN. a MOKN
4 Enter the new 4-digit PIN again. a MSAVEN a
MOFFN
72
Useful Information
TG765xAZ(en)_1215_ver001-2.pdf 72 2011/12/15 14:29:36
DECT repeater
Problem Cause/solution
The unit does not work. R When the indicators do not light, the AC adaptor is
not connected properly. Check the connections.
R When the indicators do not light green, move the
unit closer to the base unit.
R Registration may have been cancelled. Deregister
the unit, then re-register.
Deregister:
1 Unplug the AC adaptor, then press and hold
MPROGRAMN.
2 While pressing and holding MPROGRAMN,
re-connect the AC adaptor.
3 Keep holding to press MPROGRAMN for about
10 seconds until the
indicator stops
flashing and lights red. Then release
MPROGRAMN.
R The
and indicators light amber for a
moment then only the indicator flashes
red.
R If the
indicator flashes green after
releasing MPROGRAMN, deregistration
failed. Deregisterthe unit again.
Re-register:
1 DECT repeater: Unplug the AC adaptor.
2 Base unit: Press and hold MLOCATORN for
about 5 second, until the registration tone
sounds.
R The next step must be completed within 90
seconds.
3 DECT repeater: Connect the AC adaptor,
then wait until the
indicator and indicator
light green.
4 Base unit: To stop the registration tone, press
MLOCATORN.
While talking using the
handset, sound cuts in and
out.
R The handset is out of range. Move the handset
closer to this unit.
73
Useful Information
TG765xAZ(en)_1215_ver001-2.pdf 73 2011/12/15 14:29:36
Problem Cause/solution
A repeating tone is heard
while talking using the
handset.
or
The
indicator continues
to light amber and the
indicator flashes green.
R MPROGRAMN was pressed. The unit is in
programming mode. To exit, press MPROGRAMN
again. Do not press MPROGRAMN, except when
deregistering the unit.
Liquid damage
Problem Cause/solution
Liquid or other form of
moisture has entered the
handset/base unit.
R Disconnect the AC adaptor and telephone line
cord from the base unit. Remove the batteries
from the handset and leave to dry for at least 3
days. After the handset/base unit are completely
dry, reconnect the AC adaptor and telephone line
cord. Insert the batteries and charge fully before
use. If the unit does not work properly, contact an
authorised service centre.
Caution:
R To avoid permanent damage, do not use a microwave oven to speed up the drying
process.
74
Useful Information
TG765xAZ(en)_1215_ver001-2.pdf 74 2011/12/15 14:29:36
Warranty (for New Zealand)
Panasonic Canada Inc.
5770 Ambler Drive, Mississauga, Ontario L4W 2T3
PANASONIC PRODUCT - LIMITED WARRANTY
EXCHANGE PROGRAM
Panasonic Canada Inc. warrants this product to be free from defects in material and workmanship under
normal use and for a period as stated below from the date of original purchase agrees to, at its option either
(a) repair your product with new or refurbished parts, (b) replace it with a new or a refurbished equivalent
value product, or (c) refund your purchase price. The decision to repair, replace or refund will be made by
Panasonic Canada Inc.
Telephone Accessory / Product One (1) year
This warranty is given only to the original purchaser, or the person for whom it was purchased as a gift, of a
Panasonic brand product mentioned above sold by an authorized Panasonic dealer in Canada and
purchased and used in Canada, which product was not sold “as is”, and which product was delivered to you
in new condition in the original packaging.
IN ORDER TO BE ELIGIBLE TO RECEIVE WARRANTY SERVICE HEREUNDER, A PURCHASE RECEIPT
OR OTHER PROOF OF DATE OF ORIGINAL PURCHASE, SHOWING AMOUNT PAID AND PLACE OF
PURCHASE IS REQUIRED
LIMITATIONS AND EXCLUSIONS
This warranty ONLY COVERS failures due to defects in materials or workmanship, and DOES NOT COVER
normal wear and tear or cosmetic damage. The warranty ALSO DOES NOT COVER damages which
occurred in shipment, or failures which are caused by products not supplied by Panasonic Canada Inc., or
failures which result from accidents, misuse, abuse, neglect, mishandling, misapplication, alteration, faulty
installation, set-up adjustments, misadjustment of consumer controls, improper maintenance, improper
batteries, power line surge, lightning damage, modification, introduction of sand, humidity or liquids,
commercial use such as hotel, office, restaurant, or other business or rental use of the product, or service by
anyone other than a Authorized Servicer, or damage that is attributable to acts of God.
Rechargeable batteries are warranted for ninety (90) days from date of original purchase.
THIS EXPRESS, LIMITED WARRANTY IS IN LIEU OF ALL OTHER WARRANTIES, EXPRESS OR
IMPLIED, INCLUDING ANY IMPLIED WARRANTIES OF MERCHANTABILITY AND FITNESS FOR A
PARTICULAR PURPOSE. IN NO EVENT WILL PANASONIC CANADA INC. BE LIABLE FOR ANY SPECIAL,
INDIRECT OR CONSEQUENTIAL DAMAGES RESULTING FROM THE USE OF THIS PRODUCT OR
A
RISING OUT OF ANY BREACH OF ANY EXPRESS OR IMPLIED WARRANTY. (As examples, this
w
arranty excludes damages for lost time, travel to and from the Authorized Servicer, loss of or damage to
media or images, data or other memory or recorded content. This list of items is not exhaustive, but for
illustration only.)
In certain instances, some jurisdictions do not allow the exclusion or limitation of incidental or consequential
damages, or the exclusion of implied warranties, so the above limitations and exclusions may not be
applicable. This warranty gives you specific legal rights and you may have other rights which vary depending
on your province or territory.
CONTACT INFORMATION
For product information and operation assistance, please contact:
Our Customer Care Centre: Telephone #: 1-800-561-5505
Fax #: (905) 238-2360
Email link: “Support contact us email” on www.panasonic.ca
For defective product exchange within the warranty period, please contact the original dealer or our Customer
Care Centre.
75
Useful Information
TG765xAZ(en)_1215_ver001-2.pdf 75 2011/12/15 14:29:36
Index
# 3-way conference: 24
A Additional handset: 38
Alarm: 36
Answering calls: 22
Answering system
Call screening: 48
Erasing messages: 49, 50, 51
Greeting message: 49
Greeting only: 53
Listening to
messages: 49, 50, 51
Number of rings: 52
Recording time: 53
Remote access code: 51
Remote operation: 51
Ring count: 52
Toll saver: 52
Turning on/off: 48, 51, 52
Area code: 43
Auto talk: 22
B Base unit
Resetting: 38
Battery: 10, 11
Bluetooth wireless technology
Cellular phone (Link to cell): 16
Headset: 46
Phonebook transfer: 45
C Call share: 23
Call Waiting: 41
Call waiting and Caller ID
compatible: 41
Call Waiting Caller ID: 41
Caller ID service: 40
Caller list: 42
Caller list edit: 43
Cellular calls: 21
Cellular phone
Deregistration: 19
Registration: 16
Chain dial: 28
CID (Caller ID): 42
Conference calls: 56
Control type: 13
D Date and time: 15
Direct command code: 29
Display
Contrast: 33
E Eco mode: 11
Equalizer: 23
Error messages: 63
G Groups: 27, 42
H Handset
Deregistration: 39
Locator: 56
Name: 37
Registration: 39
Hold: 23
I Incoming call barring: 37
Intercom: 56
K Key tone: 33
L Landline calls: 21
Line mode: 34
Link to cell
Area code: 19
Auto connection: 18
Cellular line only mode: 18
Cellular line selection: 19
Connection: 18
Ring as cell mode: 17
Select unit to ring: 17
M Making calls: 21
Missed calls: 40
Mute: 23
N Night mode: 36
P Pause: 22
Phonebook: 26
PIN: 19
Privacy mode: 24
R Recall: 23
Redialling: 21
Region setting: 38
Repeater: 34, 57
Ringer ID: 42
Ringer tone: 31, 33, 42
S SP-PHONE (Speakerphone): 21
T Talking Caller ID Display: 41
Time adjustment: 32
Transferring calls: 56
Troubleshooting: 64
V VM (voice mail): 54
76
Index
TG765xAZ(en)_1215_ver001-2.pdf 76 2011/12/15 14:29:36
Voice Mail: 52, 54
Volume
Receiver: 21
Ringer (Base unit): 22, 31, 33
Ringer (Handset): 22, 31, 33
Speaker: 21
W Wall mounting: 58, 60
77
Index
TG765xAZ(en)_1215_ver001-2.pdf 77 2011/12/15 14:29:36
78
Notes
TG765xAZ(en)_1215_ver001-2.pdf 78 2011/12/15 14:29:36
79
Notes
TG765xAZ(en)_1215_ver001-2.pdf 79 2011/12/15 14:29:36
For your future reference
We recommend keeping a record of the following information to assist with any repair
under warranty.
Serial No. Date of purchase
(found on the bottom of the base unit)
Name and address of dealer
Attach your purchase receipt here.
For Australia
Customer Care Centre Tel. No.: 132600
or website www.panasonic.com.au
For New Zealand
Customer Care Centre Tel. No.: (09) 272 0178
or website www.panasonic.co.nz
N52
Sales Department:
1 Innovation Road, Macquarie Park NSW 2113, Australia
350 Te Irirangi Drive, East Tamaki, Private Bag 14911 Panmure, Auckland,
New Zealand
Phone: (09) 272 0100
Fax: (09) 272 0137
1-62, 4-chome, Minoshima, Hakata-ku, Fukuoka 812-8531, Japan
© Panasonic System Networks Co., Ltd. 2012
*TG7652AZ*
*TG7652AZ*
PNQX5357ZA TT0112MG0
TG765xAZ(en)_1215_ver001-2.pdf 80 2011/12/15 14:29:36
4

Hulp nodig? Stel uw vraag in het forum

Spelregels

Misbruik melden

Gebruikershandleiding.com neemt misbruik van zijn services uitermate serieus. U kunt hieronder aangeven waarom deze vraag ongepast is. Wij controleren de vraag en zonodig wordt deze verwijderd.

Product:

Bijvoorbeeld antisemitische inhoud, racistische inhoud, of materiaal dat gewelddadige fysieke handelingen tot gevolg kan hebben.

Bijvoorbeeld een creditcardnummer, een persoonlijk identificatienummer, of een geheim adres. E-mailadressen en volledige namen worden niet als privégegevens beschouwd.

Spelregels forum

Om tot zinvolle vragen te komen hanteren wij de volgende spelregels:

Belangrijk! Als er een antwoord wordt gegeven op uw vraag, dan is het voor de gever van het antwoord nuttig om te weten als u er wel (of niet) mee geholpen bent! Wij vragen u dus ook te reageren op een antwoord.

Belangrijk! Antwoorden worden ook per e-mail naar abonnees gestuurd. Laat uw emailadres achter op deze site, zodat u op de hoogte blijft. U krijgt dan ook andere vragen en antwoorden te zien.

Abonneren

Abonneer u voor het ontvangen van emails voor uw Panasonic KX-TG7652 bij:


U ontvangt een email met instructies om u voor één of beide opties in te schrijven.


Ontvang uw handleiding per email

Vul uw emailadres in en ontvang de handleiding van Panasonic KX-TG7652 in de taal/talen: Engels als bijlage per email.

De handleiding is 5,74 mb groot.


U ontvangt de handleiding per email binnen enkele minuten. Als u geen email heeft ontvangen, dan heeft u waarschijnlijk een verkeerd emailadres ingevuld of is uw mailbox te vol. Daarnaast kan het zijn dat uw internetprovider een maximum heeft aan de grootte per email. Omdat hier een handleiding wordt meegestuurd, kan het voorkomen dat de email groter is dan toegestaan bij uw provider.

Stel vragen via chat aan uw handleiding

Stel uw vraag over deze PDF

Uw handleiding is per email verstuurd. Controleer uw email

Als u niet binnen een kwartier uw email met handleiding ontvangen heeft, kan het zijn dat u een verkeerd emailadres heeft ingevuld of dat uw emailprovider een maximum grootte per email heeft ingesteld die kleiner is dan de grootte van de handleiding.

Er is een email naar u verstuurd om uw inschrijving definitief te maken.

Controleer uw email en volg de aanwijzingen op om uw inschrijving definitief te maken

U heeft geen emailadres opgegeven

Als u de handleiding per email wilt ontvangen, vul dan een geldig emailadres in.

Uw vraag is op deze pagina toegevoegd

Wilt u een email ontvangen bij een antwoord en/of nieuwe vragen? Vul dan hier uw emailadres in.


Info