


-
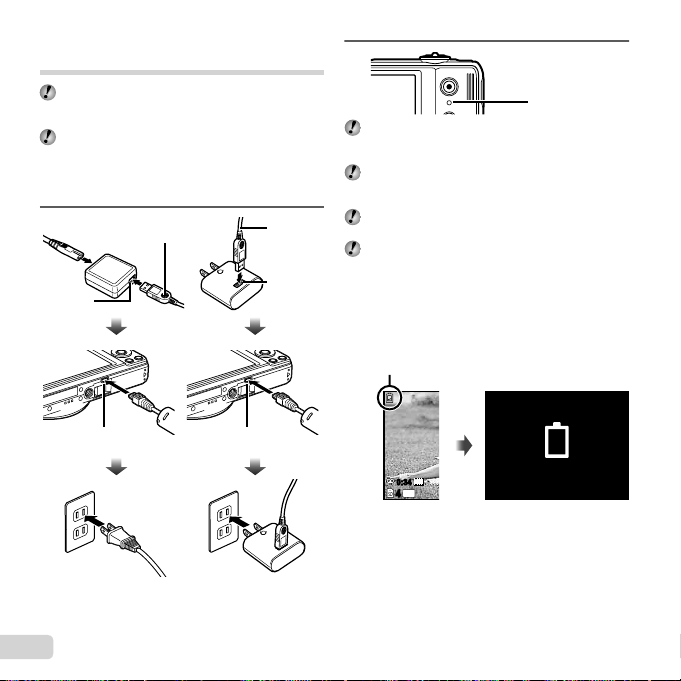
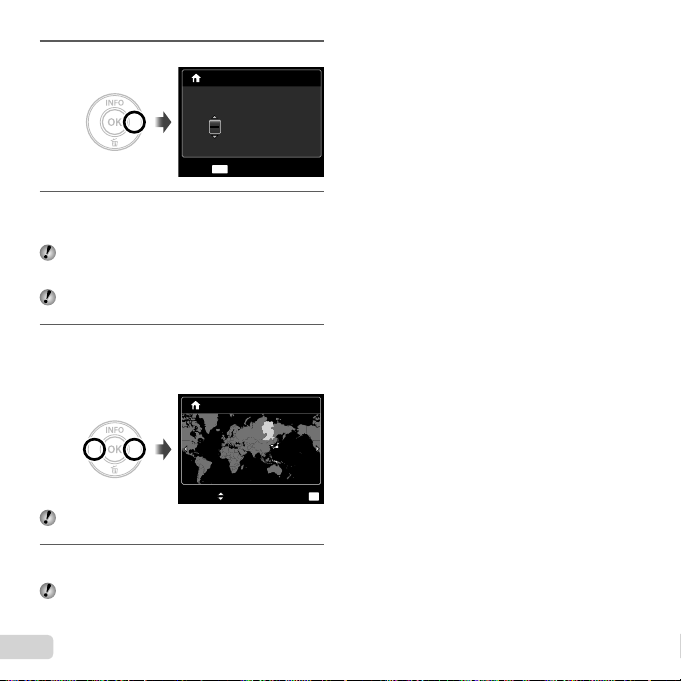
Als ik de batterij verwissel staat de datum en tiijd weer op fabrieksinstelling. Zit er een backuo batterij in het toestel? Gesteld op 15-11-2020 om 21:20
Reageer op deze vraag Misbruik melden -
Hoe kom ik aan een handleiding voor mijn Olympus D720 Gesteld op 7-1-2018 om 14:08
Reageer op deze vraag Misbruik melden-
Probeer het eens op "gebruikshandleiding.com". Succes. Herman Geantwoord op 23-1-2018 om 03:12
Waardeer dit antwoord Misbruik melden
-
-
Het rode lampje blijft branden en de camera kan niet gestart worden Gesteld op 5-7-2016 om 19:28
Reageer op deze vraag Misbruik melden-
heb je hiervoor al een oplossing gekregen? want ik heb vandaag net hetzelfde voor
Waardeer dit antwoord (2) Misbruik melden
Geantwoord op 24-7-2016 om 22:16
-
-
Ook ik heb dit probleem nu sinds vandaag, is hier al een antwoord op?
Waardeer dit antwoord (3) Misbruik melden
Bij mij ontstond het probleem toen ik een m'n D-750 aan een nieuwe refurbished DELL laptop koppelde. De laptop zag geen apparaat op m'n USB. Heb toen geprobeerd m'n camera aan te zetten tijdens koppeling en toen ging het dus mis. Nu nog alleen lens in en uit, maar zonder scherm. Bij lens uit gaat rode indicatorlampje branden Geantwoord op 1-1-2017 om 16:59 -
Camera kan niet scherp stellen.
Reageer op deze vraag Misbruik melden
Autofocus werkt niet. Gesteld op 16-2-2014 om 15:28-
Ik heb hetzelfde, altijd prima gewerkt, dan zomaar out of the blue werkt het scherpstellen niet meer Geantwoord op 27-2-2014 om 22:12
Waardeer dit antwoord (22) Misbruik melden
-
-
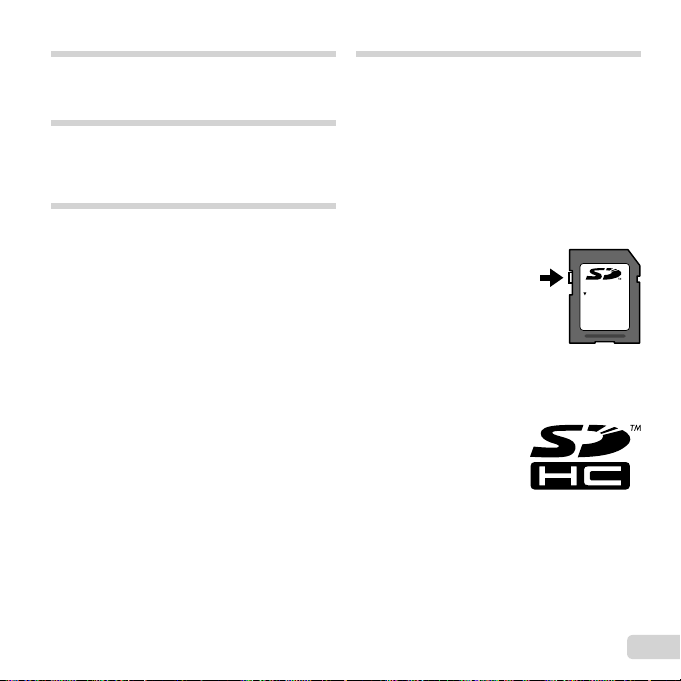
Bij het aanzetten van de camera krijg ik de melding: ! schrijfbeveiliging. Wat is dit? Gesteld op 23-12-2013 om 10:07
Reageer op deze vraag Misbruik melden-
Aan de linkerzijde van de geheugenkaart zit een wit schuifje. Deze moet naar boven staan. Staat deze naar onder dan staat deze op schrijfbeveiliging. Dit om te voorkomen dat foto's ongewenst gewist worden. Geantwoord op 27-5-2014 om 22:08
Waardeer dit antwoord (4) Misbruik melden
-
-
mijn camera stelt niet meer scherp Gesteld op 3-8-2013 om 11:43
Reageer op deze vraag Misbruik melden-
mijn camera stelt niet meer scherp S Geantwoord op 3-8-2013 om 11:43
Waardeer dit antwoord (16) Misbruik melden
-
-
Olympus d-720 sinds kort heb ik een wazig beeld herkend iemand dat in de vorige maanden nooit gehad ? Gesteld op 28-5-2013 om 21:27
Reageer op deze vraag Misbruik melden-
Heeft iemand hier al op geantwoord? Ik heb het ook sinds kort en heb geen idee hoe ik dit moet oplossen?
Waardeer dit antwoord Misbruik melden
Mvgr
marilou1980@hotmail.com Geantwoord op 1-8-2013 om 07:58
-
-
mijn camera heeft dat ook stelt niet meer scherp alleen heel dichtbij 50cm - klaas Geantwoord op 3-8-2013 om 11:38
Waardeer dit antwoord (7) Misbruik melden -
Olympus D-720 stelt plotseling niet meer scherp.
Reageer op deze vraag Misbruik melden
Wie weet hier een oplossing voor? Gesteld op 6-4-2013 om 20:30-
Is daar een oplossing voor Geantwoord op 4-12-2013 om 20:01
Waardeer dit antwoord (10) Misbruik melden
-
-
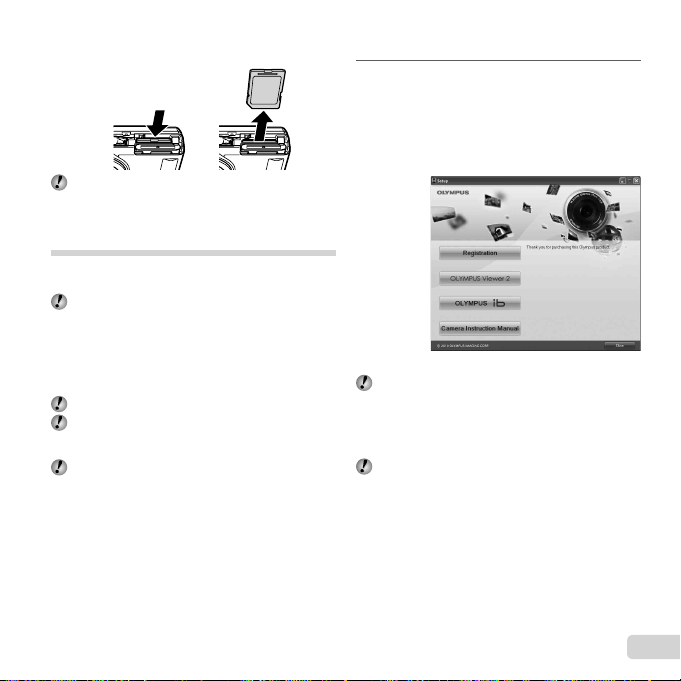
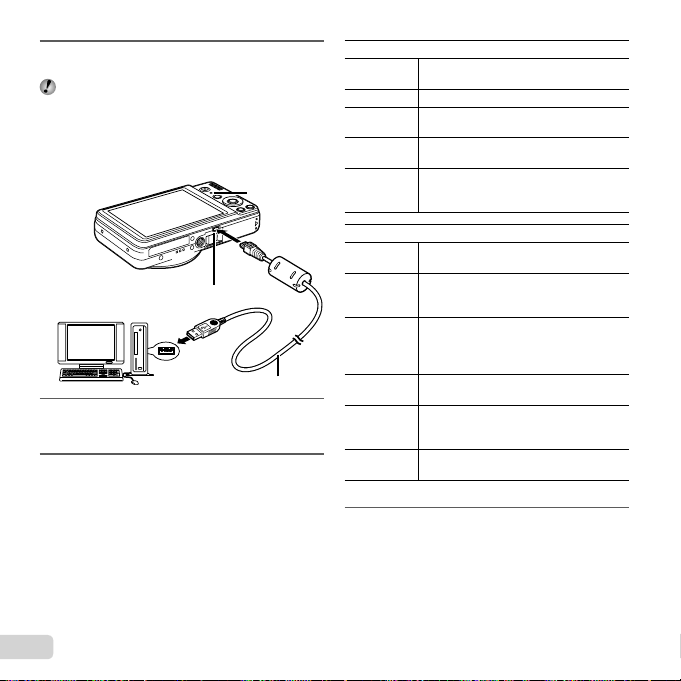
hoe kan ik mijn fotos op mijn PC plaatsen ? olympus D-750 zwart Gesteld op 23-12-2012 om 15:15
Reageer op deze vraag Misbruik melden-
met windows 7 het geheugenkaartje plaatsen en de rest gaat vanzelf Geantwoord op 16-1-2013 om 19:54
Waardeer dit antwoord (2) Misbruik melden
-
-
Mijn Camera was aan het filmen, ik wou hem ineens uit zetten, bleef de lens naar buiten staan.. als k hem nu aan zet geeft hij een raar geluid en valt hij weer uit wat nu? Gesteld op 13-9-2012 om 11:24
Reageer op deze vraag Misbruik melden-
Mijn Camera blijft constant op filmen staan,en kan hem er niet meer afkrijgen. Geantwoord op 1-10-2012 om 22:07
Waardeer dit antwoord (10) Misbruik melden
-
-
is erased foto terug te 'halen' ? Dank, Ine Gesteld op 8-6-2012 om 14:24
Reageer op deze vraag Misbruik melden-
? Geantwoord op 5-7-2012 om 21:52
Waardeer dit antwoord (7) Misbruik melden
-
-
mijn camara ook stelt ineens niet scherp meer Gesteld op 15-5-2012 om 21:50
Reageer op deze vraag Misbruik melden-
Hallo,ik heb de service dienst van olympus gebeld en zij vertelden mij dat je de accu er 48 uit moest verWijderen en Dan weer terug plaatsen (resetten)
Waardeer dit antwoord (15) Misbruik melden
Ik hoop dat je hierwat aan hebt.
Gr Paul Geantwoord op 23-5-2012 om 20:12
-
-
Ook mijn Olympus D-720 stelt niet meer scherp an garantie natuurlijk net afgelopen! Geantwoord op 6-4-2013 om 20:27
Waardeer dit antwoord (10) Misbruik melden
