OR ONE OF THE LAST 10 OUTGOING NUMBERS..................XVI
MAKING COPIESXVI
WHAT DOCUMENTS CAN BE COPIED.....................................XVI
TO MAKE A COPY......................................................................XVI
I
B
EFORE
YOU
START
C
ONSULTING
THE
MANUAL
This manual describes variousmodels of fax machine of which some
have a built-in telephone answering deviceand others do not.
In the description that follows, whenever a distinction is to be made
between these models, reference will be made to: "Base models"
and "Models with a built-in TAD".
Thismanual is divided into two sections: the first section "About
the fax machine" and "How to get started quickly" provide a
summary of the fax machine's features, allowing you to install it
and get started immediately, using its basic functions only.
After this initial phase, the second section of the manual can be
consulted. In it you will find a detailed description of the fax
machine and its many functions.
E
NVIRONMENTAL
RECYCLING
Never throw the fax machine away with ordinary household waste.
Find out how it is to be disposed of from your local authorities and
make sure you respect all regulations in force.
The cardboard box, the plastic present in the package and the vari-
ous parts of the fax machine may be recycled in accordance with the
recycling regulations in force in your country.
S
AFETY
PRECAUTIONS
RISKOFANELECTRICSHOCK
•Never attempt to repair the fax machine yourself. If you remove
the casing, you risk getting an electric shock or suffering some
other kind of injury. Repairs should be carried out by qualified
technical staff only.
•During storms we recommend you unplug the device from
both the power outlet and the telephone line so as to
eliminate the risk of it being damaged by lightning.
•Never pour liquids on the fax machine and avoid exposing it to the
damp.
If liquids seep inside it, unplug it immediately from the mains power
supply and the telephone line. Before using it again, have it re-
paired by qualified, technical staff.
•Do not use the fax machine outside in bad weather.
•Connect the fax machine exclusively to a certified wall power
socket.
•To unplug the power cable from the wall power socket, remove
the plug and refrain from yanking the cable.
•Never touch the power cable or plug with wet hands.
•Do not fold or squash the power cable. Keep it away from heat
sources.
•Before cleaning the fax machine, unplug it from the wall power
socket.
•Before using the fax machine, check that it has not been damaged
or dropped. If it has, have it checked by a qualified engineer.
RISKOFSUFFOCATION
•
The fax machine and its accessories are wrapped in plastic so do
not let children play with the packaging material.
RISKOFFIRE
•If you are to leave the fax machine unused for a long period of
time, you should disconnect it from the power supply: in this way,
it will be protected against the risk of damage due to interference or
power surges.
RISKOFACCIDENT
•Place it on a stable, flat surface free of all vibrations so as to avoid
drops that could cause damage to the machine and injury to per-
sons.
•
Lay the power cable so that it cannot be trodden on or tripped
over.
•
Never let children use or play with the fax machine.
OPERATINGPRECAUTIONS
•Keep the fax machine in a dust-free place away from sources of
water, steam and excessive heat. Do not expose it to direct sun-
light.
•Ensure that no books, documents, or other objects obstruct normal
ventilation in any way.
•Use the fax machine exclusively at a temperature of between 5°C
and 35°C and a relative humidity of between 15% and 85%.
•Keep the fax machine away from other electrical and electronic
appliances that may cause interference, e.g. radios, televisions,
etc.
•If a voltage drop or power failure occurs, it will not be possible to
make or receive telephone calls as the keypad will be disabled.
•In an emergency, if you wish to make a call, you must use a
telephone certified by the telephone company, connecting it di-
rectly to the fax machine (in countries where this is allowed) or
directly to the telephone wall socket.
•Leave enough room in front of the outlet from which documents
and received/copied documents are unloaded, so that they do not
fall on the floor.
IMPROPERUSE
The fax machine was designed to send and receive documents
and to copy paper documents. The machine may also be used as
a telephone. All other uses are to be considered improper. In par-
ticular, it is never to be connected directly to an ISDN line and, if it
is, the guarantee becomes null and void.
A
BOUT
THE
INSTALLATION
AND
SETUP
PARAMETERS
As the country default values for each installation and setup param-
eter may change due to certification requirements or specific cus-
tomers’ needs, these values do not always correspond to those
indicated in the manual: it is therefore advisable to print them before
changing them.
II
A
BOUT
THE
FAX
MACHINE
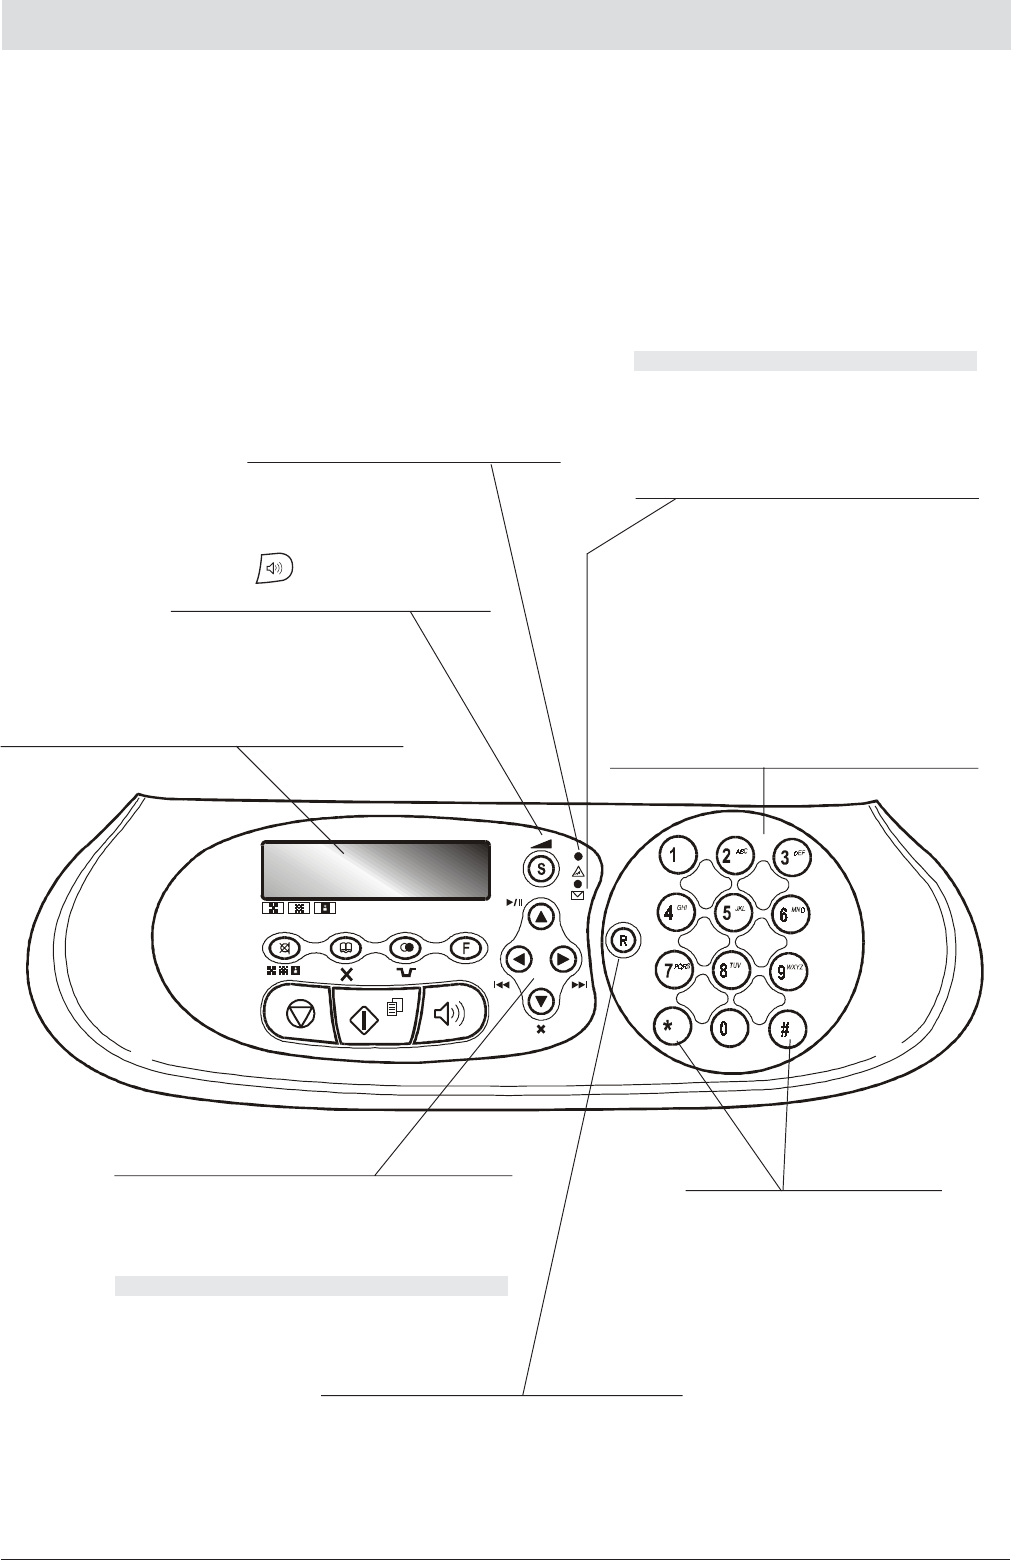
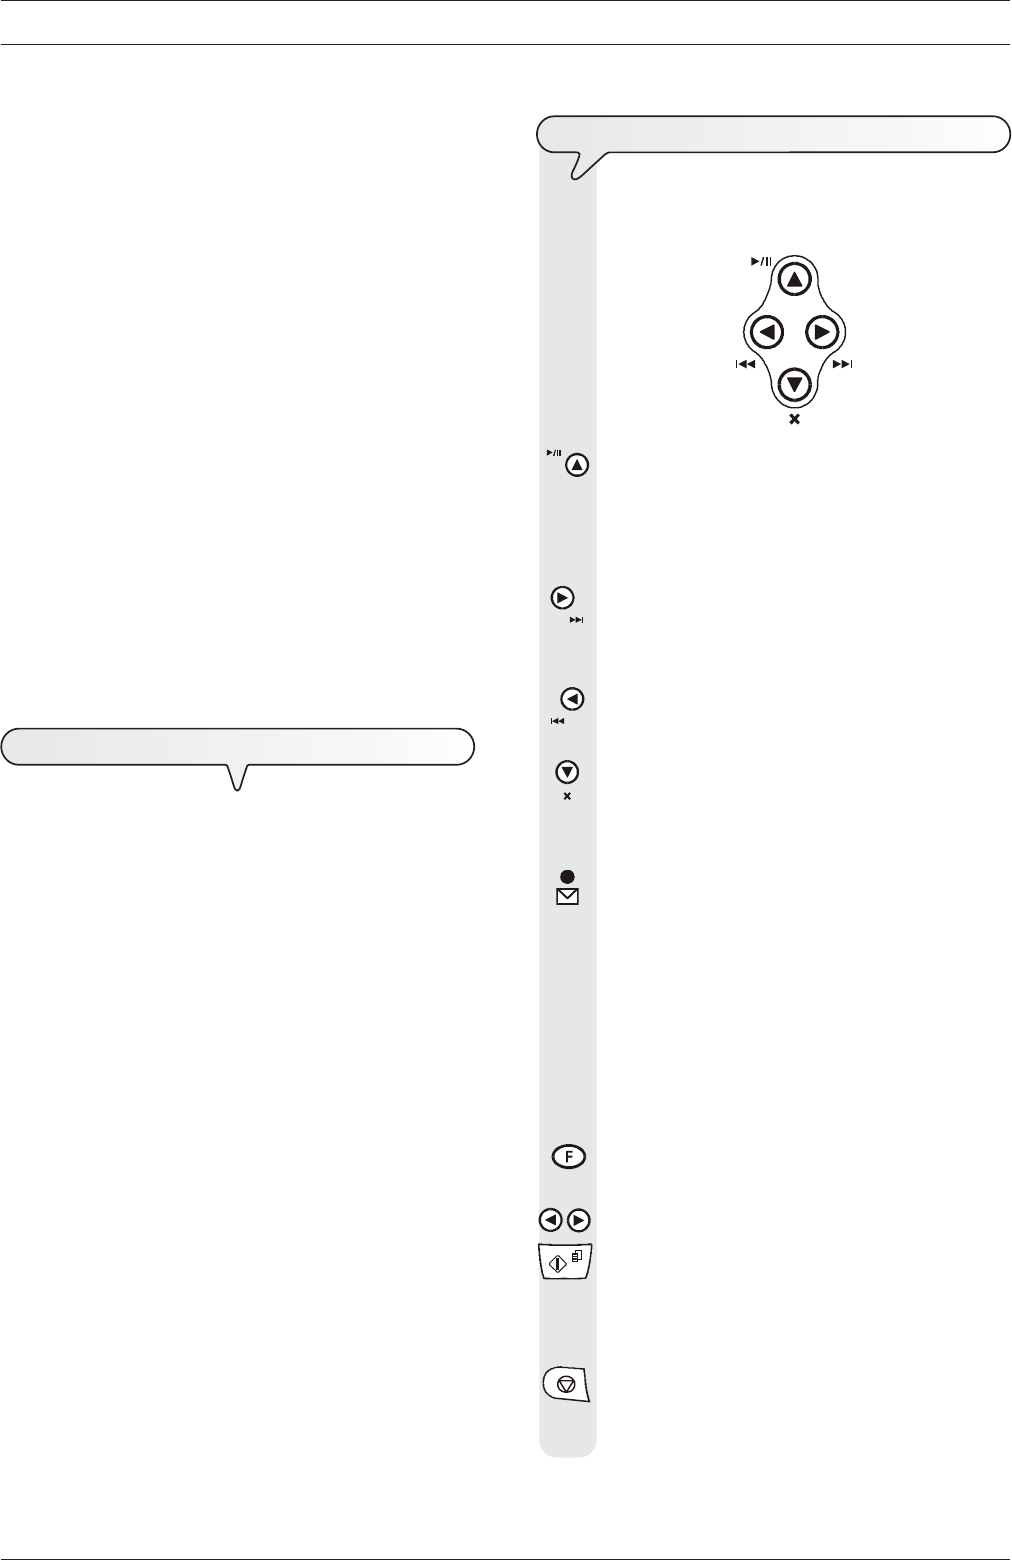
C
ONSOLE
•
Dial the fax or telephone number.
•
If pressed for more than a second, they automatically dial
(once set) the telephone or fax number assigned to them
(one-touch dialling function).
•
Enter numeric data.
•
Select digits and alphanumeric characters during the en-
try of numbers and names.
"Error" LED indicator
Signals an operating fault during transmission or
reception.
Blinking, indicates that the memory contains docu-
ments that have not been printed.
Off, indicates that the memory is empty.
M
ODELS
WITH
A
BUILT
-
IN
TA D
ONLY
On, indicates that there are messages or memos in the
memory that have already been played.
Blinking, indicates that the memory contains docu-
ments that have not been printed, messages or memos
that have not been played.
Off, indicates that the memory is empty.
With the handset lifted, gives access to the special func-
tions made available by the network manager and com-
monly known as REGISTER RECALL (R function).
•
Scroll "forwards" and "backwards" through the values of a
parameter.
•
Move the cursor to the "right" and to the "left" while entering
numbers and names.
M
ODELS
WITH
A
BUILT
-
IN
TAD
ONLY
•
Used to perform TAD functions. Described in the correspond-
ing chapter.
Display
A two-line liquid crystal display with a capacity of 16 characters
per line.
Shows operator prompts and error messages.
•
After the button has been pressed, it turns
the speaker volume "up" or "down".
•
With tone dialling, they send a tone
down the line for special network serv-
ices.
•
They scroll "backwards" and "for-
wards" through characters and spe-
cial symbols during the entry of
names.
The specific keys of the models with TAD are described under the item “
MODELS WITH A BUILT-IN TAD ONLY
”.
III
A
BOUT
THE
FAX
MACHINE
C
ONSOLE
•
Unloads a document from the ADF or manual docu-
ment feeder.
•
Turns off the "" LED indicator.
•
Returns the fax machine to the stand-by mode.
•
Stops the programming, transmission, reception or
copying operation in progress.
•
Starts receiving a document.
•
After the fax number has been dialled, starts sending a
document (only with the document inserted in the ADF
or manual document feeder).
•
Confirms the selection of menus, submenus, param-
eters and their values and moves on to the next condi-
tion.
•
Starts copying a document (only with the document
inserted in the ADF or manual document feeder).
Used to dial a telephone or fax number without lifting
the telephone handset.
•
After two numeric keys (01-50)
have been pressed, automati-
cally dials (once set) the tel-
ephone or fax number associ-
ated with them.
•
Cancels incorrect settings.
•Inserts a pause during the dialling of the telephone
or fax number.
•Displays a list of the last 10 fax or telephone
numbers dialled (outgoing calls) or the last 20
numbers from which calls have been received
and not answered (incoming calls), irrespec-
tive of whether or not a document was present in
the ADF or manual feeder.
•Adjusts the resolution of the documents to be sent and
copied (only with the document inserted in the ADF or
manual document feeder).
•Puts the line on hold during a telephone conversation (with
the handset raised).
•
Gives access to programming mode.
•
Selects menus and submenus.
IV
A
BOUT
THE
FAX
MACHINE
C
OMPONENTS
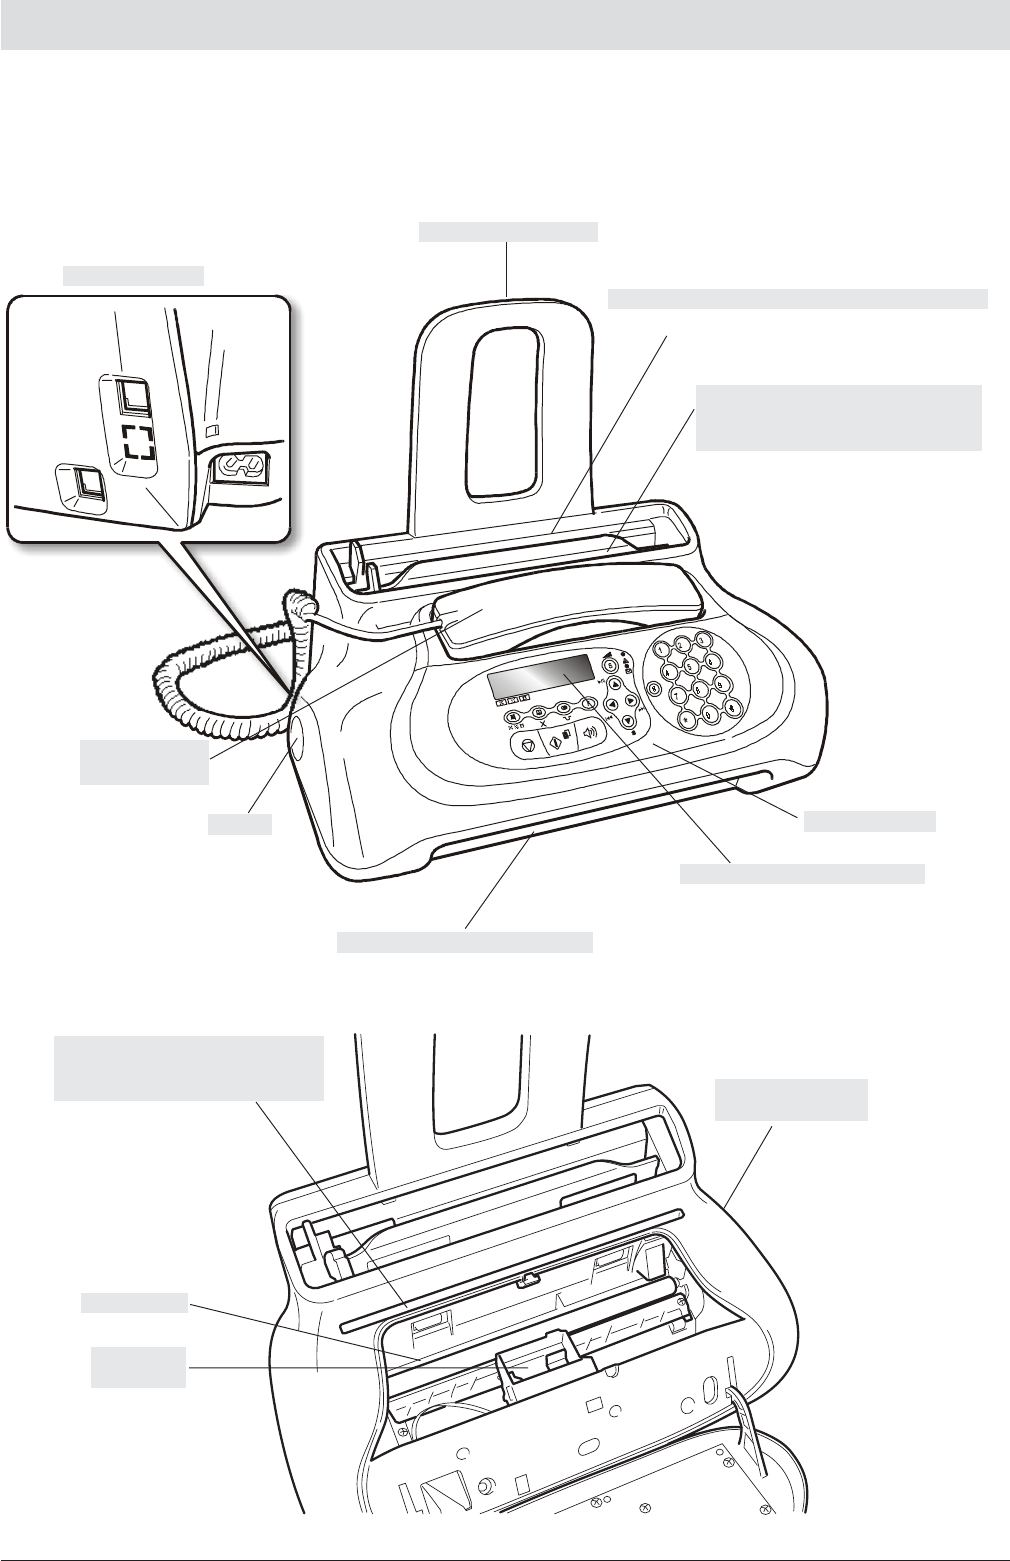
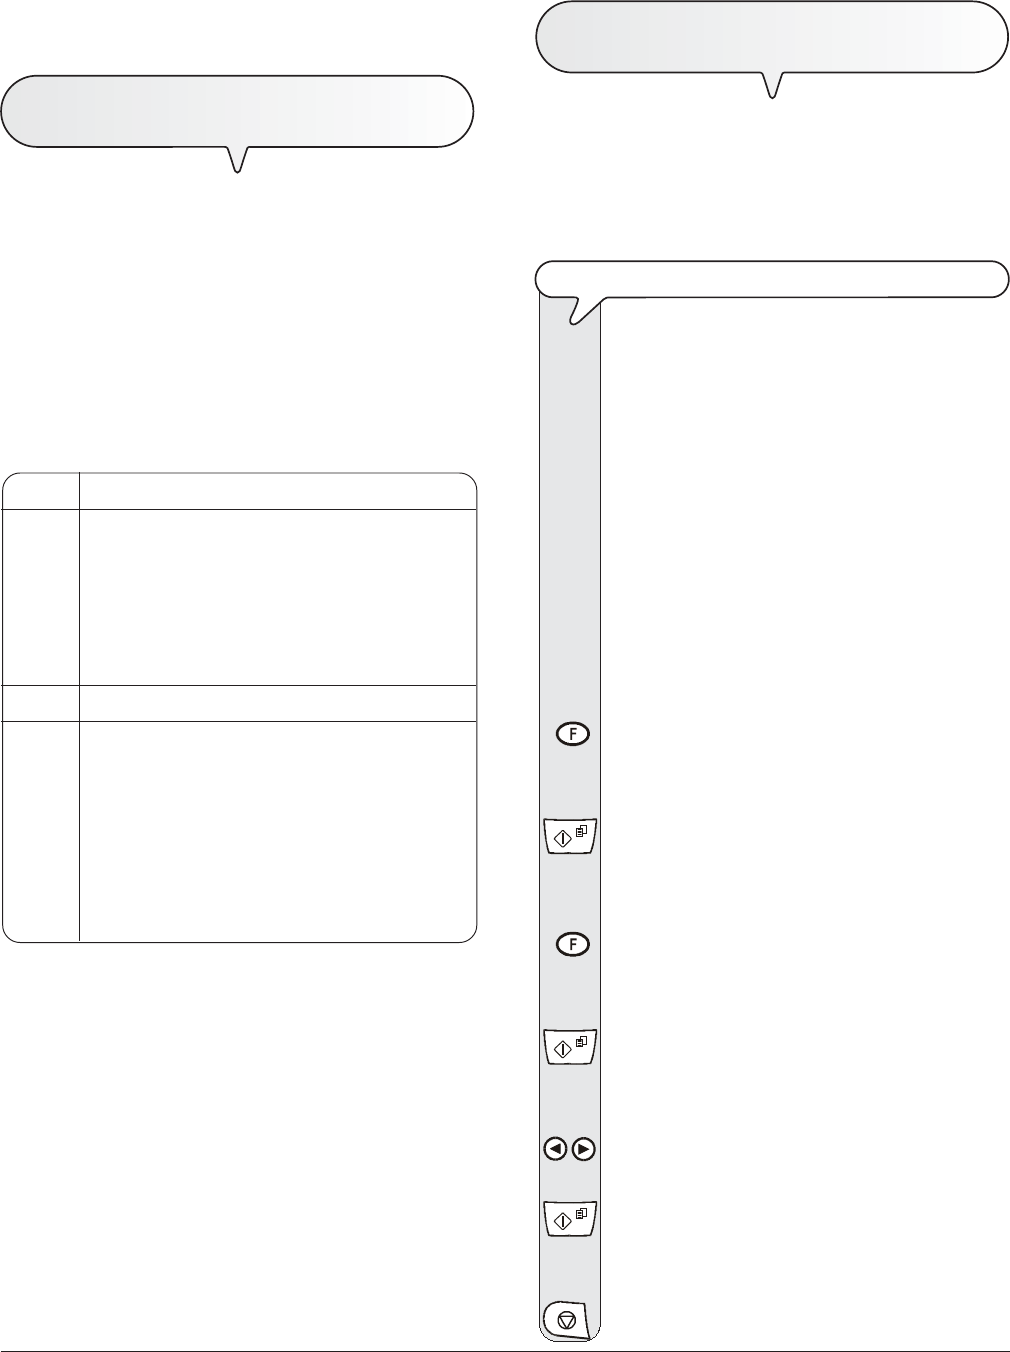
The figure shows the external and internal parts common to the various models of fax machine.
P
APER
SUPPORT
EXTENSION
C
ONNECTION
SOCKETS
B
UILT
-
IN
TELEPHONE
HANDSET
D
ISPLAY
The display consists of two lines of 16
characters each. It shows the date and
time, menu items, error messages, reso-
lution and contrast values.
P
LAIN
PAPER
FEED
COMPARTMENT
(
ASF
)
Maximum capacity: 40 sheets (80gr/m
2
).
A
UTOMATIC
FEEDER
FOR
DOCUMENTS
TO
BE
SENT
AND
COPIED
(
ADF
)
M
AXIMUM
CAPACITY
: 5
SHEETS
OF
A
4
O
PERATOR
CONSOLE
R
ECEIVED
OR
COPIED
DOCUMENT
OUTPUT
S
PEAKER
P
RINT
HEAD
COMPARTMENT
M
ACHINE
SERIAL
NUMBER
PLATE
(
SEE
BASE
)
O
PTICAL
READER
A
UXILIARY
MANUAL
FEEDER
FOR
DOCUMENTS
TO
BE
SENT
OR
COPIED
M
AXIMUM
CAPACITY
: 1
SHEET
AT
A
TIME
V
H
OW
TO
GET
STARTED
QUICKLY
This section provides a basic description of the fax machine, explaining how to install it and get started quickly, using its basic functions only. For
a more comprehensive use of the fax machine, see the corresponding section.
As this section is designed to give you a gradual and systematic approach to the fax machine, we recommend you read the topics in the
order in which they are presented.
PACKAGECONTENTS
IMPORTANT
The fax machine is set up to be connected to the
public telephone line. If you want to connect it to a
private line see section "To set it up for the tel-
ephone line".
BA
In addition to the fax machine and this manual, you will find the follow-
ing elements in the package:
•The paper support extension
•The cable for connecting the fax machine to the telephone line.
•The power cable.
•The telephone plug (if applicable).
•The box containing the monochrome print head provided with the
machine.
•The telephone handset.
•Aftersales support information.
IMPORTANT
The use of non-original print heads makes the product’s
guarantee null and void.
INSTALLATIONCONDITIONS
Place the fax machine on a stable, flat surface. Make sure there is enough room for ventilation.
Keep the fax machine in a dust-free place away from sources of excessive heat or humidity. Do not expose it to direct sunlight.
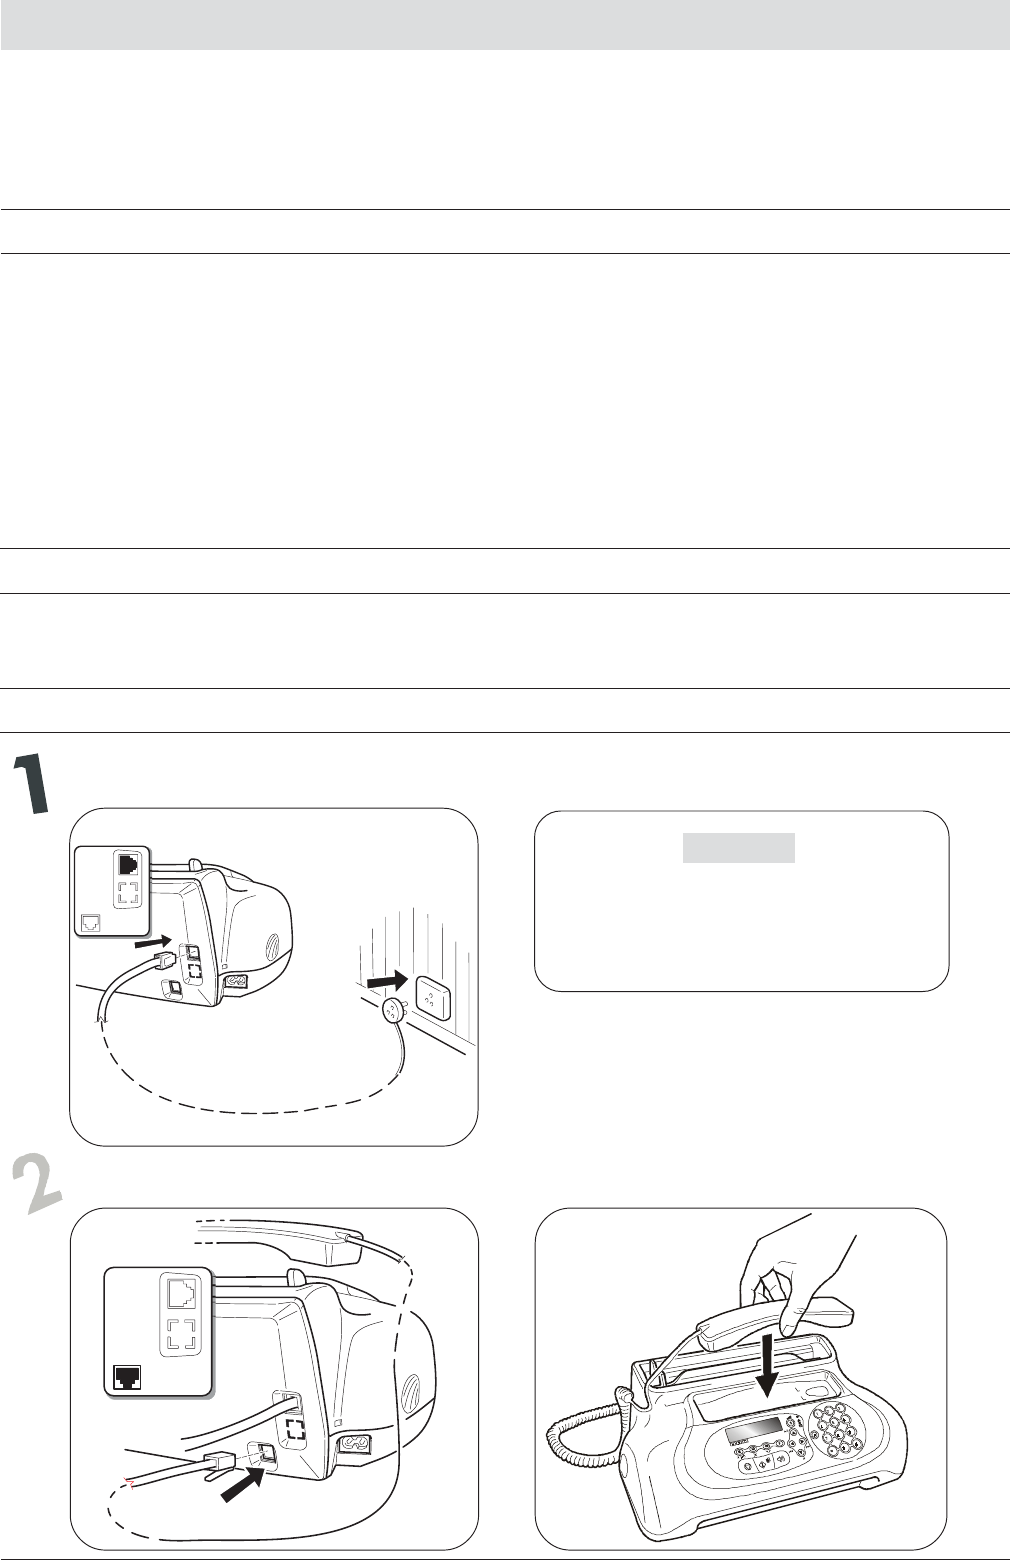
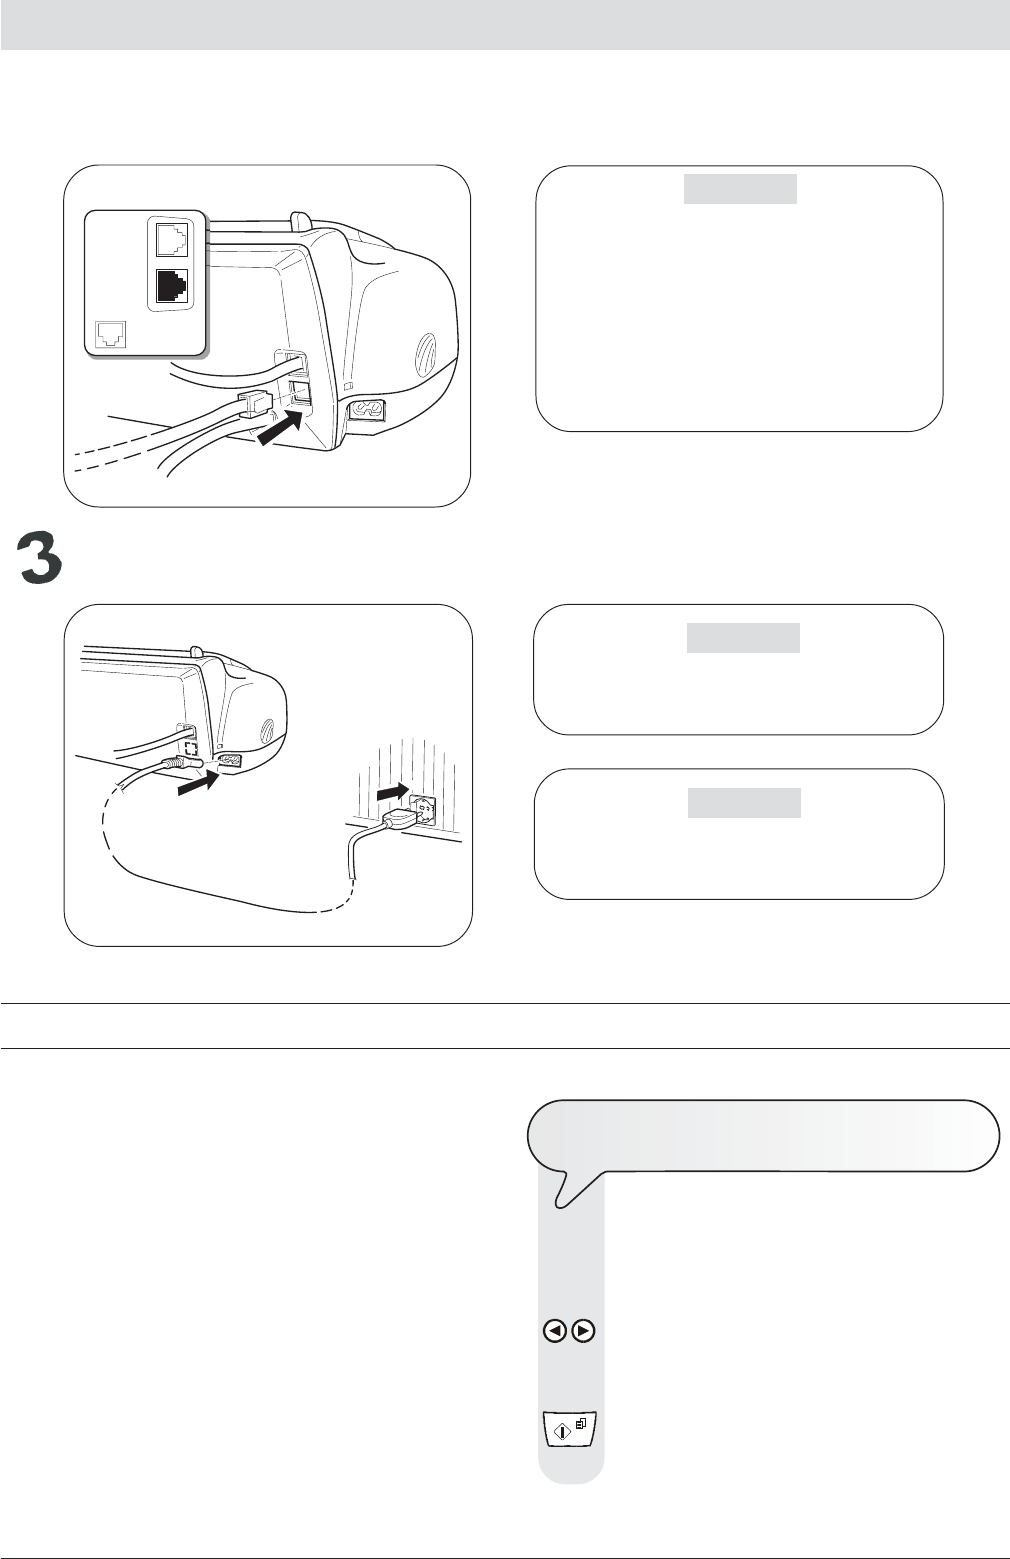
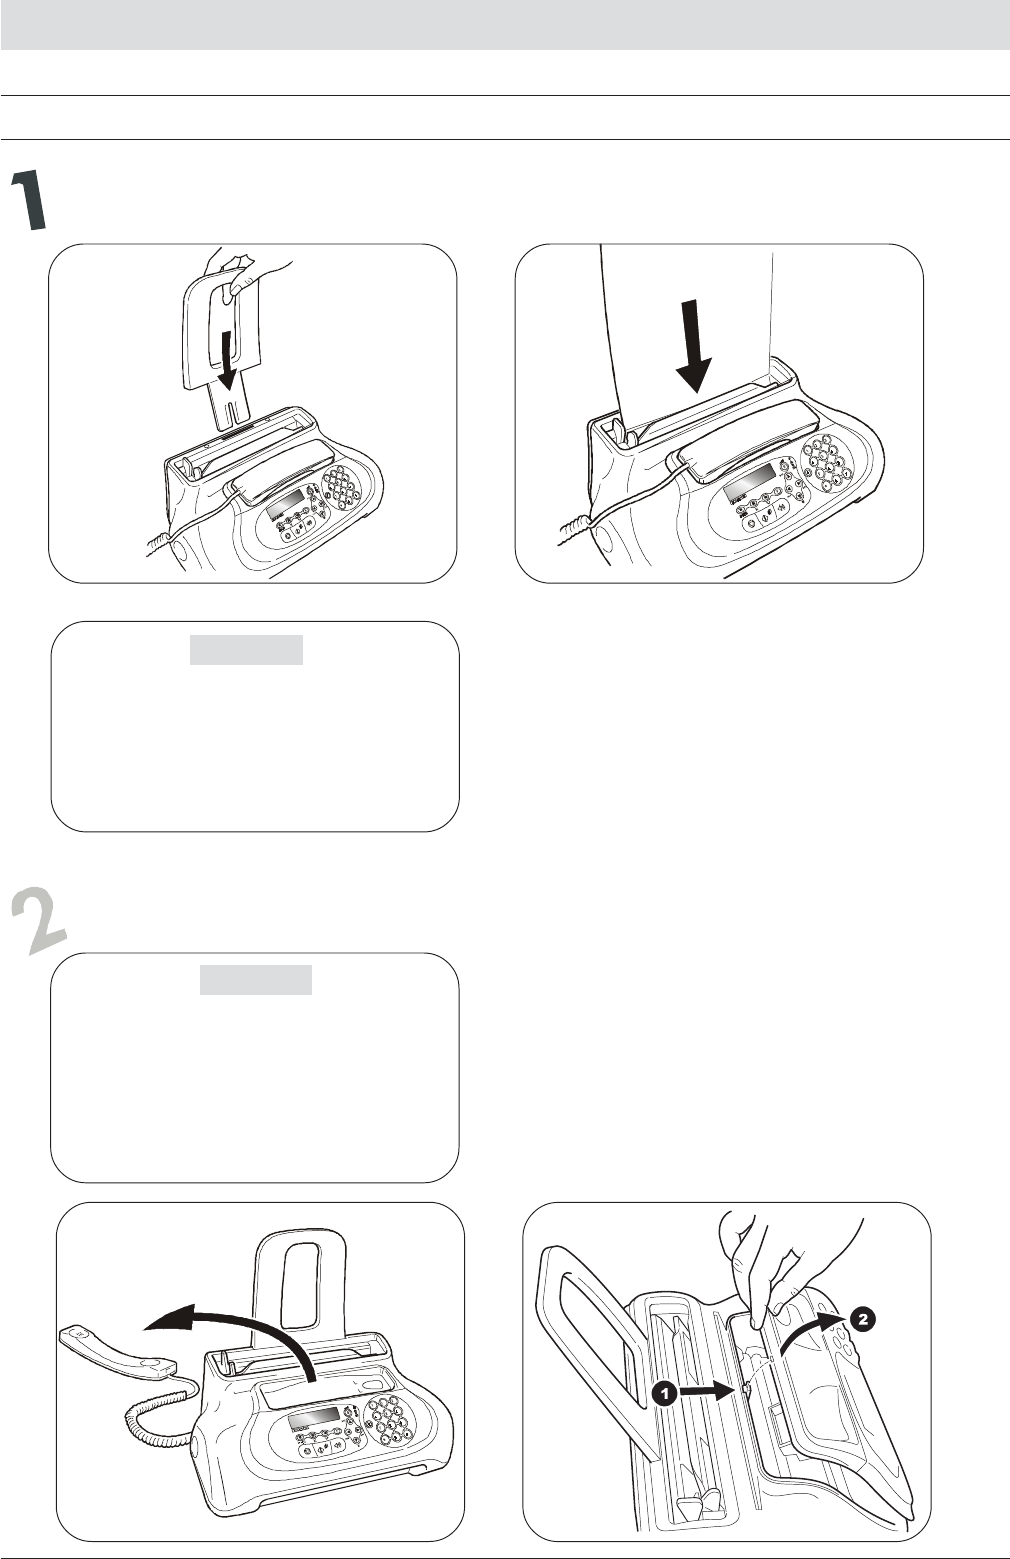
CONNECTINGTOTHETELEPHONELINEANDPOWERSUPPLY
Connect the fax machine to the telephone line
Connect the telephone handset
VI
H
OW
TO
GET
STARTED
QUICKLY
If a voltage drop or power failure occurs, it may be useful to use an emergency telephone.
IMPORTANT
The plug of the power supply cable may vary from
country to country.
SETTINGSOMEPARAMETERS (INDISPENSABLE
FOR
CORRECT
FUNCTIONING
)
Once the fax is connected to the power supply, it automatically runs a
short test to check that its components are working and the display
may show:
-the language in which the messages will be displayed
or
-the message "AUTOMATIC 00" ("AUTOMATIC" in the base
models) and, alternating on the second line, the messages "SET
DATE/TIME" and "CHECK PRINT HEAD".
In the first case, to enable the fax machine to work properly, you must
set the language and country in which it is to be used as described in
the procedure below.
In the second case, you can move on to set the date and time directly.
T
O
SET
THE
LANGUAGE
AND
THE
COUNTRY
OF
DESTINATION
The display shows the language in which the messages
are displayed. For example:
ITALIANO
1.To select the desired language, press the keys:
/The display shows, for example:
ENGLISH
2.To confirm the setting, press the key:
The display shows:
CHOOSE COUNTRY
Connect the fax machine to the power supply
IMPORTANT
To connect the emergency telephone directly to the
fax machine, remove the cover from the socket for
connecting to the external line and then insert the
plug of the emergency telephone in this socket (see
figure opposite).
In countries where this kind of connection is not al-
lowed (for example, Germany and Austria), connect
the emergency telephone directly to the telephone
wall socket.
IMPORTANT
Do not insert the print head before connecting the
fax machine to the power supply socket.
VII
H
OW
TO
GET
STARTED
QUICKLY
note
If you subsequently want to change these settings, press +
and repeat the procedure from the start, remembering always to
confirm the settings made by pressing the
button.
T
O
SET
THE
DATE
AND
TIME
The first time you connect the fax machine to the power
supply or whenever there is a power failure you must set
the date and time as described below.
Once set, the date and time can be changed at any time,
see the "To change the date and time" section.
1.Press the key:
The display shows:
DATE AND TIME
2.Press the key:
The display shows:
FORMAT: DD/MM/YY
3.If you want to select a different format from the one dis-
played, press the keys:
/
4.Press the key:
The display shows:
FORMAT: 24 H
5.To select the other time format (12 hours), press the keys:
/The display shows:
FORMAT: 12 H
6.Press the key:
The display shows:
DD/MM/YY HH:MM
25-10-0411:23
7.To enter the new date and time (e.g. 26-10-04; 12:00),
press the keys:
-As each digit is entered, the cursor will move to the next
one.
DD/MM/YY HH:MM
26-10-04 12:00
8.If you wish to move the cursor to digits to be modified, press
the keys:
/
9.Then overwrite the digits with the correct ones, by pressing
the keys:
-
3.To confirm the setting, press the key:
The display shows a country of destination, for example:
ITALIA
4.To select the desired country, press the keys:
/The display shows, for example:
U.K./IRELAND
If your country is not present among those shown on the
display, see the table below:
COUNTRYCOUNTRY TO BE SELECTED
ArgentinaAMERICA LATINA
AustraliaNZL/AUSTRALIA
AustriaÖSTERREICH
BelgiumBELGIUM
BrazilBRASIL
ChileAMERICA LATINA
ChinaCHINA
ColombiaAMERICA LATINA
Czech RepublicCZECH
DenmarkDANMARK
FinlandFINLAND
FranceFRANCE
GermanyDEUTSCHLAND
GreeceGREECE
HollandHOLLAND
IrelandU.K./IRELAND
IsraelISRAEL
ItalyITALIA
LuxembourgBELGIUM
MexicoAMERICA LATINA
New ZealandNZL/AUSTRALIA
NorwayNORGE
PeruAMERICA LATINA
PortugalPORTUGAL
Rest of worldINTERNATIONAL
South AfricaS. AFRICA
SpainESPAÑA
SwedenSVERIGE
SwitzerlandSCHWEIZ
TurkeyTURKEY
UKU.K./IRELAND
UruguayAMERICA LATINA
VenezuelaAMERICA LATINA
5.To confirm the setting, press the key:
6.To complete the procedure, press the key:
VIII
H
OW
TO
GET
STARTED
QUICKLY
10.To confirm the setting, press the key:
The date and time setting procedure has been completed.
The new date and time will be updated automatically and
will be printed on each page sent.
11.To return the fax machine to its initial stand-by mode, press
the key:
The display shows in the models with built-in telephone
answering device:
AUTOMATIC 00
In the base models:
AUTOMATIC
and alternating on the lower line:
30-10-04 12:02 - CHECK PRINT HEAD
Remember that the stand-by mode is the status in which the fax
machine is idle and that it is the mode from which the machine can be
programmed.
notE
If you have chosen the 12-hour time format, the display will show the
letter "p" (post meridiem) or the letter "a" (ante meridiem). To switch
from one format to the other:
1.Position the cursor, using the
/ keys, below the letter to be
modified.
2.Press the
key.
3.If you think you have made a mistake and want to abort the proce-
dure in progress, press the
key.
T
O
CHANGE
THE
DATE
AND
TIME
If the date and time shown on the display are not correct,
you can change them at any time.
1.Press the key
until the display shows:
FAX SET-UP
2.To confirm the setting, press the key:
The display shows:
DATE AND TIME
From this point follow the procedure previously described
in "To set the date and time".
A
LL
THAT
IS
MISSING
NOW
IS
YOUR
NAME
AND
FAX
NUMBER
Once set, the name (max. 16 characters) and number
(max. 20 digits) will remain unchanged until they are in-
tentionally changed and will be printed on each page re-
ceived by your correspondent’s fax machine.
1.Press the key
until the display shows:
INSTALLATION
2.Press the key:
The display shows:
TEL. LINE SET-UP
3.Press the key
until the display shows:
STATION NAME
4.Press the key:
The display shows:
TYPE YOUR NAME
5.To select the characters of each key cyclically, press the
keys:
-
6.To leave a space, press the keys:
/
7.To include a variety of special symbols, e.g. &, in your
name, press the keys:
-
8.If there are any wrong characters, move the cursor to the
wrong character, by pressing the keys:
/
9.Then overwrite the character with the correct one, by press-
ing the keys:
-
10.To delete the name completely, press the key:
For example, to enter the name "LARA":
Until you have selected the letter "L".
Until you have selected the letter "A".
Until you have selected the letter "R".
Until you have selected the letter "A".
11.To confirm the name, press the key:
The display shows:
PHONE NUMBER
IX
H
OW
TO
GET
STARTED
QUICKLY
Now enter the fax number as indicated below:
TOSETYOURFAXNUMBER
1.Press the key:
The display shows:
TYPE YOUR NUMBER
2.To enter your fax number, press the keys:
-
3.To leave a space, press the keys:
/
If you make any typing errors, correct them in the same
way as for your name.
If you want to include the international code in your number,
instead of the zeros, press the * key; the display will show
the symbol +.
4.To confirm the fax number, press the key:
5.To return the fax machine to its initial stand-by mode, press
the key:
POSITIONOFYOURNAMEANDFAXNUMBER
The information at the top of the document to be sent (name,
fax number, date and time and number of pages) may be
received by your correspondent’s fax machine:
-outside the text area immediately below the top edge of the
sheet;
or
-inside the text area, slightly lower down than in the previous
case.
Your fax machine is designed to send this information inside
the text area.
To change the position:
1.Press the key
until the display shows:
FAX SET-UP
2.Press the key:
The display shows:
DATE AND TIME
3.Press the key:
The display shows:
VARIOUS SETTINGS
4.Press the key
until the display shows:
HEADER INSIDE
5.To select the alternative parameter, press the keys:
/The display shows:
HEADER OUTSIDE
6.To confirm the setting, press the key:
7.To return the fax machine to its initial stand-by mode, press
the key:
X
AB
H
OW
TO
GET
STARTED
QUICKLY
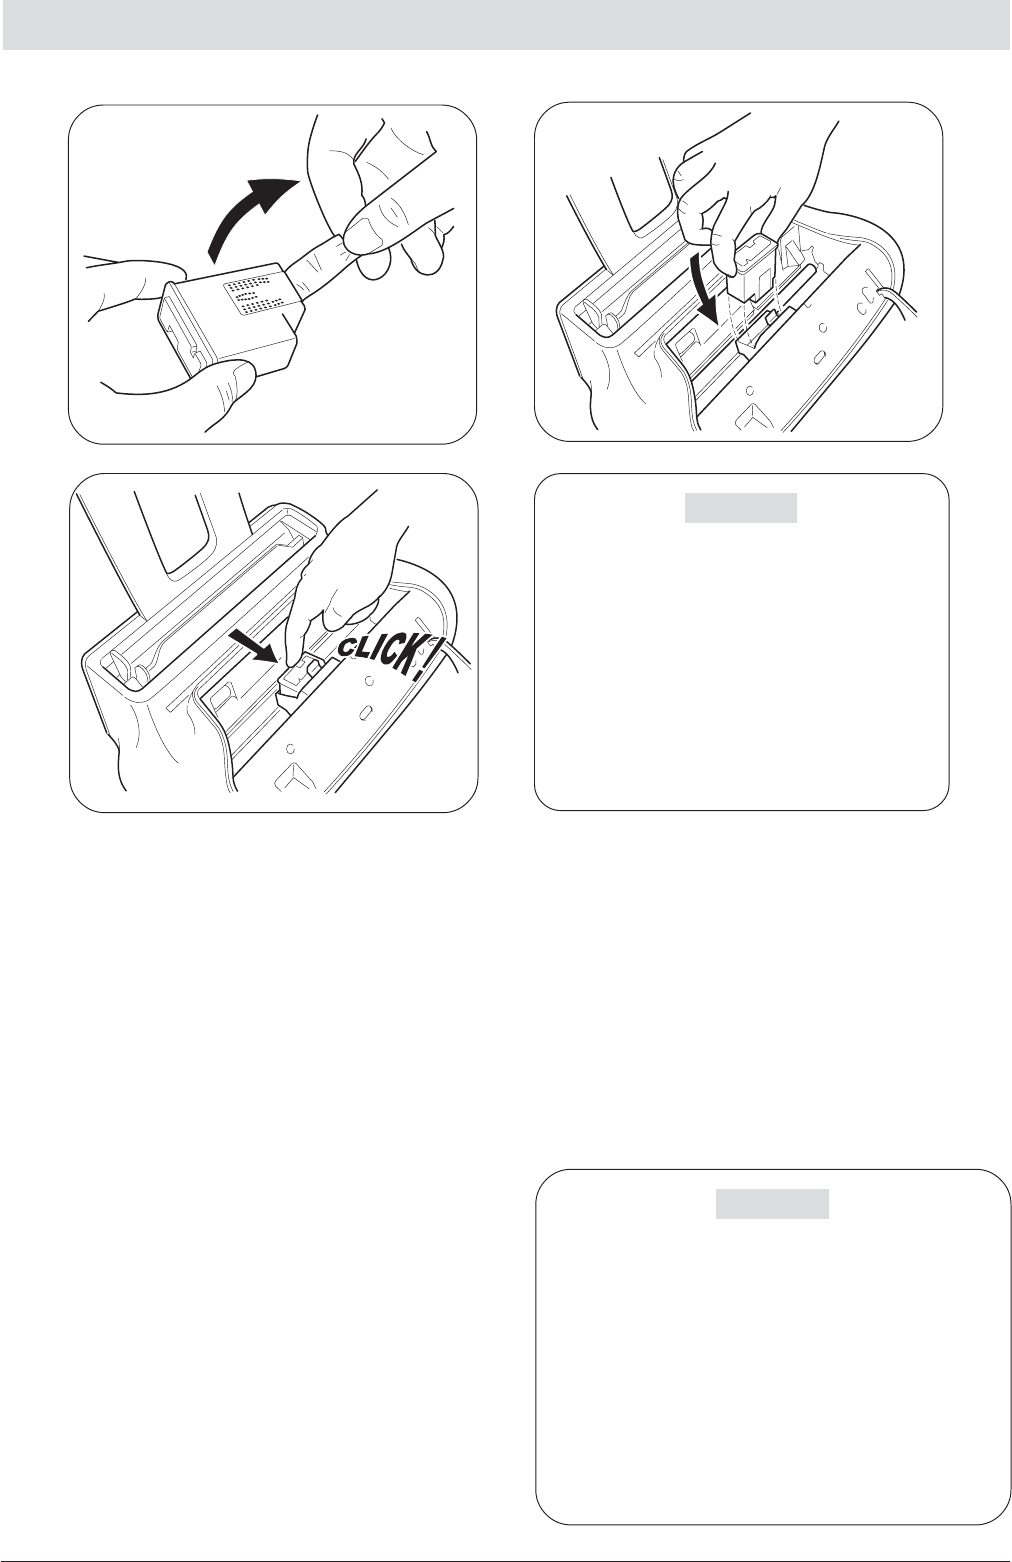
SETTINGUPTHEFAXMACHINE
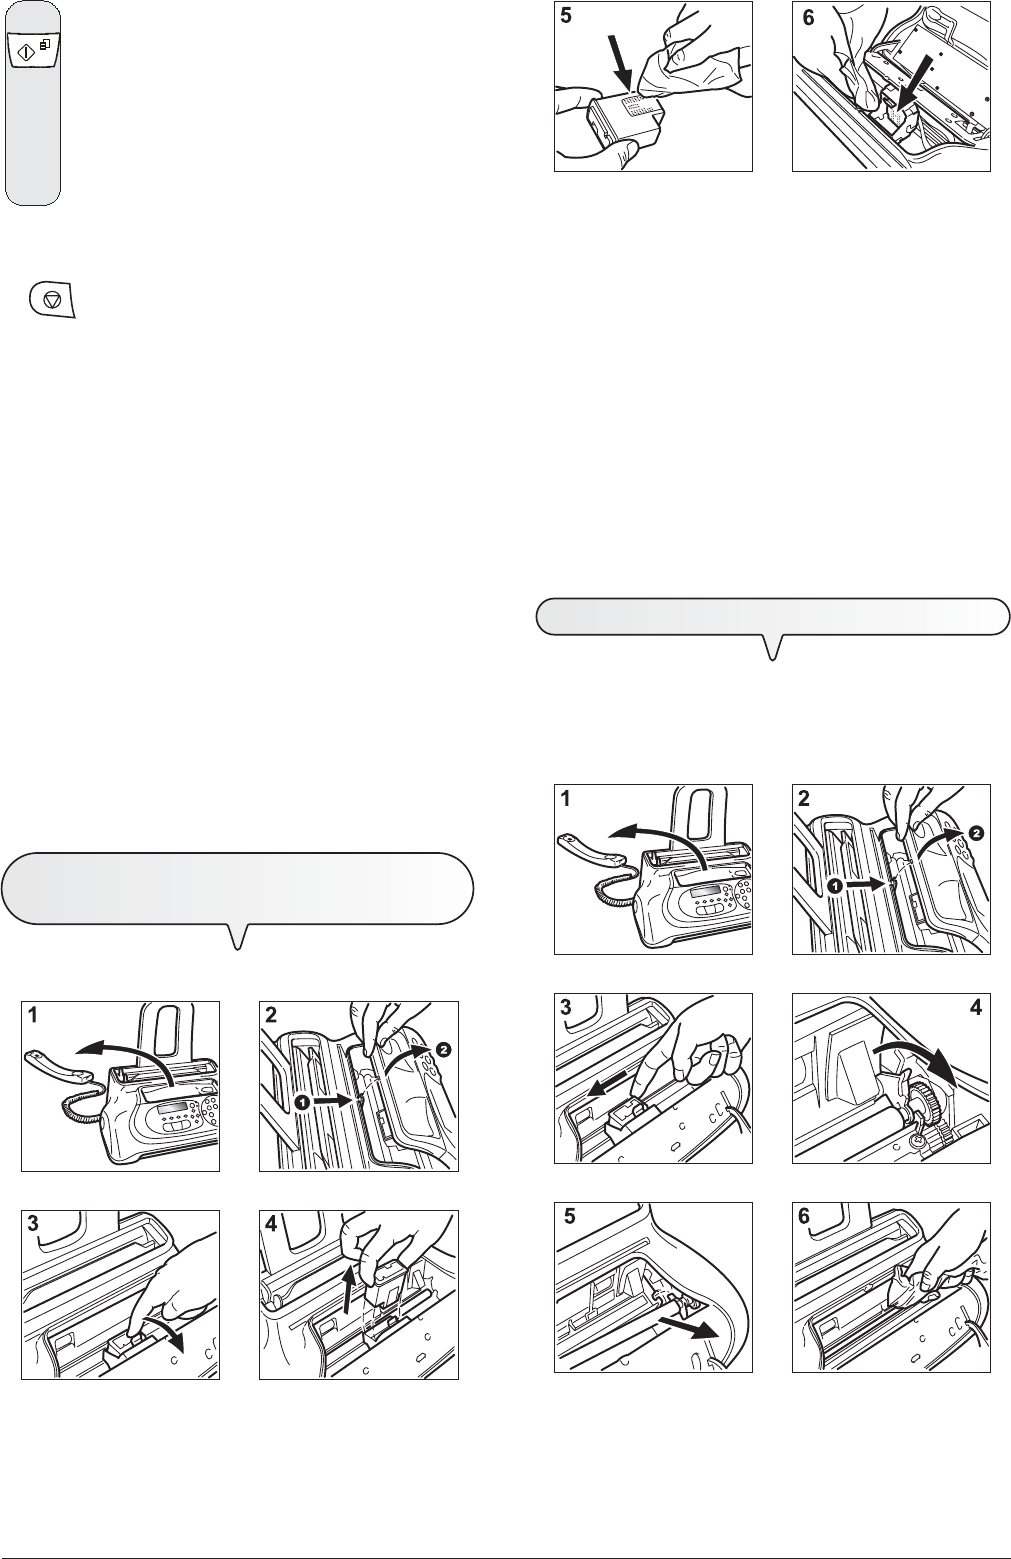
Feed the print paper into the machine
IMPORTANT
If you add sheets (max. 40) to the ASF, make sure
you place them under and not on top of those al-
ready present.
The fax machine has a memory that enables it to
receive up to 19 pages even if you do not add
any paper.
Insert the print head
IMPORTANT
The print head provided with the machine al-
lows you to print up to 80 pages*, whereas the
print heads that you will buy subsequently have a
greater capacity and will thus allow you to print up
to 450 pages*.
*Based on Test Chart ITU-TS n.1 (black
coverage = 3,8%).
AB
XI
Once the print head has been inserted, the operator
console closed and the handset replaced, the fax ma-
chine shows the message: "NEW PRINT HEAD?", "1 = YES,
0 = NO". Set the value 1; the fax machine starts the nozzle
cleaning and checking procedure, which is completed by:
•the printing, on the sheet loaded automatically, of a diag-
nostic test sheet containing:
-a numbered scale, for checking the flow of ink and the
electrical circuits of the print head nozzles.
-a group of graphics and text, so that the printing qual-
ity may be evaluated.
•the display shows the message: "CHECK PRINT OUT",
"1 = EXIT 0 = REPEAT".
Examine the print test sheet as follows:
1.Check that the numbered scale is not broken at any point
and that the black areas do notpresent any horizontal
white lines: if these conditions, which confirm that the print
head has been inserted correctly and is working properly,
are respected, set the value 1. The fax machine returns
to its
initial stand-by mode and is ready for use. The display shows
the message:
AUTOMATIC 00
25-10-04 11:23
C
D
E
2.On the other hand, if there are any breaks or white lines
present, set 0 to clean the nozzles again: if the new print test
continues to be unsatisfactory, repeat the procedure another
time. At this point:
•if the printing quality still does not meet your expectations,
clean the electrical contacts and the nozzles as indicated in
the "To clean the electrical contacts of the print head"
section of the "Maintenance operations" chapter.
•if the printing quality is satisfactory, set the value 1. The
fax machine returns
to its initial stand-by mode and is
ready for use.
IMPORTANT
When the print head is about to run out of ink, the display
shows:
INK LOW
When there is no ink left, the display shows:
OUT OF INK
To replace the print head, see the section "Maintenance op-
erations".
To buy new print heads,see the corresponding code at
the end of the manual.
H
OW
TO
GET
STARTED
QUICKLY
IMPORTANT
Once the print head provided with the machine is
worn, remember only to use original print heads
(see code printed at the end of the manual).
If, after the print head has been installed, the "CHECK
PRINT HEAD" message appears again, try remov-
ing it and then reinserting it, pressing it more firmly into
position. If the message remains on the display, re-
move the print head and clean the electrical contacts
of the print head and the carriage, see "To clean the
electrical contacts of the print head", section
"Maintenance operations".
XII
H
OW
TO
GET
STARTED
QUICKLY
TRANSMISSION
If you follow the procedures described below, you can immediately use the fax machine to carry out simple transmission operations. In
any case, if these procedures are not enough for you, see the "Transmission and reception operations" chapter, which provides a detailed
description of all the transmission modes and other dialling procedures (one-touch and speed dialling, etc.) for which the fax machine has to be set
up (see "To set one-touch and speed dialling").
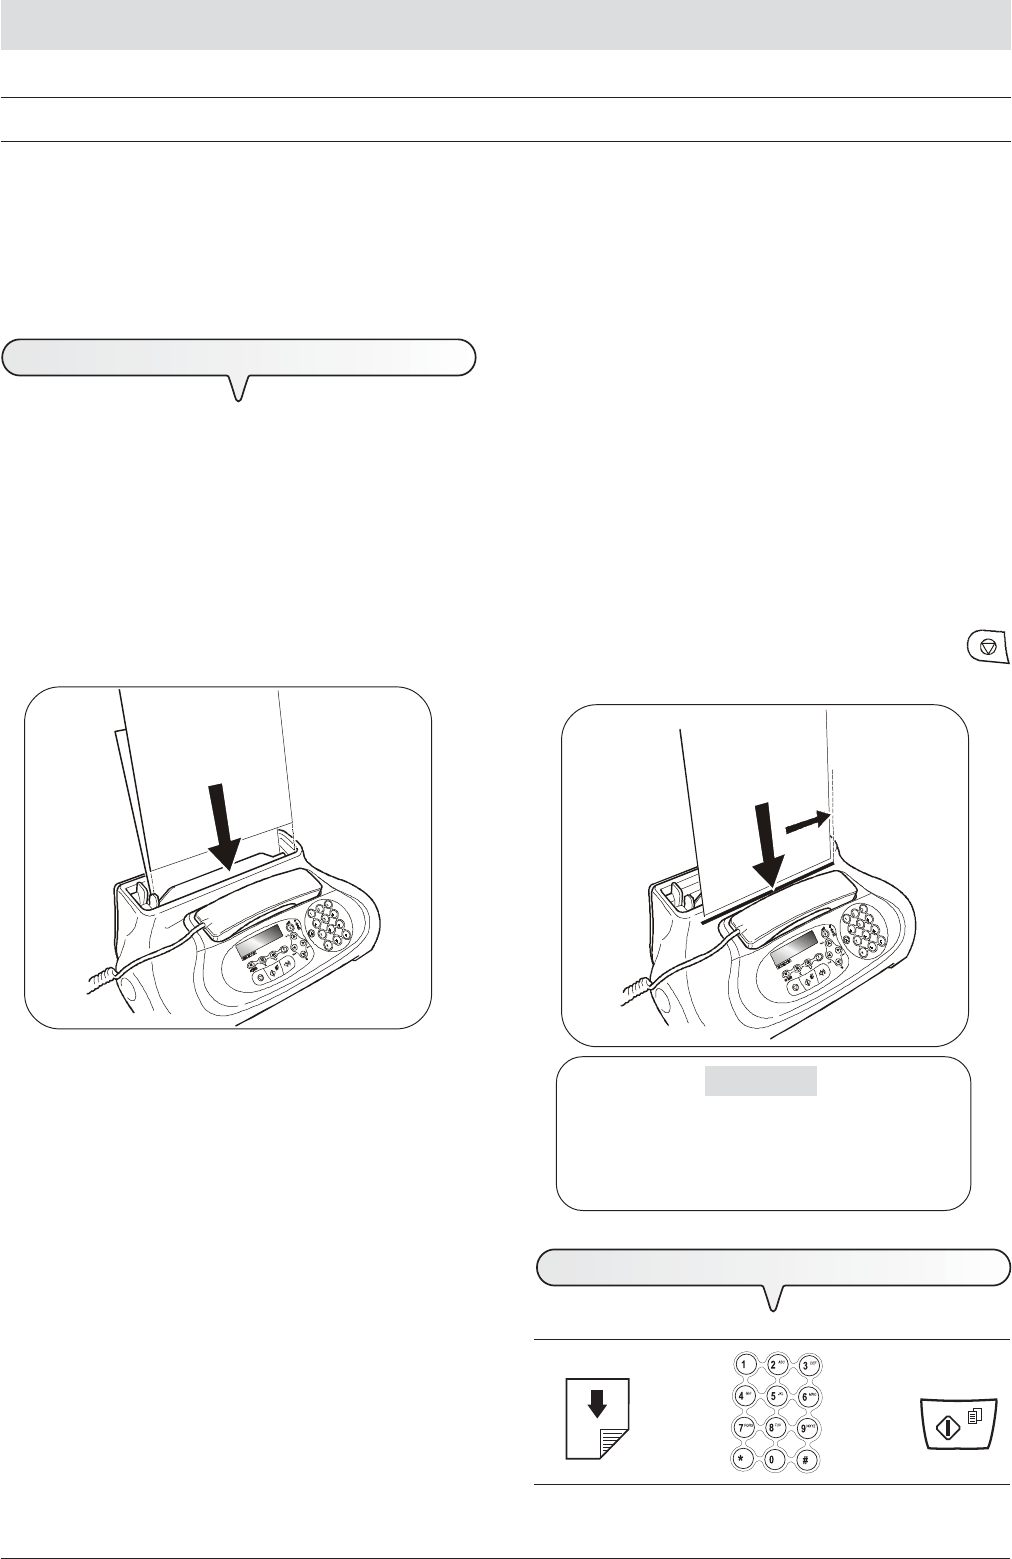
IN THE AUXILIARY MANUAL DOCUMENT FEEDER
• Width148 mm - 216 mm
• Length105 mm - 600 mm
• Unit weight70 - 110 gr/m
2
(1 sheet at a time)
Insert the document as follows:
1.Place the document against the right-hand side of the feeder (see
the mark printed on the fax machine's casing).
2.Make sure that the document has been fed at least three centime-
tres into the feeder as this indicates that it is correctly inserted. If this
is not the case, remove the document manually or press the
key and repeat the operation.
W
HAT
DOCUMENTS
MAY
BE
USED
For any type of transmission, the document has to be placed in
the ADF or manual document feeder.
IN THE AUTOMATIC DOCUMENT FEEDER (ADF)
• Width210 mm
• Length105 mm - 600 mm
• Unit weight70 - 90 gr/m
2
(max. 5 sheets)
Place the document in the automatic document feeder (ADF) with
the side to be sent face down.
T
O
SEND
A
DOCUMENT
If these diagrams are not enough:
èè
see "To send a document", section "Transmission and
reception operations".
IMPORTANT
If you do not perform any operation within about one
and half minutes of inserting the document in either of
the feeders, the fax machine will automatically unload
the document from the feeder.
XIII
H
OW
TO
GET
STARTED
QUICKLY
T
O
CHOOSE
THE
RECEPTION
MODE
1.Press the key
until the display shows:
RECEPTION MODE
2.Press the key:
The display shows:
AUTOMATIC 00
3.To view the other available options, "MANUAL" and
"PHONE/FAX", press the keys:
/
4.To confirm the setting, press the key:
5.To return the fax machine to its initial stand-by mode, press
the key:
notE
To activate reception with TAD mode, you must first record the
OUTGOING MESSAGE, see "The Telephone Answering Device".
Once you have recorded it, in step 3 of the procedure indicated
above, you can view the option: "TAD/FAX" and then confirm by
pressing the
key.
T
O
HEAR
THE
DIALLING
TONE
WHEN
SENDING
A
DOCUMENT
If these diagrams are not enough:
èèè
see "To send a document", section "Transmission and
reception operations".
T
O
SEND
A
DOCUMENT
WITH
THE
RECEIVER
RAISED
If these diagrams are not enough:
èèè
see "To send a document", section "Transmission and
reception operations".
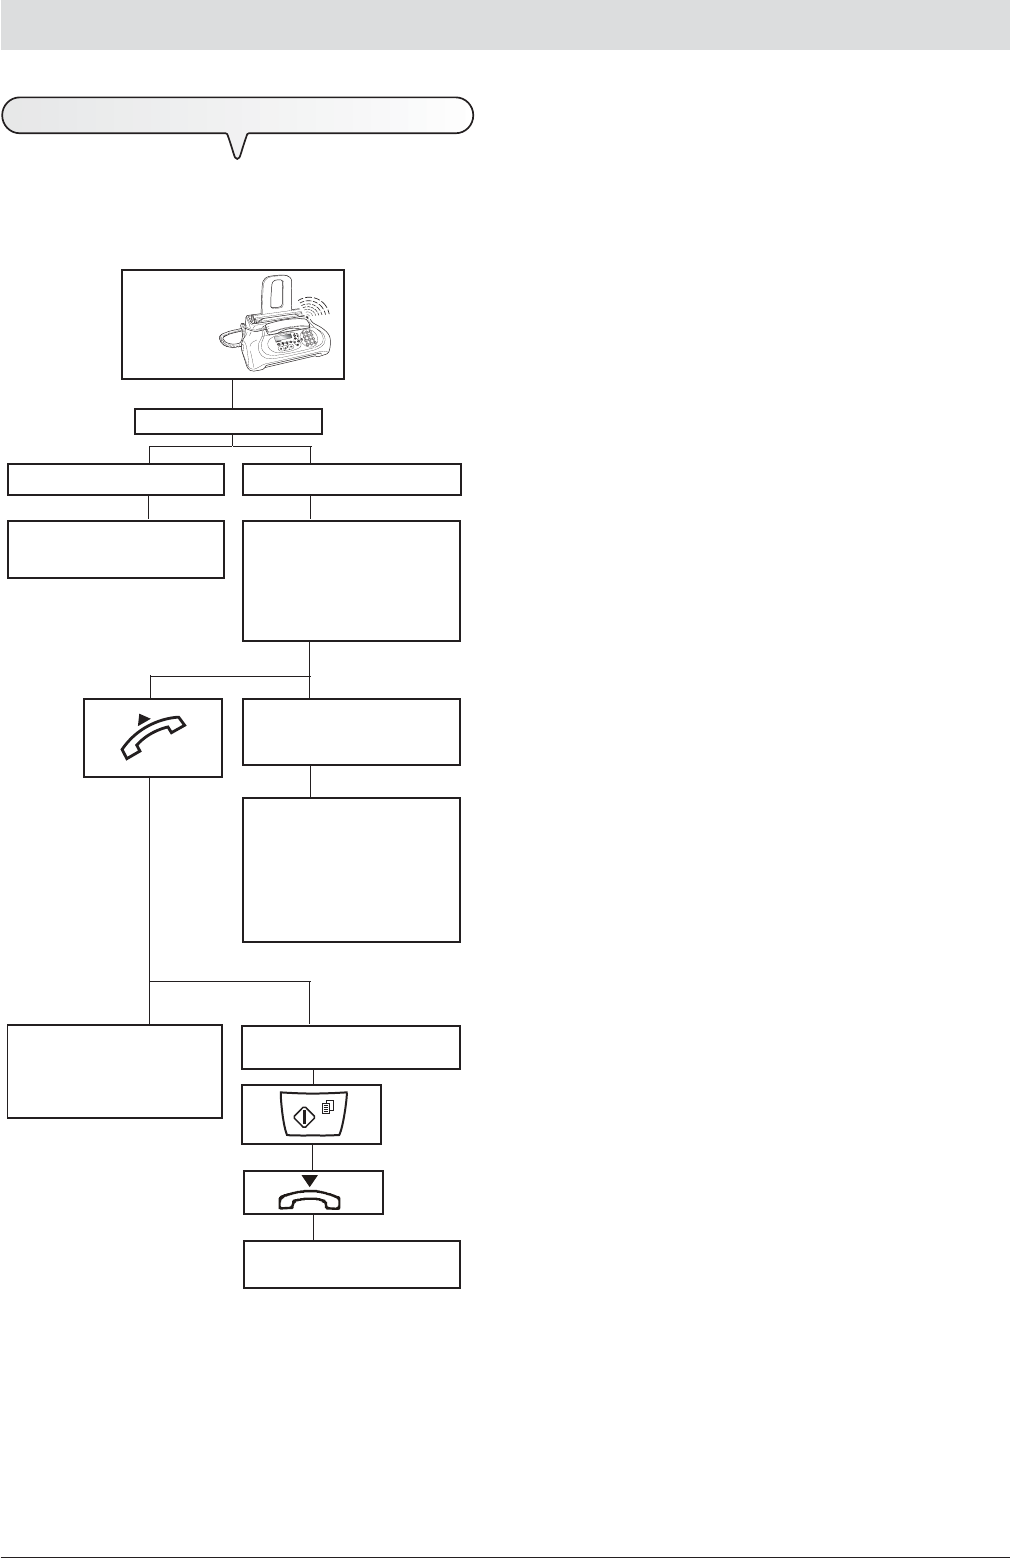
RECEPTION
You can set up the fax machine to receive the documents sent by your correspondents in four different modes, that you may access by carrying
out the procedure described below. These modes are: manual reception, automatic reception, automatic reception with recognition of the type of
call and, only on models with a built-in TAD, reception with a telephone answering device.
M
ANUAL
RECEPTION
For all occasions in which you are present and you can therefore
answer the calls yourself.
If these diagrams are not enough:
è
è
see "To receive a document", section "Transmission and
reception operations".
A
UTOMATIC
RECEPTION
For all occasions in which you are out but want to receive docu-
ments anyway. This is the mode originally set on your fax machine.
R
ECEPTION
WITH
TELEPHONE
ANSWERING
DEVICE
In this reception mode, the TAD receives the calls, records any mes-
sages left by the correspondent and, if he wants to send you a
document, enables the fax machine to receive it.
XIV
H
OW
TO
GET
STARTED
QUICKLY
A FAX MACHINE is calling.
Your fax machine is set to re-
ceive automatically.
The remote party called just to
talk to you: at the end of the con-
versation, replace the receiver.
Your fax machine beeps for 20
seconds (set value). The dis-
play shows "LIFT HANDSET".
A TELEPHONE is calling.
20 seconds have passed and you
have not lifted the receiver.
Your fax is set to receive
automaticaly. It will wait to re-
ceive a document for about 30
seconds, then it will return to its
initial stand-by mode.
The remote party asks you to
receive.
PHONE/FAX enabled.
After the
programmed
number of
rings.
Your fax is set to receive.
R
ECEPTION
IN
"
PHONE
/
FAX
"
MODE
The behaviour of the fax machine in this mode depends on who is
calling and whether you are in or not when the fax is received.
The following diagram will help you:
XV
H
OW
TO
GET
STARTED
QUICKLY
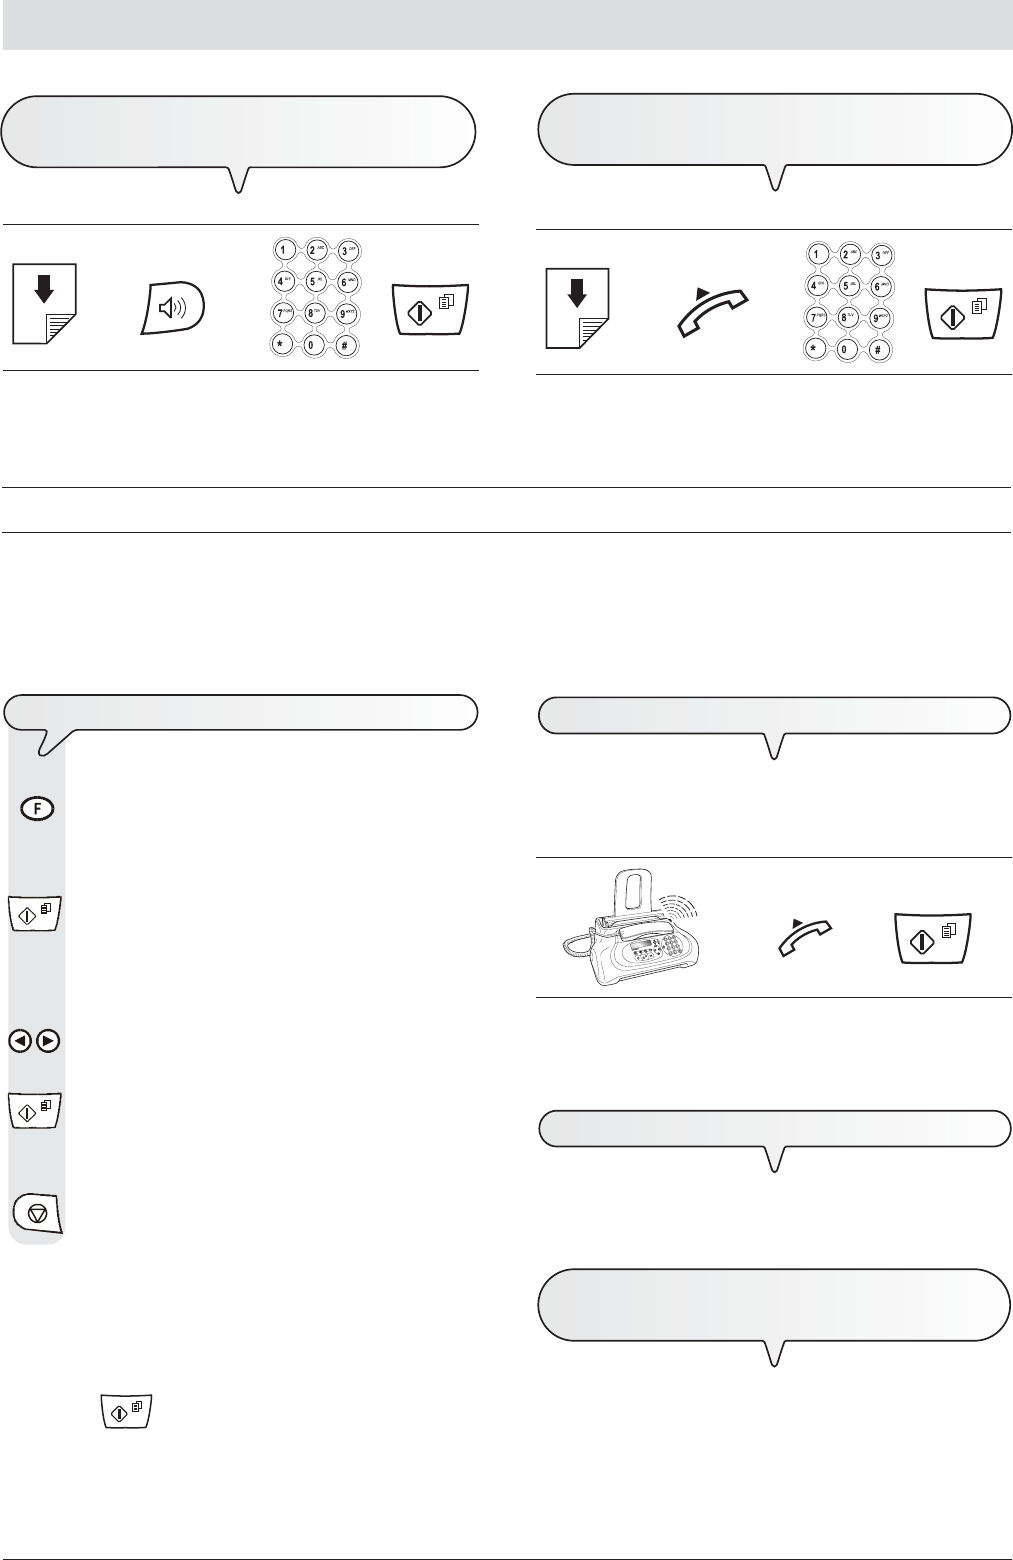
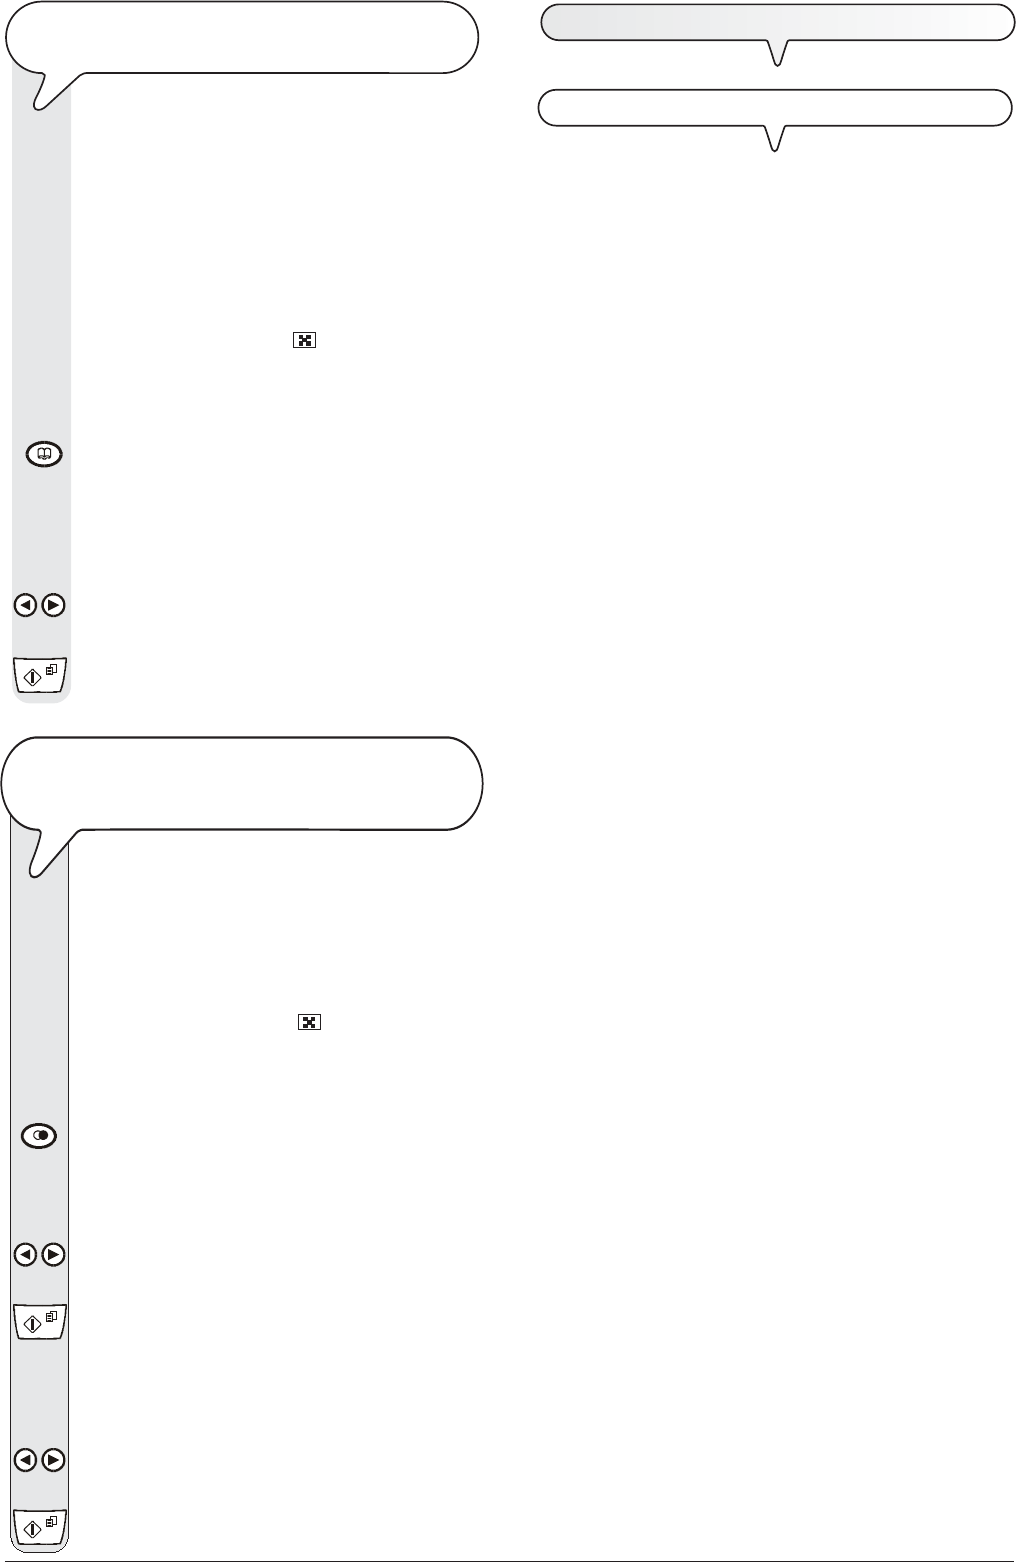
USINGTHETELEPHONE
When you engage the line by lifting the telephone handset, you may use all the telephone functions available on ordinary telephones sold on
the market.
These also include the R function (REGISTER RECALL, activated by pressing the
key) which provides access to the special services made
available by the company that manages the telephone network.
You can also use the following functions:
•
Call the correspondent using the fast dialling procedures set, see below "To telephone with one-touch dialling" and "To telephone with
speed dialling".
•
Momentarily hold a telephone call by pressing the (HOLD) key. The call is resumed as soon as the same key is pressed again.
T
O
TELEPHONE
WITH
ONE
-
TOUCH
DIALLING
Do not place the document in the ADF or the manual
document feeder.
1.Press the desired numeric key, for example
, for more
than one second.
-The display shows the digits of the telephone number that
you associated with it (see "To set one-touch and speed
dialling", chapter "Transmission and reception opera-
tions"). If you also associated a name with it, the display
will show this, too.
2.Once the number has been dialled, if the correspondent is
free, you can start talking.
The display shows the length of the call in minutes and
seconds in the top right-hand corner.
T
O
TELEPHONE
WITH
SPEED
DIALLING
Do not place the document in the ADF or the manual
document feeder.
1.Lift the handset to engage the line.
The display shows:
OFF HOOK
and the length of the call in minutes and seconds in the top
right-hand corner.
2.Press the key:
The display shows:
TEL CALL
CODE OR < >
3.To type the desired speed dialling code, for example
, press the keys:
-The display shows the digits of the telephone number that
you associated with it (see "To set one-touch and speed
dialling", chapter "Transmission and reception opera-
tions"). If a name was also associated with it, the display
will show this, too.
Once the number has been dialled, if the correspondent is
free, you can start talking.
T
O
TELEPHONE
BY
RUNNING
A
SEARCH
IN
THE
PHONE
BOOK
Do not place the document in the ADF or the manual
document feeder.
1.Lift the handset to engage the line.
The display shows:
OFF HOOK
and the length of the call in minutes and seconds in the top
right-hand corner.
2.Press the key:
The display shows:
TEL CALL
CODE OR < >
3.To locate the telephone number or name of the correspond-
ent you want to call, press the keys:
/
4.To start dialling, press the key:
Once the number has been dialled, if the correspondent is
free, you can start talking.
XVI
H
OW
TO
GET
STARTED
QUICKLY
T
O
REDIAL
ONE
OF
THE
LAST
20
INCOMING
NUMBERS
OR
ONE
OF
THE
LAST
10
OUTGOING
NUMBERS
Do not place the document in the ADF or the manual
document feeder.
1.Lift the handset to engage the line.
The display shows:
OFF HOOK
and the length of the call in minutes and seconds in the top
right-hand corner.
2.Press the key:
The display shows:
INCOMING CALLS
W
HAT
DOCUMENTS
CAN
BE
COPIED
As for transmission, copying requires the document to be
inserted in the document feeder, which may be automatic
(ADF) or manual. Before making a copy, make sure that the
document is correctly inserted in either of the feeders and that it
respects the characteristics described previously (see the "Trans-
mission" section).
Bear in mind however that for the copying function you can only
insert one sheet at a time whether you are using the automatic
document feeder (ADF) or the manual document feeder.
T
O
MAKE
A
COPY
As mentioned previously, you can also use the fax machine
as a photocopier. The printing quality obtained depends
on the type of copy you want to obtain "Normal copy" or
"Quality copy" and the contrast and resolution values
that you select before starting the copying function.
1.Choose the type of contrast on the basis of the following
criteria:
•NORMAL, if the document is neither very light nor very
dark.
•LIGHT, if the document isvery dark.
•DARK, if the document is very light.
3.To display the other available option, "OUTGOING CALLS",
press the keys:
/
4.To confirm your choice, press the key:
5.To find the telephone number or name of the correspond-
ent you wish to call on the list of the last 20 incoming calls or
on the list of the last 10 outgoing calls, press the keys:
/
6.To start dialling, press the key:
Once the number has been dialled, if the correspondent is
free, you can start talking.
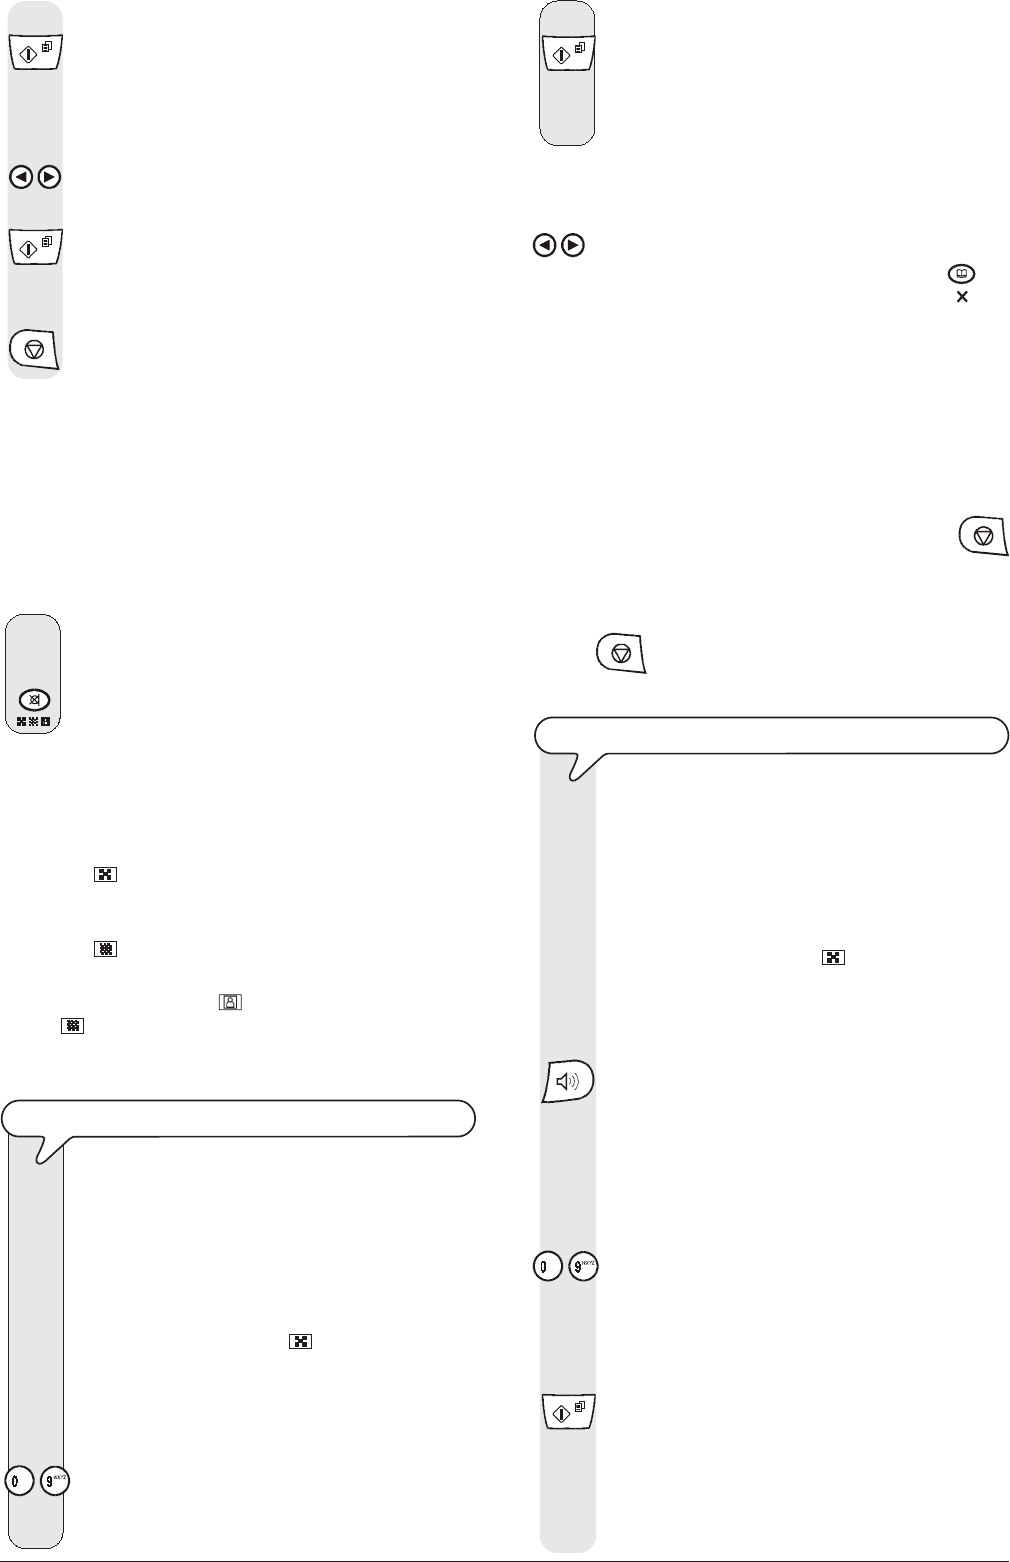
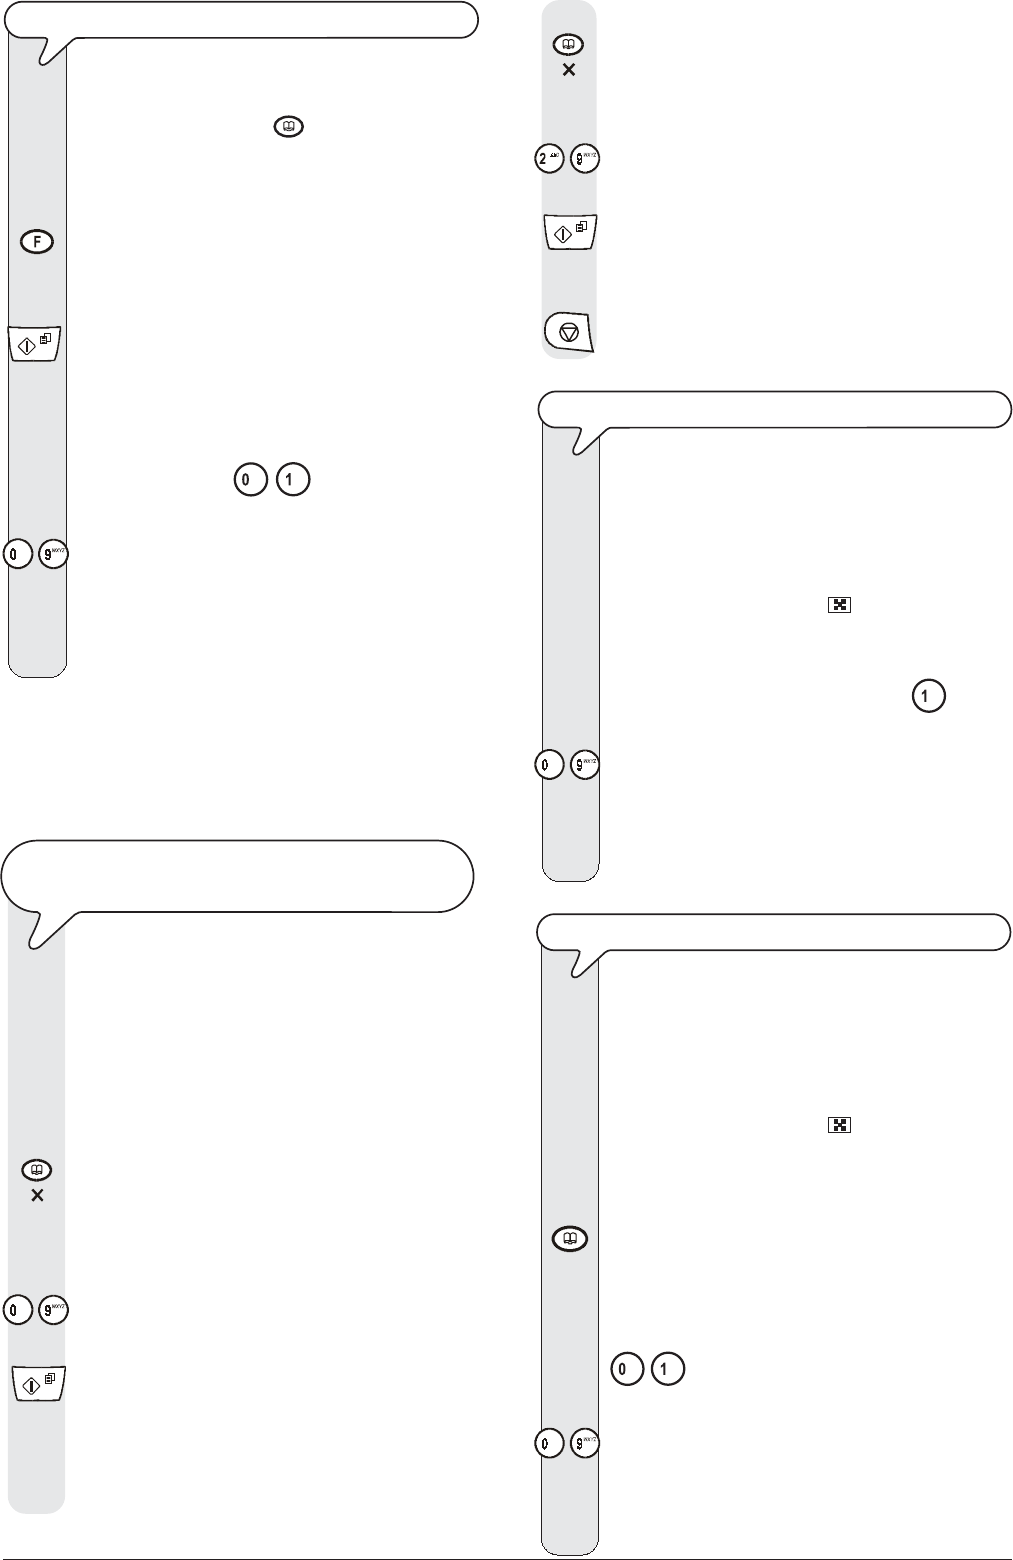
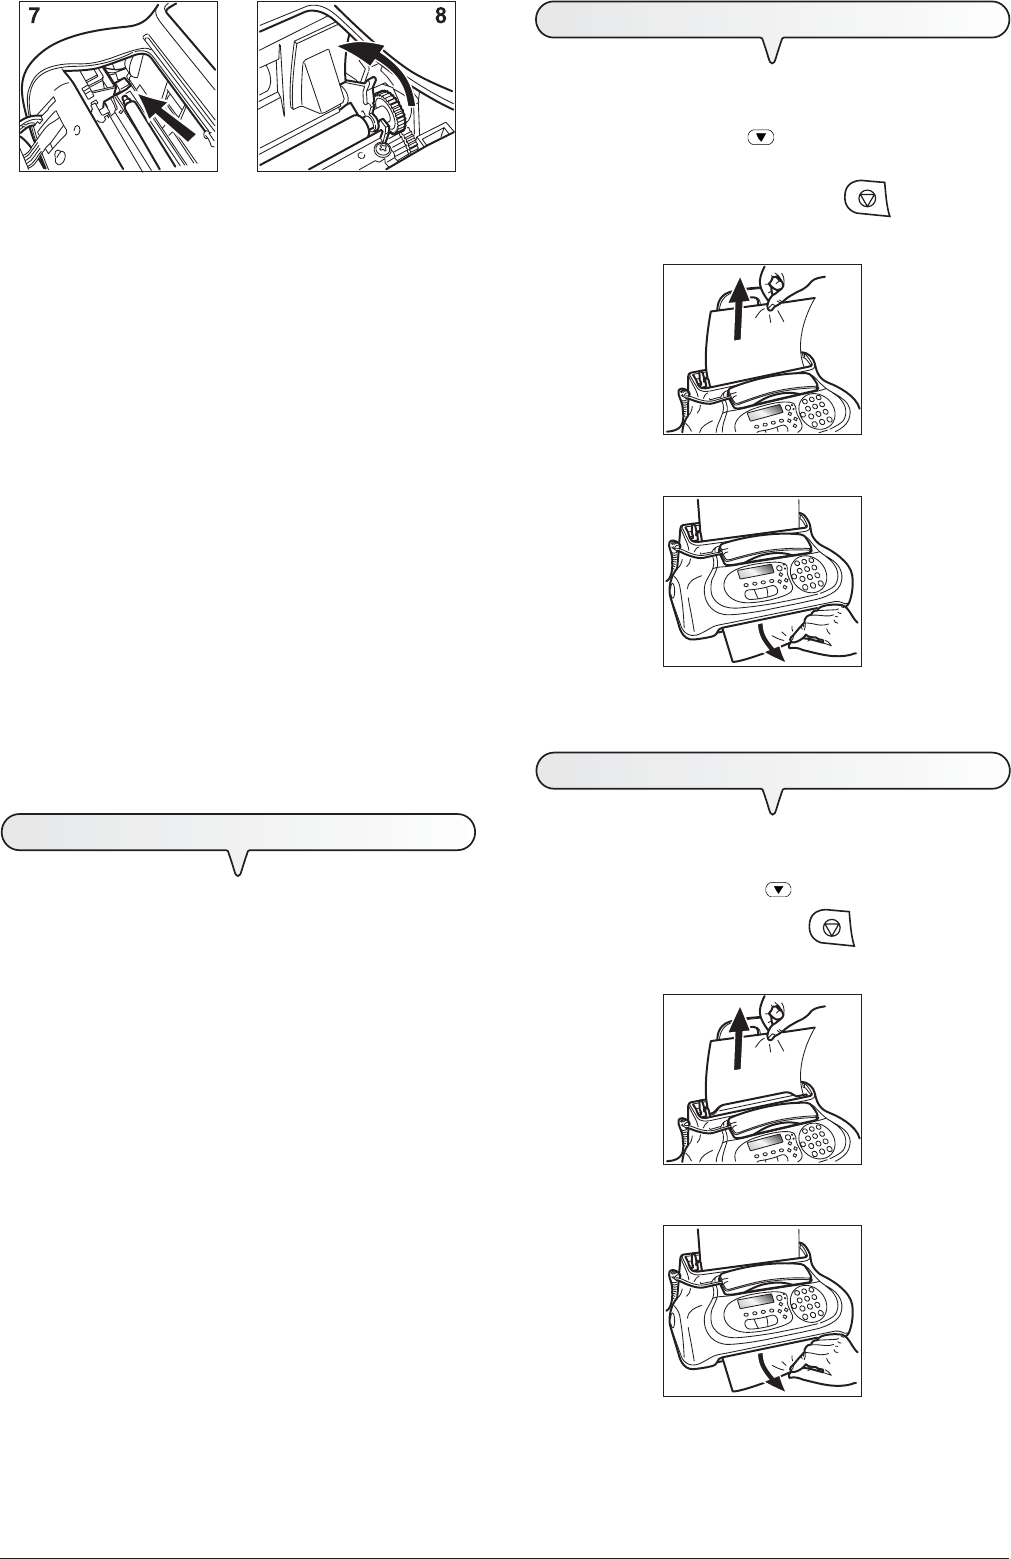
MAKINGCOPIES
2.Choose the type of resolution on the basis of the following
criteria:
•TEXT, if the document contains easily legible text or sim-
ple graphics.
•PHOTO, if the document contains shaded areas.
3.Insert the document in the ADF or the manual document
feeder.
The display shows on the top line:
DOCUMENT READY
and on the bottom line, the default contrast value: NOR-
MAL.
4.Press the key:
The display shows the default copy size, contrast and reso-
lution settings: 100%, NORMAL and TEXT, respectively. It
also shows the number of copies set (1).
5.Press the key:
The display shows:
COPY: HIGH QUAL.
6.To view the other available option, "COPY: NORMAL",
press the keys:
/
7.To confirm your choice, press the key:
The display shows:
ZOOM: 100%
8.To choose the desired copy size setting, "140%", "70%" or
"50%", press the keys:
/
XVII
H
OW
TO
GET
STARTED
QUICKLY
9.To confirm your choice, press the key:
The display shows:
CONTRAST:NORM.
10.To display the other two types of contrast available, "CON-
TRAST: LIGHT" or "CONTRAST: DARK", press the keys:
/
11.To confirm your choice, press the key:
The display shows the values that you have just selected.
At this point, simply choose the resolution you want and set
the number of copies you want to make:
12.To choose the desired resolution setting, "TEXT" or
"PHOTO", press the key:
13.If you want to make more than one copy (max. 9), enter the
desired number by pressing the keys:
-
14.If you only want to make one copy, skip to the next step.
15.To make the copy, press the key:
The fax machine starts to save the document. Having done
this, the fax machine starts copying.
notE
If you want to abort the copy in progress, press the key twice:
the first time to unload the document from the ADF and the second time
to return the fax machine to its initial stand-by mode.
T
ABLE
OF
CONTENTS
-
SECOND
SECTION
TO SET IT UP FOR THE TELEPHONE LINE1
TO CONNECT IT TO A PUBLIC LINE........................................... 1
TO CONNECT IT TO A PRIVATE LINE (PBX)............................... 1
TRANSMISSION AND RECEPTION OPERATIONS3
TO SEND A DOCUMENT.............................................................. 3
WHAT DOCUMENTS MAY BE USED............................................ 3
Gebruikershandleiding.com neemt misbruik van zijn services uitermate serieus. U kunt hieronder aangeven waarom deze vraag ongepast is. Wij controleren de vraag en zonodig wordt deze verwijderd.
Product:
Spelregels forum
Om tot zinvolle vragen te komen hanteren wij de volgende spelregels:
lees eerst de handleiding door;
controleer of uw vraag al eerder door iemand anders is gesteld;
probeer uw vraag zo duidelijk mogelijk te stellen;
heeft u een probleem en al geprobeerd om dit op te lossen, vermeld dit erbij aub;
heeft u een oplossing gekregen van een bezoeker dan horen wij dat graag in dit forum;
wilt u een reactie geven op een vraag of antwoord, gebruik dan niet dit formulier maar klik op de knop 'reageer op deze vraag';
uw vraag wordt direct op de website gezet; vermijd daarom persoonlijke gegevens in te vullen;
Belangrijk! Als er een antwoord wordt gegeven op uw vraag, dan is het voor de gever van het antwoord nuttig om te weten als u er wel (of niet) mee geholpen bent! Wij vragen u dus ook te reageren op een antwoord.
Belangrijk! Antwoorden worden ook per e-mail naar abonnees gestuurd. Laat uw emailadres achter op deze site, zodat u op de hoogte blijft. U krijgt dan ook andere vragen en antwoorden te zien.
Abonneren
Abonneer u voor het ontvangen van emails voor uw Olivetti LAB_M100 bij:
nieuwe vragen en antwoorden
nieuwe handleidingen
U ontvangt een email met instructies om u voor één of beide opties in te schrijven.
Ontvang uw handleiding per email
Vul uw emailadres in en ontvang de handleiding van Olivetti LAB_M100 in de taal/talen: Engels als bijlage per email.
De handleiding is 3,63 mb groot.
U ontvangt de handleiding per email binnen enkele minuten. Als u geen email heeft ontvangen, dan heeft u waarschijnlijk een verkeerd emailadres ingevuld of is uw mailbox te vol. Daarnaast kan het zijn dat uw internetprovider een maximum heeft aan de grootte per email. Omdat hier een handleiding wordt meegestuurd, kan het voorkomen dat de email groter is dan toegestaan bij uw provider.
Uw handleiding is per email verstuurd. Controleer uw email
Als u niet binnen een kwartier uw email met handleiding ontvangen heeft, kan het zijn dat u een verkeerd emailadres heeft ingevuld of dat uw emailprovider een maximum grootte per email heeft ingesteld die kleiner is dan de grootte van de handleiding.
Er is een email naar u verstuurd om uw inschrijving definitief te maken.
Controleer uw email en volg de aanwijzingen op om uw inschrijving definitief te maken
U heeft geen emailadres opgegeven
Als u de handleiding per email wilt ontvangen, vul dan een geldig emailadres in.
Uw vraag is op deze pagina toegevoegd
Wilt u een email ontvangen bij een antwoord en/of nieuwe vragen? Vul dan hier uw emailadres in.