Tested for you in our cooking studio en
29
Meat
Baste lean meat with fat as required or cover it with
strips of bacon.
Score the rind crosswise. If you turn the joint when
cooking, ensure that the rind is underneath at first.
When the joint is ready, turn off the oven and allow it to
rest for another 10 minutes in the cooking
compartment. This allows the meat juices to be better
distributed. Wrap the joint in aluminium foil if necessary.
The recommended resting time is not included in the
cooking time indicated.
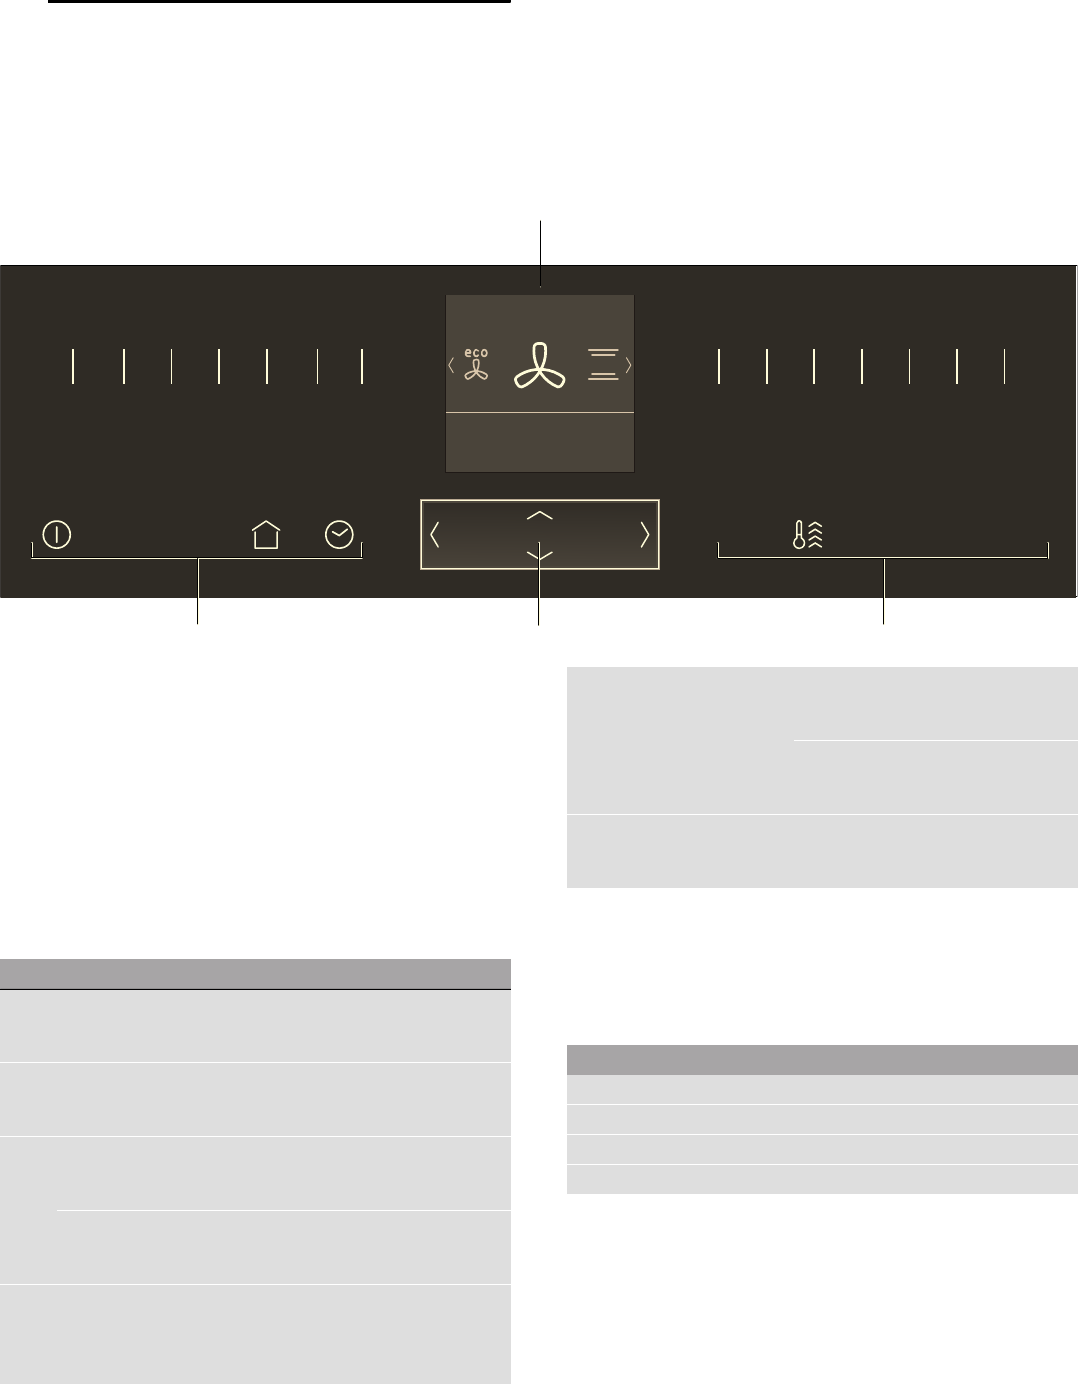
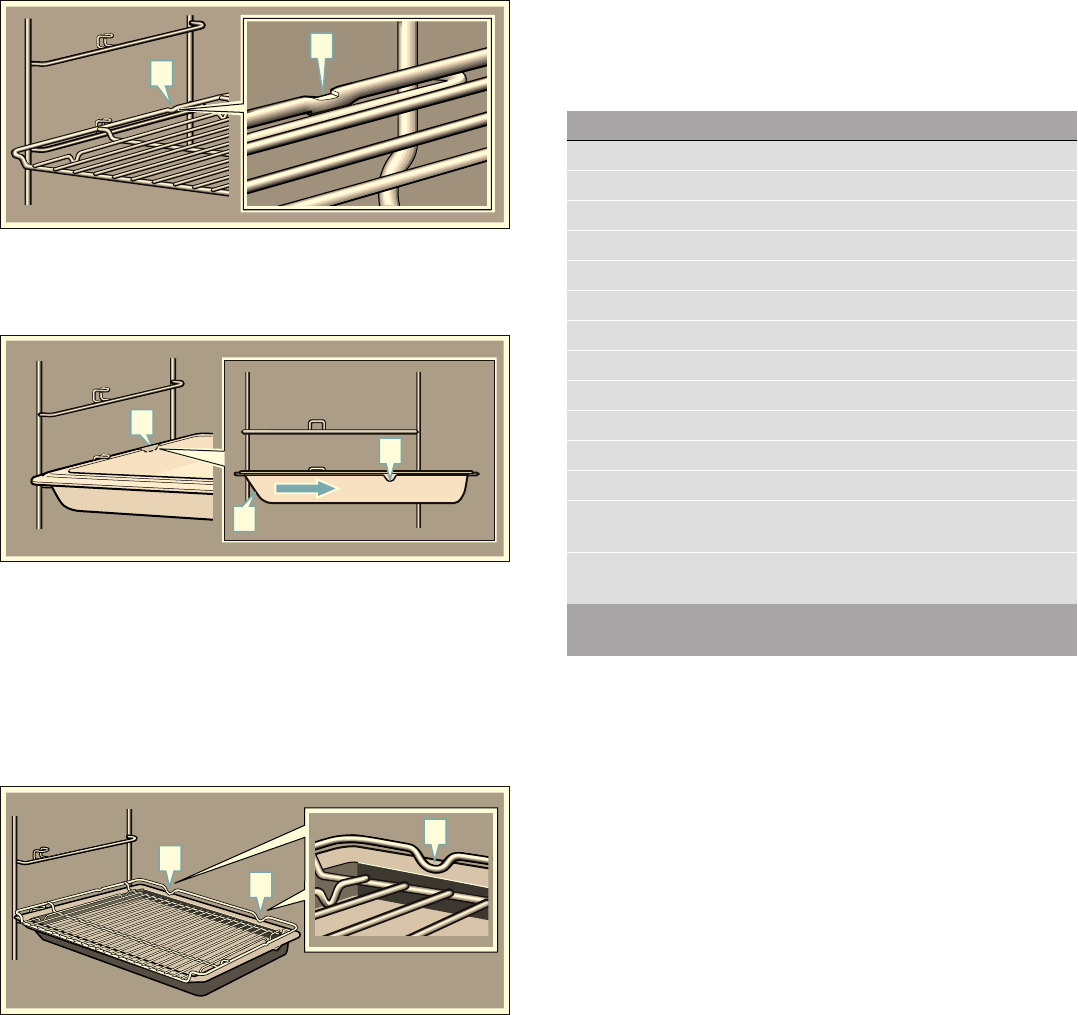
Roasting on the wire rack
On the wire rack, poultry and meat will become very
crispy on all sides. Roasting on the wire rack is well
suited for larger poultry or for multiple pieces at the
same time.
Depending on the size and type of the meat, add up to
^ litres of water to the universal pan. Any dripping fat
and meat juices will be caught. You can prepare a
sauce using these meat juices. In addition, less smoke
is generated, and the cooking compartment stays
cleaner.
Slide the universal pan into the oven at the indicated
shelf position with the wire rack attached. Ensure that
the wire rack is correctly positioned on the universal
pan. ~ "Accessories" on page 9
Roasting and braising in cookware
It is more convenient to roast and braise meat in
cookware. You can take the joint out of the cooking
compartment more easily in the cookware, and prepare
the sauce in the cookware itself.
Only use cookware which is suitable for use in an oven.
Check whether the cookware fits in the cooking
compartment.
Glass cookware is most suitable. Place hot glass
cookware onto a dry mat after cooking. If the surface is
damp or cold, the glass may crack.
Add in a little liquid for roasting if the meat is lean. A
covering of approx. ^ cm depth should be applied to
the base of any glass cookware.
The amount of liquid is dependent on the type of meat,
the cookware material and also on whether or not a lid
is used. If preparing meat in an enamelled or dark metal
roasting dish, it will need a little more liquid than if
cooked in glass cookware.
The steam evaporates in the cookware when roasting.
Carefully pour in more liquid if required.
Shiny roasting dishes made from stainless steel or
aluminium reflect heat like a mirror and are therefore
not particularly suitable. The meat cooks more slowly
and will not brown so much. Use a higher temperature
and/or a longer cooking time.
Observe the manufacturer's instructions for your
roasting cookware.
Roasting in uncovered cookware
It is best to use a deep roasting tin/dish for roasting
poultry and meat. Place the tin/dish onto the wire rack.
If you do not have any suitable cookware, use the
universal pan.
Braising in covered cookware
When preparing food with covered cookware, the
cooking compartment remains considerably cleaner.
Ensure that the lid fits well and closes properly. Place
the cookware onto the wire rack.
The distance between the meat and the lid must be at
least 3 cm. The meat may rise.
Very hot steam may escape when opening the lid after
cooking. Lift the lid at the rear, so that the hot steam
can escape away from you.
If necessary, braise the meat first by searing it. Add
water, wine, vinegar or a similar liquid to the braising
liquid. A covering at least 2 cm deep should be applied
to the base of the cookware.
The steam evaporates in the cookware when roasting.
Carefully pour in more liquid if required.
Recommended setting values
In the table, you can find the ideal heating type for
poultry and meat. Temperature and cooking time
depend on the quantity, composition and temperature
of the food. Different settings ranges are indicated for
this reason. Try using the lower values at first. You can
increase the temperature next time if necessary.
The setting values are based on the assumption that
unstuffed, chilled, ready-to-roast poultry and meat are
placed into a cold cooking compartment. By doing so,
you can make energy savings of up to 20 per cent. If
you preheat the oven, the indicated cooking times will
be reduced by several minutes.
In the table, you can find specifications for poultry and
meat with default values for the weight. If you wish to
prepare heavier poultry or meat, use the lower
temperature in every case. If roasting several joints, use
the weight of the heaviest piece as a basis for
determining the cooking time. The individual pieces
should be approximately equal in size.
A general rule: the larger the poultry or piece of meat is,
the lower the cooking temperature and the longer the
cooking time.
Turn the poultry and meat after approx. ^ to Z of the
indicated time.
Remove unused accessories from the cooking
compartment. This will achieve the best possible
cooking results and energy savings of up to 20 per
cent.