76
Table of contents
Table of contents
For proper and safe use . . . . . . . . . . . . . . . . . . . . . . . . . . . . . . . . . . . . . . . . . . . . . . . . 4
Before you begin . . . . . . . . . . . . . . . . . . . . . . . . . . . . . . . . . . . . . . . . . . . . . . . . . . . . . . 9
Adobe Photoshop Elements . . . . . . . . . . . . . . . . . . . . . . . . . . . . . . . . . . . . . . . . . . . . . 9
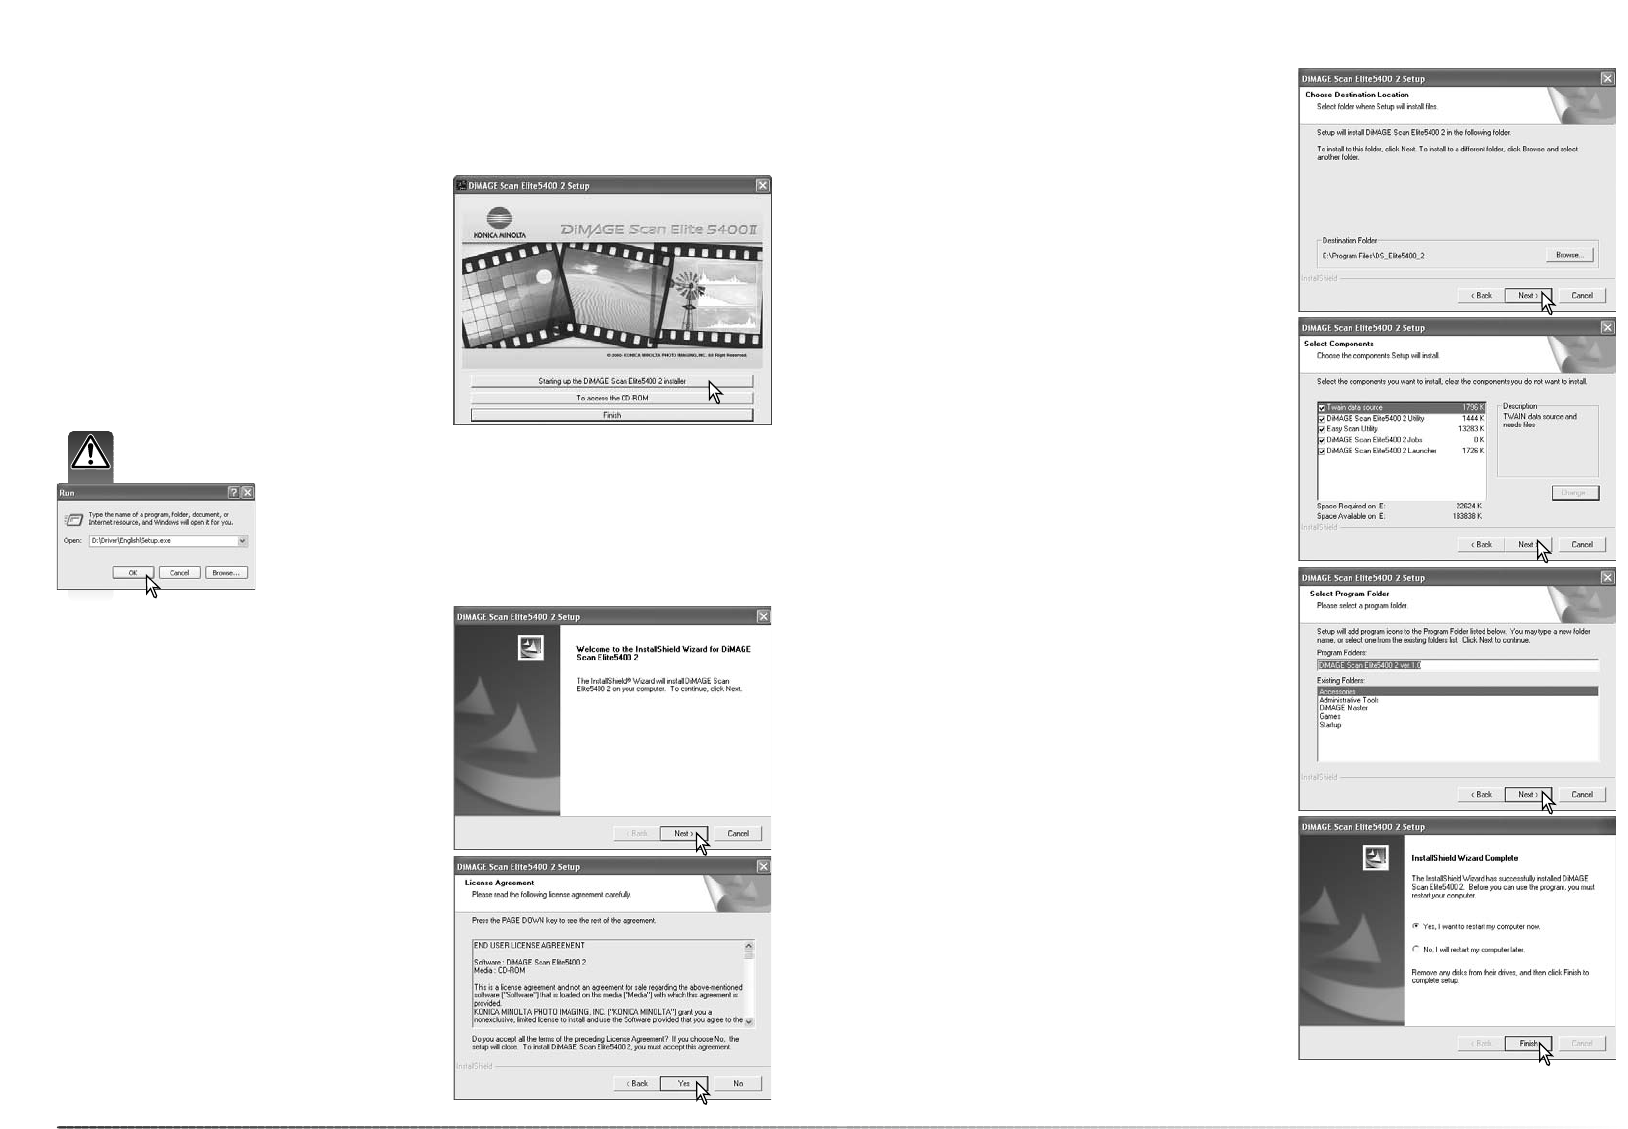
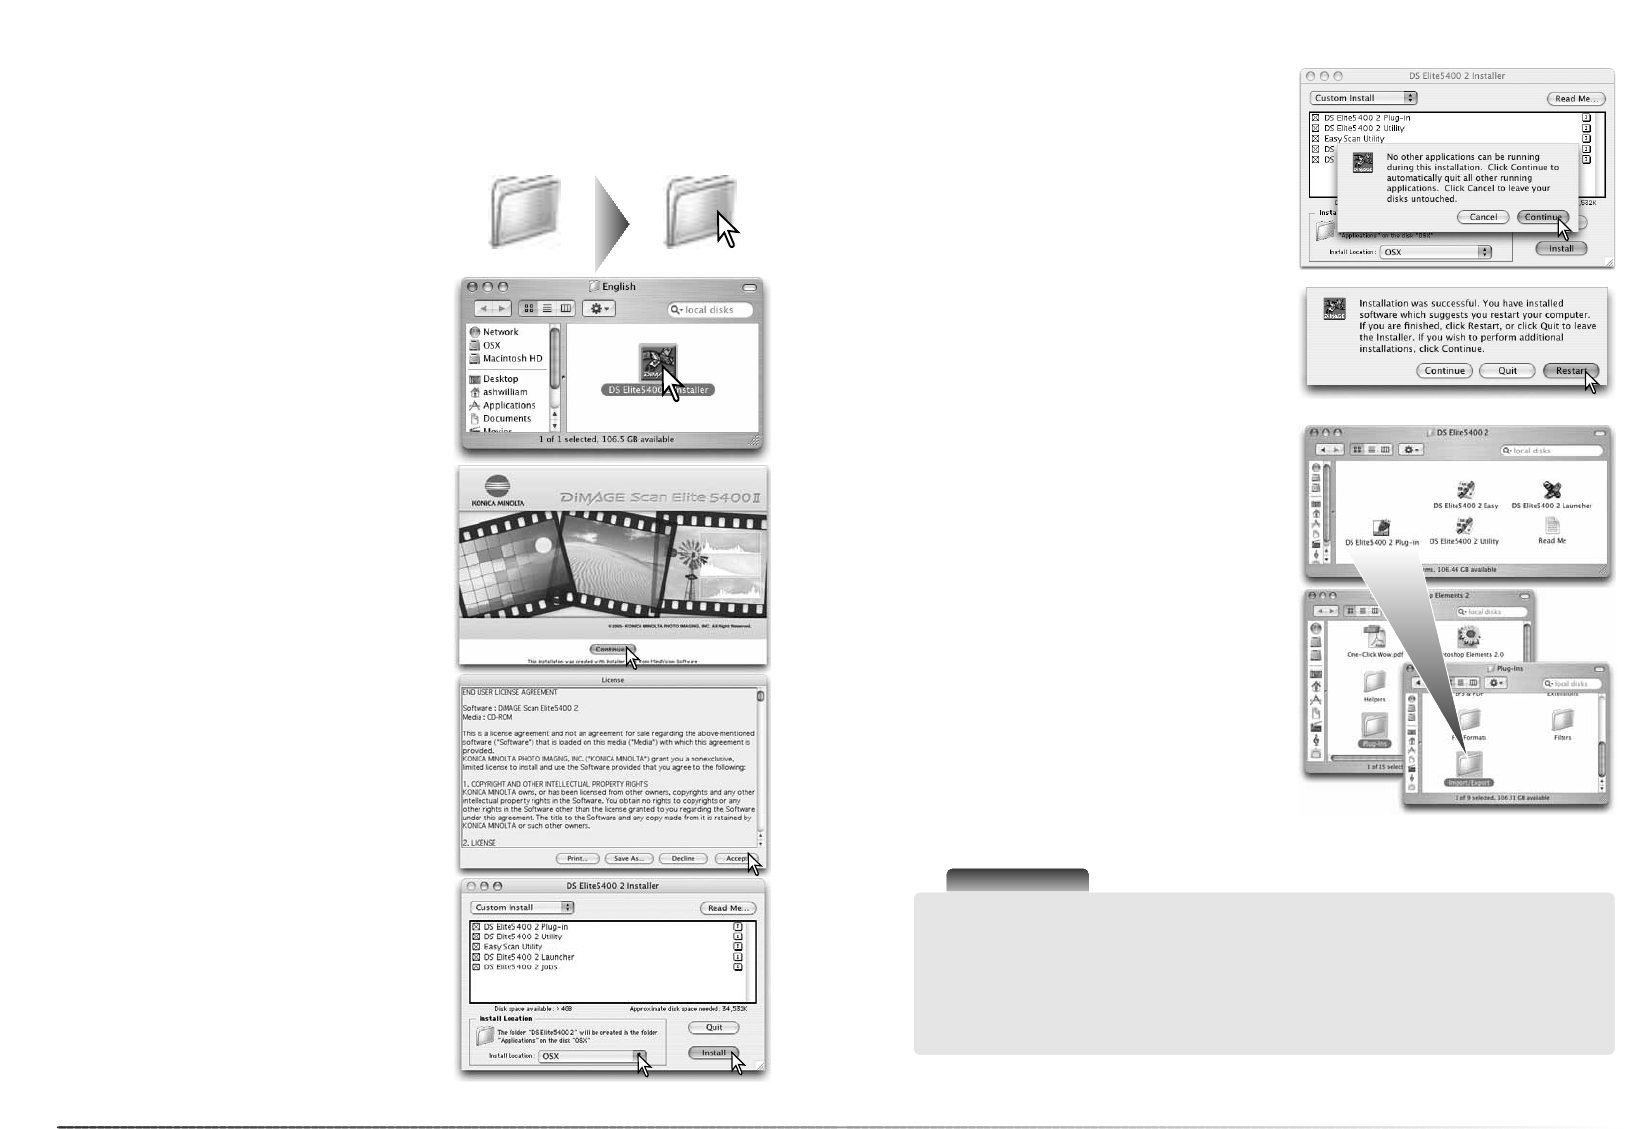
Installation . . . . . . . . . . . . . . . . . . . . . . . . . . . . . . . . . . . . . . . . . . . . . . . . . . . . . . . . . . . 9
Before installation . . . . . . . . . . . . . . . . . . . . . . . . . . . . . . . . . . . . . . . . . . . . . . 10
DiMAGE Scan system requirements . . . . . . . . . . . . . . . . . . . . . . . . . . . . . . . . 10
Windows. . . . . . . . . . . . . . . . . . . . . . . . . . . . . . . . . . . . . . . . . . . . . . . . . . . . . . 12
Macintosh. . . . . . . . . . . . . . . . . . . . . . . . . . . . . . . . . . . . . . . . . . . . . . . . . . . . . 14
Scanner setup . . . . . . . . . . . . . . . . . . . . . . . . . . . . . . . . . . . . . . . . . . . . . . . . . . . . . . . 16
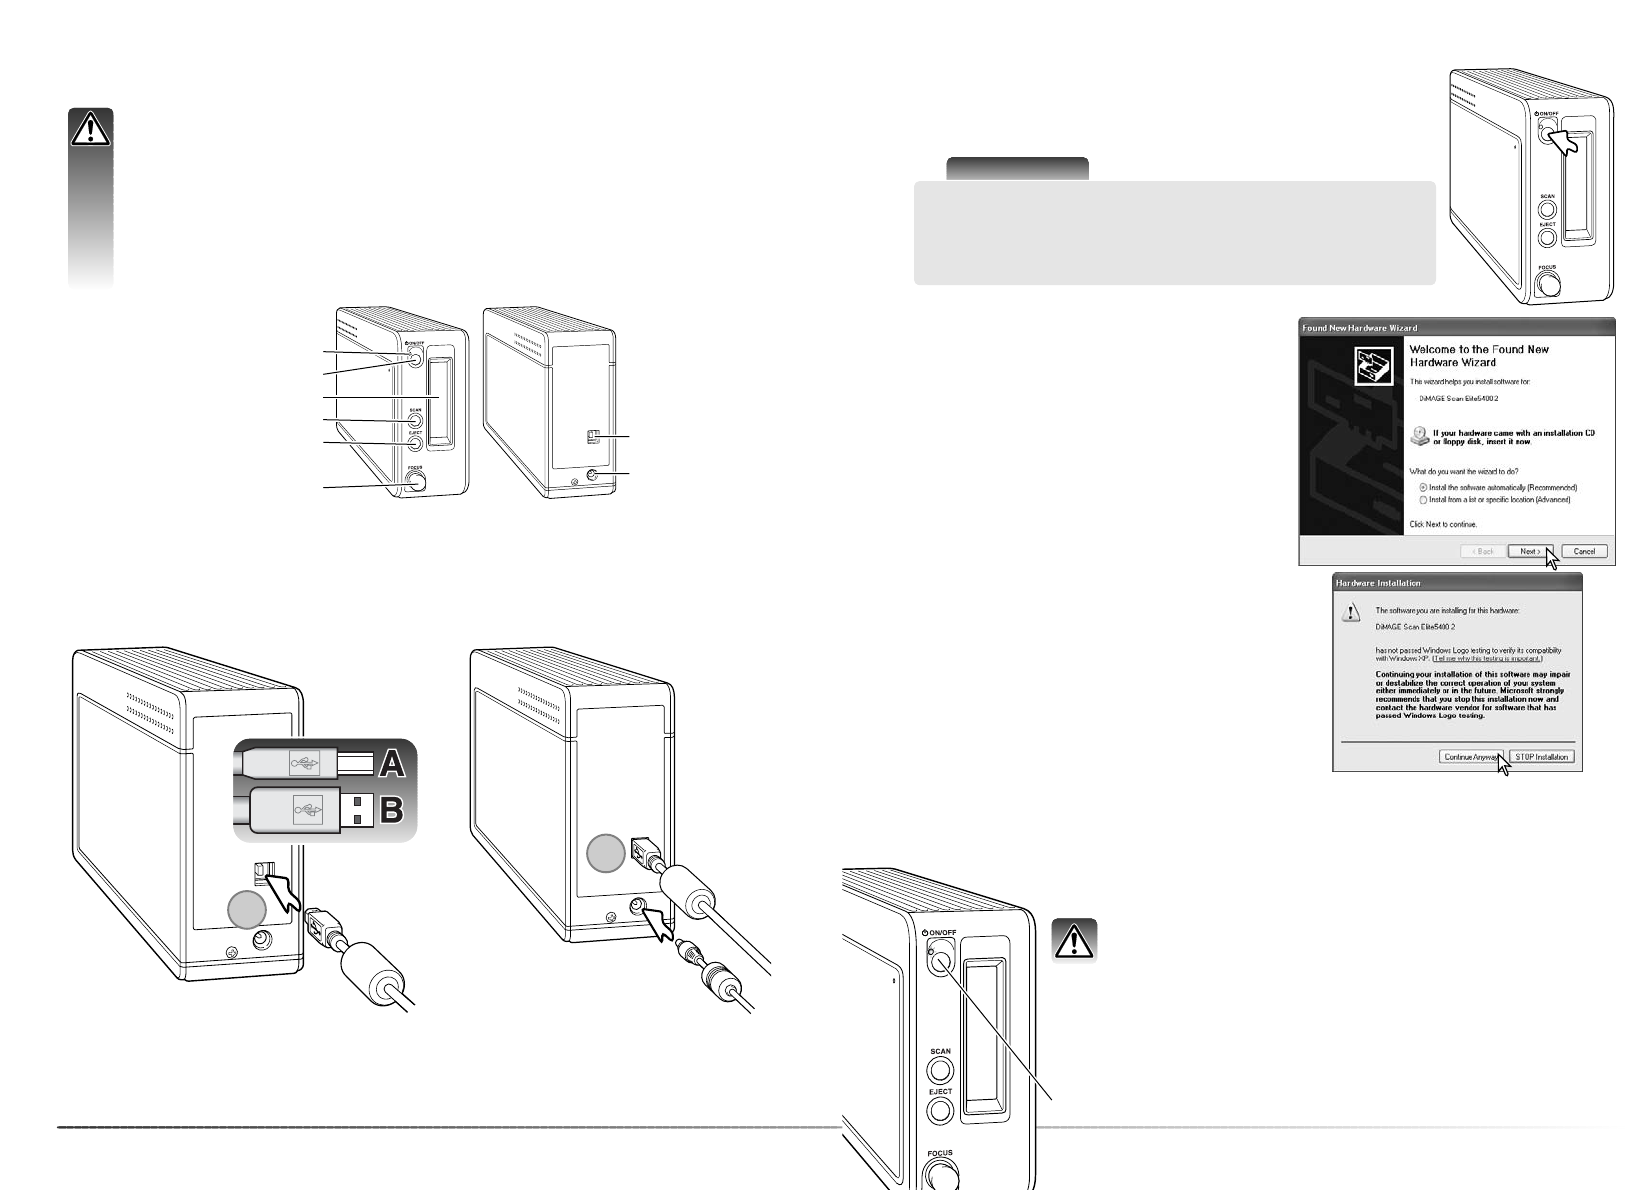
Names of parts. . . . . . . . . . . . . . . . . . . . . . . . . . . . . . . . . . . . . . . . . . . . . . . . . 16
Before connecting the scanner . . . . . . . . . . . . . . . . . . . . . . . . . . . . . . . . . . . . 16
Connecting the scanner. . . . . . . . . . . . . . . . . . . . . . . . . . . . . . . . . . . . . . . . . . 16
Turning on the scanner . . . . . . . . . . . . . . . . . . . . . . . . . . . . . . . . . . . . . . . . . . 17
Disconnecting the scanner . . . . . . . . . . . . . . . . . . . . . . . . . . . . . . . . . . . . . . . 17
Loading the film holders . . . . . . . . . . . . . . . . . . . . . . . . . . . . . . . . . . . . . . . . . . . . . . . 18
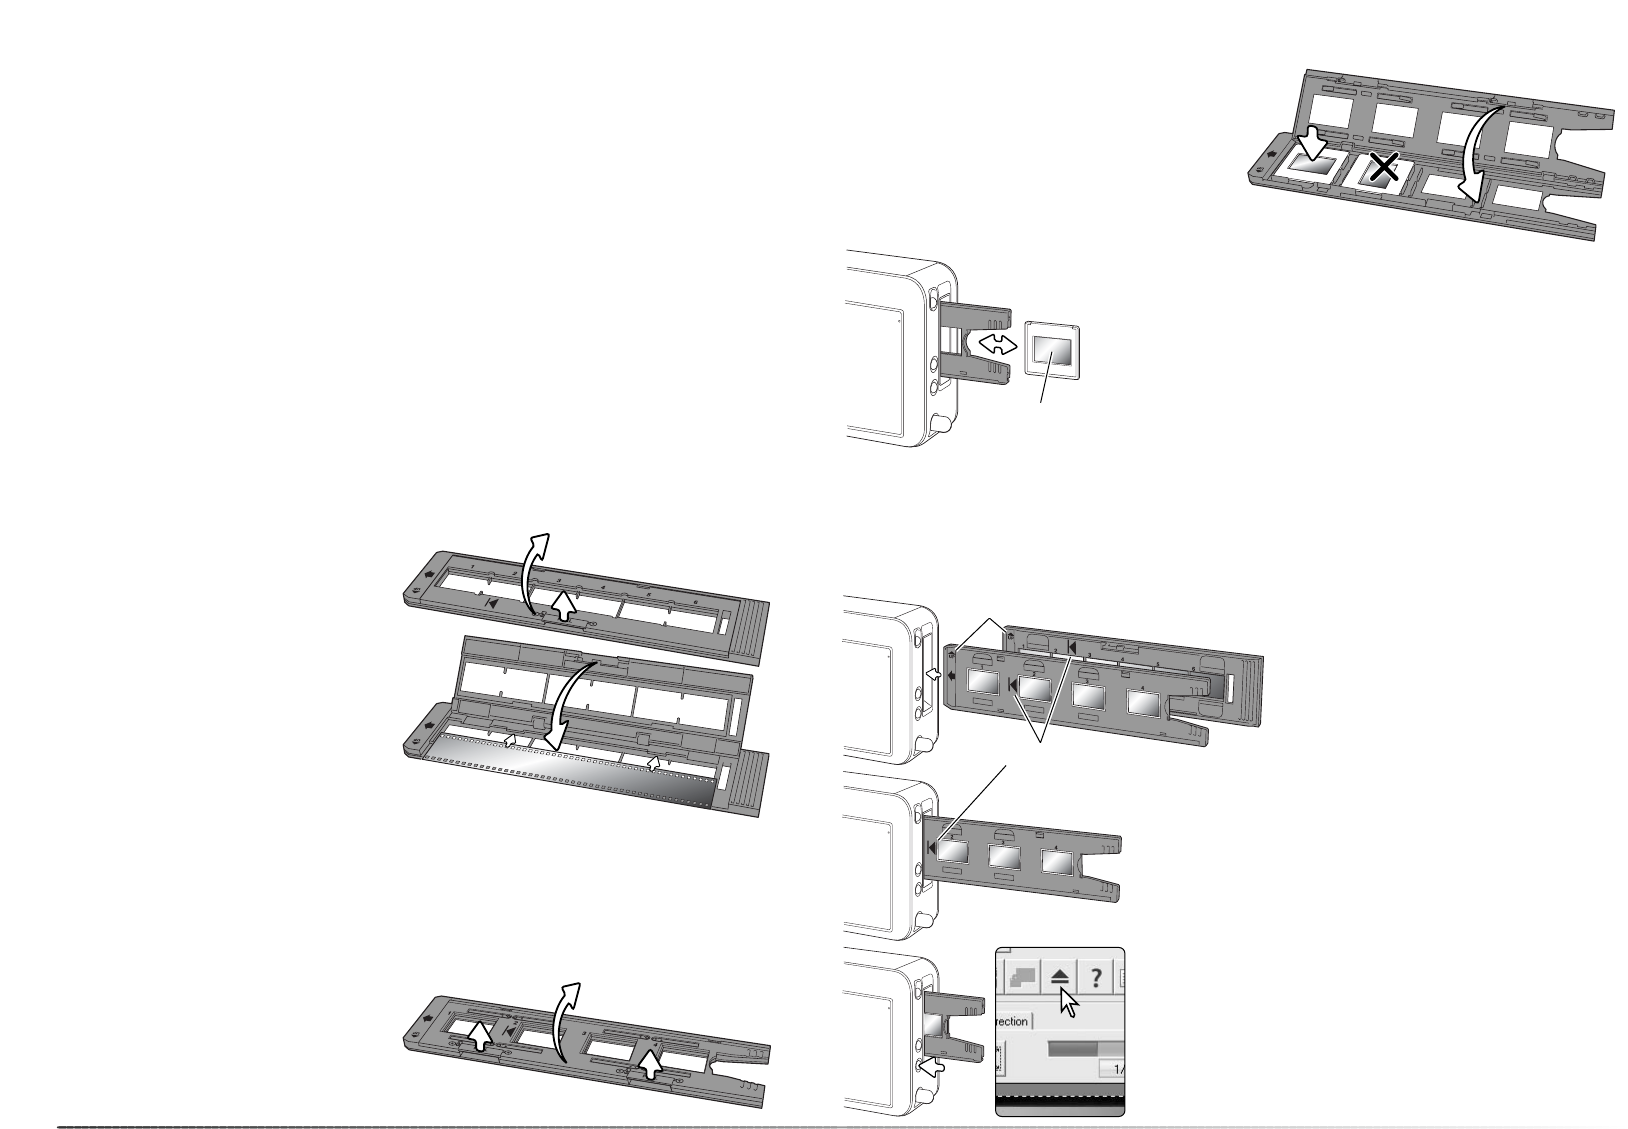
Handling film . . . . . . . . . . . . . . . . . . . . . . . . . . . . . . . . . . . . . . . . . . . . . . . . . . 18
Where is the emulsion? . . . . . . . . . . . . . . . . . . . . . . . . . . . . . . . . . . . . . . . . . . 18
Loading 35mm film strips . . . . . . . . . . . . . . . . . . . . . . . . . . . . . . . . . . . . . . . . 18
Loading mounted slides. . . . . . . . . . . . . . . . . . . . . . . . . . . . . . . . . . . . . . . . . . 18
Loading and ejecting a film holder . . . . . . . . . . . . . . . . . . . . . . . . . . . . . . . . . 19
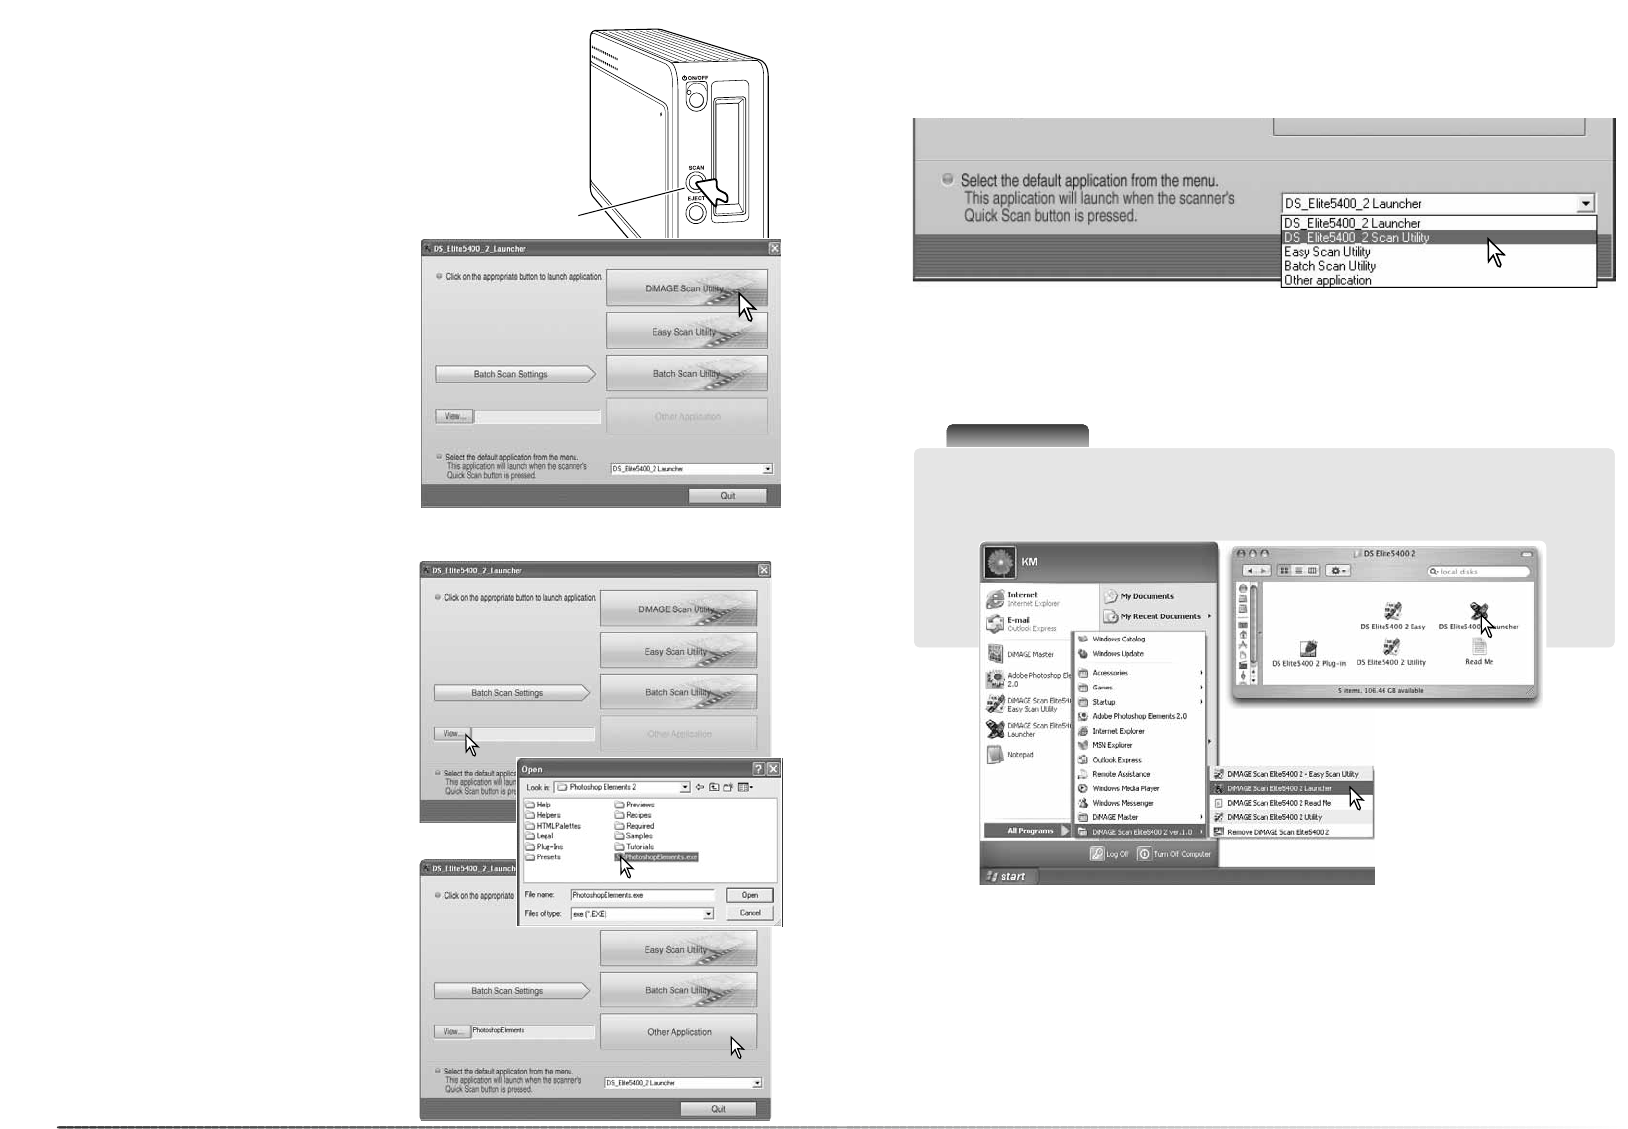
DiMAGE Scan Launcher . . . . . . . . . . . . . . . . . . . . . . . . . . . . . . . . . . . . . . . . . . . . . . . 20
Adding an application to the launcher. . . . . . . . . . . . . . . . . . . . . . . . . . . . . . . 20
Customizing the Quick Scan button . . . . . . . . . . . . . . . . . . . . . . . . . . . . . . . . 21
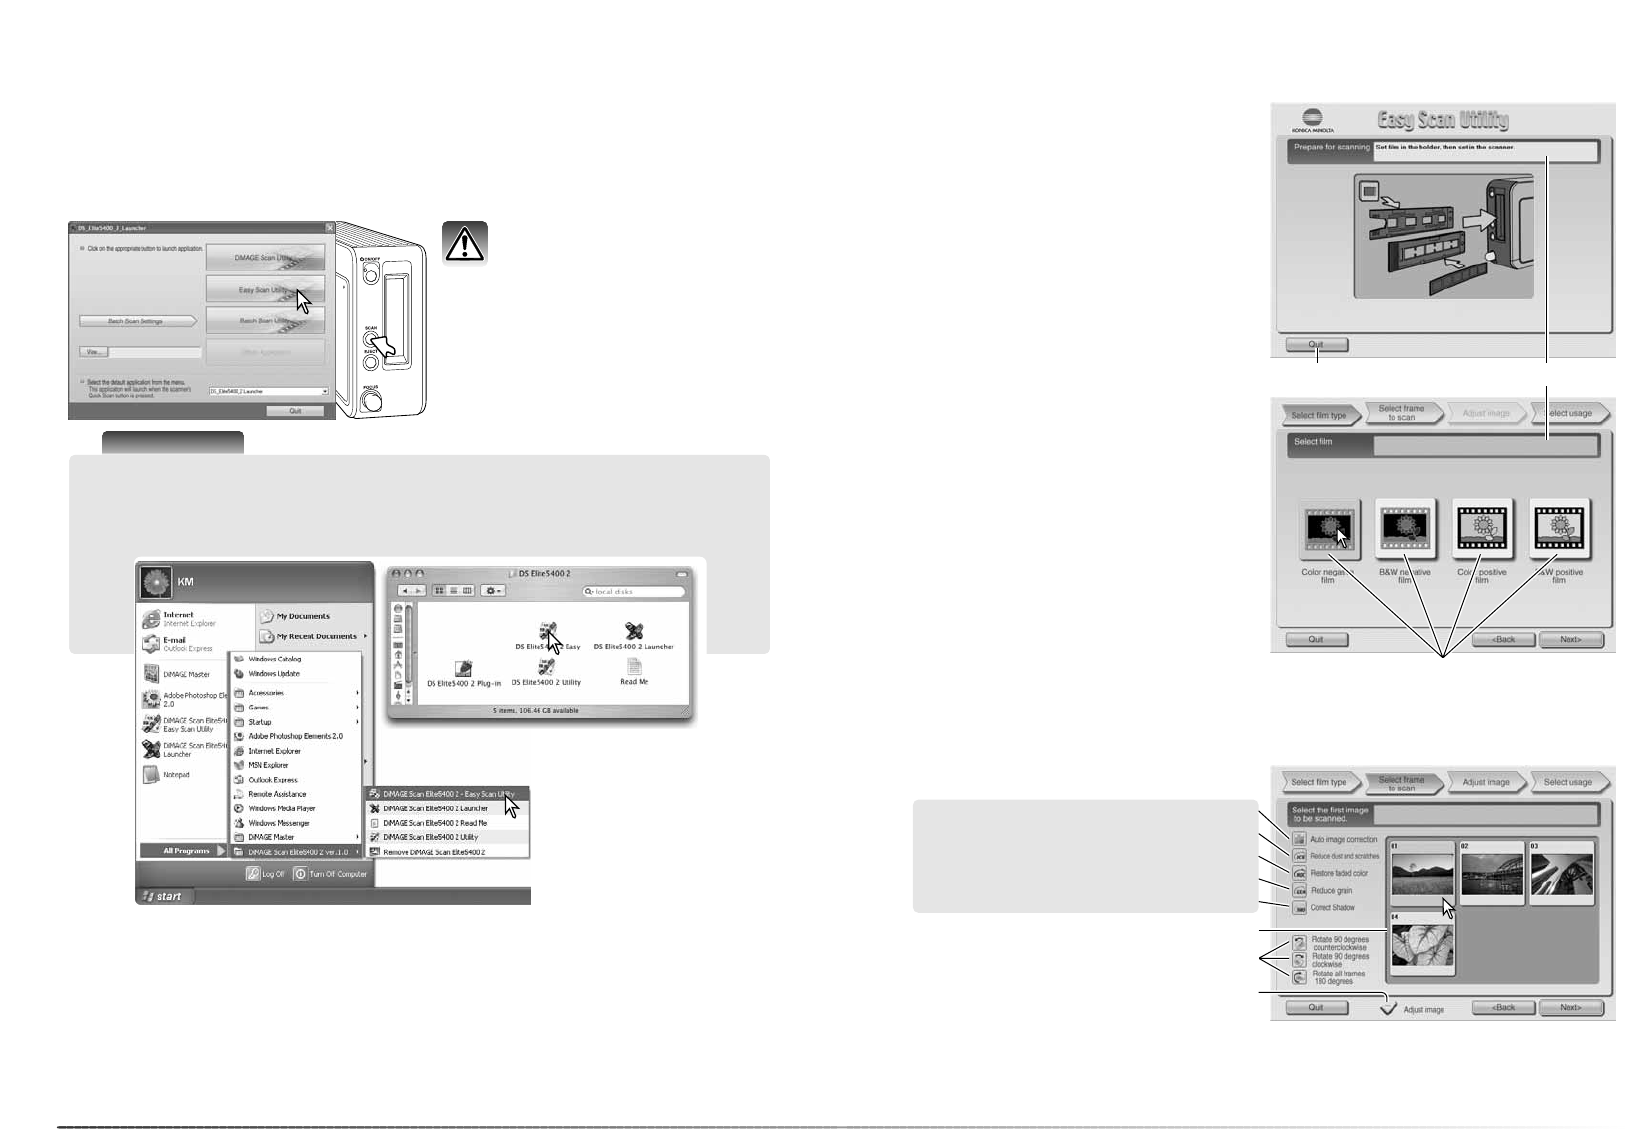
Easy Scan Utility . . . . . . . . . . . . . . . . . . . . . . . . . . . . . . . . . . . . . . . . . . . . . . . . . . . . . 22
Launching the Easy Scan Utility . . . . . . . . . . . . . . . . . . . . . . . . . . . . . . . . . . . 22
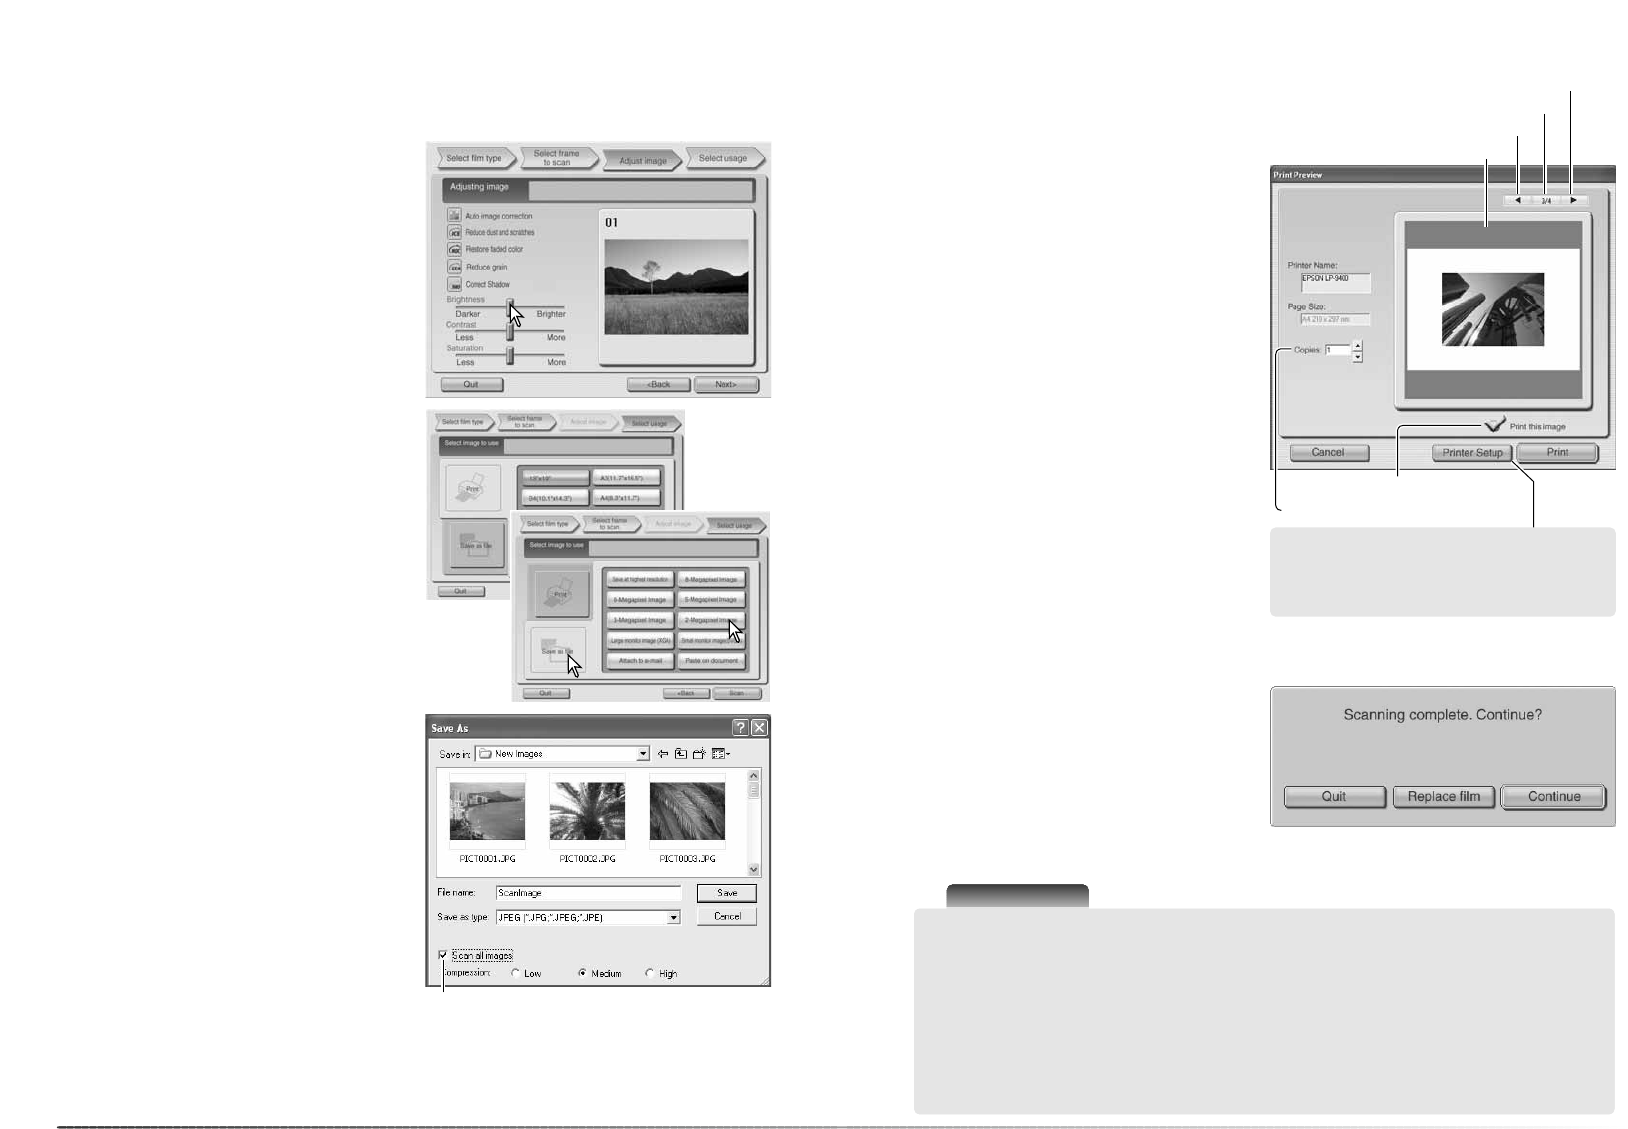
Using the Easy Scan Utility . . . . . . . . . . . . . . . . . . . . . . . . . . . . . . . . . . . . . . . 23
Basic scanning . . . . . . . . . . . . . . . . . . . . . . . . . . . . . . . . . . . . . . . . . . . . . . . . . . . . . . 26
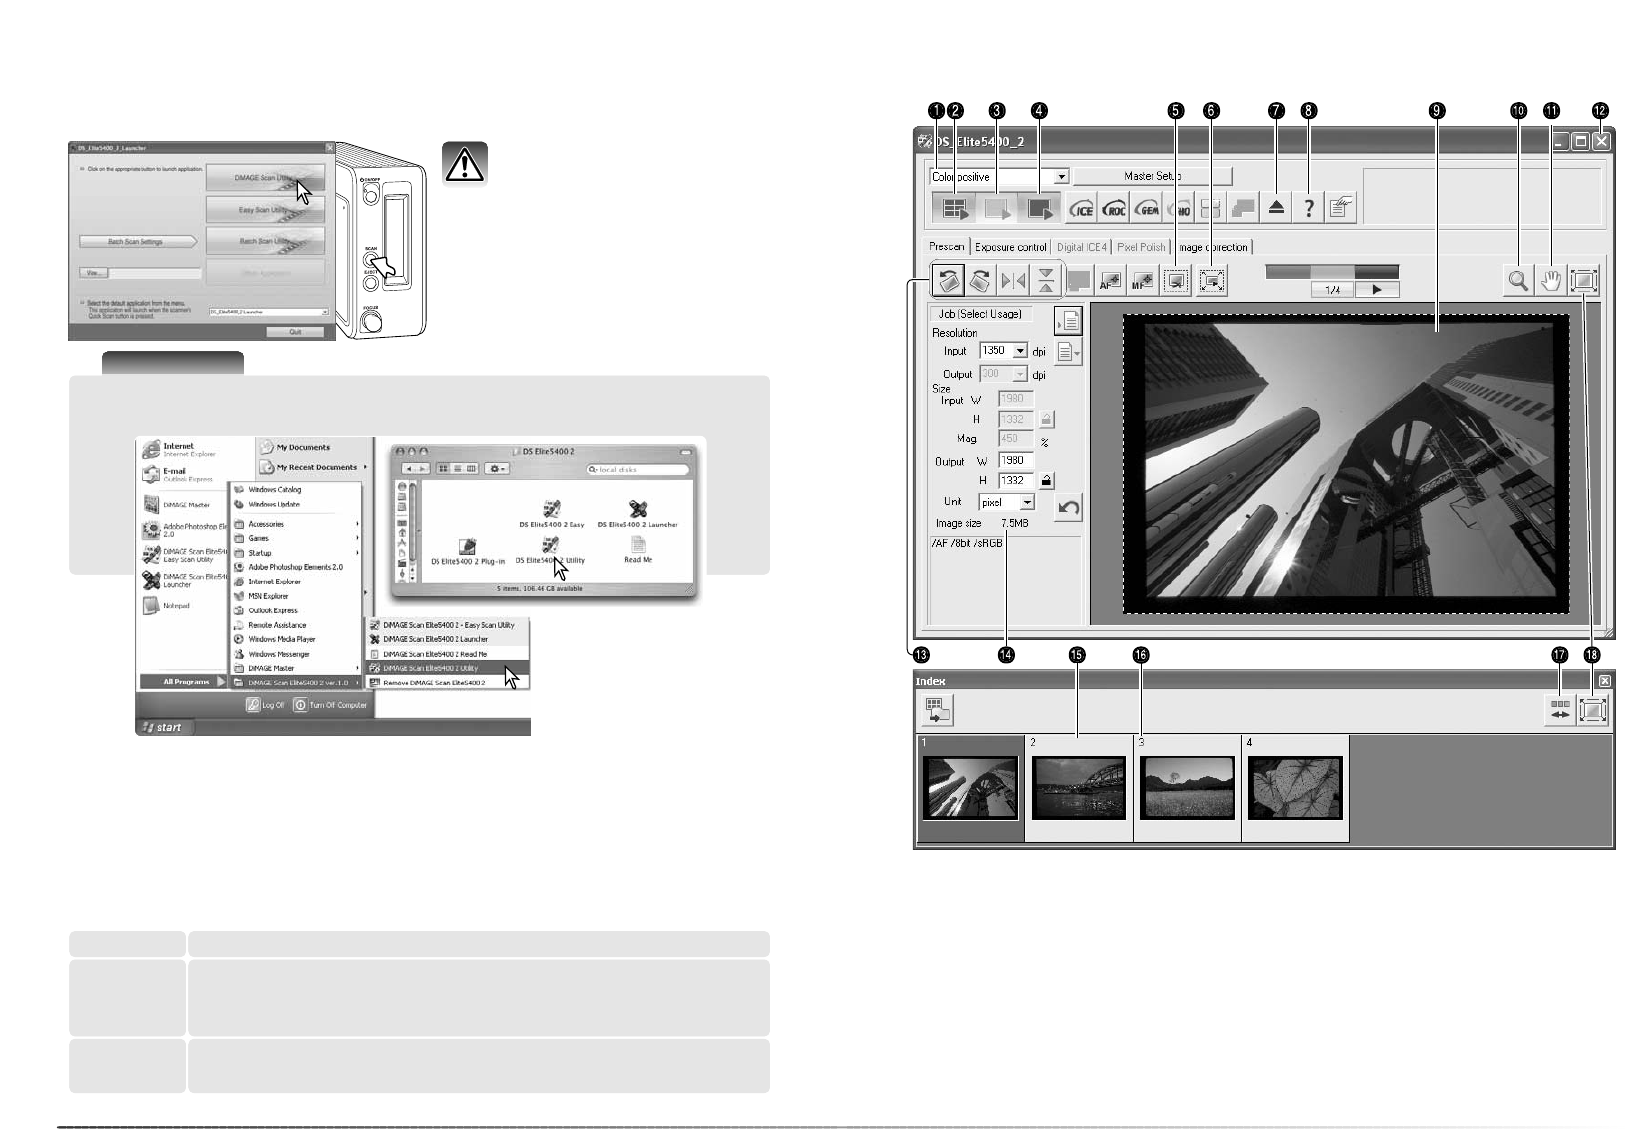
Launching the DiMAGE Scan Utility . . . . . . . . . . . . . . . . . . . . . . . . . . . . . . . . 26
Scanning basics. . . . . . . . . . . . . . . . . . . . . . . . . . . . . . . . . . . . . . . . . . . . . . . . 26
Main window and index palette. . . . . . . . . . . . . . . . . . . . . . . . . . . . . . . . . . . . 27
Film type setup . . . . . . . . . . . . . . . . . . . . . . . . . . . . . . . . . . . . . . . . . . . . . . . . 28
Index scans . . . . . . . . . . . . . . . . . . . . . . . . . . . . . . . . . . . . . . . . . . . . . . . . . . . 28
Selecting index thumbnails . . . . . . . . . . . . . . . . . . . . . . . . . . . . . . . . . . . . . . . 28
Reverse order. . . . . . . . . . . . . . . . . . . . . . . . . . . . . . . . . . . . . . . . . . . . . . . . . . 29
Prescans. . . . . . . . . . . . . . . . . . . . . . . . . . . . . . . . . . . . . . . . . . . . . . . . . . . . . . 29
Fit-to-window button . . . . . . . . . . . . . . . . . . . . . . . . . . . . . . . . . . . . . . . . . . . . 29
Flip and rotate . . . . . . . . . . . . . . . . . . . . . . . . . . . . . . . . . . . . . . . . . . . . . . . . . 30
Grab tool . . . . . . . . . . . . . . . . . . . . . . . . . . . . . . . . . . . . . . . . . . . . . . . . . . . . . 30
Magnifying tool. . . . . . . . . . . . . . . . . . . . . . . . . . . . . . . . . . . . . . . . . . . . . . . . . 30
Auto cropping . . . . . . . . . . . . . . . . . . . . . . . . . . . . . . . . . . . . . . . . . . . . . . . . . 31
Crop prescan button . . . . . . . . . . . . . . . . . . . . . . . . . . . . . . . . . . . . . . . . . . . . 31
Making the final scan . . . . . . . . . . . . . . . . . . . . . . . . . . . . . . . . . . . . . . . . . . . . 32
Quitting the DiMAGE Scan utility. . . . . . . . . . . . . . . . . . . . . . . . . . . . . . . . . . . 33
Basic image processing . . . . . . . . . . . . . . . . . . . . . . . . . . . . . . . . . . . . . . . . . . . . . . . 34
Main window and image-correction tab . . . . . . . . . . . . . . . . . . . . . . . . . . . . . 34
Digital ICE - Dust removal . . . . . . . . . . . . . . . . . . . . . . . . . . . . . . . . . . . . . . . . 35
Pixel Polish. . . . . . . . . . . . . . . . . . . . . . . . . . . . . . . . . . . . . . . . . . . . . . . . . . . . 36
Comparison display . . . . . . . . . . . . . . . . . . . . . . . . . . . . . . . . . . . . . . . . . . . . . 36
Variation palette . . . . . . . . . . . . . . . . . . . . . . . . . . . . . . . . . . . . . . . . . . . . . . . . 37
Brightness, contrast, and color-balance palette . . . . . . . . . . . . . . . . . . . . . . . 38
An introduction to color . . . . . . . . . . . . . . . . . . . . . . . . . . . . . . . . . . . . . . . . . . 39
Undoing and redoing image corrections . . . . . . . . . . . . . . . . . . . . . . . . . . . . . 39
Advanced scanning . . . . . . . . . . . . . . . . . . . . . . . . . . . . . . . . . . . . . . . . . . . . . . . . . . . 40
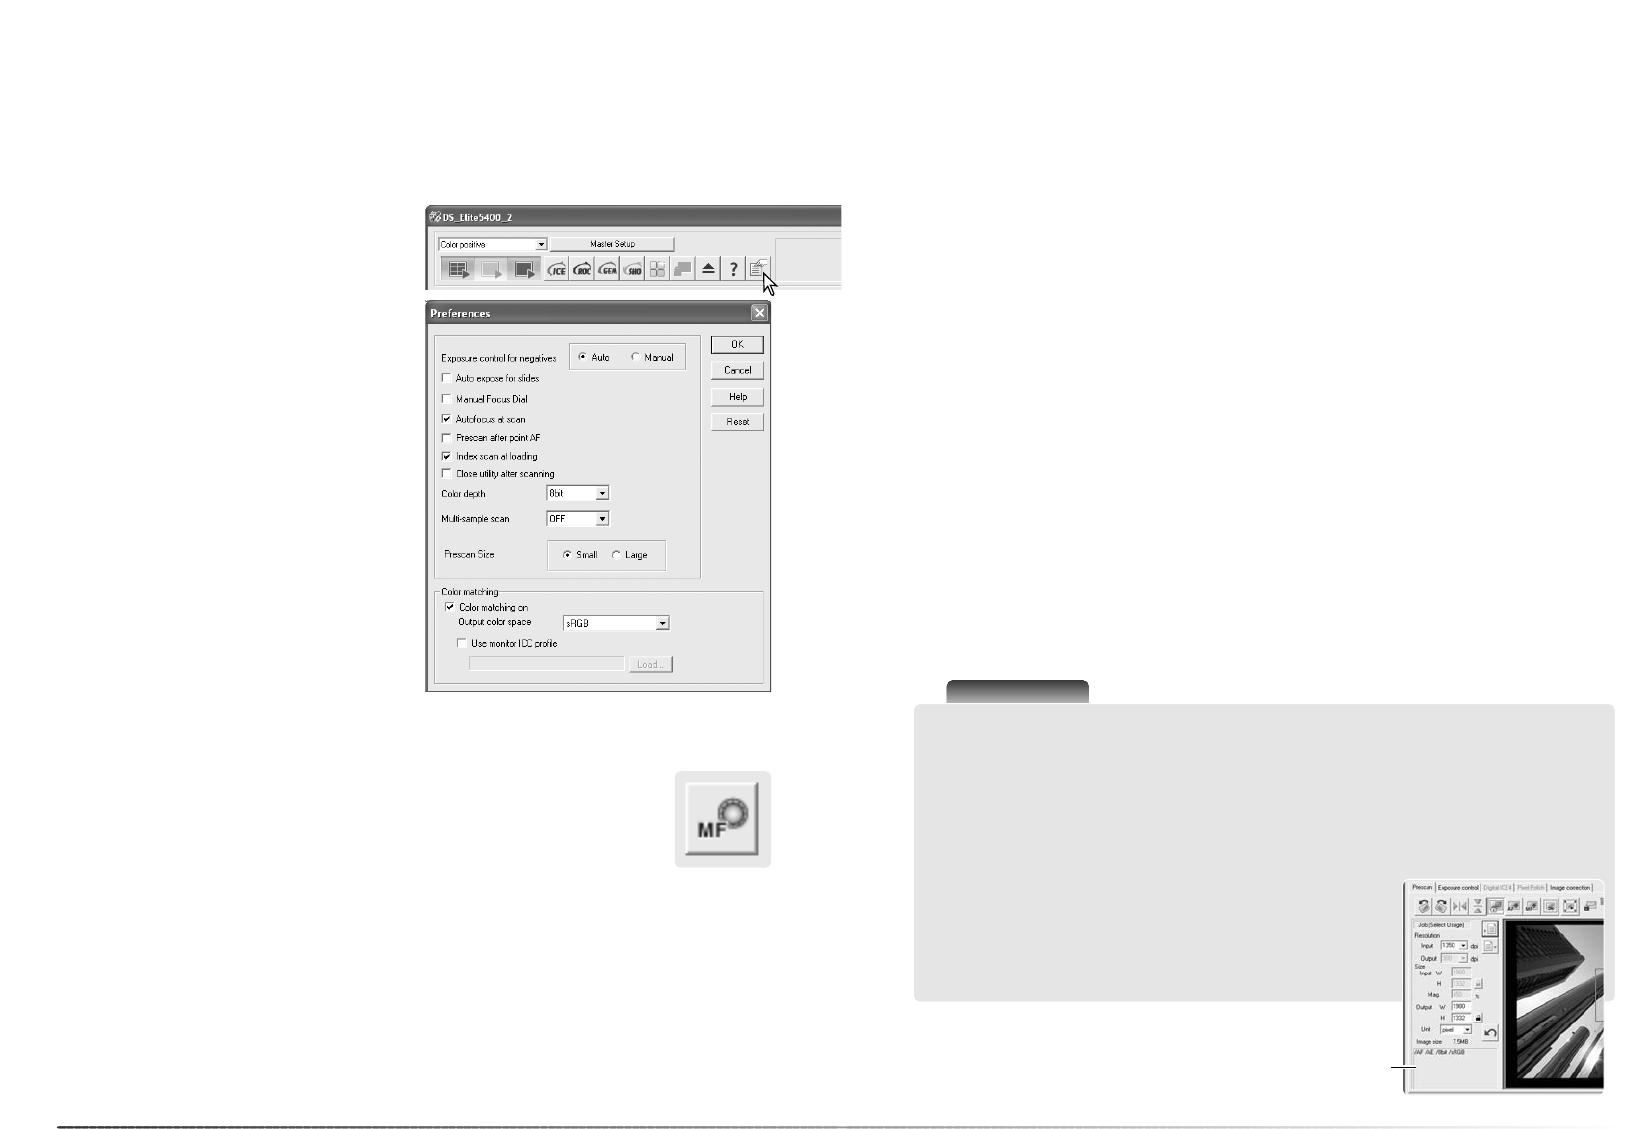
Setting scanner preferences . . . . . . . . . . . . . . . . . . . . . . . . . . . . . . . . . . . . . . 40
Exposure-control tab . . . . . . . . . . . . . . . . . . . . . . . . . . . . . . . . . . . . . . . . . . . . 42
Saving exposure settings. . . . . . . . . . . . . . . . . . . . . . . . . . . . . . . . . . . . . . . . . 43
Loading exposure settings. . . . . . . . . . . . . . . . . . . . . . . . . . . . . . . . . . . . . . . . 43
Saving index thumbnails . . . . . . . . . . . . . . . . . . . . . . . . . . . . . . . . . . . . . . . . . 43
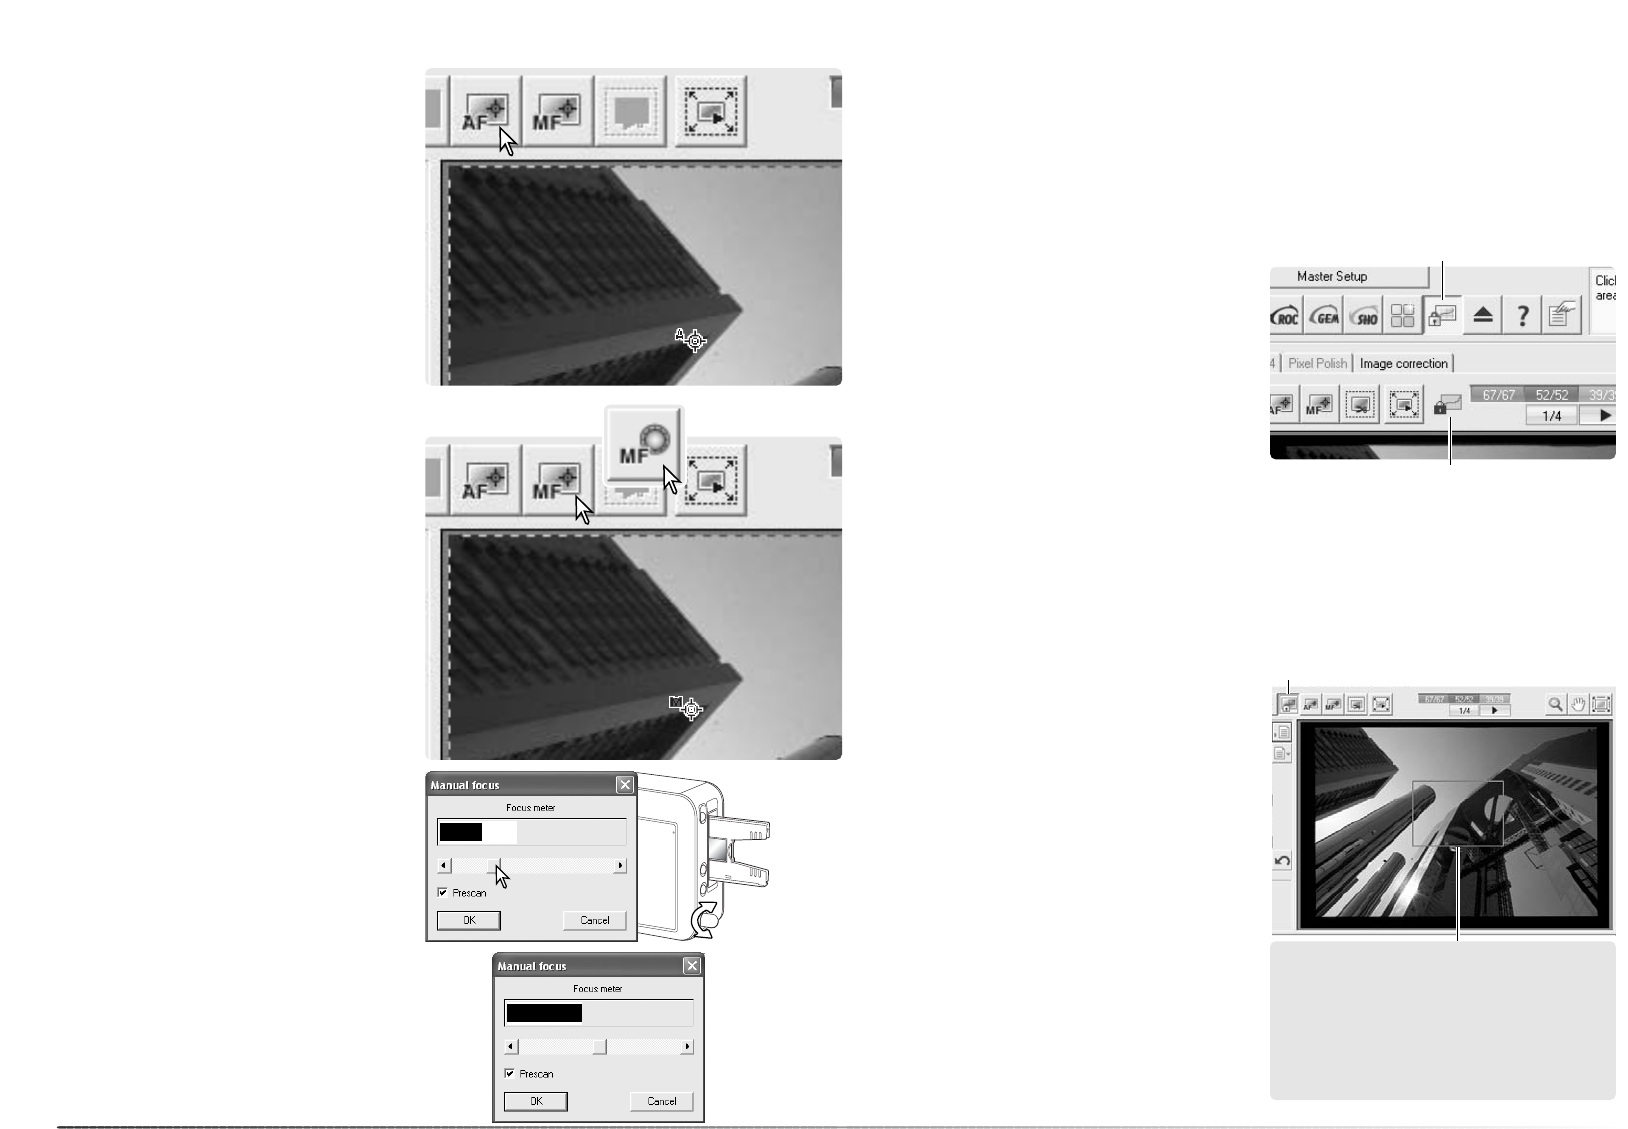
Point AF (Autofocus) . . . . . . . . . . . . . . . . . . . . . . . . . . . . . . . . . . . . . . . . . . . . 44
Manual focus . . . . . . . . . . . . . . . . . . . . . . . . . . . . . . . . . . . . . . . . . . . . . . . . . . 44
AE lock . . . . . . . . . . . . . . . . . . . . . . . . . . . . . . . . . . . . . . . . . . . . . . . . . . . . . . . 45
AE area selection . . . . . . . . . . . . . . . . . . . . . . . . . . . . . . . . . . . . . . . . . . . . . . . 45
Manual cropping . . . . . . . . . . . . . . . . . . . . . . . . . . . . . . . . . . . . . . . . . . . . . . . 46
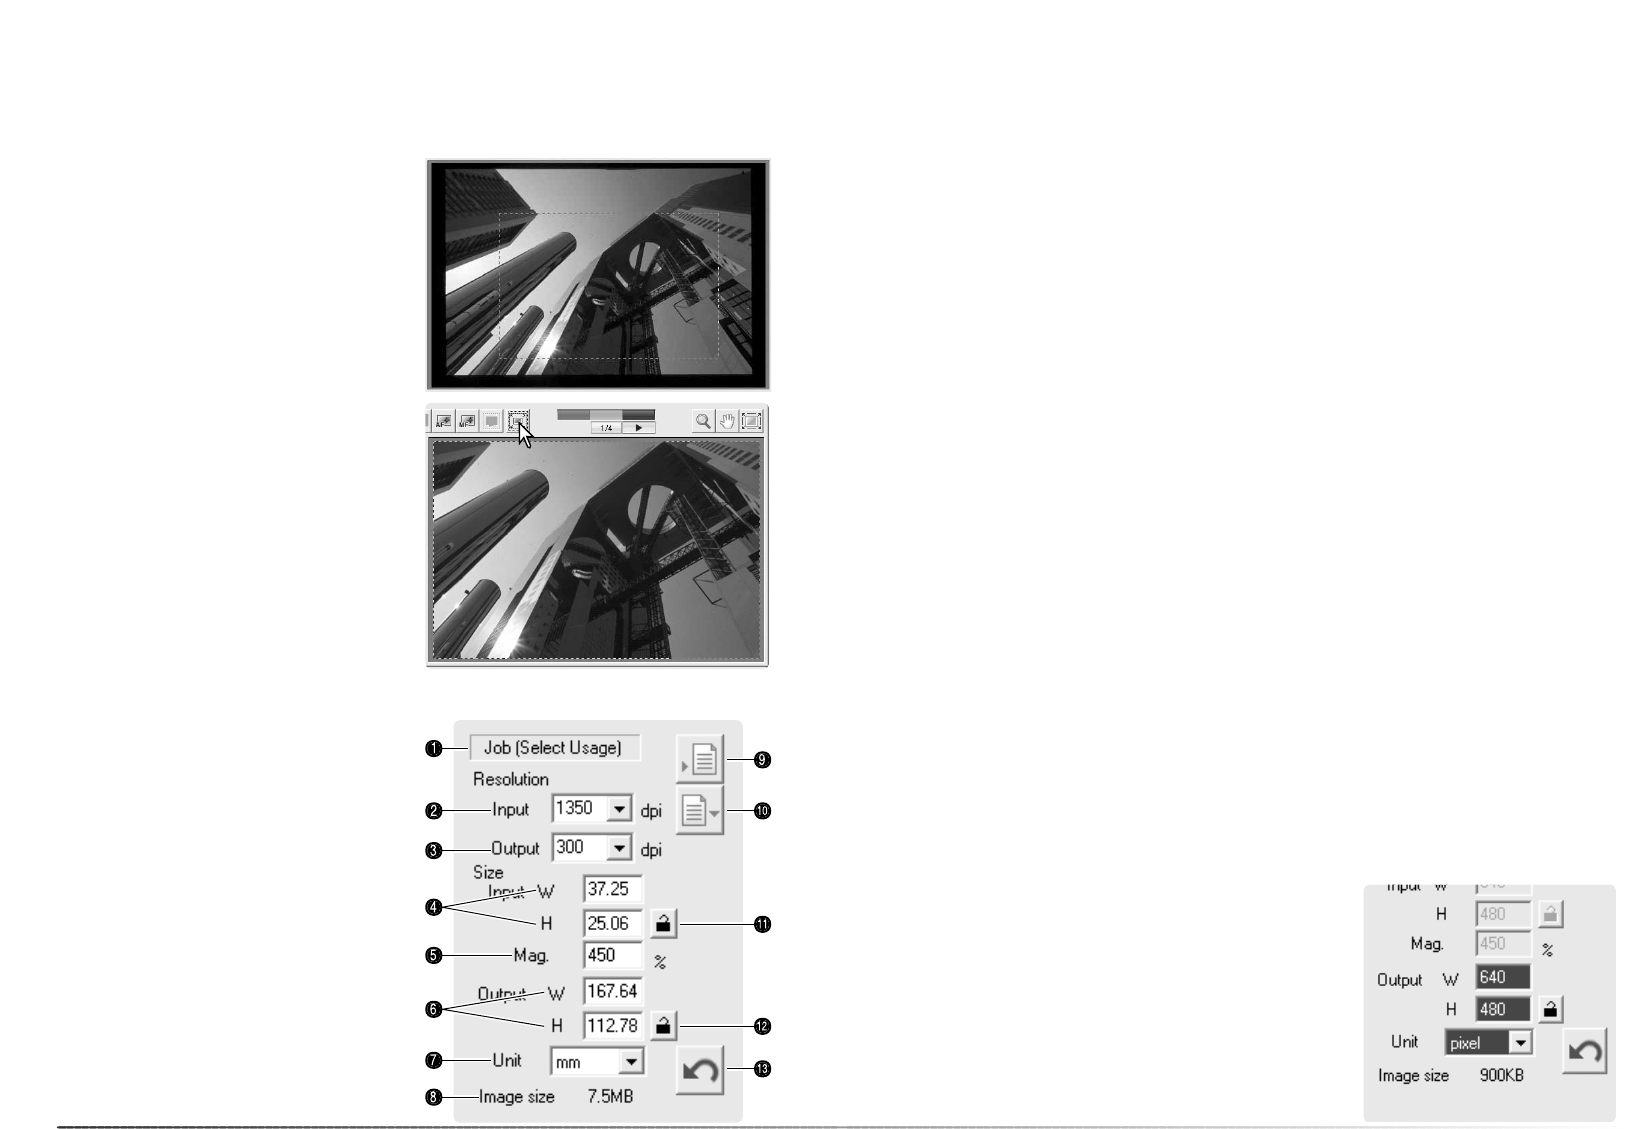
Inputting scan settings manually . . . . . . . . . . . . . . . . . . . . . . . . . . . . . . . . . . . 46
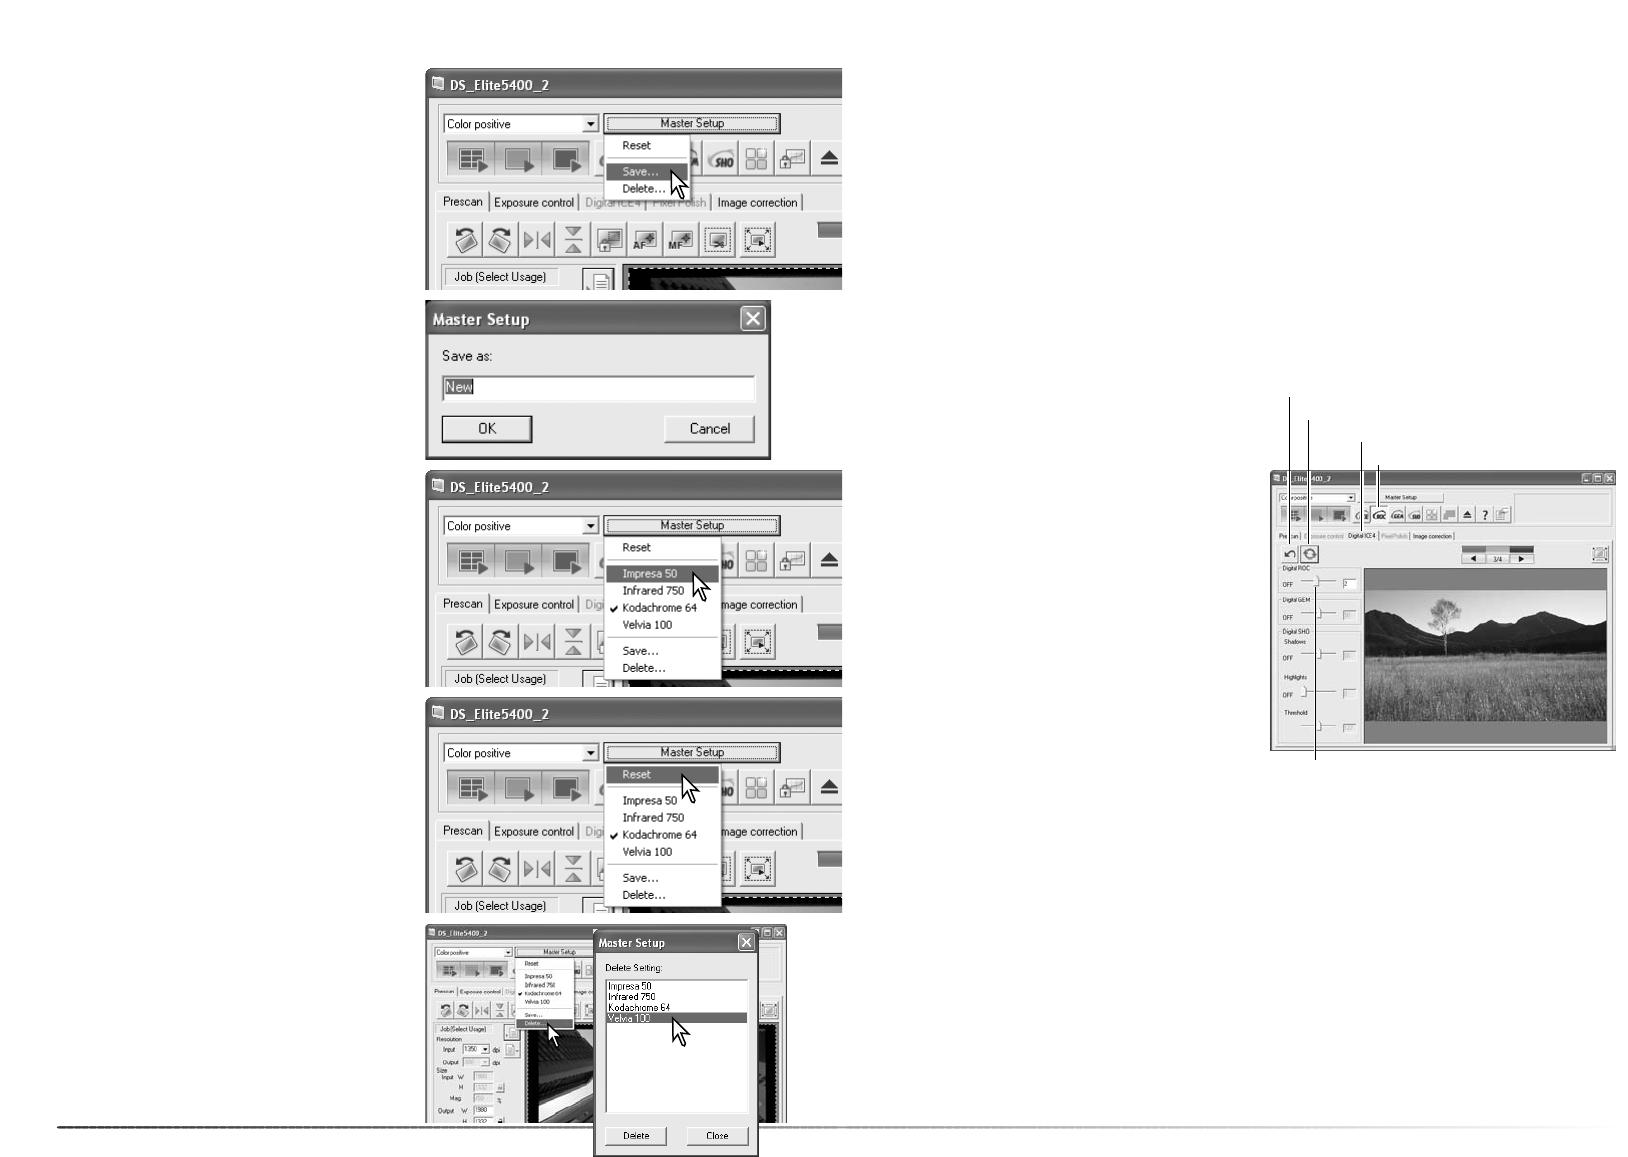
Saving scan settings as a Job . . . . . . . . . . . . . . . . . . . . . . . . . . . . . . . . . . . . . 49
Deleting a Job . . . . . . . . . . . . . . . . . . . . . . . . . . . . . . . . . . . . . . . . . . . . . . . . . 49
Master setup . . . . . . . . . . . . . . . . . . . . . . . . . . . . . . . . . . . . . . . . . . . . . . . . . . 50
Advanced image processing. . . . . . . . . . . . . . . . . . . . . . . . . . . . . . . . . . . . . . . . . . . . 51
Digital ROC . . . . . . . . . . . . . . . . . . . . . . . . . . . . . . . . . . . . . . . . . . . . . . . . . . . 51
Digital GEM . . . . . . . . . . . . . . . . . . . . . . . . . . . . . . . . . . . . . . . . . . . . . . . . . . . 52
Digital SHO. . . . . . . . . . . . . . . . . . . . . . . . . . . . . . . . . . . . . . . . . . . . . . . . . . . . 53
Image-correction palettes . . . . . . . . . . . . . . . . . . . . . . . . . . . . . . . . . . . . . . . . 54
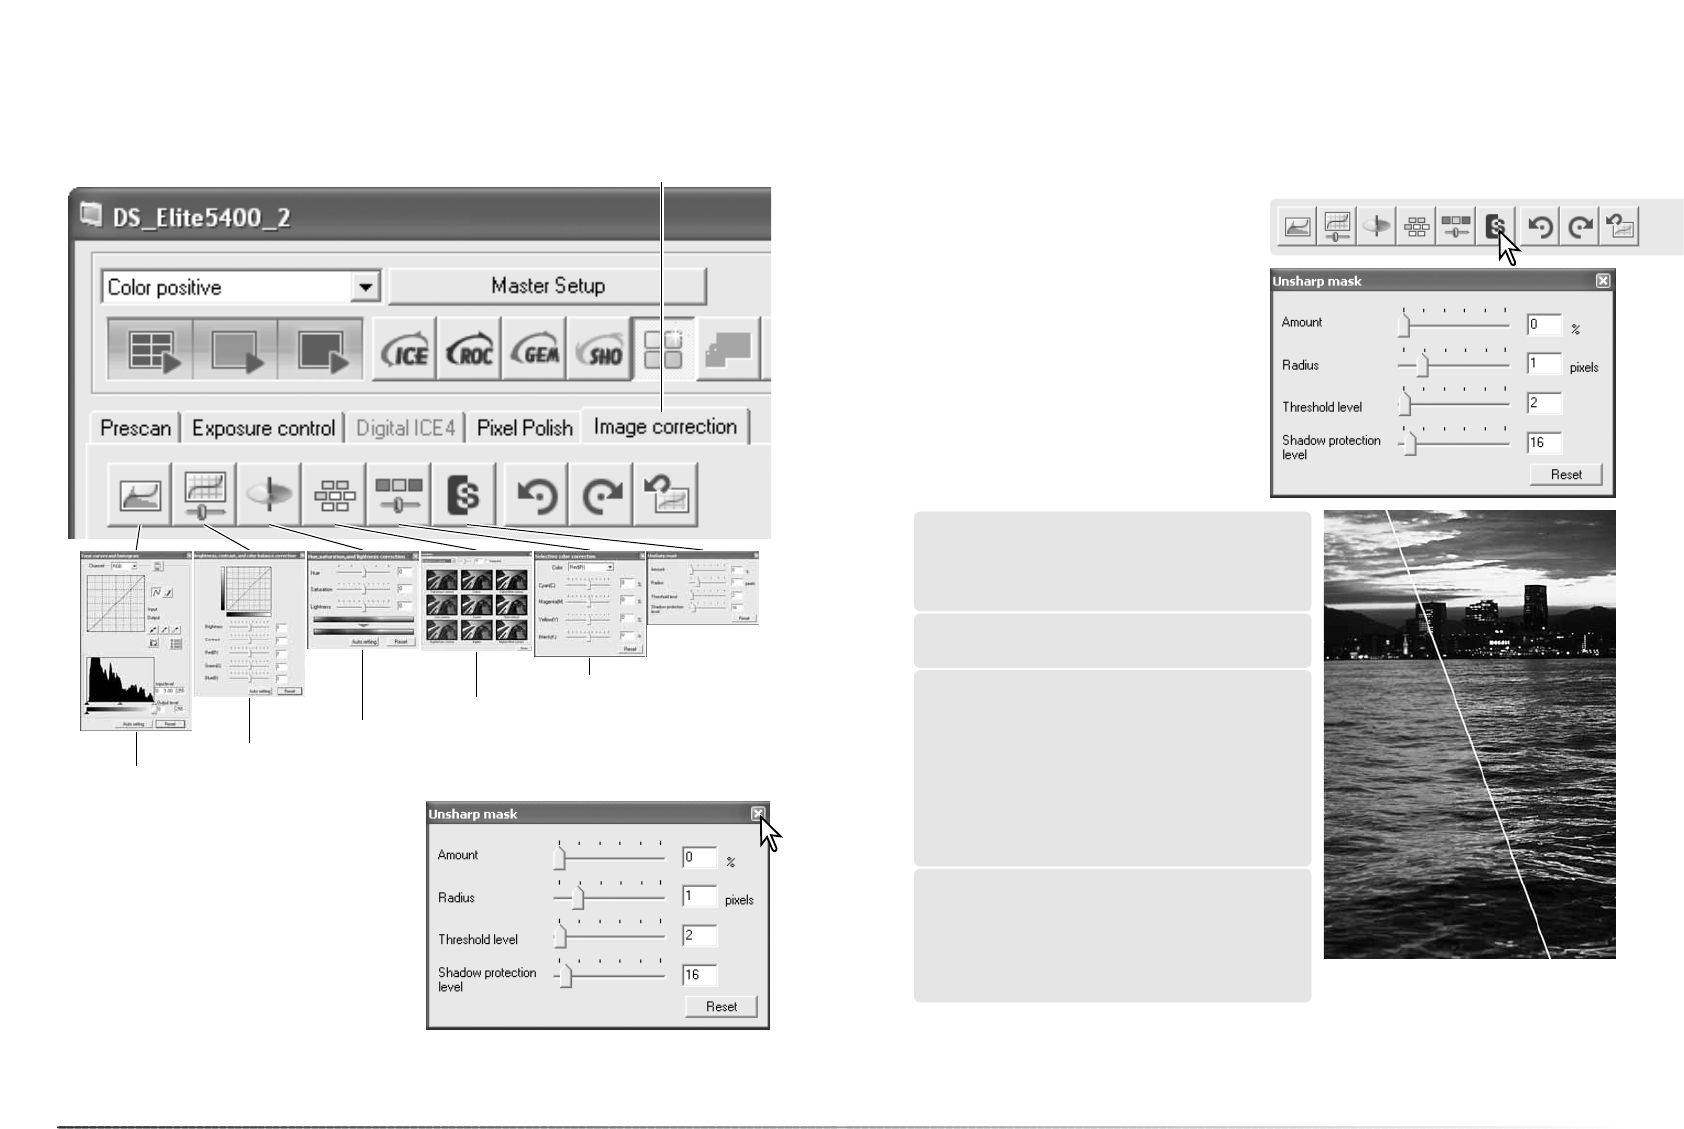
Unsharp mask . . . . . . . . . . . . . . . . . . . . . . . . . . . . . . . . . . . . . . . . . . . . . . . . . 55
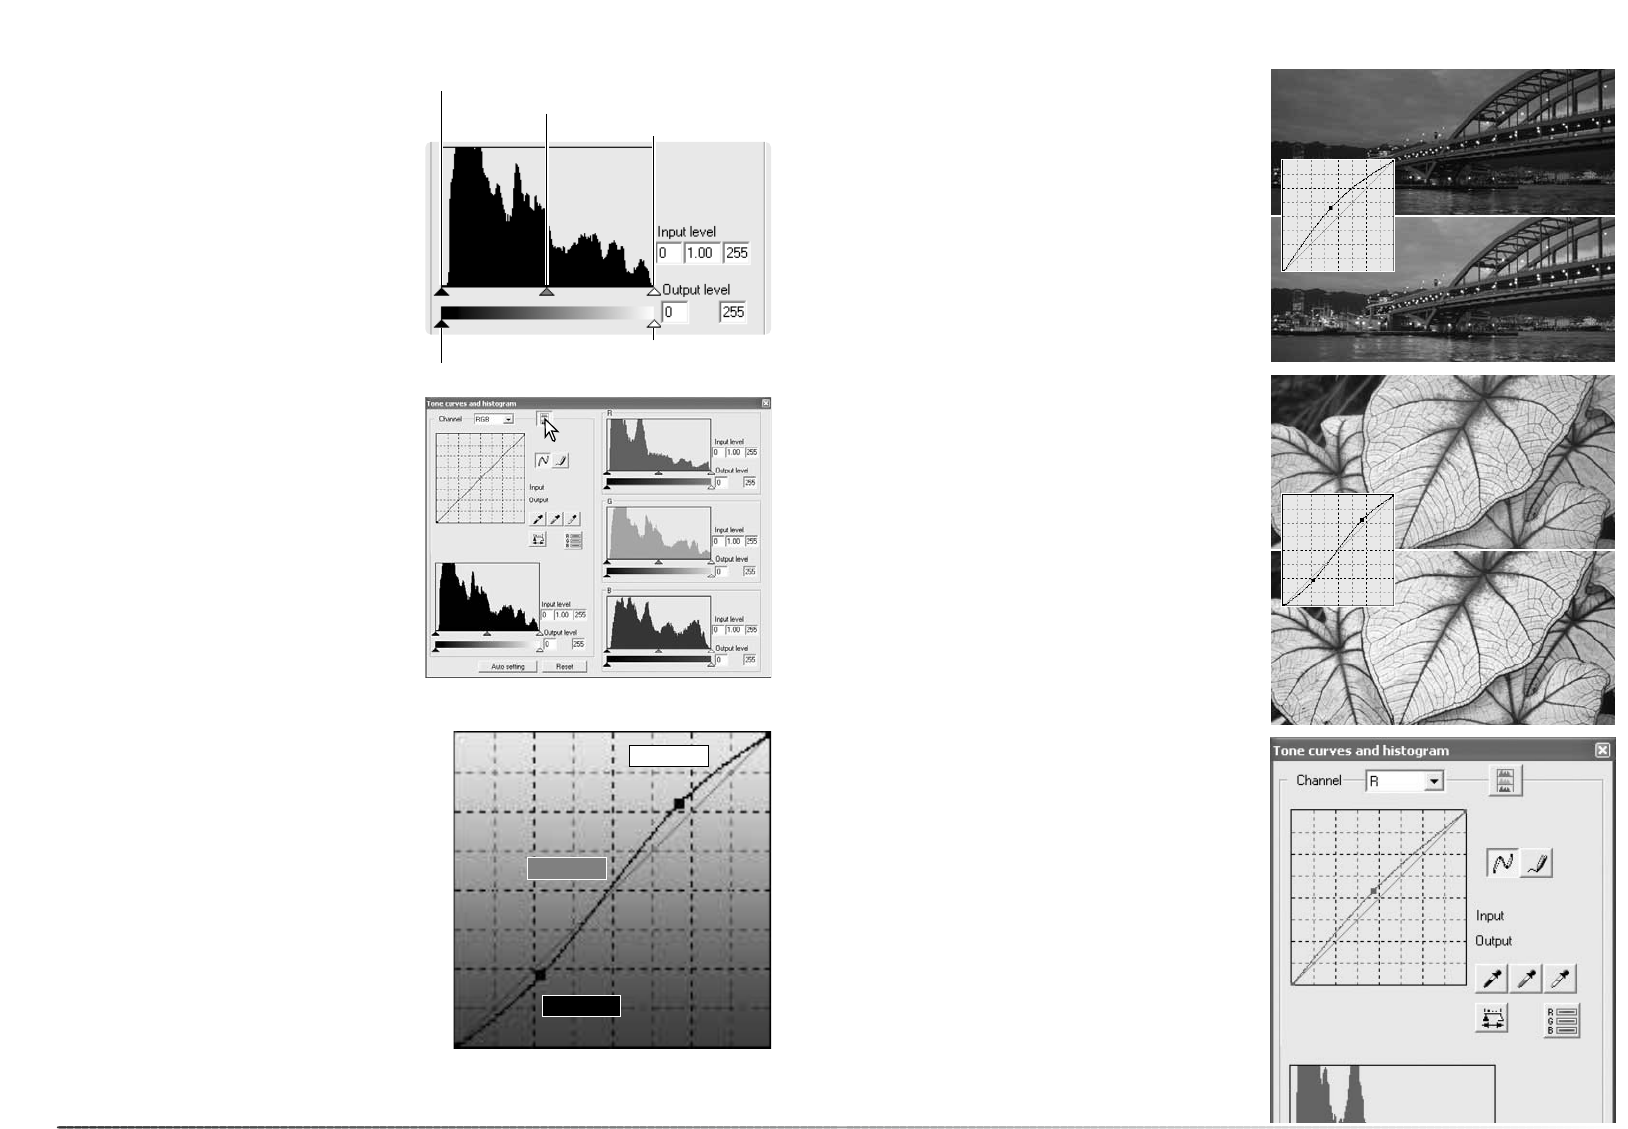
Tone curve and histogram . . . . . . . . . . . . . . . . . . . . . . . . . . . . . . . . . . . . . . . . 56
Tone-curve processing guide. . . . . . . . . . . . . . . . . . . . . . . . . . . . . . . . . . . . . . 58
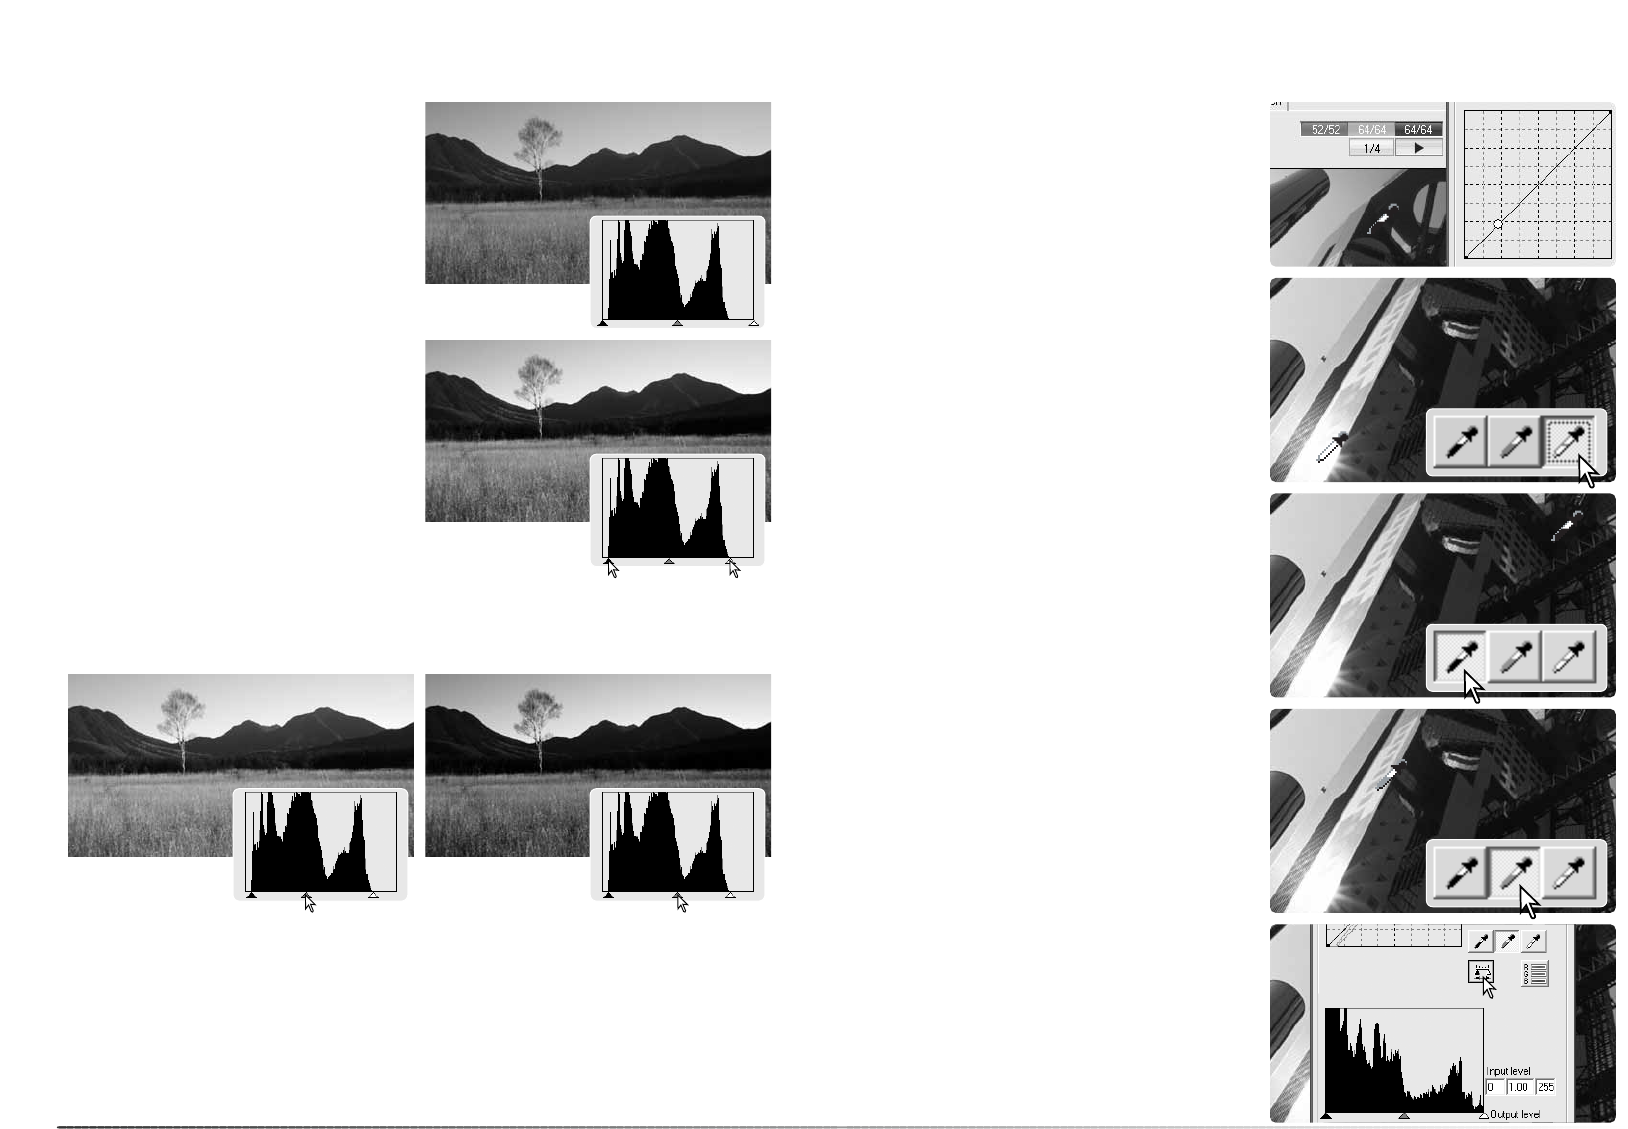
Histogram processing guide . . . . . . . . . . . . . . . . . . . . . . . . . . . . . . . . . . . . . . 60
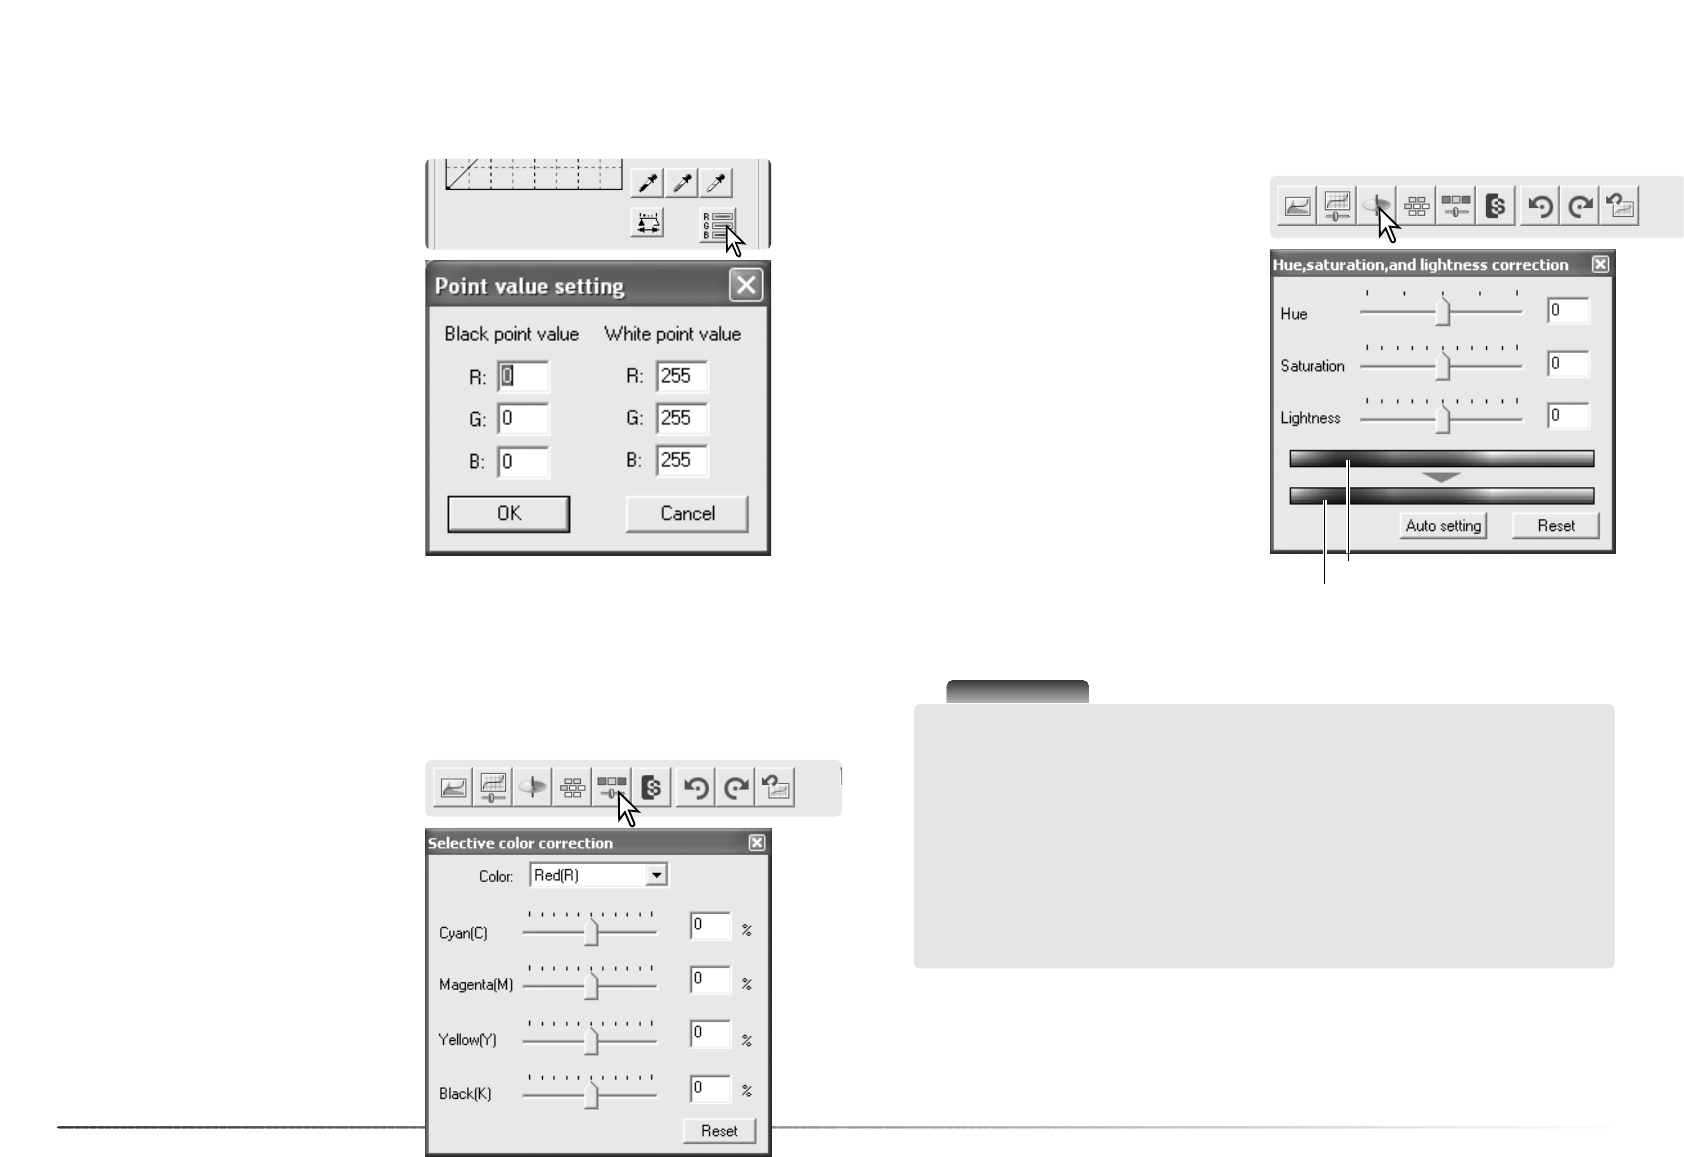
White, black, and gray-point corrections. . . . . . . . . . . . . . . . . . . . . . . . . . . . . 61
White and black-point setup. . . . . . . . . . . . . . . . . . . . . . . . . . . . . . . . . . . . . . 62
Selective-color palette . . . . . . . . . . . . . . . . . . . . . . . . . . . . . . . . . . . . . . . . . . . 62
Hue, saturation, and lightness palette . . . . . . . . . . . . . . . . . . . . . . . . . . . . . . . 63
Snapshot button . . . . . . . . . . . . . . . . . . . . . . . . . . . . . . . . . . . . . . . . . . . . . . . 64
Saving image corrections . . . . . . . . . . . . . . . . . . . . . . . . . . . . . . . . . . . . . . . . 64
Loading image-correction Jobs . . . . . . . . . . . . . . . . . . . . . . . . . . . . . . . . . . . . 64
Color matching . . . . . . . . . . . . . . . . . . . . . . . . . . . . . . . . . . . . . . . . . . . . . . . . . . . . . . 65
Setting the output color space . . . . . . . . . . . . . . . . . . . . . . . . . . . . . . . . . . . . 65
Setting the monitor ICC profile . . . . . . . . . . . . . . . . . . . . . . . . . . . . . . . . . . . . 65
Batch Scan Utility . . . . . . . . . . . . . . . . . . . . . . . . . . . . . . . . . . . . . . . . . . . . . . . . . . . . 66