495145
8
Verklein
Vergroot
Pagina terug
1/18
Pagina verder
A-8 Recording
E
A-9Recording
RECORDING
METERING
FOCUS
14-Segment Honeycomb-Pattern Metering: for
most photographic situation.
Spot Metering: uses the spot-metering area in
the viewfinder to metering specific portions
of the scene.
Center-weighted Metering: measures the entire
image area with emphasis given the central
region.
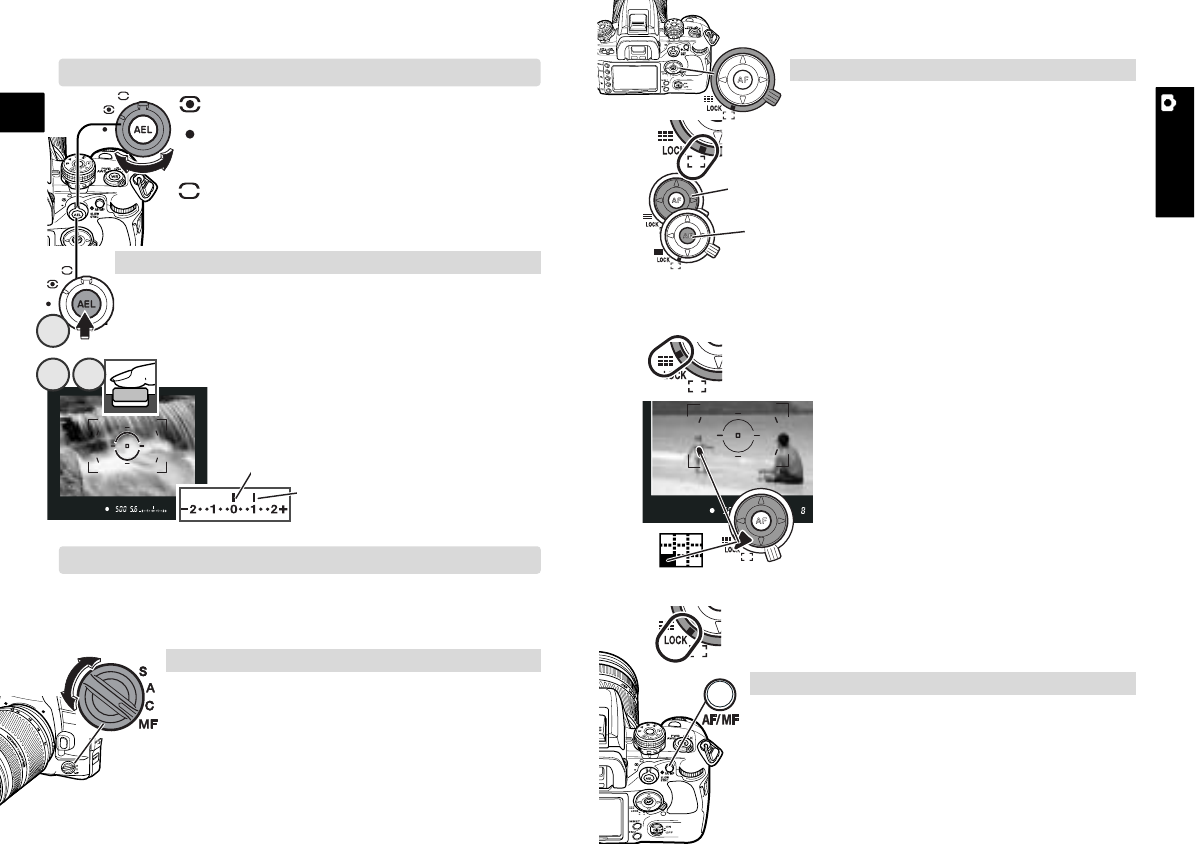
Exposure lock (AEL) (p. 46)
The AEL button locks a metered exposure without locking
the focus.
1. With the area to be metered framed, press and hold the
AEL button (1).
2. Frame the subject (2).
3. Press the shutter-release button partway
down to focus (3) and then all the way
down to take the picture.
Turn the dial to the appropriate position: A: Automatic AF (for
most situations), C: Continuous AF (for moving subjects), S:
Single-shot AF (for stationary subjects), or MF: Manual focus.
1. Turn the focus-mode dial to MF.
2. Turn the focusing ring until the subject appears
sharp.
1. Select the focus area.
2. Turn the focus-area switch to the lock position to fix
the area.
AF/MF button (p. 53)
The AF/MF button switches between autofocus and
manual focus without changing the focus-mode dial.
Locked exposure
Difference between the metered and
locked exposure.
Focus-area switch (p. 54)
The AF area can be specified.
2. Press the controller’s eight-way keys to
select one of the eight local focus areas.
Press the central controller button to
select the center spot AF area. The cam-
era focuses when the controller is pressed.
3. While pressing the controller, press the
shutter-release button to take the picture.
3. While pressing the controller, press the shutter-release button to
take the picture.
1. Turn the focus-area switch to focus-area selection.
2. Press the controller’s eight-way keys to focus using
the wide focus area.
Press the central button of the controller to use the
spot AF area.
Spot and Wide AF
Spot and local focus areas
Focus area lock
1. Turn the focus-area switch to wide.
(p. 46, 50)
(p. 52-54)
1
2 3
MF mode (p. 52)
8

Hulp nodig? Stel uw vraag in het forum

Spelregels

Misbruik melden

Gebruikershandleiding.com neemt misbruik van zijn services uitermate serieus. U kunt hieronder aangeven waarom deze vraag ongepast is. Wij controleren de vraag en zonodig wordt deze verwijderd.

Product:

Bijvoorbeeld antisemitische inhoud, racistische inhoud, of materiaal dat gewelddadige fysieke handelingen tot gevolg kan hebben.

Bijvoorbeeld een creditcardnummer, een persoonlijk identificatienummer, of een geheim adres. E-mailadressen en volledige namen worden niet als privégegevens beschouwd.

Spelregels forum

Om tot zinvolle vragen te komen hanteren wij de volgende spelregels:

Belangrijk! Als er een antwoord wordt gegeven op uw vraag, dan is het voor de gever van het antwoord nuttig om te weten als u er wel (of niet) mee geholpen bent! Wij vragen u dus ook te reageren op een antwoord.

Belangrijk! Antwoorden worden ook per e-mail naar abonnees gestuurd. Laat uw emailadres achter op deze site, zodat u op de hoogte blijft. U krijgt dan ook andere vragen en antwoorden te zien.

Abonneren

Abonneer u voor het ontvangen van emails voor uw Minolta Dynax Maxxum 7D bij:


U ontvangt een email met instructies om u voor één of beide opties in te schrijven.


Ontvang uw handleiding per email

Vul uw emailadres in en ontvang de handleiding van Minolta Dynax Maxxum 7D in de taal/talen: Engels als bijlage per email.

De handleiding is 1,71 mb groot.


U ontvangt de handleiding per email binnen enkele minuten. Als u geen email heeft ontvangen, dan heeft u waarschijnlijk een verkeerd emailadres ingevuld of is uw mailbox te vol. Daarnaast kan het zijn dat uw internetprovider een maximum heeft aan de grootte per email. Omdat hier een handleiding wordt meegestuurd, kan het voorkomen dat de email groter is dan toegestaan bij uw provider.

Andere handleiding(en) van Minolta Dynax Maxxum 7D

Minolta Dynax Maxxum 7D Gebruiksaanwijzing - English - 83 pagina's

Minolta Dynax Maxxum 7D Gebruiksaanwijzing - English - 65 pagina's


Uw handleiding is per email verstuurd. Controleer uw email

Als u niet binnen een kwartier uw email met handleiding ontvangen heeft, kan het zijn dat u een verkeerd emailadres heeft ingevuld of dat uw emailprovider een maximum grootte per email heeft ingesteld die kleiner is dan de grootte van de handleiding.

Er is een email naar u verstuurd om uw inschrijving definitief te maken.

Controleer uw email en volg de aanwijzingen op om uw inschrijving definitief te maken

U heeft geen emailadres opgegeven

Als u de handleiding per email wilt ontvangen, vul dan een geldig emailadres in.

Uw vraag is op deze pagina toegevoegd

Wilt u een email ontvangen bij een antwoord en/of nieuwe vragen? Vul dan hier uw emailadres in.


Info