3 Admin Functions ........................................................................................... 3-1
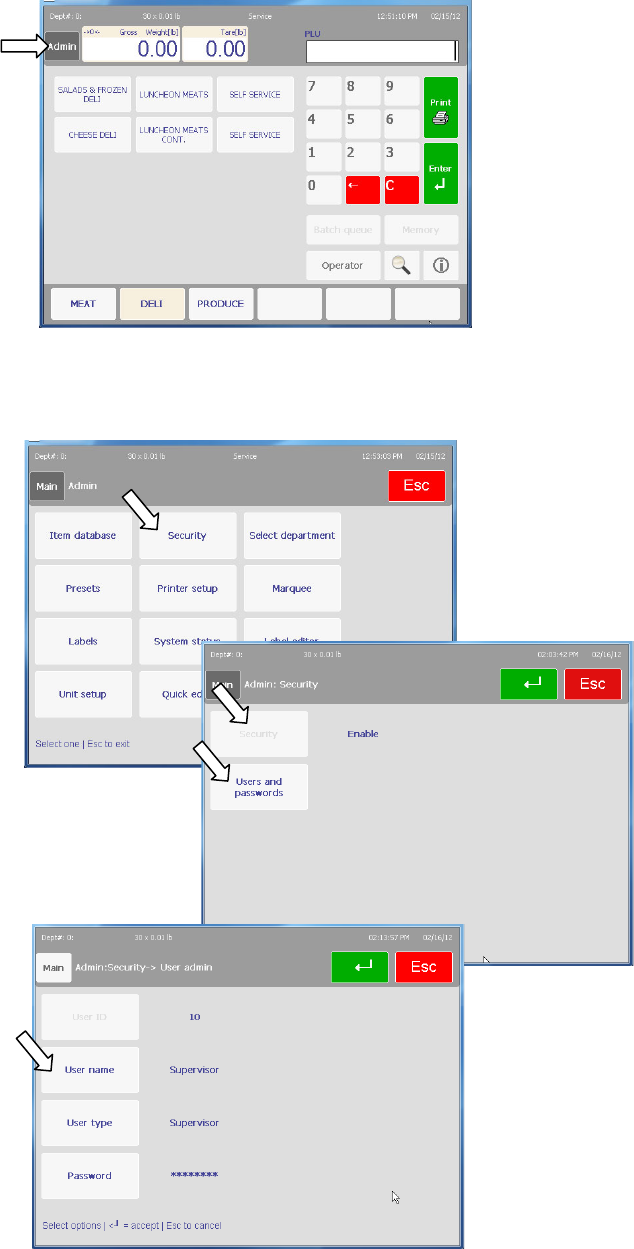
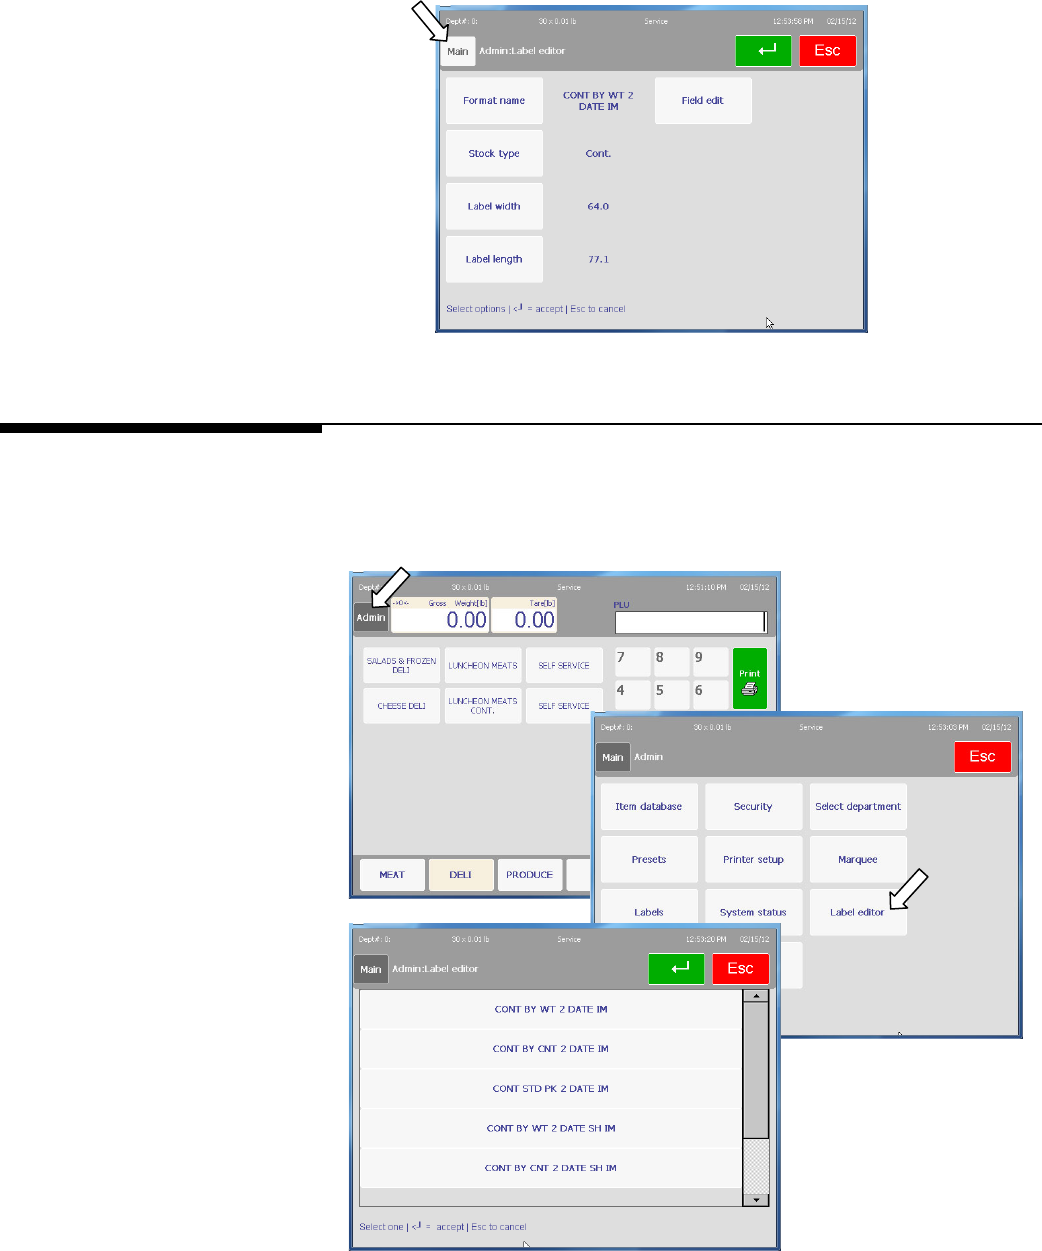
Admin Button ...................................................................................................................... 3-1
Item Database ..................................................................................................................... 3-2
Item Database Editor ............................................................................................................. 3-2
REM Master Editor ................................................................................................................ 3-3
PLUs .................................................................................................................................. 3-3
Extra Text ............................................................................................................................ 3-7
Nutrifacts............................................................................................................................. 3-7
COOL .................................................................................................................................. 3-9
Create/Edit COOL Text .............................................................................................................. 3-10
Tracking or Lot Numbers .......................................................................................................... 3-12
COOL Records and Lists .......................................................................................................... 3-13
COOL Setup ............................................................................................................................ 3-19
Label Formats ........................................................................................................................ 3-20
Using COOL ........................................................................................................................... 3-21
Accumulators ..................................................................................................................... 3-22
Reports ............................................................................................................................. 3-23
Clear ................................................................................................................................ 3-23
Action Code ....................................................................................................................... 3-24
Grade ............................................................................................................................... 3-25
Group ............................................................................................................................... 3-26
Department Settings ............................................................................................................ 3-27
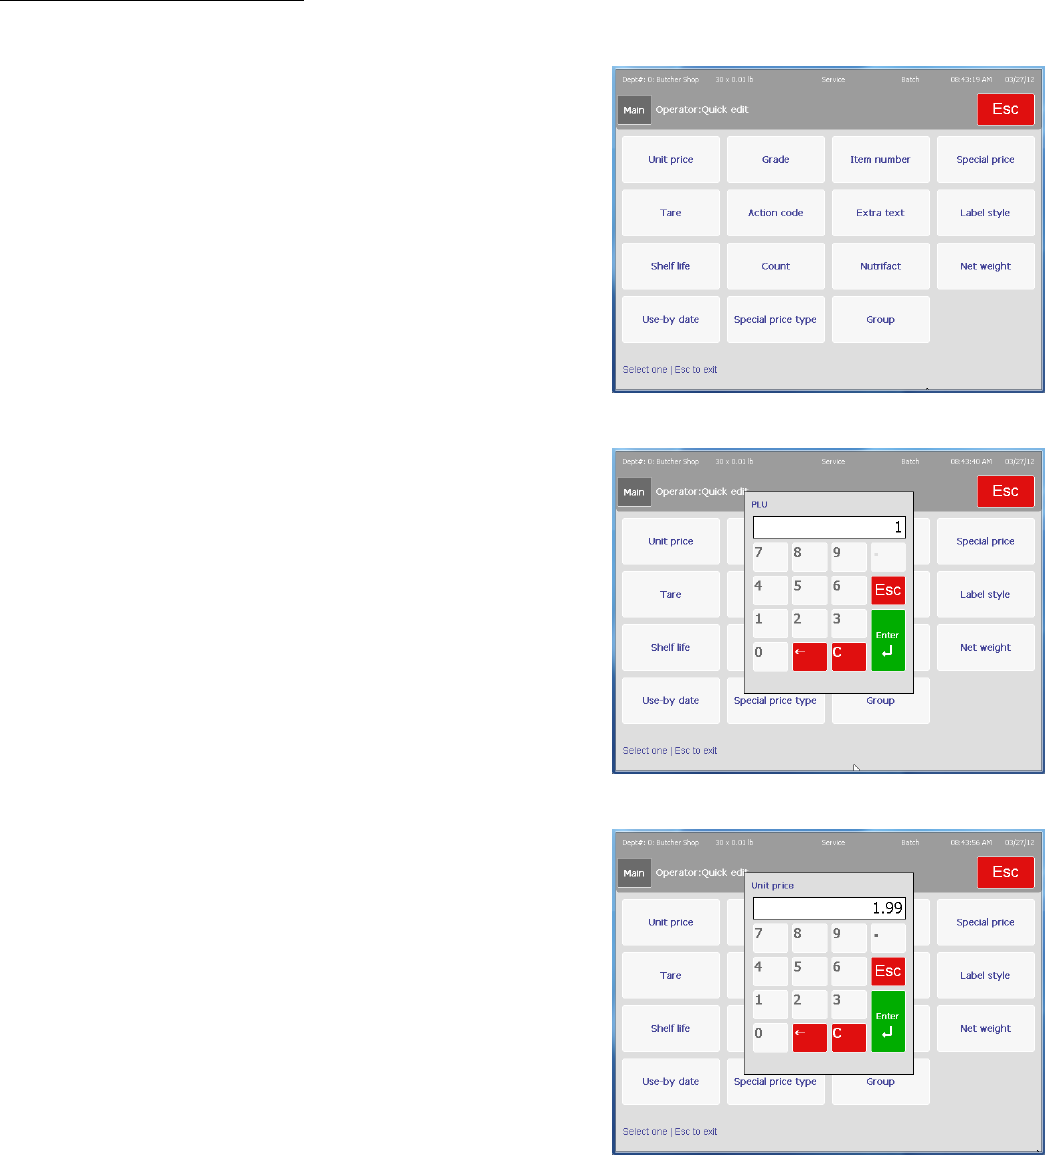
Edit ....................................................................................................................................... 3-27
Clear ..................................................................................................................................... 3-28
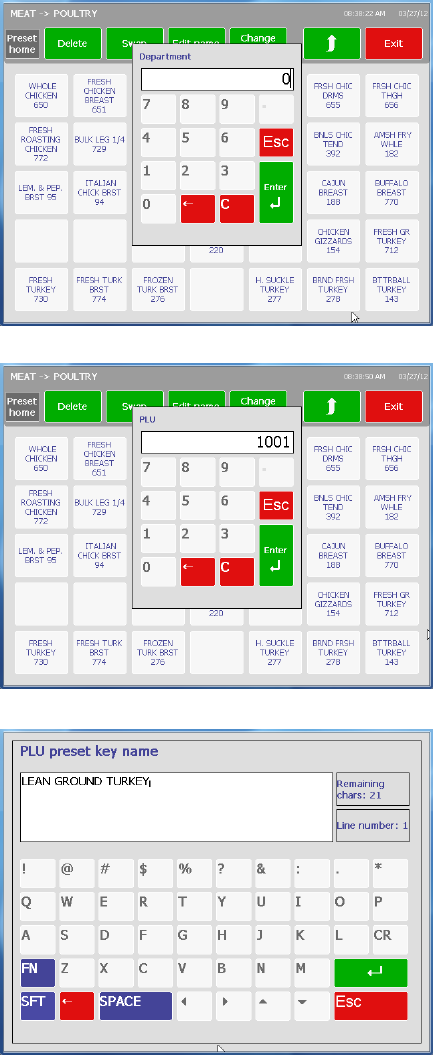
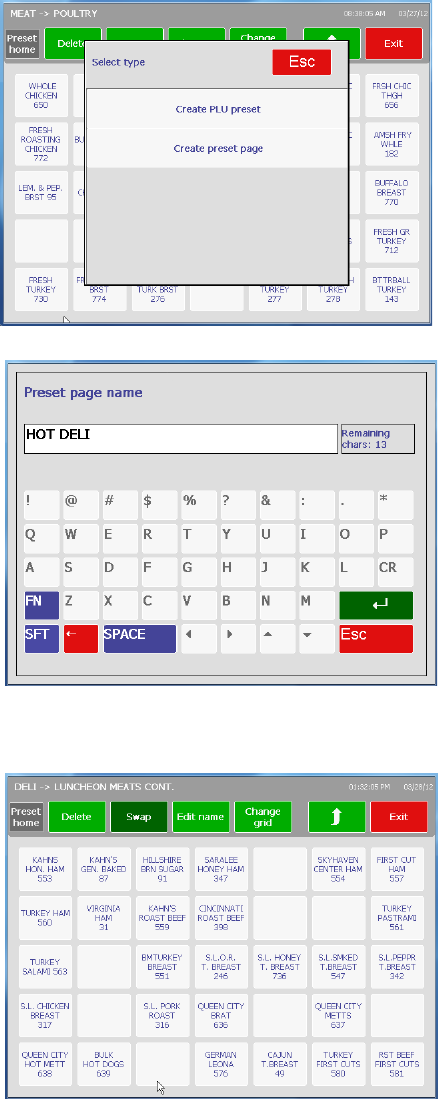
Presets ............................................................................................................................. 3-29
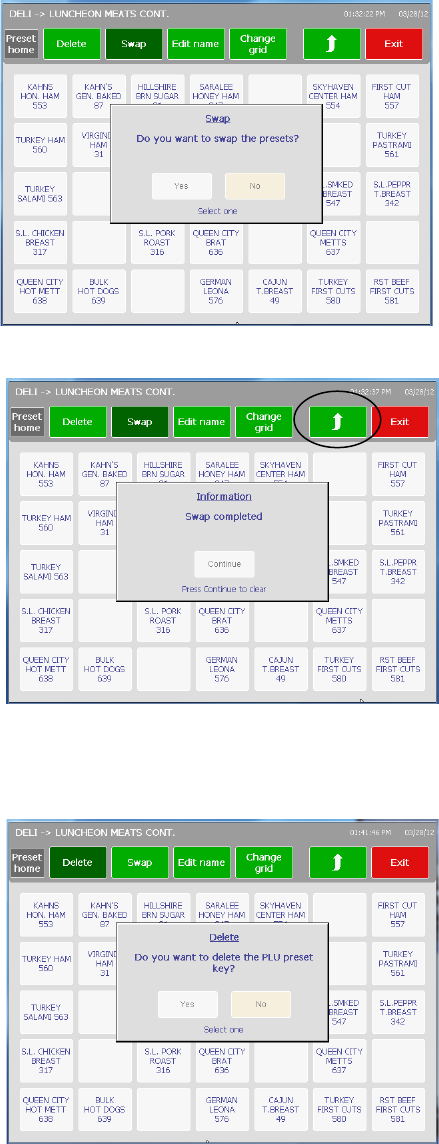
Delete ............................................................................................................................... 3-29
Swap Pages ...................................................................................................................... 3-29
Edit Name ......................................................................................................................... 3-30
Change Grid ...................................................................................................................... 3-30
Programming Presets ......................................................................................................... 3-30
Labels .............................................................................................................................. 3-32
Label Styles ..............
......................................................................................................... 3-32
Print Test Label .................................................................................................................. 3-33
Verify Labels ...................................................................................................................... 3-33
Unit Setup ......................................................................................................................... 3-34
Time & Date ...................................................................................................................... 3-35
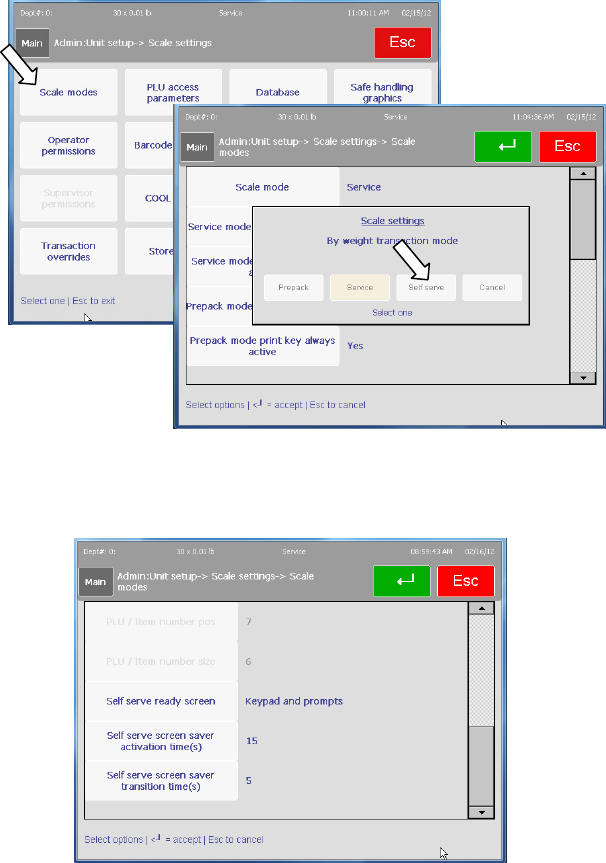
Scale Settings .................................................................................................................... 3-36
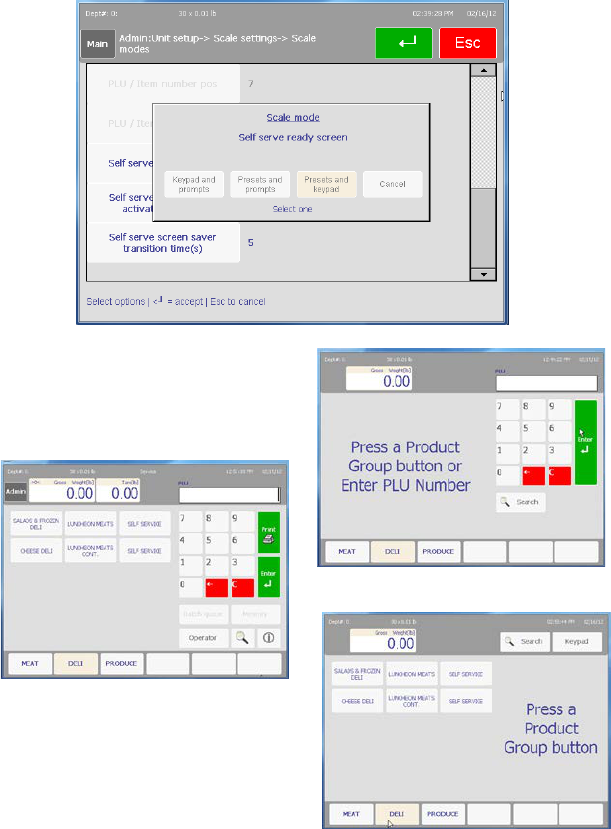
Scale Mode ............................................................................................................................ 3-37
Operator Permissions .............................................................................................................. 3-37
Supervisor Permissions ........................................................................................................... 3-38
Transaction Overrides .............................................................................................................. 3-38
PLU Access Parameters ........................................................................................................... 3-38
Barcode Settings ..................................................................................................................... 3-40
GS1 Bar Code Setup ................................................................................................................ 3-42
COOL .................................................................................................................................... 3-46
Store Logo.............................................................................................................................. 3-46
Database ............................................................................................................................... 3-47
Screen Saver .......................................................................................................................... 3-49
Preset Reaction ....................................................................................................................... 3-50
Nutrition Settings ..................................................................................................................... 3-51
2011 Nutrition Facts Formats ................................................................................................... 3-52
Safe Handling Graphics ........................................................................................................... 3-53
Set Home Screen ................................................................................................................ 3-53
Language .......................................................................................................................... 3-54
Technician......................................................................................................................... 3-54