5
Important: pay attention during the following steps
to avoid any damages to the cartridge.
If you are using the enclosed ClearAudio Moving
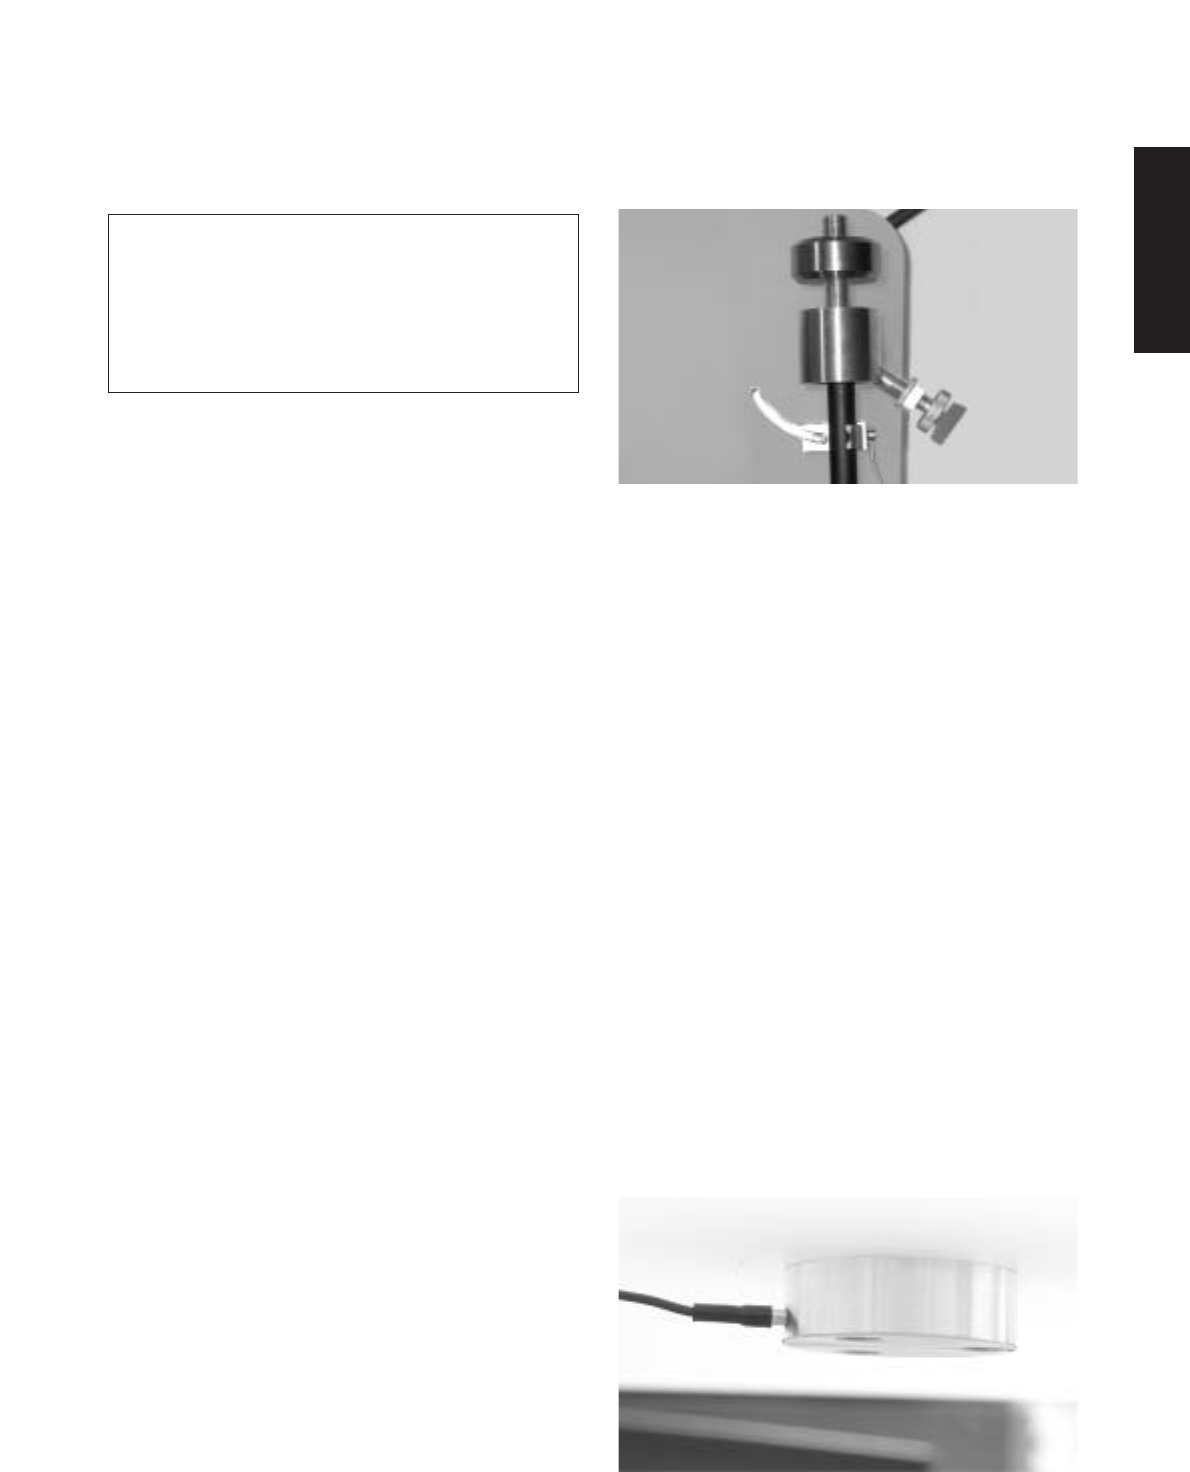
Magnet cartridge Virtuoso Wood you can adjust the
force to 22 mN. Gently push the counterweight
onto the pick up end so that the imprinted scale
shows in the pick up system direction. When you
let the pick up go, the counterweight moves down
and the system up. Now remove the needle’s
protective cover and turn the counterweight in the
system direction until the pick up is in balance and
hovers freely. Please be careful not to damage the
system’s needle when doing this. The position you
now have corresponds to a load weight of 0mN.
With the scaling on the counterweight you can now
adjust this to exactly 22mN. A complete revolution
corresponds to 5mN, i.e. you must turn the
counterweight 4 complete revolutions plus 2 scaled
units in the system direction. Now the system has
been lowered. Please take care to not damage the
system’s needle when doing this.
For the next settings place any LP on to the platter.
Now you can remove the stylus protector.
If you now lift down the cartridge to the middle of
the turntable platter, you must see (from the side)
that the upper edge of the tonearm tube is parallel to
the surface of the record. You can use the tonearm
tube as orientation. If it is necessary you can adjust
the height of the tonearm. For that you have to
move the tonearm in the chassis´s hole in the right
direction and fix the position through locking the
Allen screw in the edge of the turntable chassis.
In order to finalize the general setup you have to
adjust for antiskating. This is also related to the
tracking force of the cartridge. With the antiskating
screw (on the right hand sight of the main counter
weight) you can complete the calibration of the
tonearm. Given the tracking force of 22Nm,
the screw should be in the middle position.
The fine-tuning can be done best when a well
known recording containing a solo instrument or
voice which should be located in the front centre
position of the sound stage. In case the image has
moved to much to the right hand sight of the sound
stage, you should lower the antiskating by screwing
the antiskatingscrew out. In case the image is
positioned to much to the left hand sight you
should increase the antiskating by screwing the
antiskatingscrew in.
Connect your interconnect cable of your Marantz
TT-15S1 now with the phono input of your
phono-preamplifier and connect the power cord to
the mains.
Place one drive belt (the second is for spare)
around the platter and around the pulley. The smaller
diameter of the pulley is used for 33 1/3 rpm and
the larger diameter for 45 rpm. The position “I” on
the motor-switch indicates that the turntable is
switched on. Please let the turntable be switched
on for the first 15 to 30 minutes, for breaking in.
It is recommended to connect the lower part of the
bearing with the enclosed grounding cable to the
grounding terminal on your amplifier.
You are completely set to play and enjoy your vinyl
records on your Marantz TT-15S1 turntable.
Colour code of the Satisfy tonearm wire:
Signal left channel (L+) white
Signal ground left channel (L -) blue
Signal right channel (R+) red
Signal ground right channel (R -) green
English