5
ENGLISH
e
HEADPHONE jack for stereo headphones
This jack may be used to listen to the SR7500’s
output through a pair of headphones. Be certain
that the headphones have a standard 1/4” stereo
phono plug. Note that the main room speakers will
automatically be turned off when the headphone
jack is in use.
Notes:
• When using headphones, the surround mode will
change to STEREO and Dolby Headphone by
MENU and Cursor button.
• The surround mode returns to the previous setting
as soon as the headphone plug is removed from
the jack.
r
SURROUND MODE button
You can select the surround mode by pressing this
button.
t
AUTO (Auto surround) button
Press this button to select the AUTO mode from
the surround modes. When this mode is selected,
the receiver determines the surround mode
corresponding to a digital input signal
automatically.
q
POWER switch and STANDBY indicator
Press the button to turn the power ON, and press
again to turn it OFF. If the POWER switch is in the
ON position, the power of this unit can be turned
ON/OFF by pressing the POWER button on the
remote control unit.
When this unit is in the standby mode with the
POWER switch set to the ON position, pressing
the ENTER button also allows to turn the power on.
The STANDBY indicator lights up when this unit is
the standby mode (power OFF) by the remote
control unit.
w
INPUT SELECTOR knob (AUDIO/ VIDEO)
This knob is used to select the input sources.
The video function selectors, such as TV, DVD,
VCR1, DSS and AUX1 select video and audio
simultaneously.
Audio function sources such as CD, TAPE, CD-R/
MD, TUNER and AUX2 may be selected in
conjunction with a Video source.
This feature (Sound Injection) combines a sound
from one source with a picture from another.
Choose the video source first, and then choose a
different audio source to activate this function.
y
MULTI (Multi Room) button
Press this button to activate the Multiroom system.
“MULTI” indicator will be illuminated in the display.
u
MULTI SPEAKER button
Press this button to activate the Multiroom Speaker
system. “MULTI” indicator will be illuminated in the
display.
(See page 36)
i
BAND button
Press this button to switch between FM and AM in
the TUNER mode.
o
T-MODE button
Press this button to select the auto stereo mode or
mono mode when the FM band is selected.
The “AUTO” indicator lights in the auto stereo
mode. (See page 32)
!0
MEMORY button
Press this button to enter the tuner preset memory
numbers or station names. (See page 33)
!1
CLEAR button
Press this button to cancel the station-memory
setting mode or preset scan tuning. (See page 33)
!2
INFRARED receiving sensor window
This window receives infrared signals for the
remote control.
!3
VOLUME control knob
Adjusts the overall sound level. Turning the control
clockwise increases the sound level.
!4
AUX1 INPUT jacks
These auxiliary video/audio input jacks accept the
connections of a camcorder, portable DVD, game
etc. When not using these jacks, protect with the
included jack covers.
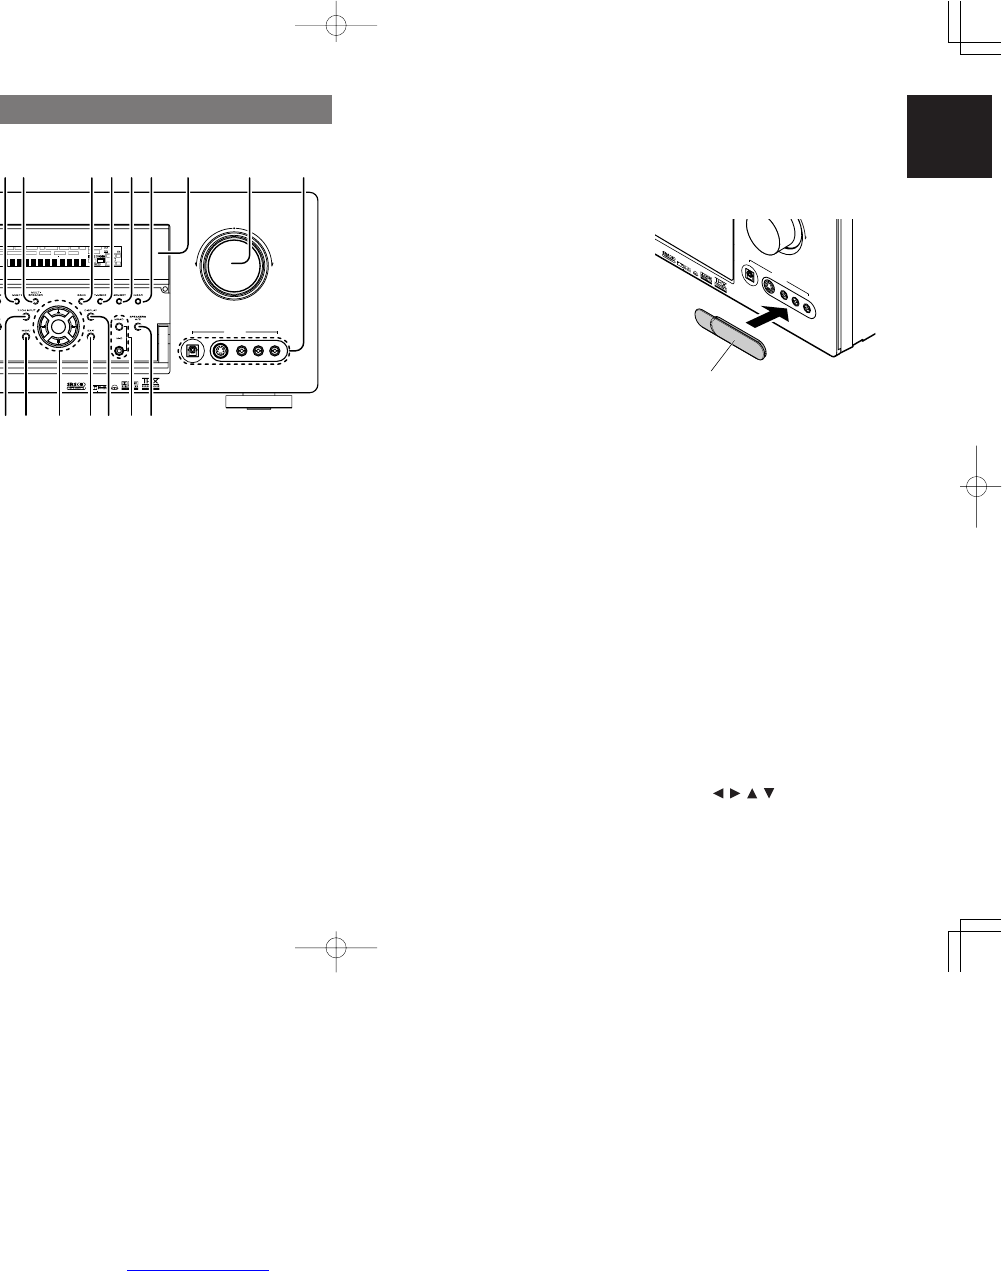
How to Attach the Front AUX Jack Cover
AUX 1 IN
PU
T
AU
D
IO
S-VIDEO
DIG
ITAL V
IDE
O
L
R
U
P
!5
PURE DIRECT button
When this button is pressed, the tone control
circuitry is bypassed as well as Bass Management.
“PURE DIRECT” indicator will be illuminated in the
display.
Notes:
• The surround mode is automatically switched to
AUTO when the pure direct function is turned on.
• Additionally, Speaker Configurations are fixed
automatically as follows.
Front SPKR = Large, Center SPKR = Large,
Surround SPKR = Large, Sub woofer = On
!6
THX button
Press this button to select THX processing for
input source.
!7
7.1CH INPUT button
Press this button to select the output of an external
multichannel player.
!8
MENU button
This button is used to enter the SETUP MAIN
MENU.
!9
Cursor ( , , , ) / ENTER button
Use these buttons when operating the SETUP
MAIN MENU and TUNER function.
FRONT PANEL