17
MODE D’EMPLOI
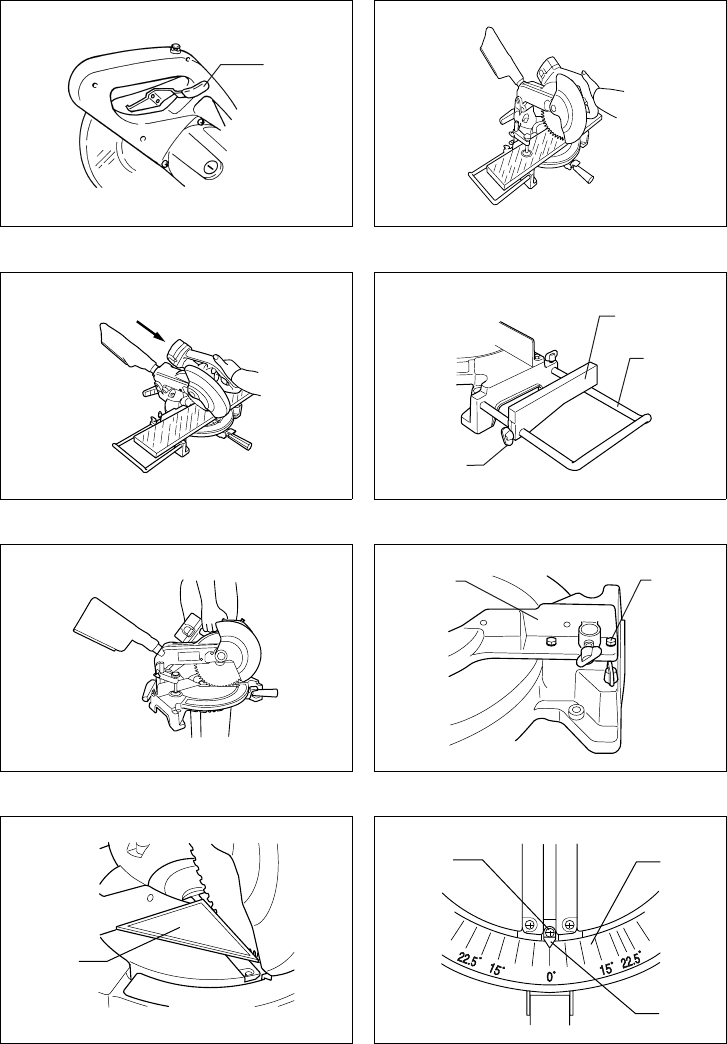
Engager et retirer la batterie (Fig. 1)
• L’alimentation doit être coupée (interrupteur à l’arrêt).
• Pour retirer la batterie, sortez-la de l’outil tout en
appuyant sur les boutons des deux côtés de la batterie.
• Pour insérer la batterie, alignez la languette de la batte-
rie sur la rainure du logement, et glissez la batterie en
place. Insérez-la toujours à fond, jusqu’à ce qu’elle se
verrouille dans un léger déclic. Sinon, elle risque de
tomber accidentellement de l’outil, ce qui pourrait vous
blesser, vous ou d’autres personnes alentour.
• La batterie doit pouvoir être introduite facilement dans
son logement ; si tel n’est pas le cas, c’est qu’elle n’est
pas présentée dans le bons sens.
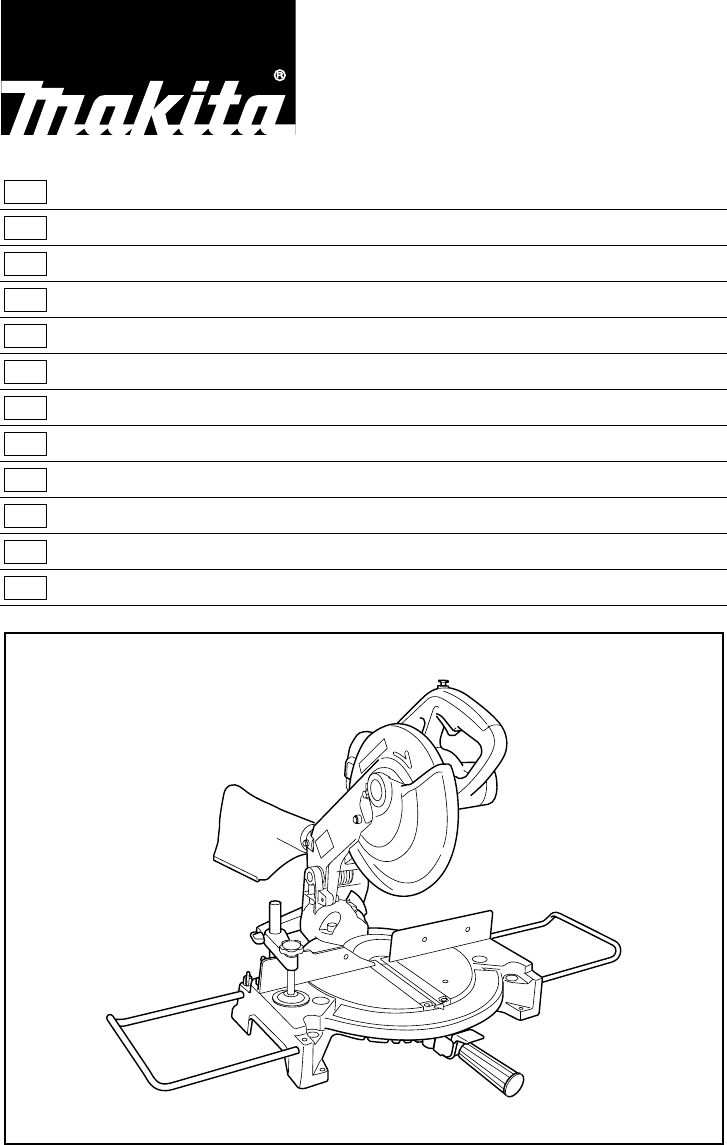
Clé à douille (Fig. 2)
La clé à douille est rangée comme indiqué sur la Fig. 2.
Pour utiliser la clé à douille, sortez-la du porte-clé.
Quand vous avez fini de vous en servir, remettez-la dans
le porte-clé.
Montage sur établi (Fig. 3 et 4)
Lorsque l’outil quitte nos usines, la poignée est ver-
rouillée en position abaissée par la tige d’arrêt. Libérez la
tige d’arrêt en abaissant légèrement la poignée et en
tirant sur la tige d’arrêt.
L’outil doit être fixé à l’aide de quatre boulons sur une
surface plane et stable aux orifices de boulon prévus sur
le socle de l’outil. Ceci a pour but d’éviter qu’il ne se ren-
verse et ne provoque des blessures.
Pose et dépose de la lame
ATTENTION :
• Assurez-vous toujours que le contact est coupé et que
la batterie est sortie avant de retirer ou d’installer la
lame.
• Utilisez toujours la clé à douille Makita fournie pour reti-
rer ou installer la lame. Sinon, le boulon hexagonal ris-
que d’être trop ou pas assez serré, ce qui pourrait
grièvement blesser l’opérateur ainsi que les personnes
aux alentours de l’outil.
Verrouillez la poignée en position relevée en enfonçant la
tige d’arrêt. (Fig. 3)
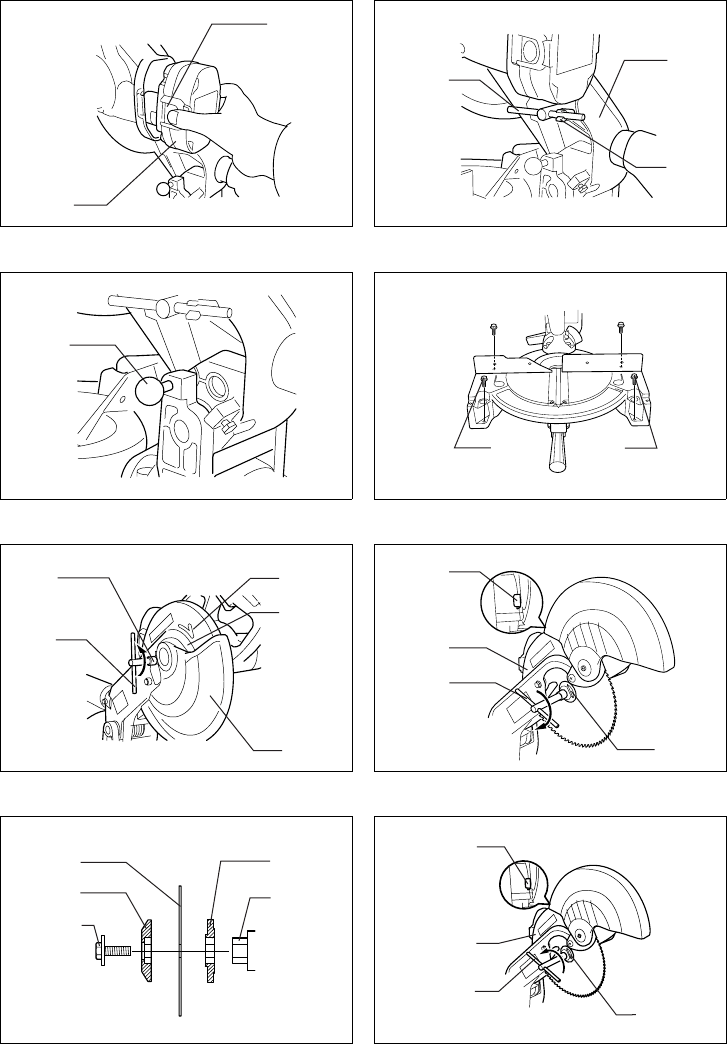
Pour retirer la lame, utilisez la clé à douille pour desser-
rer le boulon hexagonal qui fixe le capot central en le
tournant vers la gauche. Relever le carter de sécurité et
le capot central. (Fig. 5)
Appuyez sur le verrouillage d’arbre pour verrouiller
l’arbre et utilisez la clé à douille pour desserrer le boulon
hexagonal (filetage à gauche) vers la droite. Puis, retirez
le boulon hexagonal, la flasque extérieure et la lame.
(Fig. 6)
Pour remonter la lame, montez-la délicatement sur l’axe,
en veillant à ce que la flèche à la surface de la lame soit
dirigée dans le même sens que la flèche du carter de
lame. Montez la flasque extérieure et le boulon hexago-
nal, puis serrez le boulon hexagonal (filetage à gauche) à
fond vers la gauche à l’aide de la clé à douille tout en
appuyant sur le verrouillage d’arbre. (Fig. 7 et 8)
ATTENTION :
Pour tous les pays autres que l’Europe
La flasque intérieure a un diamètre de 25 mm d’un côté
et de 25,4 mm de l’autre. Le côté ayant un diamètre de
25,4 mm est marqué “25.4”. Utilisez le bon côté en fonc-
tion du diamètre d’orifice de la lame que vous allez utili-
ser. Le fait de monter la lame sur le mauvais côté risque
de provoquer des vibrations dangereuses.
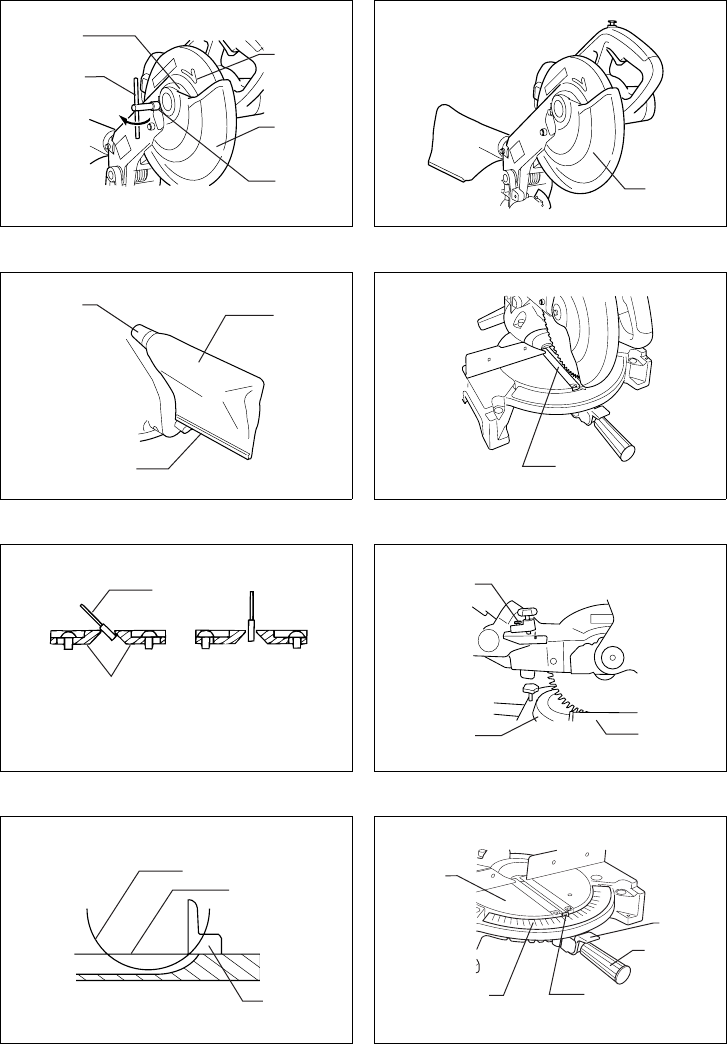
Ramenez le carter de sécurité et le capot central à leur
position d’origine. Puis, serrez le boulon hexagonal vers
la droite pour fixer le capot central. (Fig. 9)
Libérez la poignée de la position relevée en tirant sur la
tige d’arrêt. Abaissez la poignée pour vous assurer que
le carter de sécurité bouge librement.
Carter de sécurité (Fig. 10)
Lorsque vous abaissez le poignée, le carter de sécurité
se relève automatiquement. Il revient à sa position d’ori-
gine lorsque la coupe est terminée et que la poignée est
relevée. N’ENTRAVEZ JAMAIS LE LIBRE JEU DU CAR-
TER DE SECURITE ET NE LE DEMONTEZ PAS POUR
TRAVAILLER. Pour votre sécurité personnelle, vous
devez le maintenir en bon état de marche. Tout fonction-
nement anormal du carter de sécurité devra être immé-
diatement corrigé. N’UTILISEZ JAMAIS LA SCIE AVEC
UN CARTER DE SECURITE FONCTIONNANT IMPAR-
FAITEMENT. Si le carter de sécurité transparent est sale
ou que la sciure y adhère de façon que la lame et/ou
l’élément à scier ne soient plus visibles, enlevez la batte-
rie et nettoyez le carter soigneusement à l’aide d’un chif-
fon humide. N’utilisez pas de solvants ni de détergents à
base d’essence sur le carter en plastique.
Sac à poussière (Fig. 11)
L’utilisation du sac à poussière garantit un travail propre
et facilite le ramassage des poussières. Pour le fixer sur
la scie, introduisez la buse du sac dans la goulotte
d’éjection poussière du sac. Dès que le sac à poussière
est à moitié plein, retirez-le de l’outil et tirez sur la bar-
rette. Videz le sac, et tapotez-le légèrement pour en
détacher les poussières restées collées sur la paroi inté-
rieure et qui pourraient empêcher l’aspiration des pous-
sières.
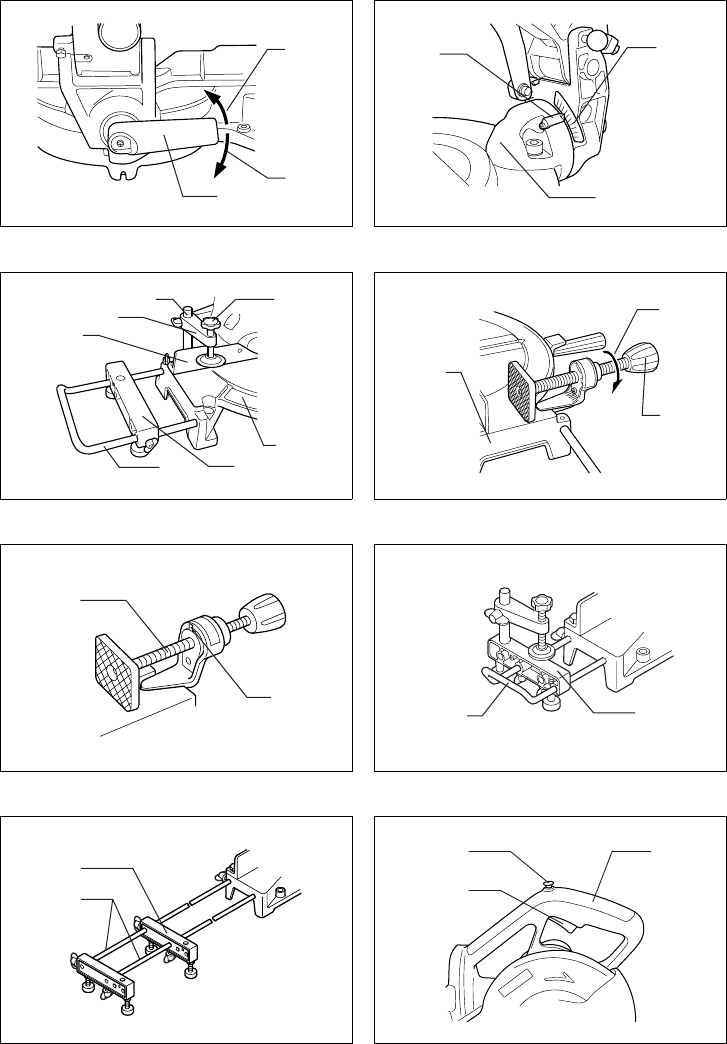
Installation des plateaux de découpe
(Fig. 12et 13)
L’outil est muni de deux plateaux de découpe dans le
socle rotatif. Les plateaux de découpe ont été réglés en
usine de façon que la lame n’entre pas en contact avec
eux. Avant l’utilisation, réglez les plateaux de découpe
comme suit :
Commencez par enlever la batterie. Puis, desserrez les
vis (2 à droite et 2 à gauche) de fixation des plateaux.
Resserrez-les de façon que les plateaux de découpe
puissent facilement bouger à la main. Abaissez la poi-
gnée à fond en enfonçant la tige d’arrêt pour verrouiller la
poignée en position abaissée. Réglez les plateaux de
découpe de façon qu’ils touchent juste l’arête des dents
de la lame. Serrez les vis arrière (sans excès). Lorsque
les plateaux de découpe sont réglés, libérez la tige
d’arrêt et relevez la poignée. Puis, serrez toutes les vis à
fond.
ATTENTION :
Quand vous modifiez l’angle de biseau, reprenez tou-
jours le réglage des plateaux de découpe comme indiqué
ci-dessus.