599973
7
Verklein
Vergroot
Pagina terug
1/22
Pagina verder
GB Cordless String Trimmer Instruction manual
F Coupe herbe sans-fil Manuel d’instructions
D Akku-Rasentrimmer Betriebsanleitung
I Tagliabordi a batteria Istruzioni per l’uso
NL Accugraskantmaaier Gebruiksaanwijzing
E Desbrozadora Inalámbrica Manual de instrucciones
P Aparador de Grama a Bateria Manual de instruções
DK Batteridrevet græstrimmer Brugsanvisning
GR Χλοοκοπτικό μπαταρίας με μεσινέζα Οδηγίες χρήσης
TR Akülü Misinalı Yan Tırpan Kullanım kılavuzu
012390
DUR141
DUR181
2
1 010820 2 010821
3 012858
4 013641
1
2
3
4
5
6
7
8
3
5 012391 6 012128
7 012397 8 012441
9 012396 10 012404
11 012394 12 012393
9
10
3
11
12
2
1
13
14
8
7
16
17
4
13 012408 14 012409
15 012440 16 012412
17 012413 18 012414
19 012415 20 012416
18
19
20
21
22
23
5
21 012417 22 012395
23 012399 24 012400
25 012401 26 012402
24
22
25
26
6
27 012403 28 012406
29 012405 30 012407
31 012398
27
14
28
7
ENGLISH (Original instructions)
Explanation of general view
SPECIFICATIONS
Due to our continuing program of research and development, the specifications herein are subject to change without
notice.
Specifications and battery cartridge may differ from country to country.
Weight, with battery cartridge, according to EPTA-Procedure 01/2003
Symbols
END017-3
The following show the symbols used for the equipment.
Be sure that you understand their meaning before use.
.................. Take particular care and attention.
........ Read instruction manual.
.................. Danger; be aware of thrown objects.
.................. The distance between the tool and
bystanders must be at least 15 m.
.......... Keep bystanders away.
.......... Keep distance at least 15 m.
.................. Avoid kickback.
.................. Wear a helmet, goggles and ear
protection.
.................. Wear protective gloves.
.................. Wear sturdy boots with nonslip soles.
Steeltoed safety boots are
recommended.
.................. Do not expose to moisture.
..................Top permissible tool speed.
............. Only for EU countries
Do not dispose of electric equipment or
battery pack together with household
waste material!
In observance of European Directive
2012/19/EU on waste electric and
electronic equipment, 2006/66/EC on
batteries and accumulators and waste
batteries and accumulators and their
implementation in accordance with
national laws, electric equipment and
battery pack that have reached the end
of their life must be collected separately
and returned to an environmentally
compatible recycling facility.
IMPORTANT SAFETY
INSTRUCTIONS GEB092-4
WARNING! Read all safety warnings and all
instructions. Failure to follow the warnings and
1. Indication lamp
2. Switch trigger
3. Battery cartridge
4. Front grip
5. Clamping nut
6. Lock grip
7. Guard
8. Nylon cutting head
9. Red indicator
10. Button
11. Star marking
12. Lock-off button
13. Shaft
14. Grip
15. Hex bolt
16. Screws
17. Cutter cover
18. Nylon cord eyehole
19. Notch of the nylon cutting head
installation port
20. Spring
21. Spool holder
22. Nylon cord
23. Retainer for nylon cord end
24. Spool
25. Shoulder strap
26. Hook
27. Motor housing
28. Lock button
Model DUR141 DUR181
No load speed 6,000 min
-1
7,800 min
-1
Overall length 1,229 mm - 1,433 mm 1,229 mm - 1,433 mm
Cutting diameter with nylon cutting head 260 mm 260 mm
Net weight 2.9 kg 3.0 kg 2.9 kg 3.1 kg
Rated voltage D.C. 14.4 V D.C. 18 V
Standard battery cartridge(s)
Warning: Use only the battery cartridge(s) described.
BL1415
BL1430/
BL1440
BL1815/
BL1815N/
BL1820
BL1830/
BL1840
Cd
Ni-MH
Li-ion
8
instructions may result in electric shock, fire and/or
serious injury.
Save all warnings and instructions for
future reference.
1. Be familiar with the controls and proper use of the
equipment.
2. Cutting elements continue to rotate after the
motor is switched off.
3. Never allow children or people unfamiliar with the
instructions to use the machine.
4. Stop using the machine while people, especially
children, or pets are nearby.
5. Only use the machine in daylight or good artificial
light.
6. Before using the machine and after any impact,
check for signs of wear or damage and repair as
necessary.
7. Take care against injury from any device fitted for
trimming the filament line length. After extending
new cutter line always return the machine to its
normal operating position before switching on.
8. Never fit metal cutting elements.
9. This appliance is not intended for use by persons
(including children) with reduced physical,
sensory or mental capabilities, or lack of
experience and knowledge, unless they have been
given supervision or instruction concerning use
of the appliance by a person responsible for their
safety. Children should be supervised to ensure
that they do not play with the appliance.
10. Use the tool with the utmost care and attention.
11. Operate the tool only if you are in good physical
condition. Perform all work calmly and carefully.
Use common sense and keep in mind that the
operator or user is responsible for accidents or
hazards occurring to other people or their
property.
12. Never operate the tool when tired, feeling ill or
under the influence of alcohol or drugs.
13. The tool should be switched off immediately if it
shows any signs of unusual operation.
Intended use of the tool
1. Use right tool. The cordless string trimmer is only
intended for cutting grass, light weeds. It should
not be used for any other purpose such as hedge
cutting as this may cause injury.
Personal protective equipment (Fig. 1 & 2)
1. Dress Properly. The clothing worn should be
functional and appropriate, i.e. it should be tight-
fitting but not cause hindrance. Do not wear either
jewelry or clothing which could become entangled
with high grass. Wear protective hair covering to
contain long hair.
2. When using the tool, always wear sturdy shoes
with a non-slip sole. This protects against injuries
and ensures a good footing.
3. Wear protective glasses or goggles.
Electrical and battery safety
1. Avoid dangerous environment. Don’t use the tool
in damp or wet locations or expose it to rain.
Water entering the tool will increase the risk of
electric shock.
2. Recharge only with the charger specified by the
manufacturer. A charger that is suitable for one
type of battery pack may create a risk of fire when
used with another battery pack.
3. Use power tools only with specifically designated
battery packs. Use of any other battery packs may
create a risk of injury and fire.
4. Do not dispose of the battery(ies) in a fire. The cell
may explode. Check with local codes for possible
special disposal instructions.
5. Do not open or mutilate the battery(ies). Released
electrolyte is corrosive and may cause damage to
the eyes or skin. It may be toxic if swallowed.
Starting up the tool (Fig. 3)
1. Make sure that there are no children or other
people within a working range of 15 meters (50 ft),
also pay attention to any animals in the working
vicinity. Otherwise stop using the tool.
2. Before use always check that the tool is safe for
operation. Check the security of the cutting tool
and the guard and the switch trigger/lever for easy
and proper action. Check for clean and dry
handles and test the on/off function of the switch.
3. Check damaged parts before further use of the
tool. A guard or other part that is damaged should
be carefully checked to determine that it will
operate properly and perform its intended
function. Check for alignment of moving parts,
binding of moving parts, breakage of parts,
mounting, and any other condition that may affect
its operation. A guard or other part that is
damaged should be properly repaired or replaced
by our authorized service center unless indicated
elsewhere in this manual.
4. Switch on the motor only when hands and feet are
away from the cutting tool.
5. Before starting make sure that the cutting tool has
no contact with hard objects such as branches,
stones etc. as the cutting tool will revolve when
starting.
Method of operation
1. Never operate the machine with damaged guards
or without the guards in place.
2. Only use the tool in good light and visibility.
During the winter season beware of slippery or
wet areas, ice and snow (risk of slipping). Always
ensure a safe footing.
3. Take care against injury to feet and hands from
the cutting tool.
4. Keep hands and feet away from the cutting means
at all times and especially when switching on the
motor.
5. Never cut above waist height.
6. Never stand on a ladder and run the tool.
7. Never work on unstable surfaces.
8. Don’t overreach. Keep proper footing and balance
at all times.
9. Remove sand, stones, nails etc. found within the
working range. Foreign particles may damage the
cutting tool and can cause to be thrown away,
resulting in a serious injury.
9
10. Should the cutting tool hit stones or other hard
objects, immediately switch off the motor and
inspect the cutting tool.
11. Before commencing cutting, the cutting tool must
have reached full working speed.
12. During operation always hold the tool with both
hands. Never hold the tool with one hand during
use. Always ensure a safe footing.
13. All protective equipment such as guards supplied
with the tool must be used during operation.
14. Except in case of emergency, never drop or cast
the tool to the ground or this may severely
damage the tool.
15. Never drag the tool on the ground when moving
from place to place, the tool may become
damaged if moved in this manner.
16. Always remove the battery cartridge from the tool:
whenever leaving the tool unattended;
before clearing a blockage;
before checking, cleaning or working on the
tool;
before making any adjustments, changing
accessories or storing;
whenever the tool starts vibrating unusually;
whenever transporting the tool.
17. Don’t force the tool. It will do the job better and
with less likelihood of a risk of injury at the rate for
which it was designed.
Maintenance instructions
1. The condition of the cutting tool, protective
devices must be checked before commencing
work.
2. Turn off the motor and remove the battery
cartridge before carrying out maintenance,
replacing the cutting tool and cleaning the tool.
3. After use, disconnect the battery cartridge from
the tool and check for damage.
4. Check for loose fasteners and damaged parts
such as nearly halfway cut-off state in the cutting
tool.
5. When not in use store the equipment in a dry
location that is locked up or out of children’s
reach.
6. Use only the manufacturer’s recommended
replacement parts and accessories.
7. Always ensure that ventilation openings are kept
clear of debris.
8. Inspect and maintain the tool regularly, especially
before/after use. Have the tool repaired only by
our authorized service center.
9. Keep handles dry, clean and free from oil and
grease.
SAVE THESE INSTRUCTIONS.
WARNING:
DO NOT let comfort or familiarity with product (gained
from repeated use) replace strict adherence to safety
rules for the subject product. MISUSE or failure to
follow the safety rules stated in this instruction
manual may cause serious personal injury.
IMPORTANT SAFETY
INSTRUCTIONS
ENC007-7
FOR BATTERY CARTRIDGE
1. Before using battery cartridge, read all
instructions and cautionary markings on (1)
battery charger, (2) battery, and (3) product using
battery.
2. Do not disassemble battery cartridge.
3. If operating time has become excessively shorter,
stop operating immediately. It may result in a risk
of overheating, possible burns and even an
explosion.
4. If electrolyte gets into your eyes, rinse them out
with clear water and seek medical attention right
away. It may result in loss of your eyesight.
5. Do not short the battery cartridge:
(1) Do not touch the terminals with any
conductive material.
(2) Avoid storing battery cartridge in a container
with other metal objects such as nails, coins,
etc.
(3) Do not expose battery cartridge to water or
rain.
A battery short can cause a large current flow,
overheating, possible burns and even a
breakdown.
6. Do not store the tool and battery cartridge in
locations where the temperature may reach or
exceed 50°C (122°F).
7. Do not incinerate the battery cartridge even if it is
severely damaged or is completely worn out. The
battery cartridge can explode in a fire.
8. Be careful not to drop or strike battery.
9. Do not use a damaged battery.
SAVE THESE INSTRUCTIONS.
Tips for maintaining maximum battery life
1. Charge the battery cartridge before completely
discharged.
Always stop tool operation and charge the battery
cartridge when you notice less tool power.
2. Never recharge a fully charged battery cartridge.
Overcharging shortens the battery service life.
3. Charge the battery cartridge with room
temperature at 10°C - 40°C (50°F - 104°F). Let a hot
battery cartridge cool down before charging it.
4. Charge the battery cartridge once in every six
months if you do not use it for a long period of
time.
PARTS DESCRIPTION (Fig. 4)
FUNCTIONAL DESCRIPTION
WARNING:
Always be sure that the tool is switched off and
battery cartridge is removed before adjusting or
checking function on the tool. Failure to switch off
and remove the battery cartridge may result in serious
personal injury from accidental start-up.
10
Installing or removing battery cartridge
(Fig. 5)
CAUTION:
Always switch off the tool before installing or removing
of the battery cartridge.
Hold the tool and the battery cartridge firmly when
installing or removing battery cartridge. Failure to
hold the tool and the battery cartridge firmly may cause
them to slip off your hands and result in damage to the
tool and battery cartridge and a personal injury.
To remove the battery cartridge, slide it from the tool while
sliding the button on the front of the cartridge.
To install the battery cartridge, align the tongue on the
battery cartridge with the groove in the housing and slip it
into place. Insert it all the way until it locks in place with a
little click. If you can see the red indicator on the upper
side of the button, it is not locked completely.
CAUTION:
Always install the battery cartridge fully until the red
indicator cannot be seen. If not, it may accidentally fall
out of the tool, causing injury to you or someone
around you.
Do not install the battery cartridge forcibly. If the
cartridge does not slide in easily, it is not being inserted
correctly.
Battery protection system (Lithium-ion
battery with star marking) (Fig. 6)
Lithium-ion batteries with a star marking are equipped
with a protection system. This system automatically cuts
off power to the tool to extend battery life.
The tool will automatically stop during operation if the tool
and/or battery are placed under one of the following
conditions:
Overloaded:
The tool is operated in a manner that causes it to
draw an abnormally high current.
In this situation, release the switch trigger on the tool
and stop the application that caused the tool to
become overloaded. Then pull the switch trigger
again to restart.
If the tool does not start, the battery is overheated. In
this situation, let the battery cool before pulling the
switch trigger again.
Low battery voltage:
The remaining battery capacity is too low and the tool
will not operate. In this situation, remove and
recharge the battery.
Power switch action
WARNING:
Before inserting the battery cartridge in the tool,
always check to see that the switch trigger
actuates properly and returns to the “OFF”
position when released. Do not pull the switch
trigger hard without pressing in the lock-off button.
This can cause switch breakage. Operating a tool
with a switch that does not actuate properly can lead to
loss of control and serious personal injury.
To prevent the switch trigger from being accidentally
pulled, a lock-off button is provided.
To start the tool, move the lock-off button forward and pull
the switch trigger. Release the switch trigger to stop.
(Fig. 7)
Indication lamp (Fig. 8)
Running the tool allows the indication lamp to show the
battery cartridge capacity status.
When the tool is also overloaded and has stopped during
operation, the lamp lights up in red.
Refer to the following table for the status and action to be
taken for the indication lamp.
Note 1: The time at which the indication lamp lights up varies by the temperature around the work area and the battery
cartridge conditions.
012443
Adjusting the shaft length
WARNING:
Before adjusting the shaft length, release the switch
trigger and remove the battery cartridge from the string
trimmer. Failure to release the trigger and removing the
battery cartridge may cause a personal injury.
To adjust the length of the shaft, turn the grip
counterclockwise until the shaft is unlocked and pull out or
push in to the desired length. (Fig. 9)
Nylon cutting head
NOTICE:
The bump feed will not operate properly if the nylon
cutting head is not rotating.
The nylon cutting head is a single string trimmer head
provided with a bump & feed mechanism.
To cause the nylon cord to feed out, the cutting head
should be bumped against the ground while the tool is
running. As the nylon cord is feeding out it will
Indication lamp Status Action to be taken
The lamp blinks in red. This indicates the appropriate time to
replace the battery cartridge when the
battery power becomes low.
Recharge the battery cartridge as soon
as possible.
The lamp lights up in red.
(Note 1)
This function works when the battery
power is almost used up. At this time,
tool stops immediately.
Recharge the battery cartridge.
The lamp lights up in red.
(Note 1)
Autostop due to overload. Turn off the tool.
11
automatically be cut to the proper length by the cutter on
the guard. (Fig. 10)
NOTE:
If the nylon cord does not feed out while bumping the
head, rewind/replace the nylon cord by following the
procedures described under “Installing or removing the
nylon cutting head” and “Winding a new nylon cord on
the spool.”
Do not bump the tool to the concrete or asphalt
surface. Bumping to this kind of objects may cause the
tool damage.
ASSEMBLY
WARNING:
Always be sure that the tool is switched off and
battery cartridge is removed before carrying out
any work on the tool. Failure to switch off and remove
the battery cartridge may result in serious personal
injury from accidental start-up.
Never start the tool unless it is completely
assembled. Operation of the tool in a partially
assembled state may result in serious personal injury
from accidental start-up.
Installing the front grip (Fig. 11)
Put the front grip on the front grip holder and secure it with
a hex bolt and the clamping nut provided with the string
trimmer as shown in the figure. At this time, the hex bolt
needs to be installed from the side in which the hex bolt
lock port is located and the clamping nut needs to be
installed from the opposite side.
NOTE:
The front grip has a edge-to-edge cut slit in its
mounting area. Using this slit allows you to easily install
the front grip on the front grip holder.
The front grip angle is adjustable. To adjust the front grip
angle, loosen the claming nut, set the front grip at an
proper angle according to your work and then tighten the
nut clockwise firmly.
Installing the guard
CAUTION:
While installing the guard, be careful not to contact
the nylon cord cutter provided on the guard.
Contact with the cutter could result in personal injury.
Mount the guard by fitting it on to the motor housing so
that the nylon cord is not pinched between the guard and
the motor housing, and then secure it with two screws.
Before starting the trimmer, take away the cutter cover
from the cord cutter. (Fig. 12)
Installing or removing the nylon cutting
head
WARNING:
Before installing or removing the nylon cutting
head (both spool cover and spool, and hereafter
called this way), make sure that the tool is switched
off and the battery cartridge is removed from the
tool. Failure to switch off the tool and remove the
battery cartridge may cause a personal injury.
CAUTION:
While installing or removing the nylon cutting
head, be careful not to contact the nylon cord
cutter provided on the guard. Contact with the cutter
could result in personal injury.
To remove the nylon cutting head (spool and spool cover)
from the string trimmer, press in the latches forcefully on
both sides of the spool cover and raise it. (Fig. 13 & 14)
NOTICE:
Make sure that the spring is installed inside the spool
holder.
To install a cord-newly-wound nylon cutting head (spool
and spool cover) on the string trimmer, align the nylon
cord eyehole with the notch of the nylon cutting head
installation port on the trimmer and then press in it until a
click is heard. (Fig. 15)
Winding a new nylon cord on the spool
Remove the spool from the spool cover and take off the
remaining used nylon cord from the spool. (Fig. 16)
Insert a nylon cord to the retainer shown in the figure.
(Fig. 17)
Wind it tightly flat around the spool in the direction of
arrow on the spool so that the wound nylon cord surface
appears uniform over the winding area. (Fig. 18)
Temporarily fix a nylon cord at the notch shown in the
figure. (Fig. 19)
Bring the nylon cord through the nylon cord eyehole in the
spool cover. (Fig. 20)
After installing the nylon cutting head, make sure that the
nylon cord comes out by pressing the spool and pulling
the nylon cord. (Fig. 21)
OPERATION
Attachment of shoulder strap (Fig. 22)
Hook the shoulder strap in a hole in the front grip.
Operation
CAUTION:
Do not cut high grass at a time. Cutting high grass at
a time near the root may cause the trimmer motor
spindle to be entangled by grass which leads to the
motor under overload, resulting in damage to the
trimmer.
CAUTION:
Use the trimmer without getting the spool into a
contact with the ground surface. Using the spool
contacting the ground surface may cause the motor
under overload resulting in damage to the trimmer.
(Fig. 23 & 24)
CAUTION:
Do not force the trimmer in densely growing grass.
(Fig. 25)
CAUTION:
Do not use the trimmer as if you dig out the ground with
it. (Fig. 26)
12
Cutting the grass near a tree, concrete
block, brick or garden stone (Fig. 27)
Hold the trimmer tilting at a level so that it does not
contact the ground surface and cut the grass using the
nylon cord tip like knocking the ground. In this work,
smooth feeding out is needed because the nylon cord
wears more quickly than usual.
NOTE:
Getting the trimmer too close to a tree, concrete block,
brick or garden stone or the like during performing the
edging work or such similar cutting work may cause the
nylon cord to be cut off halfway inside the spool cover.
At this time, take the spool out of the spool cover and
then set the nylon cord again properly by referring to
the section titled “Installing or removing the nylon
cutting head” and “Winding a new nylon cord on the
spool”. Using the tip of the nylon cord during operation
brings the best result of operation and therefore it is
recommended to keep the tool more than 5 cm away
from the tree, concrete block, brick or garden stone or
the like.
Start the trimmer before getting close to the grass to be
cut.
Cut the grass using the nylon cord tip by moving the
trimmer from right to left and proceed slowly, keeping the
trimmer tilted at the angle of about 30° in relation to the
ground surface.
When cutting high grass, cut in layers always beginning
from the top with each cut length short.
Using the tool as an edger
Using the tool as an edger allows the operator to cut along
the edge of the concrete block, brick and the like. (Fig. 28)
For using the tool as an edger, hold the shaft of the
trimmer with one hand and turn the grip counter clockwise
to loosen the shaft. Rotate the shaft with the motor
housing 180° and tighten the grip clockwise until it locks.
(Fig. 29)
NOTE:
Before rotating the shaft, it needs to be fully shortened
or extended.
After changing to the edger position, make sure that
the motor housing and shaft are locked.
To obtain a good result of finish cutting, move parallel to
the edge you are going to perform an edging work.
(Fig. 30)
Cutting the grass in a tight place or on a
slope
WARNING:
When cutting the grass on a slope, be careful of
stones, grass and other foreign objects thrown from the
cutting head area.
When cutting the grass on a slope, make sure that you
always keep a good and stable footing.
To ease the work in a tight place which restricts the
height, such as cutting the grass under an outdoor wood
deck and similars, push the lock button and then bend
down the cutting head so that the shaft is parallel to the
ground surface. Adjusting the cutting head angle properly
in this way helps you cut the grass on a slope. (Fig. 31)
MAINTENANCE
WARNING:
Always be sure that the tool is switched off and
battery cartridge is removed before attempting to
perform inspection or maintenance on the tool.
Failure to switch off and remove the battery cartridge
may result in serious personal injury from accidental
start-up.
NOTICE:
Never use gasoline, benzine, thinner, alcohol or the
like. Discoloration, deformation or cracks may result.
To maintain product SAFETY and RELIABILITY, repairs,
any other maintenance or adjustment should be
performed by Makita Authorized Service Centers, always
using Makita replacement parts.
OPTIONAL ACCESSORIES
CAUTION:
These accessories or attachments are recommended
for use with your Makita tool specified in this manual.
The use of any other accessories or attachments might
present a risk of injury to persons. Only use accessory
or attachment for its stated purpose.
If you need any assistance for more details regarding
these accessories, ask your local Makita Service Center.
Nylon cutting head
Nylon cords
Shoulder strap
Goggles
Various type of Makita genuine batteries and chargers
NOTE:
Some items in the list may be included in the tool
package as standard accessories. They may differ
from country to country.
Noise
ENG905-1
The typical A-weighted noise level determined according
to EN786:
Model DUR141
Sound pressure level (L
pA
): 75 dB (A)
Sound power level (L
WA
): 83.7 dB (A)
Uncertainty (K): 2.5 dB (A)
Model DUR181
Sound pressure level (L
pA
): 82 dB (A)
Sound power level (L
WA
): 88.5 dB (A)
Uncertainty (K): 2.5 dB (A)
Wear ear protection.
Vibration
ENG904-2
The vibration total value determined according to EN786:
Vibration emission (a
h
): 2.5 m/s
2
or less
Uncertainty (K): 1.5 m/s
2
ENG901-1
The declared vibration emission value has been
measured in accordance with the standard test method
and may be used for comparing one tool with another.
The declared vibration emission value may also be
used in a preliminary assessment of exposure.
13
WARNING:
The vibration emission during actual use of the power
tool can differ from the declared emission value
depending on the ways in which the tool is used.
Be sure to identify safety measures to protect the
operator that are based on an estimation of exposure in
the actual conditions of use (taking account of all parts
of the operating cycle such as the times when the tool
is switched off and when it is running idle in addition to
the trigger time).
For European countries only
ENH219-2
EC Declaration of Conformity
We Makita Corporation as the responsible
manufacturer declare that the following Makita
machine(s):
Designation of Machine:
Cordless String Trimmer
Model No./ Type: DUR141, DUR181
Specifications: see “SPECIFICATIONS” table.
are of series production and
Conforms to the following European Directives:
2000/14/EC, 2006/42/EC
And are manufactured in accordance with the following
standards or standardised documents:
EN60745, EN60335
The technical documentation is kept by:
Makita International Europe Ltd.
Technical Department,
Michigan Drive, Tongwell,
Milton Keynes, Bucks MK15 8JD, England
The conformity assessment procedure required by
Directive 2000/14/EC was in Accordance with annex VI.
Notified Body:
TÜV Rheinland LGA Products GmbH
Tillystraße 2
90431 Nürnberg, Germany
Identification number 0197
Model DUR141
Measured Sound Power Level: 83.7 dB (A)
Guaranteed Sound Power Level: 85 dB (A)
Model DUR181
Measured Sound Power Level: 88.5 dB (A)
Guaranteed Sound Power Level: 91 dB (A)
23.9.2011
Tomoyasu Kato
Director
Makita Corporation
3-11-8, Sumiyoshi-cho,
Anjo, Aichi, 446-8502, JAPAN
38
NEDERLANDS (Originele instructies)
Verklaring van het onderdelenoverzicht
TECHNISCHE GEGEVENS
Als gevolg van ons doorlopende onderzoeks- en ontwikkelingsprogramma, zijn de technische gegevens van dit
gereedschap onderhevig aan veranderingen zonder voorafgaande kennisgeving.
Specificaties en accu’s kunnen van land tot land verschillen.
Gewicht, inclusief de accu, volgens de EPTA-procedure 01/2003
Symbolen
END017-3
Hieronder staan de symbolen die voor het gereedschap
worden gebruikt. Zorg ervoor dat u weet wat ze
betekenen alvorens de accu te gebruiken.
.................. Besteed bijzondere zorg en aandacht!
........ Lees de gebruiksaanwijzing.
.................. Gevaar: wees bedacht op opgeworpen
voorwerpen.
.................. De afstand tussen het gereedschap en
omstanders moet minstens 15 meter te
zijn.
.......... Houd omstanders uit de buurt.
.......... Blijf minstens 15 meter uit de buurt.
.................. Voorkom terugslag.
.................. Draag een veiligheidshelm,
veiligheidsbril en gehoorbescherming.
.................. Draag veiligheidshandschoenen.
.................. Draag stevige schoenen met
antislipzolen. Veiligheidsschoenen met
stalen neuzen worden aanbevolen.
.................. Stel het gereedschap niet bloot aan
vocht.
.................. Toegestaan maximumtoerental.
............. Alleen voor EU-landen
Geef elektrisch gereedschap en accu’s
niet met het huisvuil mee!
Volgens de Europese richtlijn 2012/19/
EU inzake oude elektrische en
elektronische apparaten, 2006/66/EC
inzake batterijen en accu’s en oude
batterijen en accu’s en de toepassing
daarvan binnen de nationale
wetgeving, dienen gebruikt elektrisch
gereedschap en accu’s gescheiden te
worden ingezameld en te worden
afgevoerd naar een recyclebedrijf dat
voldoet aan de geldende milieu-eisen.
BELANGRIJKE
VEILIGHEIDSINSTRUCTIES
GEB092-4
WAARSCHUWING! Lees alle
veiligheidswaarschuwingen en alle instructies. Het
1. Bedrijfslampje
2. Aan/uit-schakelaar
3. Accu
4. Voorhandgreep
5. Klemmoer
6. Vergrendelring
7. Beschermkap
8. Nylondraad-snijkop
9. Rode deel
10. Knop
11. Ster-merkteken
12. Uit-vergrendelknop
13. Schacht
14. Vergrendelring
15. Zeskantbout
16. Schroeven
17. Meskapje
18. Nylondraadopening
19. Uitsparing voor het uitsteeksel op
de nylondraad-snijkop
20. Veer
21. Spoelhouder
22. Nylondraad
23. Klem voor nylondraad
24. Draadspoel
25. Schouderriem
26. Haak
27. Motorhuis
28. Vergrendelknop
Model DUR141 DUR181
Onbelast toerental 6.000 min
-1
7.800 min
-1
Totale lengte 1.229 mm - 1.433 mm 1.229 mm - 1.433 mm
Maaidiameter met nylondraad-snijkop 260 mm 260 mm
Nettogewicht 2,9 kg 3,0 kg 2,9 kg 3,1 kg
Nominale spanning 14,4 volt gelijkstroom 18 volt gelijkstroom
Standaardaccu(’s)
Waarschuwing: Gebruik uitsluitend de
aangegeven accu(’s).
BL1415
BL1430/
BL1440
BL1815/
BL1815N/
BL1820
BL1830/
BL1840
Cd
Ni-MH
Li-ion
39
niet volgen van de waarschuwingen en instructies kan
leiden tot elektrische schokken, brand en/of ernstig letsel.
Bewaar alle waarschuwingen en
instructies om in de toekomst te kunnen
raadplegen.
1. Zorg dat u vertrouwd bent met de
bedieningselementen en het juiste gebruik van het
gereedschap.
2. Na het uitschakelen van de motor blijft het
snijgarnituur nog even ronddraaien.
3. Laat in geen geval het gereedschap gebruiken
door kinderen of personen die niet bekend zijn
met de instructies.
4. Onderbreek het gebruik van het gereedschap
wanneer andere personen, met name kinderen, of
huisdieren in de buurt komen.
5. Gebruik het gereedschap alleen bij daglicht of
voldoende kunstlicht.
6. Vóór gebruik van het gereedschap en na iedere
botsing, controleert u op tekenen van slijtage of
beschadiging, en repareert u het gereedschap zo
nodig.
7. Wees voorzichtig dat u geen letsel oploopt door
het mesje voor het op lengte afsnijden van de
nylondraad. Nadat u de nylondraad hebt
uitgetrokken, zet u het gereedschap altijd eerst
terug rechtop voordat u hem inschakelt.
8. Monteer nooit een metalen snijgarnituur.
9. Dit gereedschap is niet geschikt voor gebruik door
personen (waaronder kinderen) met een
verminderd lichamelijk, zintuiglijk of geestelijk
vermogen, of gebrek aan kennis en ervaring,
behalve indien zij instructies hebben gehad en
onder toezicht staan van een persoon die
verantwoordelijk is voor hun veiligheid. Kinderen
dienen onder toezicht te staan om ervoor te
zorgen dat zij niet met het gereedschap spelen.
10. Gebruik het gereedschap met de hoogstmogelijke
zorg en aandacht.
11. Gebruik het gereedschap alleen als u in goede
lichamelijke conditie bent. Werk altijd rustig en
voorzichtig. Gebruik uw gezond verstand en denk
eraan dat de gebruiker van het gereedschap
verantwoordelijk is voor ongelukken en gevaren
die personen of hun eigendommen kunnen
overkomen.
12. Bedien het gereedschap nooit wanneer u
vermoeid bent, zich ziek voelt, of onder invloed
bent van alcohol of drugs.
13. Het gereedschap moet onmiddellijk uitgeschakeld
worden als tekenen van een ongebruikelijke
werking merkbaar zijn.
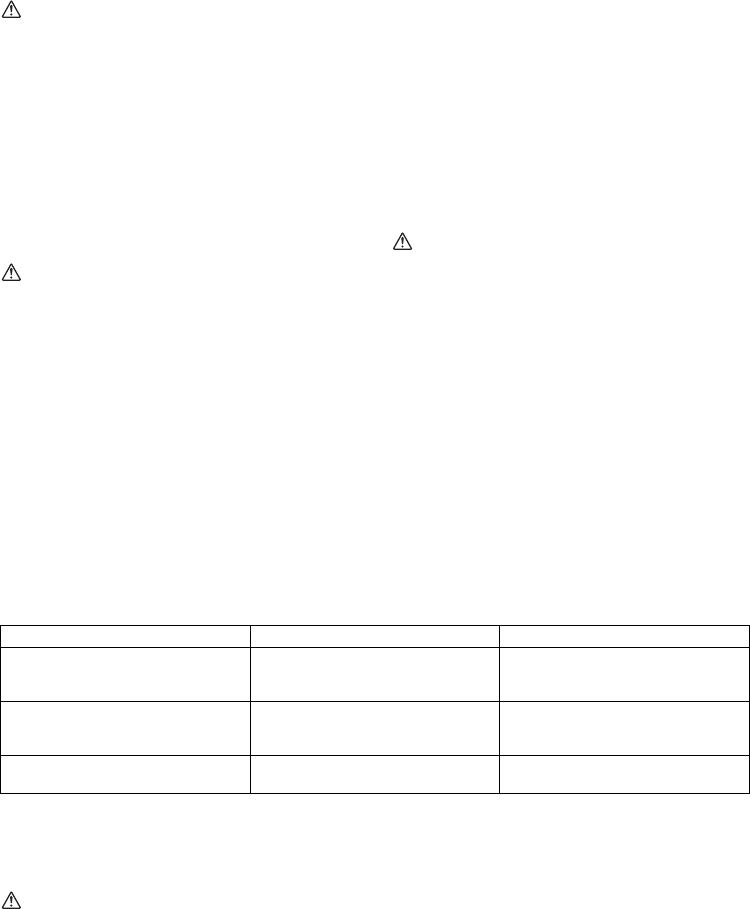
Bedoeld gebruik van het gereedschap
1. Gebruik het juiste gereedschap. De
accugraskantmaaier is uitsluitend bedoeld voor
het maaien van gras en kleine onkruiden. Het mag
niet worden gebruikt voor enig ander doel, zoals
heggen snoeien, aangezien dit tot letsel kan
leiden.
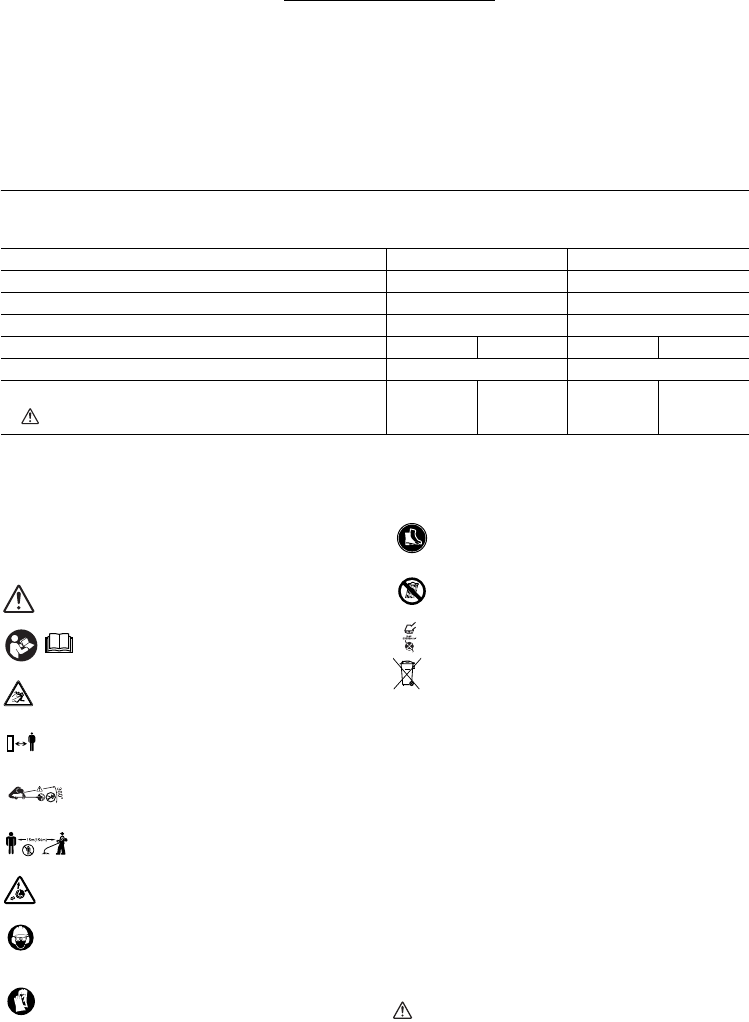
Persoonlijke-veiligheidsuitrusting (zie afb. 1 en 2)
1. Draag geschikte kleding. De te dragen kleding
dient functioneel en geschikt te zijn, d.w.z.
nauwsluitend zonder te hinderen. Draag geen
juwelen of kleding die verstrikt kunnen raken in
hoog gras. Draag een haarbedekking om lang haar
uit de weg te houden.
2. Draag altijd stevige schoenen met een antislipzool
wanneer u het gereedschap gebruikt. Dit
beschermt u tegen letsel en garandeert dat u
stevig staat.
3. Draag een veiligheidsbril of een spatscherm.
Elektrische veiligheid en accu
1. Vermijd gevaarlijke omgevingen. Gebruik het
gereedschap niet op vochtige of natte plaatsen en
stel het niet bloot aan regen. Als water
binnendringt in het gereedschap, wordt de kans
op een elektrische schok groter.
2. Laad alleen op met de acculader aanbevolen door
de fabrikant. Een acculader die geschikt is voor
een bepaald type accu, kan brandgevaar
opleveren indien gebruikt met een ander type
accu.
3. Gebruik het gereedschap uitsluitend met de
daarvoor bestemde accu. Als u een andere accu
erin gebruikt, kan dit leiden tot persoonlijk letsel
of brand.
4. Werp de accu niet in een vuur. De accu kan
exploderen. Raadpleeg de lokale regelgeving voor
mogelijke speciale verwerkingsvereisten.
5. Open of vervorm de accu niet. Het elektrolyt is
agressief en kan letsel toebrengen aan de ogen en
huid. Het kan giftig zijn bij inslikken.
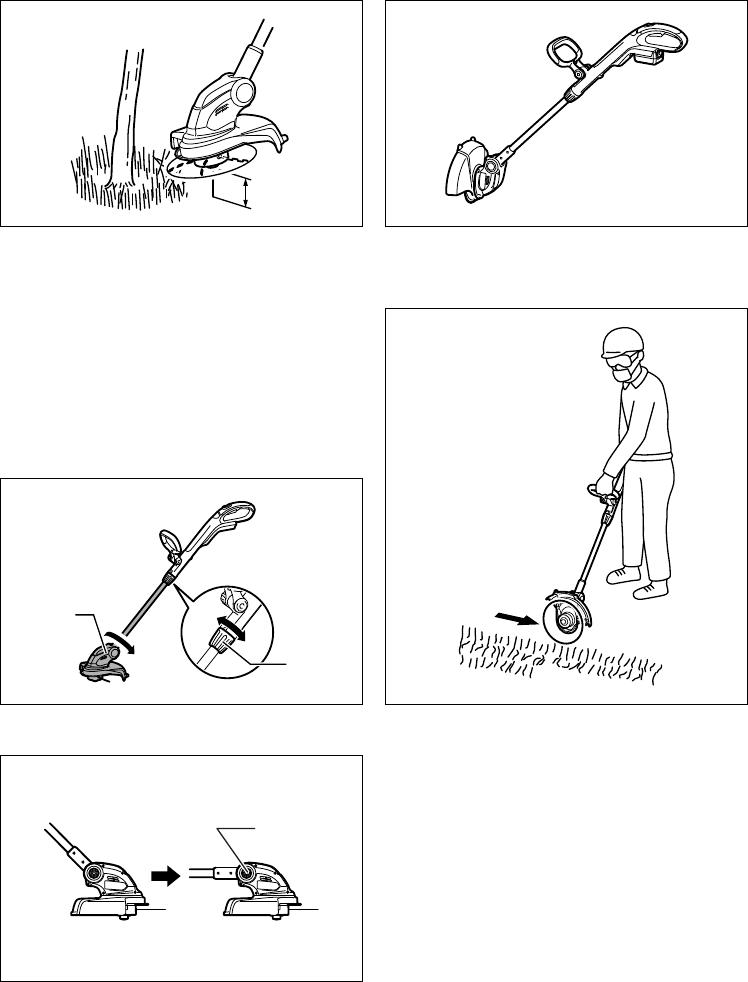
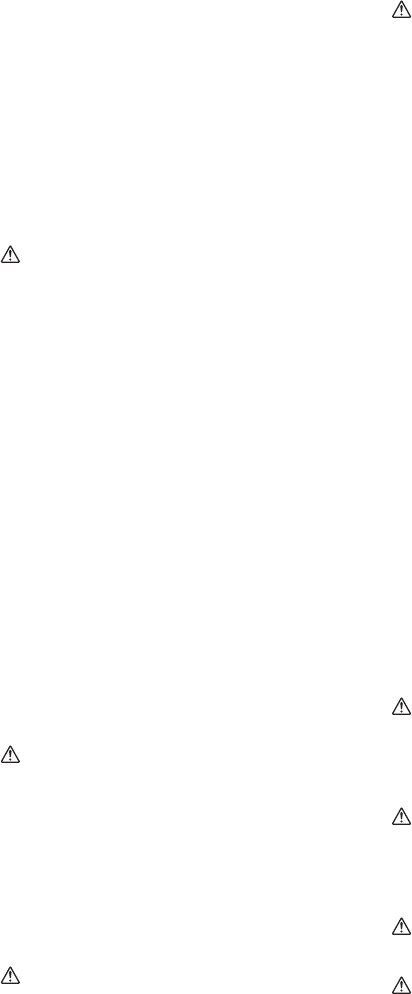
Het gereedschap inschakelen (zie afb. 3)
1. Controleer of er geen kinderen of andere mensen
aanwezig zijn binnen een werkbereik van 15 meter
en let ook op of er geen dieren in de
werkomgeving zijn. Als dat het geval is, stopt u
met het gebruik van het gereedschap.
2. Controleer voor gebruik altijd of het gereedschap
veilig is om te gebruiken. Controleer de veiligheid
van het snijgarnituur en de beschermkap, en
controleer of de aan/uit-schakelaar goed werkt en
gemakkelijk kan worden bediend. Controleer of de
handgrepen schoon en droog zijn en test de
werking van de aan/uit-schakelaar.
3.
Controleer op beschadigde onderdelen voordat u
het gereedschap verder gebruikt. Een
beschermkap of ander onderdeel day beschadigd
is, moet nauwkeurig worden onderzocht om te
beoordelen of het goed werkt en zijn beoogde
functie kan uitvoeren. Controleer of bewegende
delen goed uitgelijnd zijn en niet vastgelopen zijn,
of onderdelen niet kapot zijn en stevig
gemonteerd zijn, en enige andere situatie die van
invloed kan zijn op de werking van het
gereedschap. Een beschermkap of ander
onderdeel dat beschadigd is, dient vakkundig te
worden gerepareerd of vervangen door een
erkend servicecentrum, behalve indien anders
aangegeven in deze gebruiksaanwijzing.
40
4. Schakel de motor alleen in wanneer de handen en
voeten uit de buurt van het snijgarnituur zijn.
5. Controleer vóór het starten of het snijgarnituur
geen contact maakt met harde voorwerpen, zoals
takken, stenen, enz., omdat tijdens het starten het
snijgarnituur zal ronddraaien.
Gebruiksmethode
1. Gebruik het gereedschap nooit met beschadigde
beschermkappen of zonder aangebrachte
beschermkappen.
2. Gebruik het gereedschap alleen bij goed licht en
zicht. Wees in de winter bedacht op gladde of
natte plaatsen, ijs en sneeuw (gevaar voor
uitglijden). Zorg er altijd voor dat u stevig staat.
3. Wees voorzichtig uw handen en voeten niet te
verwonden aan het snijgarnituur.
4. Houd altijd handen en voeten uit de buurt van het
snijgarnituur, met name bij het inschakelen van de
motor.
5. Maai nooit boven heuphoogte.
6. Sta nooit op een ladder met draaiend
gereedschap.
7. Werk nooit op onstabiele oppervlakken.
8. Reik niet te ver. Zorg altijd voor een stevige stand
en goede lichaamsbalans.
9. Verwijder zand, stenen, nagels, enz. die u binnen
uw werkbereik vindt. Vreemde voorwerpen
kunnen het snijgarnituur beschadigen en
opgeworpen worden waardoor ernstig persoonlijk
letsel kan worden veroorzaakt.
10. Als het snijgarnituur stenen of andere harde
voorwerpen raakt, moet u de motor onmiddellijk
uitschakelen en het snijgarnituur controleren.
11. Voordat u begint te maaien, moet het snijgarnituur
op maximaal toerental draaien.
12. Houd tijdens gebruik het gereedschap altijd met
twee handen vast. Houd het gereedschap tijdens
het gebruik nooit met slechts één hand vast. Zorg
er altijd voor dat u stevig staat.
13. De volledige veiligheidsuitrusting, zoals een
beschermkap die bij het gereedschap wordt
geleverd, moeten tijdens het werk worden
gebruikt.
14. Behalve in noodgevallen mag u het gereedschap
nooit op de grond laten vallen of weggooien
omdat hierdoor het gereedschap zwaar
beschadigd kan raken.
15. Sleep het gereedschap nooit over de grond
wanneer u het wilt verplaatsen omdat hierdoor het
gereedschap kan worden beschadigd.
16. Verwijder altijd de accu uit het gereedschap:
iedere keer als u het gereedschap onbeheerd
achterlaat;
voordat u een verstopping opheft;
voordat u het gereedschap controleert, reinigt
of er werkzaamheden aan gaat verrichten;
voordat u enige afstelling maakt, een
accessoire vervangt of het gereedschap
opbergt;
als het gereedschap op ongebruikelijke manier
begint te trillen;
wanneer u het gereedschap gaat vervoeren.
17. Forceer het gereedschap niet. Het gereedschap
werkt beter en met een kleinere kans op letsel op
de manier waarvoor het is ontworpen.
Onderhoudsinstructies
1. De toestand van het snijgarnituur, de
veiligheidsuitrusting moet worden gecontroleerd
voor aanvang van de werkzaamheden.
2. Schakel de motor uit en verwijder de accu voordat
u onderhoudswerkzaamheden uitvoert, het
snijgarnituur vervangt, of het gereedschap
schoonmaakt.
3. Verwijder na gebruik de accu van het gereedschap
en controleer op beschadigingen.
4. Controleer op loszittende bevestigingen en
beschadigde onderdelen, zoals bijna half-
doorgescheurd in het snijgarnituur.
5. Wanneer het gereedschap niet wordt gebruikt,
bergt u het op op een droge plaats die op slot kan
of buiten bereik van kinderen ligt.
6. Gebruik uitsluitend de door de fabrikant
aanbevolen vervangingsonderdelen en
accessoires.
7. Zorg ervoor dat de ventilatieopeningen altijd vrij
zijn van vuil.
8. Inspecteer en onderhoud het gereedschap
regelmatig, met name vóór en na gebruik. Laat het
gereedschap alleen repareren door een erkend
servicecentrum.
9. Houd de handgrepen droog, schoon en vrij van
olie en vetten.
BEWAAR DEZE INSTRUCTIES.
WAARSCHUWING:
Laat u NIET misleiden door een vals gevoel van
comfort en bekendheid met het gereedschap (na
veelvuldig gebruik) en neem alle
veiligheidsvoorschriften van het betreffende product
altijd strikt in acht. VERKEERD GEBRUIK of het niet
volgen van de veiligheidsinstructies in deze
gebruiksaanwijzing kan leiden tot ernstig persoonlijk
letsel.
BELANGRIJKE
VEILIGHEIDSINSTRUCTIES ENC007-7
VOOR ACCU’S
1. Alvorens de accu in gebruik te nemen, leest u
eerst alle instructies en
waarschuwingsopschriften op (1) de acculader, (2)
de accu en (3) het apparaat waarin de accu wordt
aangebracht.
2. Haal de accu niet uit elkaar.
3. Als de gebruikstijd aanzienlijk korter is geworden,
stopt u onmiddellijk met het gebruik. Anders kan
dit leiden tot kans op oververhitting, mogelijke
brandwonden en zelfs een explosie.
4. Als de elektrolyt in uw ogen komt, wast u deze uit
met schoon water en raadpleegt u onmiddellijk
een arts. Dit kan leiden tot verlies van
gezichtsvermogen.
5. Sluit de accu niet kort:
41
(1) Raak de accupolen niet aan met enig
geleidend materiaal.
(2) Bewaar de accu niet op een plaats waar deze
in aanraking kan komen met andere metalen
voorwerpen, zoals spijkers, munten, enz.
(3) Stel de accu niet bloot aan water of regen.
Kortsluiting van de accu kan leiden tot een hoge
stroomsterkte, oververhitting, mogelijke
brandwonden en zelfs een defect.
6. Bewaar het gereedschap en de accu niet op
plaatsen waar de temperatuur kan oplopen tot
50 °C of hoger.
7. Werp de accu niet in een vuur, zelfs niet als deze
al ernstig beschadigd of helemaal versleten is. De
accu kan in een vuur exploderen.
8. Wees voorzichtig dat u de accu niet laat vallen of
ergens tegenaan stoot.
9. Gebruik nooit een beschadigde accu.
BEWAAR DEZE INSTRUCTIES.
Tips voor een lange levensduur van de
accu
1. Laad de accu op voordat deze volledig leeg is.
Wanneer u merkt dat het gereedschap minder
vermogen heeft, stopt u met het gebruik ervan en
laadt u eerst de accu op.
2. Laad nooit een volledig opgeladen accu op.
Te lang opladen verkort de levensduur van de
accu.
3. Laad de accu op bij een omgevingstemperatuur
van 10 °C tot 40 °C. Laat een warme accu eerst
afkoelen voordat u deze oplaadt.
4. Laad de accu ieder half jaar op als u deze
gedurende een lange tijd niet gebruikt.
BESCHRIJVING VAN DE
ONDERDELEN (zie afb. 4)
BESCHRIJVING VAN DE
FUNCTIES
WAARSCHUWING:
Zorg ervoor dat het gereedschap is uitgeschakeld
en dat de accu is verwijderd voordat u de werking
van het gereedschap aanpast of controleert. Als het
gereedschap niet wordt uitgeschakeld en de accu niet
uit het gereedschap wordt verwijderd, kan dat na per
ongeluk inschakelen leiden tot ernstig persoonlijk
letsel.
De accu aanbrengen en verwijderen (zie
afb. 5)
LET OP:
Schakel het gereedschap altijd uit voordat u de accu
aanbrengt of verwijdert.
Houd het gereedschap en de accu stevig vast
tijdens het aanbrengen of verwijderen van de accu.
Als u het gereedschap en de accu niet stevig
vasthoudt, kunnen deze uit uw handen glippen en
beschadigd raken, of kan persoonlijk letsel worden
veroorzaakt.
Om de accu te verwijderen verschuift u de knop aan de
voorkant van de accu en schuift u tegelijkertijd de accu
van het gereedschap af.
Om de accu aan te brengen, lijnt u de lip op de accu uit
met de groef in de behuizing en duwt u de accu op zijn
plaats. Steek de accu zo ver mogelijk erin tot u een
klikgeluid hoort. Als u het rode deel aan de bovenkant van
de knop kunt zien, is de accu niet goed aangebracht.
LET OP:
Breng de accu altijd helemaal aan totdat het rode deel
niet meer zichtbaar is. Als u dit niet doet, kan de accu
per ongeluk uit het gereedschap vallen en u of anderen
in uw omgeving verwonden.
Breng de accu niet met kracht aan. Als de accu niet
gemakkelijk erin kan worden geschoven, wordt deze
niet goed aangebracht.
Accubeveiligingssysteem (lithiumionaccu
met een ster-merkteken) (zie afb. 6)
Lithiumionaccu’s met een ster-merkteken zijn uitgerust
met een beveiligingssysteem. Dit systeem schakelt
automatisch de voeding naar het gereedschap uit om de
levensduur van de accu te verlengen.
Het gereedschap zal tijdens gebruik automatisch stoppen
wanneer het gereedschap en/of de accu zich in een van
de volgende omstandigheden bevinden:
Overbelasting:
Het gereedschap wordt gebruikt op een manier die
ertoe leidt dat een abnormaal hoge stroomsterkte uit
de accu wordt getrokken.
Laat in die situatie de aan/uit-schakelaar van het
gereedschap los en stop het gebruik dat ertoe leidde
dat het gereedschap overbelast werd. Knijp daarna
opnieuw de aan/uit-schakelaar in om het
gereedschap weer in te schakelen.
Als het gereedschap niet wordt ingeschakeld, is de
accu oververhit. In die situatie laat u de accu eerst
afkoelen voordat u opnieuw de aan/uit-schakelaar
inknijpt.
Lage accuspanning:
De resterende acculading is te laag en het
gereedschap wordt niet ingeschakeld. Verwijder in
die situatie de accu en laad hem op.
In- en uitschakelen
WAARSCHUWING:
Controleer altijd, voordat u de accu in het
gereedschap steekt, of de aan/uit-schakelaar op de
juiste manier schakelt en weer terugkeert naar de
uit-stand nadat deze is losgelaten. Knijp de aan/uit-
schakelaar niet hard in zonder de uit-
vergrendelknop te bedienen. Hierdoor kan de aan/
uit-schakelaar stuk gaan. Het gebruik van
gereedschap met een schakelaar die niet goed werkt,
kan leiden tot verlies van controle en ernstige
verwondingen.
Om te voorkomen dat de aan/uit-schakelaar per ongeluk
wordt bediend, is een uit-vergrendelknop aangebracht.
Om het gereedschap te starten, schuift u de uit-
vergrendelknop naar voren en knijpt u de aan/uit-
schakelaar in. Laat de aan/uit-schakelaar los om het
gereedschap te stoppen (zie afb. 7).
42
Bedrijfslampje (zie afb. 8)
Tijdens gebruik van het gereedschap geeft het
bedrijfslampje de toestand van de acculading aan.
In het geval het gereedschap overbelast is en tijdens
gebruik is gestopt, brandt het bedrijfslampje rood.
Raadpleeg onderstaande tabel voor de toestand van de
accu en het gereedschap, alsmede de te nemen
maatregelen voor iedere status van het bedrijfslampje.
Opmerking 1: Het moment waarop het bedrijfslampje gaat branden varieert met de temperatuur in het werkgebied en de
toestand van de accu.
012443
De schachtlengte afstellen
WAARSCHUWING:
Laat voordat u de schachtlengte afstelt eerst de aan/
uit-schakelaar los en verwijder de accu vanaf de
graskantmaaier. Als u de aan/uit-schakelaar niet
loslaat en de accu niet verwijdert, kan persoonlijk letsel
worden veroorzaakt.
Om de lengte van de schacht af te stellen, draait u de
vergrendelring linksom tot de as is ontgrendeld en trekt u
de schacht uit of duwt u hem in tot de gewenste lengte
(zie afb. 9).
Nylondraad-snijkop
KENNISGEVING:
Het aanvoeren van nylondraad zal niet goed werken
wanneer de nylondraad-snijkop niet draait.
De nylondraad-snijkop is een enkele-draadkop uitgerust
met een stoot-aanvoermechanisme.
Om ervoor te zorgen dat de nylondraad aangevoerd
wordt, moet de snijkop op de grond gestoten worden
terwijl het gereedschap is ingeschakeld. Terwijl de
nylondraad uit de snijkop komt wordt hij automatisch
afgesneden op de juiste lengte door de mesjes in de
beschermkap (zie afb. 10).
OPMERKING:
Als de nylondraad niet automatisch wordt aangevoerd
wanneer de snijkop op de grond wordt gestoten, volgt u
de procedures die zijn beschreven onder “De
nylondraad-snijkop aanbrengen of verwijderen” en
“Een nieuwe nylondraad op de spoel wikkelen” om de
nylondraad opnieuw op te wikkelen of te vervangen.
Stoot het gereedschap niet tegen een betonnen of
asfalt ondergrond. Als u tegen dergelijke ondergronden
stoot, kan het gereedschap worden beschadigd.
DE ONDERDELEN MONTEREN
WAARSCHUWING:
Controleer altijd of het gereedschap is
uitgeschakeld en de accu is verwijderd alvorens
enige werkzaamheden aan het gereedschap te
verrichten. Als het gereedschap niet wordt
uitgeschakeld en de accu niet uit het gereedschap
wordt verwijderd, kan dat na per ongeluk inschakelen
leiden tot ernstig persoonlijk letsel.
Start het gereedschap nooit voordat het op de
juiste wijze is gemonteerd. Door het gereedschap in
een gedeeltelijk gemonteerde toestand te laten
werken, kan dat na per ongeluk inschakelen leiden tot
ernstig persoonlijk letsel.
De voorhandgreep aanbrengen (zie
afb. 11)
Plaats de voorhandgreep op de voorhandgreephouder en
zet hem vast met een zeskantbout en de klemmoer die bij
de graskantmaaier werden geleverd, zoals aangegeven in
de afbeelding. Op dit moment moet de zeskantbout
worden aangebracht vanaf de zijkant waar zich het
boutkopvergrendelhuis bevindt, en moet de klemmoer
worden aangebracht vanaf de tegenoverliggende zijkant.
OPMERKING:
In het montagegebied van de voorhandgreep zit een
sleuf van rand tot rand . Door deze sleuf kunt u
gemakkelijk de voorhandgreep aanbrengen op de
voorhandgreephouder.
De hoek van de voorhandgreep is verstelbaar. Om de
hoek van de voorhandgreep te verstellen, draait u de
klemmoer linksom los, plaatst u de voorhandgreep onder
de gewenste hoek overeenkomstig uw werkzaamheden
en draait u de klemmoer weer rechtsom vast.
De beschermkap aanbrengen
LET OP:
Wees tijdens het aanbrengen van de beschermkap
voorzichtig het mesje voor het afsnijden van de
nylondraad aan de binnenkant van de
beschermkap niet aan te raken. Aanraking van het
mesje kan leiden tot persoonlijk letsel.
Breng de beschermkap aan door hem zodanig op het
motorhuis te plaatsen dat de nylondraad niet bekneld zit
tussen de beschermkap en het motorhuis, en zet hem
vervolgens vast met behulp van de twee schroeven.
Voordat u de graskantmaaier start, haalt u het meskapje
van het mesje af (zie afb. 12).
Bedrijfslampje Toestand van accu/gereedschap Te nemen maatregelen
Het bedrijfslampje knippert rood. Dit geeft het juiste tijdstip aan om de
accu te vervangen wanneer de accu
bijna leeg is.
Laad de accu zo spoedig mogelijk op.
Het bedrijfslampje brandt rood.
(Opmerking 1)
Deze functie treedt in werking wanneer
de acculading bijna opgebruikt is. Op
dat moment stopt het gereedschap
onmiddellijk.
Laad de accu op.
Het bedrijfslampje brandt rood.
(Opmerking 1)
Het gereedschap stopt automatisch als
gevolg van overbelasting.
Schakel het gereedschap uit.
43
De nylondraad-snijkop aanbrengen of
verwijderen
WAARSCHUWING:
Voordat u de nylondraad-snijkop (d.w.z. het
spoeldeksel en de spoel) aanbrengt of verwijdert,
controleert u of het gereedschap is uitgeschakeld
en de accu van het gereedschap is verwijderd. Als
het gereedschap niet wordt uitgeschakeld en de accu
niet uit het gereedschap wordt verwijderd, kan dat
leiden tot persoonlijk letsel.
LET OP:
Bij het aanbrengen of verwijderen van de
nylondraad-snijkop, let u erop niet het mesje in de
beschermkap aan te raken. Aanraking van het mesje
kan leiden tot persoonlijk letsel.
Om de nylondraad-snijkop (de spoel en het spoeldeksel)
vanaf de graskantmaaier te verwijderen, duwt u met
kracht de vergrendelnokken aan beide zijkanten van het
spoeldeksel naar binnen en tilt u het spoeldeksel eraf (zie
afb. 13 en 14).
KENNISGEVING:
Zorg ervoor dat de veer is aangebracht in het
spoelhouder.
Om een nylondraad-snijkop (de spoel en het spoeldeksel)
met een nieuw gewikkelde nylondraad aan te brengen op
de graskantmaaier, lijnt u de nylondraadopening uit met
de uitsparing voor het uitsteeksel op de nylondraad-
snijkop en drukt u hem erin tot een klik wordt gehoord (zie
afb. 15).
Een nieuwe nylondraad op de spoel
wikkelen
Verwijder de spoel vanaf het spoeldeksel en haal de
resterende nylondraad van de spoel af (zie afb. 16).
Steek een nylondraad in de klem, zoals aangegeven in de
afbeelding (zie afb. 17).
Wikkel hem strak en vlak rond de spoel in de richting van
de pijl op de spoel, zodat het oppervlak van de
gewikkelde nylondraad uniform is over het hele
wikkeloppervlak (zie afb. 18).
Zet de nylondraad tijdelijk vast in de inkeping aangegeven
in de afbeelding (zie afb. 19).
Steek het uiteinde van de nylondraad dor de
nylondraadopening in het spoeldeksel (zie afb. 20).
Nadat de nylondraad-snijkop weer is aangebracht op de
graskantmaaier, controleert u of de nylondraad wordt
aangevoerd door op de spoel te duwen en aan de
nylondraad te trekken (zie afb. 21).
BEDRIJF
De schouderriem bevestigen (zie afb. 22)
Haak de schouderriem in een gat in de voorhandgreep.
Bediening
LET OP:
Maai lang gras niet in één keer. Als u lang gras in
één keer vlak boven de wortels maait, kan het lange
gras zich rond de as van de motor van de
graskantmaaier wikkelen waardoor de motor
overbelast wordt en de graskantmaaier wordt
beschadigd.
LET OP:
Zorg ervoor dat tijdens gebruik de spoel van de
graskantmaaier niet de grond raakt. Als de spoel de
grond raakt, kan de motor overbelast worden en de
graskantmaaier worden beschadigd (zie afb. 23 en
24).
LET OP:
Duw de graskantmaaier niet het dichtbegroeide gras in
(zie afb. 25).
LET OP:
Zorg ervoor dat de graskantmaaier niet de grond in
maait (zie afb. 26).
Gras maaien naast een boom, betonblok,
tuinmuur, siersteen of dergelijke (zie
afb. 27)
Houd de graskantmaaier schuin zonder dat hij de grond
raakt en maai het gras met de punt van de nylondraad die
de grond raakt. Bij deze werkzaamheden is een soepele
aanvoer van de nylondraad belangrijk omdat de
nylondraad sneller slijt dan gebruikelijk.
OPMERKING:
Als de graskantmaaier te dicht bij een boom,
betonblok, tuinmuur, siersteen of dergelijke komt
tijdens het maaien van grasranden of soortgelijke
werkzaamheden, kan de nylondraad halverwege
binnenin het spoeldeksel worden afgesneden. Als dat
gebeurt verwijdert u de spoel uit het spoeldeksel en
plaatst u de nylondraad opnieuw volgens de
beschrijvingen onder “De nylondraad-snijkop
aanbrengen of verwijderen” en “Een nieuwe
nylondraad op de spoel wikkelen”. Als u tijdens gebruik
met de punt van de nylondraad maait, krijgt u de beste
resultaten en daarom wordt het aangeraden om het
gereedschap meer dan 5 cm verwijderd te houden van
een boom, betonblok, tuinmuur, siersteen en
dergelijke.
Schakel de graskantmaaier in voordat deze het te maaien
gras raakt.
Maai het gras met de punt van de nylondraad door de
graskantmaaier van rechts naar links te bewegen en
langzaam vooruit te gaan, waarbij u de graskantmaaier
onder een hoek van 30° ten opzichte van de grond houdt.
Maai hoog gras in lagen en begin altijd bovenaan en werk
stapsgewijs omlaag.
Het gereedschap gebruiken als een
grasschaar
Door het gereedschap als een grasschaar te gebruiken
kunt u langs de randen van een betonblok, stenen en
dergelijke maaien (zie afb. 28).
Om het gereedschap als een grasschaar te gebruiken,
houdt u de schacht van de graskantmaaier met één hand
vast en draait u de vergrendelring linksom om de schacht
te ontgrendelen. Draai de schacht met het motorhuis 180°
en draai daarna de vergrendelring rechtsom vast tot hij de
schacht vergrendelt (zie afb. 29).
44
OPMERKING:
Voordat u de schacht draait moet u hem helemaal
inschuiven of uitschuiven.
Nadat u het gereedschap in de grasschaar-stand hebt
gezet, let u erop dat de schacht met het motorhuis
goed zijn vergrendeld.
Voor een goed afwerkresultaat beweegt u de snijkop
parallel aan de rand waarlangs u wilt maaien (zie afb. 30).
Gras maaien in een krappe ruimte of op
een helling
WAARSCHUWING:
Let bij het maaien van gras op een helling goed op
stenen, gras en andere vreemde voorwerpen die door
de snijkop worden opgeworpen.
Zorg ervoor dat u bij het maaien van gras op een
helling altijd stevig en stabiel staat.
Om gemakkelijker te kunnen werken in een krappe ruimte
met een beperkte hoogte, zoals bij het maaien van gras
onder het dek van een veranda of iets dergelijks, drukt u
de vergrendelknop in en kantelt u de snijkop omlaag
zodat de schacht parallel aan de grond is. Door de hoek
van de snijkop op deze manier goed af te stellen, kunt u
gemakkelijker het gras op een helling maaien (zie
afb. 31).
ONDERHOUD
WAARSCHUWING:
Zorg er altijd voor dat het gereedschap is
uitgeschakeld en de accu is verwijderd, voordat u
een inspectie of onderhoud aan het gereedschap
uitvoert. Als het gereedschap niet wordt uitgeschakeld
en de accu niet uit het gereedschap wordt verwijderd,
kan dat na per ongeluk inschakelen leiden tot ernstig
persoonlijk letsel.
KENNISGEVING:
Gebruik nooit benzine, wasbenzine, thinner, alcohol,
enz. Dit kan leiden tot verkleuren, vervormen of
barsten.
Om de VEILIGHEID en BETROUWBAARHEID van het
gereedschap te handhaven, dienen alle reparaties,
onderhoud en afstellingen te worden uitgevoerd door een
erkend Makita-servicecentrum, en altijd met
gebruikmaking van originele Makita-
vervangingsonderdelen.
VERKRIJGBARE ACCESSOIRES
LET OP:
Deze accessoires of hulpstukken worden aanbevolen
voor gebruik met het Makita-gereedschap dat in deze
gebruiksaanwijzing wordt beschreven. Het gebruik van
andere accessoires of hulpstukken kan gevaar voor
persoonlijk letsel opleveren. Gebruik de accessoires of
hulpstukken uitsluitend voor de aangegeven
gebruiksdoeleinden.
Mocht u meer informatie willen hebben over deze
accessoires, dan kunt u contact opnemen met uw
plaatselijke Makita-servicecentrum.
Nylondraad-snijkop
Nylondraad
Schouderriem
Veiligheidsbril
Diverse types originele Makita-accu’s en -acculaders
OPMERKING:
Sommige items op de lijst kunnen zijn inbegrepen in de
doos van het gereedschap als standaard toebehoren.
Zij kunnen van land tot land verschillen.
Geluid
ENG905-1
De typische, A-gewogen geluidsniveaus zijn gemeten
volgens EN786:
Modellen DUR141
Geluidsdrukniveau (L
pA
): 75 dB (A)
Geluidsvermogenniveau (L
WA
): 83,7 dB (A)
Onzekerheid (K): 2,5 dB (A)
Modellen DUR181
Geluidsdrukniveau (L
pA
): 82 dB (A)
Geluidsvermogenniveau (L
WA
): 88,5 dB (A)
Onzekerheid (K): 2,5 dB (A)
Draag gehoorbescherming.
Trilling
ENG904-2
De trillingstotaalwaarde is bepaald volgens EN786:
Trillingsemissie (a
h
): 2,5 m/s
2
of minder
Onzekerheid (K): 1,5 m/s
2
ENG901-1
De opgegeven trillingsemissiewaarde is gemeten
volgens de standaardtestmethode en kan worden
gebruikt om dit gereedschap te vergelijken met andere
gereedschappen.
De opgegeven trillingsemissiewaarde kan ook worden
gebruikt voor een beoordeling vooraf van de
blootstelling.
WAARSCHUWING:
De trillingsemissie tijdens het gebruik van het elektrisch
gereedschap in de praktijk kan verschillen van de
opgegeven trillingsemissiewaarde afhankelijk van de
manier waarop het gereedschap wordt gebruikt.
Zorg ervoor dat veiligheidsmaatregelen worden
getroffen ter bescherming van de operator die zijn
gebaseerd op een schatting van de blootstelling onder
praktijkomstandigheden (rekening houdend met alle
fasen van de bedrijfscyclus, zoals de tijdsduur
gedurende welke het gereedschap is uitgeschakeld en
stationair draait, naast de ingeschakelde tijdsduur).
Alleen voor Europese landen
ENH219-2
EU-verklaring van conformiteit
Wij, Makita Corporation, als de verantwoordelijke
fabrikant, verklaren dat de volgende Makita-
machine(s):
Aanduiding van de machine:
Accugraskantmaaier
Modelnr./Type: DUR141 en DUR181
Technische gegevens: zie de tabel “TECHNISCHE
GEGEVENS”.
in serie zijn geproduceerd en
Voldoen aan de volgende Europese richtlijnen:
2000/14/EC en 2006/42/EC
En zijn gefabriceerd in overeenstemming met de
volgende normen of genormaliseerde documenten:
EN60745, EN60335
45
De technische documentatie wordt bewaard door:
Makita International Europe Ltd.
Technical Department,
Michigan Drive, Tongwell,
Milton Keynes, Bucks MK15 8JD, Engeland
De conformiteitsbeoordelingsprocedure vereist door
Richtlijn 2000/14/EC was is Overeenstemming met annex
VI.
Officiële instantie:
TÜV Rheinland LGA Products GmbH
Tillystraße 2
90431 Nürnberg, Duitsland
Identificatienummer 0197
Modellen DUR141
Gemeten geluidsvermogenniveau: 83,7 dB (A)
Gegarandeerd geluidsvermogenniveau: 85 dB (A)
Modellen DUR181
Gemeten geluidsvermogenniveau: 88,5 dB (A)
Gegarandeerd geluidsvermogenniveau: 91 dB (A)
23.9.2011
Tomoyasu Kato
Directeur
Makita Corporation
3-11-8, Sumiyoshi-cho,
Anjo, Aichi, 446-8502, JAPAN
ALA
Makita Corporation
Anjo, Aichi, Japan
885314A993 www.makita.com
7

Hulp nodig? Stel uw vraag in het forum

Spelregels
1

Forum

Makita-DUR181
  • mijn spoel en kogellager is bijna stuk is er een handleiding om deze te vervangen.ik ben in Thailand op dit ogenblik waar de trimmer ook is.hoe deze te bekomen en te vervangen hier? Gesteld op 31-10-2022 om 07:37

    Reageer op deze vraag Misbruik melden

Misbruik melden

Gebruikershandleiding.com neemt misbruik van zijn services uitermate serieus. U kunt hieronder aangeven waarom deze vraag ongepast is. Wij controleren de vraag en zonodig wordt deze verwijderd.

Product:

Bijvoorbeeld antisemitische inhoud, racistische inhoud, of materiaal dat gewelddadige fysieke handelingen tot gevolg kan hebben.

Bijvoorbeeld een creditcardnummer, een persoonlijk identificatienummer, of een geheim adres. E-mailadressen en volledige namen worden niet als privégegevens beschouwd.

Spelregels forum

Om tot zinvolle vragen te komen hanteren wij de volgende spelregels:

Belangrijk! Als er een antwoord wordt gegeven op uw vraag, dan is het voor de gever van het antwoord nuttig om te weten als u er wel (of niet) mee geholpen bent! Wij vragen u dus ook te reageren op een antwoord.

Belangrijk! Antwoorden worden ook per e-mail naar abonnees gestuurd. Laat uw emailadres achter op deze site, zodat u op de hoogte blijft. U krijgt dan ook andere vragen en antwoorden te zien.

Abonneren

Abonneer u voor het ontvangen van emails voor uw Makita DUR181 bij:


U ontvangt een email met instructies om u voor één of beide opties in te schrijven.


Ontvang uw handleiding per email

Vul uw emailadres in en ontvang de handleiding van Makita DUR181 in de taal/talen: Nederlands, Engels als bijlage per email.

De handleiding is 1,04 mb groot.


U ontvangt de handleiding per email binnen enkele minuten. Als u geen email heeft ontvangen, dan heeft u waarschijnlijk een verkeerd emailadres ingevuld of is uw mailbox te vol. Daarnaast kan het zijn dat uw internetprovider een maximum heeft aan de grootte per email. Omdat hier een handleiding wordt meegestuurd, kan het voorkomen dat de email groter is dan toegestaan bij uw provider.

Stel vragen via chat aan uw handleiding

Stel uw vraag over deze PDF

Andere handleiding(en) van Makita DUR181

Makita DUR181 Gebruiksaanwijzing - Nederlands, Deutsch, English, Français, Italiano, Português, Espanõl, Türkiye, Dansk - 88 pagina's


Uw handleiding is per email verstuurd. Controleer uw email

Als u niet binnen een kwartier uw email met handleiding ontvangen heeft, kan het zijn dat u een verkeerd emailadres heeft ingevuld of dat uw emailprovider een maximum grootte per email heeft ingesteld die kleiner is dan de grootte van de handleiding.

Er is een email naar u verstuurd om uw inschrijving definitief te maken.

Controleer uw email en volg de aanwijzingen op om uw inschrijving definitief te maken

U heeft geen emailadres opgegeven

Als u de handleiding per email wilt ontvangen, vul dan een geldig emailadres in.

Uw vraag is op deze pagina toegevoegd

Wilt u een email ontvangen bij een antwoord en/of nieuwe vragen? Vul dan hier uw emailadres in.


Info