


-
beste.
Reageer op deze vraag Misbruik melden
heb de IPC100 geinstalleerd, echter heb ik enkel beeld bij het opstarten (links recht draaien, bovenonder tilten)
en dan bevriest het beeld plots terwijl de cam nog roteert.
kan iemand mij hierbij helpen aub?
Gesteld op 30-12-2021 om 13:17 -
Onze camera draait af en toe vanzelf terwijl we helemaal niet op de instellingen zitten ..hoe krijgen we dit weer normaal Gesteld op 15-1-2020 om 18:42
Reageer op deze vraag Misbruik melden-
Of iemand heeft uw camera gehacked of en dat heb ik zelf ook ondervonden, wanneer de camera tijdelijk zn wifi verbinding kwijt is gaat hij automatisch naar zn default stand. Geantwoord op 15-1-2020 om 19:23
Waardeer dit antwoord Misbruik melden
-
-
ik ben op zoek naar een accukabel voor mijn wildcamera de connector moet zijn 3.5mmx1.35mm
Reageer op deze vraag Misbruik melden
wie weet waar ik die kan bestellen bij voor baat mijn dank Gesteld op 26-11-2015 om 16:41-
Ge kunt deze kabel bestellen bij WWW ALLE KABELS.NL Geantwoord op 12-4-2016 om 02:00
Waardeer dit antwoord (4) Misbruik melden
-
-
i.v.m. problemen heb ik mijn maginon ip camera IPC-1 moeten resetten
Reageer op deze vraag Misbruik melden
wil ik hem opzoeken met supraIPCam config krijg ik alleen maar 0000 en de poort 80 verder kan ik er niets mee
er staat geen ip onder de camera
hoe kan ik het terug vinden Gesteld op 24-5-2015 om 21:29-
Mijn ipc10a blijf imails opsturen 100 of meer per dag help Geantwoord op 31-10-2016 om 21:45
Waardeer dit antwoord Misbruik melden
-
-
Goeiemidag.
Reageer op deze vraag Misbruik melden
Ik heb misschien n stomme vraag. Ik heb mijn ipcamera al ns in mn ander huis geinstalleerd gehad. Verhuisd en nu wil ik m weer gaan gebruiken, maar ik ben mn wachtwoord en gebruikersnaam vergeten. Hoe kan ik daar achterkomen ? Voor t geval, ik heb er alles nog van hoor, doosje, garantiebew, en alles daarbij. Gesteld op 14-5-2015 om 16:02-
je ip camera resetten en opnieuw instellen Geantwoord op 5-6-2015 om 19:06
Waardeer dit antwoord (23) Misbruik melden
-
-
Met admin kun je altijd in de camera instellingen komen Geantwoord op 15-7-2015 om 12:55
Waardeer dit antwoord (10) Misbruik melden -
Dag, met kabel Internet werkt de camera. Met wifi helaas niet. Hoe kom je in admin?! Admin gebruikersnaam wachtwoord leeglaten staat in de gebruikershandleiding. Dit werkt Bij mij echter niet.
Waardeer dit antwoord (2) Misbruik melden
Graag hulp Geantwoord op 17-10-2016 om 21:25 -
Camera met paperclip aan onderzijde resetten en opnieuw installeren . Met admin en ww leeg. Geantwoord op 27-2-2017 om 15:19
Waardeer dit antwoord (1) Misbruik melden -
Kan de camera wel binnen wifinetwerk bekijken, maar niet via 3G verbinding. Heb een domeinnaam bij supracam.net aangevraagd en de instelling op de iPhone4 op dynamisch staan. Gebruikersnaam, wachtwoord en domeinnaam ingevoerd, maar krijg steeds een 504 foutmelding. Gesteld op 7-11-2014 om 10:51
Reageer op deze vraag Misbruik melden-
Klik op deze LINK
Waardeer dit antwoord (13) Misbruik melden
Hier staat een aardige beschrijving wat te doen Geantwoord op 14-11-2014 om 14:34
-
-
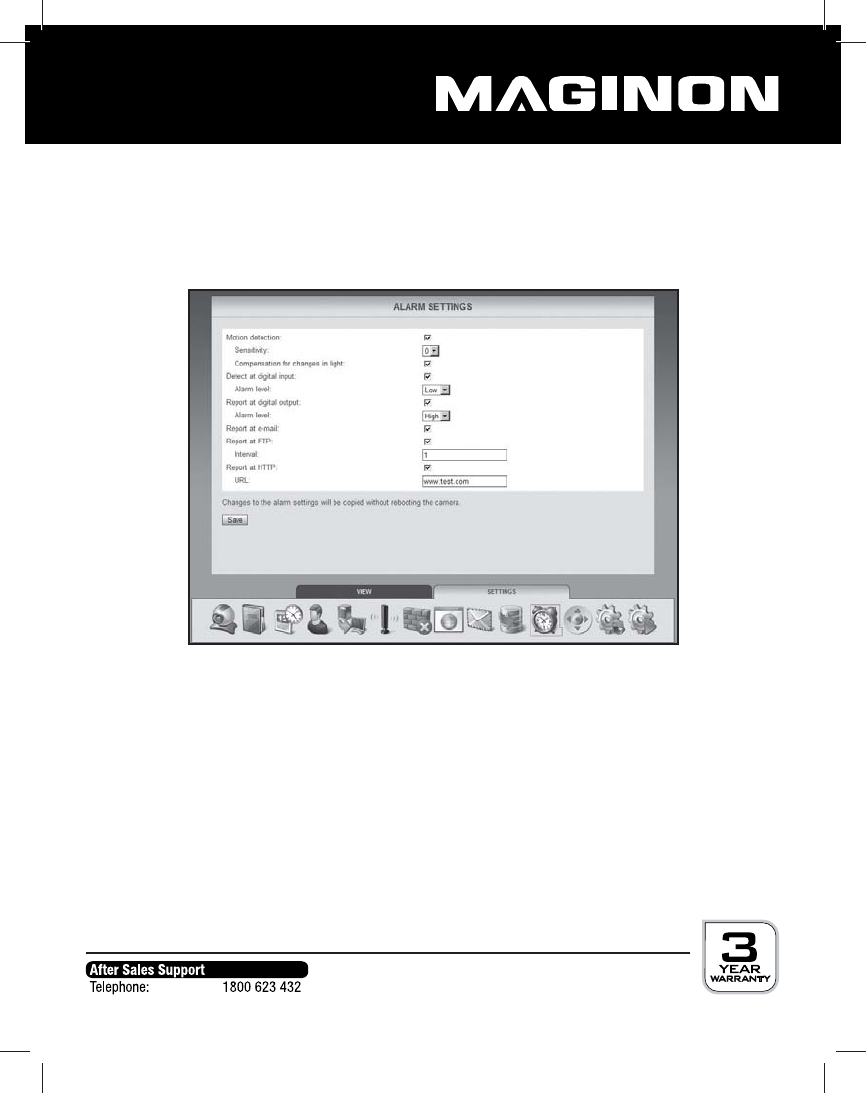
mijn Supra IPC 1A geinstalleerd, ging redelijk probleemloos (halve dag). Maar hoe ongevoelig ik de instellingen ook zet, hij blijft alarm emails sturen. Ik kan hett mailen wel uitzetten, maar wat heb ik dan aan de camera? Wie heeft tips? Gesteld op 31-7-2014 om 08:45
Reageer op deze vraag Misbruik melden-
ja ik heb hetzelfde . Ik kan op dit moment nog geen goede handleiding vinden die mij uitlegt hoe ik de gevoeligheidsperioden moet instellen. Ik dacht dat ik het goed had gedaan, maar als dat zo is , is het vreemd dat dat ding maar alarmen blijft uitsturen.
Waardeer dit antwoord Misbruik melden
Wie weet raad? Geantwoord op 16-8-2014 om 21:07
-
-
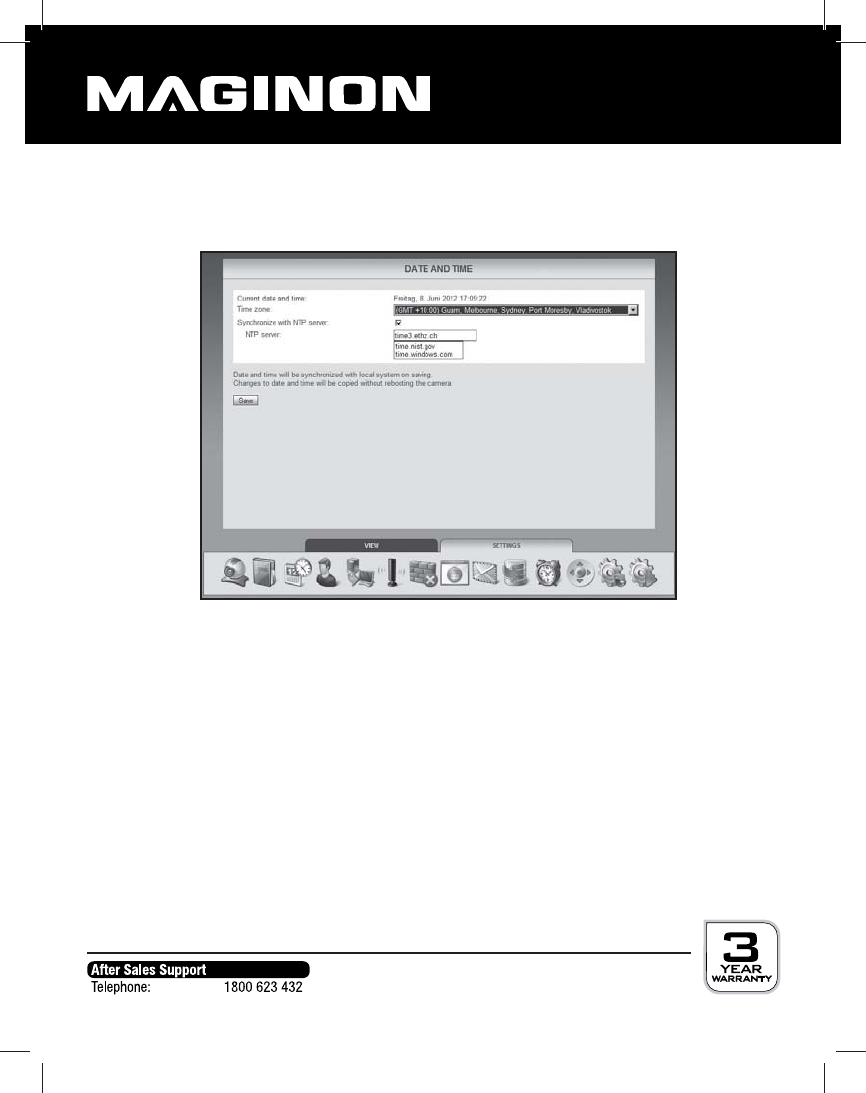
Kijk eens naar de datum? Bij mij staat deze standaard ergens op 2013 en op overdag ingesteld. Als jij dan je alarmplanning netjes hebt ingevuld, dan klopt de systeemdatum van de camera niet en heb je kans dat hij dus van alles blijft sturen. Snap je? Grt. Edwin Geantwoord op 17-10-2014 om 20:54
Waardeer dit antwoord Misbruik melden -
Hallo, ik wil graag een externe microfoon aansluiten is dit mogelijk?
Reageer op deze vraag Misbruik melden
Gesteld op 28-7-2014 om 18:16-
ja , dat kan. Ik heb een eenvoudige koolstofmicrofoon en die blijkt het goed te doen.
Waardeer dit antwoord (1) Misbruik melden
Als de camera draait hoor je dat wel heel erg op de microfoon. Geantwoord op 16-8-2014 om 21:08
-
-
Onze camera valt steeds uit en dan krijg ik de melding geen antwoord op de telefoon en via internet geeft hij aan: There's no connection available to this device.
Reageer op deze vraag Misbruik melden
Ik gebruik hem als babycamera, dus ik kan niet steeds naar binnenlopen om hem even van de stroom af te halen Hoe kan ik dit oplossen? Lijkt me niet de bedoeling dat de camera steeds weg valt. Kan je hem niet ergens resetten? Gesteld op 14-7-2014 om 16:40-
je kunt de camera resetten door, met bijvoorbeeld. een paperclip einde het reset gaatje onderop de camera in te drukken ( ca 5 sec. ) zie ook de handleiding, of het pijltje met de tekst Reset onderop de camera. Resetten betekend wel ( denk ik ) dat al je instellingen weg zijn en de camera dus opnieuw geïnstalleerd zal moeten worden. Geantwoord op 14-7-2014 om 16:55
Waardeer dit antwoord (2) Misbruik melden
-
-
ik heb een mac book pro.Bij de klantenservice werd gezegd dat ik een "snifferprogramma" moet op zoeken op internet anders weet ik niet het ip adres van de camera. dat is dus bij nader inzien een doolhof.
Reageer op deze vraag Misbruik melden
Wat heb je nou precies nodig om de zaak aan de praat te krijgen.Wie kan mij helpen? kan het ook zonder dat programma? In de gebruiks-aanzijzing staat daar niets over. Gesteld op 15-4-2014 om 15:55-
Als je wel de camera op je laptop kan zoeken, kan je in Supra IPCam config. de link "Adres"aanklikken en zie je het IP adres van je camera volgens mij. Geantwoord op 15-4-2014 om 21:40
Waardeer dit antwoord Misbruik melden
-
-
Kan ik de beelden ook rechtstreeks op een externe harde schijf of op een sd kaart zetten? Gesteld op 7-4-2014 om 15:32
Reageer op deze vraag Misbruik melden-
JA DAT KAN EEN BEEL GRABBER Geantwoord op 6-5-2014 om 12:41
Waardeer dit antwoord (1) Misbruik melden
-
-
Wij hebben de Ip camera aangeschaft.
Reageer op deze vraag Misbruik melden
Draadloos kunnen installeren.
Nu willen wij ook graag via onze telefoon/tablet meekijken.
Na uren puzzelen lukt dit nog steeds niet.
Wanneer ik aanmeld, staat er wel dat ik verbonden ben.
Wil ik het camerabeeld bekijken blijft er urenlang een zandloper in beeld staan, wat is hier fout?
Verder is het nog onduidelijk via welke site oid ik kan meekijken via een pc? En hoe via je mobiele internet?
Ik voel me stom! Gesteld op 5-3-2014 om 19:54-
Je bent niet de enigste met dit problem, kijk maar eens op de volgende link.
Waardeer dit antwoord (2) Misbruik melden
Het bericht # 142 helpt je misschien op weg.
Klik op deze LINK
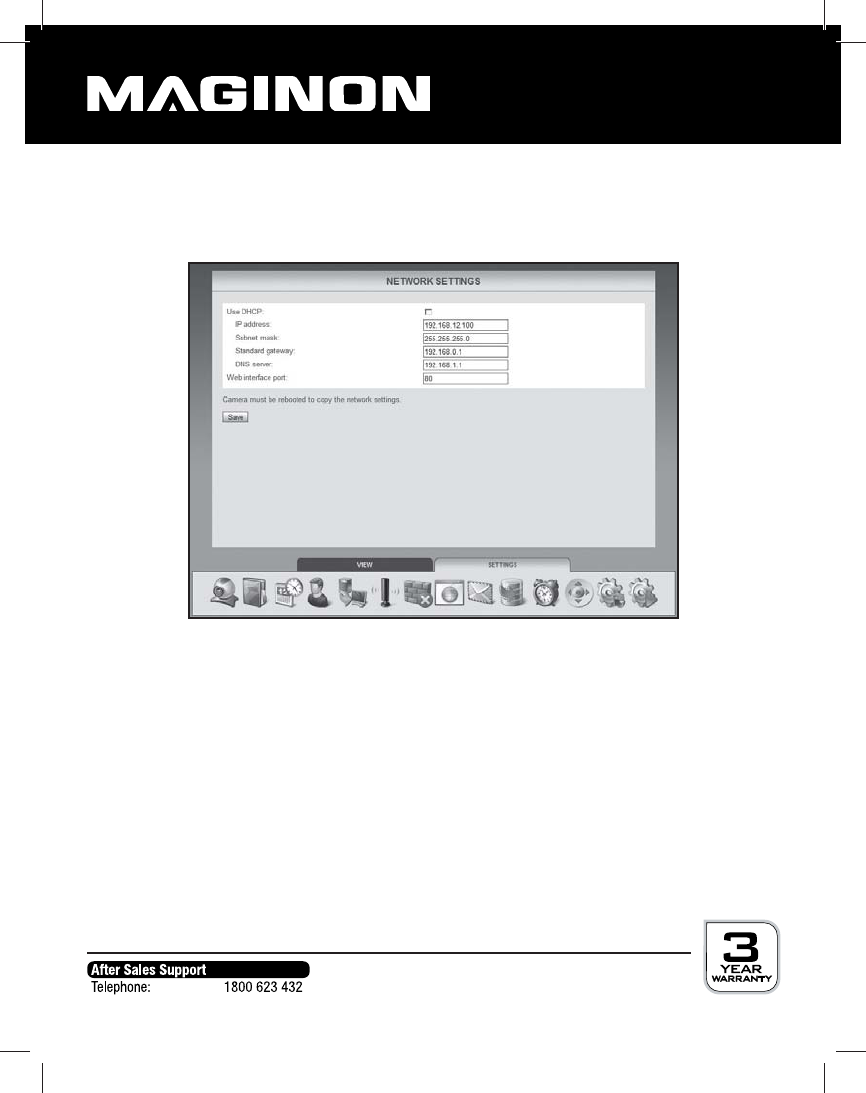
Volgens mij heeft het met port forwarding ( in je Router ) te maken, want ik kon de camera wel op mij laptop zien binnen mijn eigen wifi verbinding maar via het internet niet.
Zelf ben ik gestopt met proberen, dus mocht je wel slagen laat het dan even weten.
Geantwoord op 5-3-2014 om 22:35
-
-
Heb nog even voor je nagekeken wat die Wim Koopman hierover allemaal geschreven heeft.
Waardeer dit antwoord Misbruik melden
zie , Klik op deze LINK
Zitten toch een paar aardige leerzame opmerkingen bij. Geantwoord op 5-3-2014 om 22:42 -
klik even op de foto van Wim Koopman, dan kom je een overzicht van zijn berichten tegen Geantwoord op 5-3-2014 om 22:44
Waardeer dit antwoord (5) Misbruik melden -
Heb je mijn berichtje van 19-2-2014 gelezen.?
Waardeer dit antwoord (1) Misbruik melden
Ik had toen wel beeld op mijn telefoon ( via eigen wifi , dat wel maar nog niet via internet )
zie mijn bericht van 20-2-2014 Geantwoord op 5-3-2014 om 22:49 -
ik denk dat je via de website van de leverancier kan kijken. Je moet je aanmelden op die site. Kijk bij instellingen : "ddns instellingen" Geantwoord op 16-8-2014 om 21:12
Waardeer dit antwoord Misbruik melden -
Ik wil de camera gebruiken om mijn voordeur in de gaten te houden.Hij komt dus op de vensterbank te staan. Is deze camera hiervoor geschikt want ik zie hier vaak dat er problemen zijn met wifi-verbinding. Gesteld op 28-2-2014 om 09:12
Reageer op deze vraag Misbruik melden-
WIFI is het probleem niet, bij mij zo lang ik thuis ben binnen het bereik van mijn eigen wifi.
Waardeer dit antwoord Misbruik melden
Een open wifi verbinding heb ik nog niet geprobeerd en kan daar dus niets over zeggen.
Mijn problem is nog steeds dat ik via Internet, dus daar waar geen wifi is, de camera niet kan bereiken. Heeft met port forwarding te maken maar daar ben ik nog niet uit.
Succes
Geantwoord op 28-2-2014 om 09:50
-
-
Thuis binnen eigen wifi bereik heb ik beeld op laptop en telefoon.
Waardeer dit antwoord (2) Misbruik melden
Via een open wifi verbinding echter niet als ik in een andere stad of vliegveld ben.
Via internet ook geen beeld op de telefoon.
Kan iemand mij hiermee helpen ? Geantwoord op 10-4-2014 om 21:37 -
Ik krijg het maar niet voor elkaar de camera op mijn Samsung 4 te zien.
Reageer op deze vraag Misbruik melden
Wel op mijn laptop maar niet op mijn mobiel.
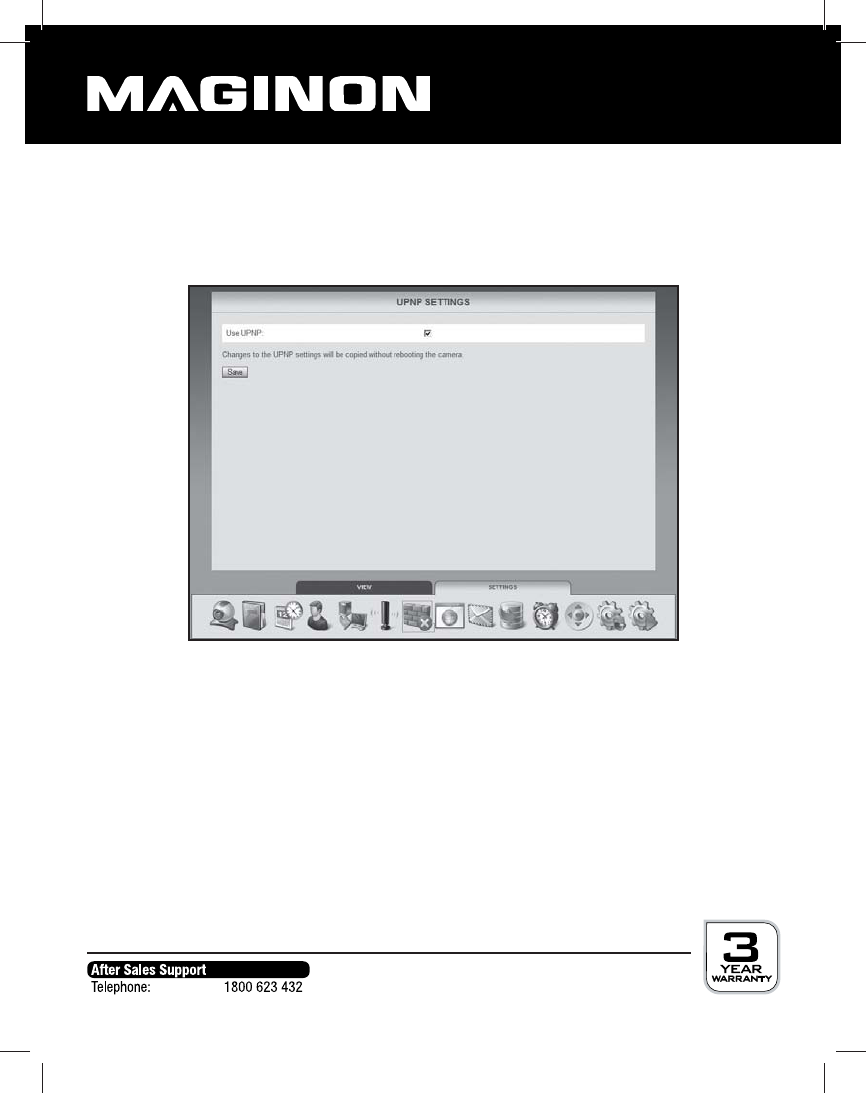
Ik heb UPNP en DDNS aangevinkt.
Na installatie de netwerk kabel verwijderd.
Als ik echter op mijn mobile de App aanklik wordt de camera niet gevonden.
Ik heb de camera een naam gegeven - een gebruikers naam - een wachtwoord - de verbindingmodus Dynamisch - en een bij supracam.net domainnaam.
Heb het vermoeden dat e.e.a. met IP-adressen te maken heeft, maar wat ?
Of toch iets anders.
Hulp is zeer welkom. Gesteld op 15-2-2014 om 23:37-
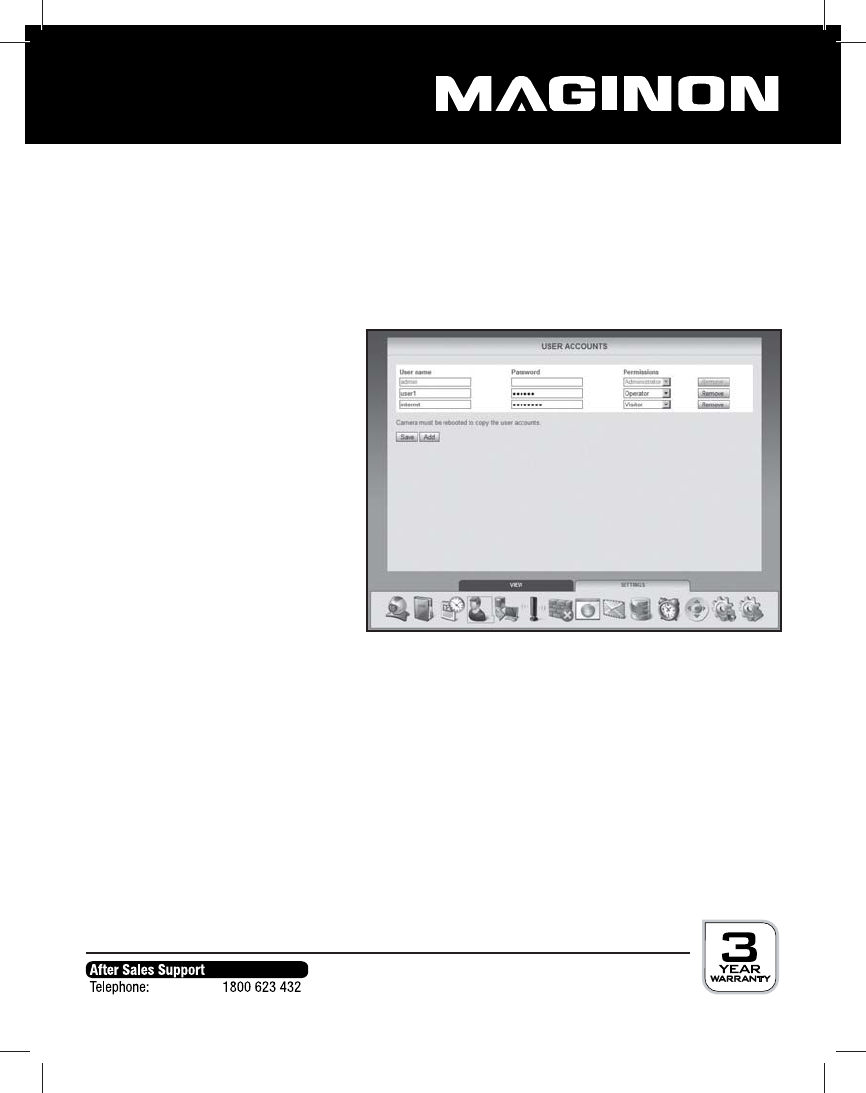
Heb uiteindelijk zelf de oplossing gevonden:
Waardeer dit antwoord (5) Misbruik melden
Na inloggen met admin ( zonder wachtwoord )
Bij accountinstellingen kreeg in beeld , wel op mijn laptop maar niet op mijn mobiel zoals hierboven al gemeld, en daaronder de twee tabs.
Links "Beeld" en rechts "Instellingen"
Klik op instellingen.
Klik op account instellingen
Bij gebruiker staat in het licht grijs admin en administrator.
MIJN oplossing was:
Toevoegen aanklikken en je zelf verzonnen gebrukersnaam invullen.
Je zelf verzonnen wachtwoord invullen.
Administrator invullen.
Opslaan.
Hierna kreeg ik beeld op mijn mobiel.
Nu nog een beetje spelen met e-mail - alarm e.d. Geantwoord op 19-2-2014 om 21:54
-
-
Was vandaag in een andere stad en wilde de camera "zien ".
Waardeer dit antwoord Misbruik melden
Helaas dat lukte niet.
Thuis gekomen en WIFI op telefoon uitgezet.
Via Internet camera opgevraagd.
Helaas bleek deze verbinding niet te werken.
Wie o wie kan mij helpen ??
Geantwoord op 20-2-2014 om 15:29 -
Je dient in te geven dat je de camera ook buiten jouw eigen interne netwerk om wilt zien. Dan krijg je daar een apart ip adres voor toegewezen. Anders dus dan binnen je eigen netwerkomgeving. Geantwoord op 17-10-2014 om 20:57
Waardeer dit antwoord Misbruik melden -
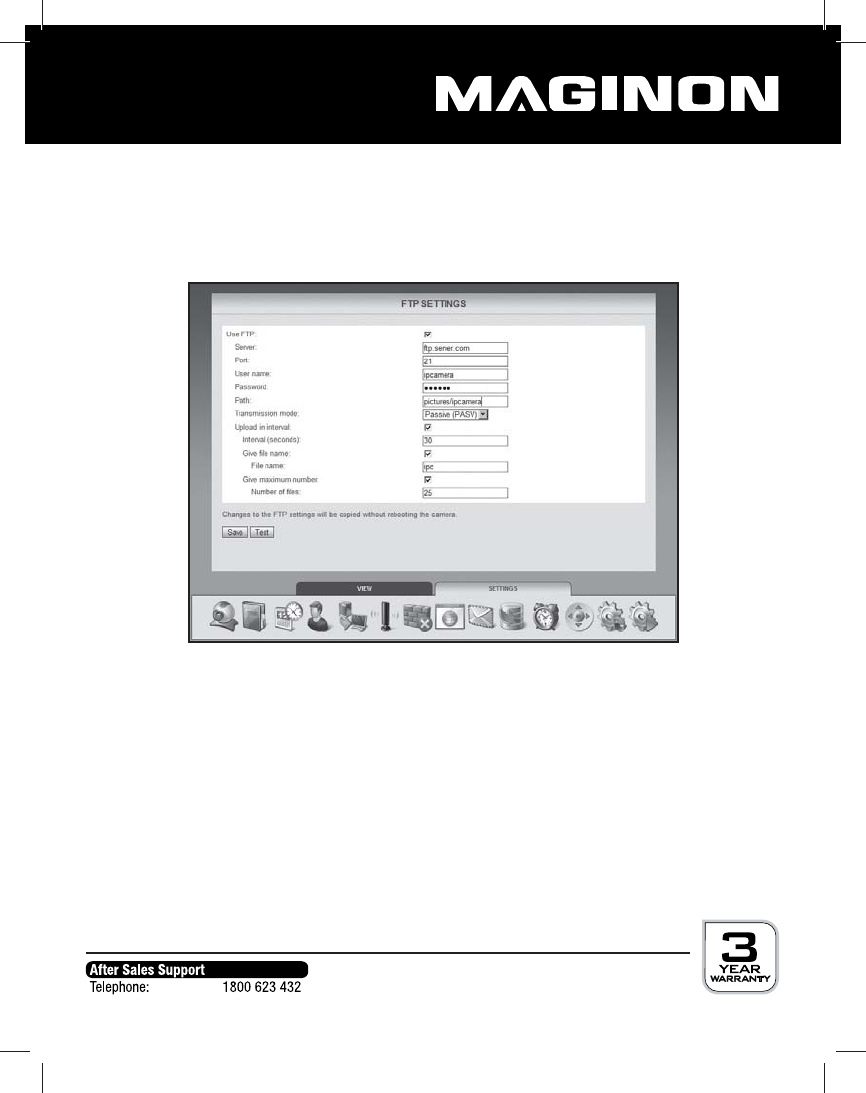
SMTP gebruiken welke server bedoelen ze dan?
Reageer op deze vraag Misbruik melden
Gesteld op 1-2-2014 om 03:58-
smtp staat voor uitgaande e-mail, zie je e-mail. bij outlook klik op bestand - account instellingen - klik op je eigen e-mail adres - klik op wijzigen en zie de instellingen.
Waardeer dit antwoord (1) Misbruik melden
Hieraan niets wijzigen !!! alleen ter info. Geantwoord op 15-2-2014 om 23:27
-
-
Die van jouw email provider. Geantwoord op 17-10-2014 om 20:57
Waardeer dit antwoord Misbruik melden -
Nu kreeg de IP-camera nog nu een week ineens een ander ip adres. De laatste 2 cijfers waren gewijzigd, daar kwam ik achter omdat ik via de mobiel de site niet meer op kon. In de pc zag ik bij de camera gegevens ineens dat ander ip adres staan. Die opgevraagd in de mobiel en het werkt weer.
Reageer op deze vraag Misbruik melden
Hoe kan dat van zelf wijzigen??? Gesteld op 30-1-2014 om 14:51-
Gebruik je een MAC OS X ?
Waardeer dit antwoord Misbruik melden
Kijk dan onderaan pagina 20 van de handleiding. Geantwoord op 16-2-2014 om 00:10
-
-
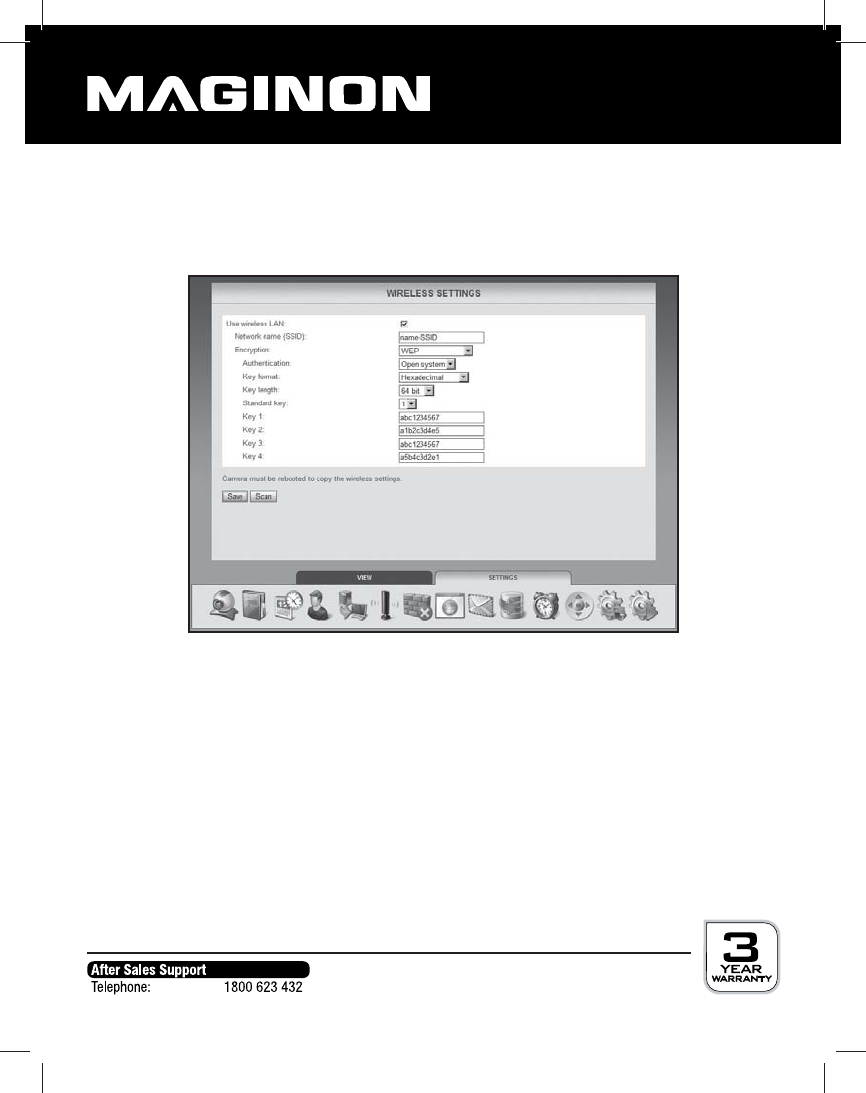
snap niiet hij verbind niet met wifi
Reageer op deze vraag Misbruik melden
hoe moet je dat doen of oplossen?????? Gesteld op 27-1-2014 om 18:48-
Wel je netwerkkabel verwijderd , na installatie v.d. software ? Geantwoord op 15-2-2014 om 23:48
Waardeer dit antwoord Misbruik melden
-
-
Ook ik heb de magninon camera bij de aldi vandaan gehaald, afgelopen zomer zag ik bij iemand dat het een prachtige camera is en makkelijk te bedienen is met de iphone. echter wil het bij mij nog niet echt lukken.
Reageer op deze vraag Misbruik melden
Heb de app gedownload maar zoals bij volgens mij iedereen geeft hij als status aan 'geen antwoord', is hier inmiddels al iemand die de oplossing gevonden heeft?! De camera is bedoelt voor de babykamer dus zou erg fijn zijn als hij voor 8feb zou werken!! Gesteld op 23-1-2014 om 23:37-
Waarschijnlijk kan je de camera wel op je laptop - tablet zien ?
Waardeer dit antwoord Misbruik melden
Zo ja dan heb je het zelfde probleem als ik, nl wel via laptop maar niet op mobiel.
Heb je al een oplossing ?
Is dan voor mij ook interessant. Geantwoord op 15-2-2014 om 23:52
-
-
welke app heb ik voor de iphone 4 nodig (heb wel besturing ios 7). De geadviseerde app Maginon IP Vieuvia de app store is alleen geschikt voor de iphone 5. Gesteld op 23-1-2014 om 16:33
Reageer op deze vraag Misbruik melden-
rectificatie: werkt wel op de iphone 4, is inmiddels gelukt Geantwoord op 15-2-2014 om 11:16
Waardeer dit antwoord (1) Misbruik melden
-
-
bleek achteraf wel op de iphone 4 te werken! Geantwoord op 15-2-2014 om 11:18
Waardeer dit antwoord Misbruik melden -
Je kunt ook gewoon het ip adres intikken om hem waar dan ook via een browser te bekijken. Dit werkt goed, mits je alle instellingen goed hebt staan. Geantwoord op 17-10-2014 om 20:59
Waardeer dit antwoord Misbruik melden -
Vraag:
Reageer op deze vraag Misbruik melden
Gisteren Maginon ipc camera van Alde gehaald
Heb hem aan router aangesloten en vervolgens de cd op laptop windows 8 geinstaleerd.
Verder moet je dan via de geinstaleerde app op camera zoeken de camera vinden ,maar dat doet hij niet,hij stopt meteen met zoeken, Gesteld op 23-1-2014 om 12:18-
Heb je wel de internet stekker aangesloten aan de camera? Geantwoord op 23-1-2014 om 15:30
Waardeer dit antwoord Misbruik melden
-
-
Als je de software geinstalleerd hebt en je wilt de camera op je mobiel zien, dan moet de netwerkkabel toch uit de camera ???? Geantwoord op 16-2-2014 om 00:15
Waardeer dit antwoord Misbruik melden -
Status geen antwoord, ip adres is correct, port zou correct moeten zijn = 80.
Reageer op deze vraag Misbruik melden
Wat doe ik verkeerd?
Ik had een iphone4 waar de app wel werkte en nu op de iphone 5s geen beeld.
Er brand ook geen groen lampje op de camera. Gesteld op 22-1-2014 om 17:35-
Hier precies hetzelfde probleem. :-(
Waardeer dit antwoord Misbruik melden
Iemand een oplossing? Geantwoord op 22-1-2014 om 21:41
-
-
Welke app gebruikte je voor de iphone 4, want die moet ik dus juist wel hebben. IK heb de ip camera gisteren gekocht, via de appstore een app gedownload alleen doet deze niet, je moet namelijk een iphone 5 hebben (kwam ik later achter) . Ik heb nog een iphone 4 wel met ios versie 7. Geantwoord op 23-1-2014 om 16:12
Waardeer dit antwoord (1) Misbruik melden -
Geen groen lampje zou betekenen: geen stroom.
Waardeer dit antwoord (1) Misbruik melden
Reden wellicht:
Stekker op dim stopcontact zonder ingeschakeld te zijn.
Stop door geslagen van betreffende stopcontact.
Stroomdraad verkeerd of niet verbonden.
Iets binnen camera stuk. ( 3 jaar garantie !!) Geantwoord op 15-2-2014 om 23:57 -
Groen lampje brand niet als de netwerkkabel niet aangesloten is.
Waardeer dit antwoord Misbruik melden
Dat hoort toch ook zo, of toch niet ? Geantwoord op 18-2-2014 om 11:25 -
Vandaag de IP camera Maginon aangekocht bij de Aldi.
Reageer op deze vraag Misbruik melden
Was in de veronderstelling dat de camera geschikt was voor outdoor.
Nu is mijn vraag of de camera toch evt buiten kan worden geplaatst onder mijn carpoort.
Er komt geen vocht op de camera maar wat gebeurt er met e.v.t condens.
In de gebruiksaanwijzing staat toepassing van 0 tot 35 graden.
Heeft iemand ervaring die de Ip cam ook buiten heeft geplaatst. Gesteld op 22-1-2014 om 13:29-
Ik heb hem op mijn overdekt balkon hangen. geen probleem tot nu toe Geantwoord op 14-5-2014 om 22:58
Waardeer dit antwoord Misbruik melden
-
-
Tot welke afstand heeft deze Camera bereik ? Gesteld op 22-1-2014 om 09:22
Reageer op deze vraag Misbruik melden-
Bedoel je draadloos bereik ?
Waardeer dit antwoord (1) Misbruik melden
Dat is denk ik toch afhankelijk van je Router c.q. WIFI.
Het nachtzichtbereik is volgens de gebruiksaanwijzing 15 mtr. Geantwoord op 16-2-2014 om 00:47
-
-
Applicatie heeft geen verbinding meer met de camera. Laptop geeft wel beeld weer Gesteld op 16-1-2014 om 15:50
Reageer op deze vraag Misbruik melden-
Heb het zelfde probleem, zie mijn vraag van 15-2-2014
Waardeer dit antwoord (1) Misbruik melden
Heb je al een oplossing ?
Laat even weten a.u.b. Geantwoord op 16-2-2014 om 00:57
-
-
Misschien is mijn oplossing in mijn bericht op 19-2-2014 ook voor jou van toepassing ?
Waardeer dit antwoord (1) Misbruik melden
Geantwoord op 20-2-2014 om 00:03 -
kan niet meer in de camera inloggen.. dus ookniet meer in zijn instellingen, resset op camera helpt ook niet.. hoe los ik dat op?? Gesteld op 22-12-2013 om 22:55
Reageer op deze vraag Misbruik melden-
Wordt waarschijnlijk volledig opnieuw installeren. Geantwoord op 16-2-2014 om 00:59
Waardeer dit antwoord (4) Misbruik melden
-
-
Na een tijd goed gewerkt te hebben doet mijn maginon ipc-1 camera nu niets meer ik heb het oude programma van mijn pc verwijderd en toen met behulp van de bijgeleverde cd de camera weer geïnstalleerd maar ik kom niet verder dan zoeken starten in het. Configuratie programma, wie weet wat er aan de hand is
Reageer op deze vraag Misbruik melden
Gesteld op 19-11-2013 om 20:40-
had ik ook maar had toen even geen WiFi verbinding Geantwoord op 23-12-2013 om 13:50
Waardeer dit antwoord (6) Misbruik melden
-
-
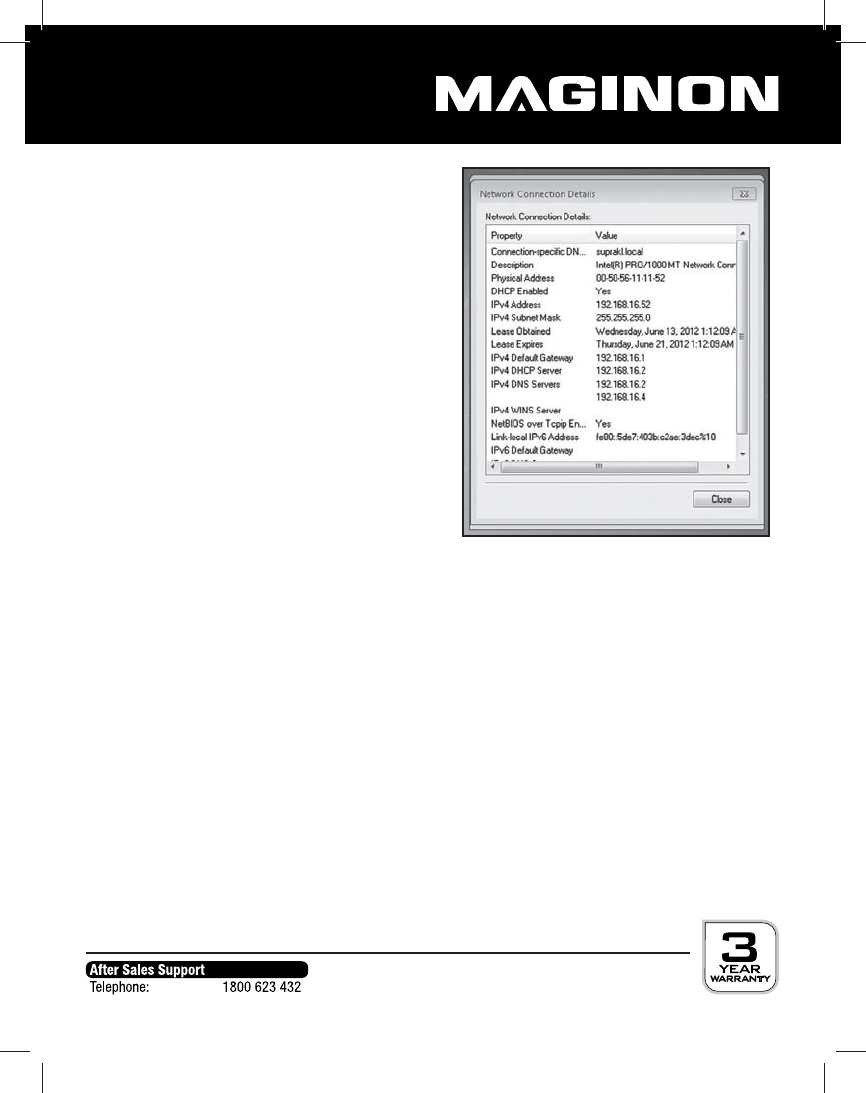
wat is mijn ip adres ?
Reageer op deze vraag Misbruik melden
Gesteld op 26-10-2013 om 13:46-
www.mijnip.nl en je ziet jou ip adres Geantwoord op 17-12-2013 om 16:36
Waardeer dit antwoord (1) Misbruik melden
-
-
Ikkan mijn camera alleen via wifi gebruiken met 3g krijg ik geen verding Gesteld op 6-9-2013 om 22:32
Reageer op deze vraag Misbruik melden-
ip adres zie www.mijnip.nl in jou router poort 80 naar de camera door verwijzen
Waardeer dit antwoord (4) Misbruik melden
port forwarding Geantwoord op 17-12-2013 om 16:38
-
-
Ik heb de software van mijn Maginon IPC-1 geïnstalleerd maar kan mijn camera niet vinden, graag zou ik willen weten hoe ik dit kan oplossen. Gesteld op 15-3-2013 om 10:03
Reageer op deze vraag Misbruik melden-
op myn fujutsu laptop
Waardeer dit antwoord (9) Misbruik melden
Geantwoord op 15-5-2013 om 23:37
-
-
Eerst met een utp kabel aansluiten op je router zodat de camera een IP adres krijgt. Geantwoord op 16-5-2013 om 00:08
Waardeer dit antwoord (12) Misbruik melden -
ik kan niet meer inloggen met mijn wachtwoord admin heb de camera gerist en nu werkt het wacht woord admin niet meer hoe kan ik nu veder kommen en opnieuw instaleren Geantwoord op 21-2-2016 om 22:08
Waardeer dit antwoord Misbruik melden -
Op de site van Maginon vind je nieuwe firmware en webinterface software.
Waardeer dit antwoord Misbruik melden
Dit pakketje downlaoden, zit ook een uitleg bij (in het Duits maar toch...) precies de instructies volgen en zonder het ingeven van een wachtwoord zal de firmware geladen worden en is het admin wachtwoord probleem opgelost !!
Geantwoord op 27-7-2016 om 17:21
