55
54
MessagesMessages
(Menu 4.1.5)
(Menu 4.1.6)
Settings
This menu lets you set up default SMS information.
▶ Message types: Sets the default message type (Text, Voice,
Fax, Paging, X.400, E-mail, ERMES). The network can convert
the messages into the selected format.
▶ Valid period: Sets the length of time for which your text
messages will be saved at the SMS center while attempts are
made to deliver them to the recipient. Possible values are 30
minutes, 1 hour, 6 hours, 12 hours, 1 day, 1 week and the
maximum authorised by your network operator.
▶ Paper: You can insert one of 3 wallpaper images to a text
message.
▶ Delivery reports: Activates or deactivates the report
function. When this function is activated, the network informs you
whether or not your message has been delivered.
▶ Reply with same service: Allows the recipient of your SMS
message to send you a reply via your message centre, if the
service is provided by the network.
▶ Message centre number: Saves or changes the number of
your SMS centre when sending text messages. You must obtain
this number from your service provider.
▶ Bearer setting: Selects GPRS or GSM. Contact your network
operator or service provider for information related to setting a
selected bearer, pricing and connection speed.
Delete
You can delete all messages in the message memory or delete
only read messages.
Multimedia messages
(MMS)
Menu 4.2
A multimedia message can contain text, images, and/or sound
clips.
This feature can be used only if it is supported by your network
operator or service provider. Only devices that offer compatible
multimedia message or e-mail features can receive and send
multimedia messages.
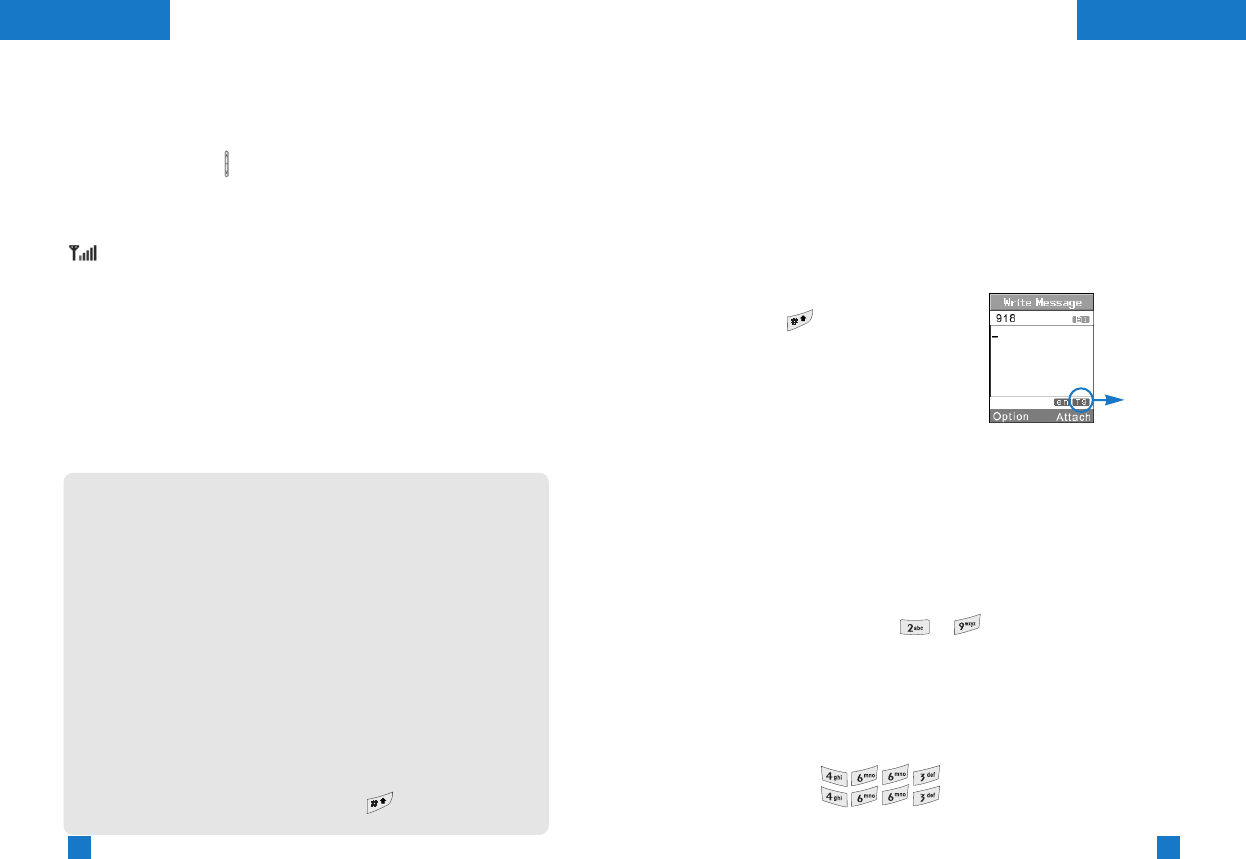
Write
1. Key in the text message. Using the right soft key, you can input
symbols, numbers and emoticons, or use T9 input mode. After
the text message input, press the left soft key [Done].
2. Add an image and/or sound. You can move to the next section
using the up/down navigation.
3. You can add a slide by moving the cursor on , then pressing
the OK key or the left soft key [Select]. You can also add a slide
using the right soft key [Menu].
(Menu 4.2.1)
Note Up to 9 slides are affordable.
Note When you are writing a multimedia message or
checking a received MMS, with a resolution over
“320×240”, the image will not be displayed and
a “?” will be displayed instead.
To view the image first press the left soft key [Menu],
select Save items to save the received image.
You can now view the image in My pictures [Menu
2.4.2].
Press the Menu key in standby mode, and select
Downloads → Pictures → My pictures.