


-
Zoek een standaard voor lg tv 42pc1r wie kan mij helpen Gesteld op 21-3-2020 om 10:39
Reageer op deze vraag Misbruik melden -
als ik mijn tv aan zet heb ik wel geluid maar geen beeld het knipper wel een keer Gesteld op 30-8-2014 om 00:30
Reageer op deze vraag Misbruik melden-
Weet je al meer. Ik heb nml hetzelfde probleem..? Geantwoord op 1-12-2014 om 11:29
Waardeer dit antwoord (47) Misbruik melden
-
-
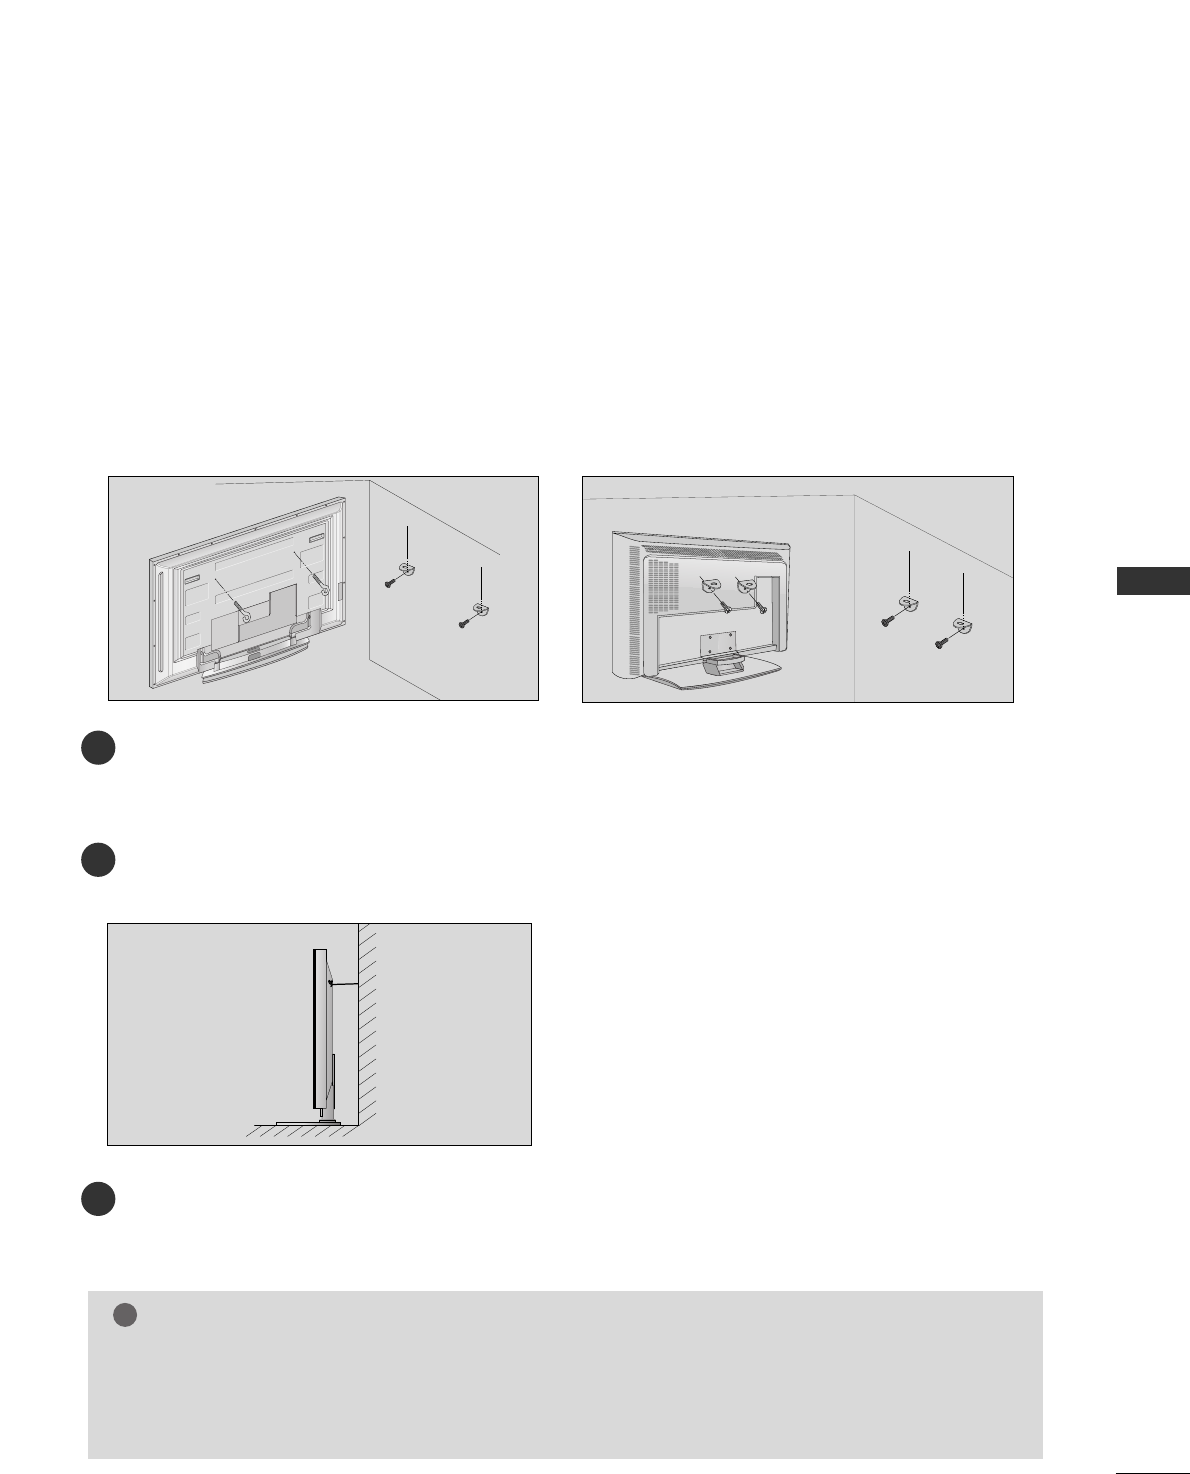
Heeft iemand nog een standaard voor een lg 42pc1r, onze televisie heeft aan de muur gehangen en ik wil hem nu neer zetten maar ik heb de standaard niet meer. Wie kan mij hieraan helpen?? Gesteld op 12-3-2014 om 08:20
Reageer op deze vraag Misbruik melden-
ik heb een standaard staan tel. 0616130975 Geantwoord op 9-8-2014 om 09:19
Waardeer dit antwoord (5) Misbruik melden
-
-
Ik heb LG Flatron M208WA ,start heel even op en daarna valt uit.Wat kan de oorzaak zijn Gesteld op 4-4-2013 om 22:10
Reageer op deze vraag Misbruik melden-
ik heb een lg flatron w2234S krijg steeds melding osd locked en als ik hem afsluit krijg ik hem niet meer aan koppel hem af en sluit de volgende dag na 3 uur weer aan da doet het scherm het weer wat moet ik doen Geantwoord op 16-9-2013 om 16:33
Waardeer dit antwoord (15) Misbruik melden
-
-
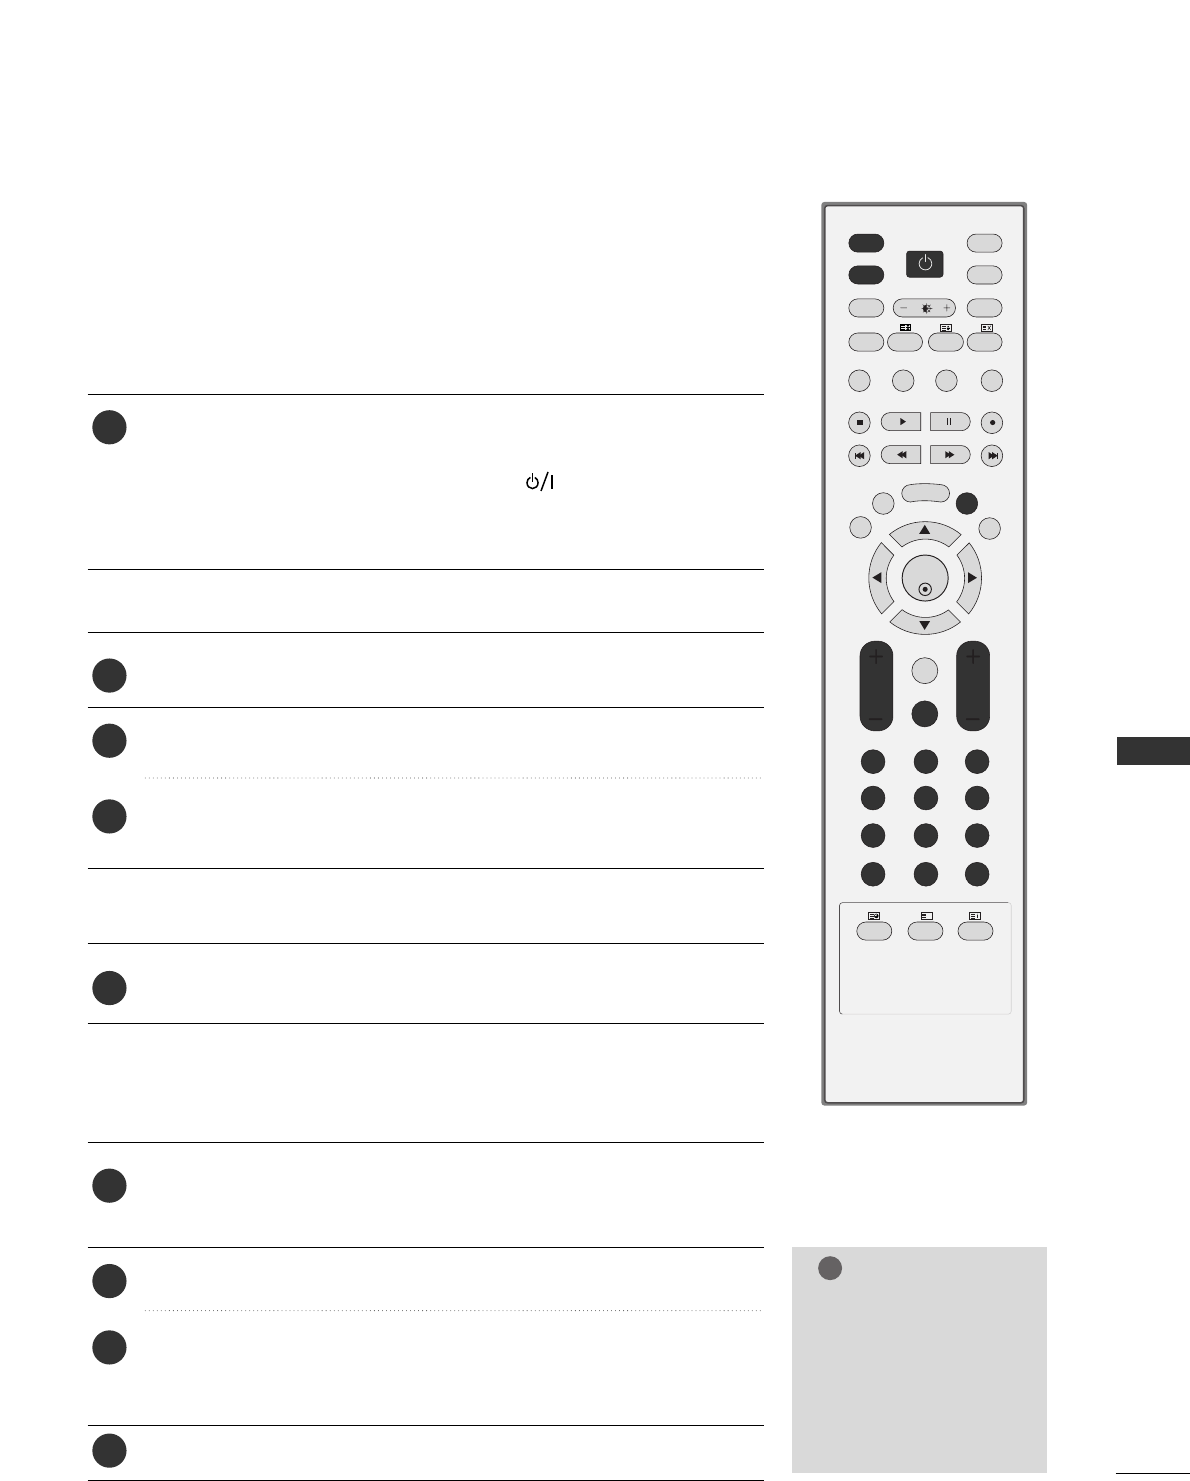
mijn afstandbediening werkt niet meer en de knoppen ook niet Gesteld op 2-2-2013 om 17:09
Reageer op deze vraag Misbruik melden-
Mijn asrandbediening werk niet meer
Waardeer dit antwoord (14) Misbruik melden
Geantwoord op 14-2-2014 om 09:22
-
-
De films die ik heb opgenomen hebben geen geluid.De tv heeft een ingebouwde opname mogelijkheid. Het gekke is dat het geluid van de tv het wel doet.
Reageer op deze vraag Misbruik melden
Het geluid van de opgenomen programma's is van de één op de andere dag verdwenen. Maar de volgende dag werkte het weer en daarna niet meer. Help!!! Gesteld op 13-7-2011 om 20:14-
Hallo ik heb net hetzelfde probleem. weet u ondertussen wat het probleem was en hebt u het probleem zelf kunnen oplossen.
Waardeer dit antwoord (5) Misbruik melden
Groetjes Anita Meertens
Mailadres meertensjan@zonnet.nl Geantwoord op 7-8-2011 om 20:38
-
-
mijn tv doet het wel maar heb geen beeld heeft iemand enig idee wat er aan de hand is (denk zelf aan beeldbuis maar weet niet zeker) Gesteld op 12-6-2011 om 18:29
Reageer op deze vraag Misbruik melden-
Beeldbuis ?? ik weet niet hoe oude tv dan wel is.
Waardeer dit antwoord (5) Misbruik melden
Buizen TV`s worden al een poos niet meer gemaakt.
Zal wel een Plasma TV zijn ( 42PC1RR ) meestal is het Ysus board defect. Geantwoord op 17-6-2011 om 17:37
-
-
ben je er al achter wat dat is? volgen mij kan het ook in de voeding zitten die stuurt het licht in de buis. gr Sipke. Geantwoord op 8-1-2013 om 19:13
Waardeer dit antwoord (2) Misbruik melden -
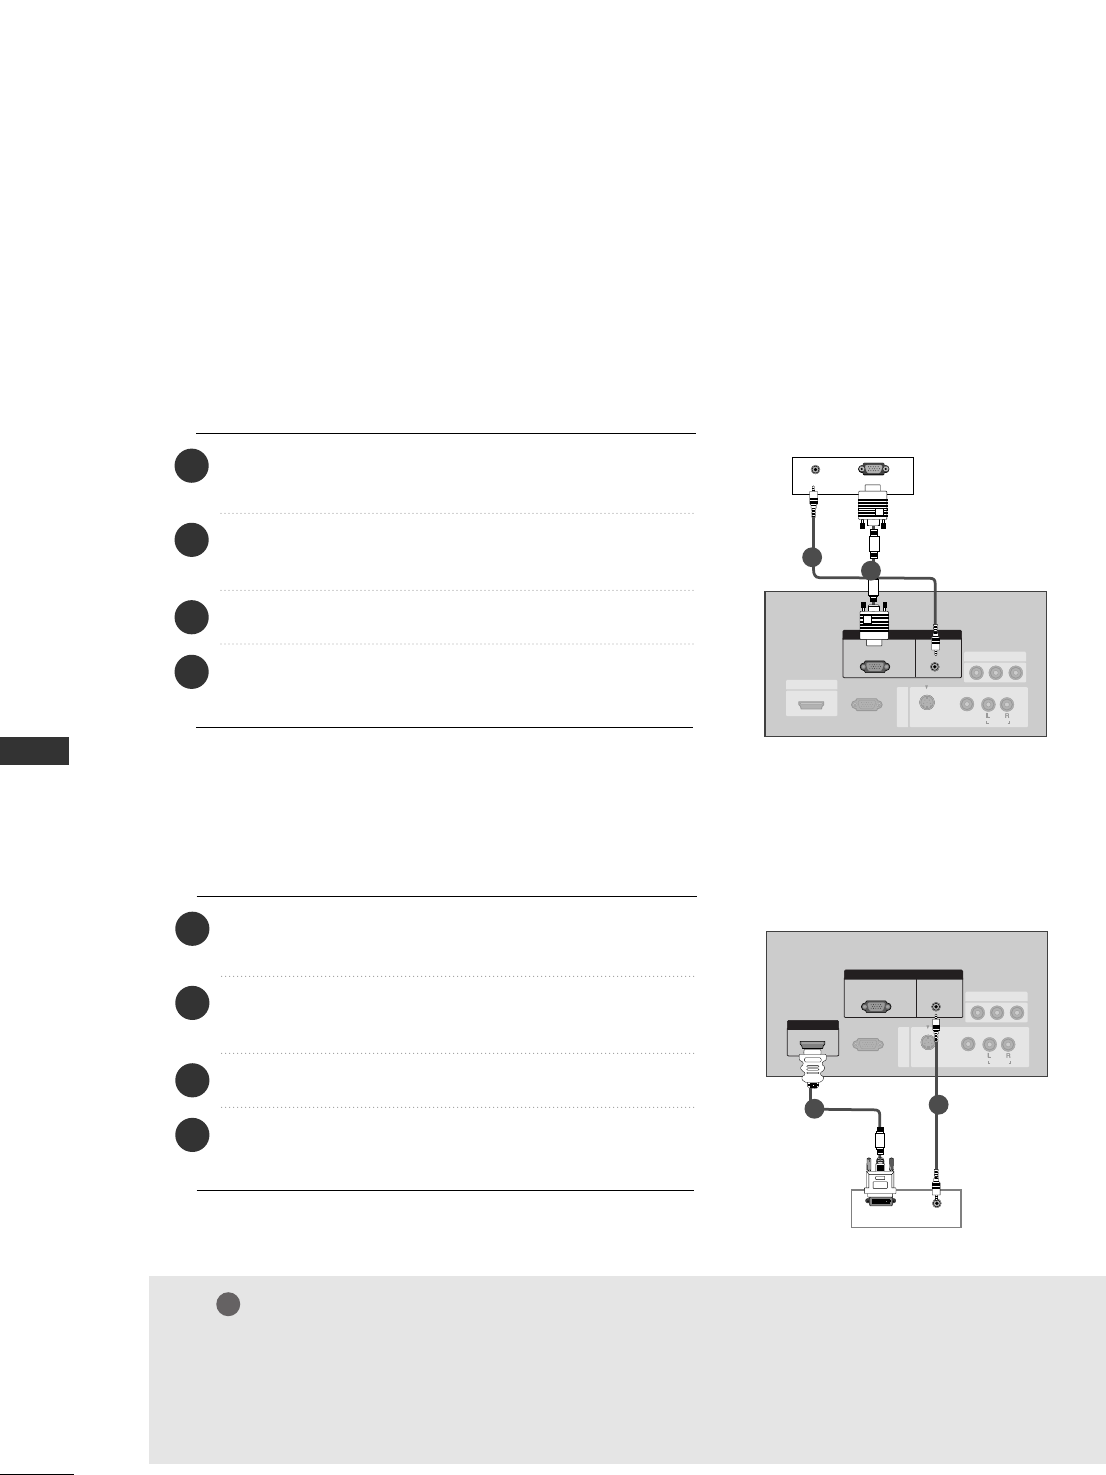
Ik heb een ps3 aangesloten via HDMI kabel(T4), het beeld is geweldig maar ik krijg geen geluid. Wat doe ik fout? Gesteld op 4-11-2010 om 17:14
Reageer op deze vraag Misbruik melden-
bij ons is het juist het beeld
Waardeer dit antwoord Misbruik melden
Geantwoord op 7-12-2011 om 20:28
-
-
Beeld: ik heb in het beeld rode stippeltjes in de zwarte delen van het beeld? ook zie ik dit lins bovenin en aan de rechts bovinin? lijkt of dit steeds meer wordt? is er wat aan te doen of gaat deze plasma tv kapot? with wash helpt niet? Gesteld op 8-10-2010 om 10:51
Reageer op deze vraag Misbruik melden-
Y sus module niet goed meer / veroudering scherm Geantwoord op 9-10-2010 om 14:21
Waardeer dit antwoord (2) Misbruik melden
-
-
Wat voor ype scherm zit er in de LG 42PC1R
Reageer op deze vraag Misbruik melden
bruss75@xs4all.nl Gesteld op 15-7-2010 om 09:41-
X3 scherm Geantwoord op 9-10-2010 om 14:21
Waardeer dit antwoord Misbruik melden
-
