(Can be used when the optional ADF is installed. See page 7-2.)
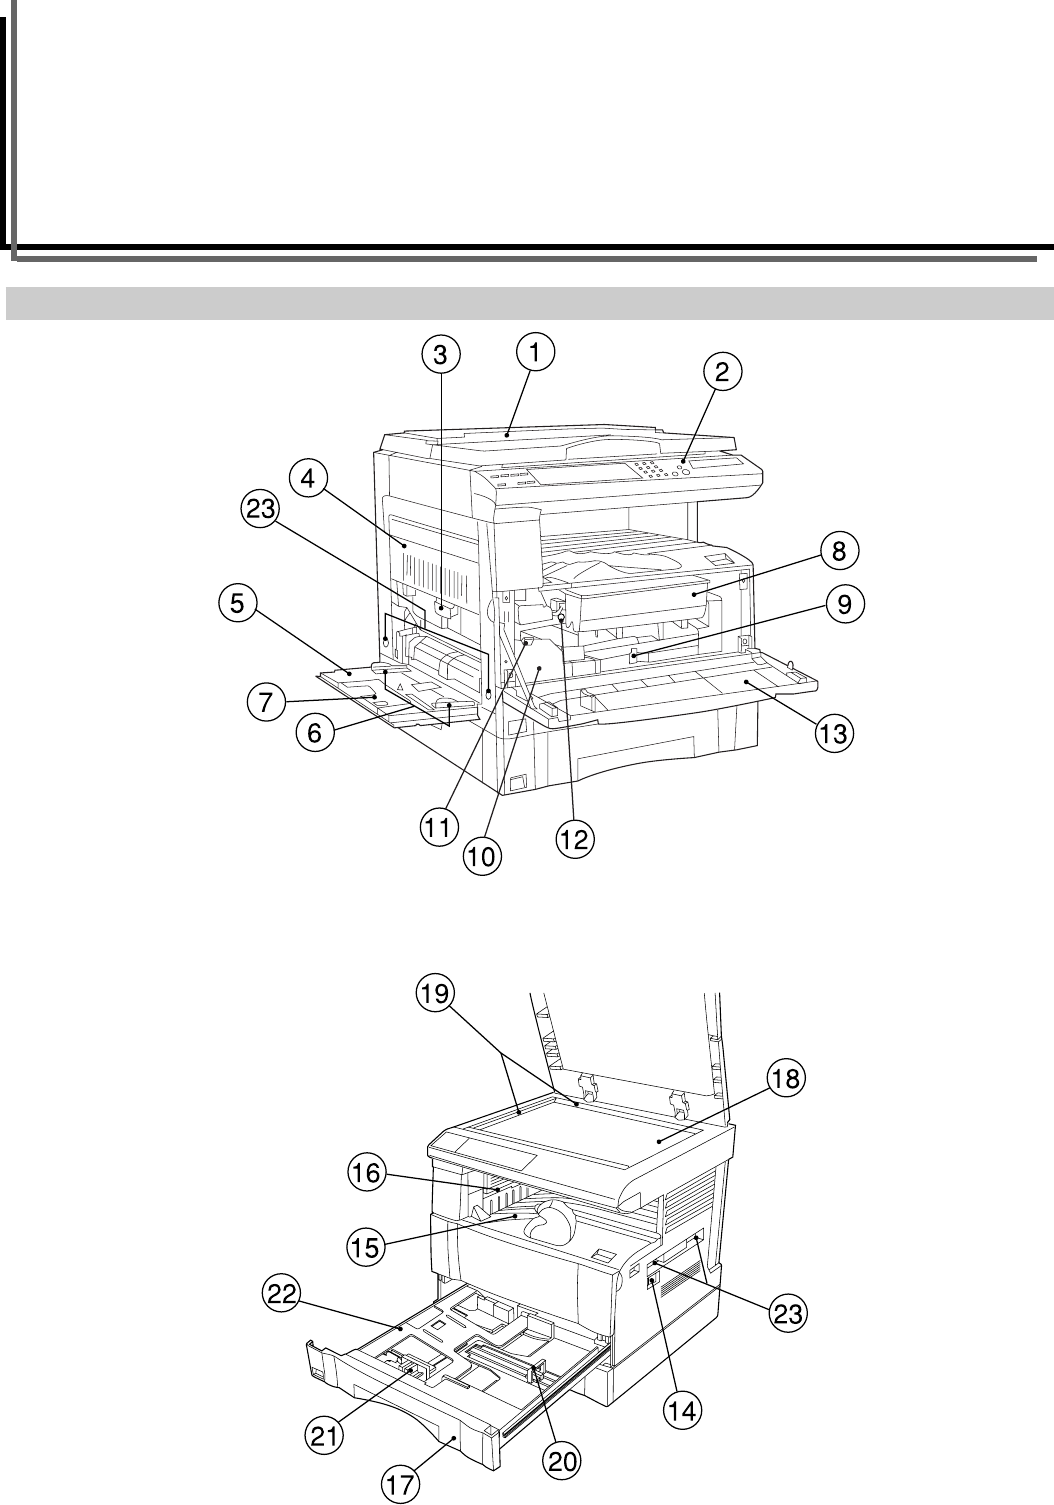
CHAPTER 2 NAMES OF PARTS
2-4
· Layout key/2 in 1 indicator/4 in 1 indicator
(Press to copy multiple images on the same face of the copy. See
page 5-2.)
‚ Margin key (Indicator)
(Press to create margins. See page 5-1.)
ΠBorder Erase key (Indicator)
(Press to erase blemishes from the edges of copies. See page
5-2.)
„ Transparency key (Indicator)
(Press to copy onto thick paper or transparencies. See page 3-3.)
´ Book Erase key (Indicator)
(Press to erase blemishes from the edges and middle of copies
made from books. See page 5-2.)
‰ Sort key (Indicator)
(Press to sort copies into separate sets. See page 5-6.)
ˇ Printer key
(Press to use the optional printer function.)
Á Data On-line indicator
(Lights while using the optional printer function or receiving data
from a computer.)
● Initial mode (at the end of warm-up or when the Reset key is
pressed)
In the initial mode, paper of the same size as the original is selected
automatically (“auto paper selection mode”), the number of copies is
set to “1” and copy exposure mode is set to “Text & Photo mode”.
* The auto paper selection mode is not available on some models.
● Auto clear function
About 90 seconds after copying stops, the copier will automatically
return to the same settings as those after warm up. (However, the
exposure mode will not change.) Copying can be performed at the
same settings (copy mode, number of copies and exposure mode) if
copying is started before the auto clear function operates.
● Automatic drawer switching function
If two drawers contain paper of the same size and the paper in one
drawer runs out during copying, this function switches paper feed
from the empty drawer to the full drawer without interrupting copying.
* The automatic drawer switching function can be disabled. (See
“Automatic drawer switching” ON PAGE 6-5.)
3-1
1
2
3
4
CHAPTER 3 PREPARATIONS BEFORE USE
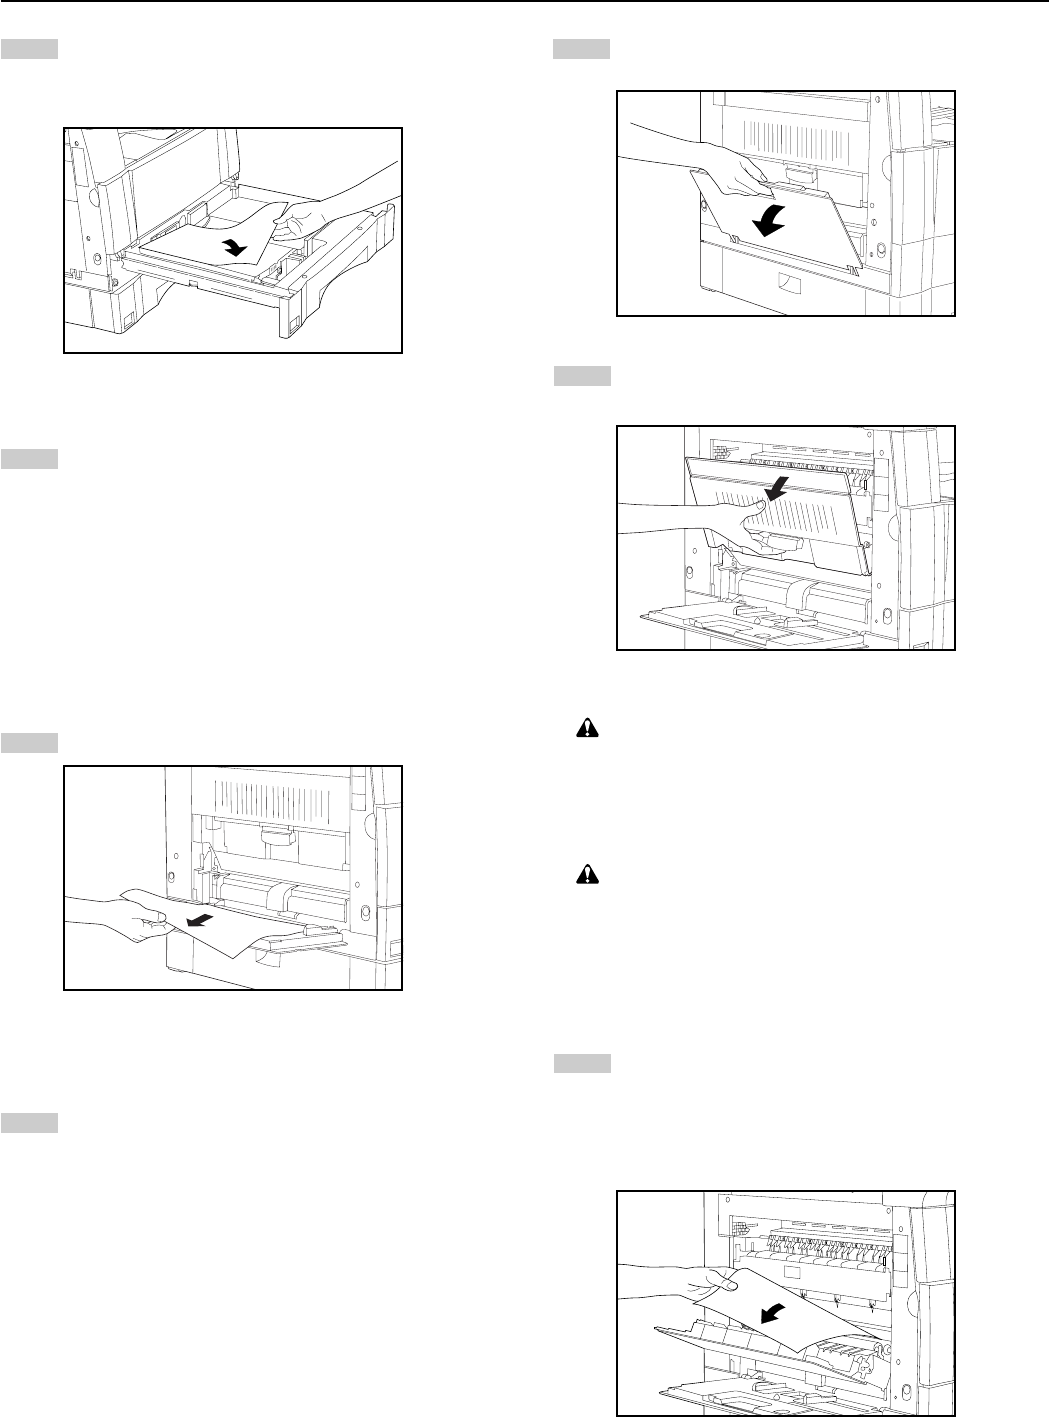
1. How to load paper
Paper can be loaded into the drawer and the multi-bypass.
(1) Precautions for loading paper
After unpacking the paper, fan it several times and then load into the
tray.
(2) Loading paper into the drawer
Up to 250 sheets of standard paper (75 or 80 g/m
2
/standard paper as
specified by our company) or colored paper can be loaded into the
drawer.
(Inch specifications)
* The drawer can be set to hold paper of any desired size from 11" x
17" to 5 1/2" x 8 1/2".
(Metric specifications)
* The drawer can be set to hold paper of any desired size from A3 to
A5 (vertical).
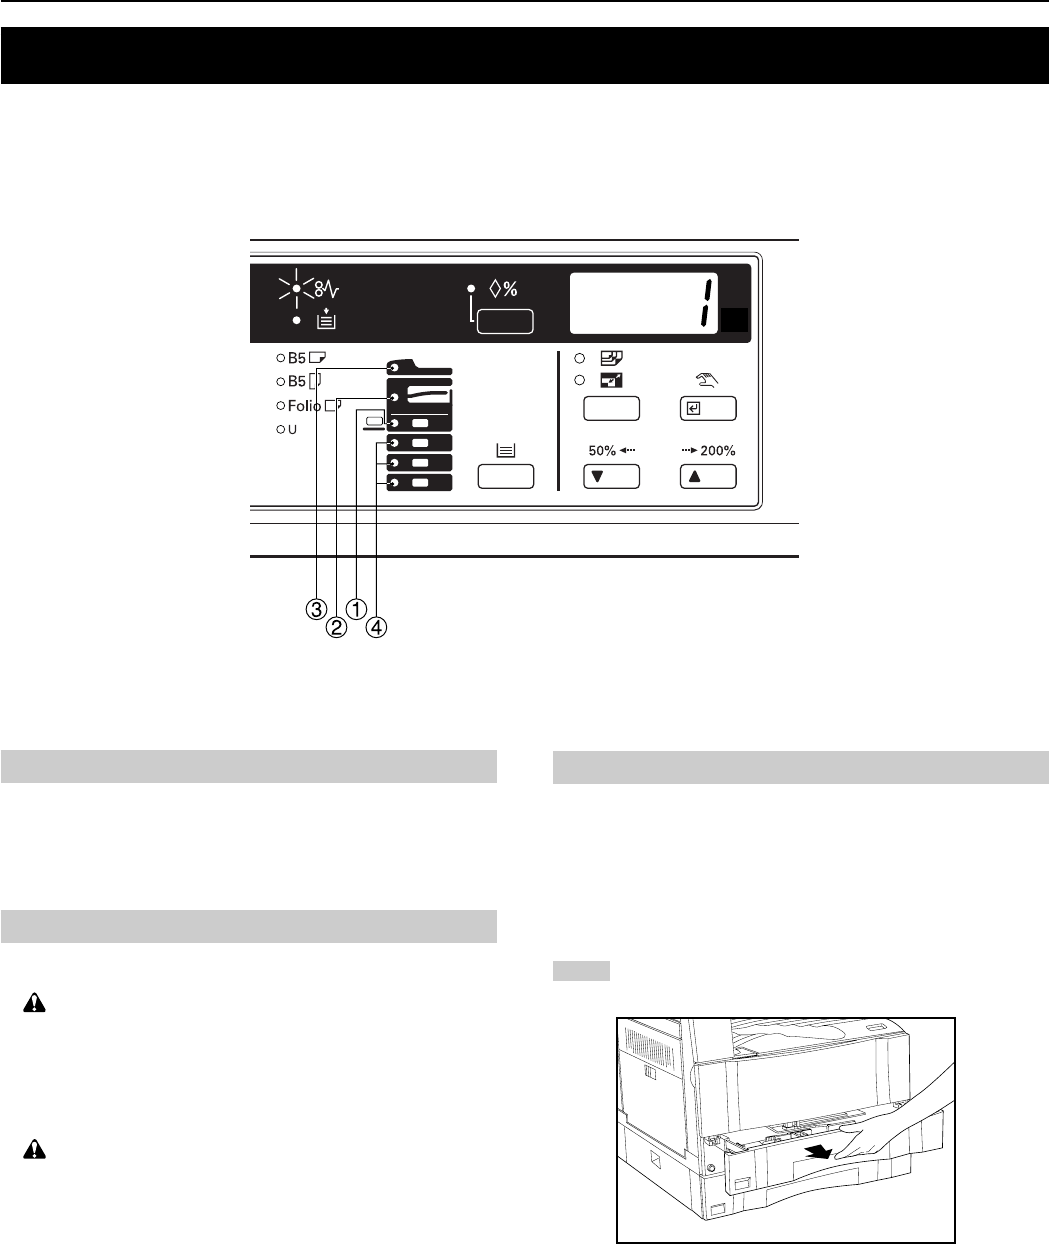
Pull the drawer out toward you as far as it will go.
* If optional drawers are installed, do not pull more than one
drawer out at a time.
Press the drawer bottom plate down and fix it there.
Hold the width adjustment lever and move it to align the
width guide with the required paper width.
Paper sizes are marked inside the drawer.
Hold both sides of the length adjustment plate and move it to
align with the required paper length.
CHAPTER 3 PREPARATIONS BEFORE USE
3-2
5
6
7
1
Set the paper flush against the left-hand wall of the drawer.
IMPORTANT
* There is a sticker (“1” in the illustration) indicating paper capacity
attached to the inside of the drawer. Do not load paper above this
limit.
* When loading paper into the drawer, make sure that the copy side is
facing upward. (The copy side is the side facing upward when the
package is opened.)
* Check that the length adjustment plate and width guide make
secure contact with the paper. If there is a gap, adjust the position of
the length adjustment plate or width guide.
Set the supplied paper size sheet so that the size of the
paper loaded can be checked by looking at the front of the
drawer.
Gently push the drawer back in.
* Check that the paper is kept under the claws of the drawer.
If not, reload the paper.
* Before leaving the copier in disuse for a prolonged period
of time, remove the paper from the drawer(s) and seal it in
its original packaging to protect from moisture.
(3) Loading paper into the multi-bypass
Special paper as well as standard paper can be loaded into the multi-
bypass. When copying onto special paper, be sure to use the multi-
bypass.
* The number of sheets of standard paper, colored paper and
letterheads that can be loaded into the multi-bypass differ depend-
ing on the paper size.
11" x 17" and 8 1/2" x 14" (A3, B4 and Folio): 25 sheets
11" x 8 1/2" and 5 1/2" x 8 1/2" (A4 to A5 [vertical]): 50 sheets
* The types of special paper and the number of sheets that can be
loaded in the multi-bypass are:
• Transparencies: 1 sheet
• Standard paper (120g/m
2
, 160g/m
2
): 1 sheet
Open the multi-bypass.
CHAPTER 3 PREPARATIONS BEFORE USE
3-3
2
1
3
IMPORTANT
When copying onto thick paper or transparencies, press the Transpar-
ency key to light the indicator.
* When using transparencies or thick paper, select “Transparencies”
or “Thick paper” in the “Transparency mode” (see page 6-6) of the
default settings.
Adjust the insert guides to the size of the paper to be loaded.
* When loading A4 (vertical) or larger paper, pull out the
support guide.
Insert the paper along the guides as far as it will go.
IMPORTANT
When loading paper into the multi-bypass, make sure that the copy
side is facing downward. (The copy side is the side facing upward
when the package is opened.)
If the leading edge of the paper is curled, straighten it out before
loading the paper in the multi-bypass.
● Setting the paper size for the multi-bypass
The paper size for the multi-bypass can be fixed so that the multi-
bypass is automatically selected according to the original size, such
as when the auto paper selection mode is selected.
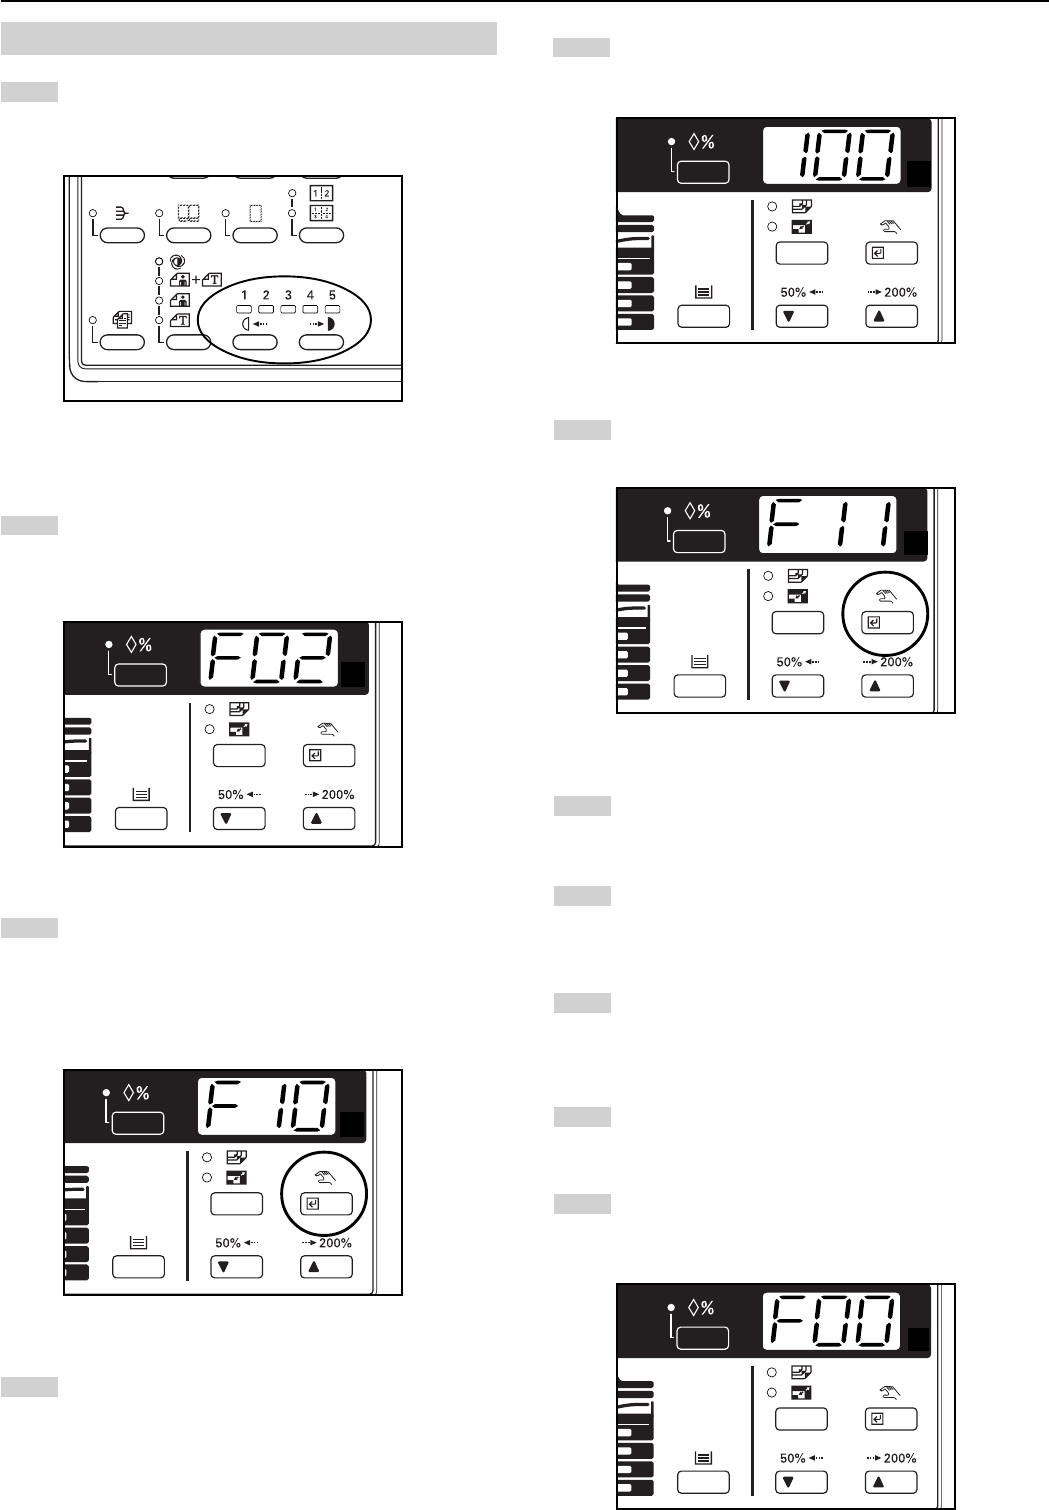
Press and hold the Paper Select key for 3 seconds. The
indicator for the size of the paper currently loaded in the
multi-bypass lights. “F12” appears on the copy quantity
display and, 2 seconds later, a number appears.
The number displayed indicates the paper size as follows:
1: A3
2: A4 (vertical)
3: A4
4: B4
5: B5 (vertical)
6: B5
7: Folio
8: U (no size setting)
xxx: Setting of non-standard size paper width for multi-
bypass
CHAPTER 3 PREPARATIONS BEFORE USE
3-4
2
3
3
1
2
Press the Zoom (+) or Zoom (-) key and change the number
to select the paper size.
Press the enter key. The paper size indicator for the selected
paper size will light. Normal copying is enabled.
● Setting envelopes
When using the optional printer function, envelopes can be set in the
multi-bypass.
NOTE
The types of envelopes that can be used are COM-10, Monarch, DL
and C5. Up to 6 envelopes can be loaded in the multi-bypass at a
time.
Open the multi-bypass.
Align the insert guides with the envelope size.
Open the envelope and set it with the print side face-down
and its flap opposite to the insertion slot and then insert it
along the insert guide as far as it will go.
* Incorrectly loading envelopes can result in printing in the
wrong orientation or on the wrong side.
CHAPTER 3 PREPARATIONS BEFORE USE
3
4
5
1
2
3-5
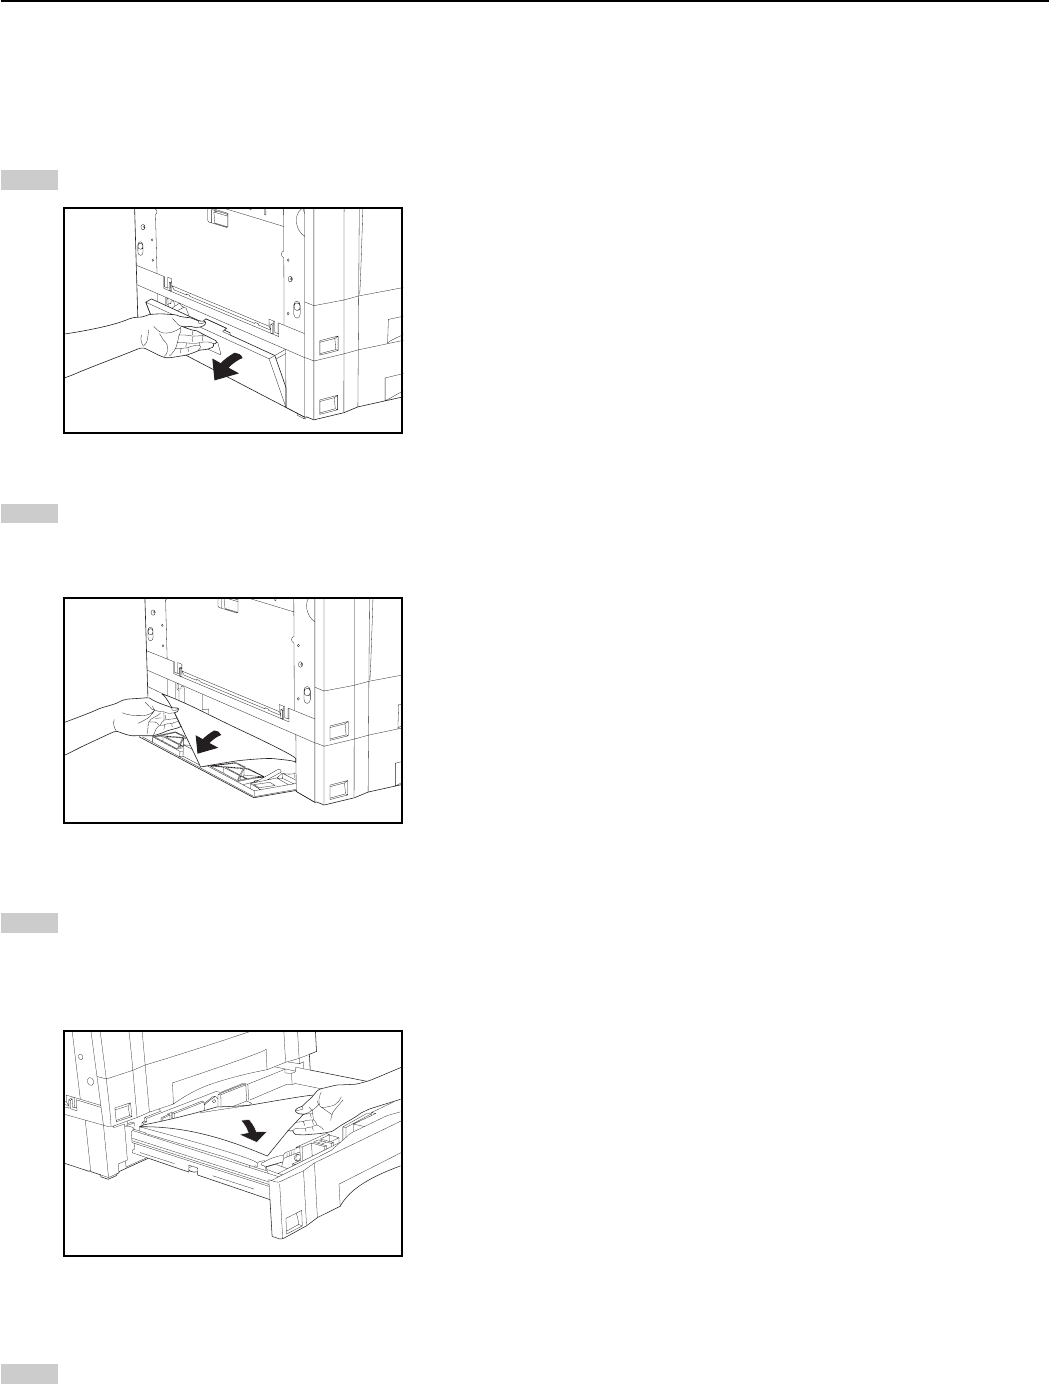
2. Replacing the toner cartridge and waste toner tank
When the Add Toner indicator lights, replenish toner. Although several
copies can be made after the indicator lights, it is recommended to
replace the toner cartridge immediately. When the Add Toner indicator
lights, the Toner Disposal indicator will also light. Replace the waste
toner tank after replacing the toner cartridge.
* Replenish toner only when the Add Toner indicator is lit.
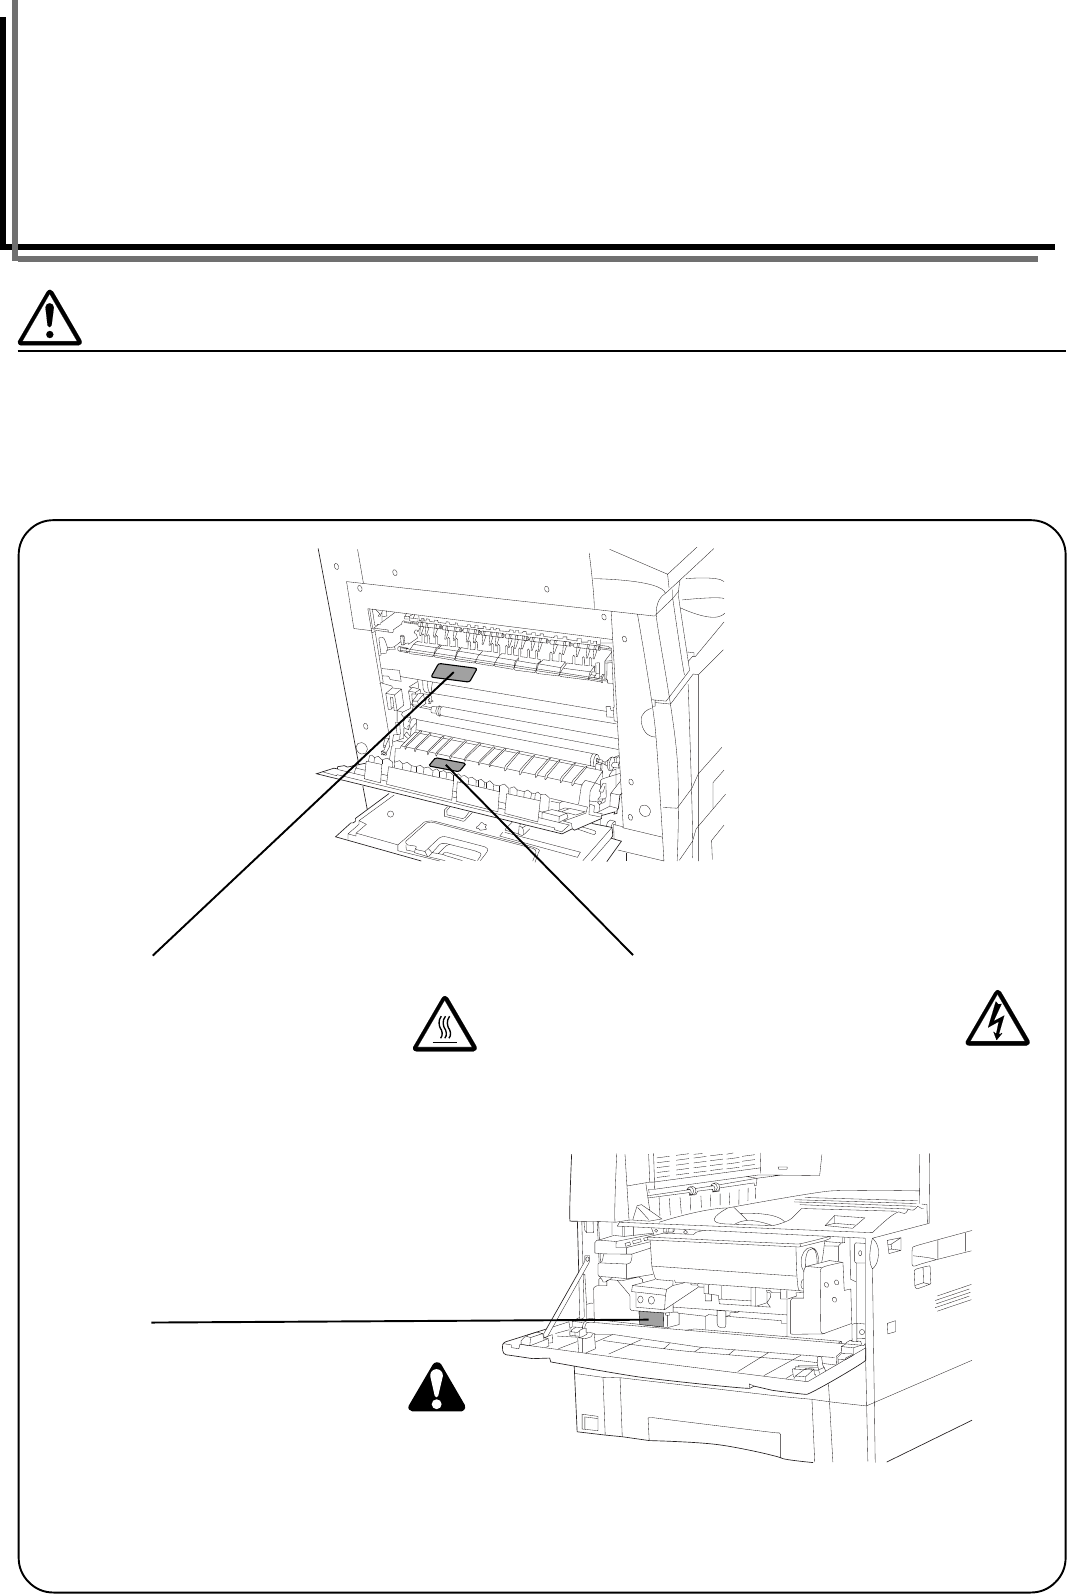
CAUTION
Do not incinerate toner and toner containers. Dangerous
sparks may cause burns.
Open the front cover.
Turn the toner cartridge release lever to the right as far as it
will go. The old cartridge will be unlocked.
Pull the old toner cartridge out toward you.
WARNING
High voltage is present in the charger section. Take
sufficient care when working in this area, as there is a
danger of electrical shock.
Tap the new toner cartridge on the top 5 or 6 times and
shake it from side to side 8 to 10 times.
Fit the new toner cartridge into the copier.
* Align the arrow on the top of the toner cartridge with the
cutout in the copier and then insert the cartridge into the
copier.
CHAPTER 3 PREPARATIONS BEFORE USE
3-6
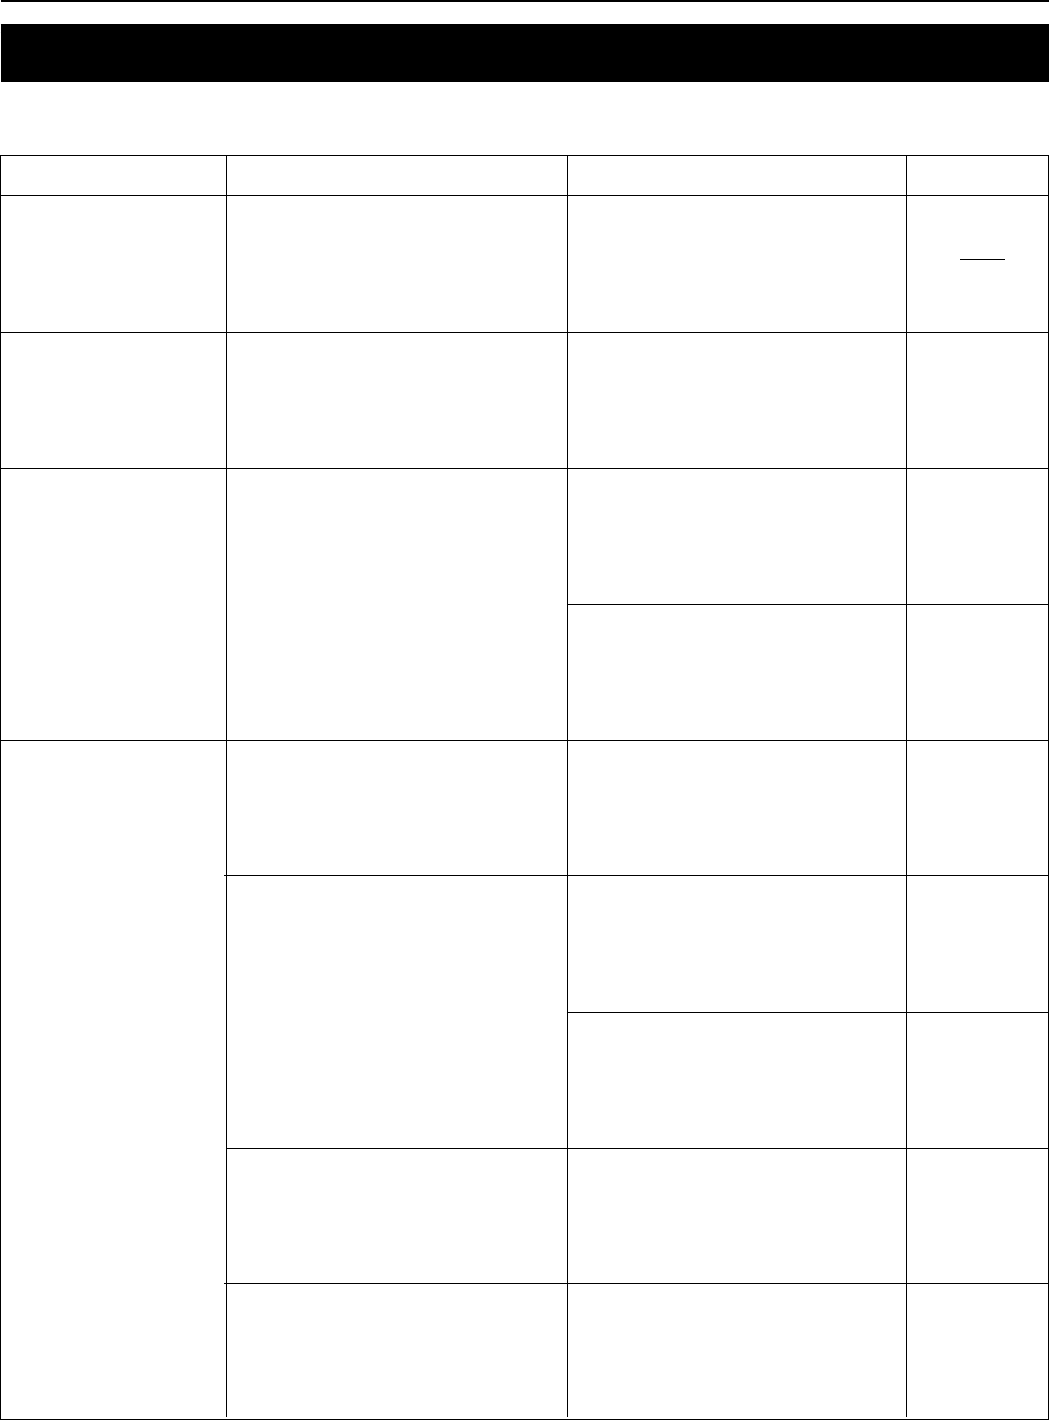
6
7
8
9
10
11
Turn the toner cartridge release lever to the left as far as it
will go.
The new toner cartridge is now be locked.
While holding the waste toner tank release lever 1 up,
remove the waste toner tank.
Close the opening of the waste toner tank with its seal.
CAUTION
Do not incinerate toner and toner containers. Dangerous
sparks may cause burns.
While holding the waste toner tank release lever up, fit the
new waste toner tank into the copier.
Gently pull the cleaning shaft as far as it will go and then
push it back in.
IMPORTANT
Do not pull the cleaning shaft with force or pull it out completely.
Close the front cover.
13
2
4-1
4
CHAPTER 4 BASIC OPERATIONS
1. Basic copying procedure
1. Warm-up
Turn the main switch ON (|). When warm-up ends, the Start indicator
lights.
* If you set an original and press the Start key before warm-up ends,
copying automatically starts at the end of warm-up.
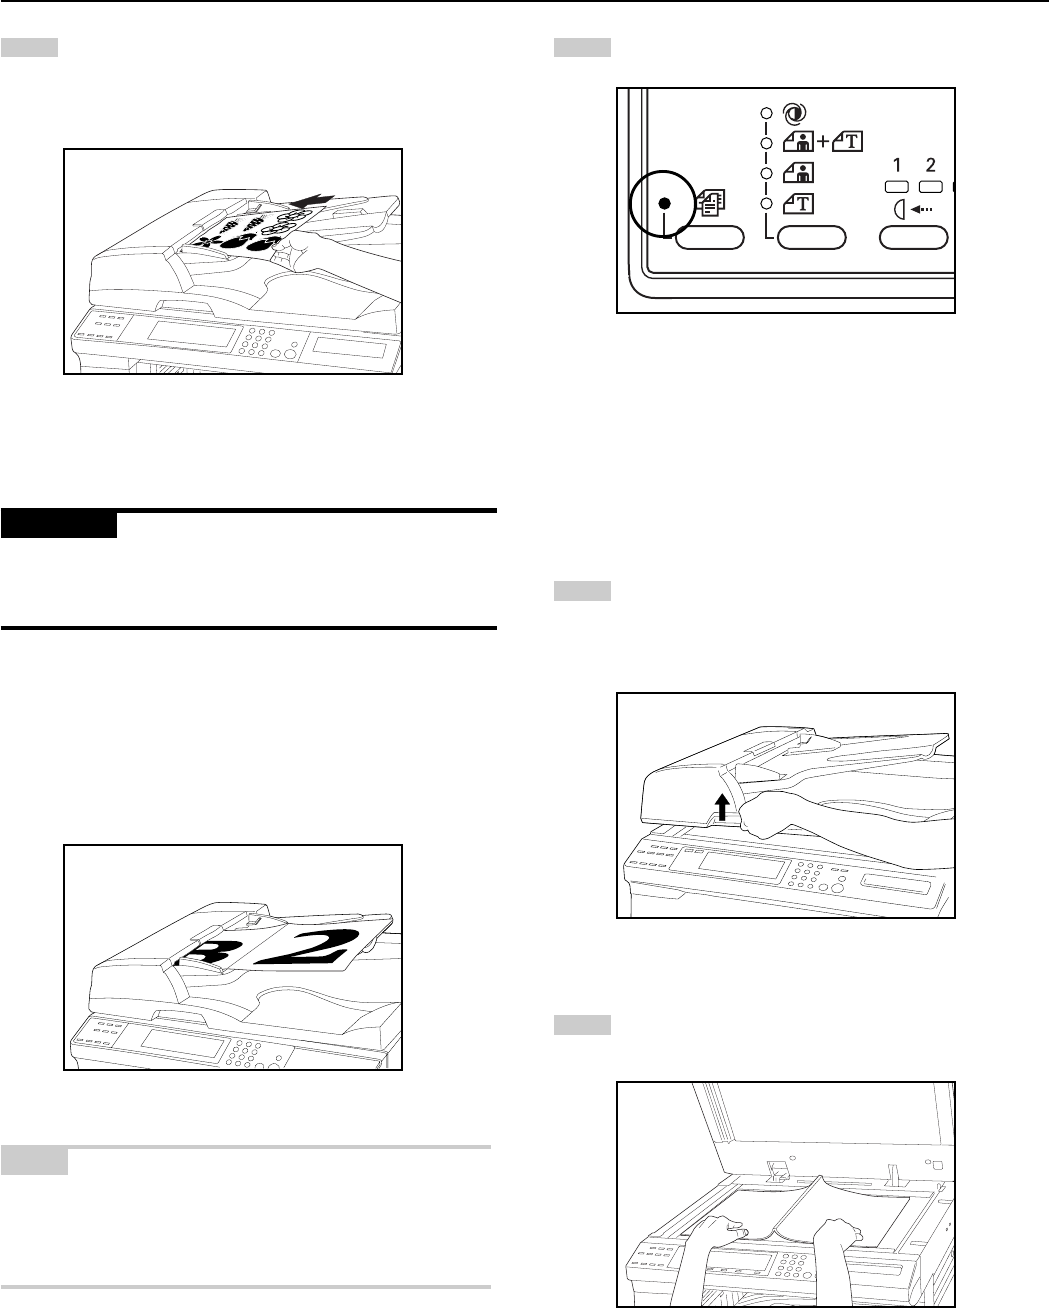
2. Setting originals
Set the original on the platen. When setting the original, adjust its
position using the original size scales based on the left rear position.
3. Function selection
Select from the various function of the copier.
* See pages 4-3 to 5-6 for details about the copy functions.
4. Paper size selection
When copying onto paper of the same size as the original, check that
the APS indicator is lit. If not, press the auto mode selection key to
light the indicator. When copying onto paper of a different size from
the original without changing the size of the image, press the Paper
Select key for the desired paper size and press the Manual key.
* The copier can be set so that the paper size is always to be set
manually. (See “Paper selection” on page 6-5.)
* A drawer (paper feed drawer) to be selected automatically without
setting any originals can be specified. (See “Default drawer” on page
6-5.)
* The original size and paper size are not automatically selected on
some models. Select the original size using the Original key and
select the paper size using the Paper Select key.
CHAPTER 4 BASIC OPERATIONS
8
9
4-2
5-1
5-2
6
7
5. Copy quality selection
Copy quality can be selected according to the original type. Press the
image mode selection key to light the respective indicators.
To adjust automatically:Auto Exposure indicator
Photo originals:Photo indicator
Text and photo originals:Text & Photo indicator
Text originals:Text indicator
* The copy exposure can be adjusted in all image modes. (See “Auto
exposure adjustment”, “Text and photo original exposure adjust-
ment”, “Text original exposure adjustment” and “Photo original
exposure adjustment” on pages 6-4 and 6-5.)
* The image mode used in the initial mode can be selected. (See
“Exposure mode” on page 6-4.)
When the Auto Exposure, Photo, Text & Photo and Text indicators are
all turned off, the copier is in the economy mode. In the economy
mode, the image density becomes lighter to reduce toner consump-
tion. Use this mode when high quality printing is not required.
6. Copy exposure adjustment
Copy exposure can be selected for all the image modes excluding the
auto exposure mode. To make the copy density darker, press the right
copy exposure adjustment key to move the exposure indicator to the
right; to make the copy density lighter, press the left copy exposure
adjustment key to move the exposure indicator to the left.
* The number of exposure adjustment levels can be selected from 5
and 9. (See “Exposure steps” on page 6-4.)
7. Setting the number of copies
Use the numeric keys to enter the desired number of copies on the
copy quantity display. The number of copies can be set to up to 250.
* It is possible to lower the limit on the number of copies that can be
set at a time. (See “Copy limit” on page 6-6.)
8. Starting copying
Press the Start key. Copying is possible when the indicator is lit green.
9. At the end of copying
Copied sheets are ejected onto the copy store section.
* Up to 250 sheets of standard paper (75 - 80 g/m
2
) can be stored.
Note that the number of sheets that can stored varies depending on
the condition of the paper used.
CAUTION
If the copier will not be used for a short period of time
(overnight, etc.), turn the main switch OFF (O). If it will
not be used for an extended period of time (vacations,
etc.), remove the power plug from the outlet for safety
purposes during the time the copier is not in use.
CHAPTER 4 BASIC OPERATIONS
4-3
1
2
3
1
2
3
2. Enlargement/reduction
(1) Auto magnification selection mode
The original image is enlarged/reduced automatically according to the
selected paper size.
Check that the AMS indicator is lit. If not, press the auto
mode selection key to light the indicator.
Set the original(s).
The size of the original will be automatically detected and the
paper of the same size as the original will be selected.
* The original size is not automatically selected on some
models. Select the original size using the Original key.
Press the Paper Select key to specify the paper size.
The magnification ratio indication flashes and then changes
to the indication of the number of copies.
* Copying will start when the Start key is pressed.
(2) Zoom copy
The zoom ratio can be set to any value from 50 to 200% in 1%
increments.
Set the original(s).
Press the Zoom (+) or Zoom (-) key to change the displayed
zoom ratio.
“%” lights on the magnification display.
NOTE
After pressing the Zoom (+) or Zoom (-) key, the zoom ratio can also
be entered using the numeric keys.
Press the Recall % key. The zoom ratio will be set and the
display indication changes from the magnification to the
number of copies.
* If a zoom ratio other than 100% is set, the Recall %
indicator will light.
* Press the Paper Select key to change the paper size.
* Copying will start when the Start key is pressed.
CHAPTER 4 BASIC OPERATIONS
4-4
1
2
3
4
(3) Size zoom copy
When the sizes of the original and copy paper are selected, the zoom
ratio is automatically set.
Set the original(s).
Press the auto mode selection key to light the AMS indicator.
Press the Original key to select the original size.
The zoom ratio is displayed on the magnification display.
Press the Paper Select key to change the paper size.
After 3 seconds, the display indication changes from the
magnification to the number of copies.
* If a zoom ratio other than 100% is set, the Recall %
indicator will light.
CHAPTER 4 BASIC OPERATIONS
4-5
1
2
3
4
3. Interrupt copying
Interrupt copying is useful if, during one copy job, other originals need
to be copied at different settings. The interrupted job can be resumed
at the same settings as before, after the rush job is finished.
Press the Interrupt key. When interrupt copying is enabled,
the Interrupt indicator lights.
Remove the present original(s) and put it aside.
Set the new original(s) and execute copying.
When copying ends, press the Interrupt key again and
replace the newly copied original(s) with the one(s) removed
before. Then, press the Start key. The interrupted copy job
will be resumed.
CHAPTER 4 BASIC OPERATIONS
4-6
This function turns the machine off to save energy by pressing the
Energy Saver (preheat) key, while leaving the main switch turned ON.
When this function is activated, the Energy Saver (preheat) indicator
is the only lit indicator on the operation panel.
* To resume copying after the energy saver (preheat) function has
been activated, press the Energy Saver (preheat) key again. It takes
about 30 seconds for the copier to recover from the energy saver
(preheat) function.
* The auto energy saver function can be set to trigger after no copying
has been done for a certain period of time. (See “Auto preheat time”
on page 6-7.)
5. Auto shut-off function
This function automatically turns the main switch OFF (O) if no
copying operation is preformed for a certain period (15 to 240
minutes). To make copies again, set the main switch to the ON (|)
position.
● Auto shut-off function
The auto shut-off function is a power saving feature which automati-
cally turns OFF (O) the main switch when a certain time elapses
without copying being performed. Copiers are generally in the standby
mode more than operation mode, and power consumption in the
standby mode occupies a large part of overall consumption. Having
the copier turn OFF (O) automatically reduces unnecessary power
consumption in the standby mode or at night when the copier is left
on. The result is a lower electricity bill.
* To change the time until the auto shut-off function starts, see “Auto
shut-off time” on page 6-7. To cancel the auto shut-off function, see
“Auto shut-off” on page 6-7.
4. Energy saver (preheat) function
5-1
1
2
4
3
CHAPTER 5 FUNCTIONS
1. Margin mode
The image of the original is shifted to the right to make a margin for
binding on the left side of the paper. The margin width can be set
between 1 mm and 18 mm in 1 mm increments.
* The margin mode requires the optional memory board.
* The initial value of margin width can be selected from the above.
(See “Margin width” on page 6-6.)
To change the margin width, press and hold the Margin key
for 3 seconds. “F17” appears on the copy quantity display
and, 2 seconds later, a margin width appears. If you do not
wish to change the margin width, press Margin key and
proceed to step 4.
Press the Zoom (+) or Zoom (-) key and change the number
to select the margin width.
Press the enter key or Margin key. The number of copies
appears on the display. The margin mode is now selected.
Set the original(s).
* Set the originals so that the top (left) side of the original is
positioned at the rear side. Setting them in the wrong
direction may cause the margin to appear in the incorrect
position.
CHAPTER 5 FUNCTIONS
5-2
5
Press the Start key. Copying will start.
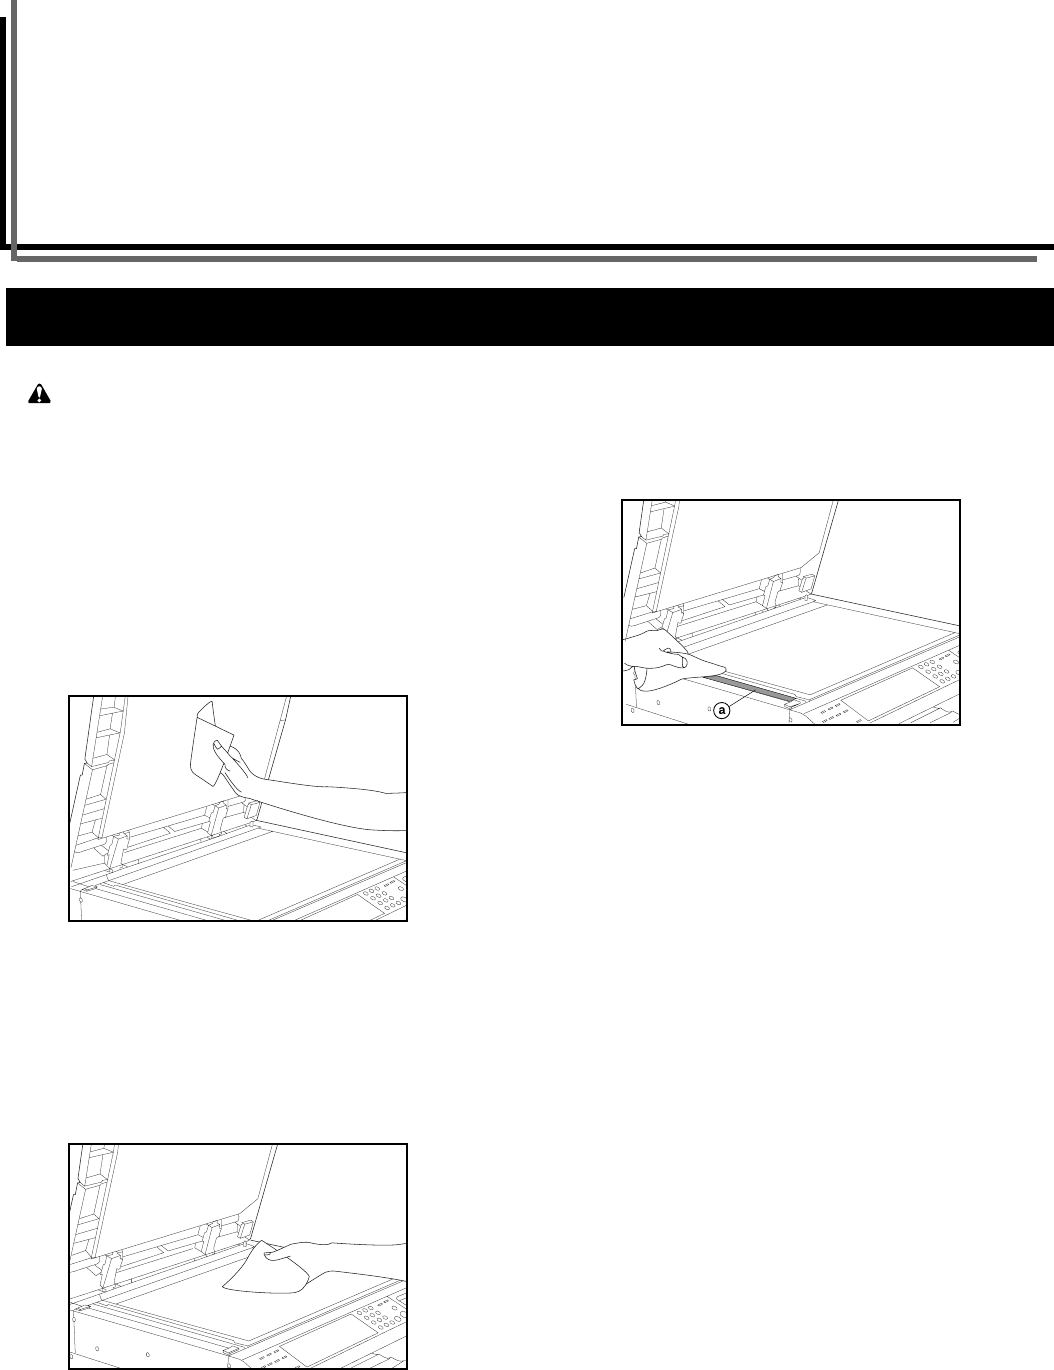
2. Border erase mode
(1) Sheet Erase
Use for erasing shadows, lines, etc., that appear around the edges of
copies made from sheet originals. The border width can be selected
from 6 mm, 12 mm and 18 mm. (a in the illustration is the width of
erasing border.)
(2) Book Erase
Use for making neat copies from thick books. The border width can be
selected from 6 mm, 12 mm and 18 mm. (a in the illustration is the
width of erasing boarder.)
* The Sheet Erase mode requires the optional memory board.
* The initial value of the erasing boarder width can be set. (See
“Border width” on page 6-6.) This initial value is common to the Book
Erase mode.
* The Book Erase mode requires the optional memory board.
* The initial value of the erasing boarder width can be set. (See
“Border width” on page 6-6.) This initial value is common to the
Sheet Erase mode.
CHAPTER 5 FUNCTIONS
5-3
1
2
3
4
5
To change the erasing border width, press and hold the
Border Erase key or Book Erase key for 3 seconds. “F18”
appears on the copy quantity display and, 2 seconds later, a
number appears. If you do not wish to change the erasing
boarder width, press either key and proceed to step 4.
The number displayed indicates the erasing boarder width as
follows:
1: 6 mm
2: 12 mm
3: 18 mm
Press the Zoom (+) or Zoom (-) key and change the number
to select the erasing border width.
Press the enter key, Border Erase key or Book Erase key.
The number of copies appears on the display. The Sheet
Erase or Book Erase mode is now selected.
Set the original(s).
* Set book originals as shown in the illustration below.
Press the Start key. Copying will start.
CHAPTER 5 FUNCTIONS
5-4
1
3. Layout copy
Two or four originals can be combined into a single copy.
The borderline of each original can also be marked with a solid line or
dotted line.
* Layout copying requires the optional memory board.
* The initial setting of the borderline can be set. (See “Layout (border-
line)” on page 6-6.)
* The original and copy paper must be the standard size.
● 2 in 1
Use this mode to copy two originals onto one sheet.
(When setting the originals on the platen, originals are arranged in the
order of 1 and 2.)
● 4 in 1
Use this mode to copy four originals onto one sheet.
(When setting the originals on the platen, originals are arranged in the
order of 1, 2, 3 and then 4.)
* In the 4 in 1 mode, available modes differ depending on the
orientation of the originals. The initial setting of the orientation can
be selected from vertical and horizontal. (see “Layout (4 in 1)” on
page 6-6.)
To change the type of the borderline, press and hold the
layout key for 3 seconds. “F20” appears on the copy quantity
display and, 2 seconds later, a number appears. If you do not
wish to change the type of the borderline, proceed to step 4.
The number displayed indicates the type of the borderline as
follows:
1: None
2: Solid line
3: Dotted line
CHAPTER 5 FUNCTIONS
5-5
2
3
4
5
6
7
Press the Zoom (+) or Zoom (-) key and change the number
to select the type of the borderline.
Press the enter key or layout key. The number of copies
appears on the display.
Press the layout key to light the 2 in 1 indicator or 4 in 1
indicator.
Set the original(s).
* Before setting originals on the platen, make sure they are in
the correct sequence.
Press the Start key.
* When originals are set in the DF, all originals are scanned
one by one and copying performed accordingly.
* When setting originals on the platen, “1” (number of
scanned originals) will be displayed after the first original is
scanned. Replace the original and press the Start key.
Repeat the same procedure for all the originals to be
copied.
When scanning of all the originals ends, press the enter key
or layout key. Copying will start.
CHAPTER 5 FUNCTIONS
5-6
1
2
3
4
Copies can be sorted into the required number of sets by storing
original images in the memory before performing copying.
* Sort copying requires the optional memory board.
NOTE
Rotate sort
If “ON” is selected for “Rotate sort” (see page 6-6) and A4 paper is
used, the orientation of each set of copies can be changed for easy
sorting. To use this setting, A4 paper must be set in the copier drawer
and an optional drawer.
Set the original(s).
Press the Sort key to light the indicator.
NOTE
If “Sort ON” is selected for “Output mode” (see page 6-6), the sort
indicator is lit and the copier is in the sort mode. If “Sort OFF” is
selected, press the sort key to light the indicator.
Enter the number of copies to be made and press the Start
key.
* When originals are set in the DF, all originals are scanned
one by one and copying performed accordingly.
* When setting the originals on the platen, “1” (number of
scanned originals) will be displayed after the first original is
scanned. Replace the original and press the Start key.
Repeat the same procedure for all the originals to be
copied.
When scanning of all the originals ends, press the enter key
or Sort key. Copying will start.
5. Rotate copy
Even if the orientation of the original is different from that of paper in
the drawer, copying will be performed by rotating the image 90
degrees counter-clockwise. No setting is required for this function.
* Rotate copying requires the optional memory board.
NOTE
The paper size available for rotate copying is limited to A4.
4. Sort copy
6-1
CHAPTER 6 COPIER MANAGEMENT
1. Copy management
The total number of copies made by each department can be managed using 4-digit codes for up to 100 departments.
(1) Copy management modes
Setting codes are provided for the copy management modes that have selection items. Only the number of the setting code appears on the copy
quantity display. See the "Setting code" column in the table below for the meanings of those numbers. Initial settings are indicated with an asterisk
(
*
).
d01Turning copy management
ON/OFF
Turn copy management ON when required (to apply the settings
made). Turn it OFF when not required.
1: Copy management ON
2: Copy management OFF
*
d02
Registering ID-codesAssigns a 4-digit ID-code. Up to 100 ID-codes can be registered.
d03Deleting ID-codesDeletes the ID-codes that are no longer needed.
d04Clearing copy countsClears all the copy counts for the various departments after a suitable
period of time. Copy counts cannot be cleared individually.
1: Clear
2: Do not clear
*
d05
Printing copy management list
Prints the number of copies made by ID-code.
Mode
code
Copy management modeMode contentSetting code
CHAPTER 6 COPIER MANAGEMENT
6-2
1
2
4
5
6
3
7
8
9
(2) How to set the copy management mode
Press and hold both of the copy exposure adjustment keys
and the * key of the numeric keys for 3 seconds. "d00" (mode
code) appears on the copy quantity display.
The mode code changes each time the Zoom (+) key or
Zoom (-) key is pressed. Select the desired mode code by
referring to the table shown in "(1) Copy management
modes".
Press the enter key.
If "d01" or "d04" is selected, proceed to the next step.
If "d02" or "d03" is selected, proceed to step 6.
If "d05" is selected, the copy management list will be printed
out. Proceed to step 10.
The setting code changes each time the Zoom (+) or Zoom (-)
key is pressed. Select the desired setting code by referring to
the table shown in "(1) Copy management modes".
Press the enter key. The display returns to that for step 2. To
end the copy management mode setting, proceed to step 11.
Enter the ID-code (4 digits) to be registered or deleted with
the numeric keys.
* If a wrong code is entered, press the Stop/Clear key and
enter the correct code.
Press the enter key.
When registering, the display returns to that for step 2. To
end the copy management mode setting, proceed to step 11.
When deleting, proceed to the next step.
Confirm whether or not to proceed with the deletion. To
cancel the deletion, leave the setting as "2"; to proceed with
the deletion, press the Zoom (+) or Zoom (-) key to change
the setting to "1".
Press the enter key.
The display returns to that for step 2. To end the copy
management mode setting, proceed to step 11.
CHAPTER 6 COPIER MANAGEMENT
6-3
10
2
1
11
When the copy management list is printed out, the display
returns to that for step 2. To make other settings, perform the
respective procedures (see above). To end the copy manage-
ment mode setting, proceed to the next step.
Press the Zoom (+) or Zoom (-) key to display "d00" and
press the enter key. The display indication changes from the
mode code to the number of copies.
(3) Making copies when the copier is in the copy management mode
When the copier is in the copy management mode, "---" will appear on
the copy quantity display.
Enter the ID-code (4 digits) for your department with the
numeric keys.
If "1" appears on the copy quantity display, carry out copying
in the usual manner.
* When copying is finished, press the Energy Saver (preheat)
key. If the auto clear function operates, the copier will return
to the previous state.
CHAPTER 6 COPIER MANAGEMENT
6-4
The state the copier is in at the end of warm-up or when the Reset key is pressed is called the initial mode, and the function settings that are
automatically set for the initial mode are called the default settings. The default settings can be changed according to how you wish to use the copier.
(1) Default settings
Setting codes are provided for the default setting items that have selection items. Only the number of the setting code appears on the copy uantity
display. See the "Setting code" column in the table below for the meanings of those numbers. Initial settings are indicated with an asterisk (
*
).
F01User status reportPrints the details of the default settings.
F02Exposure modeSelects the image mode at power-on.1: Auto Exposure
2: Text & Photo
*
3: Photo
4: Text
F03
Exposure stepsChanges the number of exposure steps for the manual
exposure mode.
1: 5 steps
*
2: 9 steps
F04Auto exposure adjustment
Adjusts the overall exposure when using the auto exposure
mode. The larger the setting code number, the darker the
copy density.
1: 1 Light
2: 2
3: 3
4: 4
*
5: 5
6: 6
7: 7 Dark
F05
Text and photo original exposure
adjustment
Adjusts the exposure for when text and photo original is
selected for the image mode. The larger the setting code
Originals.........................................................................Sheets of paper, books and 3-dimensional objects (Maximum original size: A3)
Copy sizes.....................................................................A3, B4 (257 mm x 364 mm), A4, B5, A5 (vertical), B6 (vertical), A6 (vertical), Folio
Ik heb een storing met code J100. Kon de handleiding niet vinden. De foutmelding kom ik overigens ook niet tegen ! Iemand een idee ?
Gesteld op 4-8-2011 om 17:59
Gebruikershandleiding.com neemt misbruik van zijn services uitermate serieus. U kunt hieronder aangeven waarom deze vraag ongepast is. Wij controleren de vraag en zonodig wordt deze verwijderd.
Product:
Spelregels forum
Om tot zinvolle vragen te komen hanteren wij de volgende spelregels:
lees eerst de handleiding door;
controleer of uw vraag al eerder door iemand anders is gesteld;
probeer uw vraag zo duidelijk mogelijk te stellen;
heeft u een probleem en al geprobeerd om dit op te lossen, vermeld dit erbij aub;
heeft u een oplossing gekregen van een bezoeker dan horen wij dat graag in dit forum;
wilt u een reactie geven op een vraag of antwoord, gebruik dan niet dit formulier maar klik op de knop 'reageer op deze vraag';
uw vraag wordt direct op de website gezet; vermijd daarom persoonlijke gegevens in te vullen;
Belangrijk! Als er een antwoord wordt gegeven op uw vraag, dan is het voor de gever van het antwoord nuttig om te weten als u er wel (of niet) mee geholpen bent! Wij vragen u dus ook te reageren op een antwoord.
Belangrijk! Antwoorden worden ook per e-mail naar abonnees gestuurd. Laat uw emailadres achter op deze site, zodat u op de hoogte blijft. U krijgt dan ook andere vragen en antwoorden te zien.
Abonneren
Abonneer u voor het ontvangen van emails voor uw Kyocera KM1530 bij:
nieuwe vragen en antwoorden
nieuwe handleidingen
U ontvangt een email met instructies om u voor één of beide opties in te schrijven.
Ontvang uw handleiding per email
Vul uw emailadres in en ontvang de handleiding van Kyocera KM1530 in de taal/talen: Engels als bijlage per email.
De handleiding is 2,14 mb groot.
U ontvangt de handleiding per email binnen enkele minuten. Als u geen email heeft ontvangen, dan heeft u waarschijnlijk een verkeerd emailadres ingevuld of is uw mailbox te vol. Daarnaast kan het zijn dat uw internetprovider een maximum heeft aan de grootte per email. Omdat hier een handleiding wordt meegestuurd, kan het voorkomen dat de email groter is dan toegestaan bij uw provider.
Stel vragen via chat aan uw handleiding
Stel uw vraag over deze PDF
Uw handleiding is per email verstuurd. Controleer uw email
Als u niet binnen een kwartier uw email met handleiding ontvangen heeft, kan het zijn dat u een verkeerd emailadres heeft ingevuld of dat uw emailprovider een maximum grootte per email heeft ingesteld die kleiner is dan de grootte van de handleiding.
Er is een email naar u verstuurd om uw inschrijving definitief te maken.
Controleer uw email en volg de aanwijzingen op om uw inschrijving definitief te maken
U heeft geen emailadres opgegeven
Als u de handleiding per email wilt ontvangen, vul dan een geldig emailadres in.
Uw vraag is op deze pagina toegevoegd
Wilt u een email ontvangen bij een antwoord en/of nieuwe vragen? Vul dan hier uw emailadres in.