20
MEAT PROBE (PROBE)
The meat probe supplied allows the exact temperature (up to 100°C)
to be measured during cooking, to ensure optimum cooking.
Based on the food being cooked, the required core temperature can
be set.
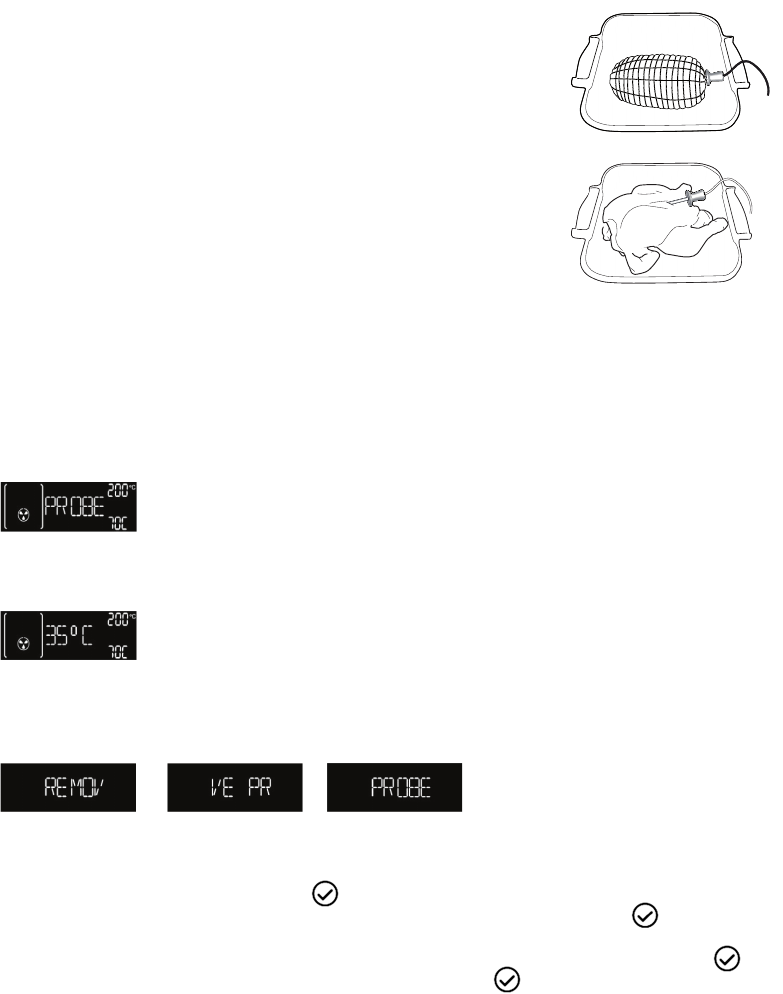
It is very important to position the probe accurately in order to obtain
perfect cooking results. Insert the probe fully into the fleshiest part of
the meat, avoiding bones and fatty parts (Fig. 1). For poultry, the
probe should be inserted sideways, in the middle of the breast, taking
care to ensure the tip does not end up in a hollow part (Fig. 2).
In the case of meat with very irregular thickness, check it is cooked
properly before removing it from the oven. Connect the end of the
probe in the hole located on the right wall of the oven chamber.
Meat Probe Cooking Function
When the meat probe is inserted, cavity temperature is managed as defined for the selected function but
cooking process finish once the temperature measured reach the estimated meat probe target set by the
customer.
There isn't a specified menu for the meat probe cooking functions, but is always possible switch from a
traditional function to a "Meat Probe function" This occurs when the meat probe is inserted on.
An acoustic signal sounds when the meat probe is detected, and "PROBE" appears on the display for 3
seconds. The display then shows the current information again.
If the Functions knob is not turned to Standby or Lamp, the display shows the general information on the
cooking functions and
the temperature set for the meat probe.
If the meat probe is inserted and detected at the start of a function (quick preheating, grill, special
functions, browning) without
probe enabling, cooking will not start until the probe is removed. An alarm signal occurs and the following
message is displayed:
Since the end of cooking depends on the temperature set for the meat probe, a countdown timer cannot
be set for the function, and therefore a cooking function with delayed start cannot be set.
After selecting a cooking function, adjust the oven temperature (at the top right of the display) by turning
the knob +/- and confirming with the key . The value to be set for the meat probe (at the bottom
right of the display) can now be changed: turn the knob +/- and confirm with the key to start
cooking. The oven and meat probe temperature can be changed at any time during cooking. To change the
oven temperature, just turn the knob +/-; to change the meat probe temperature, press the key
twice, turn the knob +/- to set the value and confirm with the key . The meat probe default value is
70°C and can be adjusted with minimum steps of 1°C.
When the meat probe is detected at the start of or during a function, all the preheating phases are skipped
and the first cooking phase of the selected function is carried out; the lamp stays ON until the meat probe
is removed and no longer detected.
If the probe is removed during operation, the display shows the minutes of cooking and the counter
increases the value until the user stops the function or inserts the meat probe again.
When end of cooking occur the display shows a blinking "END".
fig. 1
fig. 2
Instructions for oven use