Whatever the case, if you stop a Midi file using the START push button, Song Play will loose the data of the chain permanently and you will have
to re-load them. The same applies to all Juke-Box controls, disabled when a chain is in use. Just the words can be displayed.
FF88 CChhaaiinn LLiisstt
: This displays all the chains of Midi files already stored within the Folder in use.
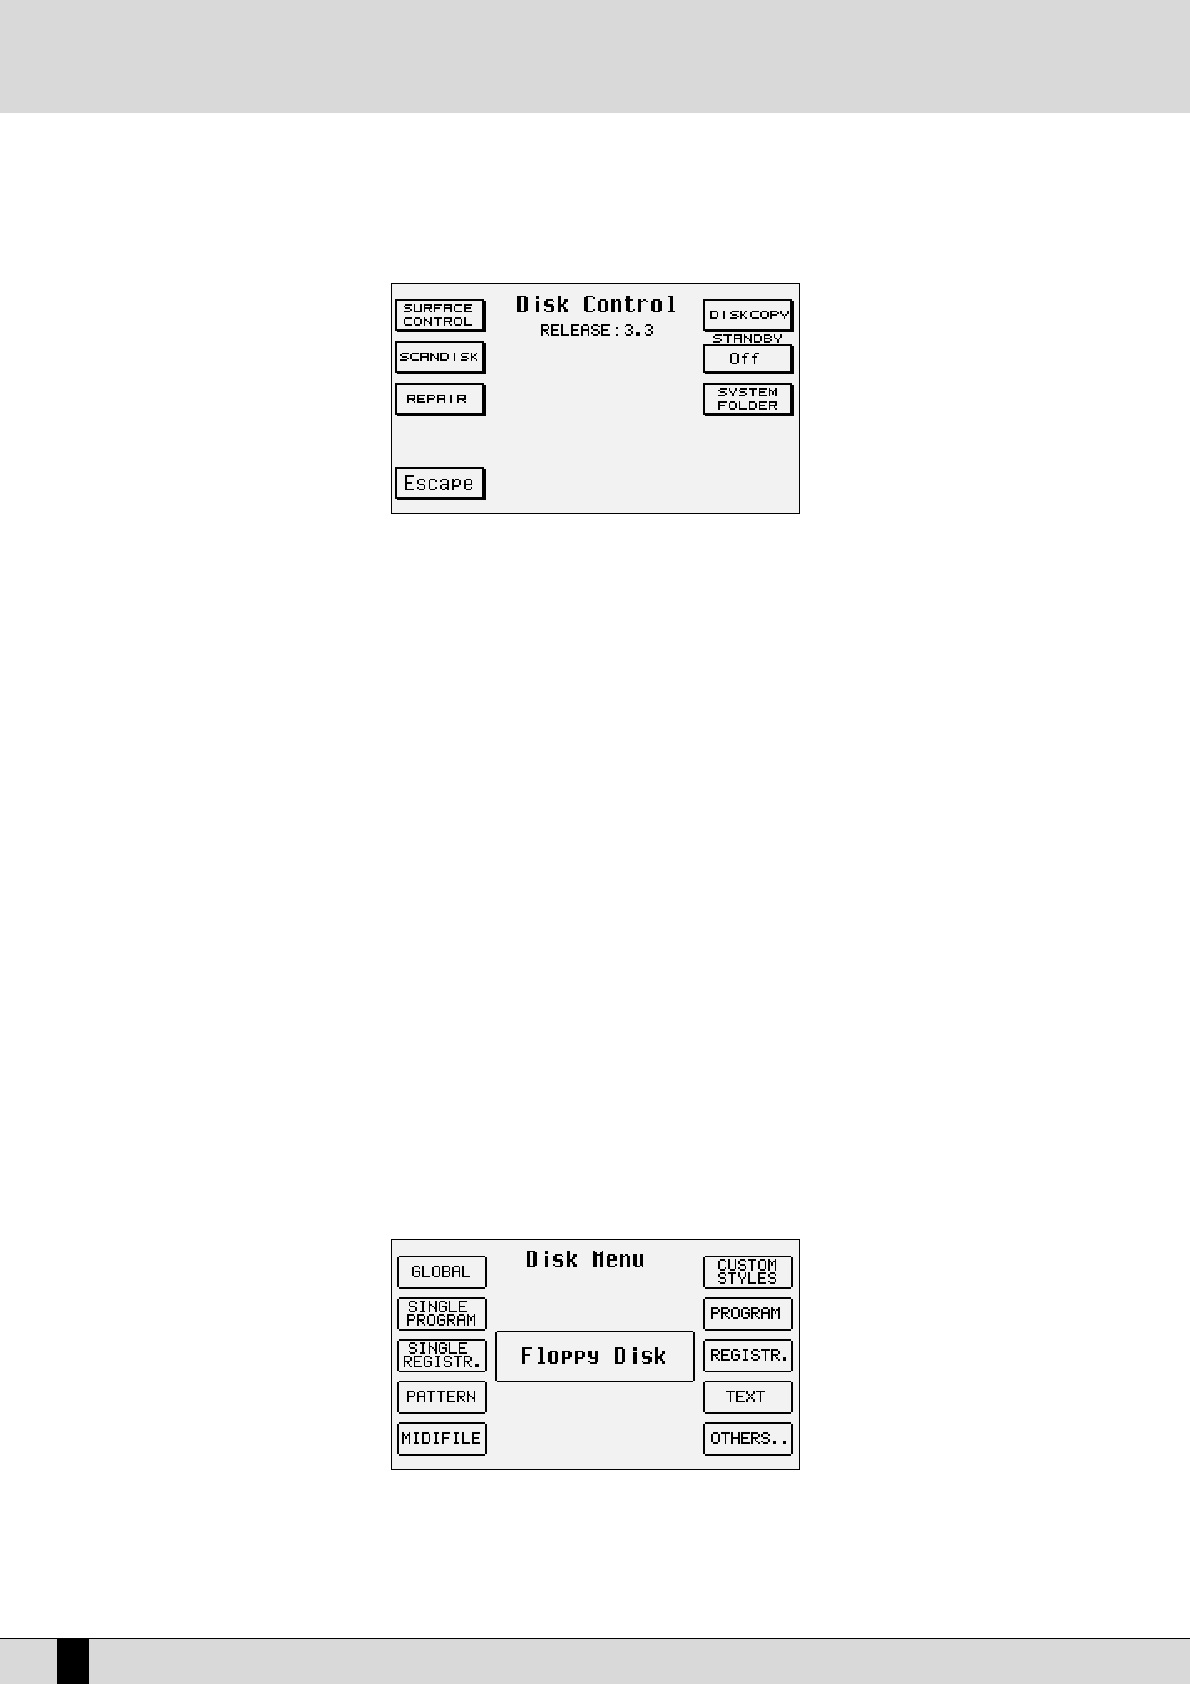
F9 Disk Control:
This calls up a number of functions required to control the Hard Disk. The options available are the following:
F1 Surface Control: This controls the Hard Disk surface and takes a few minutes for the procedure to be completed. If
Fatal Error appears you must contact a Ketron service centre as the Hard Disk is seriously damaged. If the Hard Disk
surface test detects no anomalies the display will return to the menu once the procedure has been completed.
F2 ScanDisk: This controls the integrity of the Folders and the files. When the test ends press F10 Escape to return to
the previous page. If errors are found the XD9 automatically moves onto the Repair function.
F3 Repair: This repairs errors found in damaged files. Press F10 Escape once this procedure has been completed.
F5 Escape: This returns to the previous page of the menu.
F6 Disk Copy: Using a special cable you can connect a second Hard Disk to the standard one for back-up procedures.
Contact Ketron for further information.
F7 Standby: This is used to set the time in minutes, which can be selected by pressing function push button F7 repeat
edly, after which the Hard Disk enters the stand-by status if it is not used. The Hard Disk is immediately available again
as soon as some function that requires it’s use is accessed.
F8 System Folder: This creates a so-called System Folder dedicated to containing a system file, after having formatted
the hard disk.
THE DISK FUNCTIONS FOR THE FLOPPY DISK
When using the Floppy Disk, the XD9 offers the following functions:
F1 Dir: This displays all the files stored in the Floppy Disk.
F2 Load: Once a file has been selected using the VALUE +/- and F10 Select push buttons you can load it in RAM.
F3 Save: This calls up the page used to select the type of memory to be saved on Floppy. The options are the same as those described
for F3 Save.
F4 Copy: This is used to copy the file, selected using the VALUE +/- and F10 Select push buttons, in the Folder in use. When copying you
must also re-name the file and the Skip commando for single files and Copy All for all files. It works in the exact same manner
as the F4 Copy function of the Hard Disk.
F5 File Choice:
When a number of files are stored in Floppy disk but with different extension, you can find only those desired by choosing the
type of file to be displayed. The options are the exact same as those for the Hard Disk.
F6 Delete: This cancels one or a number of files selected using the VALUE +/- and F10 Select push buttons.
F7 Rename: This is used to re-name a file selected using the VALUE +/- push buttons.
XD9-XD3
90
DISK