XD9-XD3
81
Vocalize: track dedicated to the control of the Vocalizer
Based on the choice made, Drumset, Live Drum, Voice and Vocal Set can be called up or otherwise. Whereas in the case of
Voice and Drumset mode the Voice and Drumset are called up normally. For Drum 2 and Vocal Set the Live Drums and Vocal
Sets must be selected using the VALUE +/- push buttons. The modification of operational mode of a track can make the song
incompatible with modules in General MIDI.
FF99 MMuuttee
: If the function is enabled, the track is cut-out from the reproduction.
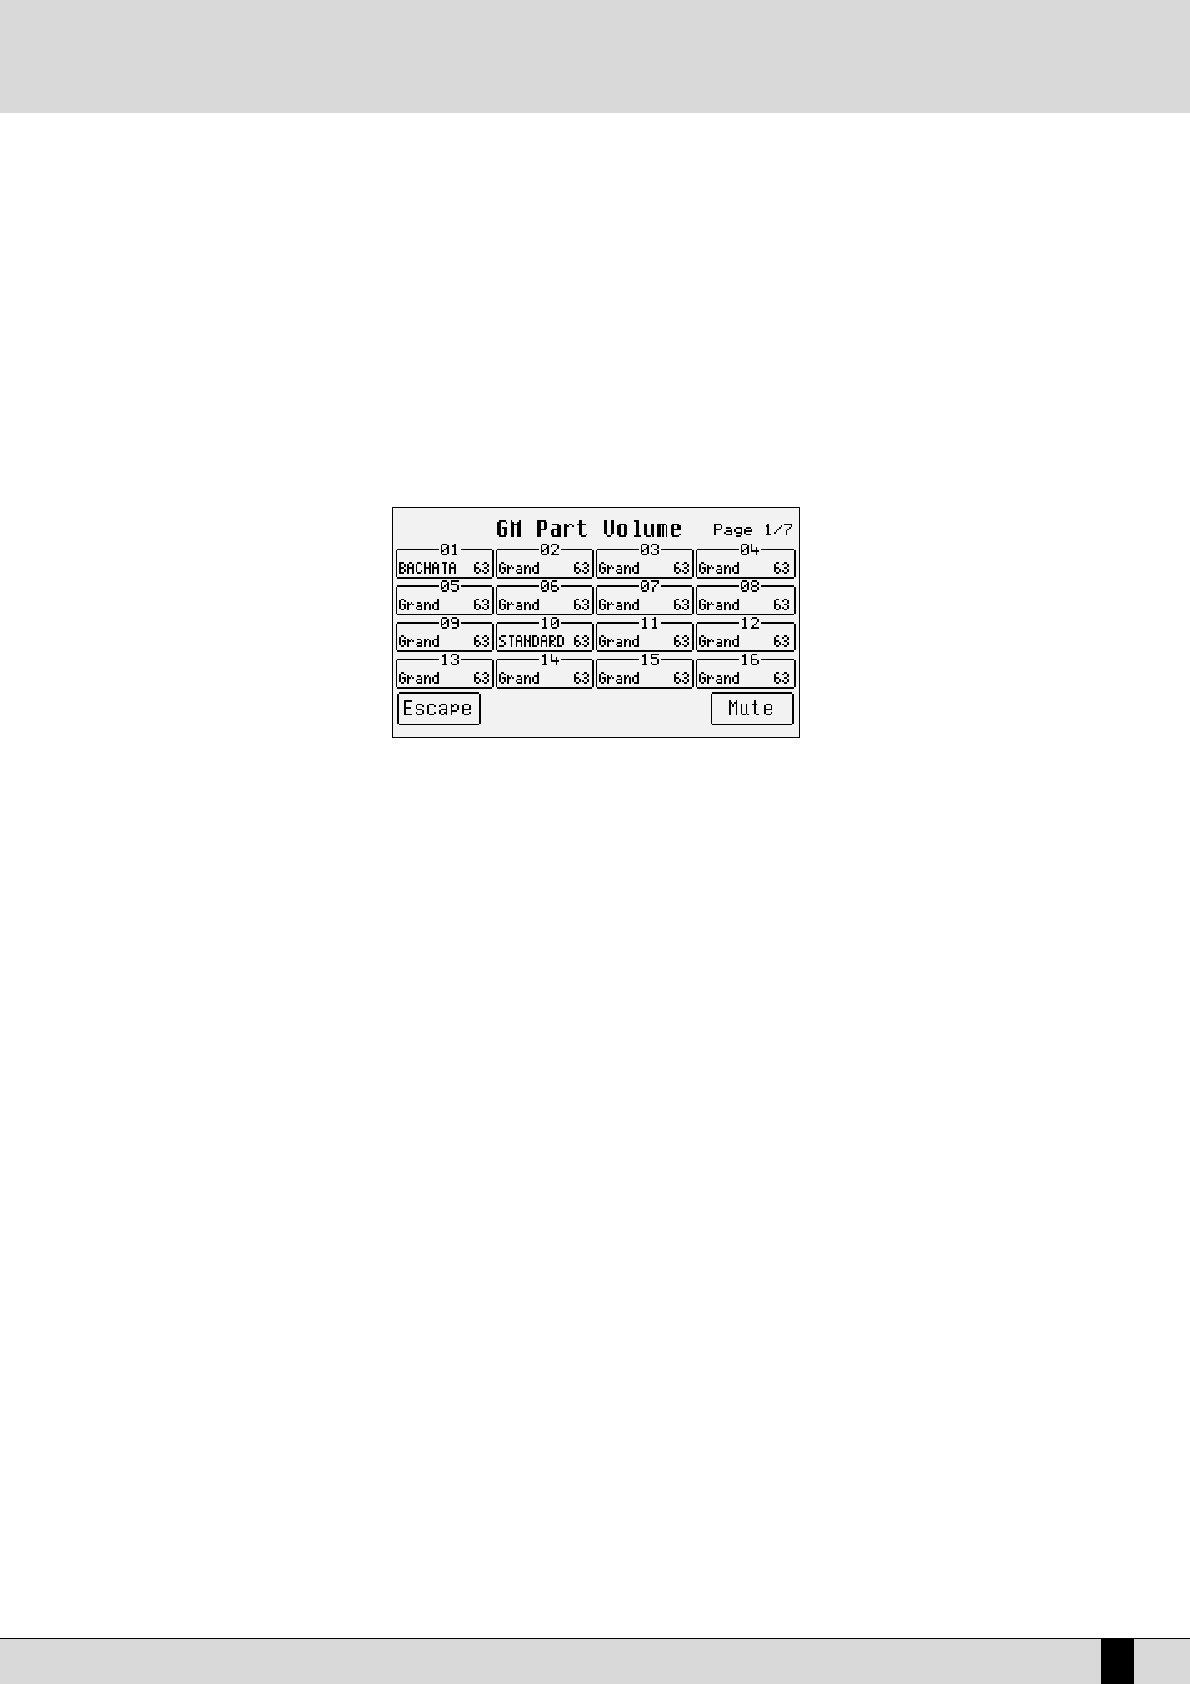
FF1100 1166 PPaarrttss
: This enables the display of each single parameter, showing its value for all sixteen Parts.
MODIFYING A PARAMETER FOR THE SIXTEEN GM PARTS
As already mentioned, the status of a single parameter for all sixteen tracks can be displayed using the F10 16 Parts function. To rapidly access
a parameter, select it from the GM Part page and then press F10 16 Parts to display the status of that parameter for the sixteen tracks. The
page F10 16 Parts structure shows a table with four lines and four columns relative to the sixteen Parts. To access the single Part use push
buttons F1 and F6 for Parts 1, 2, 3 and 4 that are selected by pressing the same push buttons repeatedly. Use push buttons F2 and F7 for Parts
5, 6, 7, and 8. Use push buttons F3 and F8 for Parts 9, 10, 11 and 12 and push buttons F4 and F9 for Parts 13, 14, 15 and 16. Once the Part has been
found its value can be modified using the VALUE+/- push buttons which, if pressed together at the same time, will reset the value.
The parameters that can be modified in this way are distributed over seven pages that are called up using push buttons PAGE +/-, and include
Volume, Reverb, Effects, Pan, Shift, Channel Rx and Channel Tx (already explained in the previous section).
F10 Mute is used to cut-out only the track selected at the time from the reproduction.
THE MIDI PARAMETERS OF THE XD9 SECTIONS
From the main page of the display press F6 MIDI to call up the menus dedicated to the XD9 sections. For each single function the single sec-
tions involved are displayed together with relative value. To move around between the sections use the CURSOR +/- push buttons and use the
VALUE +/- push buttons to modify the value.
THE MIDI SET-UPS
To simplify programming, the XD9 uses some memory locations called MIDI Set-up’s that are used to save the MIDI settings. When a modifica-
tion has been completed in these menus, you can save it by pressing the SAVE/ENTER push button. The options available are the following:
FF44 UUnnddoo
: This returns to the page of MIDI channel settings, restoring the initial situation.
FF55 EEssccaappee
: This returns to the MIDI channel settings page without saving.
FF99 DDeeffaauulltt
: This restores the default settings.
FF1100 SSaavvee
: This confirms that the settings in the current MIDI set-up are to be saved.
The preferred MIDI set-up can be called up when turning the instrument on using the Power On Setup function. Once the MIDI set-up has been
selected, go back to the initial page of the MIDI menu using F5 Escape, press the SAVE/ENTER push button, select F3 Power On Setup and
then confirm using F10 Save. More details are given in the Power On Set-up section.
MIDI