1. The copyright and all the other intellectual property rights
relating to the Licensed Software shall belong to the Licensor
and the Original Rightholder, and in no event shall they be
under the ownership of the User.
2. The User shall, whenever it uses the Licensed Software,
comply with any laws relating to the copyright and other
intellectual property rights.
Article 11 Export Restriction
1. It is prohibited to export the Licensed Software and any
related documents outside the country of the User (including
transmission thereof outside the country of the User via
Internet of other communication tools).
2. The User shall understand that the Licensed Software shall be
subject to the export restrictions adopted by the country of
User and any other countries.
3. The User shall agree that the software will be subject to any
and all applicable international and domestic laws (including
the export control regulation of the country of User and
any other countries, and any restrictions concerning the
end-users, the use by end-users and importing countries to be
provided by the country of User and any other countries, and
any other governmental authorities).
Article 12 Miscellaneous
1. In the event any part of this Agreement is invalidated by
operation of law, the residual provisions shall continue in
force.
2. Matters not stipulated in this Agreement or any ambiguity or
question raised in the construction of this Agreement shall be
provided or settled upon good-faith consultation between the
Licensor and the User.
3. The Licensor and the User hereby agree that this Agreement
is governed by the laws of Japan, and any dispute arising
from, and relating to the rights and obligations under, this
Agreement shall be submitted to the exclusive jurisdiction of
the Tokyo District Court for its first instance.
Important Notice concerning the Software
-jansson
Copyright (c) 2009-2012 Petri Lehtinen <petri@digip.org>
Permission is hereby granted, free of charge, to any person obtaining a copy of this software and associated documentation files (the "Software"),
to deal in the Software without restriction, including without limitation the rights to use, copy, modify, merge, publish, distribute, sublicense, and/
or sell copies of the Software, and to permit persons to whom the Software is furnished to do so, subject to the following conditions:
The above copyright notice and this permission notice shall be included in all copies or substantial portions of the Software.
THE SOFTWARE IS PROVIDED "AS IS", WITHOUT WARRANTY OF ANY KIND, EXPRESS OR IMPLIED, INCLUDING BUT NOT LIMITED TO THE WARRANTIES
OF MERCHANTABILITY, FITNESS FOR A PARTICULAR PURPOSE AND NONINFRINGEMENT. IN NO EVENT SHALL THE AUTHORS OR COPYRIGHT HOLDERS
BE LIABLE FOR ANY CLAIM, DAMAGES OR OTHER LIABILITY, WHETHER IN AN ACTION OF CONTRACT, TORT OR OTHERWISE, ARISING FROM, OUT OF OR
IN CONNECTION WITH THE SOFTWARE OR THE USE OR OTHER DEALINGS IN THE SOFTWARE.
-cJSON
Copyright (c) 2009 Dave Gamble
Permission is hereby granted, free of charge, to any person obtaining a copy of this software and associated documentation files (the "Software"),
to deal in the Software without restriction, including without limitation the rights to use, copy, modify, merge, publish, distribute, sublicense, and/
or sell copies of the Software, and to permit persons to whom the Software is furnished to do so, subject to the following conditions:
The above copyright notice and this permission notice shall be included in all copies or substantial portions of the Software.
THE SOFTWARE IS PROVIDED "AS IS", WITHOUT WARRANTY OF ANY KIND, EXPRESS OR IMPLIED, INCLUDING BUT NOT LIMITED TO THE WARRANTIES
OF MERCHANTABILITY, FITNESS FOR A PARTICULAR PURPOSE AND NONINFRINGEMENT. IN NO EVENT SHALL THE AUTHORS OR COPYRIGHT HOLDERS
BE LIABLE FOR ANY CLAIM, DAMAGES OR OTHER LIABILITY, WHETHER IN AN ACTION OF CONTRACT, TORT OR OTHERWISE, ARISING FROM, OUT OF OR
IN CONNECTION WITH THE SOFTWARE OR THE USE OR OTHER DEALINGS IN THE SOFTWARE.
-CMP
The MIT License (MIT)
Copyright (c) 2014 Charles Gunyon
Permission is hereby granted, free of charge, to any person obtaining a copy of this software and associated documentation files (the "Software"),
to deal in the Software without restriction, including without limitation the rights to use, copy, modify, merge, publish, distribute, sublicense, and/
or sell copies of the Software, and to permit persons to whom the Software is furnished to do so, subject to the following conditions:
The above copyright notice and this permission notice shall be included in all copies or substantial portions of the Software.
THE SOFTWARE IS PROVIDED "AS IS", WITHOUT WARRANTY OF ANY KIND, EXPRESS OR IMPLIED, INCLUDING BUT NOT LIMITED TO THE WARRANTIES
OF MERCHANTABILITY, FITNESS FOR A PARTICULAR PURPOSE AND NONINFRINGEMENT. IN NO EVENT SHALL THE AUTHORS OR COPYRIGHT HOLDERS
BE LIABLE FOR ANY CLAIM, DAMAGES OR OTHER LIABILITY, WHETHER IN AN ACTION OF CONTRACT, TORT OR OTHERWISE, ARISING FROM, OUT OF OR
IN CONNECTION WITH THE SOFTWARE OR THE USE OR OTHER DEALINGS IN THE SOFTWARE.
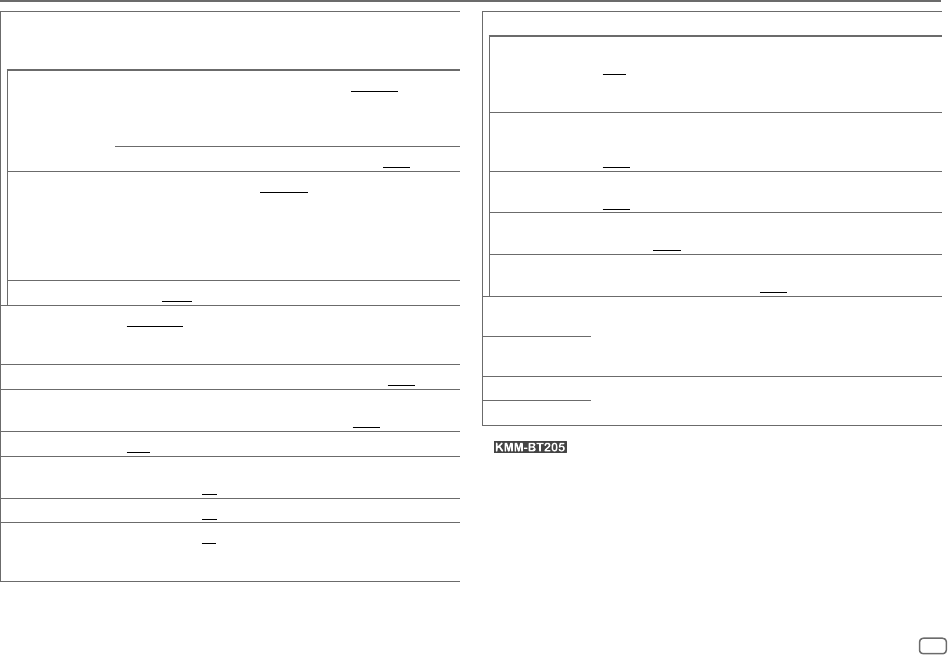
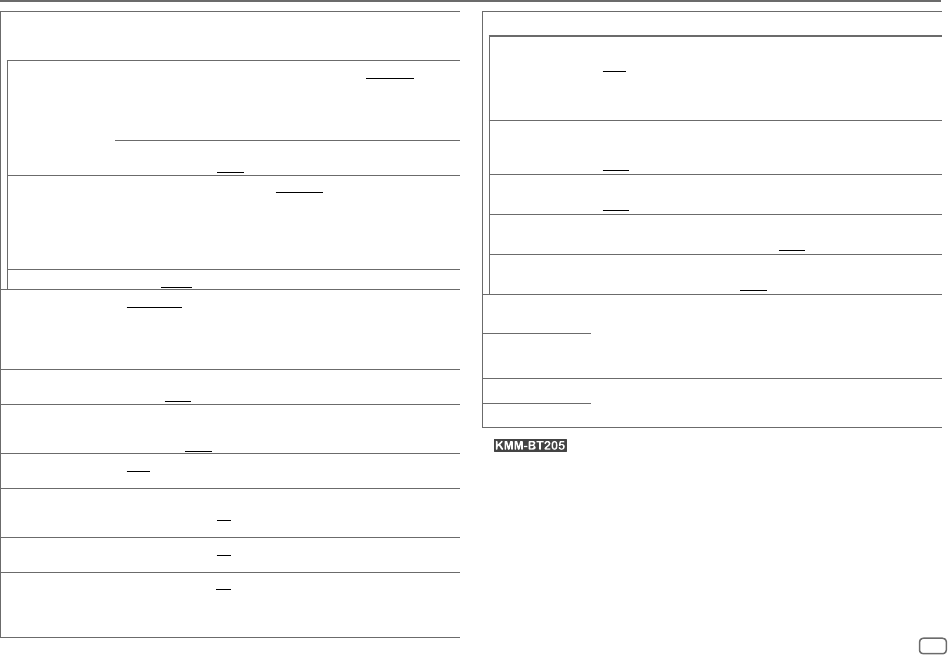
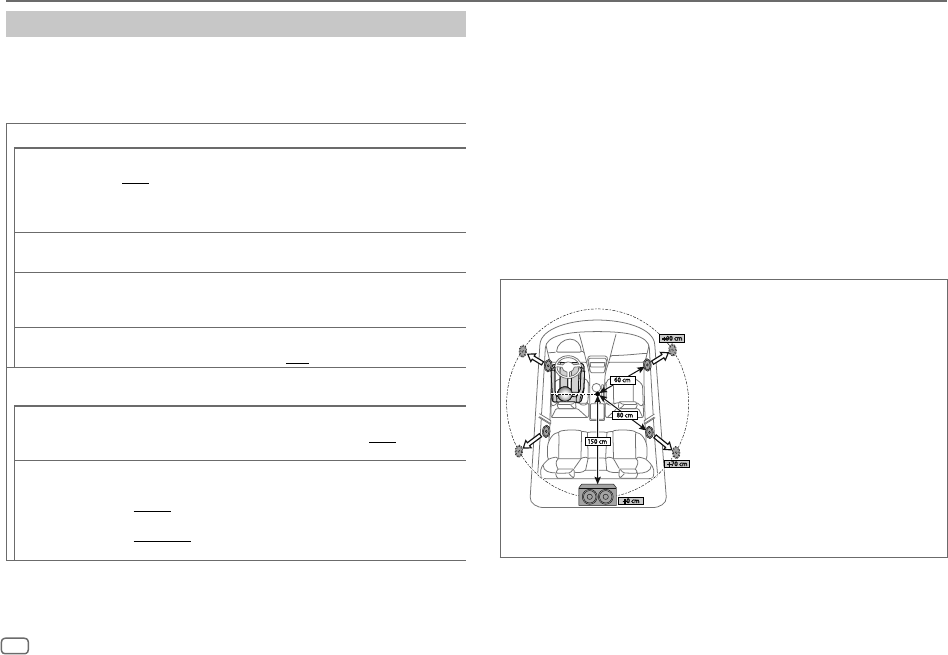
Maximaal communicatiebereikOngeveer 10 meter zichtveld
ProfielHFP 1.6 (Hands-Free Profile)
A2DP (Advanced Audio Distribution Profile)
AVRCP 1.5 (Audio/Video Remote Control Profile)
PBAP (Phonebook Access Profile)
SPP (Serial Port Profile)
Audio
Maximaal uitgangsvermogen50 W × 4
Volledig bandbreedte-vermogen
(met minder dan 1 % THV)
22 W × 4
Luidsprekerimpedantie4 Ω — 8 Ω
ToonbereikBand 1: 62,5 Hz ±9 dB
Band 2: 100 Hz ±9 dB
Band 3: 160 Hz ±9 dB
Band 4: 250 Hz ±9 dB
Band 5: 400 Hz ±9 dB
Band 6: 630 Hz ±9 dB
Band 7: 1 kHz ±9 dB
Band 8: 1,6 kHz ±9 dB
Band 9: 2,5 kHz ±9 dB
Band 10: 4 kHz ±9 dB
Band 11: 6,3 kHz ±9 dB
Band 12: 10 kHz ±9 dB
Band 13: 16 kHz ±9 dB
JS_KWD_KMM_BT305_EN_NL.indd 33JS_KWD_KMM_BT305_EN_NL.indd 336/9/2018 9:06:41 AM6/9/2018 9:06:41 AM
Data Size: B6L (182 mm x 128 mm)
Book Size: B6L (182 mm x 128 mm)
2
ITALIANO
PRIMA DELL’USO
IMPORTANTE
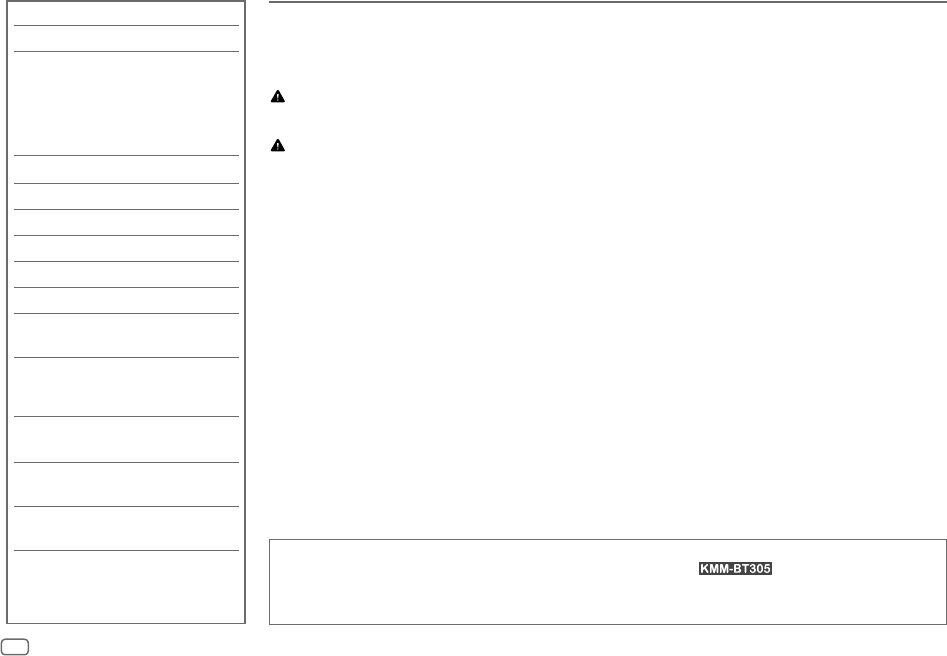
• Prima di usare l’apparecchio, e per usarlo in modo corretto, si raccomanda di leggere a fondo questo manuale. È particolarmente importante leggere e
osservare gli avvisi e le note di attenzione nel presente manuale.
• È infine consigliabile tenerlo in un luogo sicuro e prontamente accessibile per ogni necessità futura.
AVVERTENZA
• Non usare l’apparecchio in alcun modo che distragga dalla guida.
Attenzione
Regolazione del volume:
• Per ridurre il rischio d’incidenti regolare il volume in modo che sia possibile udire i rumori esterni al veicolo.
• Per evitare di danneggiare i diffusori con l’aumento improvviso del livello d’uscita, ridurre il volume prima di riprodurre le sorgenti digitali.
Generale:
• Non usare un apparecchio esterno se ciò può far distrarre dalla guida.
• Eseguire il backup di tutti i dati importanti. Il produttore dell’apparecchio non accetta alcuna responsabilità in caso di perdita dei dati registrati.
• Non inserire né lasciare nell’apparecchio corpi metallici quali monete o attrezzi, pena la possibilità di cortocircuiti.
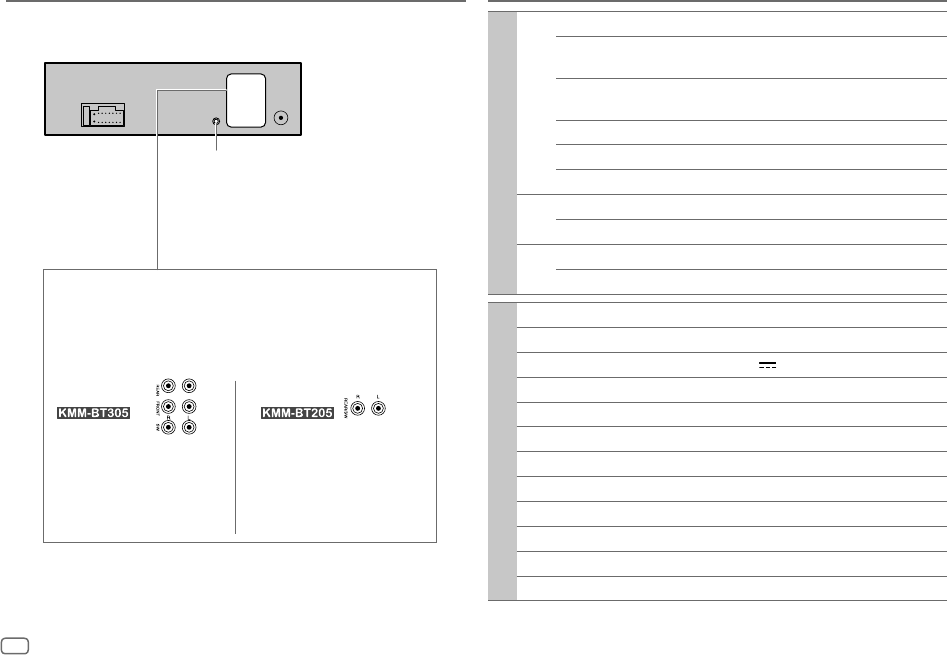
• I dati USB sono riportati sull’unità principale. Per accedervi occorre rimuovere il pannello anteriore. (Pagina 3)
• Quando in alcuni tipi di auto è installato il cavo di controllo dell’antenna, questa si estende automaticamente non appena si accende l’unità principale
(pagina 31). In tal caso, prima di parcheggiare in un luogo a soffitto basso è raccomandabile spegnerla o semplicemente portarla in STANDBY.
INDICE
PRIMA DELL’USO 2
FONDAMENTI 3
OPERAZIONI PRELIMINARI 4
1 Selezionare la lingua da usare
per le visualizzazioni e annullare
il modo dimostrativo
2 Impostare l’ora e la data
3 Eseguire le impostazioni iniziali
RADIO 6
USB, iPod e ANDROID 7
Spotify 10
AUX 11
BLUETOOTH® 11
IMPOSTAZIONI AUDIO 18
IMPOSTAZIONI DI
VISUALIZZAZIONE 23
RIFERIMENTI 24
Manutenzione
Informazioni aggiuntive
RISOLUZIONE DEI
PROBLEMI 27
INSTALLAZIONE E
COLLEGAMENTI 29
CARATTERISTICHE
TECNICHE 32
Come leggere il manuale
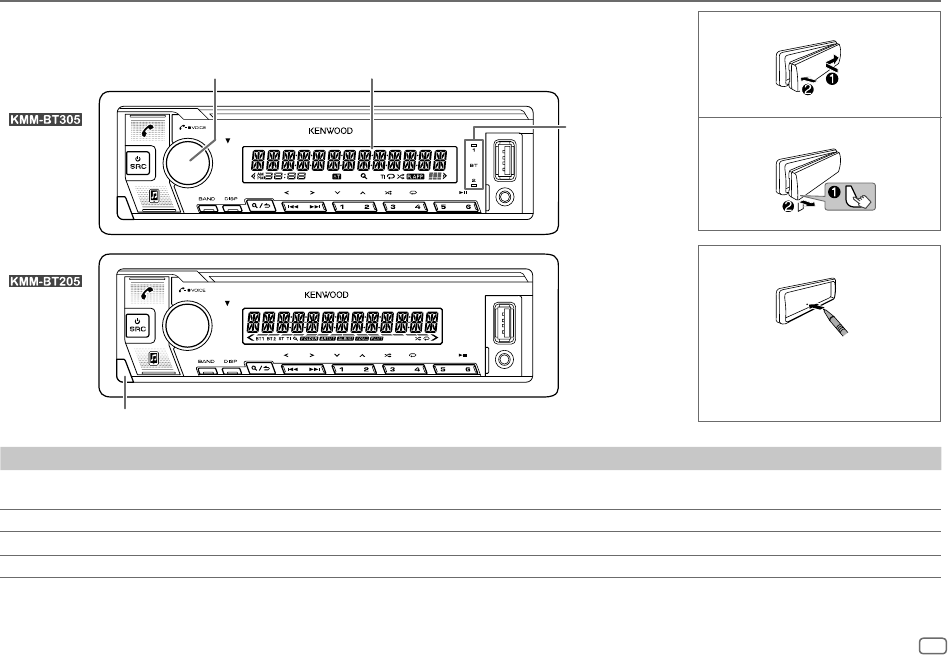
• Le operazioni di seguito descritte si riferiscono principalmente ai tasti del frontalino del modello .
• Per le spiegazioni si usano indicazioni in inglese. La lingua delle visualizzazioni è selezionabile dal menu
[FUNCTION]. (Pagina 5)
•
[XX] indica l’elemento selezionato.
• (Pagina XX) indica la disponibilità di riferimenti nella pagina specificata.
JS_KWD_KMM_BT305_EN_IT.indd 2JS_KWD_KMM_BT305_EN_IT.indd 216/8/2018 9:37:03 AM16/8/2018 9:37:03 AM
Data Size: B6L (182 mm x 128 mm)
Book Size: B6L (182 mm x 128 mm)
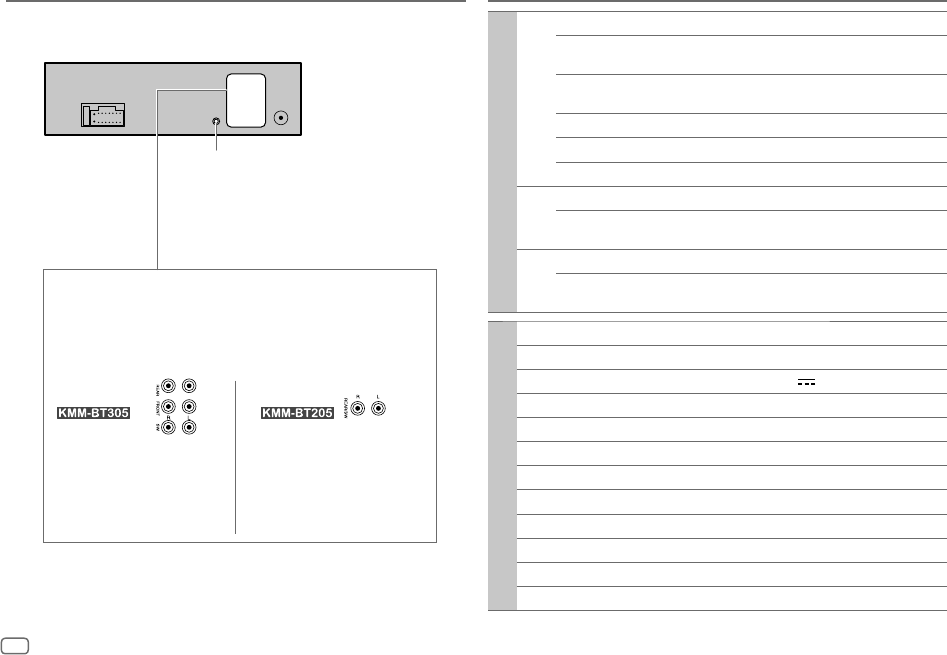
3
ITALIANO
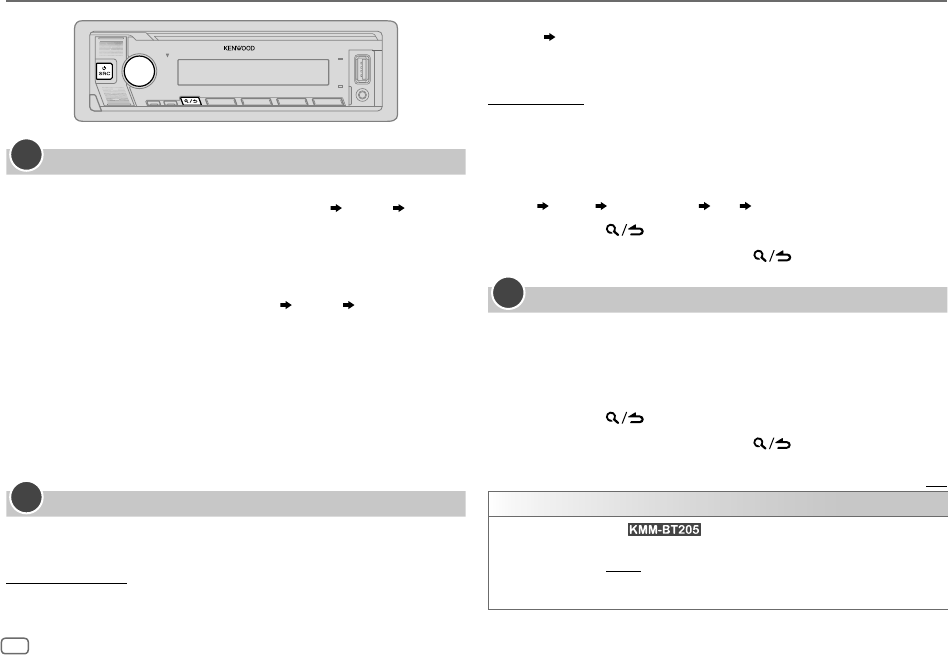
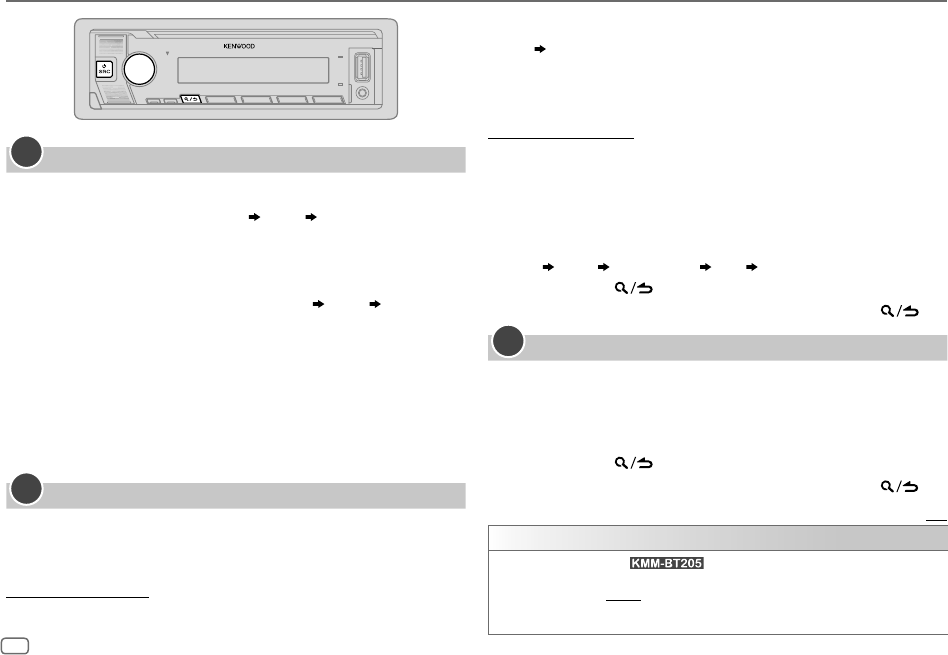
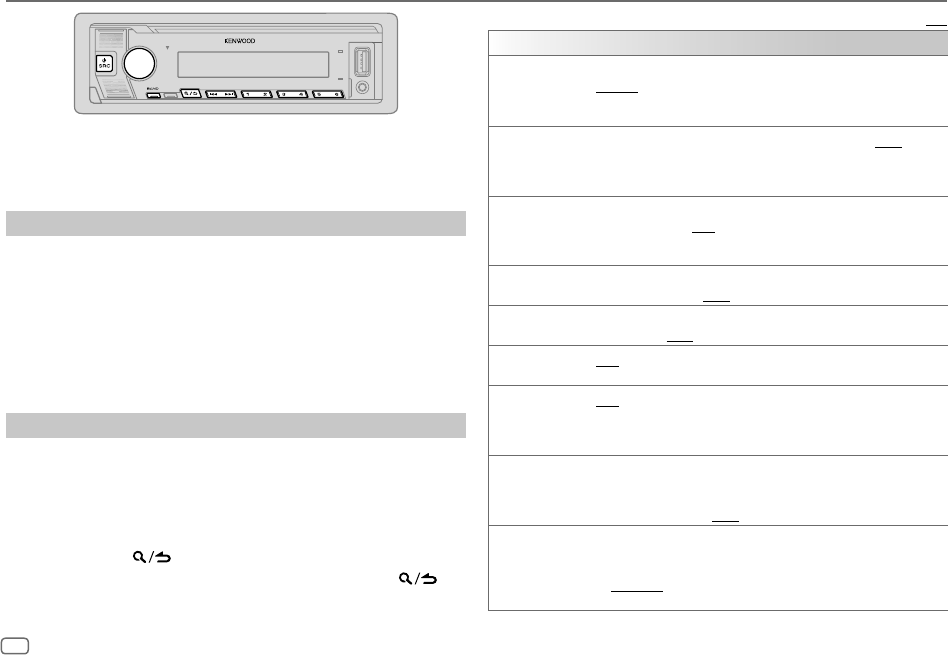
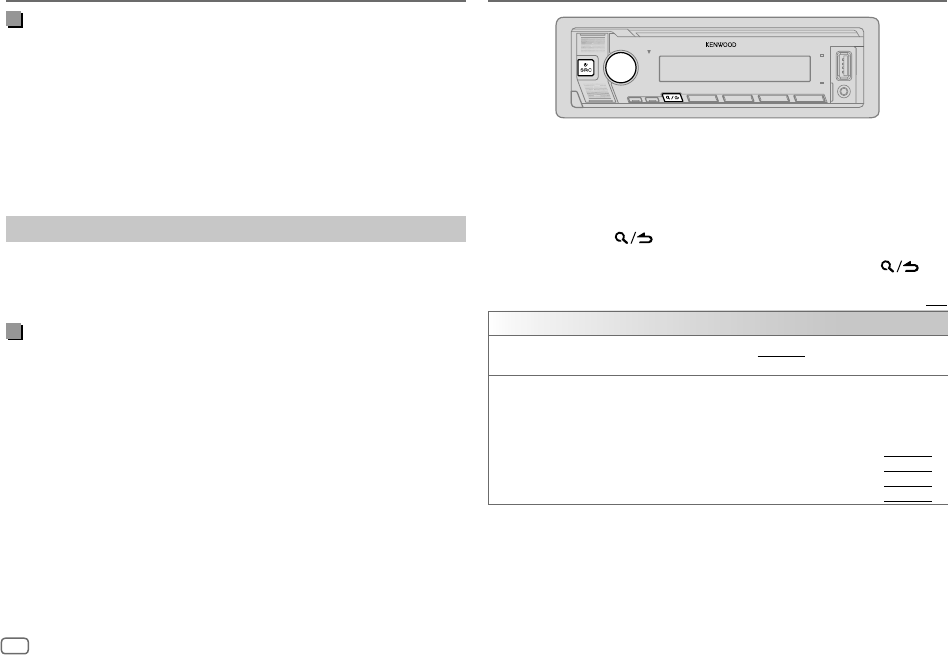
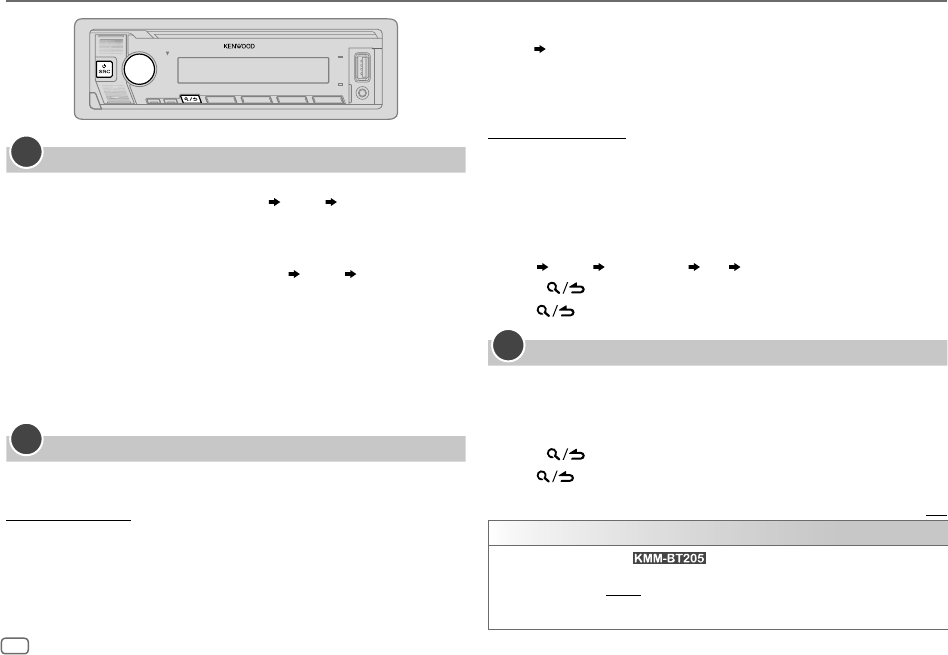
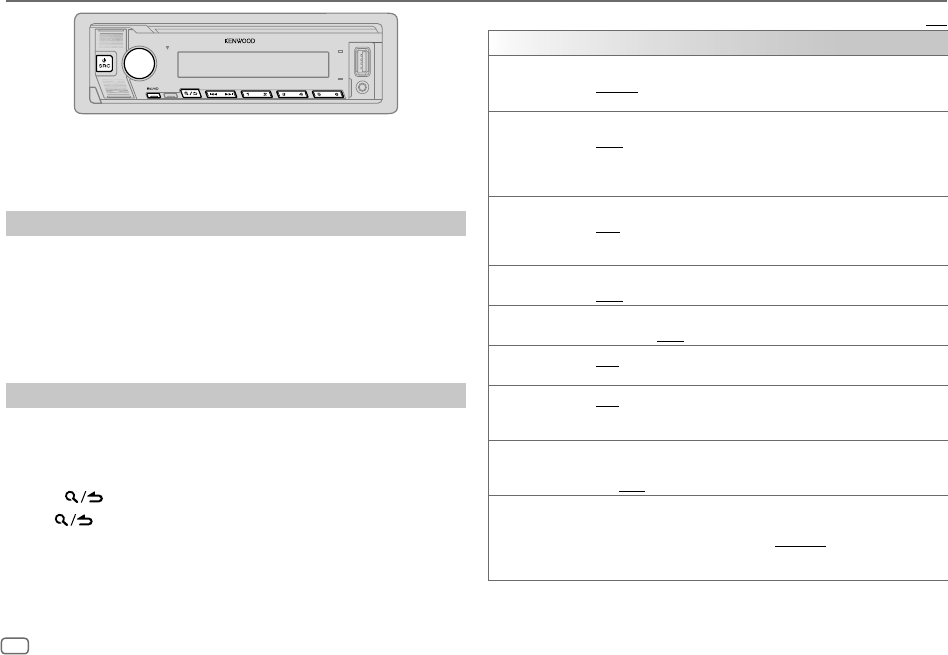
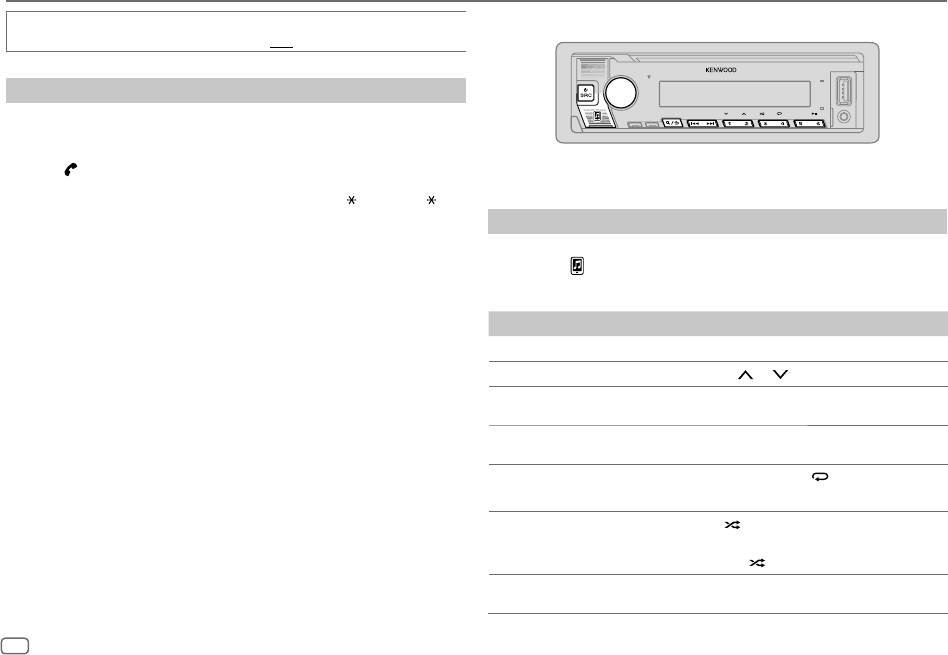
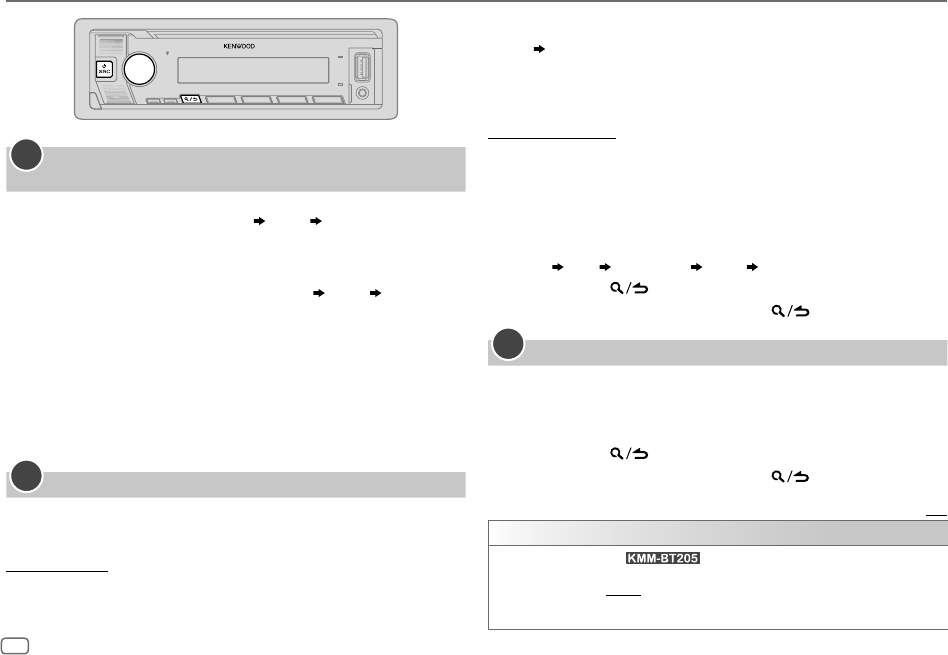
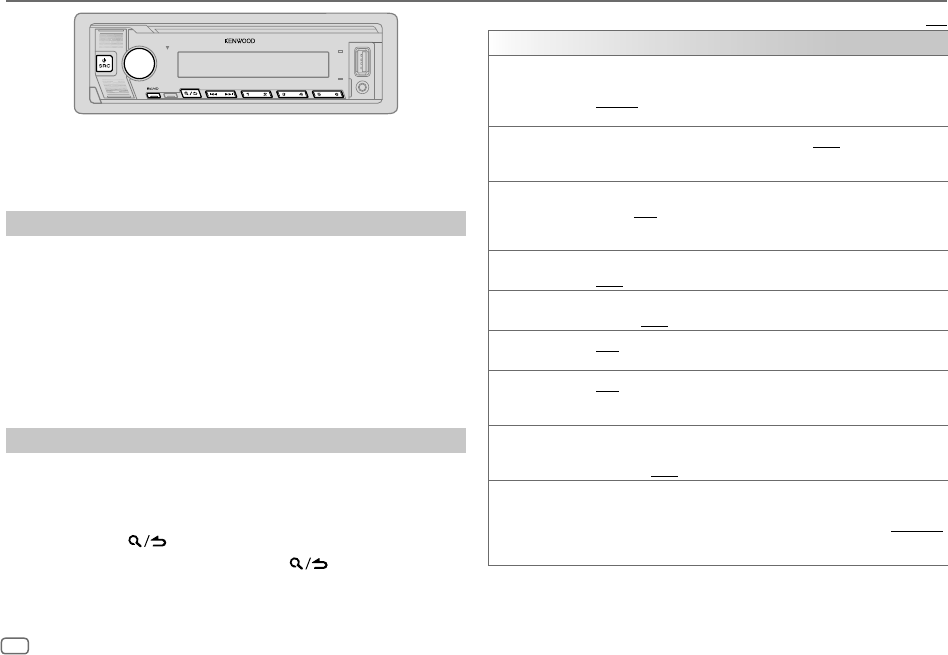
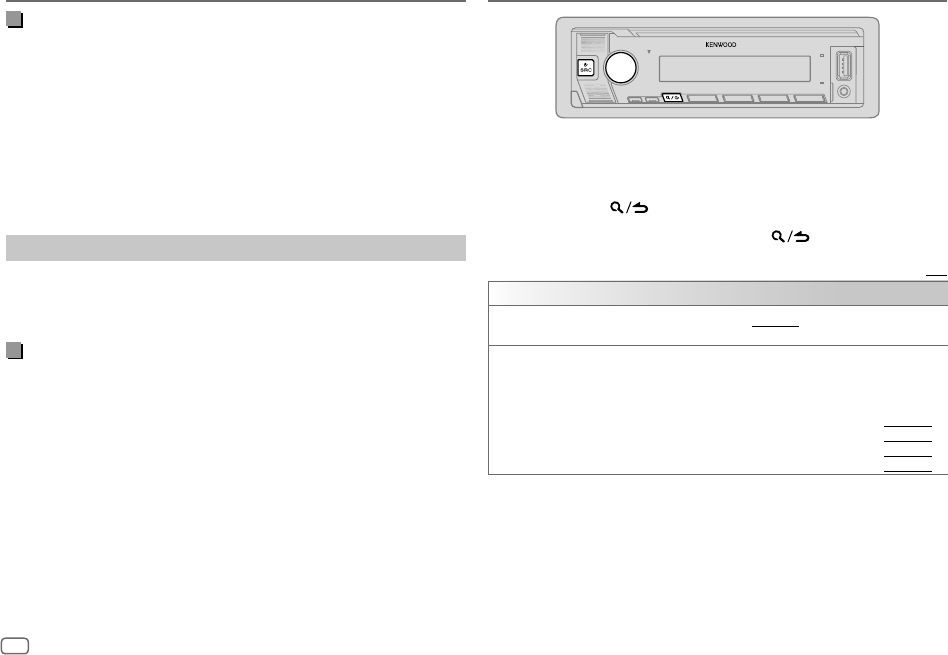
FONDAMENTI
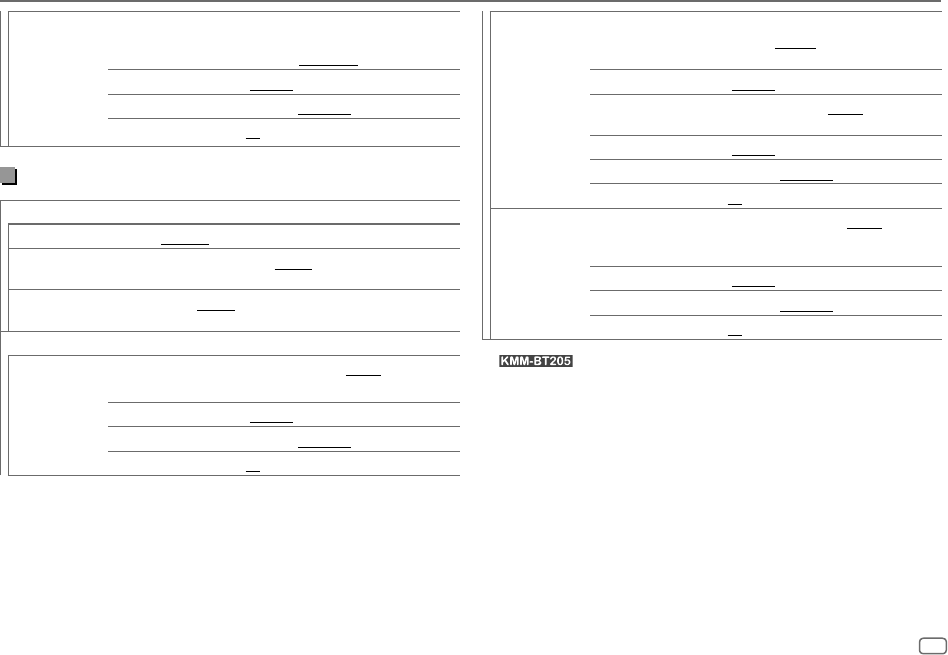
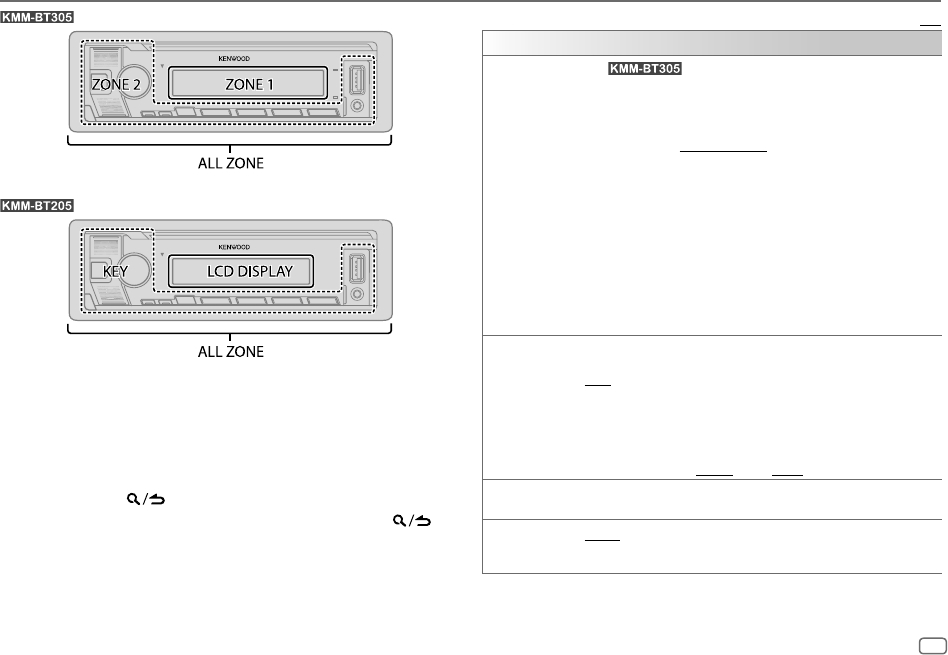
PerDal frontalino
Accendere l’impianto
Premere
B SRC.
• Premere a lungo per spegnere l’impianto.
Regolare il volumeRuotare la manopola del volume.
Selezione della sorgente
Premere
B SRC quante volte necessario.
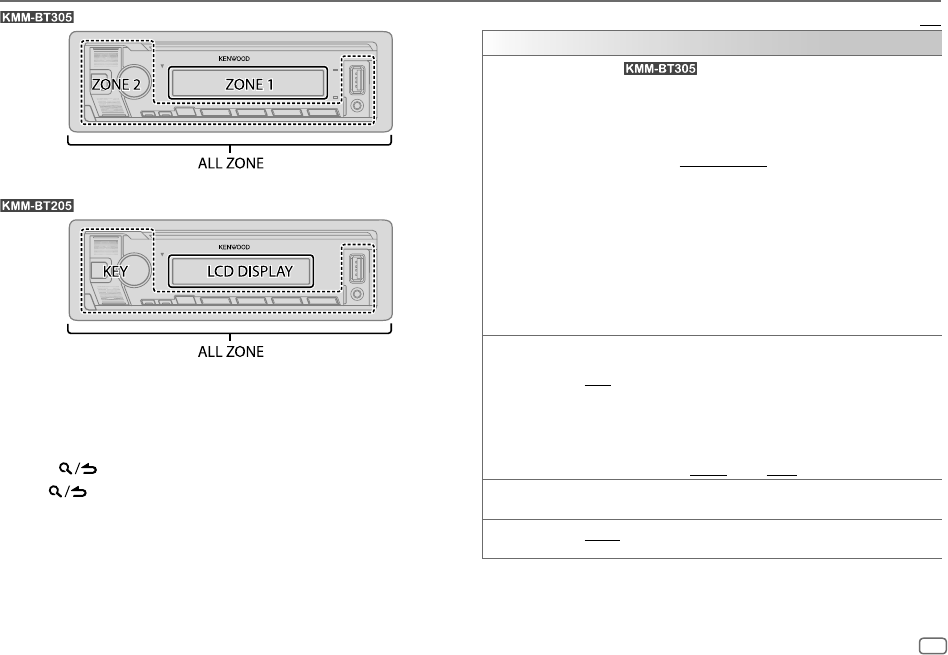
Cambiare le informazioni visualizzate sul displayPremere DISP quante volte necessario. (Pagina25)
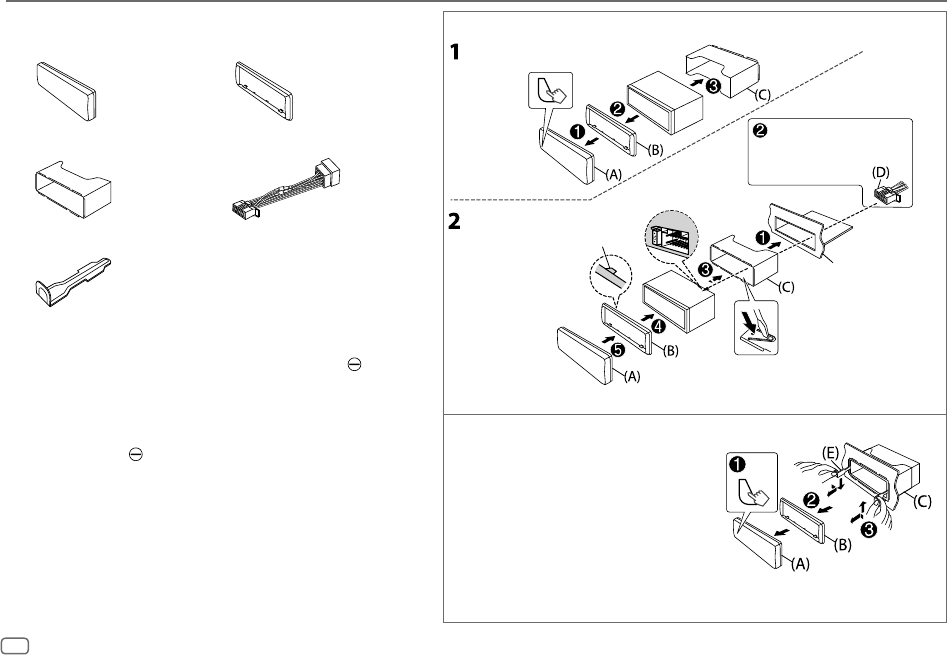
Applicare
Come resettare
Rimuovere
Frontalino
Resettare l’apparecchio entro 5 secondi
dalla rimozione del frontalino.
Manopola del volume
Pulsante di rimozione
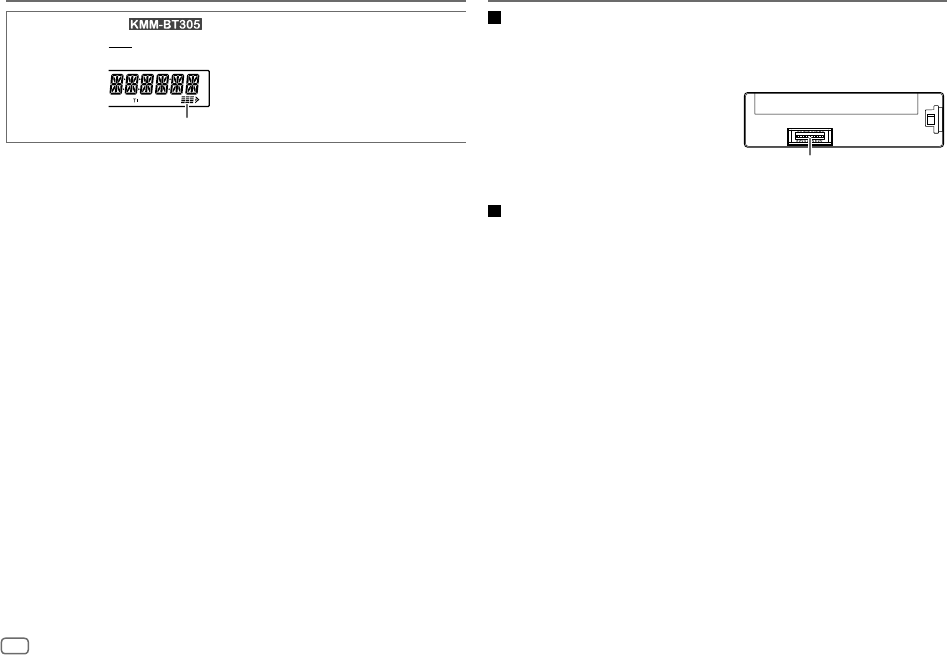
Finestra del display
S’illumina non
appena si stabilisce
la connessione
Bluetooth.
(Pagina12)
JS_KWD_KMM_BT305_EN_IT.indd 3JS_KWD_KMM_BT305_EN_IT.indd 316/8/2018 9:37:05 AM16/8/2018 9:37:05 AM
4
ITALIANO
Data Size: B6L (182 mm x 128 mm)
Book Size: B6L (182 mm x 128 mm)
OPERAZIONI PRELIMINARI
Selezionare la lingua da usare per le visualizzazioni e
annullare il modo dimostrativo
Alla prima accensione dell’unità (o
[FACTORY RESET]
è impostato su
[YES]
; vedere a
pagina5), il display mostra: “SEL LANGUAGE”
“PRESS” “VOLUME KNOB”
1 Ruotando la manopola del volume selezionare
[EN]
(inglese),
[RU]
(russo),
[SP]
(spagnolo) o
[FR]
(francese), quindi premerla.
L’impostazione predefinita è
[EN]
.
Sul display appaiono in sequenza: “CANCEL DEMO” “PRESS” “VOLUME
KNOB”.
2 Premere nuovamente la manopola del volume.
L’impostazione predefinita è
[YES]
.
3 Premere nuovamente la manopola del volume.
Viene visualizzata l’indicazione “DEMO OFF”.
Sul display appare quindi il tipo di crossover selezionato: “2-WAY X ’ OVER” o “3-WAY
X ’ OVER”
• Per istruzioni sul cambio del tipo di crossover vedere la sezione “Cambio del tipo
di crossover” a pagina 5.
Impostare l’ora e la data
1
Premere la manopola del volume per accedere al modo
[FUNCTION]
.
2 Ruotare la manopola del volume sino a selezionare
[CLOCK]
e quindi
premerla.
Per regolare l’ora
3 Ruotare la manopola del volume sino a selezionare
[CLOCKADJUST]
e quindi
premerla.
1
2
4 Ruotando la manopola del volume eseguire le varie impostazioni e quindi
premerla.
Ora Minuti
5 Ruotare la manopola del volume sino a selezionare
[CLOCKFORMAT]
e quindi
premerla.
6 Ruotare la manopola del volume sino a selezionare
[12H]
o
[24H]
e quindi
premerla.
Per impostare la data
7 Ruotare la manopola del volume sino a selezionare
[DATEFORMAT]
e quindi
premerla.
8 Ruotare la manopola del volume sino a selezionare
[DD/MM/YY]
o
[MM/DD/YY]
e quindi premerla.
9 Ruotare la manopola del volume sino a selezionare
[DATESET]
e quindi
premerla.
10 Ruotando la manopola del volume eseguire le varie impostazioni e quindi
premerla.
Giorno Mese Anno o Mese Giorno Anno
11 Premere a lungo per uscire.
Per ritornare all’impostazione precedente premere
.
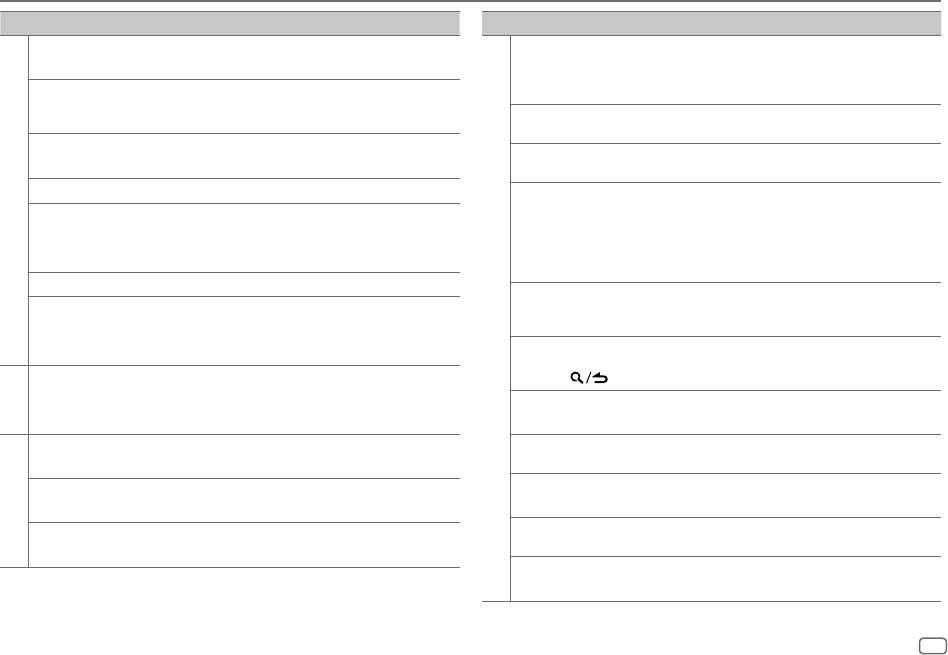
Eseguire le impostazioni iniziali
1
Premere B SRC ripetutamente per accedere al modo STANDBY.
2 Premere la manopola del volume per accedere al modo
[FUNCTION]
.
3 Ruotare la manopola del volume sino a selezionare l’elemento desiderato
(vedere la tabella che segue), e quindi premerla.
4 Ripetere il passo 3 sino a selezionare o attivare l’elemento d’interesse.
5 Premere a lungo per uscire.
Per ritornare all’impostazione precedente premere
.
Impostazione predefinita: [XX]
[AUDIO CONTROL]
[SWITCH PREOUT]
(Per : Soltanto quando [X’OVER] è impostato su [2WAY].)
(Pagina 5)
[REAR]/[SUB-W]: specifica se alle prese di uscita di linea posteriori sono
collegati i diffusori posteriori o un subwoofer (attraverso un amplificatore
esterno). (Pagina 32)
3
JS_KWD_KMM_BT305_EN_IT.indd 4JS_KWD_KMM_BT305_EN_IT.indd 416/8/2018 9:37:05 AM16/8/2018 9:37:05 AM
ITALIANO
5
Data Size: B6L (182 mm x 128 mm)
Book Size: B6L (182 mm x 128 mm)
OPERAZIONI PRELIMINARI
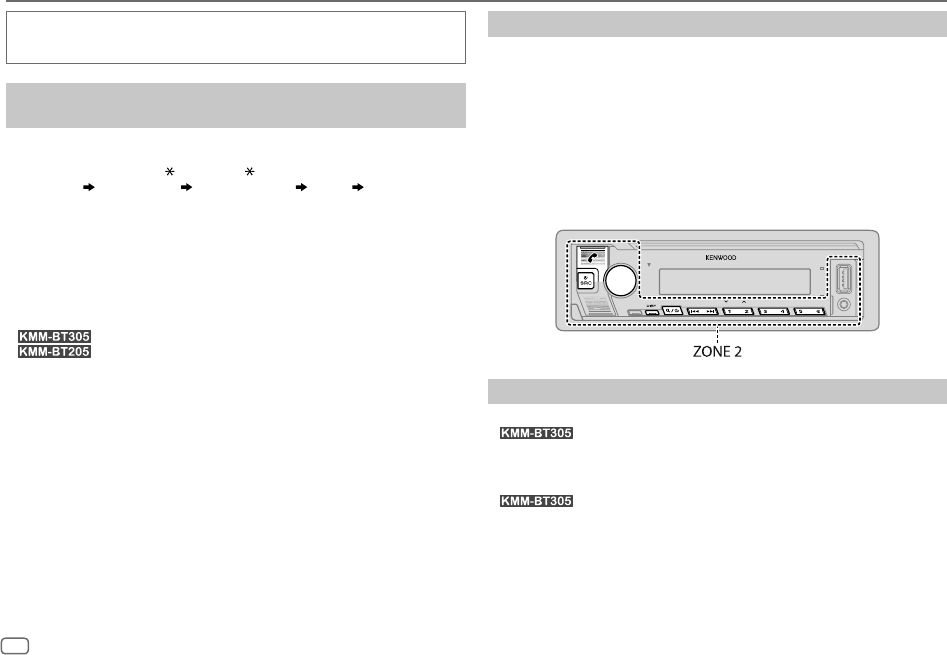
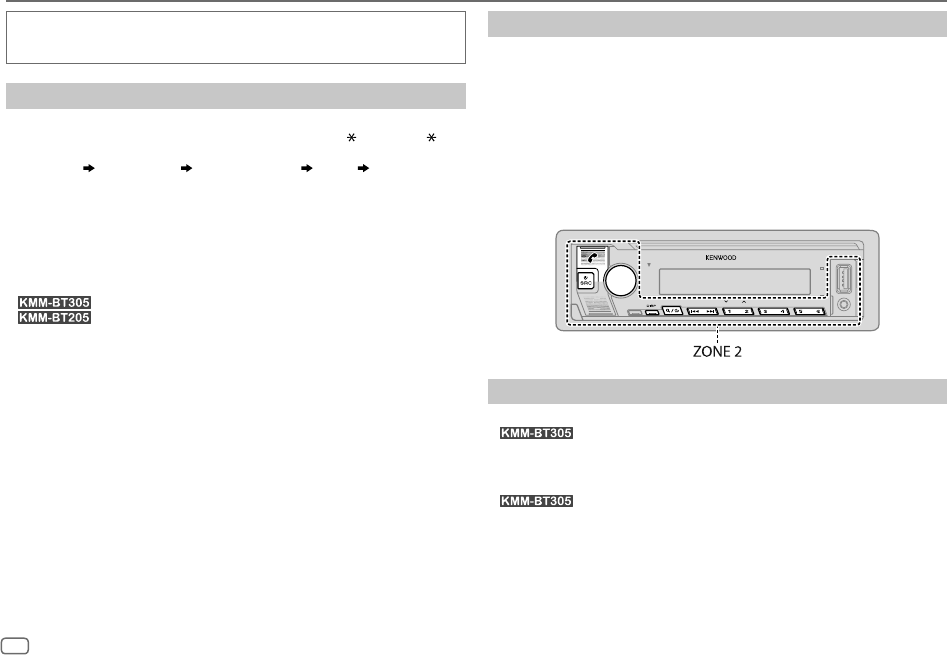
[DISPLAY]
[EASY MENU]
(Per )
Per
[FUNCTION]...
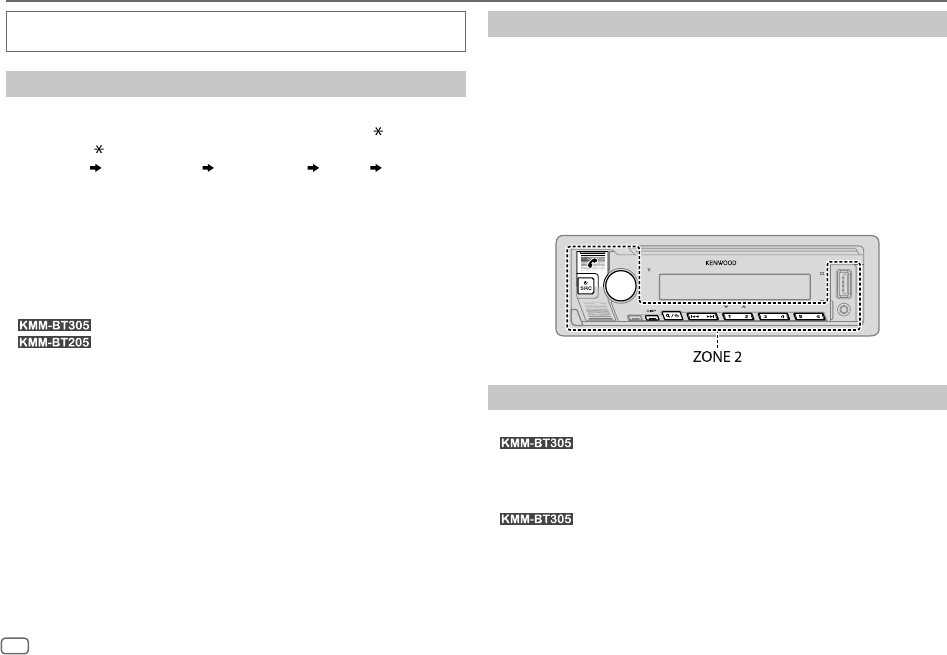
[ON]: l’illuminazione di [ZONE 1] diviene bianca. ;
[OFF]: l’illuminazione [ZONE 1] rimane dello stesso colore specificato in
[COLOR SELECT]. (Pagina 23)
• Quando si seleziona
[FUNCTION], l’illuminazione della [ZONE 2] diviene
azzurra a prescindere dall’impostazione di
[EASY MENU].
• Per come identificare la zona vedere l’illustrazione a pagina 23.
[TUNER SETTING]
[PRESET TYPE]
[NORMAL]: salva una stazione per ciascun tasto di preimpostazione in
ciascuna banda (FM1/FM2/FM3/MW/LW). ;
[MIX]: salva una stazione per
ciascun tasto di a prescindere dalla banda selezionata.
[SYSTEM]
[KEY BEEP]
(Soltanto quando [X’OVER] è impostato su [2WAY].)
[ON]: attiva il tono alla pressione dei tasti. ; [OFF]: disattiva il tono.
[SOURCE SELECT]
[SPOTIFYSRC]
[ON]: abilita la sorgente SPOTIFY/SPOTIFY BT nella selezione delle sorgenti. ;
[OFF]: la disabilita. (Pagina 10)
[BUILT-IN AUX][ON]: abilita la sorgente AUX nella selezione delle sorgenti. ;
[OFF]: la disabilita. (Pagina 11)
[P-OFF WAIT]
Disponibile soltanto quando il modo dimostrativo è disattivato.
Imposta l’intervallo di tempo al trascorrere del quale l’unità si spegne
automaticamente (mentre si trova in standby) per risparmiare la carica della
batteria.
[20M]: 20 minuti ; [40M]: 40 minuti ; [60M]: 60 minuti ; [–––]: annulla
[F/W UPDATE]
[UPDATE SYSTEM]
[F/W UP xxxx]
[YES]: avvia l’aggiornamento del firmware. ; [NO]: annulla l’operazione
(non avvia l’aggiornamento). Per informazioni particolareggiate
sull’aggiornamento del firmware si prega di vedere il sito
<www.kenwood.com/cs/ce/>.
[FACTORY RESET][YES]: ripristina le impostazioni di fabbrica (a eccezione di quelle salvate
dall’utilizzatore). ;
[NO]: annulla.
[CLOCK]
[CLOCK DISPLAY]
[ON]: sul display appare l’ora anche ad apparecchio spento. ; [OFF]: annulla.
[ENGLISH]
Selezionare la lingua di visualizzazione del menu [FUNCTION] e delle
informazioni musicali, se disponibile.
La lingua predefinita è
[ENGLISH].
[РУССКИЙ]
[ESPANOL]
[FRANCAIS]
Cambio del tipo di crossover
1
Premere B SRC ripetutamente per accedere al modo STANDBY.
2 Per selezionare il crossover premere a lungo i tasti numerici 4 e 5.
Appare il tipo di crossover attualmente selezionato.
3 Ruotando la manopola selezionare “2WAY” o “3WAY”, quindi premerla.
4 Ruotando la manopola selezionare “YES” o “NO”, quindi premerla.
Appare il nuovo tipo di crossover selezionato.
• Per annullare l’operazione premere a lungo
.
• Per regolare le impostazioni di crossover, vedere pagina20.
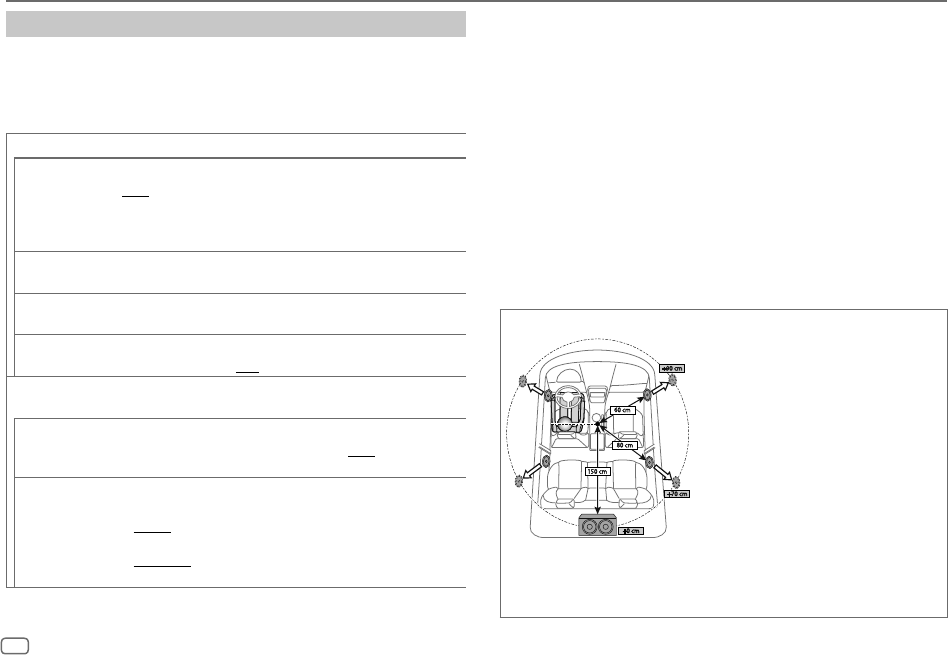
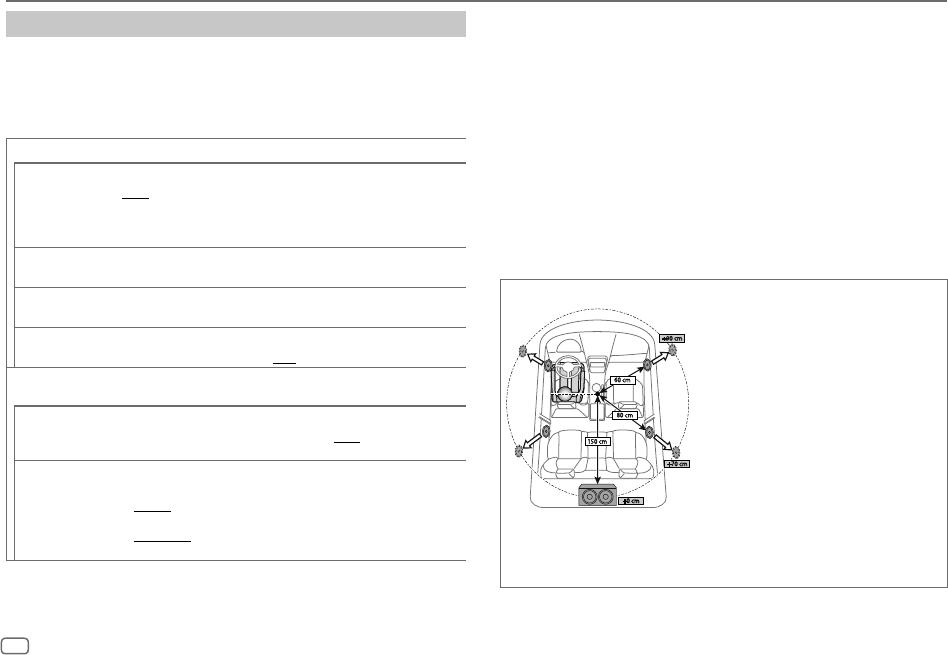
Attenzione:
Si deve selezionare il tipo di crossover adatto alla modo di collegamento dei
diffusori. (Pagina31, 32)
Se si seleziona il tipo sbagliato:
• i diffusori possono danneggiarsi.
• il livello sonoro potrebbe essere eccessivamente alto o basso.
JS_KWD_KMM_BT305_EN_IT.indd 5JS_KWD_KMM_BT305_EN_IT.indd 516/8/2018 9:37:05 AM16/8/2018 9:37:05 AM
6
ITALIANO
Data Size: B6L (182 mm x 128 mm)
Book Size: B6L (182 mm x 128 mm)
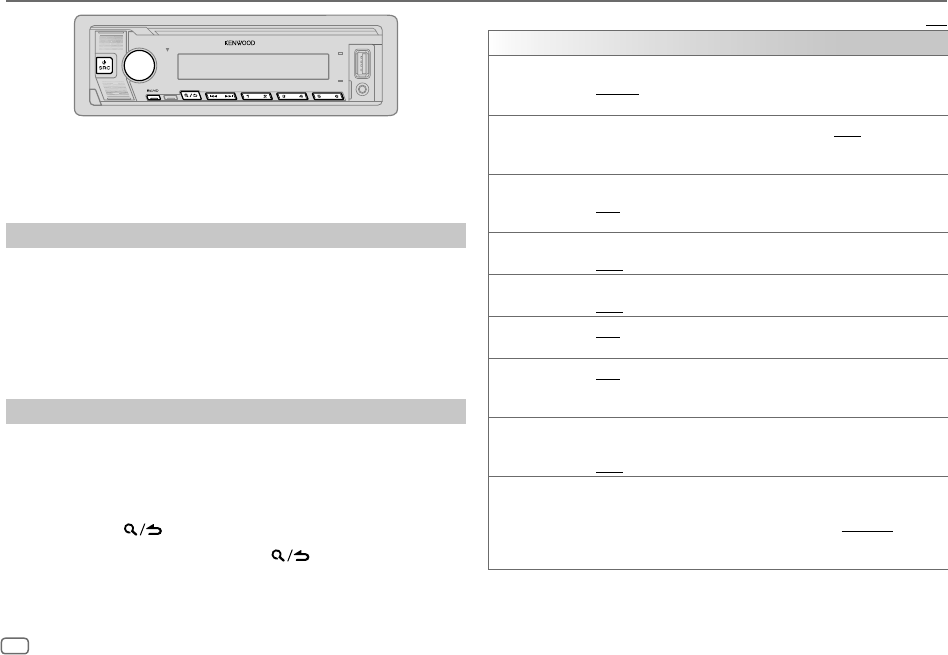
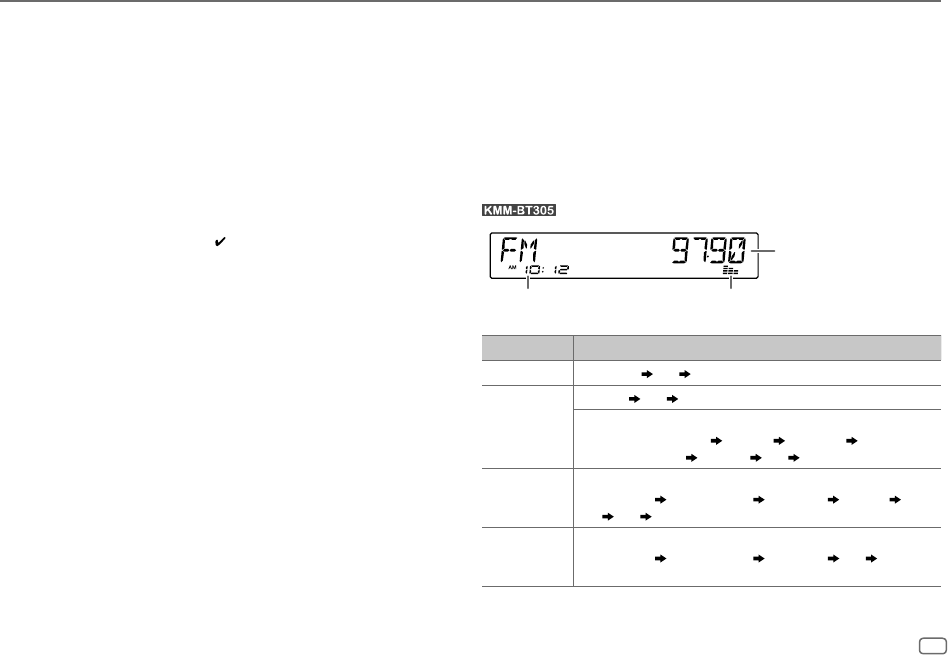
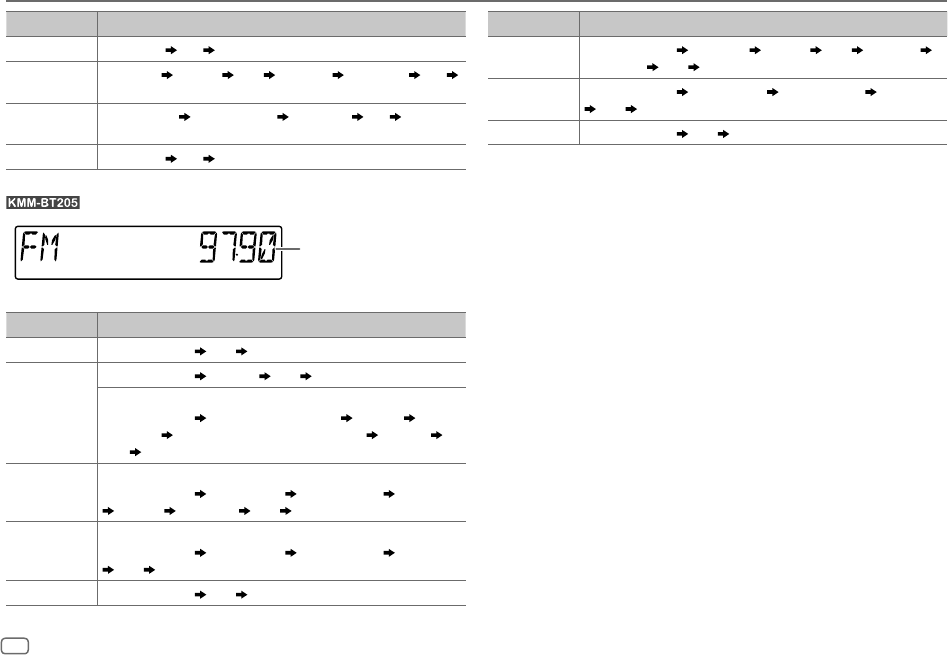
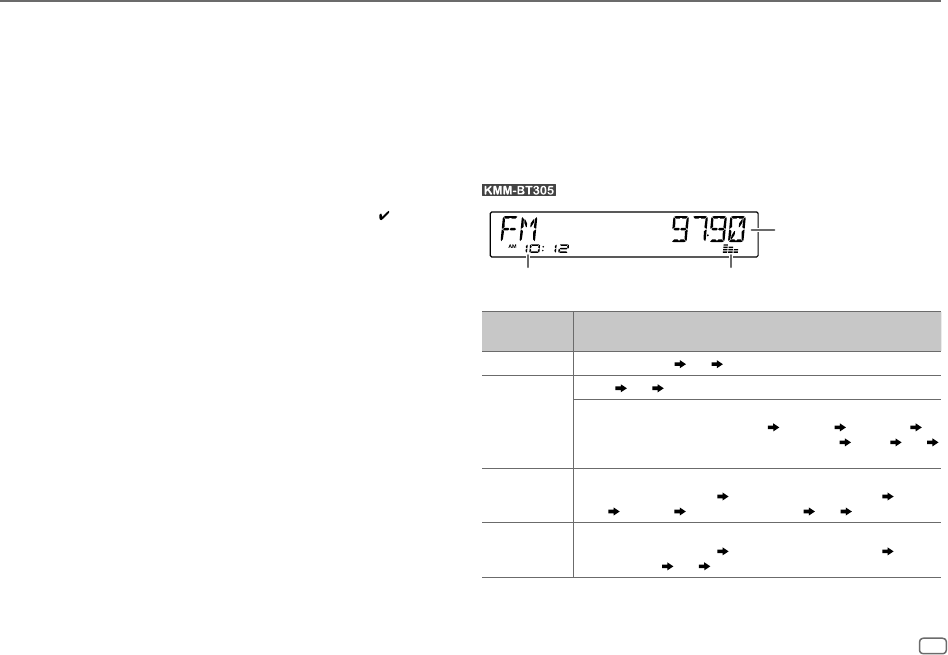
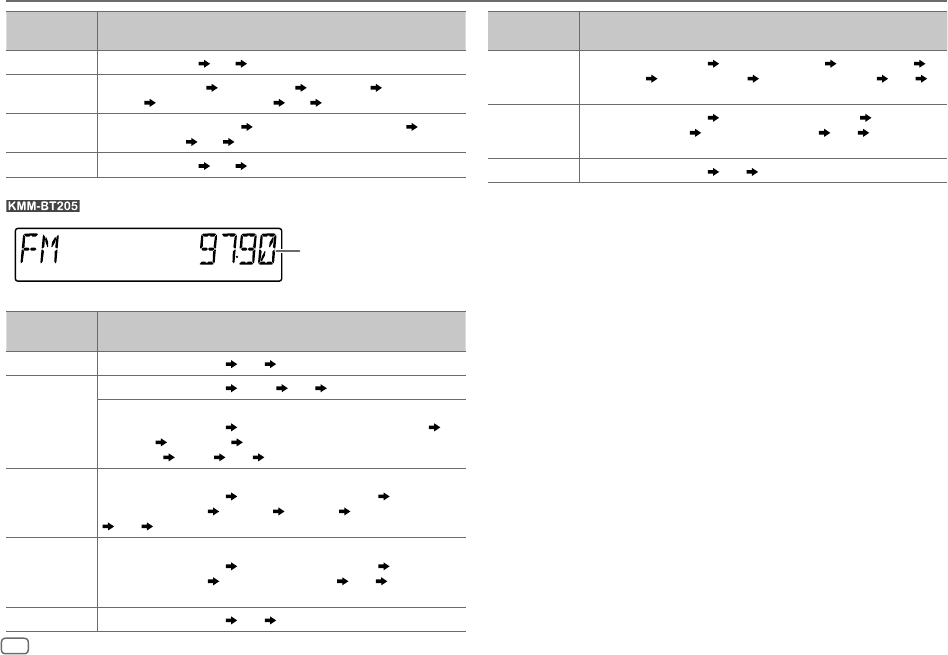
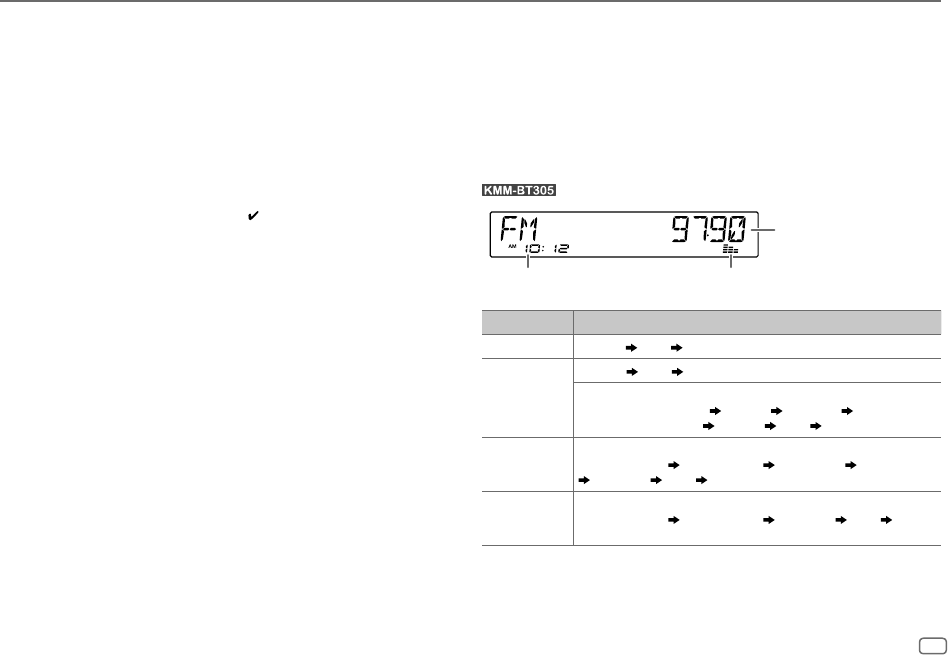
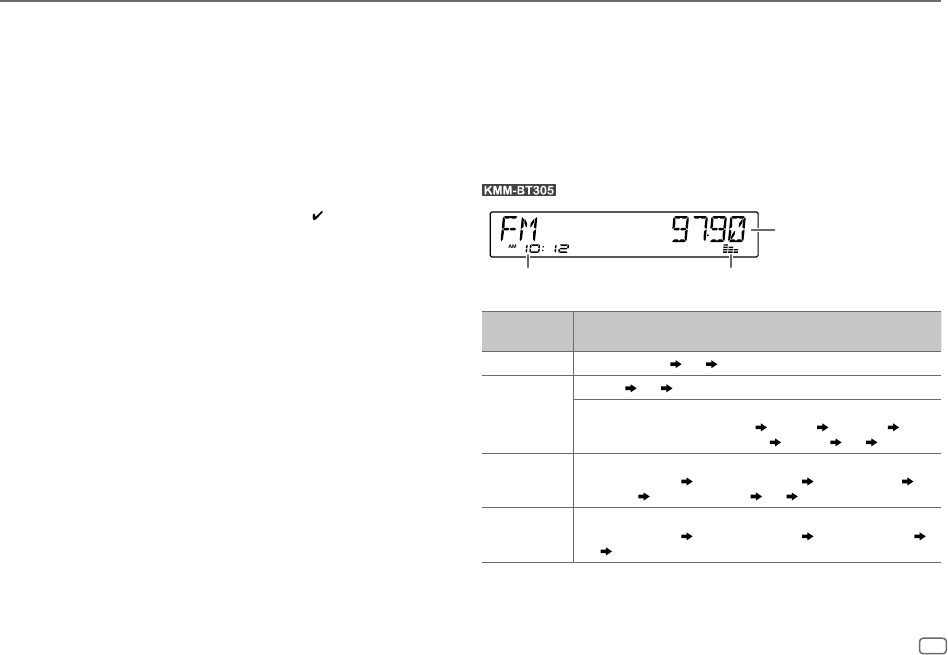
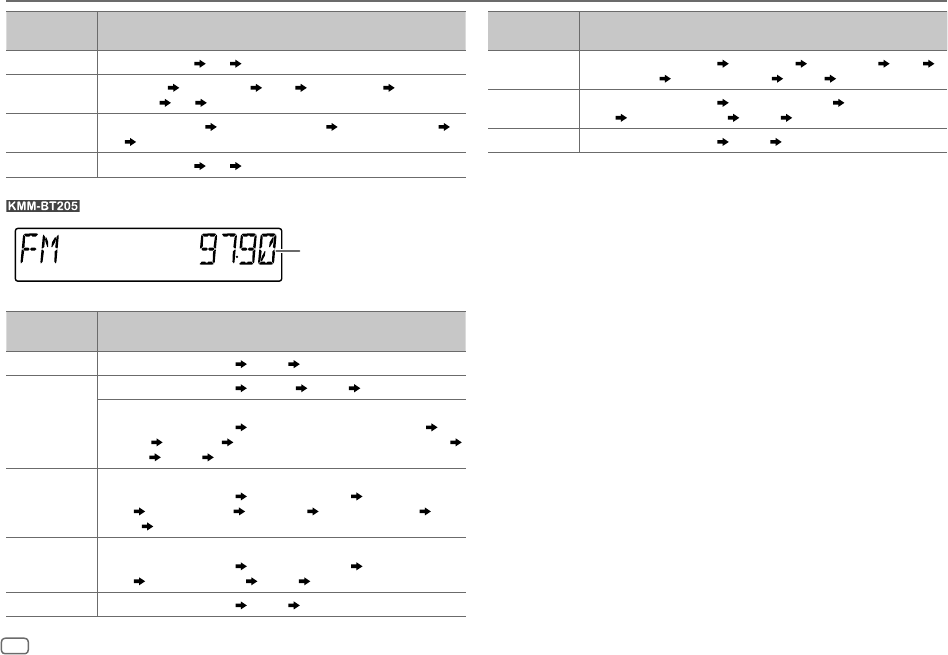
RADIO
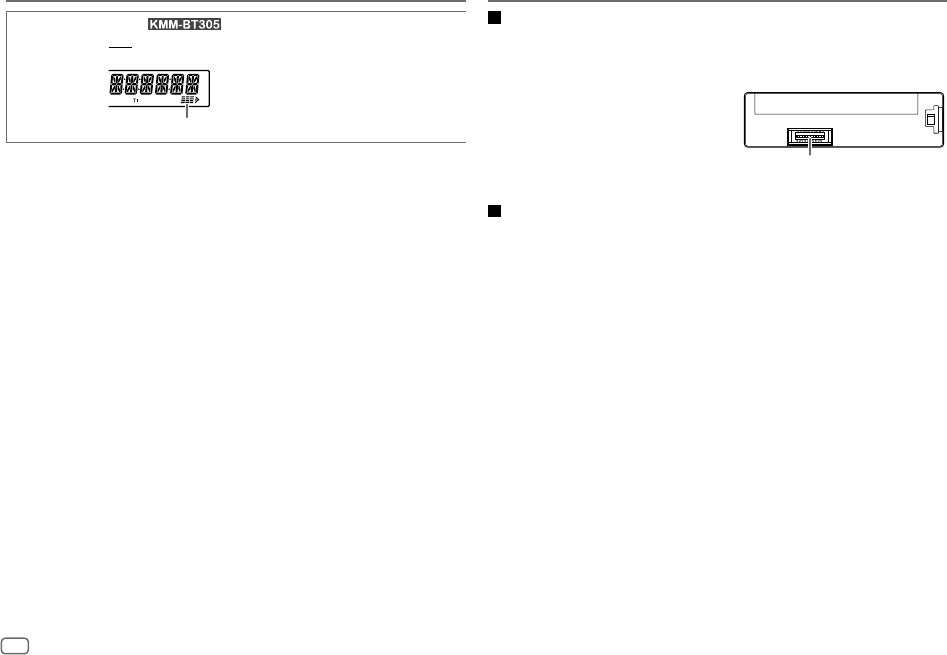
• Quando l’apparecchio riceve una trasmissione FM stereo di segnale
sufficientemente forte “ST” s’illumina.
• L’unità passa automaticamente all’allarme FM quando riceve un segnale di
allarme dalla trasmissione FM.
Ricercare una stazione
1
Premere quante volte necessario B SRC sino a selezionare BTAUDIO.
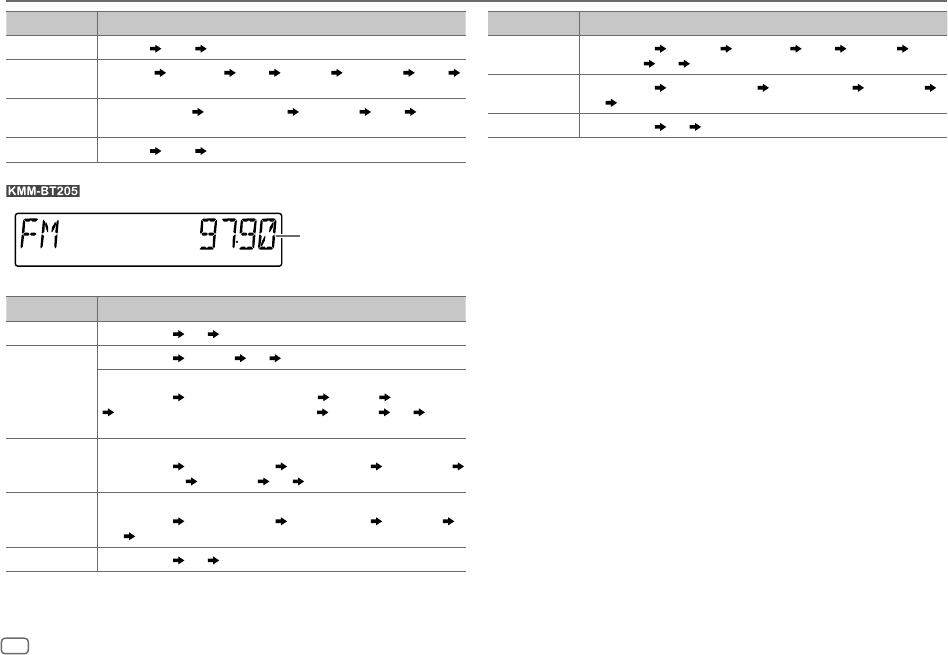
2 Premere quante volte necessario BAND per selezionare la banda FM1, FM2,
FM3, MW o LW.
3 Premere S / T per cercare una stazione.
Con questo apparecchio è possibile salvare in memoria sino a 18 stazioni FM e
sino a 6 stazioni MW/LW.
• Per salvare la stazione in memoria: Premere a lungo uno dei tasti numerici
(da 1 a 6).
• Per selezionare una stazione salvata in memoria: Premere uno dei tasti
numerici (da 1 a 6).
Altre impostazioni
1
Premere la manopola del volume per accedere al modo
[FUNCTION]
.
2 Ruotare la manopola del volume sino a selezionare l’elemento desiderato
(vedere la colonna destra), e quindi premerla.
3 Ripetere il passo 2 sino a selezionare o attivare l’elemento desiderato,
oppure seguire le istruzioni riportate per l’elemento selezionato.
4 Premere a lungo per uscire.
Per ritornare all’impostazione precedente premere
.
Impostazione predefinita: [XX]
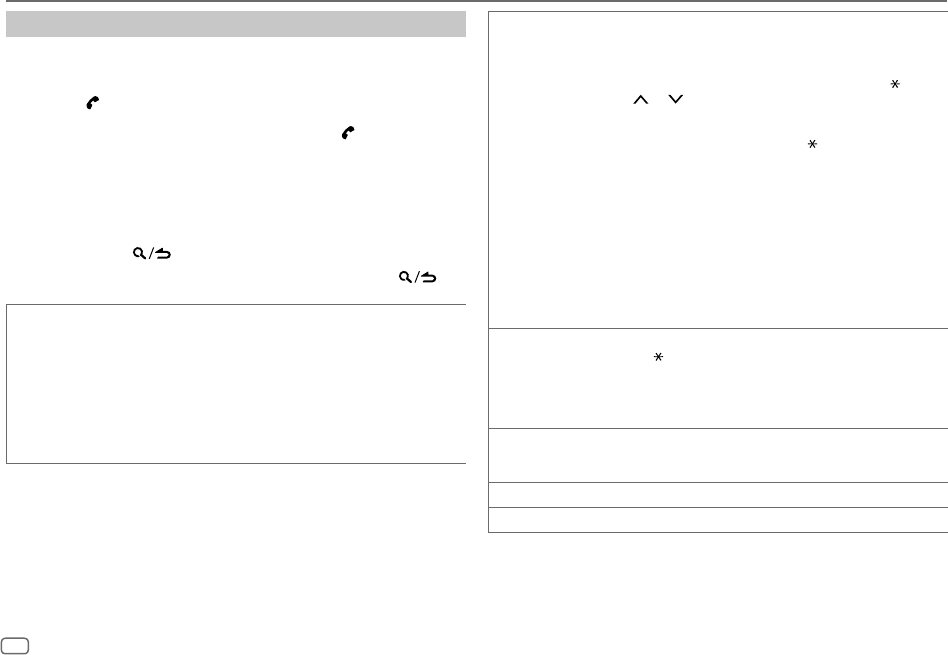
[TUNER SETTING]
[SEEK MODE]
Permette di selezionare il metodo ricerca per i tasti
S / T
alla loro
pressione.
[AUTO1]: cerca automaticamente le stazioni. ; [AUTO2]: per cercare una
stazione preimpostata. ;
[MANUAL]: cerca manualmente le stazioni.
[LOCAL SEEK][ON]: cerca soltanto le stazioni dal segnale forte. ; [OFF]: annulla.
• L’impostazione eseguita riguarda solo la sorgente/stazione selezionata. Quando
si cambia sorgente/stazione è necessario ripetere l’impostazione.
[AUTO MEMORY][YES]: inizia automaticamente a salvare le prime sei stazioni la cui ricezione è
buona. ;
[NO]: annulla.
• Selezionabile soltanto quando
[PRESETTYPE] è impostato su [NORMAL].
(Pagina 5)
[MONO SET][ON]: migliora la ricezione FM (l’effetto stereo va comunque perso). ;
[OFF]: annulla.
[NEWS SET][ON]: se disponibile, l’apparecchio seleziona temporaneamente il programma dei
notiziari. ;
[OFF]: annulla.
[REGIONAL][ON]: passa a un’altra stazione, ma solo nella regione specifica, usando il
comando “AF”. ;
[OFF]: annulla.
[AF SET][ON]: quando la qualità di ricezione non è soddisfacente cerca automaticamente
un’altra stazione che diffonda lo stesso programma nella medesima rete Radio
Data System ma il cui segnale sia migliore. ;
[OFF]: annulla.
[TI][ON]: durante l’ascolto di qualsiasi sorgente (ad eccezione della radio MW/LW)
abilita il passaggio temporaneo alle informazioni sul traffico, se disponibili (“TI”
s’illumina). ;
[OFF]: annulla.
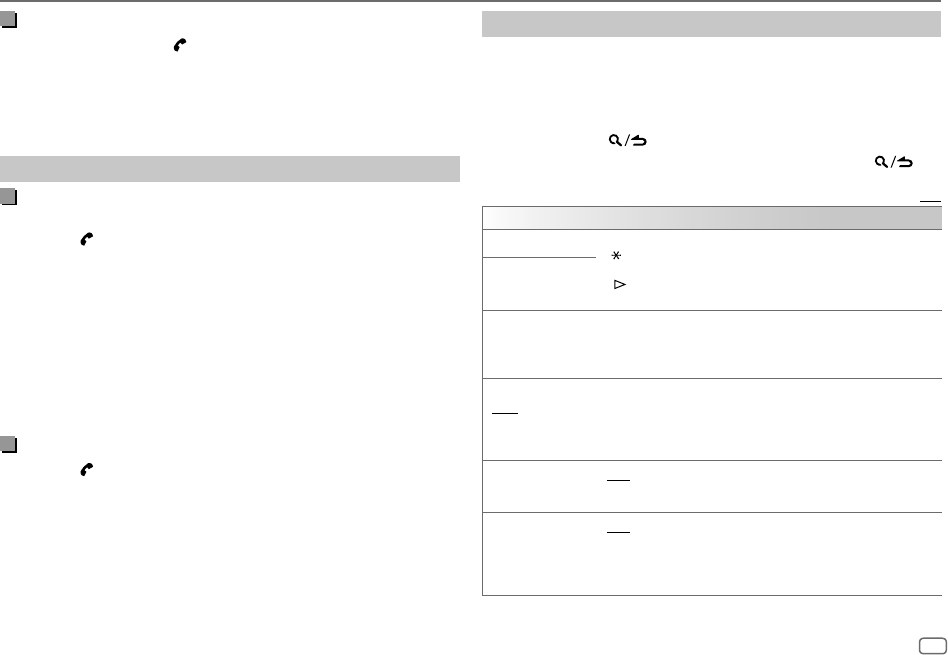
[PTY SEARCH]
1
Ruotare la manopola del volume sino a selezionare il tipo di programma
disponibile (pagina 7) e quindi premerla.
2
Ruotare la manopola del volume sino a selezionare la lingua PTY ([ENGLISH]/
[FRENCH]/[GERMAN]) e quindi premerla.
3
Premere
S
/
T
per avviare la ricerca.
JS_KWD_KMM_BT305_EN_IT.indd 6JS_KWD_KMM_BT305_EN_IT.indd 616/8/2018 9:37:06 AM16/8/2018 9:37:06 AM
ITALIANO
7
Data Size: B6L (182 mm x 128 mm)
Book Size: B6L (182 mm x 128 mm)
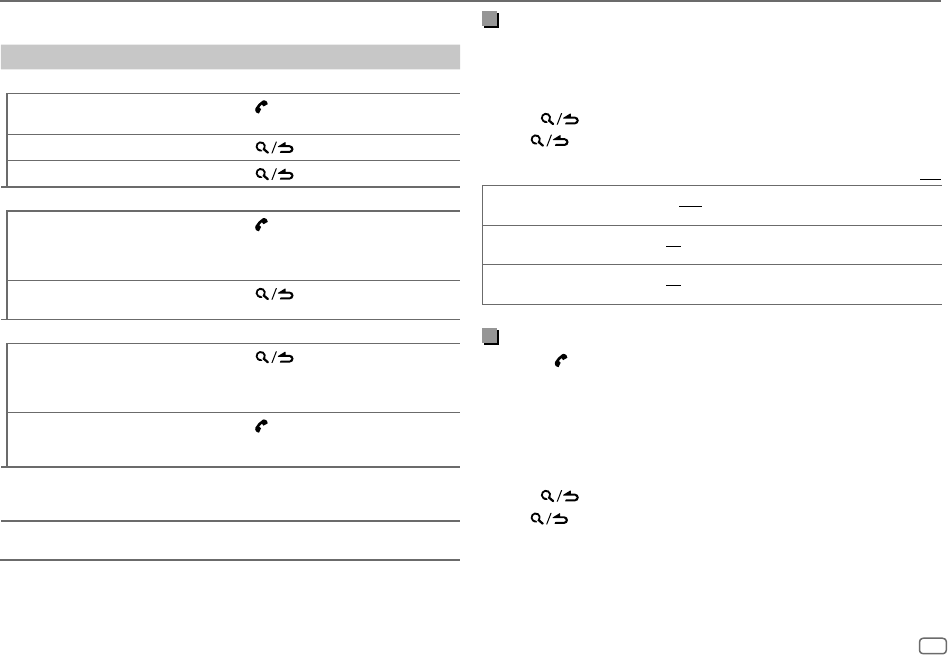
[CLOCK]
[TIME SYNC]
[ON]: sincronizza l’orologio dell’apparecchio con quello del Radio Data System. ;
[OFF]: annulla.
• [
LOCAL SEEK]/[MONO SET]
/
[NEWS SET]
/
[REGIONAL]
/
[AF SET]
/
[TI]
/
[PTY SEARCH]
sono
selezionabili soltanto nelle bande FM1, FM2 e FM3.
• Se si regola il volume durante la ricezione delle informazioni sul traffico o mentre
si sta ricevendo un notiziario, l’apparecchio lo memorizza automaticamente.
Applicherà quindi lo stesso volume la volta successiva che si accederà allo stesso
tipo di servizio.
Tipi di programma disponibili durante la ricerca [PTY SEARCH]
[SPEECH]
:
[NEWS]
,
[AFFAIRS]
,
[INFO]
(informazioni),
[SPORT]
,
[EDUCATE]
,
[DRAMA]
,
[CULTURE]
,
[SCIENCE]
,
[VARIED]
,
[WEATHER]
,
[FINANCE]
,
[CHILDREN]
,
[SOCIAL]
,
[RELIGION]
,
[PHONE IN]
,
[TRAVEL]
,
[LEISURE]
,
[DOCUMENT]
[MUSIC]
:
[POP M]
(musica),
[ROCK M]
(musica),
[EASY M]
(musica),
[LIGHT M]
(musica),
[CLASSICS]
,
[OTHER M]
(musica),
[JAZZ]
,
[COUNTRY]
,
[NATION M]
(musica),
[OLDIES]
,
[FOLK M]
(musica)
L’apparecchio cerca il tipo di programma categorizzato come
[SPEECH]
o
[MUSIC]
,
se selezionato.
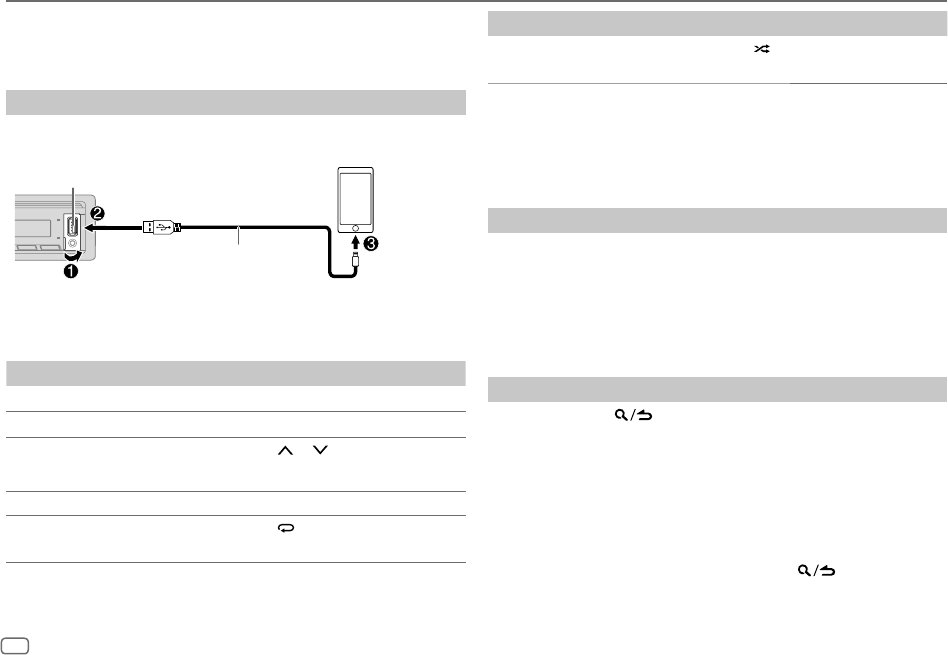
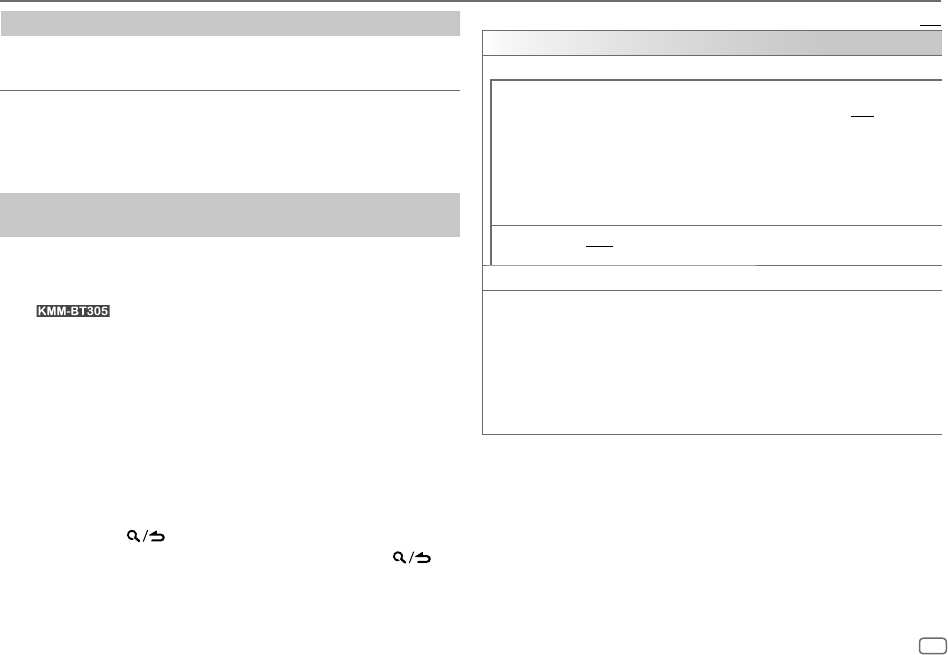
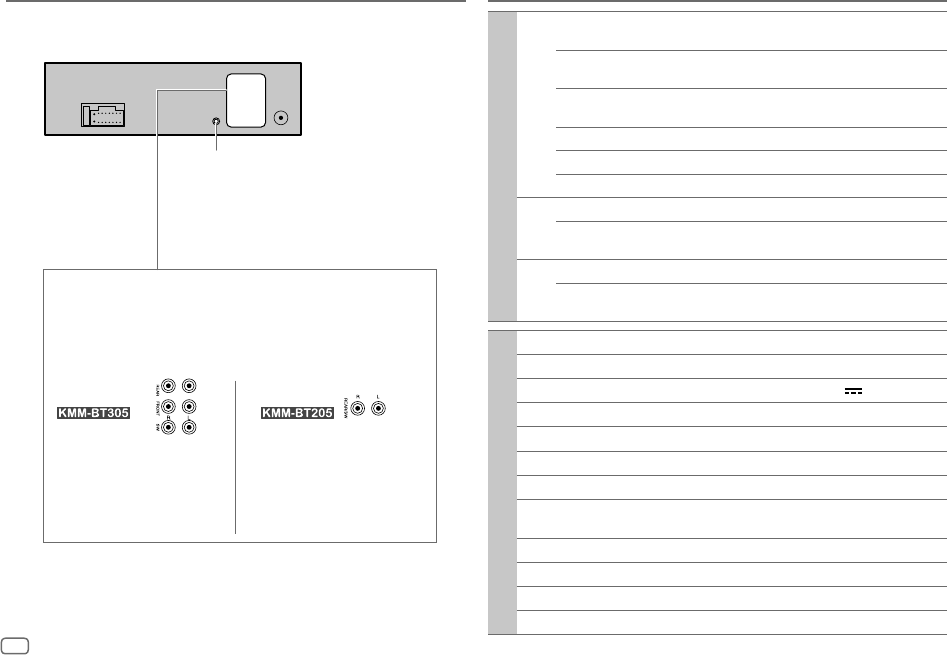
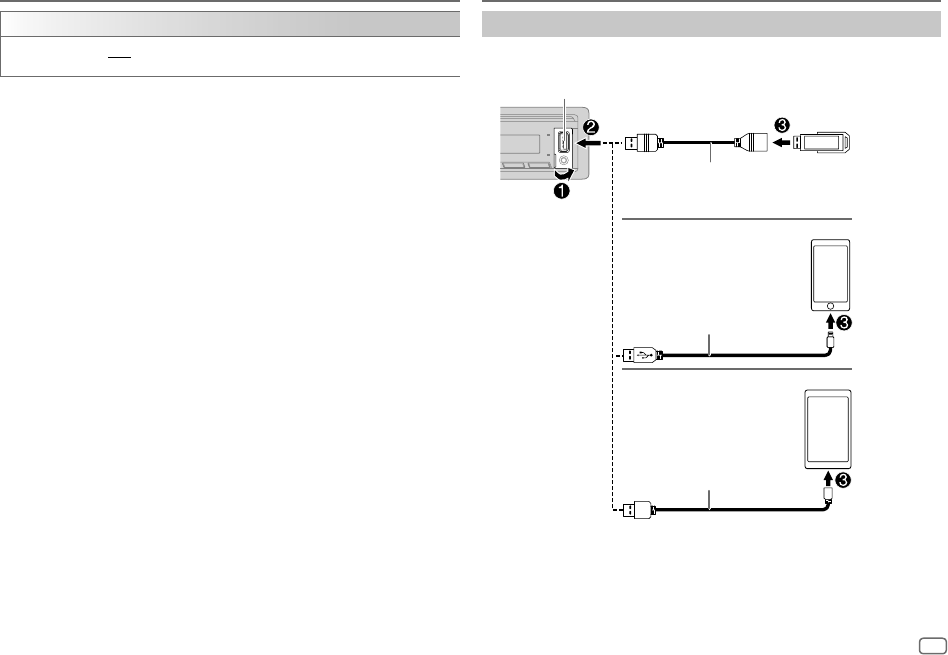
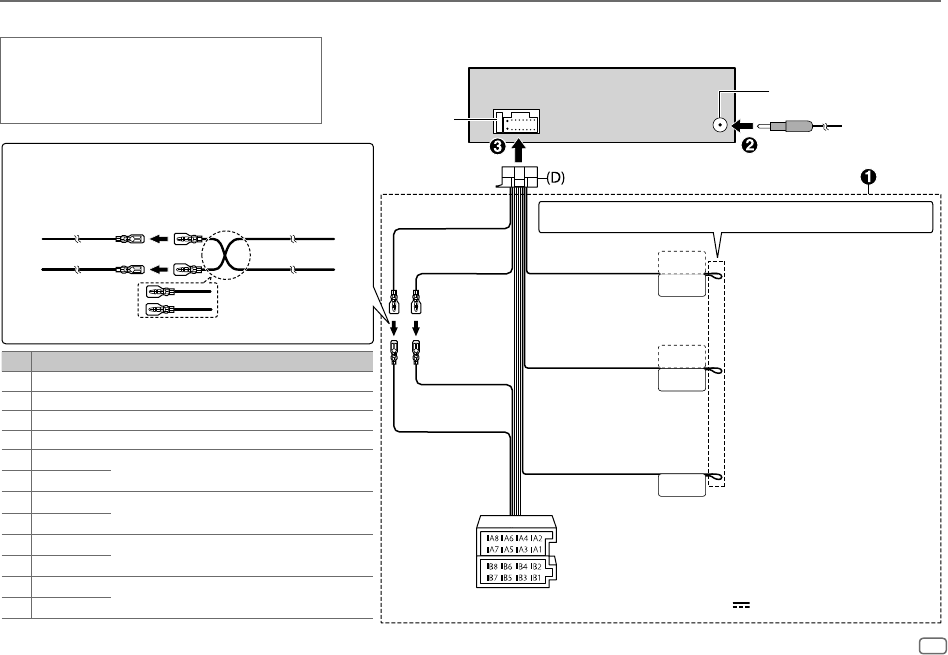
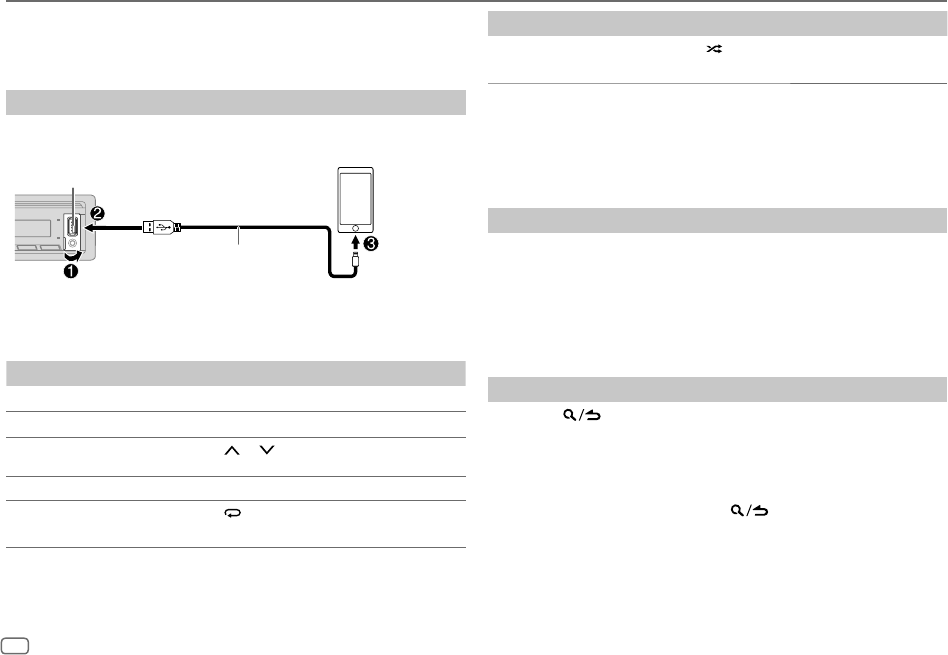
RADIO USB, iPod e ANDROID
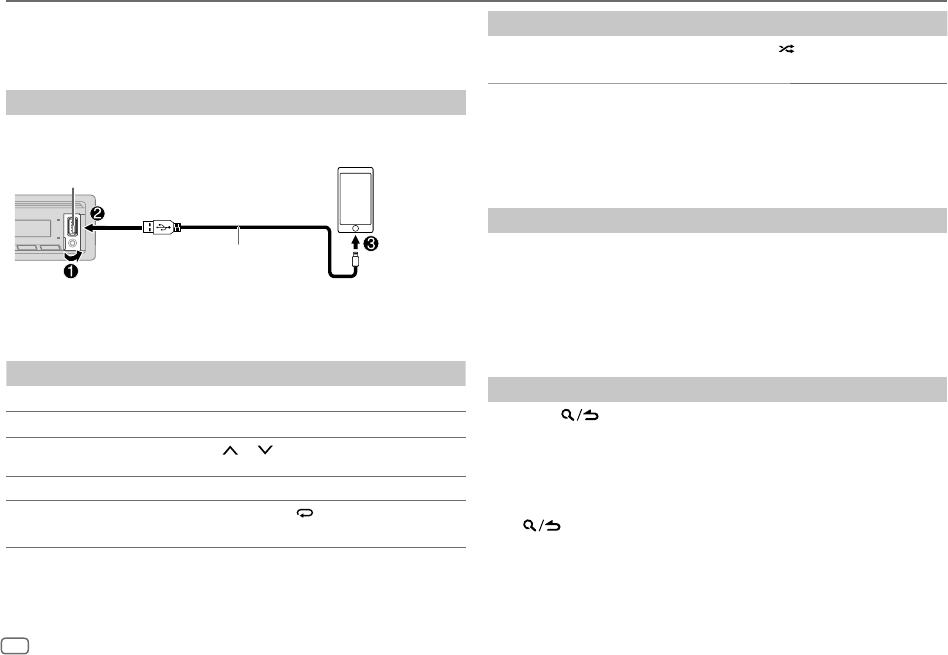
Avviare la riproduzione
L’apparecchio seleziona automaticamente la sorgente e ne avvia la riproduzione.
*1 KCA-iP102: tipo a 30 contatti; KCA-iP103: tipo Lightning
*2 Quando non si usa questo cavo si raccomanda di non lasciarlo nel veicolo.
*3 È possibile controllare il dispositivo Android utilizzando lo stesso dispositivo Android tramite altre
applicazioni per lettori di file multimediali in esso installate.
Presa d’ingresso USB
CA-U1EX (massimo.: 500 mA)
(accessorio opzionale)
Comune cavo USB*2
(del tipo comunemente
disponibile in commercio)
KCA-iP102/KCA-iP103
(accessorio opzionale)*1 o
accessorio dell’iPod o dell’iPhone*2
USB
iPod/iPhone
ANDROID*3
JS_KWD_KMM_BT305_EN_IT.indd 7JS_KWD_KMM_BT305_EN_IT.indd 716/8/2018 9:37:06 AM16/8/2018 9:37:06 AM
8
ITALIANO
Data Size: B6L (182 mm x 128 mm)
Book Size: B6L (182 mm x 128 mm)
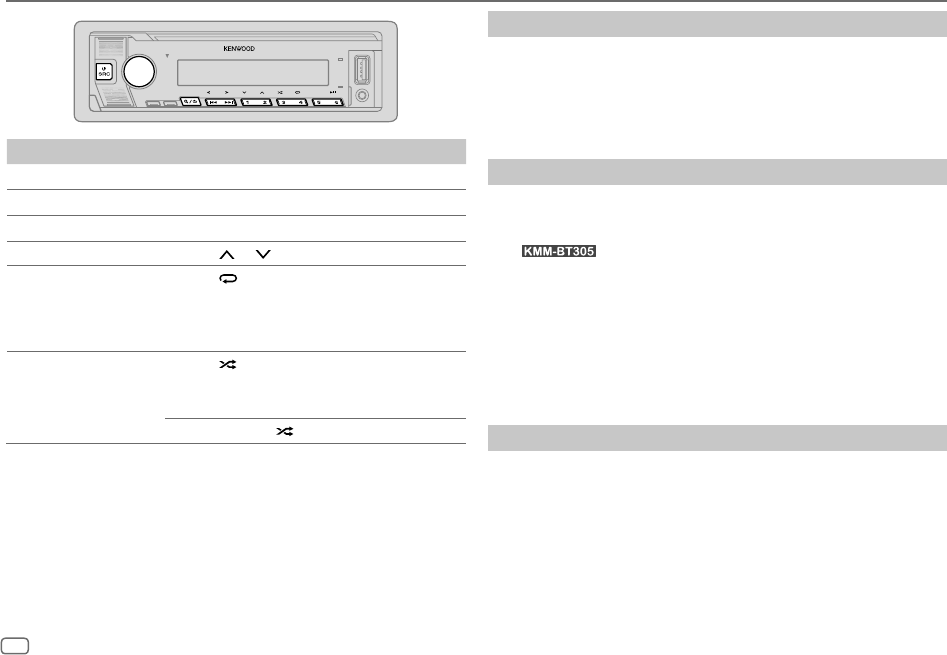
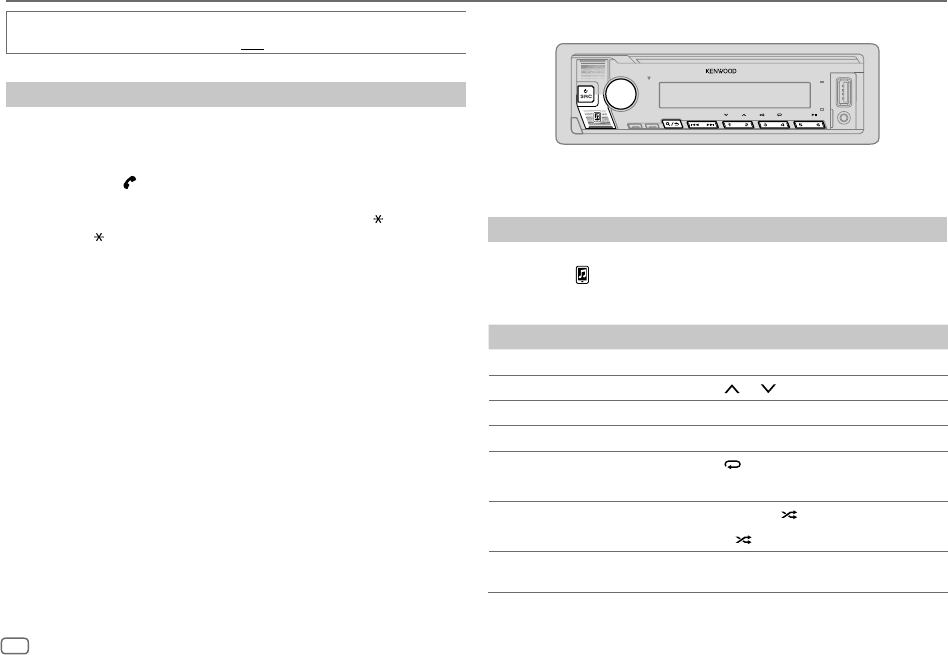
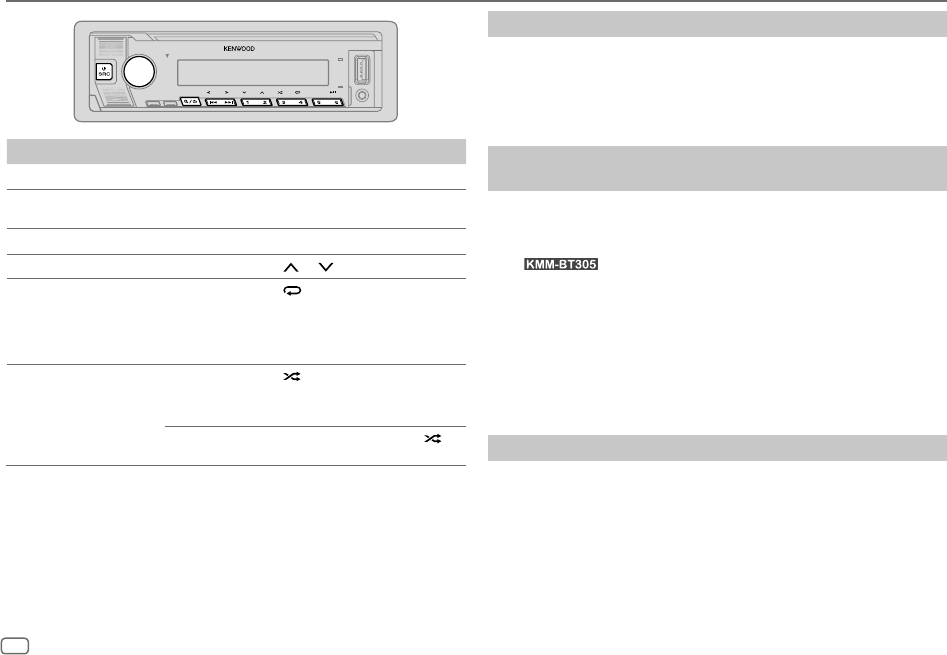
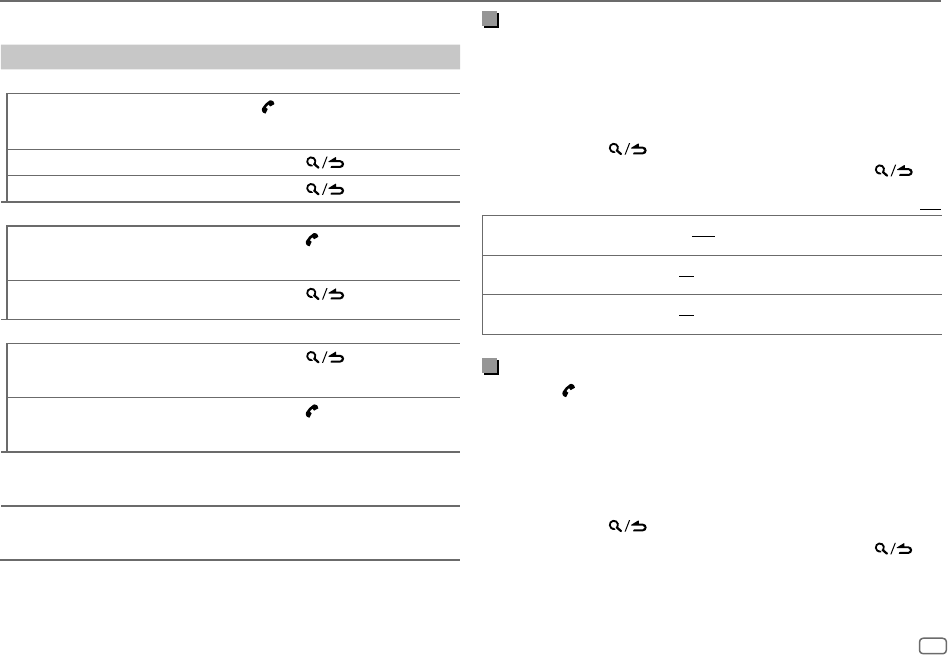
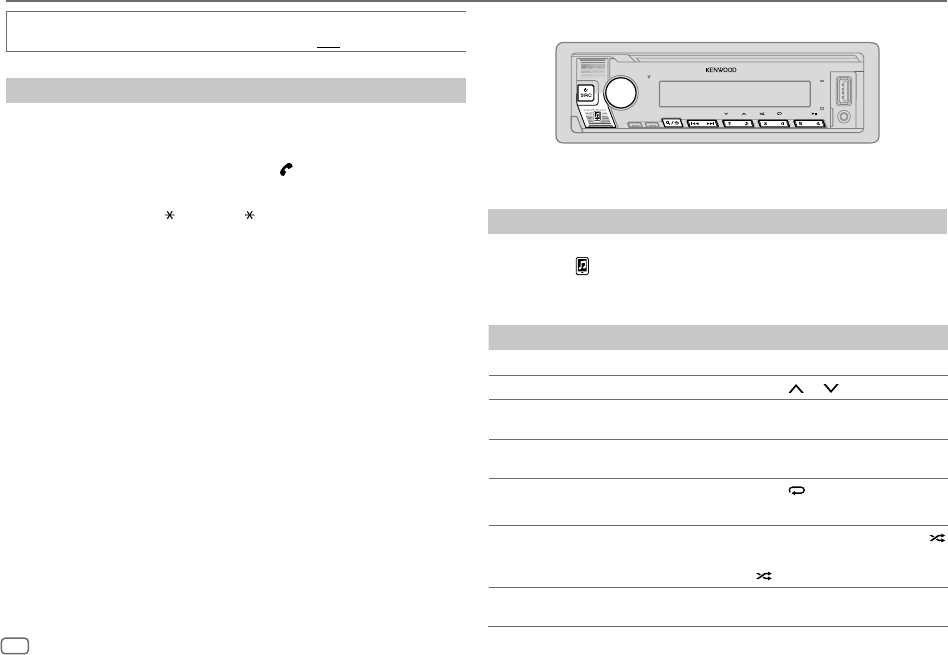
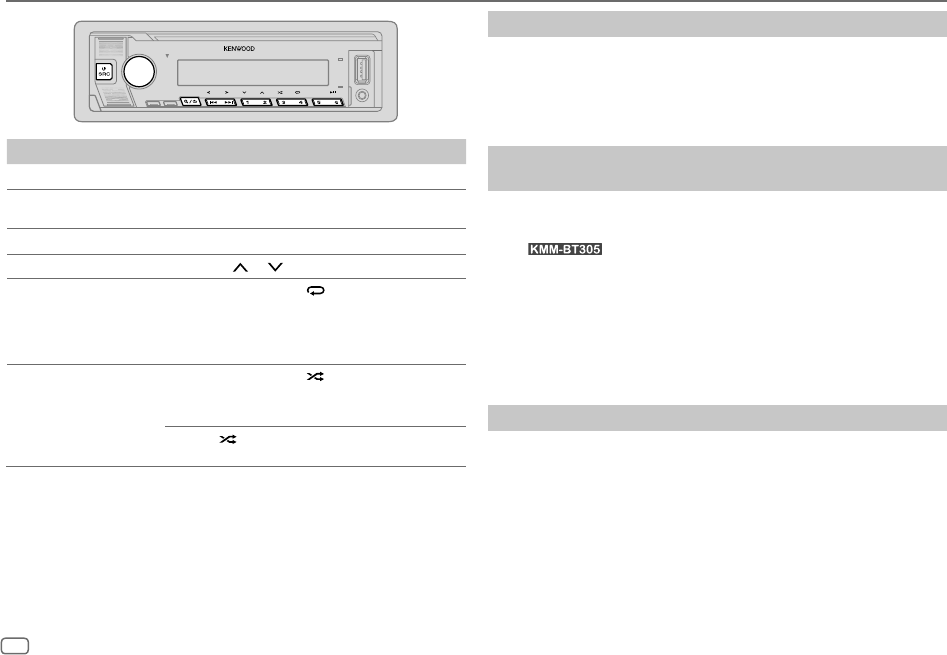
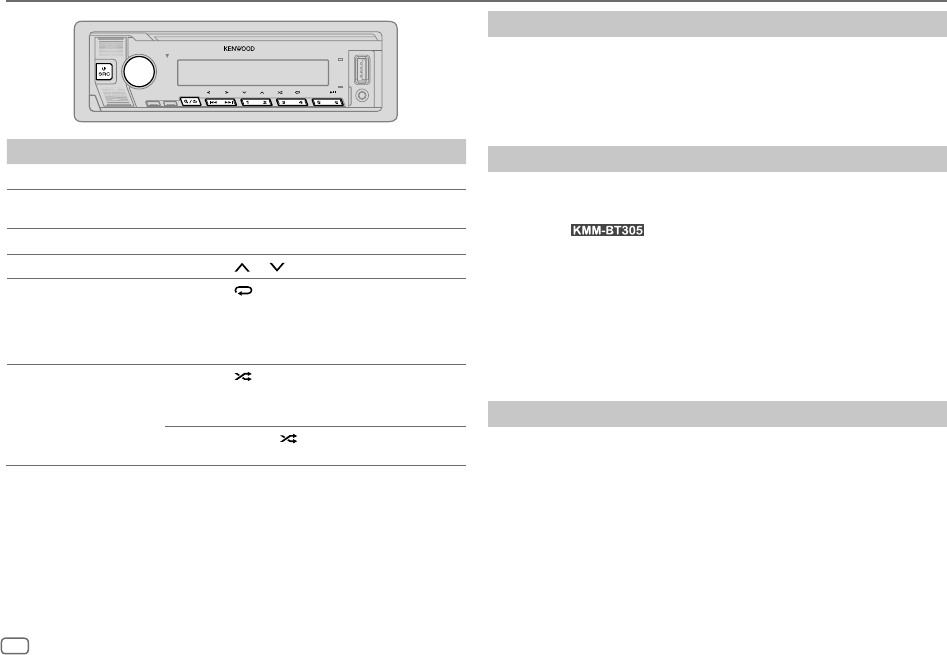
PerDal frontalino
Riproduzione/pausa
Premere 6
IW.
Avanzare o retrocedere
rapidamente*4
Premere a lungo
S / T.
Selezionare un file
Premere
S / T.
Seleziona una cartella*5Premere 2
/ 1 .
Ripetizione*4*6Premere 4
quante volte necessario.
[FILE REPEAT]
/
[FOLDER REPEAT]
/
[ALL REPEAT]
:
file MP3, WMA, AAC, WAV e FLAC
[FILE REPEAT]
/
[FOLDER REPEAT]
/
[REPEAT OFF]
: iPod
Riproduzione casuale*4*6Premere 3
quante volte necessario.
[FOLDERRANDOM]
/
[RANDOM OFF]
:
file MP3, WMA, AAC, WAV e FLAC o iPod
Premere a lungo 3
sino a selezionare
[ALLRANDOM]
.
*4 Non applicabile per ANDROID.
*5 Non disponibile per l’iPod e ANDROID.
*6 Per iPod: Disponibile soltanto quando si seleziona
[MODEOFF]. (Pagina 9)
Selezionare un’unità con file audio
Mentre è selezionata la sorgente USB premere quante volte necessario 5.
L’apparecchio riprodurrà i brani salvati in.
• Memoria interna o esterna selezionata di uno smartphone (classe di
archiviazione di massa).
• Unità selezionata di un dispositivo multi-unità.
Impostazioni per l’uso dell’applicazione KENWOOD Remote
L’applicazione KENWOOD Remote permette di gestire il sintolettore KENWOOD
con un iPhone o un iPod (mediante la connessione Bluetooth o la presa d’ingresso
USB) o con uno smartphone Android (mediante la connessione Bluetooth).
• Nel modello
quando si collega l’applicazione KENWOOD Remote
nella finestra di visualizzazione appare l’indicatore “R.APP”.
Preparazione:
• Prima di connettere il dispositivo è necessario installarvi la versione più recente
dell’applicazione KENWOOD Remote.
• Per maggiori informazioni al riguardo si prega di visitare il sito
<www.kenwood.com/cs/ce/>.
Le impostazioni sono effettuabili allo stesso modo della connessione Bluetooth.
(Pagina17)
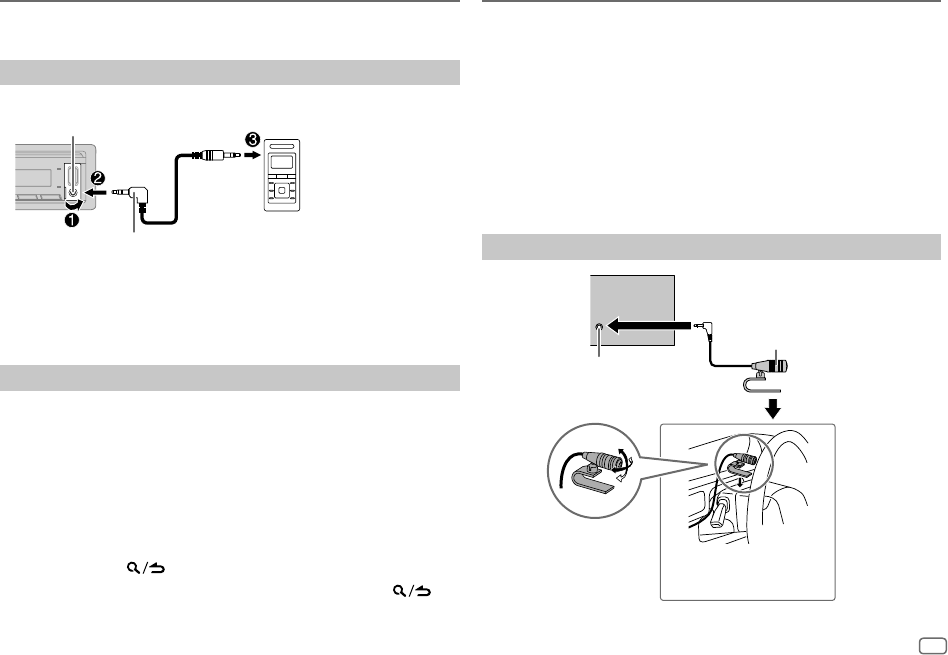
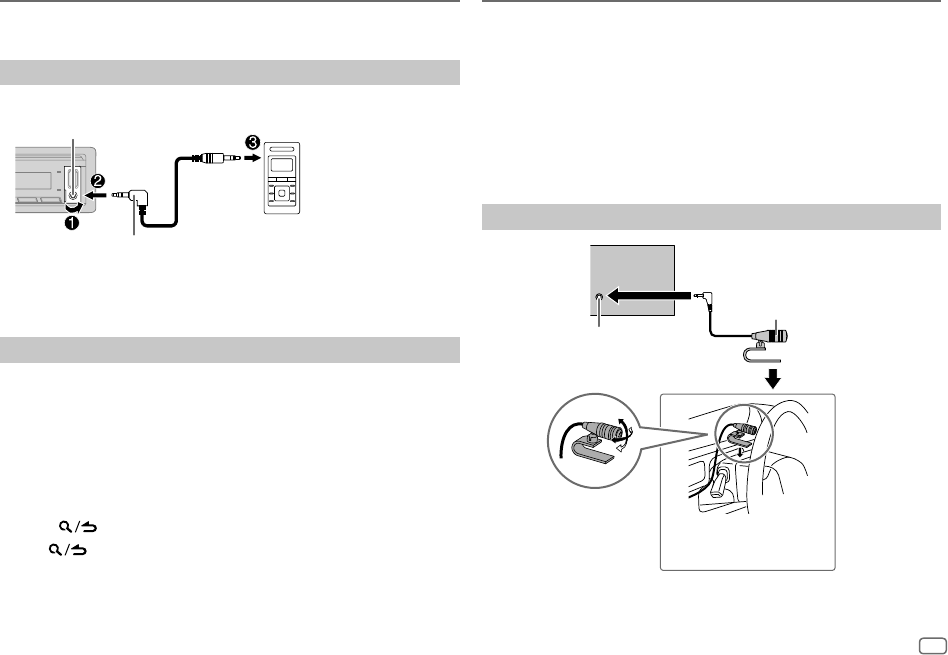
Ascoltare TuneIn Radio/TuneIn Radio Pro
Durante l’ascolto dell’applicazione TuneIn Radio, o TuneIn Radio Pro collegare
l’iPod o l’iPhone alla presa d’ingresso USB di questo apparecchio.
• Ora sarà l’apparecchio a emettere il suono proveniente da queste applicazioni.
USB, iPod e ANDROID
JS_KWD_KMM_BT305_EN_IT.indd 8JS_KWD_KMM_BT305_EN_IT.indd 816/8/2018 9:37:06 AM16/8/2018 9:37:06 AM
ITALIANO
9
Data Size: B6L (182 mm x 128 mm)
Book Size: B6L (182 mm x 128 mm)
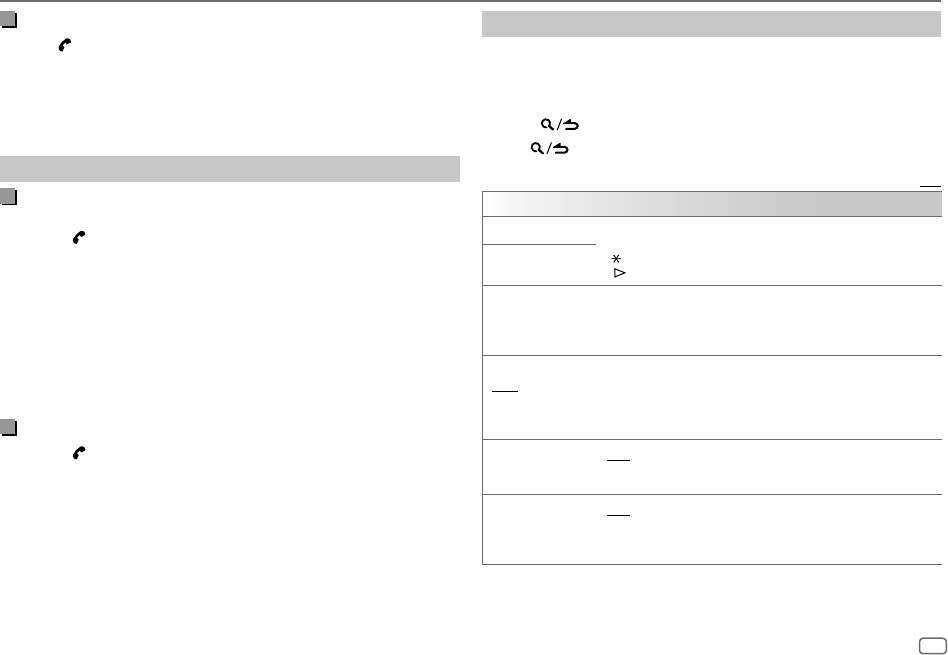
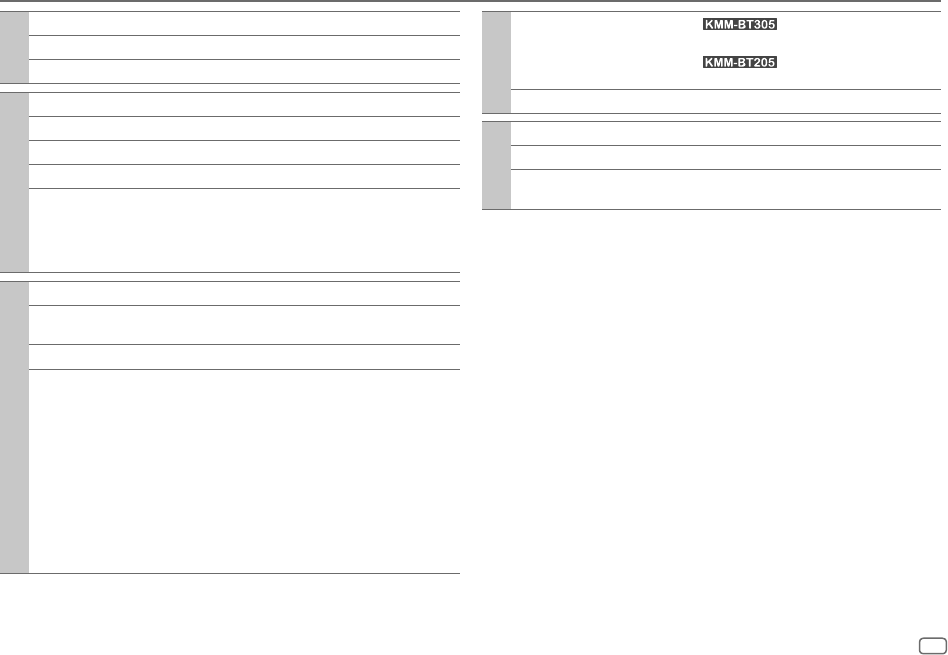
Selezionare il modo di controllo
Mentre ci si trova nella sorgente iPodUSB (o nella sorgente iPodBT), premere
ripetutamente 5.
[MODE ON]
: controlla l’iPod dall’iPod stesso. Da questa unità è comunque possibile
eseguire operazioni quali riproduzione/messa in pausa, salto di file e
avanzamento o riavvolgimento rapidi.
[MODE OFF]
: controlla l’iPod dall’unità principale.
Selezionare un file da una cartella o da un elenco
Con l’iPod questa funzione è disponibile soltanto quando si seleziona
[MODE OFF]
.
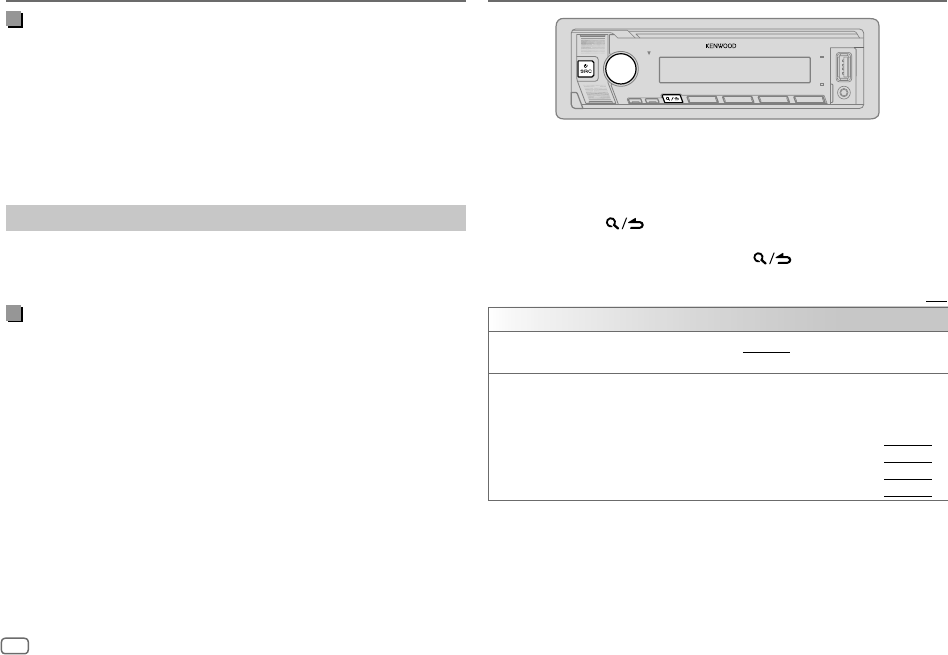
1 Premere .
2 Ruotare la manopola del volume sino a selezionare la cartella o l’elenco
desiderato, quindi premerla.
3 Ruotare la manopola del volume sino a selezionare il file desiderato, quindi
premerla.
Ricerca rapida
(
applicabile solo per la sorgente
USB)
Se i file sono molti è possibile cercarli rapidamente.
Ruotando velocemente la manopola del volume si scorre velocemente
l’elenco.
Salto di ricerca
(applicabile solo per la sorgente iPodUSB o la sorgente iPodBT)
Premere S / T per cercare i file al rapporto di salto ricerca pre-
impostato.
• Premendo
S / T a lungo la ricerca avanza con un rapporto di salto
del 10%.
Ricerca alfabetica
(applicabile solo per la sorgente iPodUSB o la sorgente
iPodBT)
La ricerca dei file può essere effettuata inserendone il primo carattere.
1Ruotare velocemente la manopola del volume per accedere alla
ricerca per caratteri.
2Ruotare la manopola del volume sino a selezionare il carattere
d’interesse.
• Per cercare un carattere diverso da AaZ e da 0a9 selezionare “
*
”.
3Premere S / T per fare scorrere la posizione d’inserimento.
• È possibile inserire sino a tre caratteri.
4Premere la manopola del volume per avviare la ricerca.
USB, iPod e ANDROID
• Per ritornare alla cartella principale (root), al primo file o al menu principale
premere il tasto 5. (Operazione non disponibile con la sorgente BT AUDIO.)
• Per ritornare all’impostazione precedente premere
.
• Per annullare l’operazione premere a lungo
.
Altre impostazioni
1
Premere la manopola del volume per accedere al modo
[FUNCTION]
.
2 Ruotare la manopola del volume sino a selezionare l’elemento desiderato
(vedere la tabella che segue), e quindi premerla.
3 Ripetere il passo 2 sino a selezionare o attivare l’elemento d’interesse.
Gebruikershandleiding.com neemt misbruik van zijn services uitermate serieus. U kunt hieronder aangeven waarom deze vraag ongepast is. Wij controleren de vraag en zonodig wordt deze verwijderd.
Product:
Spelregels forum
Om tot zinvolle vragen te komen hanteren wij de volgende spelregels:
lees eerst de handleiding door;
controleer of uw vraag al eerder door iemand anders is gesteld;
probeer uw vraag zo duidelijk mogelijk te stellen;
heeft u een probleem en al geprobeerd om dit op te lossen, vermeld dit erbij aub;
heeft u een oplossing gekregen van een bezoeker dan horen wij dat graag in dit forum;
wilt u een reactie geven op een vraag of antwoord, gebruik dan niet dit formulier maar klik op de knop 'reageer op deze vraag';
uw vraag wordt direct op de website gezet; vermijd daarom persoonlijke gegevens in te vullen;
Belangrijk! Als er een antwoord wordt gegeven op uw vraag, dan is het voor de gever van het antwoord nuttig om te weten als u er wel (of niet) mee geholpen bent! Wij vragen u dus ook te reageren op een antwoord.
Belangrijk! Antwoorden worden ook per e-mail naar abonnees gestuurd. Laat uw emailadres achter op deze site, zodat u op de hoogte blijft. U krijgt dan ook andere vragen en antwoorden te zien.
Abonneren
Abonneer u voor het ontvangen van emails voor uw Kenwood KMM-BT305 bij:
nieuwe vragen en antwoorden
nieuwe handleidingen
U ontvangt een email met instructies om u voor één of beide opties in te schrijven.
Ontvang uw handleiding per email
Vul uw emailadres in en ontvang de handleiding van Kenwood KMM-BT305 in de taal/talen: Nederlands, Engels, Italiaans als bijlage per email.
De handleiding is 2,73 mb groot.
U ontvangt de handleiding per email binnen enkele minuten. Als u geen email heeft ontvangen, dan heeft u waarschijnlijk een verkeerd emailadres ingevuld of is uw mailbox te vol. Daarnaast kan het zijn dat uw internetprovider een maximum heeft aan de grootte per email. Omdat hier een handleiding wordt meegestuurd, kan het voorkomen dat de email groter is dan toegestaan bij uw provider.
Uw handleiding is per email verstuurd. Controleer uw email
Als u niet binnen een kwartier uw email met handleiding ontvangen heeft, kan het zijn dat u een verkeerd emailadres heeft ingevuld of dat uw emailprovider een maximum grootte per email heeft ingesteld die kleiner is dan de grootte van de handleiding.
Er is een email naar u verstuurd om uw inschrijving definitief te maken.
Controleer uw email en volg de aanwijzingen op om uw inschrijving definitief te maken
U heeft geen emailadres opgegeven
Als u de handleiding per email wilt ontvangen, vul dan een geldig emailadres in.
Uw vraag is op deze pagina toegevoegd
Wilt u een email ontvangen bij een antwoord en/of nieuwe vragen? Vul dan hier uw emailadres in.