516530
27
Verklein
Vergroot
Pagina terug
1/68
Pagina verder
I General User Manual 27
18.6 Fitting the wheel
Please note that the work steps described here are for a
specic example.
Please observe the information om the relevant manu-
facturer or consult your specialist cycle shop.
18.6.1 Inserting the ont wheel
Bear the running direction of the tyre in mind when
tting the ont wheel.
If your bike is equipped with a disc brake, make sure
that the brake discs are correctly positioned between
the brake pads.
18.6.2 Inserting the rear wheel
18.6.2.1 Bikes with derailleur gears
If your bike is equipped with derailleur gears, put
the chain back onto the smallest sprocket when
tting the rear wheel.
Insert the wheel as far as it will go so it sits cen-
trally in the dropouts.
Tighten the hub nut, or rmly close the quick-
release device (see
Chapter 9.2.2 "Operating the
quick-release device").
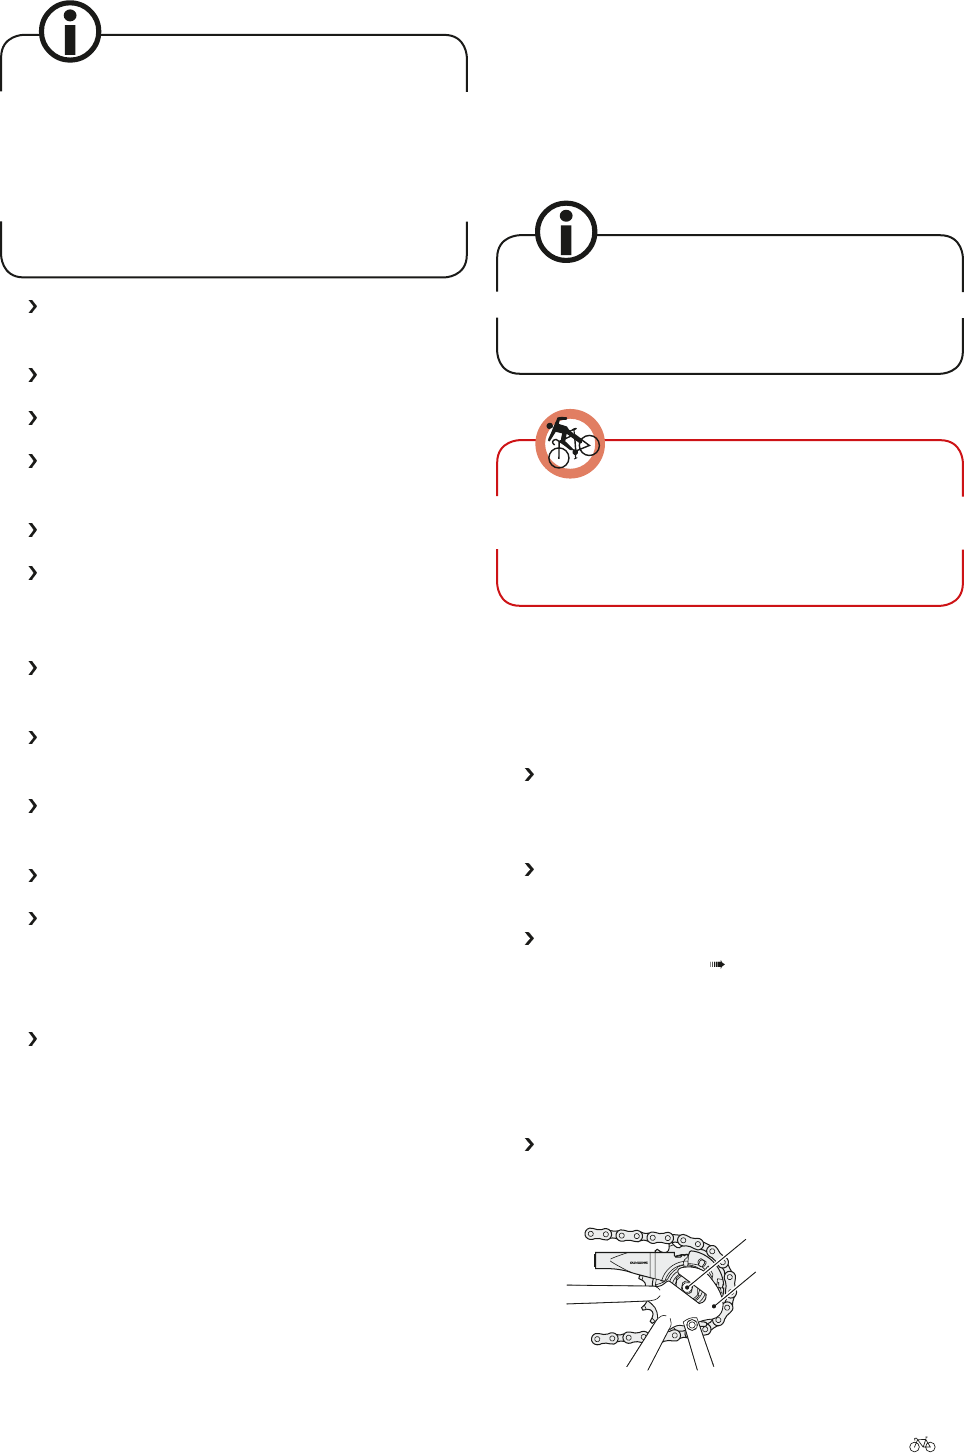
18.6.2.2 Bikes with hub gears
Fitting a wheel with gear hub in the ame
1. Fit the chain on the sprocket and oer up the
hub axle to the dropouts.
CJ-NX10
JAPAN
Hub axle
Dropout
18.5 Fitting the tyre and inner tube
Make sure that foreign bodies do not enter the inside
of the tyre. Make sure that the inner tube is crease-
ee and not pinched at all times. When tting the
tyre, bear in mind the running direction. If the tyre
has a running direction, this will be indicated on the
tyre sidewall.
Make sure that the rim tape covers the spoke nip-
ples and is undamaged.
Put the rim with one edge inside the tyre.
Push one side of the tyre completely into the rim.
Insert the valve through the valve hole in the rim
and t the inner tube inside the tyre.
Push the tyre over the rim sidewall.
Pull the tyre forcelly into the centre of the rim.
The area that has already been tted will slip into
the base of the rim.
Check once again that the inner tube is seated
correctly.
Push the other side of the tyre completely over the
rim ange using the heel of your hand.
With Dunlop or Woods valves: Put the valve insert
back into position and screw the cap nut tight.
Inate the inner tube slightly.
Check that the tyre is correctly seated and is true
using the indicator ring on the rim sidewall. Adjust
the seating of the tyre by hand if it does not run
straight.
Inate the inner tube up to the recommended tyre
pressure.
27

Hulp nodig? Stel uw vraag in het forum

Spelregels

Misbruik melden

Gebruikershandleiding.com neemt misbruik van zijn services uitermate serieus. U kunt hieronder aangeven waarom deze vraag ongepast is. Wij controleren de vraag en zonodig wordt deze verwijderd.

Product:

Bijvoorbeeld antisemitische inhoud, racistische inhoud, of materiaal dat gewelddadige fysieke handelingen tot gevolg kan hebben.

Bijvoorbeeld een creditcardnummer, een persoonlijk identificatienummer, of een geheim adres. E-mailadressen en volledige namen worden niet als privégegevens beschouwd.

Spelregels forum

Om tot zinvolle vragen te komen hanteren wij de volgende spelregels:

Belangrijk! Als er een antwoord wordt gegeven op uw vraag, dan is het voor de gever van het antwoord nuttig om te weten als u er wel (of niet) mee geholpen bent! Wij vragen u dus ook te reageren op een antwoord.

Belangrijk! Antwoorden worden ook per e-mail naar abonnees gestuurd. Laat uw emailadres achter op deze site, zodat u op de hoogte blijft. U krijgt dan ook andere vragen en antwoorden te zien.

Abonneren

Abonneer u voor het ontvangen van emails voor uw Kalkhoff Mountainbike bij:


U ontvangt een email met instructies om u voor één of beide opties in te schrijven.


Ontvang uw handleiding per email

Vul uw emailadres in en ontvang de handleiding van Kalkhoff Mountainbike in de taal/talen: Engels als bijlage per email.

De handleiding is 3,4 mb groot.


U ontvangt de handleiding per email binnen enkele minuten. Als u geen email heeft ontvangen, dan heeft u waarschijnlijk een verkeerd emailadres ingevuld of is uw mailbox te vol. Daarnaast kan het zijn dat uw internetprovider een maximum heeft aan de grootte per email. Omdat hier een handleiding wordt meegestuurd, kan het voorkomen dat de email groter is dan toegestaan bij uw provider.

Stel vragen via chat aan uw handleiding

Stel uw vraag over deze PDF

loading

Andere handleiding(en) van Kalkhoff Mountainbike

Kalkhoff Mountainbike Gebruiksaanwijzing - Nederlands - 69 pagina's

Kalkhoff Mountainbike Gebruiksaanwijzing - Deutsch - 68 pagina's

Kalkhoff Mountainbike Gebruiksaanwijzing - Français - 68 pagina's


Uw handleiding is per email verstuurd. Controleer uw email

Als u niet binnen een kwartier uw email met handleiding ontvangen heeft, kan het zijn dat u een verkeerd emailadres heeft ingevuld of dat uw emailprovider een maximum grootte per email heeft ingesteld die kleiner is dan de grootte van de handleiding.

Er is een email naar u verstuurd om uw inschrijving definitief te maken.

Controleer uw email en volg de aanwijzingen op om uw inschrijving definitief te maken

U heeft geen emailadres opgegeven

Als u de handleiding per email wilt ontvangen, vul dan een geldig emailadres in.

Uw vraag is op deze pagina toegevoegd

Wilt u een email ontvangen bij een antwoord en/of nieuwe vragen? Vul dan hier uw emailadres in.


Info