13 14
O
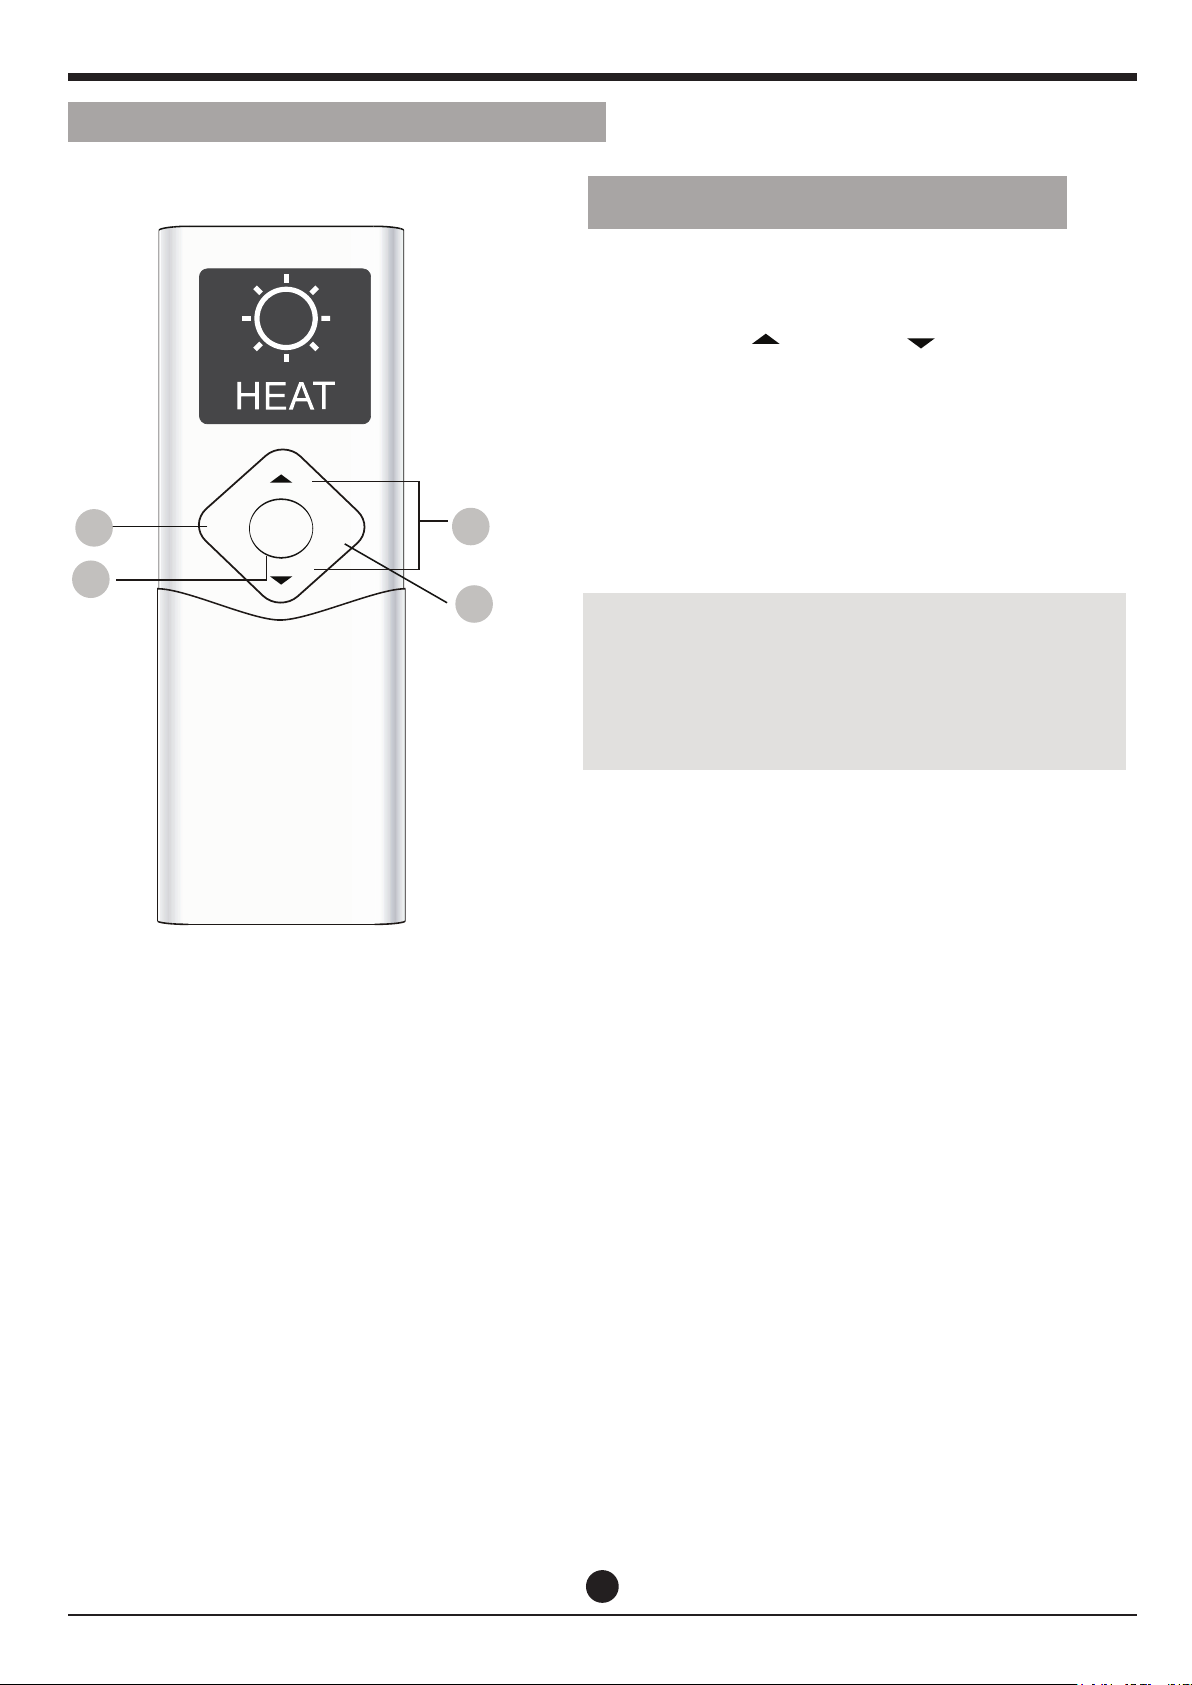
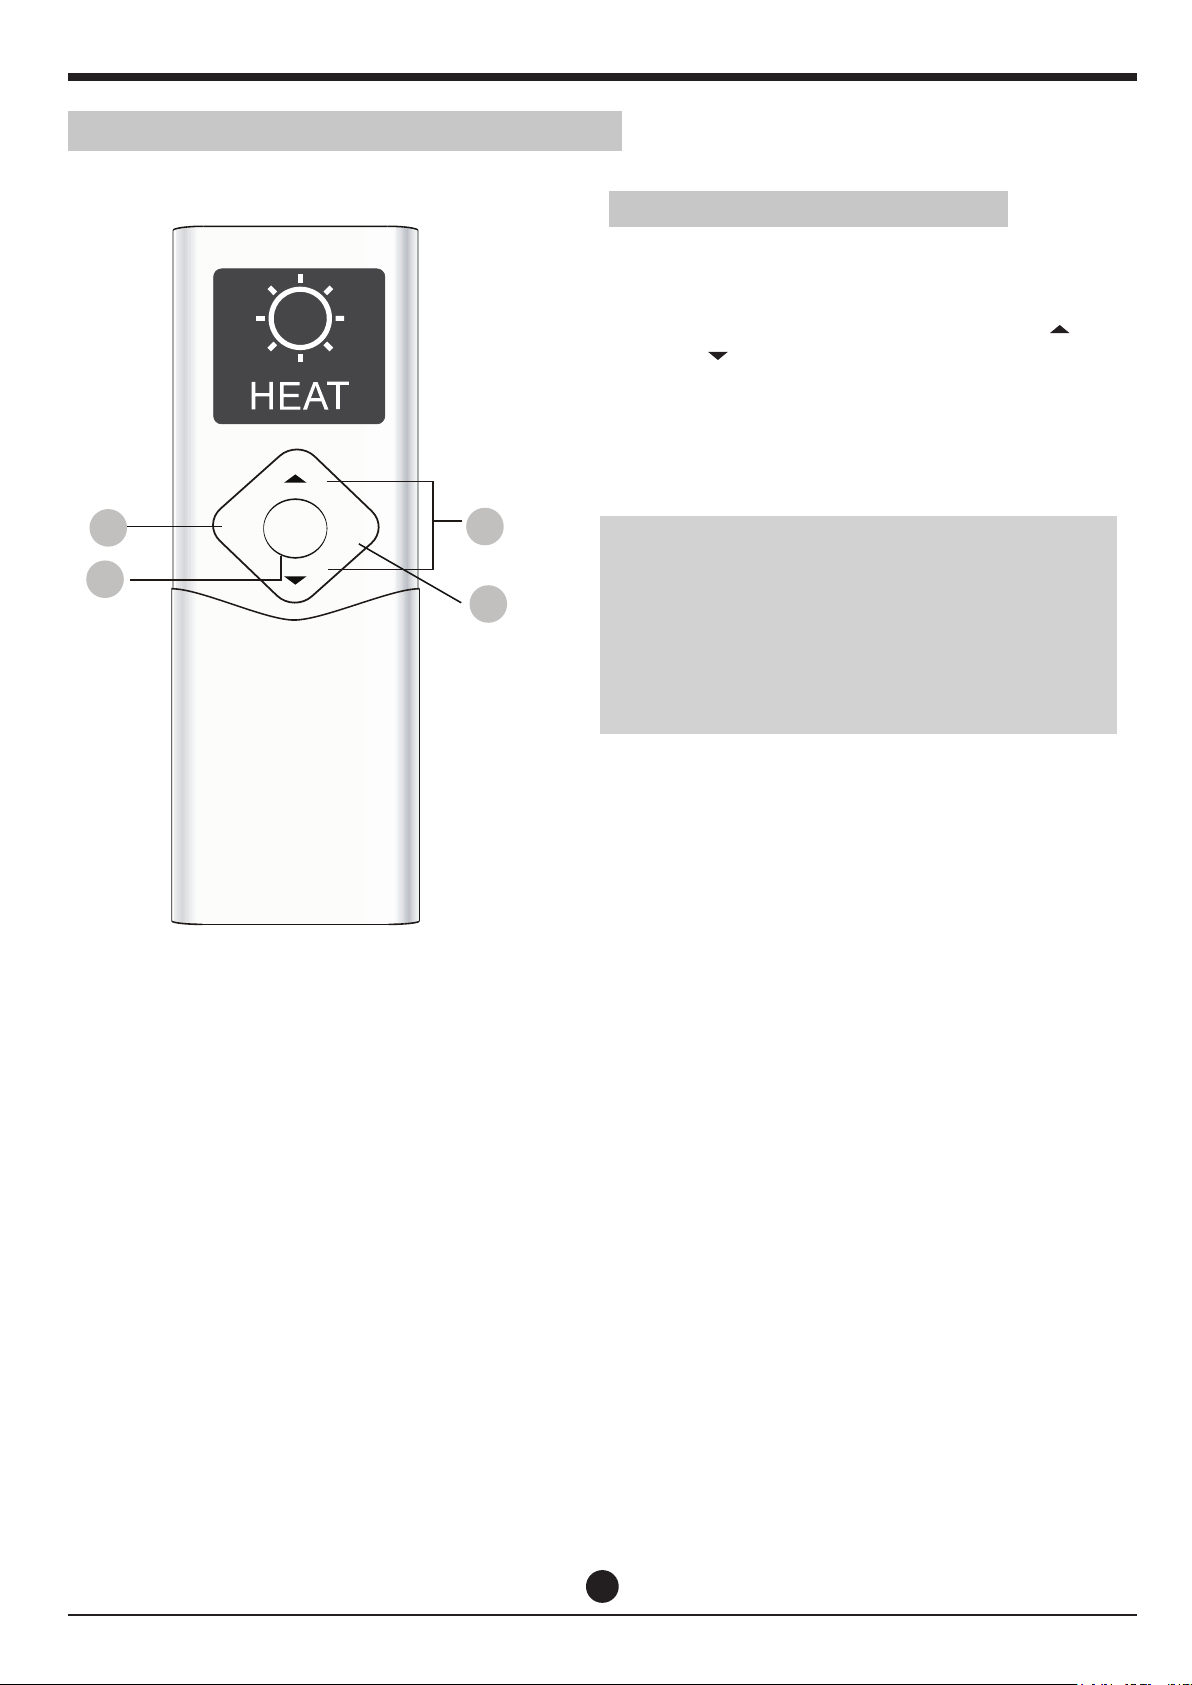
8 C Heating Function
How To Use The Advanced Functions How To Use The Advanced Functions
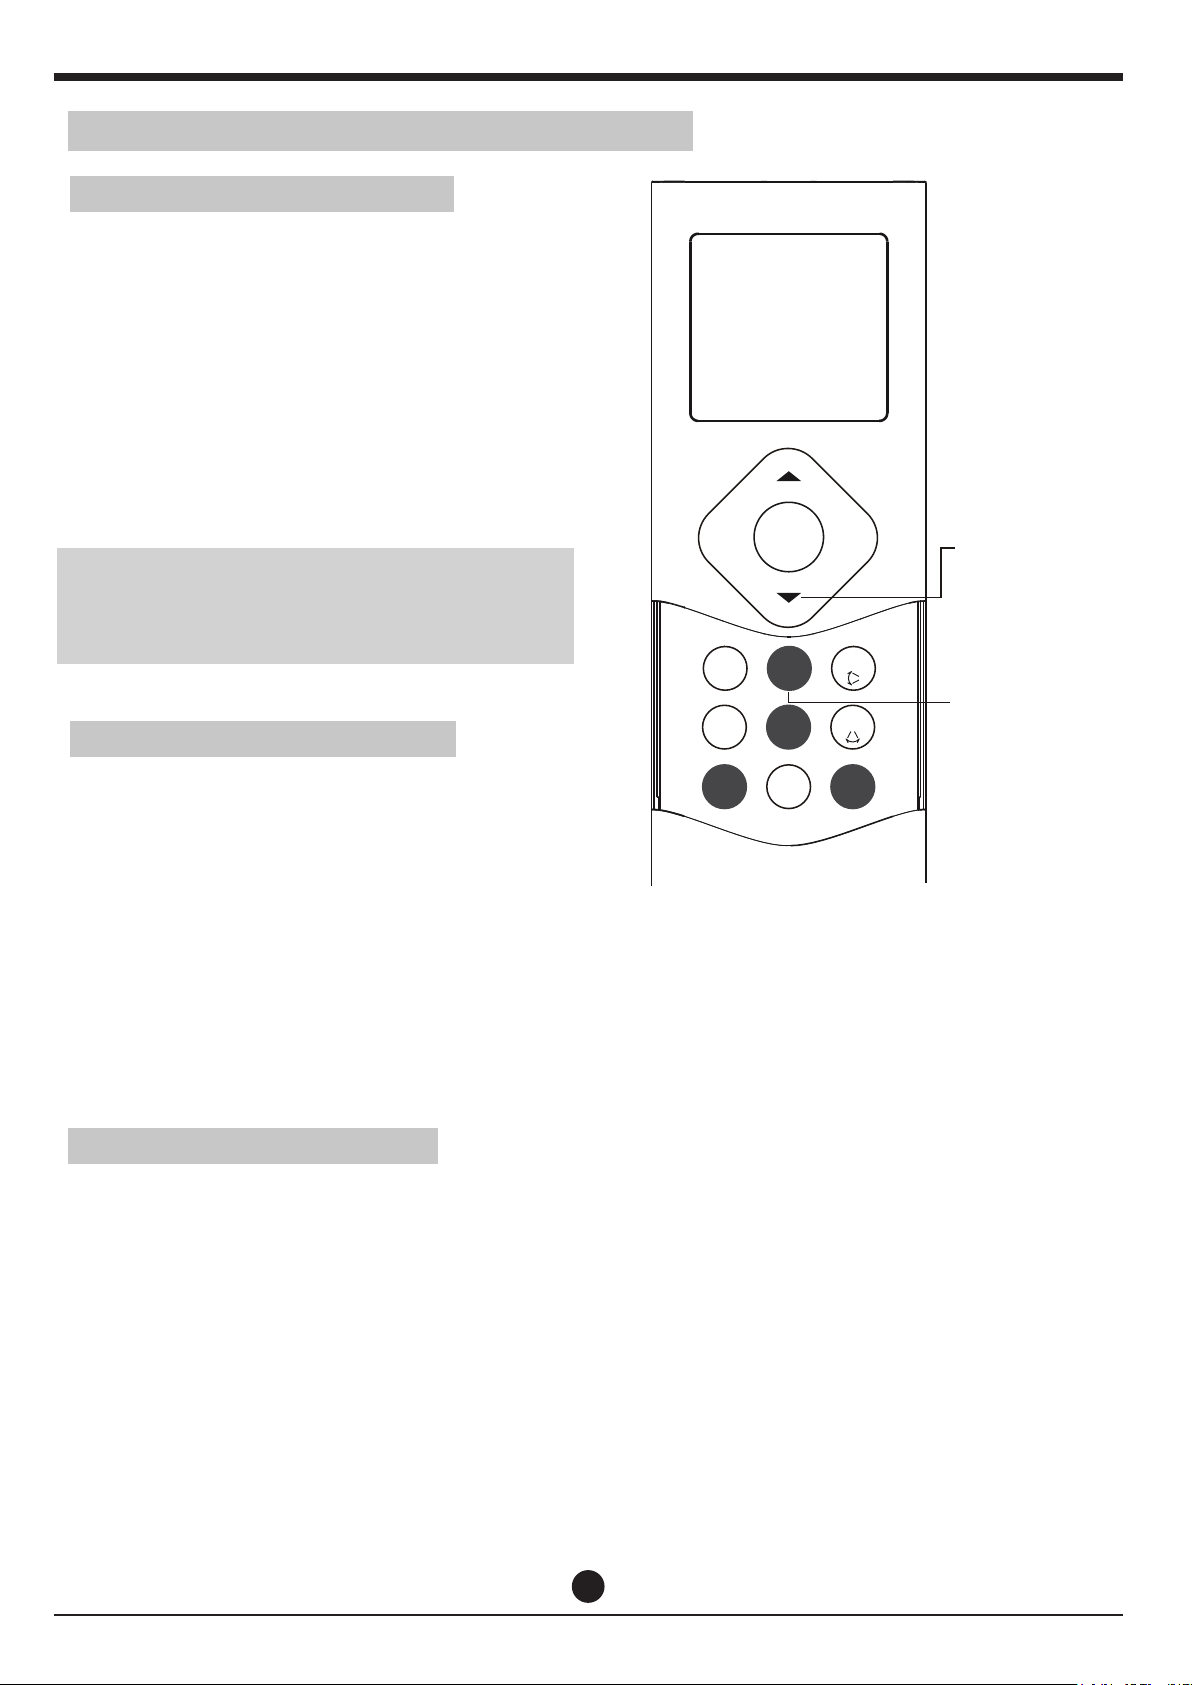
The TURBO function makes the unit work
extra hard to reach your present temperature
in the shortest amount of time possible.
When you select TURBO feature in COOL
mode, the unit will blow cool air with
strongest wind setting to jump-start the
cooling process.
When you select TURBO feature in HEAT
mode, for units with Electric heat elements,
the Electric Heater will activate and
jump-start the heating process.
Airborne bacteria can grow in the moisture
that condenses around heat exchanger in
the unit. With regular use, most of this
moisture is evaporated from the unit.
When the SELF CLEAN feature is activated,
your unit will clean itself automatically. After
that, the unit will turn off automatically.
You can use SELF CLEAN as often as you like.
(Applicable to the air conditioner with SELF
CLEAN feature only)
Note: You can only activate this function
in COOL or DRY mode.
SELF CLEAN function
TURBO function
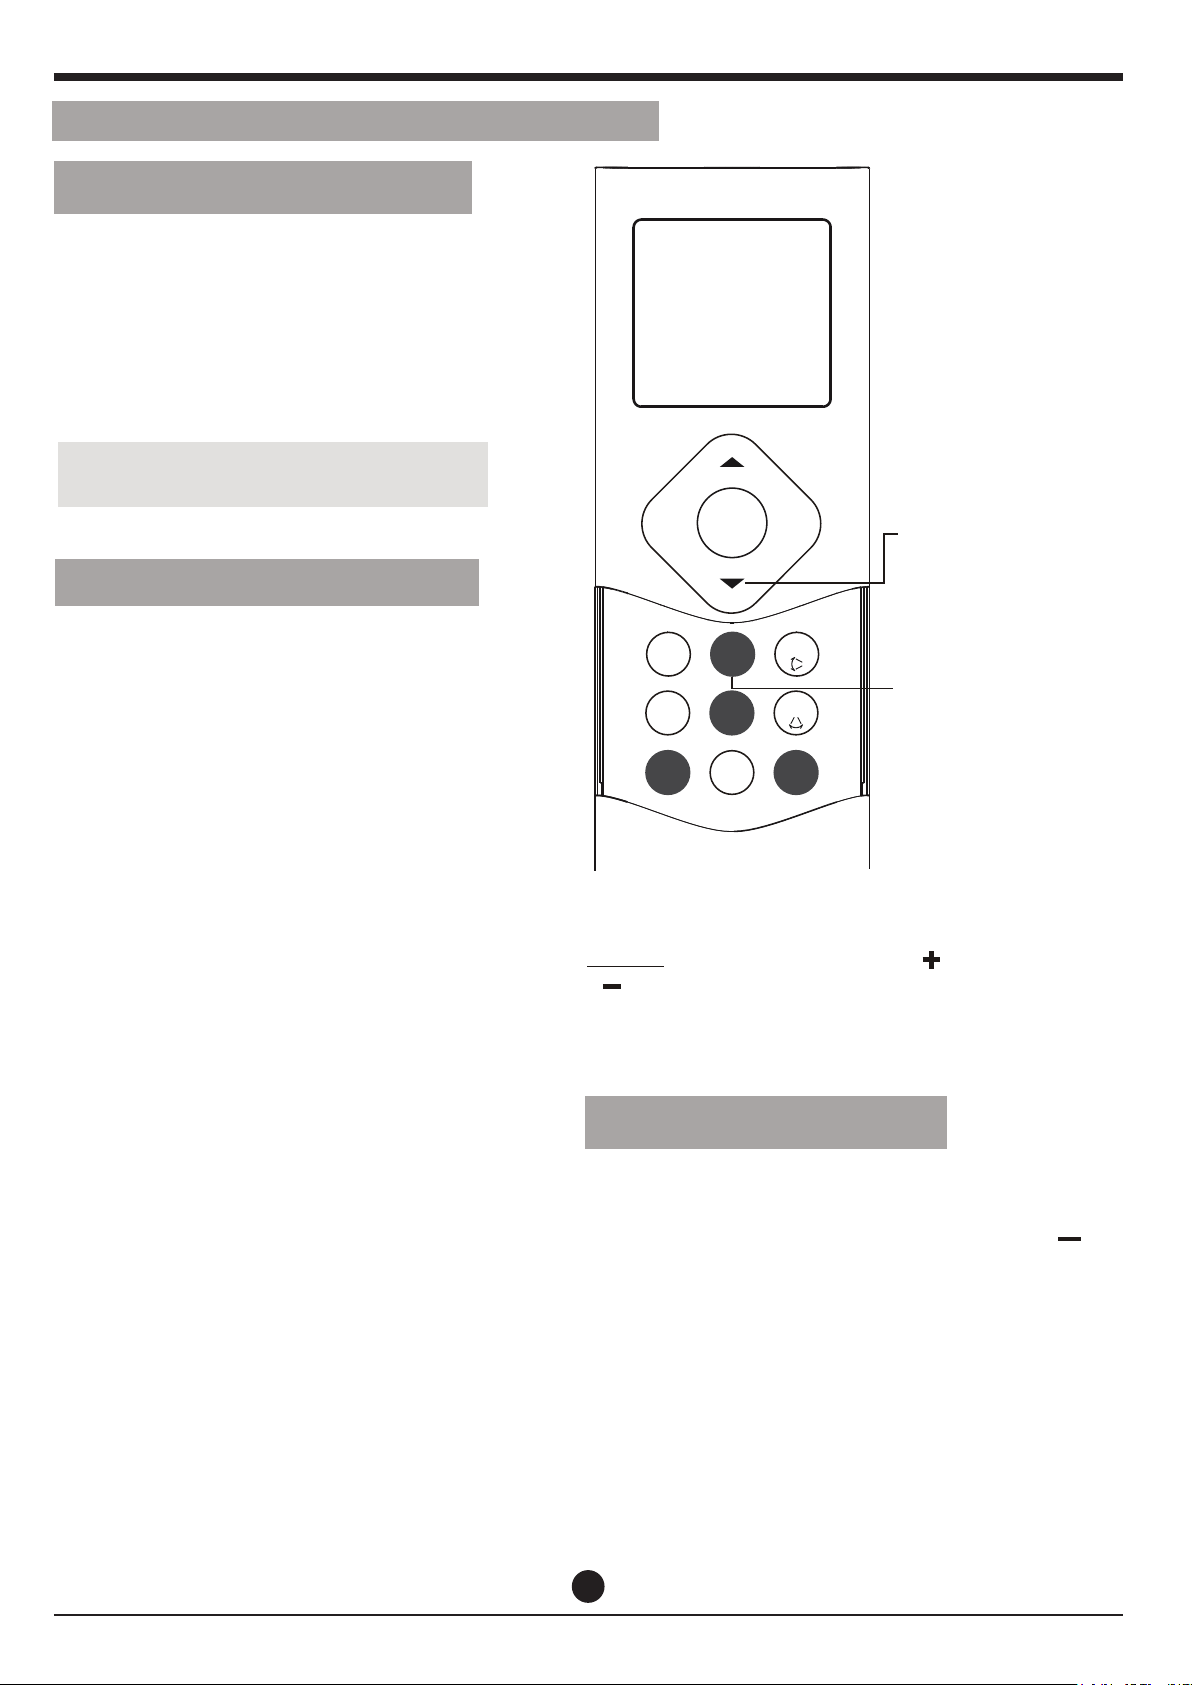
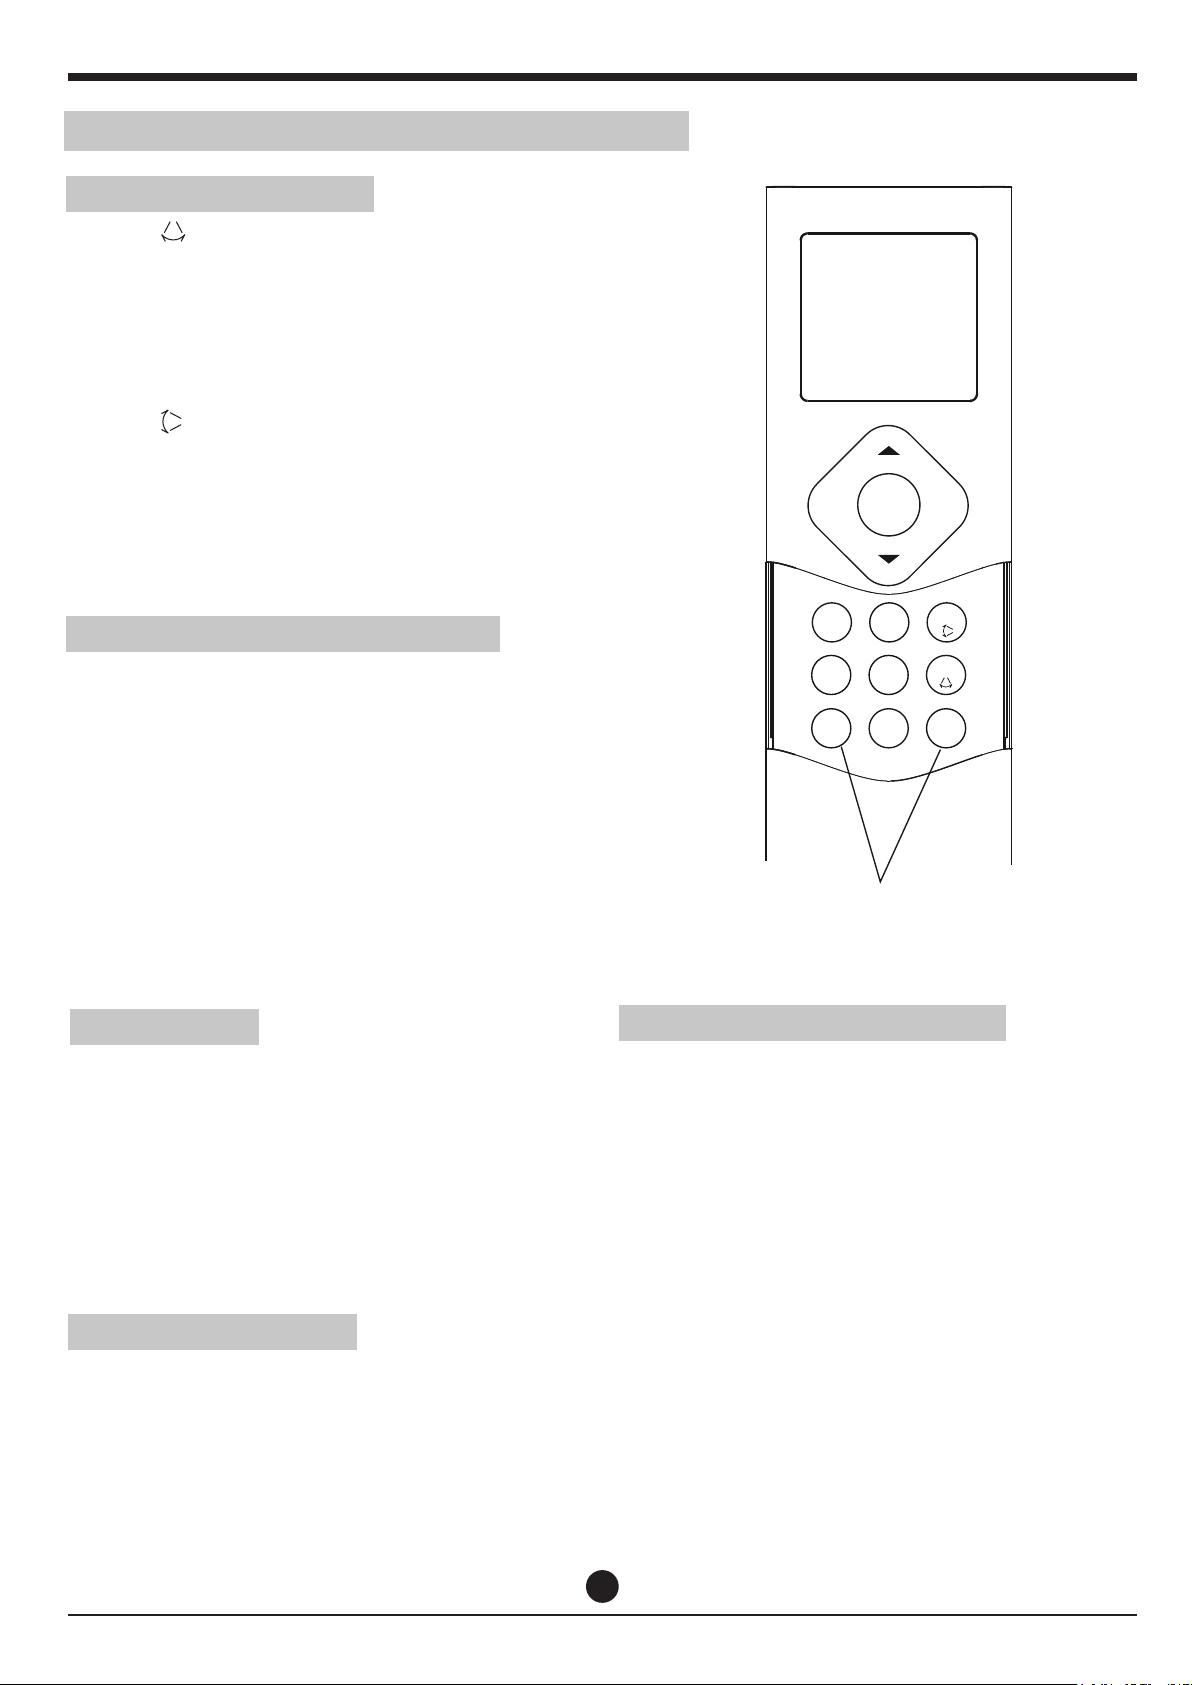
SWING function
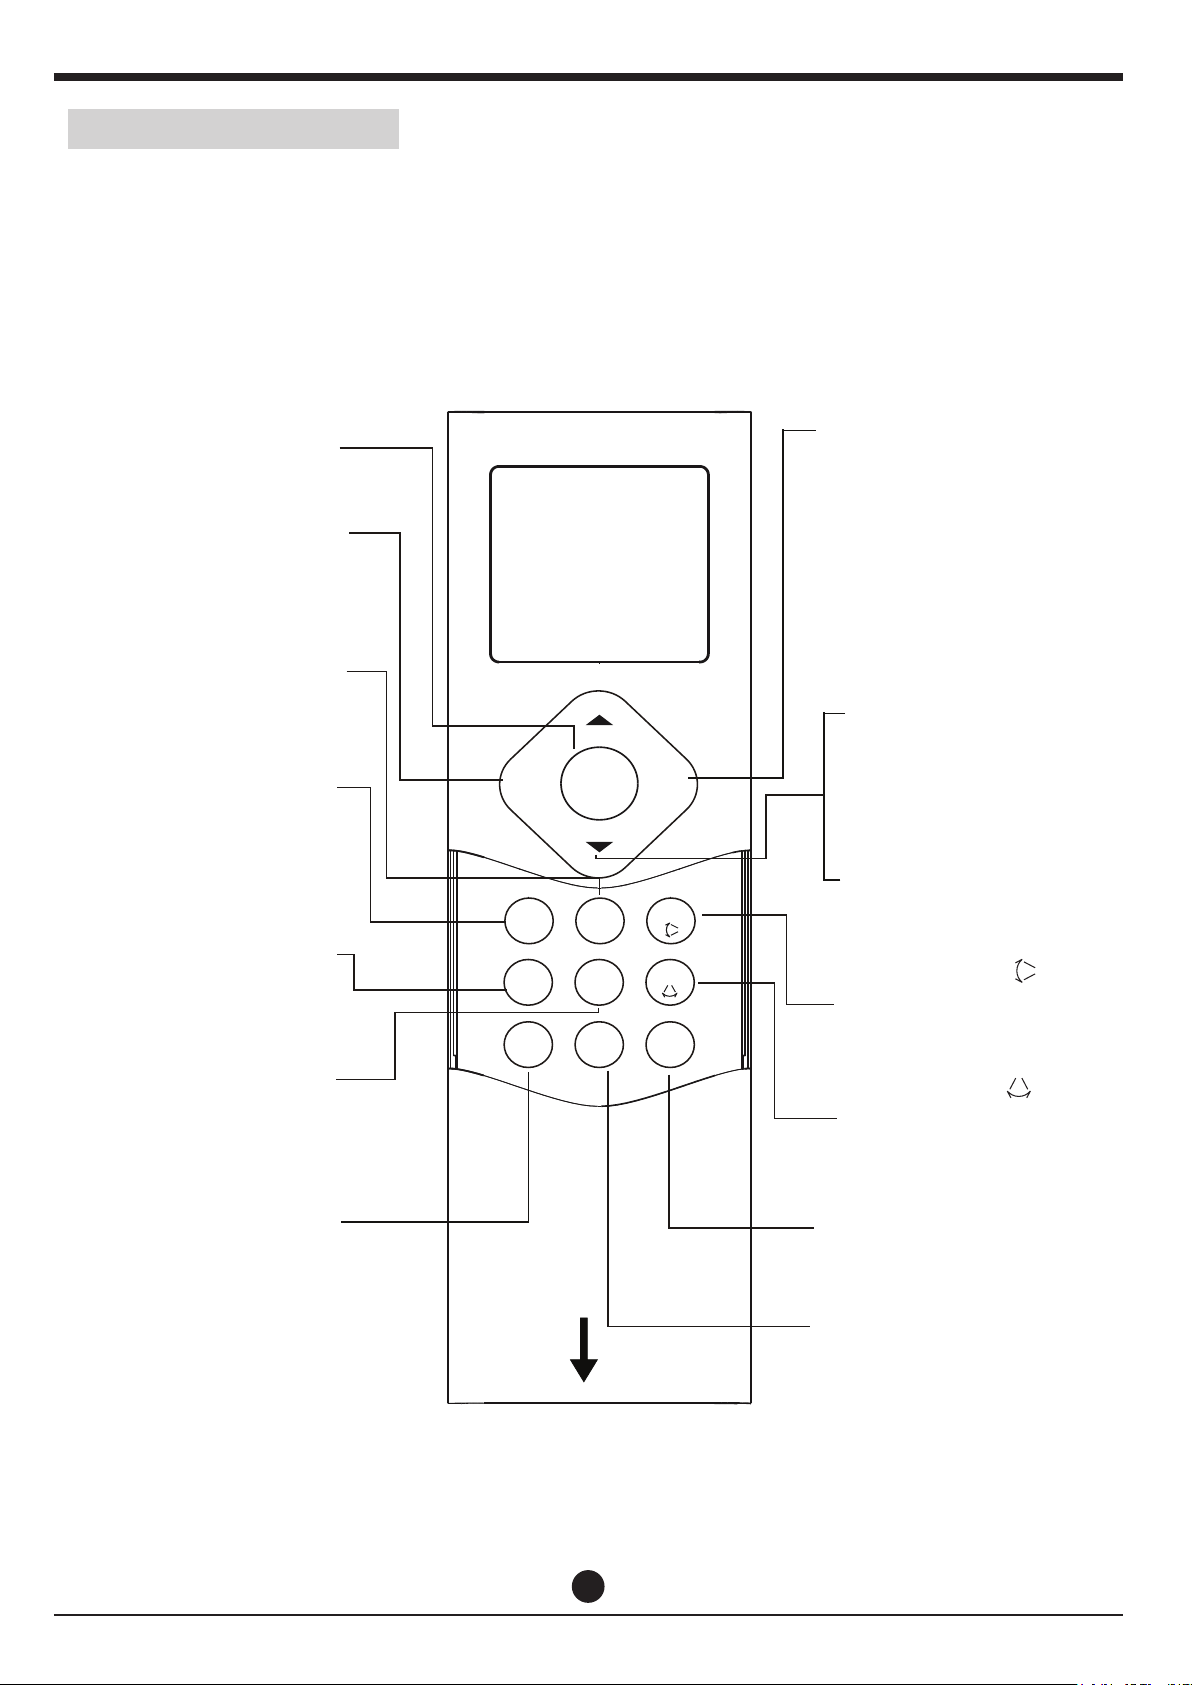
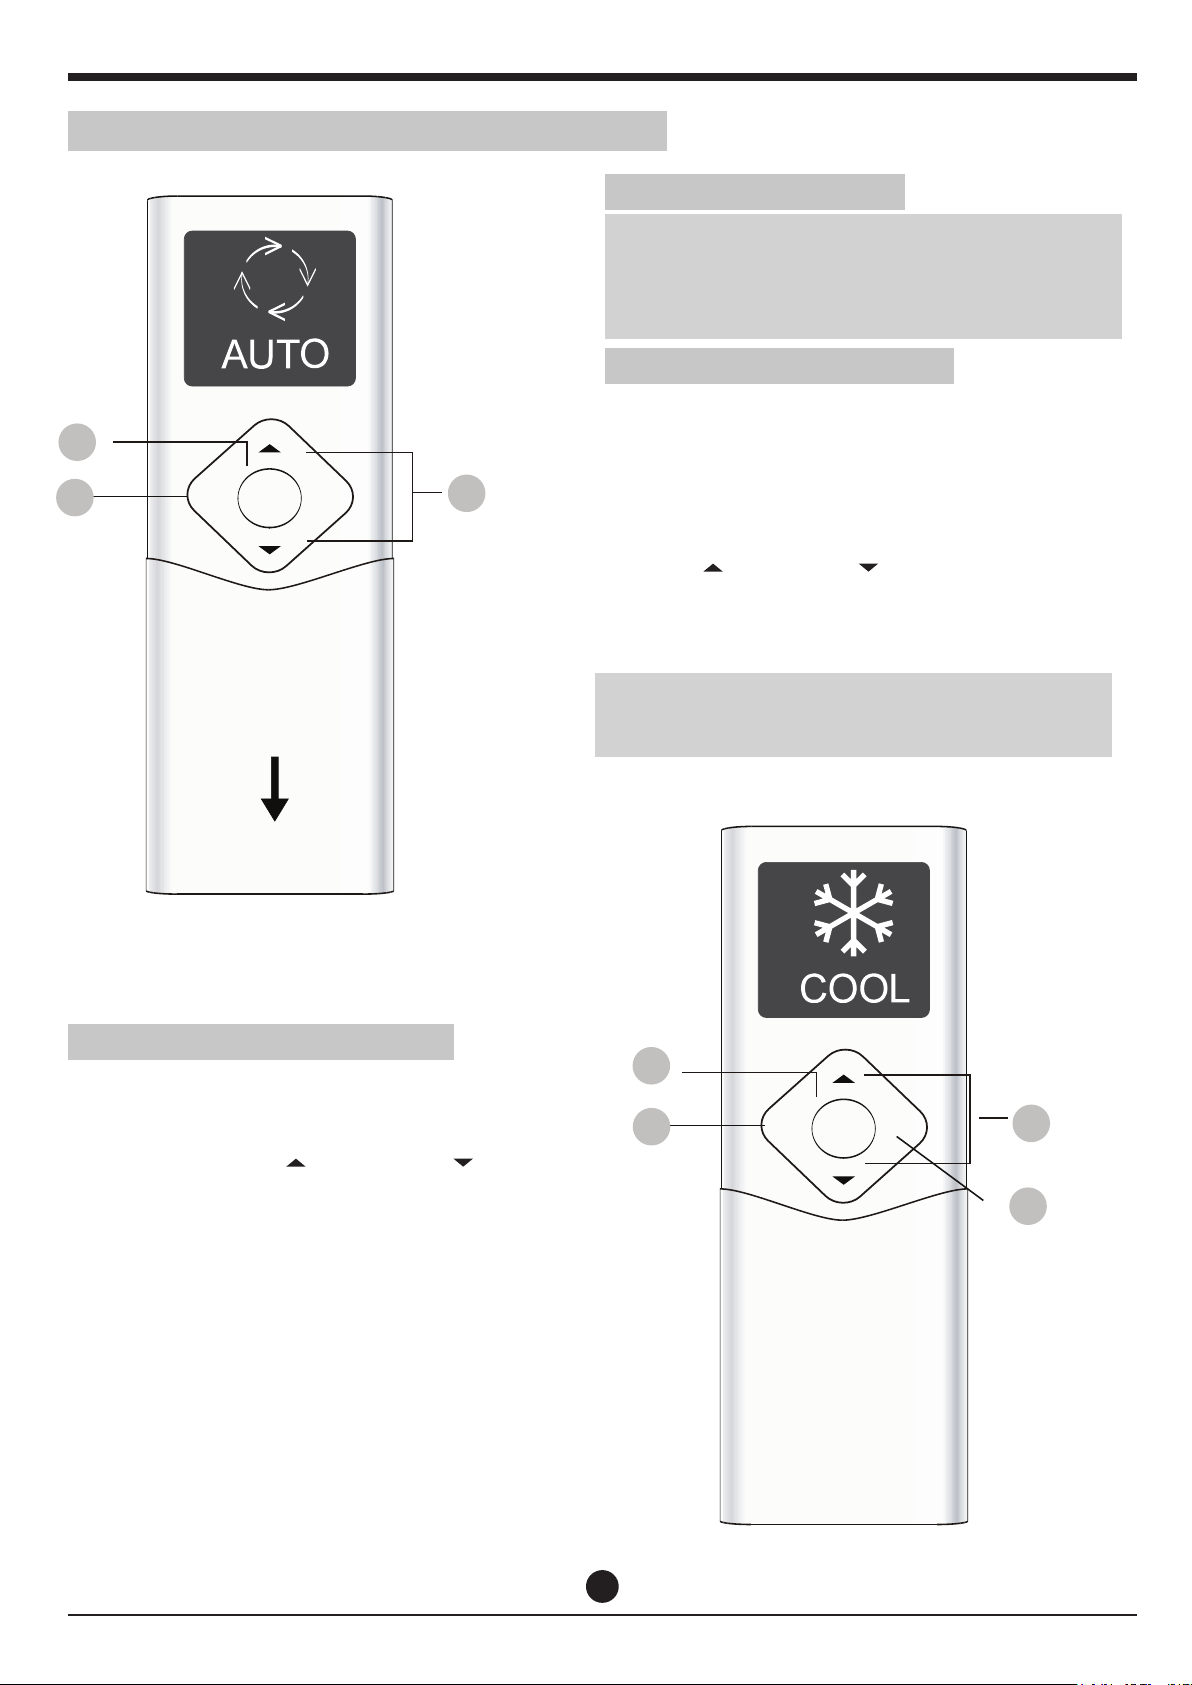
Button
Button
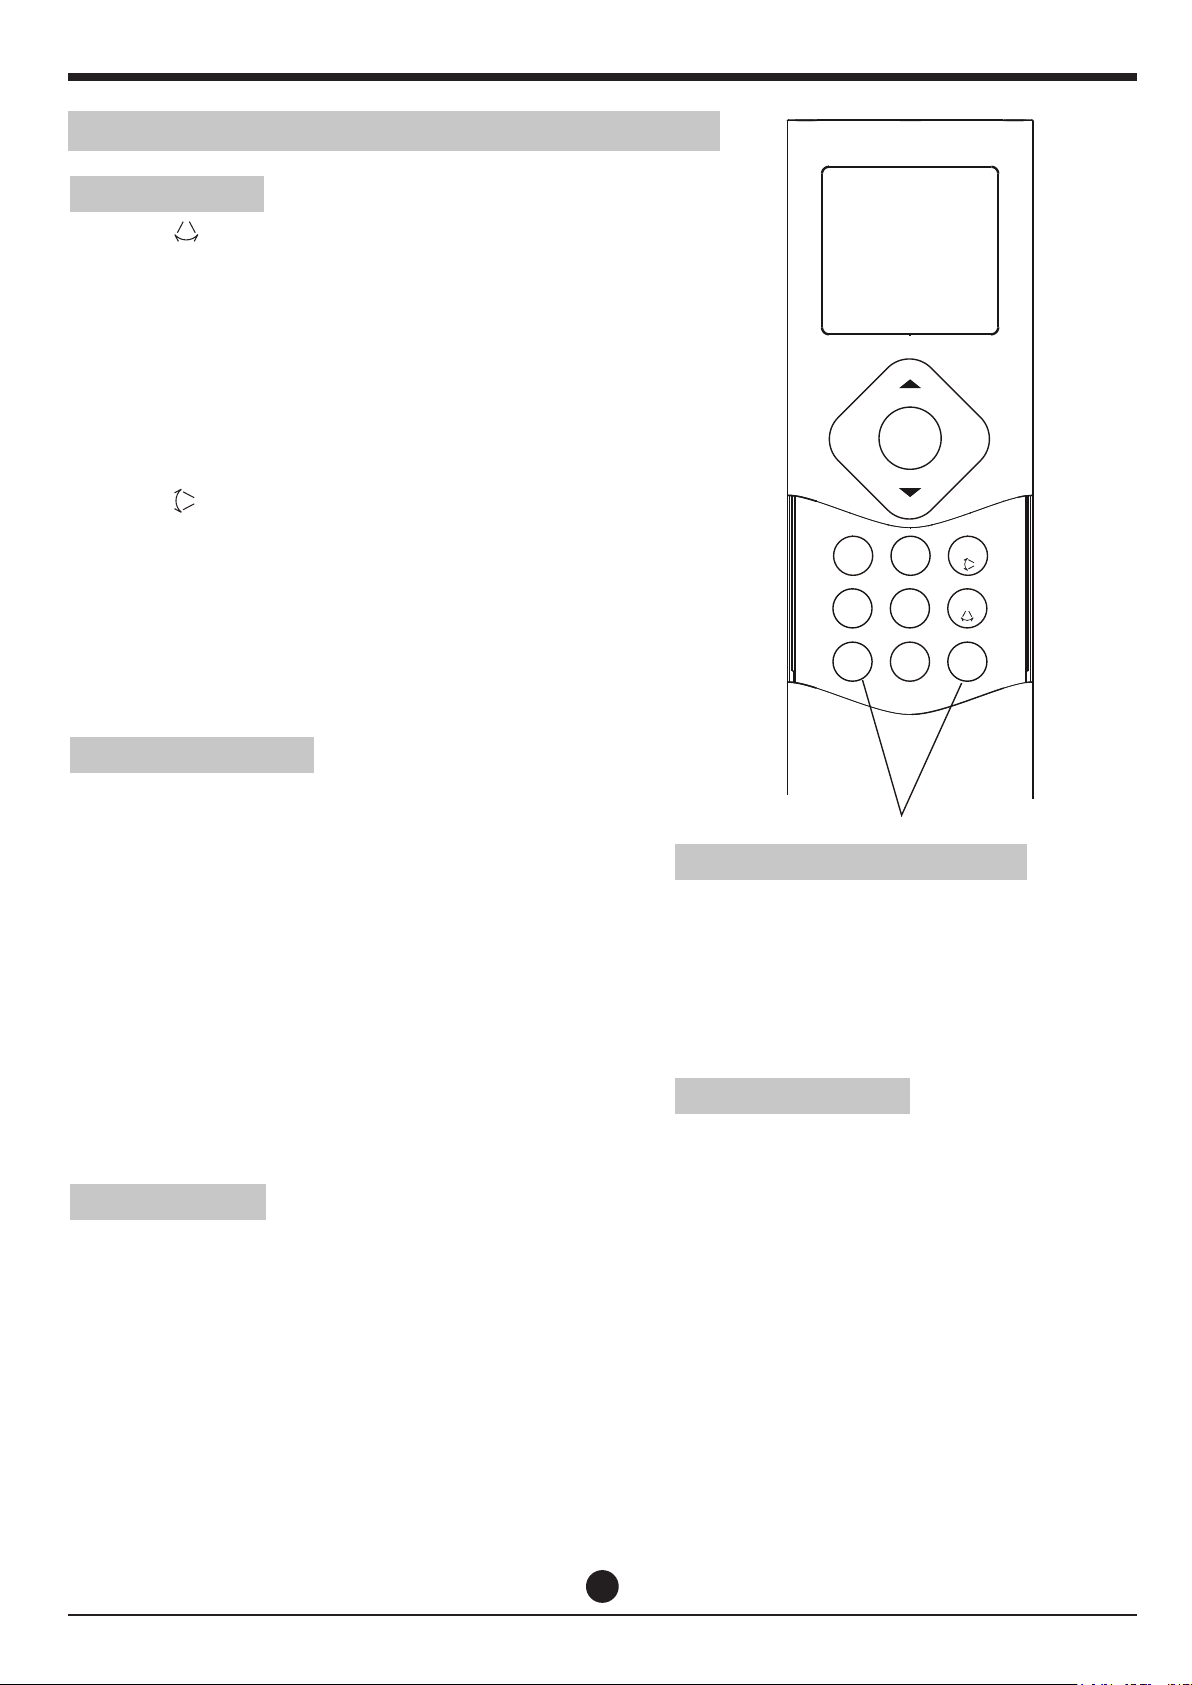
Used to stop or start horizontal louver
movement or set the desired up/down air flow
direction. The louver changes 6 degree in
angle for each press. If keep pushing more
than 2 seconds, the louver will swing up and
down automatically.
Used to stop or start vertical louver movement
and set the desired left/right air flow direction.
The vertical louver changes 6 degree in angle
for each press. If keep pushing more than 2
seconds, the vertical louver auto swing feature
is activated.
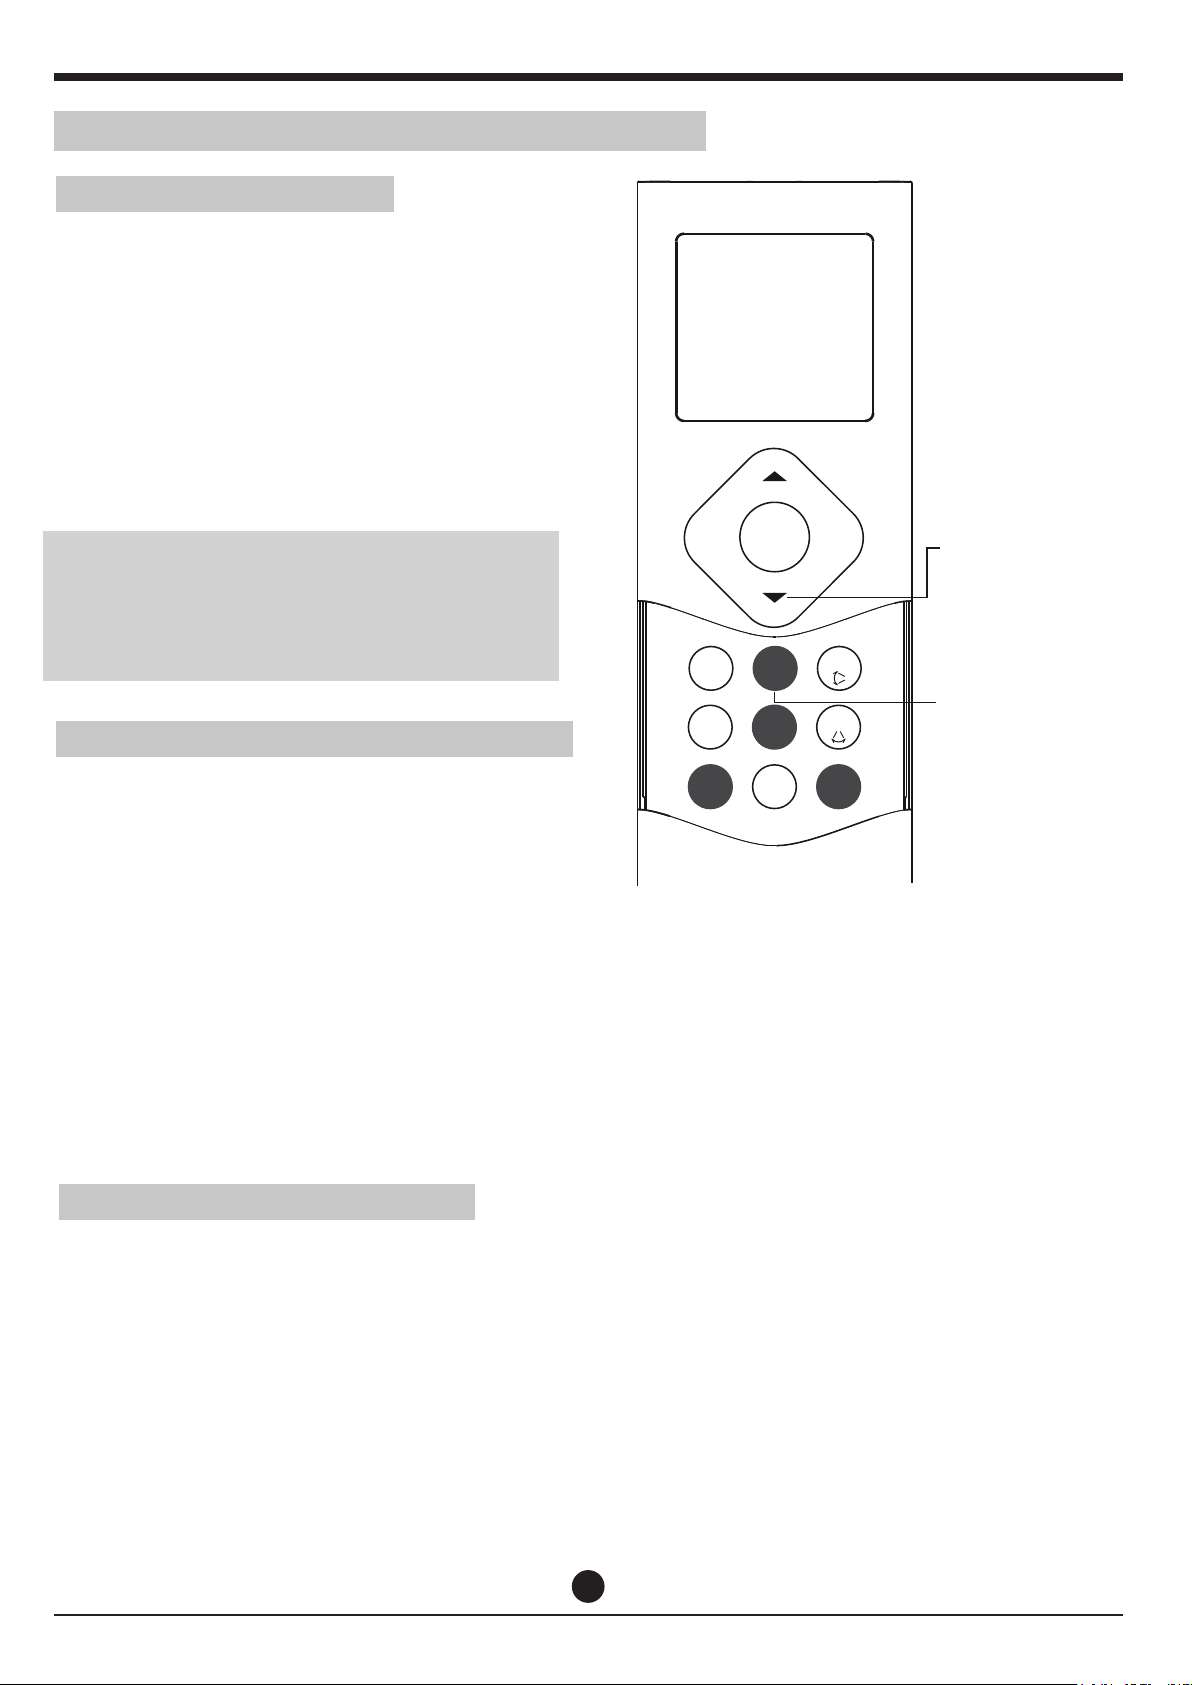
When the air conditioner operates
under heating mode with the set
O O
temperature of 17 C(62F), press Temp
button twice in one second will
activate 8 Degree heating function.
The unit will operate at a setting
O O
temperature of 8 C(46F).
The indoor unit display shows FP .
(applicable to the air conditioner with
feature only)
O
8 C Heating
,,
,,
Press this button
twice in one second
O O
to activate 8 C(46 F)
heating function
LOCK function
Press Turbo button and Self clean
button simultaneously for one second
to lock or unlock the keyboard.
Hold together for one second
to activate LOCK function
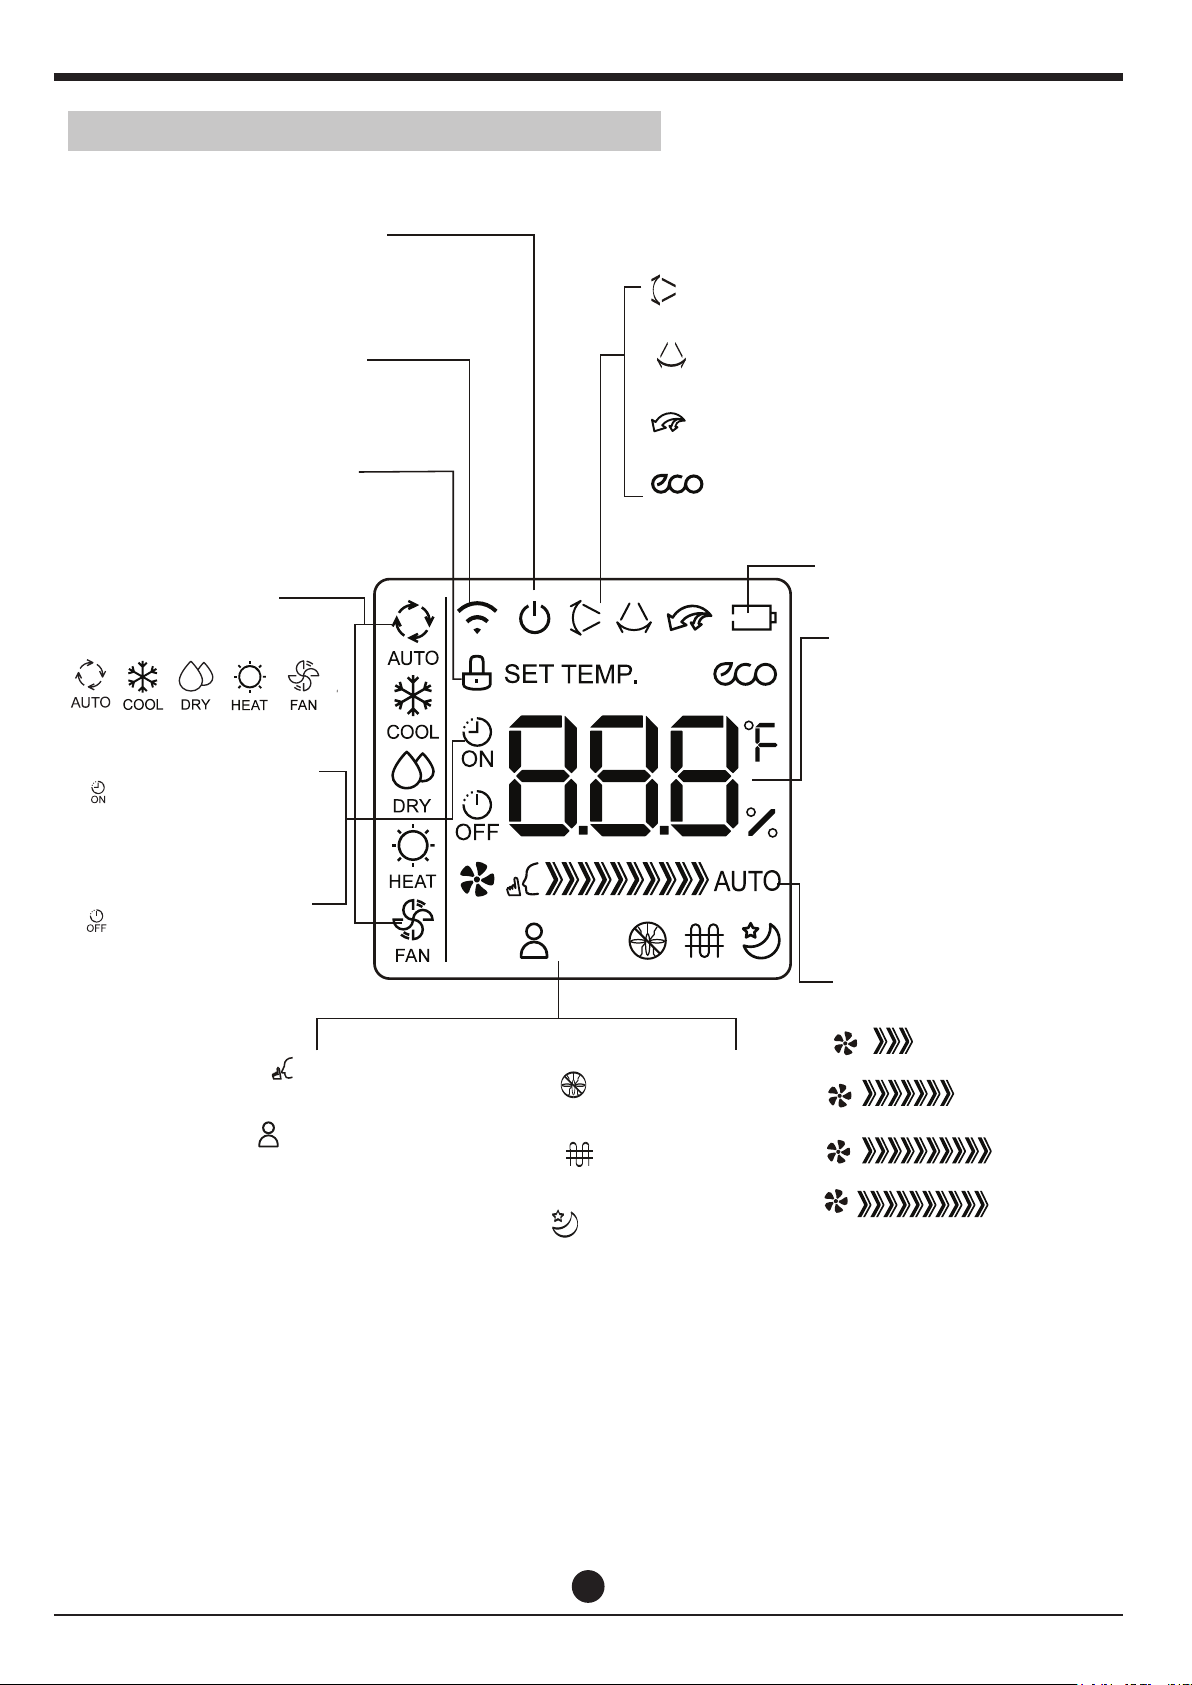
SLEEP
MODE
MODE
FAN
FAN
ON/OFF
ON/OFF
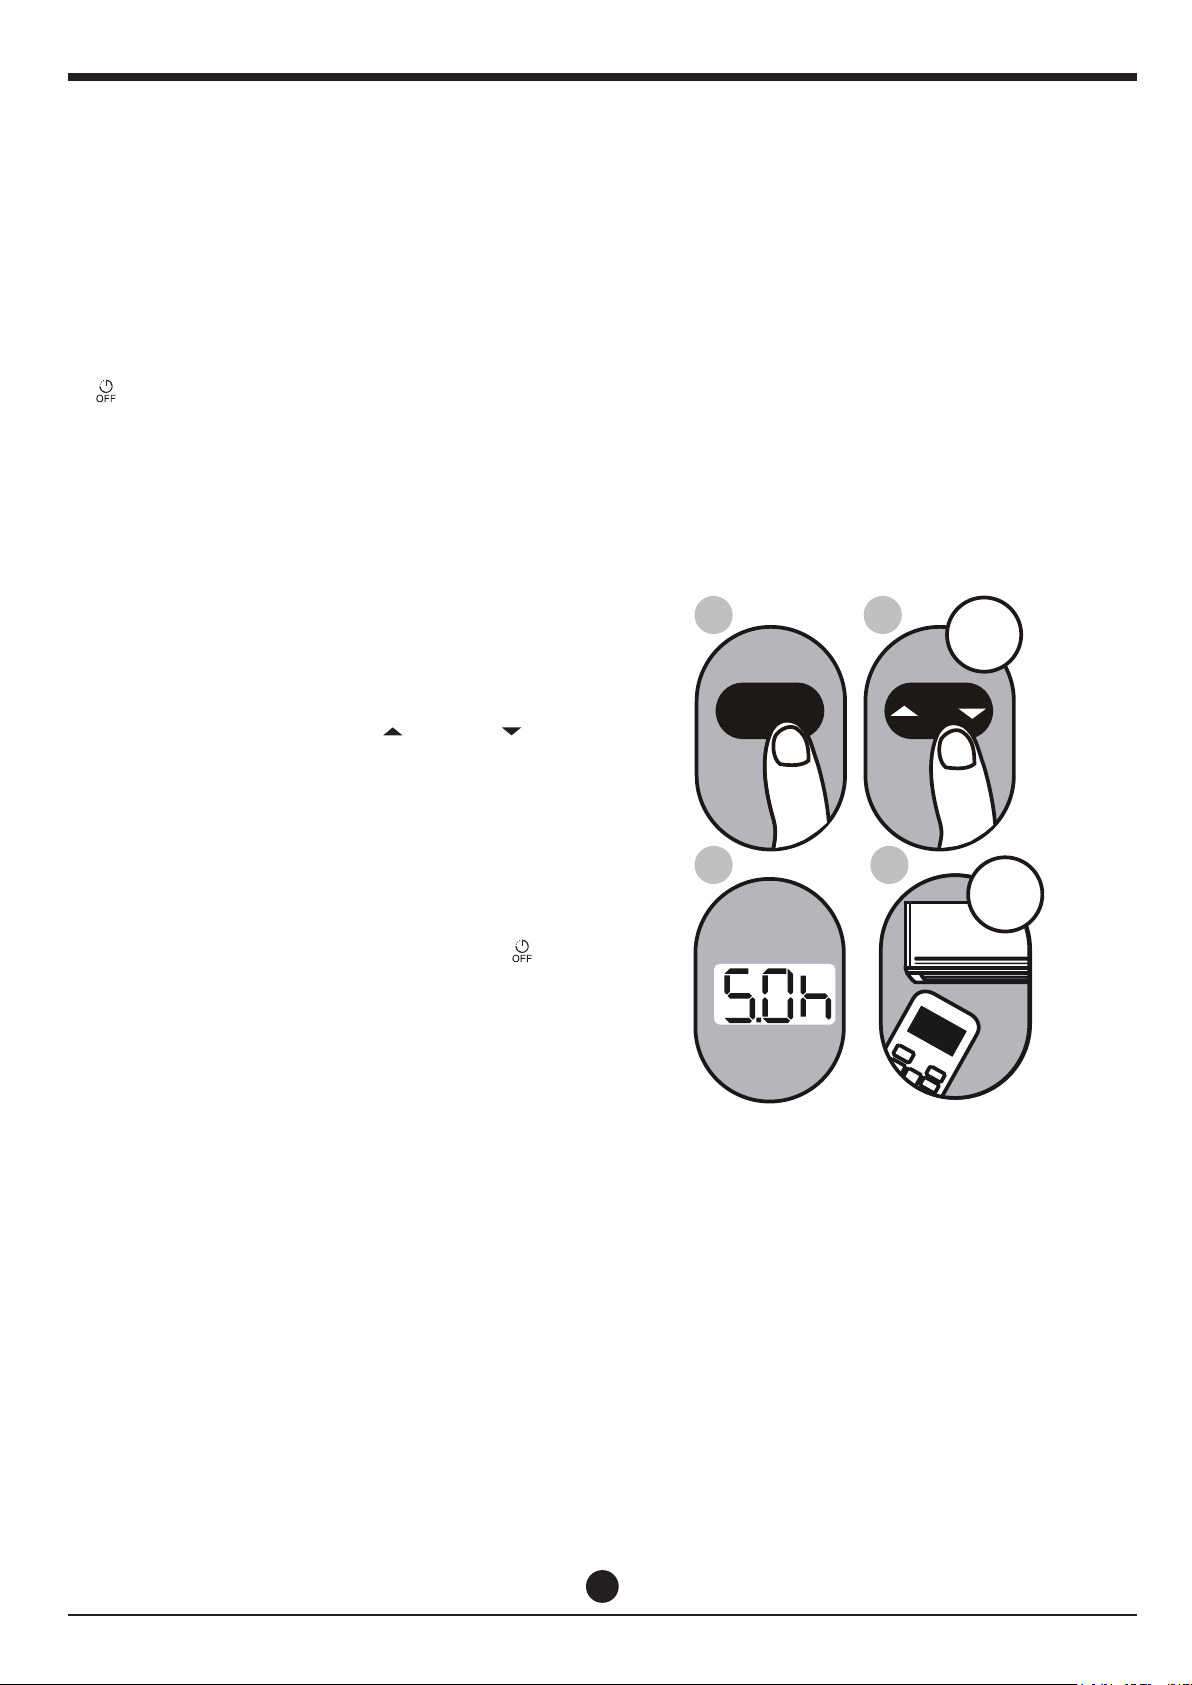
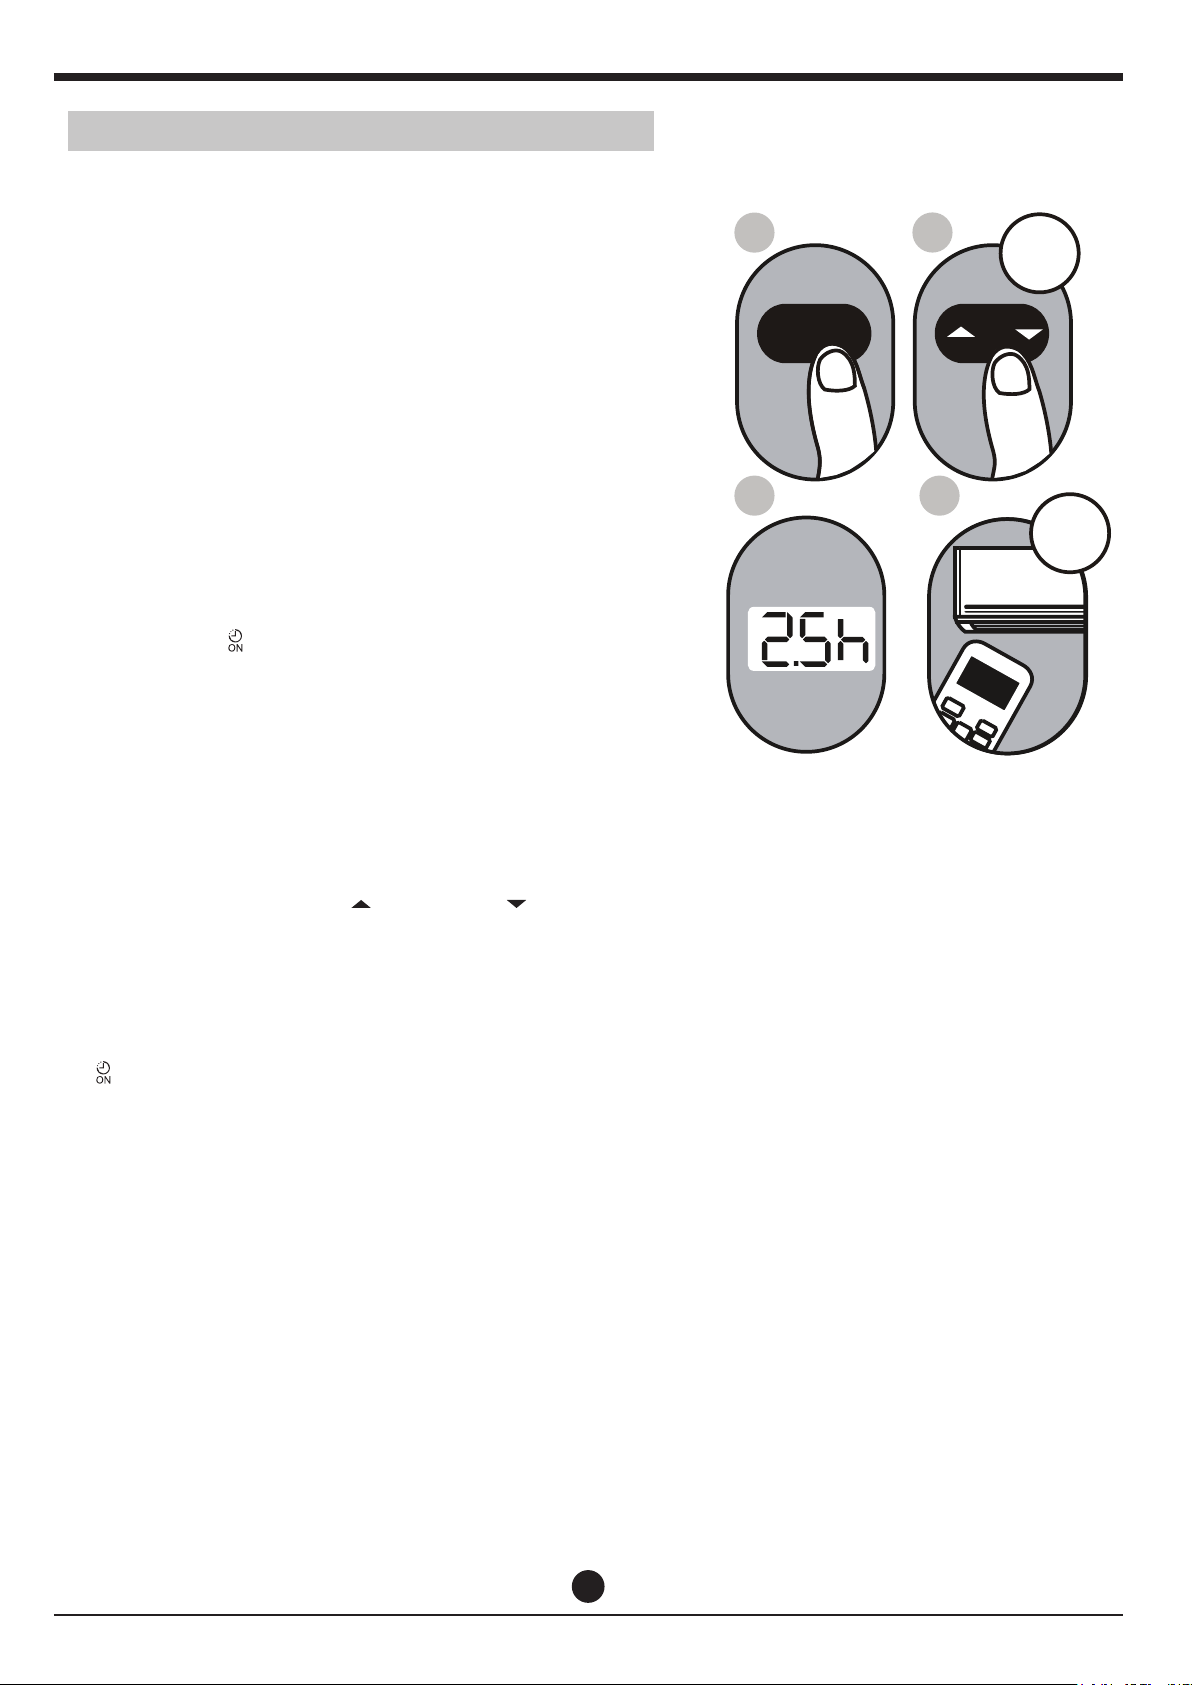
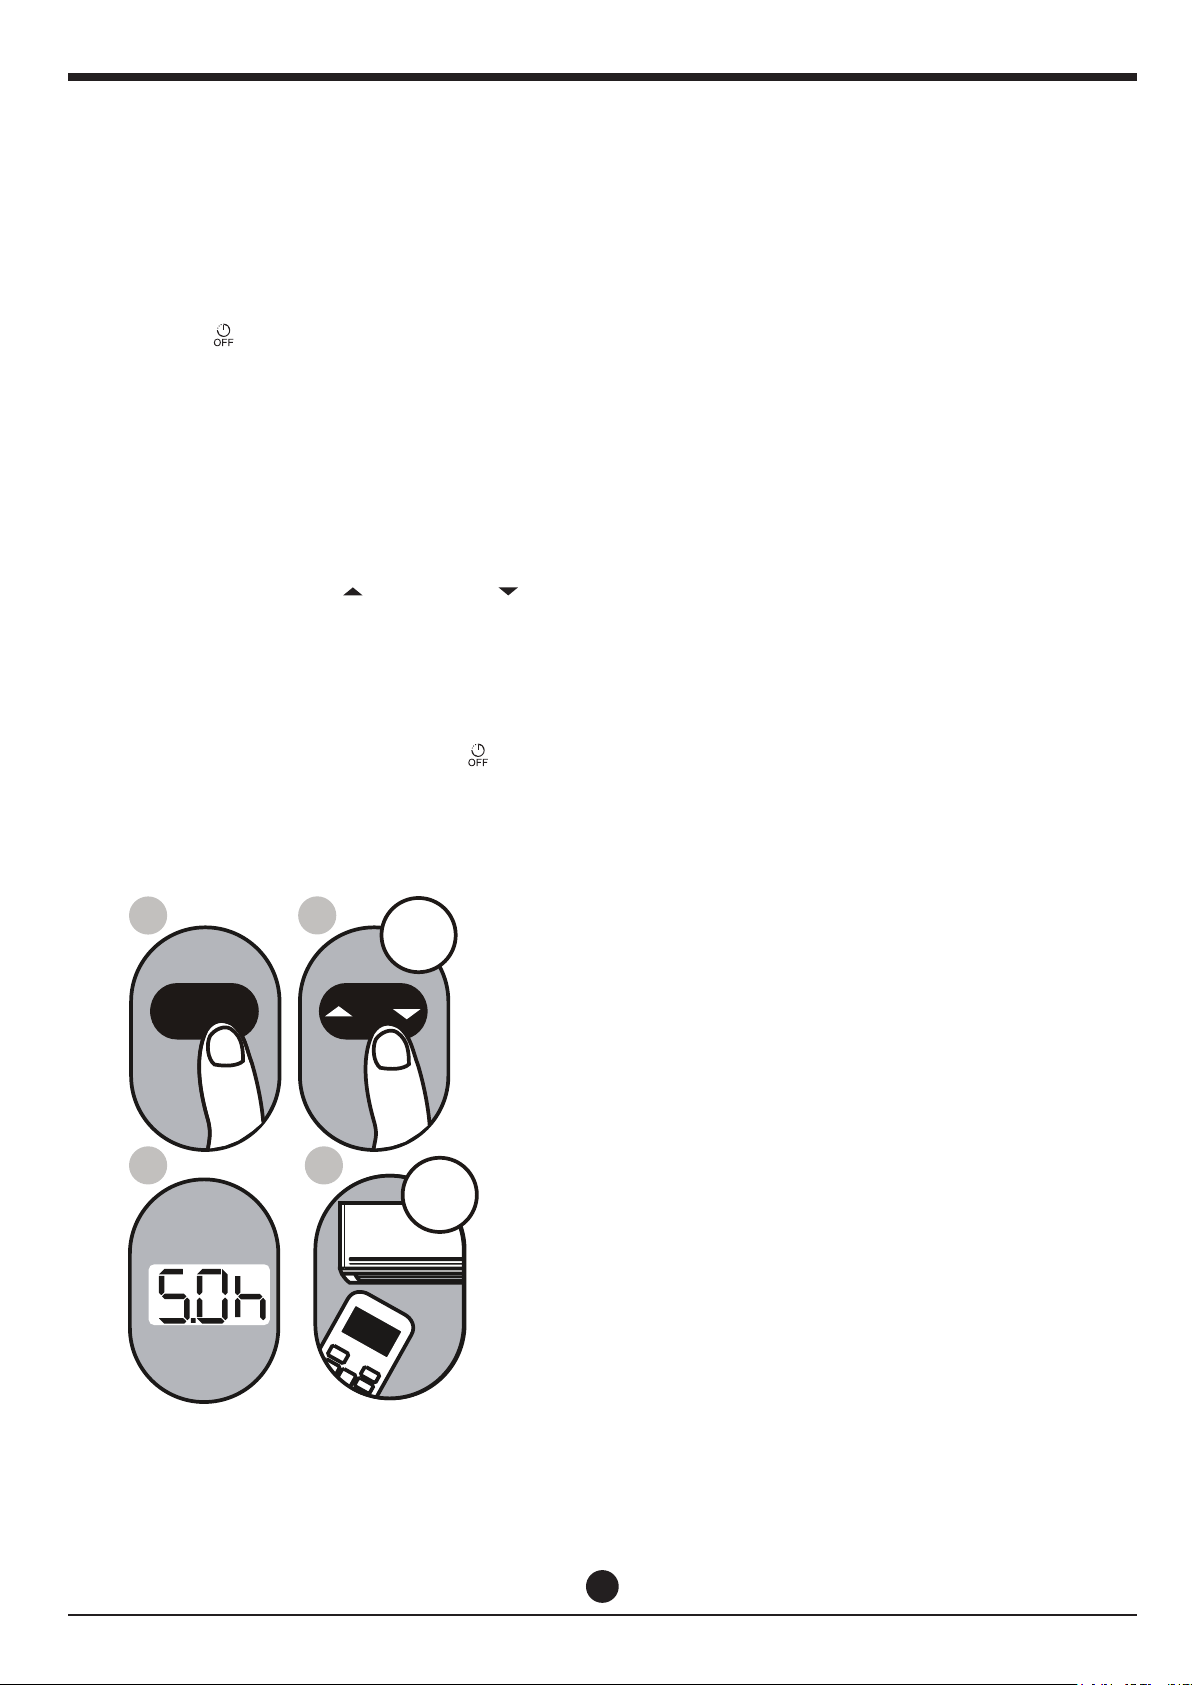
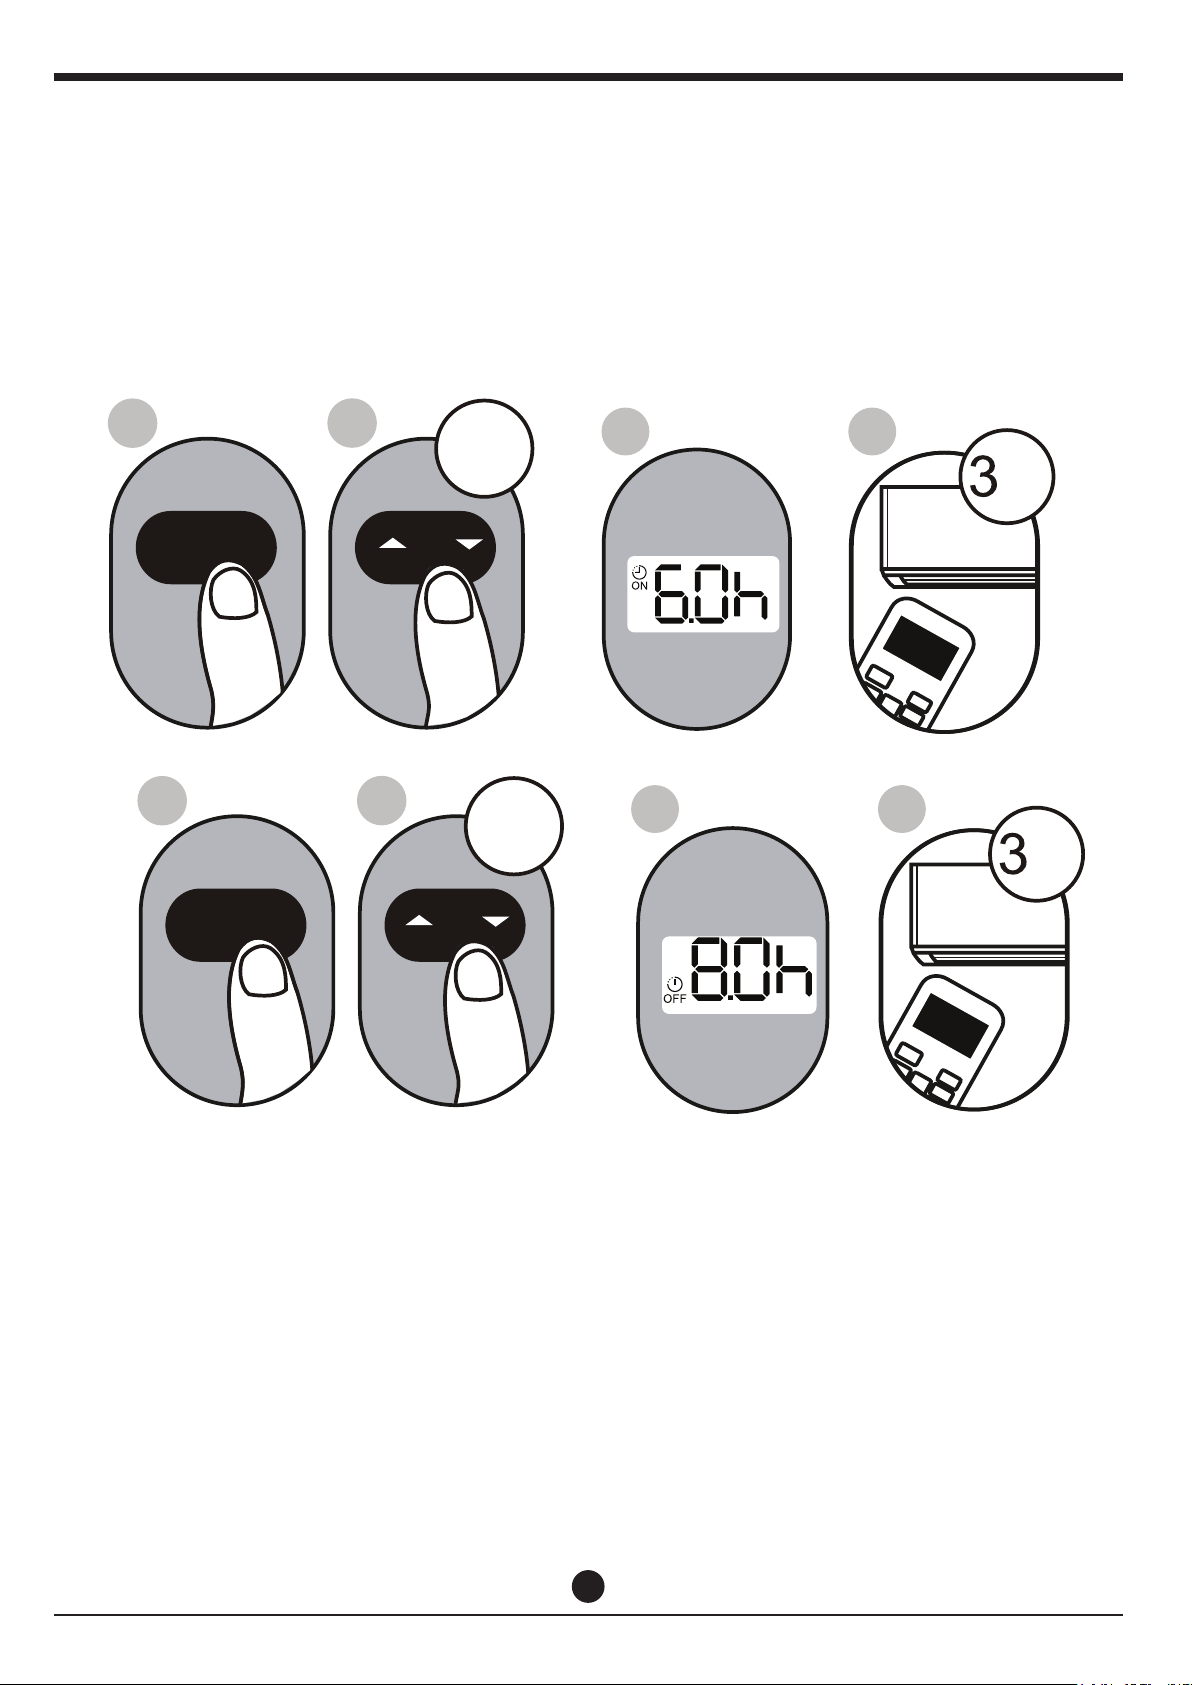
TIMER
TIMER
LED
LED
SWING
SWING
SWING
SWING
SWING
SWING
TURBO
TURBO
FOLLOW
ME
FOLLOW
ME
SELF
CLEAN
SHORT
CUT
SELF
CLEAN
SHORT
CUT
The Follow me function enables the
remote control to measure the temperature
at its current location and
.
When using AUTO, COOL, or HEAT modes,
measuring ambient temperature from the
remote control (instead of from the indoor
unit itself) will enable the air conditioner to
optimize the temperature around you and
ensure maximum comfort.
send this signal
to the air conditioner every 3 minutes interval
Follow me function
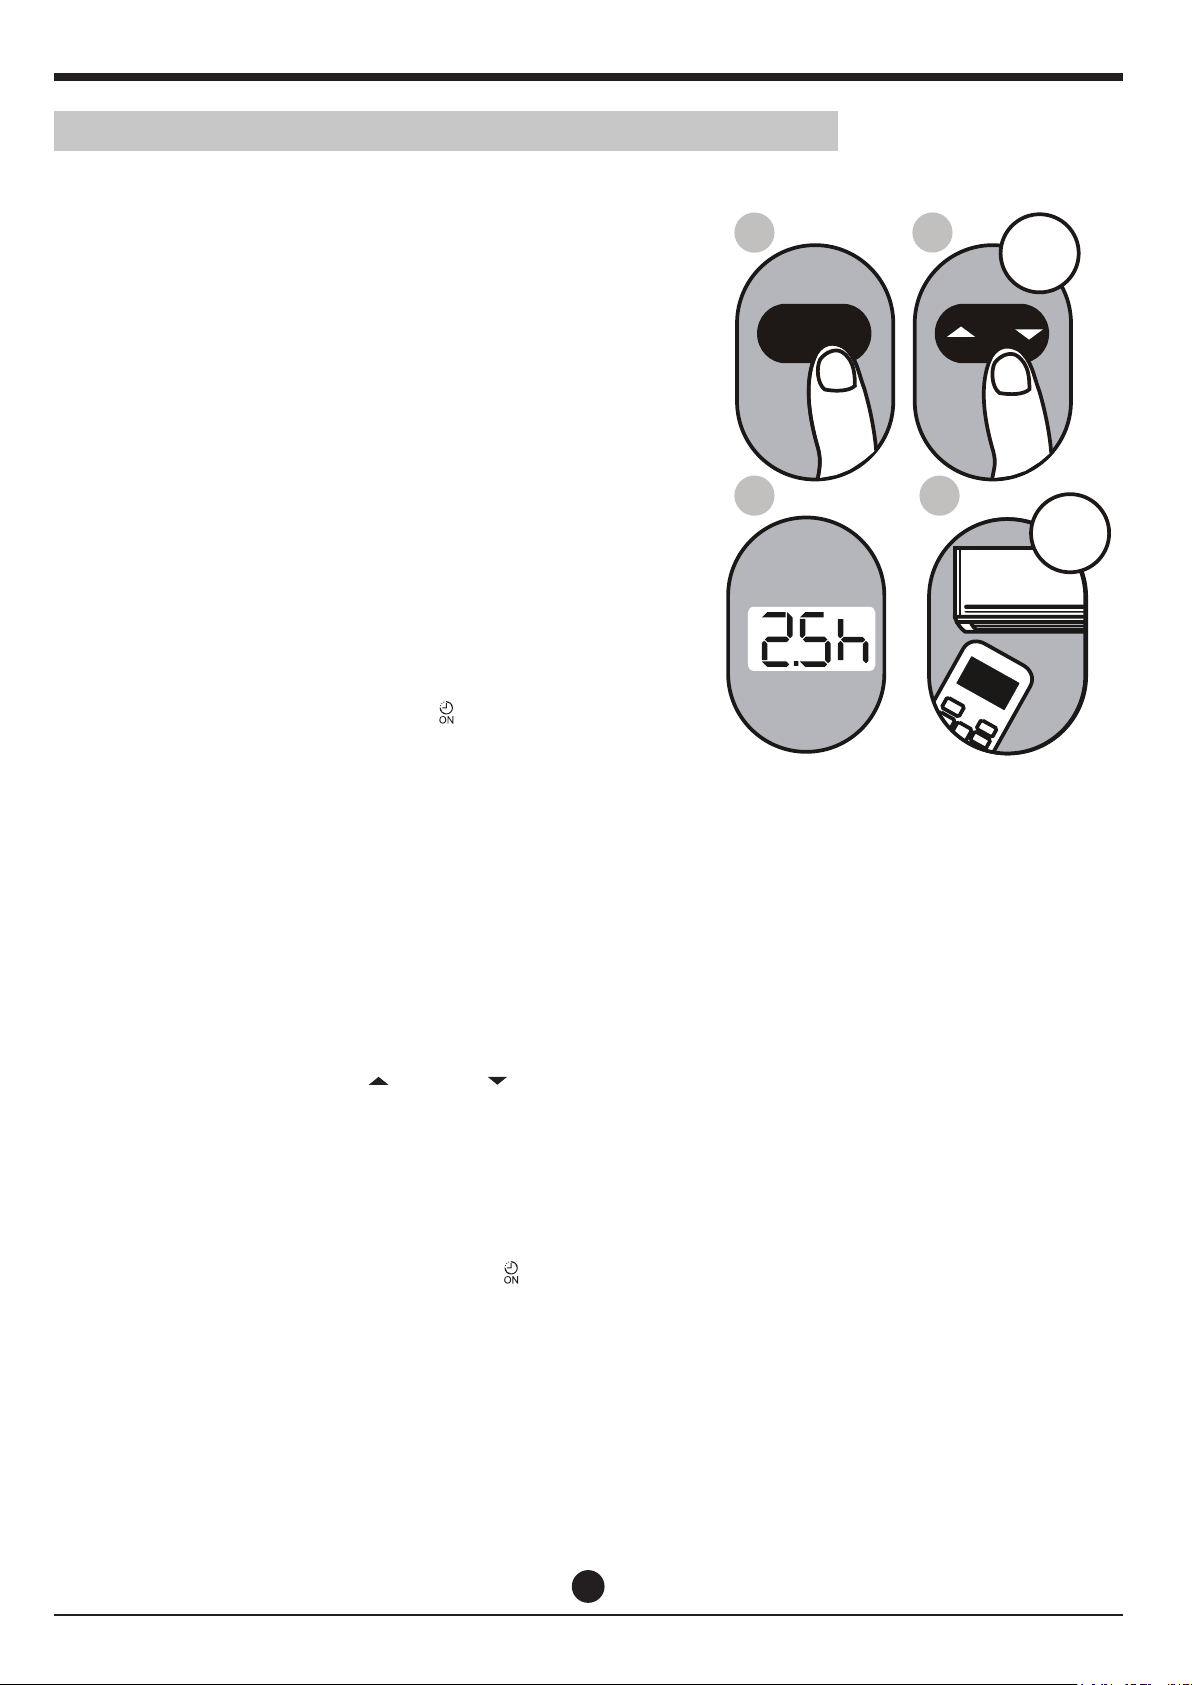
SLEEP Function
The SLEEP function is used to decrease
energy use while you sleep (and don t
need the same temperature settings to
stay comfortable). This function can
only be activated via remote control.
Note: The SLEEP function is not
available in FAN or DRY mode.
,
For the detail, see sleep operation in
USER S MANUAL.
,
,, ,,
,,
,,
SHORTCUT function
Used to restore the current settings or
resume previous settings.
Push this button when remote controller
is on, the system will automatically revert
back to the previous settings including
operating mode, setting temperature, fan
speed level and sleep feature (if activated).
If pushing more than 2 seconds, the
system will automatically restore the
current operation settings including
operating mode, setting temperature,
fan speed level and sleep feature
(if activated ).
NOTE: Press and hold Temp and
buttons together for 3 seconds will
alternate the temperature display
O O
between the C & F scale.
SLEEP