As a last resort, ImmersionRC runs a global network of repair and support centers. These handle warranty
repairs, supply hard-to-find spare parts, and also handle non-warranty work.
Send an email to repairs@immersionrc.com to open a support ticket.
Frequently Asked Questions
Q. How do I calibrate my 150/180 Mini ESCs?
DO NOT CALIBRATE THEM! ImmersionRC ESCs use quality components with accurate timing and never require
calibration!
Q. Can I fly in the rain?
ImmersionRC is one of the only companies in the racing quad business which conformally coats key PCBs to
add a level of water-resistance. This avoids problems when flying in very humid areas, occasional crashes in
wet grass, and the occasional use of the front of the quad as a snow-shovel.
That said, not all components like getting soaked, the R/C Rx for example, or the sensitive video transmitter
module. For this reason, flying in the rain (which isn’t much fun anyway) is not really recommended.
Q. I dunked my 150/180 Mini in the ocean/lake/pond, what do I do?
First thing to do (especially where highly corrosive salt water is involved) is to rinse the entire quad in distilled
water (available where car parts are sold, used to refill car batteries).
This rinsing process will remove potentially conductive salts from the water, and will ensure that they don’t
remain after drying.
Once the quad is rinsed, place it in a zip-lock bag filled with rice, and leave it in a warm place for at least 48
hours. The rice will absorb the remaining water, and increase the chances of life for your quad after the dunk.
Q. My motors are ‘stuttering’, and the quad falls out of the sky under full throttle
This is almost always due to motor screws touching the windings. Motor screw length on any mini-quad is
absolutely critical, especially for ‘upgrade’ motors which have extremely thin base material.
Q. My R/C Receiver isn’t auto-detected by the wizard
Normally, the 150/180 Mini will start up in a receiver ‘auto-detect’ mode which will automatically identify the
connected PPM/SBUS/DSMX. Receiver.
From time to time (for reasons not yet understood) this process fails. To work around this, simply connect the
quad to a PC/Mac and using the Vortex Configurator manually set the receiver type.
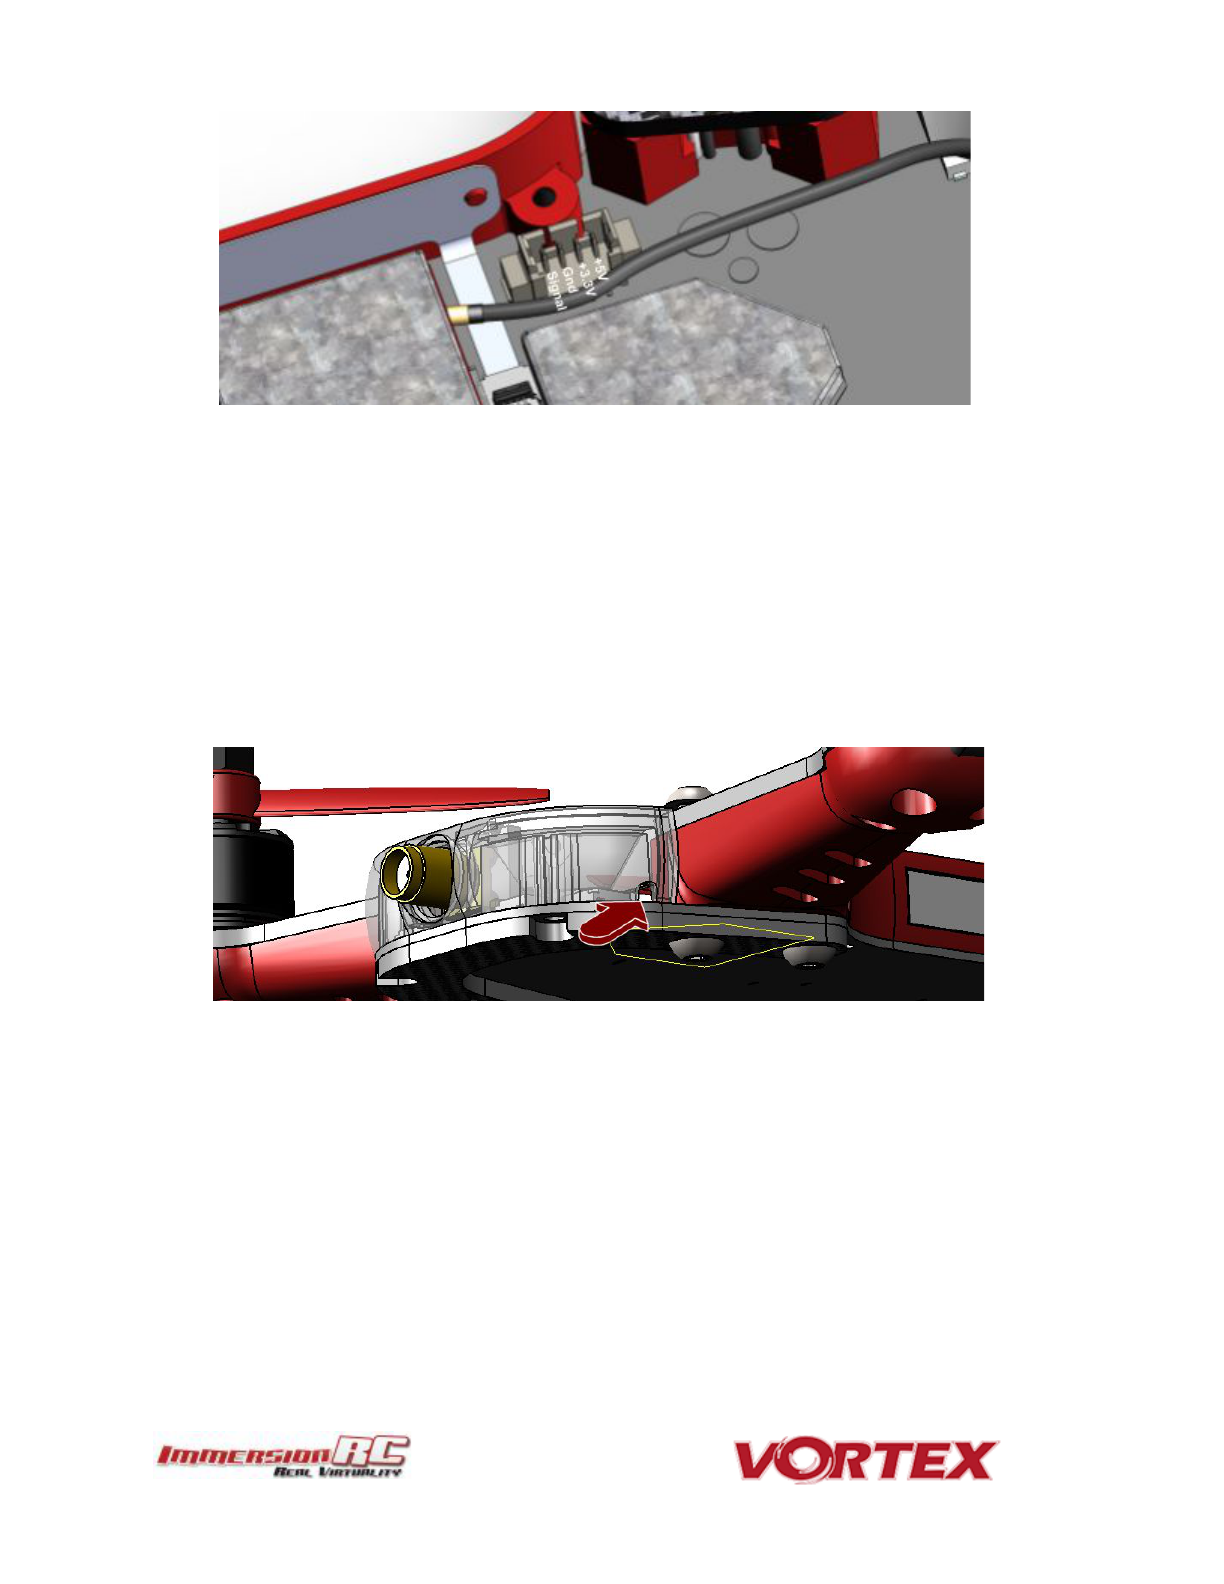
Q. I don’t like the stock camera, and would like to upgrade it
With previous Vortex quads, which shipped with a CMOS camera, there were clear reasons to do this. For the
150/180 Mini, we have installed a top-of-the-line CCD camera, with integrated OSD control, and a wide GoPro
lens.
If there are good reasons to change it, we would love to hear about them :-)