670299
12
Verklein
Vergroot
Pagina terug
1/20
Pagina verder
INSTRUCTION MANUAL
iPW1
HF/50 MHz ALL BAND
1 kW LINEAR AMPLIFIER
RWARNING HIGH VOLTAGE! NEVER attach
an antenna or internal antenna connector during trans-
mission. This may result in an electrical shock or burn.
RWARNING! NEVER carry the linear amplifier by
yourself. At least two persons must carry the linear
amplifier since it weights approx. 25 kg (55 lb).
RWARNING! NEVER apply AC voltage until the
linear amplifier is grounded. Touching the linear ampli-
fier may result in an electrical shock.
RNEVER apply AC voltage that exceeds the sug-
gested voltage. This could cause a fire or ruin the
IC-PW1.
RNEVER use an extension cord with the AC power
cable. Extension cords may cause fire or electrical
shock.
RNEVER let metal, wire or other objects touch any
internal part or connectors on the panel of the linear
amplifier. This will cause electric shock.
RNEVER expose the linear amplifier or remote con-
troller to rain, snow or any liquids.
NEVER allow children to play with the linear ampli-
fier or remote controller.
DO NOT operate the IC-PW1 before adjusting the
[ALC adj1] and [ALC adj2] pots properly on the rear
panel of the linear amplifier.
AVOID using or placing the linear amplifier or remote
controller in areas with temperatures below –10°C
(+14°F) or above +40°C (+104°F).
AVOID placing the linear amplifier or remote controller
in excessively dusty environments or in direct sunlight.
AVOID placing the linear amplifier against walls or
putting anything on top of the linear amplifier. This will
obstruct heat dissipation.
BE CAREFUL! The linear amplifier will become hot
when operating if continuously for long periods.
BE CAREFUL! Set the transceiver’s (exciter’s) RF out-
put power to less than 100 W, otherwise, the IC-PW1
will be damaged.
During maritime mobile operation, keep the linear am-
plifier, remote controller and microphone as far away
as possible from the magnetic navigation compass to
prevent erroneous indications.
The IC-PW1 cannot be used with the AH-2 HF AUTO-
MATIC ANTENNA TUNER.
For U.S.A. only
CAUTION: Changes or modifications to this device,
not expressly approved by Icom Inc., could void your
authority to operate this device under FCC regulations.
READ THIS INSTRUCTION MANUAL
CAREFULLY before attempting to operate the lin-
ear amplifier.
SAVE THIS INSTRUCTION MANUAL. This in-
struction manual contains important safety and oper-
ating instructions for the IC-PW1.
PRECAUTIONS
IMPORTANT
i
IMPORTANT ...................................................... i
PRECAUTIONS ................................................. i
EXPLICIT DEFINITIONS .................................. ii
TABLE OF CONTENTS .................................... ii
UNPACKING ..................................................... ii
1 PANEL DESCRIPTION ............................. 1–4
Front panel and remote controller ...................... 1
Rear panel ........................................................ 3
2 INSTALLATION AND CONNECTIONS .. 5–10
Unpacking ......................................................... 5
Ferrite core installation ...................................... 5
OPC-853 AC cable with line filter ....................... 5
AC power cable connection ............................... 5
Selecting a location ........................................... 5
Grounding ......................................................... 6
Antenna ............................................................ 6
System interconnections ................................... 7
Separating the remote controller ..................... 10
3
OPERATION
.......................................... 11–14
When first applying power (CPU resetting) ...... 11
Setting the ALC levels ..................................... 11
Programming the CI-V address ....................... 12
Operation ........................................................ 13
Antenna tuner operation ................................. 14
Protection circuit ............................................. 14
4 MAINTENANCE ......................................... 15
Troubleshooting .............................................. 15
5 SPECIFICATIONS ...................................... 16
EXPLICIT DEFINITIONS
UNPACKING
TABLE OF CONTENTS
ii
qwerty
i
o!0
u
Accessories included with the IC-PW1: Qty.
q Accessory cable (OPC-104B) .............................. 1
w Coaxial cable (OPC-125B) .................................. 1
e Separation cable (OPC-730) ............................... 1
r Remote control (CI-V) cable (OPC-718) .............. 1
t Remote controller feet ......................................... 2
y Grounding lug ...................................................... 1
u Dummy panel screws .......................................... 2
i Dummy panel ...................................................... 1
o Ferrite core ...........................................................2
!0 Cable clips ............................................................2
WORD DEFINITION
RWARNING
Personal injury, fire hazard or electric
shock may occur.
CAUTION Equipment damage may occur.
NOTE
If disregarded, inconvenience only.
No risk of personal injury, fire or elec-
tric shock.
The explicit definitions described at left apply to this in-
struction manual.
1
1
PANEL DESCRIPTION
Front panel and remote controller
0
100
250
500
1K
1.5K
0
TEMP ALC
ALC adj
SWR
0
1
1.5
2
3
10
20
30
40
50
60
V
D
HOT
I
D
Po
10
20
30
40
50
60
W
A
METER-1 METER-2
Po
TEMP
I
D
VD
ALC
SWR
DOWN 1.8 3.5 7 10 14 18 21 24 28 50 UP
ANT
INPUT
AUTO
TRANSMIT
TUNER
AMP/
PROTECT
POWER
V
1
2
1
2
3
4
HF/50MHz ALL BAND 1kW LINEAR AMPLIFIER
w
r
e
t
q
y
ui o!0
!3
!4
!5 !1!2
0
100
250
500
1K
1.5 K
0
TEMP ALC
ALC adj
SWR
0
1
1.5
2
3
10
20
30
40
50
60
V
D
HOT
I
D
Po
10
20
30
40
50
60
W
A
METER-1 METER-2
Po
TEMP
I
D
VD
ALC
SWR
DOWN
1.83.5 7 1014 18 21 242850 UP
ANT
INPUT
AUTO
TRANSMIT
TUNER
AMP/
PROTECT
POWER
V
1
2
1
2
3
4
HF/50MHz ALL BAND 1kW LINEAR AMPLIFIER
2
1
PANEL DESCRIPTION
q POWER SWITCH [POWER] (p. 11)
Push momentarily to turn power ON.
w TRANSMIT INDICATOR [TRANSMIT] (p. 13)
Lights green while transmitting.
During transmission, a humming may sound de-
pending on the output power. This is caused by
the large current produced by the power supply
and does not indicate equipment malfunction.
e ANTENNA TUNER INDICATOR [TUNER] (p. 13)
Lights while the antenna tuner is activated.
Blinks while tuning and the SWR becomes 1.5:1 or
greater on the 50 MHz band.
Goes out after slow blinking when antenna turner
cannot tune the selected antenna (SWR 1.5:1 or
greater).
r ANTENNA TUNER SWITCH [TUNER] (p. 14)
Turns the antenna tuner ON and OFF (bypass)
when pushed momentarily.
- The [TUNER] indicator lights while the antenna tuner is
activated; blinks while tuning.
- While operating in the 50 MHz band, the antenna tuner
does not start automatically. Push [TUNER] for 2 sec.
to tune the antenna manually.
Starts to tune the antenna manually when pushed
for 2 sec.
- When the tuner cannot tune the antenna (SWR 1.5:1
or greater), the tuning circuit is bypassed automatically
after 20 sec.
t LINEAR AMPLIFIER SWITCH [AMP/PROTECT]
Turns the linear amplier ON and OFF.
- The [AMP/PROTECT] indicator lights green when the
linear amplier is ON. (p. 13)
- The [AMP/PROTECT] indicator lights red when the pro-
tector circuit is activated. (p. 14)
- When the linear amplier is OFF, the [AMP/PROTECT]
does not light and the exciters signal is applied to one of
the output connectors or the IC-PW1s antenna tuner.
y LOWER BAND SELECTOR [DOWN] (p. 13)
Selects the lower operating band when pushed.
u AUTOMATIC INDICATOR [AUTO] (p. 13)
Indicates that automatic band selection is activated.
(When an Icom CI-V transceiver is connected.)
i BAND INDICATORS (p. 13)
Indicate the selected operating band.
o UPPER BAND SELECTOR [UP] (p. 13)
Selects the higher operating band when pushed.
!0 OUTPUT ANTENNA SELECTOR [ANT] (p. 13)
Selects one of 4 output antenna connectors.
!1 INPUT ANTENNA SELECTOR [INPUT] (p. 13)
Selects one of 2 input antenna connectors.
!2 TRANSMIT METER-2 [METER-2]
Shows the nal FETs voltage (V
D
), SWR (Standing
Wave Ratio) or ALC (Automatic Level Control) level.
!3 TRANSMIT METER-2 SELECTOR
Selects the nal FETs voltage (V
D
), SWR (Stand-
ing Wave Ratio) or ALC (Automatic Level Control)
level for transmit meter-2.
!4 TRANSMIT METER-1 [METER-1]
Shows the RF output power (P
O
), final FETs cur-
rent (I
D
) or heatsink temperature (TEMP).
!5 TRANSMIT METER-1 SELECTOR
Selects the RF output power (P
O
), nal FETs cur-
rent (I
D
) or heatsink temperature (TEMP) for trans-
mit meter-1.
q OUTPUT ANTENNA CONNECTORS
[ANT1] [ANT4] (p. 6)
Accept a 50 antenna with a PL-259 connector.
w ACCESSORY SOCKET-1 [ACC-1]
ACCESSORY SOCKET-2 [ACC-2]
Enable connection to Icom exciters (transceivers).
- See the page at right for socket information.
- The [ACC-2] socket is connected in parallel with [ACC-1]
by default and can be used for connecting external
equipment such as the EX-627
AUTOMATIC ANTENNA SE-
LECTOR
, etc. These sockets can be separated by the
[EXCITER] switch. (!0)
e REMOTE CONTROLLER CABLE HOLE
[CONTROLLER] (p. 10)
Used for separation of the remote controller and lin-
ear amplier.
r ALC OUTPUT JACKS [ALC1]/[ALC2] (p. 11)
Connect to the ALC input jack of a non-Icom exciter
(transceiver).
- Control voltage: 10 to 0 V DC
t SEND CONTROL JACKS [SEND1]/[SEND2]
(pgs. 8, 9)
Input terminals for transmit control. Go to ground
while transmitting.
- Max. control level: 5.0 V DC/0.1 A
- Ground level: 0.5 to 0.8 V DC
y CI-V REMOTE CONTROL JACKS [REMOTE]
(pgs. 79)
Used for band control with an Icom CI-V exciter
(transceiver).
u ALC LEVEL ADJUSTMENT POTS
[ALC adj1]/[ALC adj2] (p. 11)
Adjust the ALC levels.
RCAUTION! DO NOT operate the IC-PW1 be-
fore adjusting the [ALC adj1] and [ALC adj2] pots
properly. This may damage the nal FETs.
i CIRCUIT BEAKERS (p. 14)
Cut off the AC input when over current occurs.
- Circuit breaker capacity: 20 A (U.S.A. version)
15 A (Europe version)
o GROUND TERMINAL (p. 6)
Connect this terminal to a ground to prevent electri-
cal shocks, TVI, BCI and other problems.
3
1
PANEL DESCRIPTION
Rear panel
ANT4
ACC-2 ALC2
REMOTE ALC adj2
SEND2 ALC1 SEND1
EXCITER
CONTROLLER
ACC-1
ANT3 ANT2 ANT1
INPUT1
INPUT2
1
L
N
1&2
REMOTE ALC adj1
o
!1
!0
e
r
t
u
y
i
q
w
4
1
PANEL DESCRIPTION
D ACC-1 SOCKET
D ACC-2 SOCKET (w/[EXCITER] is 1)
The following descriptions are applied when the
[EXCITER] switch is set to 1 (default). When [EX-
CITER] is set to 1&2, [ACC-2] functions the same
as [ACC-1] above for the 2nd exciter.
ACC-1 PIN NO.
PIN NAME
DESCRIPTION SPECIFICATIONS
1 8 V
Regulated reference 8 V DC input
for band control.
Input voltage : 8 V ±0.3 V
Input current : Less than 10 mA
2 GND Connects to ground.
3 SEND
Input/output pin.
Goes to ground when transmitting.
When grounded, transmits.
Ground level : 0.5 V to 0.8 V
Output current : Less than 20 mA
Input current : Less than 200 mA
4 BAND
Band voltage input.
(Varies with amateur band)
Input voltage : 0 to 8.0 V
5 ALC ALC voltage output.
Control voltage : 10 to 0 V
Output impedance : 10 k
6 NC No connection.
7 13.8 V 13.8 V DC input terminal. Input current : Less than 1 A
Rear panel
view
1
2
3
4
5
6
7
ACC-2 PIN NO.
PIN NAME
DESCRIPTION SPECIFICATIONS
1 8 V
Regulated reference 8 V DC output
from the [ACC-1] socket.
Output voltage : 8 V ±0.3 V
Output current : Less than 10 mA
2 GND Connects to ground.
3 SEND
Input/output pin.
Goes to ground when transmitting.
When grounded, transmits.
Ground level : 0.5 V to 0.8 V
Output current : Less than 20 mA
Input current : Less than 200 mA
4 BAND
Band voltage output from the
[ACC-1] socket.
(Varies with amateur band)
Output voltage : 0 to 8.0 V
5 ALC ALC voltage output.
Control voltage : 10 to 0 V
Output impedance : 10 k
6 NC No connection.
7 13.8 V
13.8 V DC output terminal from the
[ACC-1] socket.
Output current : Less than 1 A
Rear panel
view
1
2
3
4
5
6
7
!0 EXCITER SELECTOR [EXCITER] (pgs. 79)
Sets the connected exciter number.
- Select [1] when 1 exciter is connected. [ACC-2] outputs
the received [ACC-1] signal to another Icom option such
as the EX-627
AUTOMATIC ANTENNA SELECTOR.
- Select [1&2] when 2 exciters or 1 exciter with 2 speci-
ed band antenna connectors is connected.
!1 INPUT ANTENNA CONNECTORS
[INPUT1]/[INPUT2] (p. 6)
Accept a 50 antenna with a PL-259 connector.
5
2
INSTALLATION AND CONNECTIONS
(1) Single-phase 3-wire line (200240 V AC)
q The green wire from the AC power cable must be
connected to the protective earth.
w The black and white wires from the AC power
cable can be connected to either terminal.
*Use the appropriate AC plug if required.
(2) Single-phase 2-wire line (100120 V AC)
q The green wire from the AC power cable must be
connected to the protective earth.
w The black wire from the AC power cable must be
connected to the hot (live) wire.
e The white wire from the AC power cable must be
connected to the return wire.
(3) Three-phase 3-wire line (200240 V AC)
q The green wire from the AC power cable must be
connected to the protective earth.
w The black and white wires from the AC power
cable can be connected to 2 of 3 wires.
white
black
green
*
GND
white
black
green
white
black
green
AC power cable connection (Except Europe version)
Unpacking
After unpacking, immediately report any damage to the
delivering carrier or dealer. Keep the shipping cartons.
For a description and a diagram of accessory equip-
ment included with the IC-PW1, see UNPACKING on
p. ii of this manual.
Ferrite core installation
The supplied ferrite core and cable clips (o and !0 in
UNPACKING) should be attached to the AC cable of
the IC-PW1 as illustrated below. This will help prevent
interference such as TVI, etc.
OPC-853 AC cable with line lter
The IC-PW1 Europe version must be used with the
OPC-853 AC cable to satisfy European EMC require-
ments.
AC power cable connection
A suitable AC power plug must be connected to the AC
power cable end. See the diagram below for connec-
tion procedures. AC input voltage is automatically se-
lected.
The IC-PW1 can accept either 100120 V AC or
200240 V AC power.* However, we recommend using
200240 V AC rather than 100120 V AC for better
power supply efficiency and longer periods of trans-
mission.
*Europe version: 230 V AC only
Selecting a location
Select a location for the linear amplier that allows ad-
equate air circulation, free from extreme heat, cold, or
vibrations, and away from TV sets, TV antenna ele-
ments, radios and other electro-magnetic sources.
The linear amplier and remote controller sections of
the IC-PW1 can be separated. The remote controller
can be placed near the operator for easy monitoring of
linear amplifier conditions at any time. See p. 10 for
separation instructions.
The linear amplier must be placed on a solid founda-
tion since it is very heavy.
Attach and position
the cable clips to
the AC cable as
illustrated.
AC cable
Ferrite core
Cut the cable clips
so that enough
length remains to
secure the ferrite
core in place.
Grounding
To prevent electrical shock, television interference
(TVI), broadcast interference (BCI) and other prob-
lems, ground the linear amplier through the GROUND
terminal on the rear panel.
For best results, connect a heavy gauge wire or strap
to a long earth-sunk copper rod. Make the distance be-
tween the GROUND terminal and ground as short as
possible.
R WARNING: NEVER connect the
GROUND terminal to a gas or electric pipe, since
the connection could cause an explosion or electric
shock.
Antenna
For radio communications, the antenna is of critical im-
portance, along with output power and sensitivity. Se-
lect antenna(s), such as a well-matched 50 antenna
with more than 2 kW power rating, and feedline. 1.5:1
of Voltage Standing Wave Ratio (VSWR) is recom-
mended for a desired band. Of course, the transmis-
sion line should be a coaxial cable.
When using 1 antenna, use the [ANT1] connector.
CAUTION: Protect your linear amplier from light-
ning by using a lightning arrestor.
6
2
INSTALLATION AND CONNECTIONS
PL-259 CONNECTOR INSTALLATION
30 mm
9
8 in 10 mm
3
8 in 12 mm
1
16 in
q Slide the coupling ring down. Strip the cable jacket
and soft solder.
w Strip the cable as shown at left. Soft solder the
center conductor.
e Slide the connector body on and solder it.
r Screw the coupling ring onto the connector body.
Antenna SWR
Each antenna is tuned for a specified frequency
range and SWR may be increased out-of-range.
When the SWR is higher than approx. 2.0:1, the lin-
ear ampliers power drops to protect the nal FET.
In this case, an antenna tuner is useful to match the
linear amplifier and antenna. Low SWR allows full
power for transmitting even when using the antenna
tuner. The IC-PW1 has an SWR meter to monitor the
antenna SWR continuously.
30 mm
10 mm (soft solder)
10 mm
12 mm
SolderSolder
Soft
solder
Coupling ring
System interconnections
1 or 2 Icom 100 W HF transceivers can be connected
as exciters to the IC-PW1. Non-Icom transceivers can
be used, however, band selection will not be synchro-
nized for each exciter.
See the following diagrams for making connections be-
tween the IC-PW1 and an exciter (transceiver). See p.
5 for AC power cable connection.
7
2
INSTALLATION AND CONNECTIONS
Using a 13-pin ACC socket (IC-706 series)
IC-PW1
Ground
Coaxial cable
(supplied)
ACC cable (supplied)
Remote control cable (supplied)
To an
antenna
ANT
ACC-1
ANT1
REMOTE
REMOTE
INPUT1
GND
GND
IC-706 series
ACC (13 pins)
OPC-599 (optional)
EXCITER
1 1&2
AC outlet
(Non-Europe versions: 100120/220240 V
Europe version : 230 V)
Using 1 Icom exciter (transceiver)
ANT
ACC-1
ANT2 ANT1 ACC(2) REMOTE
REMOTE
INPUT1
INPUT2
Connect
[INPUT2]
if necessary.
GND
GND
IC-PW1
IC-756
Ground
AC outlet
(Non-Europe versions: 100120/220240 V
Europe version : 230 V)
Coaxial cable (supplied)
Coaxial cable
(optional)
ACC cable (supplied)
Be sure to connect the cable
to the 7-pin ACC(2) jack.
Remote control cable (supplied)
To an
antenna
EXCITER
1 1&2
8
2
INSTALLATION AND CONNECTIONS
Using 2 Icom exciters (transceivers)
The following connections also apply to trans-
ceivers having multiple antenna connectors for
specied bands (e.g. IC-726, IC-729, etc.)
IC-PW1
IC-756
Ground
Coaxial cable (supplied)
OPK-5
(optional)
ACC cable (supplied)
Remote control cable (supplied)
To an
antenna
OPC-599 (optional)
EXCITER
1 1&2
ANT
ACC-1
ACC-2
ANT1
ANT1 or 2
ACC REMOTE
REMOTE
REMOTEACC(2)
REMOTE
INPUT1
INPUT2
GND
GND
GND
IC-706 series
OPK-5 (optional)
OPK-5 (optional)
Be sure to connect the cable to the 7-pin ACC(2) jack.
AC outlet
(Non-Europe versions: 100120/220240 V
Europe version : 230 V)
Using a non-Icom exciter (transceiver)
Set the [EXCITER] switch to [1] when 1 exciter is con-
nected; set to [1&2] when 2 exciters are connected.
NOTE: The specications for the SEND relay are
5 V DC 0.1 A. If this level is exceeded, a large ex-
ternal relay must be used.
IC-PW1
Ground
Coaxial cable
(supplied)
To an
antenna
ANT
Non-Icom exciter
INPUT1
RCA plug
ALC
ALC1
SEND1
SEND
SEND
Relay
DC power
GND
GND
ALCDC OUT SEND
RF OUT
EXCITER
1 1&2
AC outlet
(Non-Europe versions: 100120/220240 V
Europe version : 230 V)
9
2
INSTALLATION AND CONNECTIONS
Using 1 Icom and 1 non-Icom exciters
(transceivers)
NOTE: The specications for the SEND relay are
5 V DC 0.1 A. If this level is exceeded, a large ex-
ternal relay must be used.
Using non-Icom exciters
(transceivers) when the
IC-PW1s power is OFF
To use the antenna selector of the
IC-PW1 when the IC-PW1 power
is OFF, follow 1 of 2 methods.
(1) Supply the antenna selector
power to the ACC-1 socket
Supply the 13.8 V DC, 0.5 A to pin
7 of the [ACC-1]/[ACC-2] socket.
- Use [ACC-1] when the exciter is con-
nected to [INPUT1].
- Use [ACC-2] when the exciter is con-
nected to [INPUT2].
(2) Use the auxiliary power
supply
Set the jumper to 2 to use the
auxiliary power supply as shown at
right.
-The antenna selector functions even
when the IC-PW1 power is OFF
In addition set the jumper on the
IC-PW1 controller to 2 to turn the
controllers LEDs OFF as shown at
right.
When the jumper is set to 2,
the CI-V control does not func-
tion even if an Icom exciter is
connected.
These diagrams show the factory de-
faults.
J3
J4
S3
12
1
2
Jumper location of linear amplifier
Jumper location of controller
1
2
3
4
5
6
SEND ALC
RF
DC
GND
[ACC-1]
13.8 V DC
to IC-PW1 [INPUT1]
to IC-PW1 [GND]
IC-PW1 (DIN)
Non-Icom exciter
ANT
ACC-1
ANT
ACC(2) REMOTE
REMOTE
INPUT1
INPUT2
Connect
ANT1 or
ANT2
GND
GND
IC-PW1
IC-756
Ground
Coaxial cable (supplied)
Coaxial cable
(optional)
ACC cable (supplied)
Remote control cable (supplied)
To an
antenna
EXCITER
1 1&2
RCA plug
ALC
ALC2
SEND2
SEND
SEND
Relay
DC power
Non-Icom exciter
GND
RF OUT
ALC
DC OUT
SEND
Be sure to connect the cable to the 7-pin ACC(2) jack.
AC outlet
(Non-Europe versions: 100120/220240 V
Europe version : 230 V)
10
2
INSTALLATION AND CONNECTIONS
The control section of the linear amplier can be sep-
arated from the main body, doubling as a remote con-
troller. It can be placed on the exciter or in another
convenient place.
q Disconnect the AC power cable.
w Remove 8 screws from the sides of the linear am-
plier, then lift up the top cover.
e Unplug the control cable from J3 on the MAIN unit.
r Remove 2 screws from the front panel of the linear
amplier, then detach the remote controller. (Fig.
1) Attach the dummy panel onto the space left by
the controller using the 2 screws.
t Remove 5 screws from the rear panel of the re-
mote controller, then remove the rear panel.
y Replace the control cable with the supplied sepa-
ration cable through the cable hole. Use the
shorter end (from the bushing) to connect to the
remote controller.
u Remove 2 screws from the cable hole cover on the
linear amplifier rear panel. Insert the separation
cable into the cable hole. Keep the hole cover and
screws for future use.
i Plug the other longer end (from the bushing) of the
separation cable into J10 on the JACK unit through
the cable hole. Connect the grounding wire as
shown below. Connect the control cable to J11.
o Plug the other end of the control cable into J3 on
the MAIN unit. (Fig. 2)
!0 Replace the top cover and 8 screws.
Separating the remote controller
Setting the ALC levels
Before rst applying power, make sure all connections
required for your system are complete by referring to
chapter 2. Then, reset the linear amplifier using the
following procedure.
NOTE: Resetting CLEARS all programmed set-
tings to default values.
q Make sure the linear amplier, exciter and auxiliary
power supply (p. 9) powers are OFF.
w While pushing [UP] and [DOWN], push [POWER]
to turn power ON.
- The internal CPU is reset.
- The remote controller shows its initial condition when
resetting is complete.
e Reset the exciters CI-V settings after resetting. (p.
12)
If the controllers power is supplied from non-Icom
exciters or auxiliary power supply (p. 9), turn the
exciter or auxiliary power supply ON while pushing
[UP] and [DOWN] to reset the CPU.
[DOWN] [UP]
[POWER]
11
3
OPERATION
R CAUTION: Final FETs may be damaged if
the ALC level adjustment is set incorrectly.
NOTE: Re-adjustment is necessary when replac-
ing the exciter.
q Select an antenna which has an SWR of 1.5:1 or
better.
w Set the 1st exciters RF output power for the mini-
mum output.
e Be sure that the [ALC adj1] and [ALC adj2] pots on
the rear panel max. counterclockwise. (default)
r Push [POWER] to turn the linear amplier power
ON.
t Push [UP] or [DOWN] to select an operating band
except 50 MHz band.
- Select a band which uses a well-matched 50 an-
tenna.
y Push the transmit meter-2 switch one or more
times to select the ALC level meter.
- The [ALC] indicator lights.
u Push [TUNER] to turn the antenna tuner ON.
- The [TUNER] light lights.
i While adjusting the 1st exciters RF output power,
transmit a 100 W output power of the selected
band signal using CW or RTTY mode.
o Adjust the [ALC adj1] pot to the ALC adjustment
point as shown below.
!0 Check that the Po meter shows 1 kW output
power.
!1 Adjust the [ALC adj2] pot in the same manner
when a 2nd exciter is connected.
METER-2
ALC
ALC adj
SWR
0
1
1.5
2
3
10
20
30
40
50
60
V
D
V
ALC adjustment
point
METER-1
0
100
250
500
1K
1.5 K
0
TEMP
HOT
I
D
Po
10
20
30
40
50
60
W
A
Output power
When rst applying power (CPU resetting)
12
3
OPERATION
The IC-PW1 uses CI-V frequency data for automatic
selection of the operating band. Program the exciters
address to use this capability as follows:
For non-Icom exciters, the IC-PW1 cannot be con-
trolled using the CI-V function, so this setting is not
necessary.
For transceivers which have multiple antenna con-
nectors for specified bands (e.g. IC-726, IC-729,
etc.), set the same as for 2 Icom exciters.
D Setting the Icom exciters
When connecting 2 or more CI-V devices:
DO NOT use the AUTO baud rate for CI-V de-
vices. We recommend that all CI-V devices are set
to 9600 bps.
When using the same baud rate, the exciters fre-
quencies are synchronized.
When using different baud rates (i.e. 4800 and
9600 bps, etc.), the exciters frequencies are not
synchronized.
q Conrm that the exciters CI-V transceive function
is ON.
- Refer to the instruction manual for details.
w When connecting 2 exciters, connect the 1st and
2nd exciter to [INPUT1] and [INPUT2], respec-
tively.
e When connecting 2 Icom exciters, set [EXCITER]
to the [1&2] position.
r When connecting 2 or more CI-V devices, DO
NOT set to AUTO baud rate.
- Refer to the instruction manual for details.
- When using the same baud rate, the exciters frequen-
cies are synchronized.
- When using different baud rates (i.e. 4800 and 9600
bps, etc.), the exciters frequencies are not synchro-
nized. [INPUTz] and [INPUTx] selection is automat-
ically selected using the exciters baud rate.
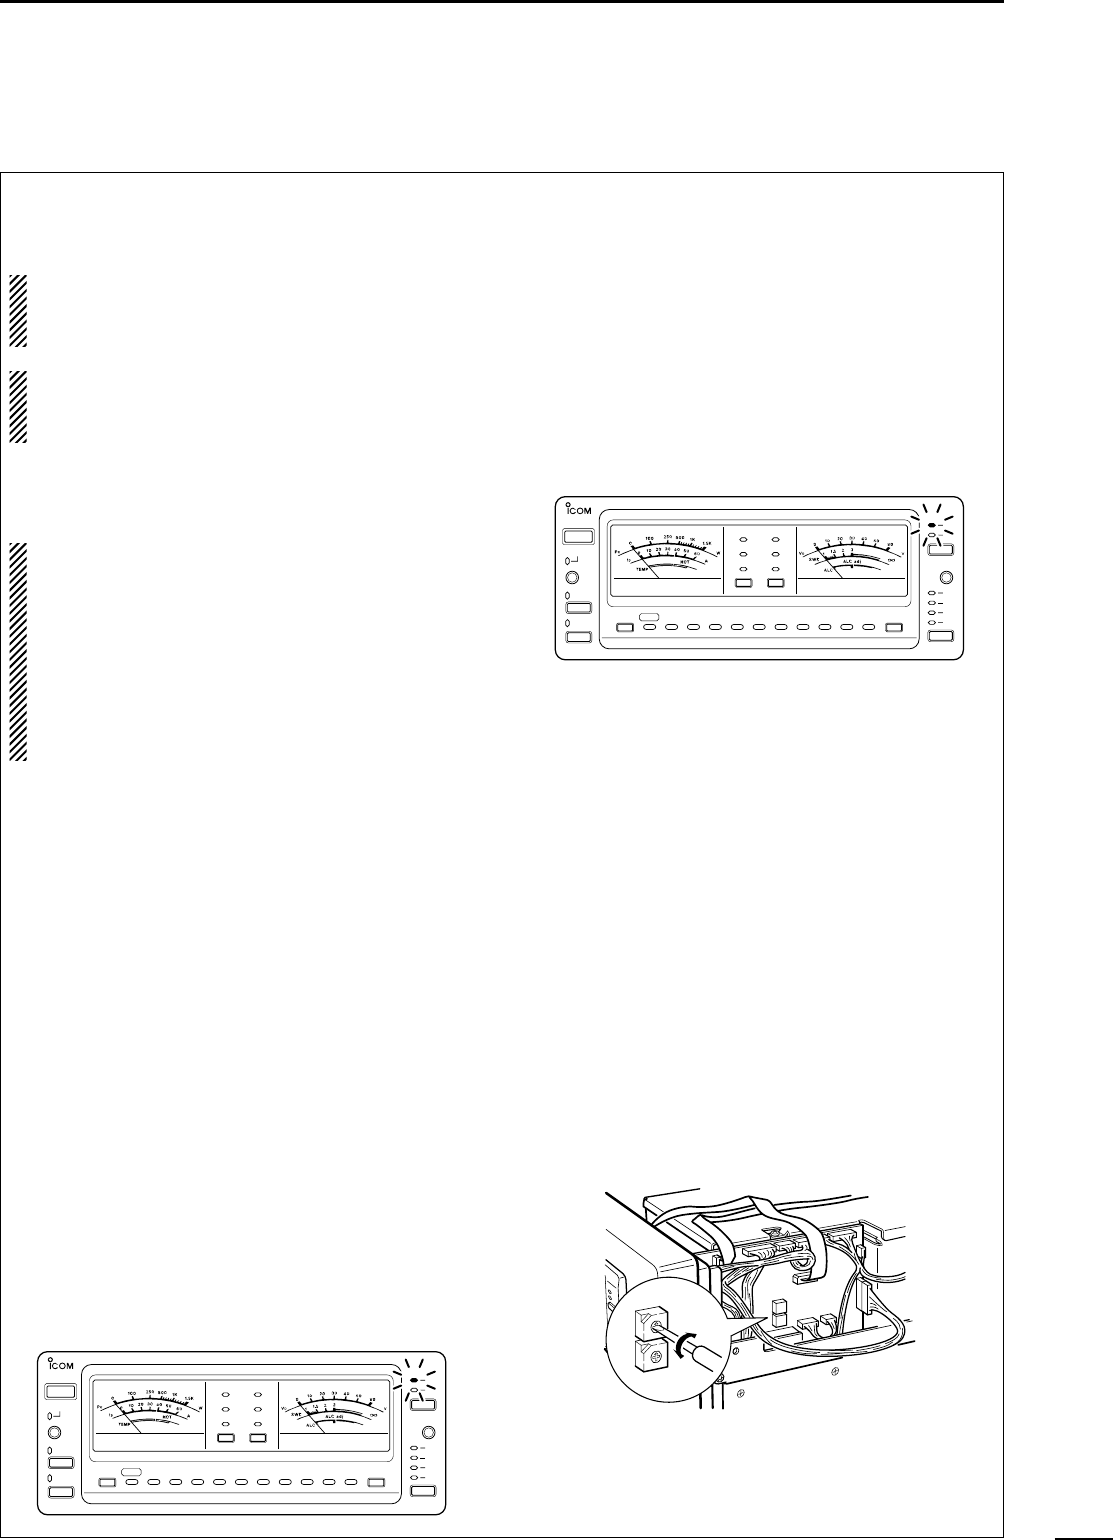
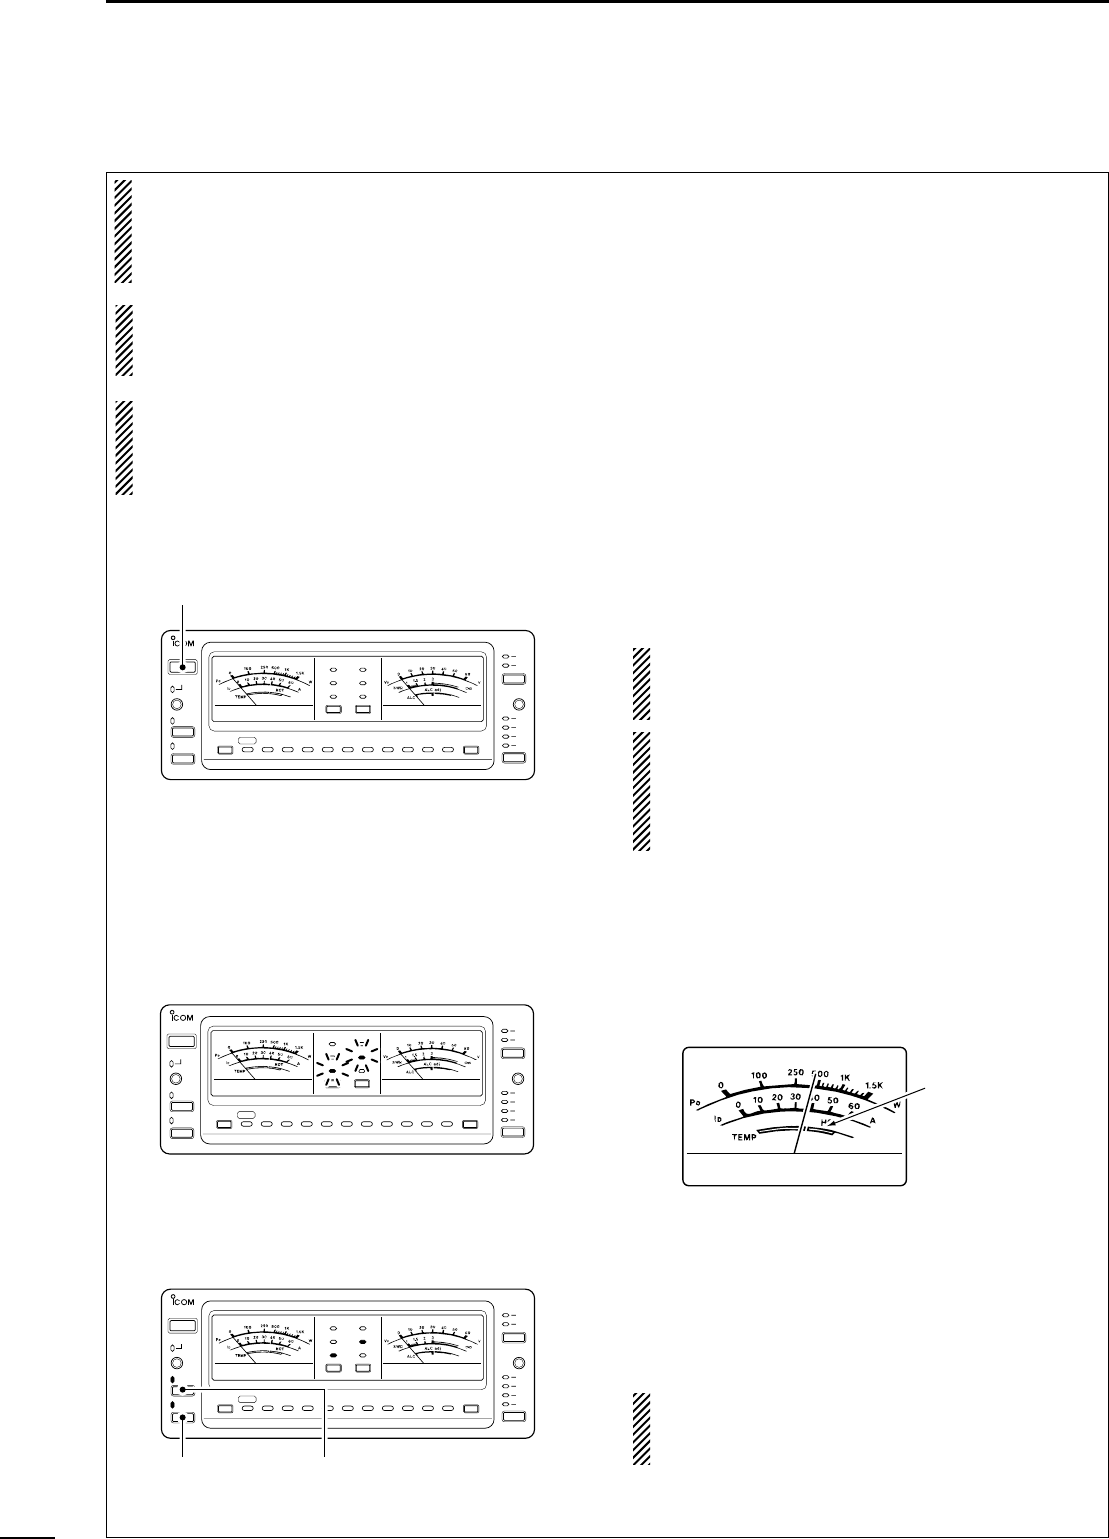
D When using 1 Icom exciter
q While pushing [INPUT], push [POWER] to enter
the CI-V address programming mode.
- [INPUTz] blinks.
w Rotate the Icom exciters tuning dial until the
[INPUTz] light continuously lights.
e Push [POWER] to turn the IC-PW1 power OFF
and complete the setting.
D When using 2 exciters
q When using 2 Icom exciters, be sure that
[EXCITER] is set to the [1&2] position.
w While pushing [INPUT], push [POWER] to enter
the CI-V address programming mode.
- [INPUTz] blinks.
e Push [DOWN].
- The band indicators, [1.8][50], light continuously.
r Rotate the 1st Icom exciters tuning dial until the
[INPUTz] light continuously lights.
t When 1 Icom exciter and 1 non-Icom exciter are
connected, turn the power OFF to complete the
setting. When 2 Icom exciters are connected, push
[INPUT].
- [INPUTx] blinks when [INPUT] is pushed.
y Rotate the 2nd Icom exciters tuning dial until the
[INPUTx] light continuously lights.
u Push [POWER] to complete the setting.
D Setting the IC-PW1s CI-V address
It is not necessary to change the IC-PW1s default
CI-V address of 54H. However, if desired, the address
can be changed using the internal address switch il-
lustrated below.
HF/50MHz ALL BAND 1kW LINEAR AMPLIFIER
iPW1
POWER
TRANSMIT
TUNER
DOWN
UP
AUTO
AMP/
PROTECT
1.8 3.5 7 10 14 18 21 24 28 50
TEMP
ID
Po
ALC
SWR
VD
METER-1 METER-2
ANT
INPUT
z
x
z
x
c
v
HF/50MHz ALL BAND 1kW LINEAR AMPLIFIER
iPW1
POWER
TRANSMIT
TUNER
DOWN
UP
AUTO
AMP/
PROTECT
1.8 3.5 7 10 14 18 21 24 28 50
TEMP
ID
Po
ALC
SWR
VD
METER-1 METER-2
ANT
INPUT
z
x
z
x
c
v
Programming the CI-V address
13
3
OPERATION
CAUTION:
DO NOT operate the IC-PW1 before adjusting the
ALC levels properly with the [ALC adj1] and
[ALC adj2] pots. (p. 11)
It takes 15 sec. for CI-V line initial settings when
several CI-V devices (more than 5) are connected
to a CI-V line.
For IC-781 users with other Icom CI-V transceivers:
Turn the IC-781 power ON before turning the
IC-PW1 and other transceiver power ON and keep
the IC-781 power ON during operation.
q Push [POWER] to turn the linear amplier ON then
turn the exciters power ON.
w Select the input/output antenna with [INPUT] and
[ANT].
e Set the exciter to CW or RTTY mode with minimum
output power.
r Select the temperature and SWR meters with
[METER-1] and [METER-2].
- The [TEMP] and [SWR] indicators light.
t Push [TUNER] and [AMP/PROTECT] to turn the
automatic antenna tuner and linear amplier circuit
ON.
y Push [UP]/[DOWN] to select [AUTO] for automatic
band selection when a CI-V Icom exciter is used;
or push [UP]/[DOWN] to select the desired band
for manual band selection.
u Use the exciters antenna tuner to tune the line be-
tween the IC-PW1 and exciter, if you have an an-
tenna tuner connected to the exciter.
i Transmit with the exciter and adjust the exciters
output power to 50 W with the RF output power
control on the exciter.
- [TRANSMIT] indicator lights.
- See the exciters instruction manual for transmitting.
o The built-in antenna tuner automatically tunes the
antenna.
- SWR reading on meter-2 should be less than 1.2:1.
- Push [TUNER] for 2 sec. to tune the antenna manually.
- The [TUNER] indicator blinks while tuning.
- The [TUNER] indicator lights while the tuner is acti-
vated.
NOTE: The band information is not updated while
scanning. Turn the antenna tuner OFF and use the
manual band selection while scanning.
During split operation:
When changing the frequency more than 100 kHz,
the IC-PW1s antenna tuner presets the tuner to
the new frequency. Use manual tuning during split
operation.
!0 When operating for long periods, select the tem-
perature meter with [METER-1] to monitor the lin-
ear ampliers temperature.
- If the temperature meter reading is in the red HOT
zone, the exciter should be returned to receive, other-
wise, the protection circuit may be activated and the lin-
ear amplier may be turned OFF.
D Band memory
The IC-PW1 stores ON/OFF settings for the antenna
tuner and linear amplier according to the operating
band when at least 1 Icom exciter is connected to the
[INPUT1] connector.
The set conditions may not be stored when the lin-
ear amplier is turned OFF immediately after set-
ting the antenna tuner and linear amplier.
Operation
3
OPERATION
14
This linear amplier has various protection circuits.
D ALC circuit
The ALC (Automatic Level Control) circuit automati-
cally limits RF output power by controlling the input
level of the exciter. This prevents transmission of dis-
torted signals when the input signal level exceeds the
allowable level.
The ALC activates under the following conditions:
- Output power of the linear amplier exceeds 1 kW
- Antenna SWR becomes 2:1 or more
- Output power of the exciter exceeds 100 W
D Cooling fans
The power supply cooling fans activate when the lin-
ear amplier is activated and while transmitting.
The antenna tuner cooling fans activate when the
antenna tuner is activated and while transmitting.
All cooling fans activate when the heatsink tempera-
ture of the final FETs reaches 50 °C (122 °F) or
more.
D Circuit breaker
If the circuit breaker activates or the linear amplier
stops functioning, try to nd the source of the prob-
lem, then push the circuit breaker button to fill the
white parts.
- Circuit breaker capacity: 20 A (U.S.A. version)
15 A (Europe version)
D Linear amplier protection circuit
When a protection circuit is activated, a band indicator
blinks to show a problem as described below.
[AMP/PROTECT] lights red when a protection cir-
cuit is activated.
- Push [AMP/PROTECT] to cancel the protection circuit.
The built-in automatic antenna tuner can match the
antenna feed line impedance to 50 when the feed
line impedance is within 16.7 to 150 for HF bands
(VSWR 3:1) or within 20 to 125 for 50 MHz bands
(VSWR 2.5:1).
Once the tuner matches an antenna, the tuning cir-
cuit condition is memorized as a preset point for each
frequency range (100 kHz steps, 70 ranges). There-
fore, when you change the frequency range, the tun-
ing circuit is automatically preset to the memorized
point.
This antenna tuner is also used when the linear am-
plier is turned OFF.
Push [TUNER] for 2 sec. to start manual antenna
tuning.
When the tuner cannot tune the antenna (SWR 1.5:1 or
greater), the tuning circuit is bypassed automatically
after 20 sec.
While operating in the 50 MHz band, the antenna
tuner does not start automatically. Push [TUNER]
for 2 sec. to tune the antenna manually.
Protection circuit
Antenna tuner operation
Item Indication Possible cause
1 [TEMP]
The heatsink temperature of the
nal FETs exceeds 100 °C (212
°F).
2 [AUTO]
Power level of the 4 PA units be-
comes unbalanced.
3 [ALC]
ALC control level exceeds the
control range.
4 [VD]
Output voltage of the internal
power supply exceeds 55 V DC.
5 [ID]
Current of the nal FETs (I
D
) ex-
ceeds 50 A.
6
Current bands
indicator
Gain of the nal FETs drops.
7
Selected and
current bands
indicator
When transmitting with different
band selections between the lin-
ear amplier and exciter.
8
[AMP/PROTECT]
The power supply has a malfunc-
tion.
4
MAINTENANCE
15
PROBLEM POSSIBLE CAUSE SOLUTION REF.
Power does not come
on when the [POWER]
switch is pushed.
Cable connection is faulty.
The circuit breaker is turned OFF.
Check the connection and connection cable
pins.
Check for the cause, then turn the circuit
breaker ON.
pgs.
79
p. 3
Sensitivity is low. The antenna is not connected properly.
The antenna for another band is
selected.
The antenna is not properly tuned.
Reconnect the antenna connector.
Select an antenna suitable for the operating
frequency.
Push [TUNER] for 2 sec. to manually tune the
antenna.
p. 6
p. 13
p. 14
Output power is too
low.
Reverse connection on the antenna input
and output.
[ALC adj] is not adjusted properly.
The linear amplifier circuit is turned OFF.
The antenna for another band is
selected.
The antenna is not properly tuned.
The protector circuit activates and a band
indicator blinks.
Connect properly.
Set [ALC adj] properly.
Push [AMP/PROTECT] to turn the linear
amplifier ON. (The indicator lights green.)
Select an antenna suitable for the operating
frequency.
Push [TUNER] for 2 sec. to manually tune the
antenna.
Stop the exciters transmission, then push
[AMP/PROTECT] to deactivate the protection
circuit.
pgs.
79
p. 11
p. 13
p. 13
p. 13
p. 14
Protection circuit
activates during short
periods of operation.
Antenna SWR is more than 3:1.
The antenna tuner is turned OFF.
The linear amplifier is located in an area
with bad air circulation.
[ALC adj] is not adjusted properly.
Check the antenna SWR. Adjust the antenna, if
necessary.
Push [TUNER] to turn the antenna tuner ON.
Select a location with good air circulation.
Adjust [ALC adj] to the correct position.
p. 6
p. 14
p. 11
Operating band does
not change
automatically.
Cable connection is faulty.
The CI-V setting is not properly
programmed.
Check the connection and connection cable
pins.
Set the CI-V address.
pgs.
79
p. 12
Troubleshooting
The following chart is designed to help you correct
problems which are not equipment malfunctions.
If you are unable to locate the cause of a problem or
solve it through the use of this chart, contact your near-
est Icom Dealer or Service Center.
5
SPECIFICATIONS
16
General
Frequency coverage: 01.80001.999 MHz
03.50013.999 MHz
07.00017.300 MHz
10.10010.150 MHz
14.00014.350 MHz
18.06818.168 MHz
21.00021.450 MHz
24.89024.990 MHz*
1
28.00029.700 MHz*
1
50.00054.000 MHz
*
1
The U.S.A. version can only be
used the antenna tuner on the
2428 MHz bands.
Antenna connector :
Input PL-239×2 (50 )
Output PL-239×4 (50 )
Usable temperature : 10°C to 40°C (14°F to 104°F)
range
Power supply requirement:
non-Europe versions
100120 V AC or
200240 V AC (±10 %)
Europe version 230 V AC (±10 %)
Dimensions (W × H × D):
Linear amplier 350 × 265 × 375 mm
13
25
32 × 10
7
16 × 14
3
4 in
Remote controller 205 × 71 × 68.3 mm
8
1
16 × 2
25
32 × 2
11
16 in
(Projections not included)
Weight : 25 kg (55 lb)
(incl. remote controller)
CI-V connector : 2-conductor 3.5(d) mm (
1
8")
Transmitter
Output power :
Driving power : 100 W max.
Spurious emissions : 60 dB (HF bands)
70 dB (50 MHz band)
SEND connector : Phono (RCA)
ALC connector : Phono (RCA)
Antenna tuner
Matching impedance range:
HF bands*
2
16.7 to 150 unbalanced
(Less than VSWR 3:1)
50 MHz band 20 to 125 unbalanced
(Less than VSWR 2.5:1)
*
2
The U.S.A. version can only be tuned within 1.801.95
MHz of the 1.8 MHz band.
Minimum operating : 60 W
input power
Tuning accuracy : VSWR 1.5:1 or less
Insertion loss : Less than 1.0 dB
(after tuning)
MODE
INPUT AC VOLTAGE
200240 V AC 100120 V AC
CW, RTTY 1 kW 500 W
SSB 1 kW PEP 500 W PEP
DECLARATION
OF CONFORMITY
Icom Inc. Japan
6-9-16, Kamihigashi, Hirano-ku
Osaka 547-0002, Japan
Kind of equipment: HF+50 MHz 1 KW LINEAR AMPLIFIER
Type-designation: IC-PW1 + opC-853
Signature
Authorized representative name
Place and date of issue
T. Aoki
General Manager
Icom (Europe) GmbH
Himmelgeister straße 100
D-40225 Düsseldorf
Düsseldorf 14D. Dec. 1998
Icom (Europe) GmbH
These equipments comply with the European harmonised standard
ETS300 684 (EMC product standard for Commercially Available
Amateur Radio Equipment).
These equipments also comply with the requirements of the 73/23/EEC
directive for electrical safety. This compliance is based upon the
harmonised CENELEC generic standard EN60 065: 1993 +A11.
(Report No.: E 9861504 E 01 and E 9860764 E 01 by TÜV Rheinland
Germany)
Versions of the IC-PW1 which dis-
play CE on the serial number seal,
comply with the essential require-
ments of the 89/336/EEC directive
for Electromagnetic Compatibility.
NOTE: To meet European EMC regulations,
the OPC-853 AC cable with EMC lter must be
connected to the IC-PW1 Europe version.
6-9-16 Kamihigashi, Hirano-ku, Osaka 547-0002 Japan
A-5449G-1EX-w
Printed in Japan
©1997 Icom Inc.
Count on us!
12

Hulp nodig? Stel uw vraag in het forum

Spelregels

Misbruik melden

Gebruikershandleiding.com neemt misbruik van zijn services uitermate serieus. U kunt hieronder aangeven waarom deze vraag ongepast is. Wij controleren de vraag en zonodig wordt deze verwijderd.

Product:

Bijvoorbeeld antisemitische inhoud, racistische inhoud, of materiaal dat gewelddadige fysieke handelingen tot gevolg kan hebben.

Bijvoorbeeld een creditcardnummer, een persoonlijk identificatienummer, of een geheim adres. E-mailadressen en volledige namen worden niet als privégegevens beschouwd.

Spelregels forum

Om tot zinvolle vragen te komen hanteren wij de volgende spelregels:

Belangrijk! Als er een antwoord wordt gegeven op uw vraag, dan is het voor de gever van het antwoord nuttig om te weten als u er wel (of niet) mee geholpen bent! Wij vragen u dus ook te reageren op een antwoord.

Belangrijk! Antwoorden worden ook per e-mail naar abonnees gestuurd. Laat uw emailadres achter op deze site, zodat u op de hoogte blijft. U krijgt dan ook andere vragen en antwoorden te zien.

Abonneren

Abonneer u voor het ontvangen van emails voor uw Icom iPW1 bij:


U ontvangt een email met instructies om u voor één of beide opties in te schrijven.


Ontvang uw handleiding per email

Vul uw emailadres in en ontvang de handleiding van Icom iPW1 in de taal/talen: Engels als bijlage per email.

De handleiding is 0,5 mb groot.


U ontvangt de handleiding per email binnen enkele minuten. Als u geen email heeft ontvangen, dan heeft u waarschijnlijk een verkeerd emailadres ingevuld of is uw mailbox te vol. Daarnaast kan het zijn dat uw internetprovider een maximum heeft aan de grootte per email. Omdat hier een handleiding wordt meegestuurd, kan het voorkomen dat de email groter is dan toegestaan bij uw provider.

Stel vragen via chat aan uw handleiding

Stel uw vraag over deze PDF

Uw handleiding is per email verstuurd. Controleer uw email

Als u niet binnen een kwartier uw email met handleiding ontvangen heeft, kan het zijn dat u een verkeerd emailadres heeft ingevuld of dat uw emailprovider een maximum grootte per email heeft ingesteld die kleiner is dan de grootte van de handleiding.

Er is een email naar u verstuurd om uw inschrijving definitief te maken.

Controleer uw email en volg de aanwijzingen op om uw inschrijving definitief te maken

U heeft geen emailadres opgegeven

Als u de handleiding per email wilt ontvangen, vul dan een geldig emailadres in.

Uw vraag is op deze pagina toegevoegd

Wilt u een email ontvangen bij een antwoord en/of nieuwe vragen? Vul dan hier uw emailadres in.


Info