2 4PJ12235-HH series_V.01.indd 52013-06-07 오후 7:40:50
PRECAUTIONS FOR SAFE USE
04 l
All users of this appliance must read and understand this safety precaution before operating.
WARNING Hazards or unsafe practices which could result in serious personal injury or
death.
This sign indicates contents of regulating or directing actions. Specific instructions
are written around or in the sign.
This sign indicates prohibited acts.
Specific prohibitions are written around or in the sign.
CAUTION Hazards or unsafe practices which could result in minor personal injury or
appliance damage.
This sign indicates contents that may cause risk of a fire or an electrical shock.
Specific warnings are written in the sign.
SIGN
EXAMPLES
This sign indicates contents that may cause risk of a fire or an electrical shock.
Specific warning is written in the sign.
WARNING Hazards or unsafe practices which could result in serious personal
injury or death.
APPLIANCES CAN BE USED BY PERSONS WITH REDUCED PHYSICAL,
SENSORY OR MENTAL CAPABILITIES OR LACK OF EXPERIENCE AND
KNOWLEDGE IF THEY HAVE BEEN GIVEN SUPERVISION OR INSTRUC-
TION CONCERNING USE OF THE APPLIANCE IN A SAFE WAY AND IF THEY
UNDERSTAND THE HAZARDS INVOLVED. CHILDREN SHALL NOT PLAY
WITH THE APPLIANCE. CLEANING AND USER MAINTENANCE SHALL
NOT BE MADE BY CHILDREN WITHOUT SUPERVISION. THIS APPLIANCE
SHALL NOT BE USED BY CHILDREN. KEEP THE APPLIANCE AND ITS
CORD OUT OF REACH OF CHILDREN.
DO NOT PLUG IN NOR UNPLUG WITH WET HANDS.
It may cause electric shock or injury.
2 4PJ12235-HH series_V.01.indd 62013-06-07 오후 7:40:51
www.hurom.com l05
WARNINGS AND CAUTIONS
PLUG THE POWER CORD CORRECTLY AND PUSH IT TIGHT IN A WALL
SOCKET.
It may cause an electric shock or a fire.
DO NOT MOISTEN THE BASE OR SPLASH WATER ON THE BASE.
Be careful not to let any liquids or other substances get into the switch on the appliance.
DO NOT OPERATE THE SWITCH WITH WET HANDS.
It may cause an electric shock or fire.
NEVER ALTER THE APPLIANCE. ALSO, DO NOT DISASSEMBLE OR RE-
PAIR BY YOURSELF. DO NOT INSERT FINGERS, FOREIGN SUBSTANCES
OR OBJECTS SUCH AS PINS INTO GAPS OR HOLES IN THE BASE.
It may cause a fire, electric shock or failure. For any technical support, contact the authorized local
Customer Care Center.
WHEN THE POWER CORD, WIRE WAS BROKEN OR DAMAGED OR THE
PLUG-IN PART BECAME LOOSE, DO NOT OPERATE IT.
It may cause electric shock, fire or injury.
FOR SAFETY, MUST DO GROUNDING CONNECTION. ALSO, DO NOT DO
THE GROUNDING ON GAS PIPE, PLASTIC WATER PIPE, TELEPHONE
WIRE, ETC.It could cause electric shock, fire, malfunction or explosion.
Be sure to use the electrical outlet with ground connection.
IF THE SUPPLY CORD IS DAMAGED, IT MUST BE REPLACED BY THE
MANUFACTURER ITS SERVICE OR SIMILARLY QUALIFIED PERSONS IN
ORDER TO AVOID A HAZARD.
If the power cord is damaged, it may cause electric shock or fire.
NEVER DISASSEMBLE THE CHAMBER SET DURING OPERATION OR
INSERT FINGERS, FOREIGN OBJECTS SUCH AS FORKS, SPOONS, ETC.
INTO HOPPER CHUTE OR JUICE OUTLET.It may cause injury, accident or failure.
DO NOT USE OTHER THAN 230V - 240V AC.
It may cause electric shock, fire or abnormal performance.
If the voltage is different, it may shorten the life of the motor or cause a failure.
2 4PJ12235-HH series_V.01.indd 72013-06-07 오후 7:40:52
WARNINGS AND CAUTIONS
06 l
30minute
ON
REV
DO NOT OPERATE WITHOUT LOCKING THE HOPPER PROPERLY.
It may cause an injury or a failure.
CAUTIONHazards or unsafe practices which could result in minor personal injury or
appliance damage.
IF AUGER ROTATION IS STOPPED IN NORMAL OPERATION, PRESS [RE-
VERSE/REV] BUTTON AND HOLD FOR 2~3 SECONDS AND THEN AFTER
REVERSE OPERATION IS COMPLETELY STOPPED, PRESS [ON] BUTTON
AGAIN.If such a stop event continues during the operation, the parts may be damaged and perfor-
mance may be deteriorated due to overheating in a motor. When the problem continues, immediately
stop the appliance and contact the local Customer Care Center.
DO NOT OPERATE THE APPLIANCE FOR MORE THAN 30 MINUTES AT A
TIME.
It may cause a motor failure due to overheating.
Cool it down sufficiently about 5 minutes and operate it again.
WHEN PLACING INGREDIENTS INTO THE HOPPER CHUTE, ONLY USE THE
PUSHER PROVIDED.
It may cause injury or failure.
ALWAYS UNPLUG THE APPLIANCE AFTER USE. ALWAYS DISCONNECT
THE APPLIANCE FROM THE SUPPLY IF IT IS LEFT UNATTENDED AND BE-
FORE ASSEMBLING, DISASSEMBLING OR CLEANING. WHEN UNPLUG-
GING THE POWER CORD, MAKE SURE TO HOLD THE POWER CORD.
Pulling on the wire to unplug may cause electric shock or fire.
WHEN USING THE APPLIANCE, BE CAREFUL FOR A NECKTIE, LONG
NECKLACE, SCARF, ETC. NOT TO BE ENTANGLED INTO HOPPER CHUTE.
It may cause injury, failure or breakage.
2 4PJ12235-HH series_V.01.indd 82013-06-07 오후 7:40:53
www.hurom.com l07
WARNINGS AND CAUTIONS
WHEN DETECTING A GAS LEAK, DO NOT INSERT THE POWER CORD INTO
ITS SLOT. OPEN THE WINDOW TO VENTILATE FULLY AND IMMEDIATELY.
It may cause injury or failure.
NEVER PUT A FINGER, FORK OR SPOON, ETC. INTO JUICE OUTLET.
It may cause injury or failure.
DURING THE OPERATION, DO NOT ATTEMPT TO MOVE THE BASE, DISAS-
SEMBLE THE CHAMBER SET OR PARTS AND TRY TO LOCK THEM.
It may cause an injury or a failure.
Any act of event needed, switch off first and unplug the power cord.
DO NOT ALLOW A SEVERE SHOCK TO THE APPLIANCE OR DROP IT.
It may cause electric shock, fire or damage.
IF THE APPLIANCE GIVES OFF AN UNPLEASANT SMELL OR EXCESSIVE
HEATING, SMOKE, STOP USING IMMEDIATELY AND CONTACT THE LOCAL
CUSTOMER CARE CENTER.
When using a new appliance, it gives off a smell and the smell disappears naturally over time.
DO NOT WASH AT HIGH TEMPERATURES OF 80
0
C(176
0
F) OR HIGHER.
DO NOT PUT THE APPLIANCE IN A DISHWASHER, A DRYER OR A MICRO-
WAVE ETC.It may cause a failure or parts deformation.
THE APPLIANCE WEIGHS ABOUT 6.1KG (13.4LB).
WHEN MOVING THE APPLIANCE, ENSURE TO MOVE IT HOLDING GRIPS
TIGHTLY AT THE BASE BOTTOM WITH BOTH HANDS.
If attempting to hold chamber or the edge of the base, the base falls causing an injury or failure.
PLACE THE APPLIANCE ON A FLAT AND STABLE SURFACE.
It may cause injury or failure.
2 4PJ12235-HH series_V.01.indd 92013-06-07 오후 7:40:54
Align the chamber arrow [ ] with hopper arrow
[ OPEN] and turn the hopper clockwise until it
clicks so that the hopper arrow [ CLOSE] aligned
with chamber arrow[ ].
OPEN
SLOW JUICER ASSEMBLY
Place the chamber on the base.
Make sure to press the auger down into the strainer in
STEP 2. The hopper does not close properly when the
auger does not fit in completely.
4
3
2
1
Assemble the parts in the following order:
Chamber>Spinning Brush> Strainer. Make sure
chamber arrow [ ] aligns with strainer arrow [ ].
08 l
The spinning brush can be assembled regardless
of the direction.
STEP
STEP
STEP
STEP
2 4PJ12235-HH series_V.01.indd 102013-06-07 오후 7:40:57
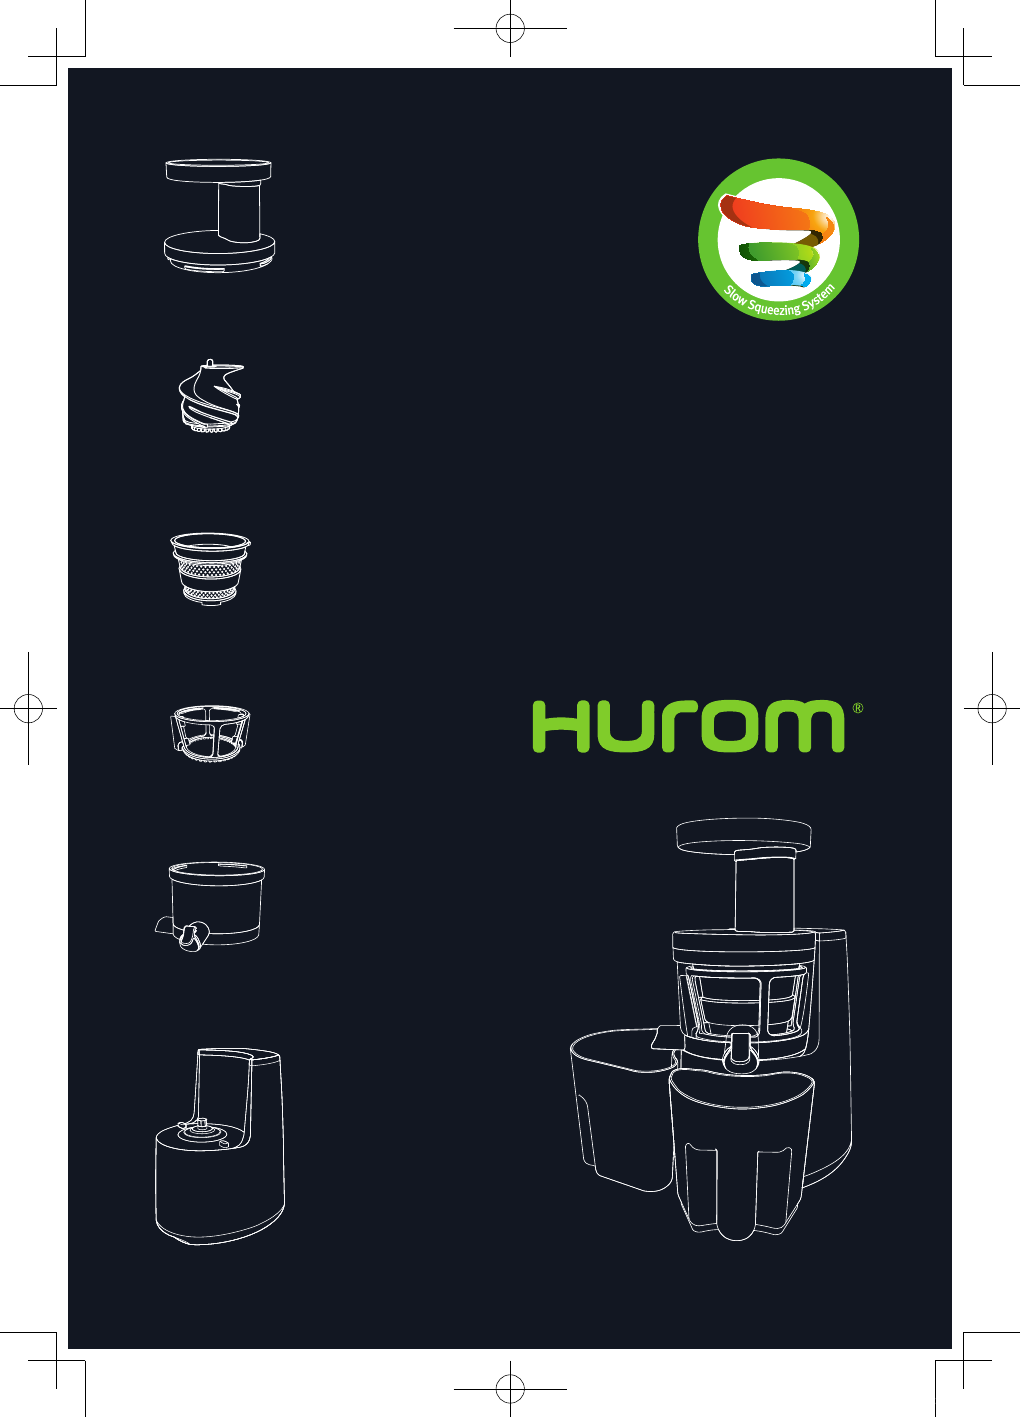
Hopper
Strainer
Chamber
Spinning brush
www.hurom.com I 09
SLOW JUICER ASSEMBLY IN DETAIL
Firmly insert the extraction seal located at the bottom of the chamber into the pulp outlet.
Make sure the outer groove of the chamber is completely aligned with the base ridge.
1
Assemble the parts in the order of chamber> spinning brush> strainer> auger> hopper (or assemble the spinning brush into the chamber then fit
strainer ridge in the chamber inner groove). Make sure all the arrows of chamber [ ], strainer [ ] and hopper [ OPEN ] are aligned in a vertical line.
2,3
Chamber outer groove
Base ridge
Strainer
ridge
BOTTOM
OF THE
STRAINER
INSIDE
THE
CHAMBER
Chamber
inner
groove
Extraction
seal
Hopper
rear arrow
Align the hopper arrow with the base arrow located at the rear of the appliance.
The hopper will not close if the parts are assembled incorrectly.
4
Auger
2 4PJ12235-HH series_V.01.indd 112013-06-07 오후 7:41:05
HOW TO USE THE APPLIANCE
10 l
누름
정회전
역회전
작동스위치
정회전
역회전
Press [On] button to start.
정회전
역회전
정지상태
작동스위치
정회전
역회전
off(정지)
정지
REAR VIEW
1
2
3
Motor does not stop immediately upon pressing [Re-
verse/REV]. For safety reasons and to preserve the
performance level of the appliance, the motor will slowly
come to a complete stop.
OPERATING
SWITCHES
Normal
direction
Reverse
direction
Press
off (stop)
Stop
Normal
direction
Reverse
direction
OPERATING
SWITCHES
Normal
direction
Reverse
direction
Reverse
direction
Normal
direction
STOP
After juicing is completed, click [Reverse/
REV] to stop.
Wash the fruits and/or vegetables and cut
them into small pieces that can fit into the
hopper chute. Place the suitable pieces into
hopper chute slowly and press with a pusher.
Use fresh fruits and vegetable for juicing as they contain more
juice themselves.
2 4PJ12235-HH series_V.01.indd 122013-06-07 오후 7:41:09
JUICE CAP AND EXTRACTION SEAL
www.hurom.com l11
JUICE CAP
This is the juice outlet cap on the chamber. Close the juice cap to fill up the chamber with juice from various ingredients.
Close juice cap and press [ON] button to start.
1
When juice starts filling up the chamber, you
can mix banana, nuts, boiled sweet potato, etc.
and liquids such as milk as well as vegetables
and fruits for a unique smoothie.
2
3
Open the juice cap to pour out as much juice
as you need and close it to save the juice for
another serving without any drops or mess on
the counter.
EXTRACTION SEAL
This is the pulp stopper made of silicone at the bottom of the chamber. Always close the extraction seal before every use as shown below. For cleaning,
open the extraction seal and wash out the food that has been trapped. (Page 16)
CLOSED
Extraction seal
Juice cap
Juice cap
Juice cap
seal
2 4PJ12235-HH series_V.01.indd 132013-06-07 오후 7:41:12
If the auger does not work even after following the di-
rections above, unplug the power cord form the electrical
outlet, disassemble and clean the chamber set before at-
tempting again.
Normal
direction
(ON)
WHEN THE AUGER IS STOPPED DURING OPERATION (REVERSE/REV BUTTON)
Open
1
2
3
Reverse
direction
(REV)
Stop
12 l
NOTE
Reverse button pushes the ingredients back up.
Reverse only works while the button held down.
The Reverse rotation of the auger stops once the
button is released.
Click the [Reverse/REV] button on the
operating switch and stop the appli-
ance.
Press the [Reverse/REV] on the operat-
ing switch for 3~5 seconds and release
it. Repeat this process 2~3 times.
After the rotation stops completely,
press [ON] button to operate.
Before changing the rotation direction of the auger,
make sure that auger has come to a complete stop.
2 4PJ12235-HH series_V.01.indd 142013-06-07 오후 7:41:16
www.hurom.com l 13
DO NOT OPERATE SWITCHES WITH WET HANDS.
It may cause electric shock or fire.
Do not put foreign objects on or near the switch.
IMPORTANT SAFEGUARDS FOR USE
NEVER INSERT FINGER, FORK OR SPOON, ETC. INTO THE JUICER OUTLET DUR-
ING OPERATION.
Inserting foreign objects into the juice outlet during operation may cause the spinning bush to become stuck and damage
the parts.
USE ONLY THE PUSHER TO PRESS DOWN THE INGREDIENTS.
Any other objects may damage the parts and cause injury or failure of equipment.
DO NOT PLACE GRAINS, FRUIT WITH HARD SEED OR NUTS WITH HARD SHELL
SUCH AS WALNUTS INTO THE JUICER.
It may damage the chamber, auger, squeezing strainer, etc.
Fruits with pits, hard seeds such as nectarines, peaches, mangos, apricots, plums and cherries must be pitted before juicing.
DO NOT USE IT FOR MORE THAN 30 MINITUES CONTINUOUSLY.
It may cause a failure due to overheating of the motor.
When using continuously, stop and cool it down for about 5 minutes after each use.
30minute
Frozen fruit or withered ingredients that have been stored in the refrigerator for a long time may produce less juice or may be difficult to
juice.
NOTE
DO NOT USE FOR FRUIT PRESERVED IN SUGAR, HONEY, ALCOHOL, ETC.
(GRAPES, APRICOT, BERRES, ETC.)
It may cause the hopper to become stuck and difficult to open.
DO NOT USE FOR MEAT OR SEAFOOD.
It may cause abnormal performances or a failure.
∙ Fruits with pits and hard seeds such as nectarines, peaches, mangos, apricots, plums and cherries must be pitted before juicing.
∙ Cut fibrous ingredients (water parsleys, etc) into small sizes about 3~4cm(1.5inch) before placing into the hopper chute.
∙ Drink the fruit juice or green vegetable juice immediately after extraction.
The juice will lose taste and nutritional value longer it is exposed to air.
∙ Do not use the appliance for grinding dry ingredients such as grains, coffee beans, etc.
This may damage the parts or cause failure of the appliance.
∙ Do not re-squeeze leftovers expelled through the pulp outlet.
∙ Do not operate the appliance when the chamber is empty.
2 4PJ12235-HH series_V.01.indd 152013-06-07 오후 7:41:21
Juice outlet
14 l
DISASSEMBLING, CLEANING AND CARE
1
2
3
FIGURE IN ORDER
2 4PJ12235-HH series_V.01.indd 162013-06-07 오후 7:41:29
www.hurom.com l 15
1. Ensure the motor has stopped completely and unplug the power cord.
2. Hold the juice outlet and the hopper with both hands and lift them up from the base.
When unplugging the power cord, hold the head part of the power cord and unplug it.
Do not touch the power cord with wet hands.
Always wash the chamber set immediately after use. Without prompt cleaning, the pulp residue may dry and crust on the parts, making it
difficult to disassemble or clean at a later time. Improper cleaning may also cause decreased performance of the appliance.
DISASSEMBLING, CLEANING AND CARE
3. Disassemble to parts as below:
1) Unlock the chamber by rotating it counterclockwise.
2) Remove the auger.
3) Remove the strainer.
4) Remove the spinning brush.
45
4. Rinse each part with the cleaning brush. Brush the inside and outside of each part thoroughly
under running water.
Never use scouring pads, abrasive cleaning agents, harsh detergents or sharp cleaning tools. Do not wash the parts in the dishwasher or a
dish dryer.
5. Wipe the base with a soft, damp cloth and dry thoroughly.
Do not immerse the base unit in water or any other liquid or rinse it under running water.
6. After cleaning, allow the parts to air-dry completely and store in a clean and safe place.
2 4PJ12235-HH series_V.01.indd 172013-06-07 오후 7:41:33
DISASSEMBLING AND CLEANING THE CHAMBER
Open juice cap first. Hold the chamber and juice cap with one hand and peel off the juice cap seal with the other hand.
Remove the chamber seal by pinching and twisting it off with two fingers.
Wash chamber and chamber seal with cleaning
brush under the running water.
16 l
1
Remove the juice cap seal and the chamber seal.
2
Open the extraction seal at the bottom of
the chamber.
3
Wash the chamber and all the seals.
juice cap
seal
chamber
seal
Extraction
Seal
2 4PJ12235-HH series_V.01.indd 182013-06-07 오후 7:41:36
www.hurom.com l 17
STERILIZATION AND EASY CLEANING SYSTEM
Sterilize all washable parts by immersing in a dilute solution of baking soda (about 1~2 teaspoon in 1 quart of water) for 30 minutes.
For sterilization, use baking soda or natural cleaning liquids only.
1
After closing the juice cap, pour water into the
hopper chute and press the [ON] button.
2
After about 15 seconds, turn off the appli-
ance, open the juice cap and discharge the
water.
STERILIZATION
EASY CLEANING SYSTEM
It is not necessary to disassemble and wash the chamber every time for a different recipe. However, always disassemble and wash
the chamber set after the last juicing.
2 4PJ12235-HH series_V.01.indd 192013-06-07 오후 7:41:38
3
DISASSEMBLING AND CLEANING THE SPINNING BRUSH
2
Detach the silicone brush from the
spinning brush.
With the cleaning brush, wash inside
and outside of spinning brush under
running water.
As shown in the figure, hold the outer part of silicone
brush and pull it out gently in the direction of the
arrow. Silicone brush may be torn or damaged if it is
pulled apart forcefully.
Clean the silicone brush in the same way under run-
ning water.
Remove the spinning brush from
strainer.
1
18 l
Silicone brush
Cleaning brush
Spinning brush
2 4PJ12235-HH series_V.01.indd 202013-06-07 오후 7:41:41
www.hurom.com l19
ASSEMBLING THE SPINNING BRUSH
As shown in the figure on left, position
the silicone brush so the ‘inner wing’
faces the spinning brush.
See No. 1 above and let the longer part of inner
wing
1
face upward.
Hold the outer wing
2
of silicone brush with your
thumb and index finger and insert the inner wing into
the groove of spinning brush.
Check the groove of the spinning brush
and the direction of silicone brush.
There are grooves to insert silicone brush in the
spinning brush.
Silicone brush has inner wing
1
and outer wing
2
.
As shown in the figure on left, position the silicone
brush so the ‘inner wing’ faces the spinning brush.
Pull the inner wing tightly into the spin-
ning brush.
Push the silicone brush in from the outside and pull
the ‘inner wing’ into the spinning brush with the other
hand. (See figure)
Pull the silicone brush tightly into the groove on the
spinning brush. The unit may be damaged if it is op-
erated without being properly and fully assembled.
Make sure the silicone brush is placed firmly into
the groove by holding the top and bottom part of
the ‘outer wing’ and pulling it up and down in op-
posite directions.
3
2
1
Brush
groove
Inner
wing
Outer wing
1
2
SPINNING BRUSHSILICONE BRUSH
Top
(longer part)
Bottom
(shorter part)
1
2
2 4PJ12235-HH series_V.01.indd 212013-06-07 오후 7:41:43
ASSEMBLING THE CHAMBER SEAL
Insert the chamber seal into the cham-
ber hole.
Turn over the chamber and settle the
chamber seal into place.
Insert the bottom of the chamber seal into the
chamber hole and press it down fully. Do not in-
sert the entire chamber seal. The upper part of the
chamber seal must stay above the chamber hole.
If the chamber seal at the bottom of the chamber
is not fully installed, set it into place properly with
the rotating pick on the end of the cleaning brush.
Hold the chamber seal by pinching it
between the thumb and index finger.
As shown to the left in the dotted circle, let the pro-
truding part on the chamber seal face upward when
you hold it by pinching it between the thumb and
index finger.
20 l
Chamber seal
3
2
1
2 4PJ12235-HH series_V.01.indd 222013-06-07 오후 7:41:45
www.hurom.com l 21
ASSEMBLING THE JUICE CAP SEAL
Open the juice cap and fit the juice cap
seal on to the inner disk.
Arrange the seal for a complete fit.
Be careful not to drop the chamber.
If the seal is not placed correctly, it may cause juice
leakage.
Hold juice cap seal as shown on the left.
As shown on the left in the dotted circle, the opening
on the seal must be visible when you hold the seal.
Juice cap seal
3
2
1
2 4PJ12235-HH series_V.01.indd 232013-06-07 오후 7:41:46
Gebruikershandleiding.com neemt misbruik van zijn services uitermate serieus. U kunt hieronder aangeven waarom deze vraag ongepast is. Wij controleren de vraag en zonodig wordt deze verwijderd.
Product:
Spelregels forum
Om tot zinvolle vragen te komen hanteren wij de volgende spelregels:
lees eerst de handleiding door;
controleer of uw vraag al eerder door iemand anders is gesteld;
probeer uw vraag zo duidelijk mogelijk te stellen;
heeft u een probleem en al geprobeerd om dit op te lossen, vermeld dit erbij aub;
heeft u een oplossing gekregen van een bezoeker dan horen wij dat graag in dit forum;
wilt u een reactie geven op een vraag of antwoord, gebruik dan niet dit formulier maar klik op de knop 'reageer op deze vraag';
uw vraag wordt direct op de website gezet; vermijd daarom persoonlijke gegevens in te vullen;
Belangrijk! Als er een antwoord wordt gegeven op uw vraag, dan is het voor de gever van het antwoord nuttig om te weten als u er wel (of niet) mee geholpen bent! Wij vragen u dus ook te reageren op een antwoord.
Belangrijk! Antwoorden worden ook per e-mail naar abonnees gestuurd. Laat uw emailadres achter op deze site, zodat u op de hoogte blijft. U krijgt dan ook andere vragen en antwoorden te zien.
Abonneren
Abonneer u voor het ontvangen van emails voor uw Hurom HH Series bij:
nieuwe vragen en antwoorden
nieuwe handleidingen
U ontvangt een email met instructies om u voor één of beide opties in te schrijven.
Ontvang uw handleiding per email
Vul uw emailadres in en ontvang de handleiding van Hurom HH Series in de taal/talen: Engels als bijlage per email.
De handleiding is 2,66 mb groot.
U ontvangt de handleiding per email binnen enkele minuten. Als u geen email heeft ontvangen, dan heeft u waarschijnlijk een verkeerd emailadres ingevuld of is uw mailbox te vol. Daarnaast kan het zijn dat uw internetprovider een maximum heeft aan de grootte per email. Omdat hier een handleiding wordt meegestuurd, kan het voorkomen dat de email groter is dan toegestaan bij uw provider.
Uw handleiding is per email verstuurd. Controleer uw email
Als u niet binnen een kwartier uw email met handleiding ontvangen heeft, kan het zijn dat u een verkeerd emailadres heeft ingevuld of dat uw emailprovider een maximum grootte per email heeft ingesteld die kleiner is dan de grootte van de handleiding.
Er is een email naar u verstuurd om uw inschrijving definitief te maken.
Controleer uw email en volg de aanwijzingen op om uw inschrijving definitief te maken
U heeft geen emailadres opgegeven
Als u de handleiding per email wilt ontvangen, vul dan een geldig emailadres in.
Uw vraag is op deze pagina toegevoegd
Wilt u een email ontvangen bij een antwoord en/of nieuwe vragen? Vul dan hier uw emailadres in.