• DC-latching solenoidi içeren tek istasyonlu model (NODE-100). Ayrıca tek, iki, dört veya altı istasyonlu modeller de sunulur (solenoidler dahil değildir).
• Anlaşılır simgelere sahip geniş Likit Kristal Ekran (LCD)
• En az bir adet standart dokuz voltluk alkalin pil ile çalıştırılır (uzun pil ömrü için iki adet kullanın)
• Her birinde dört adede kadar başlangıç zamanı bulunan üç program (A, B veya C)
• Bir dakikadan altı saate kadar çalışma süreleri
• Manuel sulama özellikleri
• Pil ömrü göstergesi
• Kablolu yağmur sensörü uyumlu
• Kalıcı bellek tüm program bilgisini hafızasında tutma
• %10’ dan %150 ye kadar mevsimsel ayarlama
• Easy Retrieve™ (Kolay Yenilenebilir) bellek, istenen program verilerinin kaydedilmesine/alınmasına olanak sağlar
• Yağmur sensörünü manuel atlama
• Bu bölümde bazı NODE bileşenlerine yönelik genel bakış sunulur
2
TR
NODE BİLEŞENLERİ
Bu bölümde bazı NODE bileşenlerine yönelik genel bakış sunulur. Her
bir detay daha sonra ayrıntılı olarak incelenecektir. Yine de bu bölüm
farklı kullanma opsiyonları ile tanışmanız için size yardımcı olacaktır.
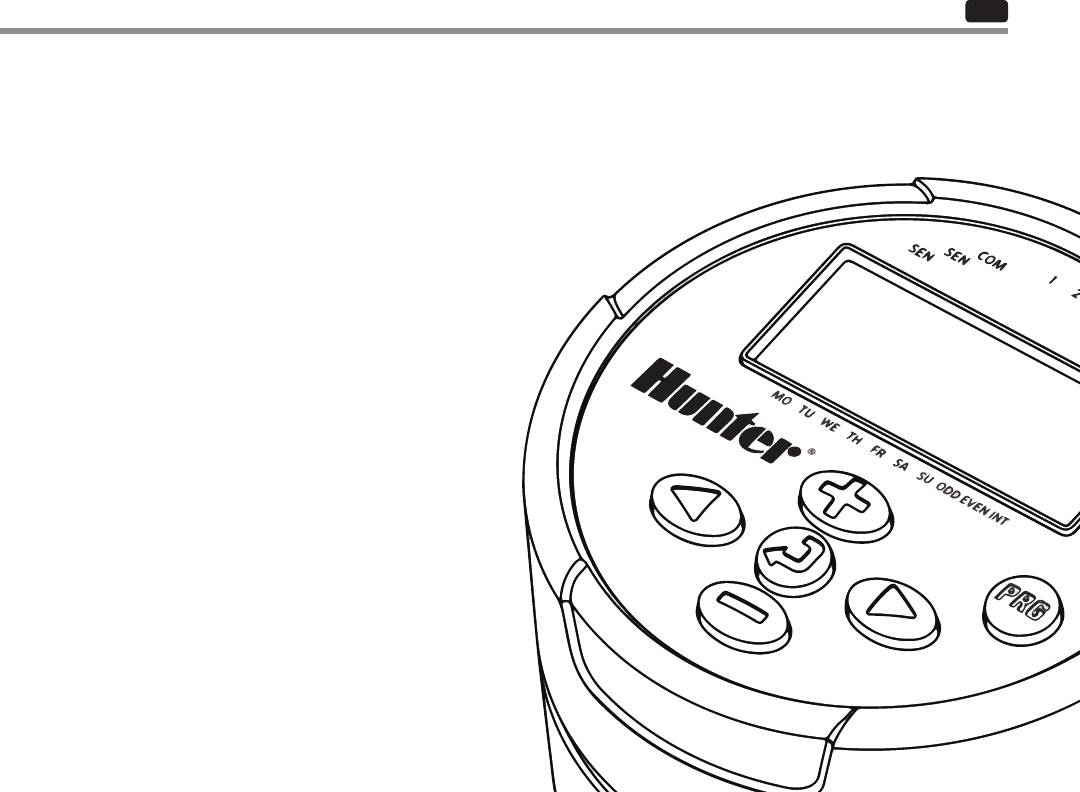
Kontrol Düğmeleri
1.
İşareti
–
Ekranda yanıp sönen seçili ögeyi arttırır.
2.
İşareti
–
Ekranda yanıp sönen seçili ögeyi azaltır.
3.
İşareti
–
Programlama fonksiyonunu seçer.
4.
İşareti
–
Ekranda yanıp sönen seçili ögeyi bir sonraki
ögeye ilerletir.
5.
İşareti
–
Ekranda yanıp sönen seçili ögeyi bir önceki
ögeye ilerletir.
6.
İşareti
–
Programı seçer (A, B, veya C)
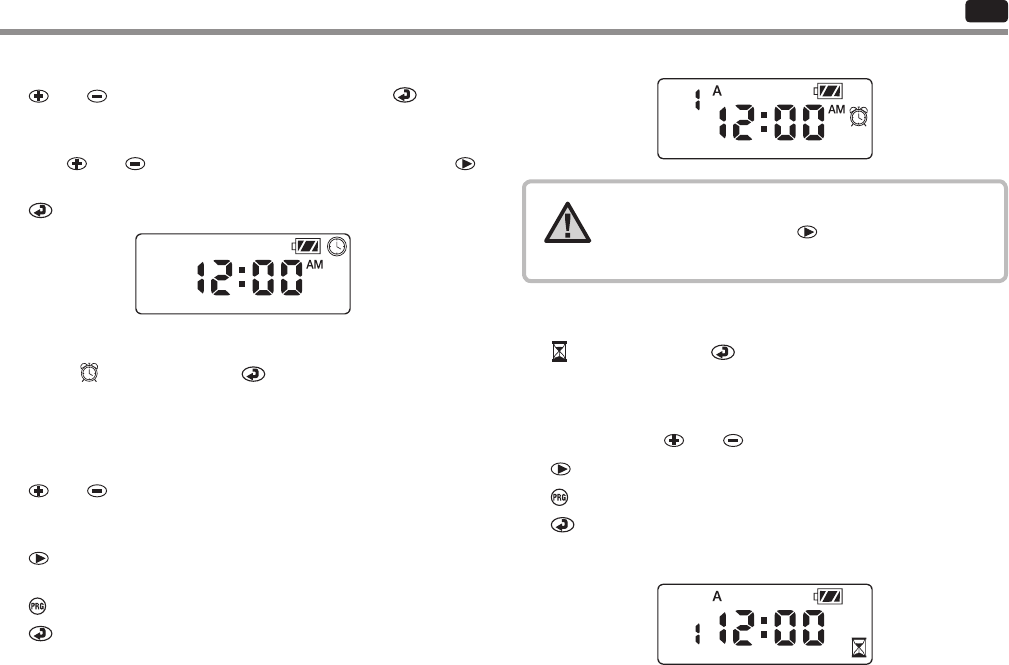
LCD Ekran
1.
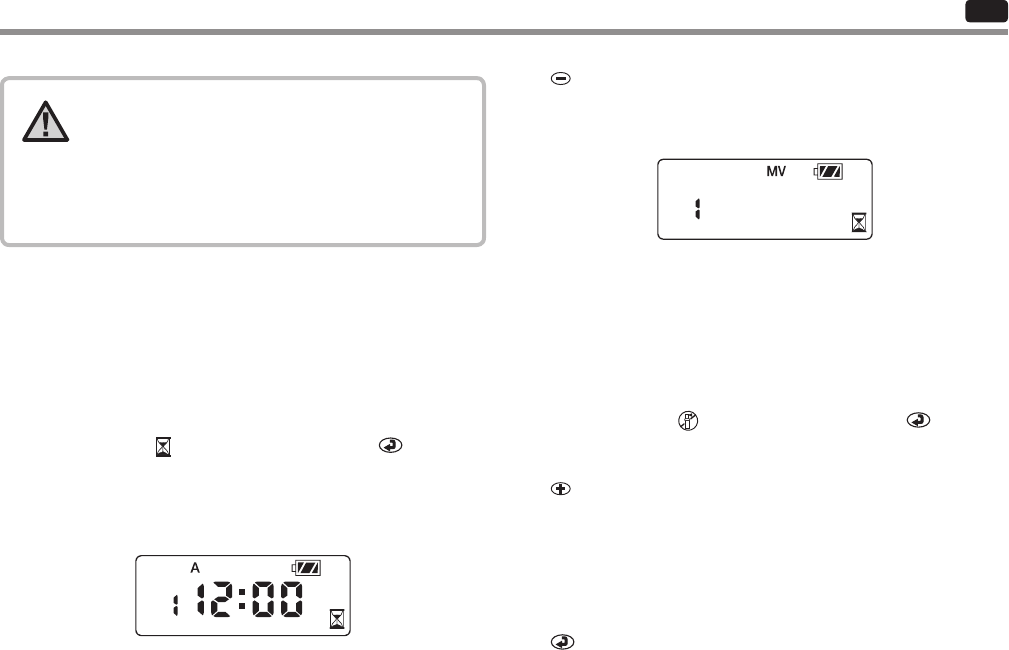
Ana Ekran –
Tüm program bilgilerini gösterir.
2.
İstasyon Numarası –
Seçilmiş olan istasyon numarasını gösterir.
3.
Başlama Zamanı Numarası –
Programlanan seçili başlama zamanı
numarasını gösterir.
4.
Programa –
Programı gösterir. (A, B, veya C)
5.
Geçerli Zaman/Gün –
Geçerli Gün/Zaman ‘ın ayarlandığı
dilimi gösterir.
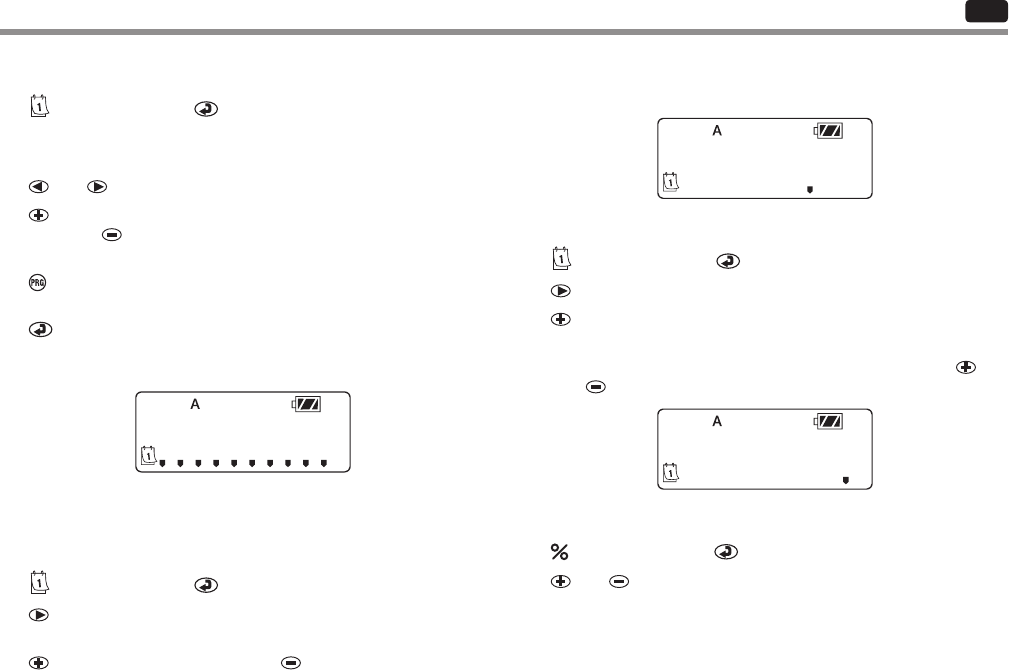
6.
Başlama Zamanı –
Başlama zamanlarının ayarlandığı
dilimi gösterir.
7.
Çalışma Zamanı –
Çalışma zamanlarının ayarladığı dilimi
gösterir. Kullanıcıların bir dakikadan altı saate kadar çalışma süresi
ayarlamasına olanak sağlar.
8.
Sulama Günleri –
Kullanıcıya sulama günlerini bağımsız olarak
veya sulama aralıklarındaki gün sayısnı seçmesini sağlar.
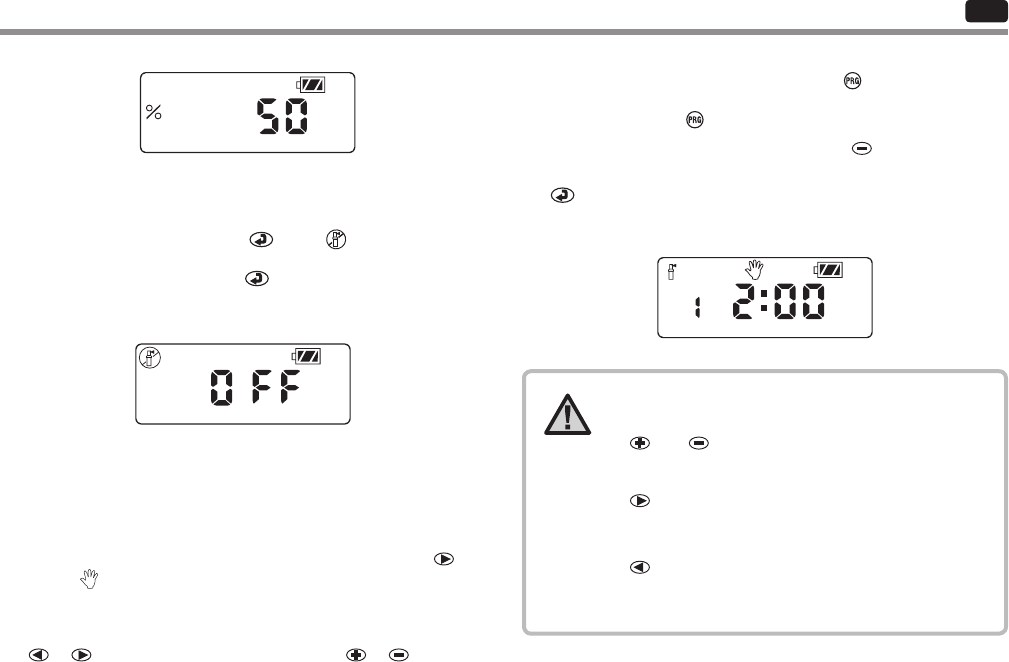
9.
% Mevsimsel ayarlama –
%10 dan %150 ye kadar mevsimsel olarak
programlanabilir. (sabit değeri %100)
10.
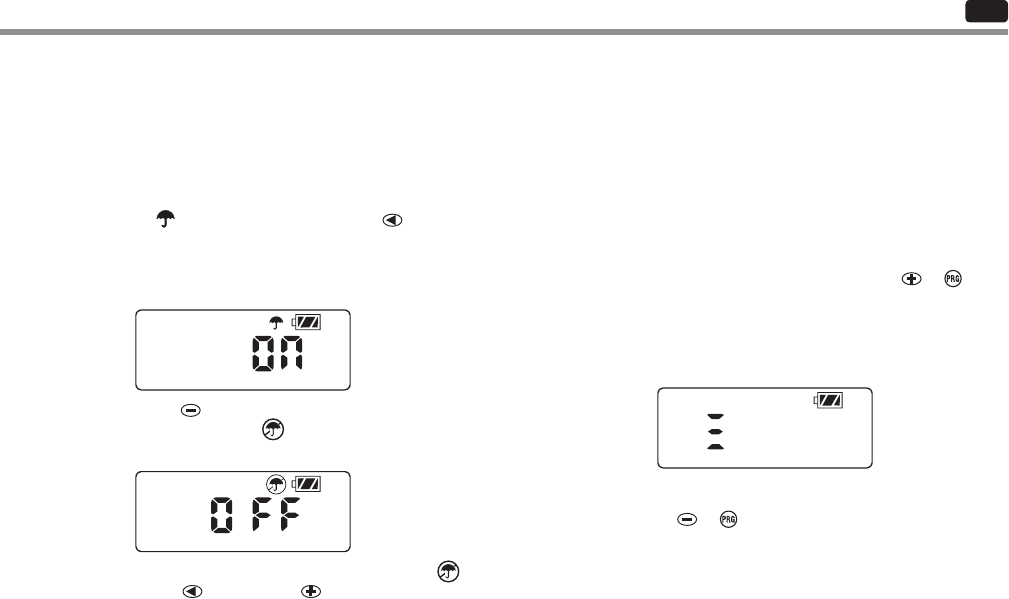
Sistem kapalı –
Sulamanın ertelendiğini gösterir.
11.
Manual Açma/kapama –
Manuel sulamanın programlandığını
gösterir. Kullanıcının istasyonu manuel aktive etmesini sağlar.
12. MV – Birinci istasyonun ana vana
–
çalışması için ayarlandığını belirtir
(yalnızca iki, dört veya altı istasyonlu modellerde mevcuttur)
13.
Pil Göstergesi –
Kalan pil ömrünü gösterir.
14.
Şemsiye –
Yağmur sensörünün sulamayı ertelediğini gösterir.
15.
Üstü Çizili Şemsiye –
Yağmur sensörünün manuel olarak
atlatıldığını gösterir.
3
TR
Pilin/Pillerin Montajı
1. Batarya bölümüne ulaşmak için NODE ‘un alt kısmını çevirerek
açınız.
2. Pili/ pilleri pil yuvasına yerleştiriniz ve pil bağlantısını kullanarak
kontrol ünitesine bağlayınız.
3. Pil yuvasına su kaçmadığından emin olun.
4. Batarya bölümünü tekrar üst kısım ile çevirerek birleştiriniz.
NOT: Uygun sızdırmazlığı sağlamak için NODE'nin
arka yarısındaki sızdırmazlık işaretinin ön yarısı ile
üst üste geldiğini doğrulayıngeldiğinden emin olun.
NODE, vanaları çalıştırmak ve kontrol ünitesini programlamak için bir
veya iki adet standart dokuz voltluk pil (dahil değildir) kullanır. Kontrol
ünitesi, bir veya iki adet dokuz voltluk pil kullanılarak çalıştırılabilir.
Normal koşullarda tahmini kullanım ömrü, tek pil için bir yıl ve iki adet
dokuz voltluk pil için iki yıldır.
NOT: NODE kalıcı belleği sayesinde.Bu da program
bilgileri kaybedilmeden pilin çıkarılmasına olanak
sağlar.
PİL/PİLLERİN BAĞLANTISI
4
Ortak Kablo (Siyah Hat)
İstasyon Kablosu
(Kırmızı Hat)
TR
SOLENOİDLERIN BAĞLANMASI
NODE-100, kontrol ünitesine takılı bir solenoid ile gönderilir.
NODE-100-LS solenoid içermez. NODE-200, NODE-400 ve NODE-600
çok istasyonlu kontrol üniteleri, sırasıyla iki, dört veya altı adede kadar
solenoid ile çalışır. Hunter DC-latching solenoidler (P/N 458200), tüm
Hunter plastik vanalarına kolaylıkla takılabilir.
NOT: 9-11 VDC arasında çalışan DC latching
solenoidler kullanın. 24 VAC solenoidler, NODE ile
çalışmayacaktır.
DC Solenoidlerin NODE’a kablolanması
1. Her bir selenoid bobinden gelen siyah kabloları, NODE ’dan
gelen tek ortak kabloya (siyah kablo) bağlayınız. Bütün kablo
bağlantılarınızı su geçirmez birleştiriciler ile güvence altına alın.
2. Her bir selenoid bobinden gelen kırmızı kabloları NODE ’dan gelen
uygun istasyon kablosuna (kırmızı kablo) bağlayınız. İstasyon
numaraları NODE ‘un ön yüzünde belirtilmiştir. Bütün kablo
bağlantılarınızı su geçirmez birleştiriciler ile güvence altına alın.
NOT: Solenoid ve NODE arasındaki maksimum kablo
mesafesi, 1 mm (18 AWG) kablo boyutu ile 30 m’dir
(100').n).
5
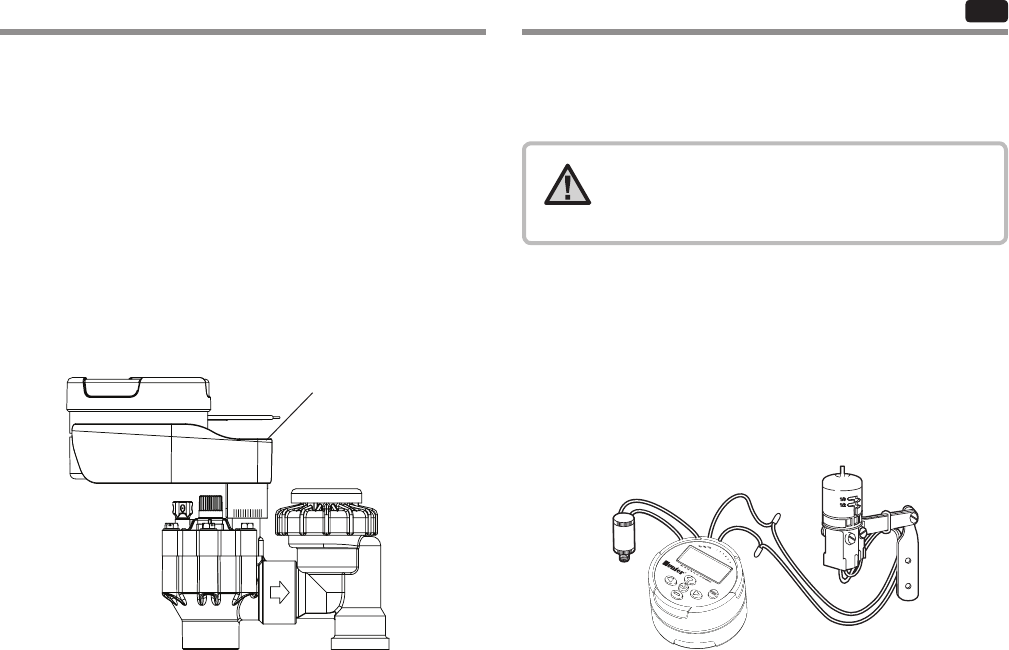
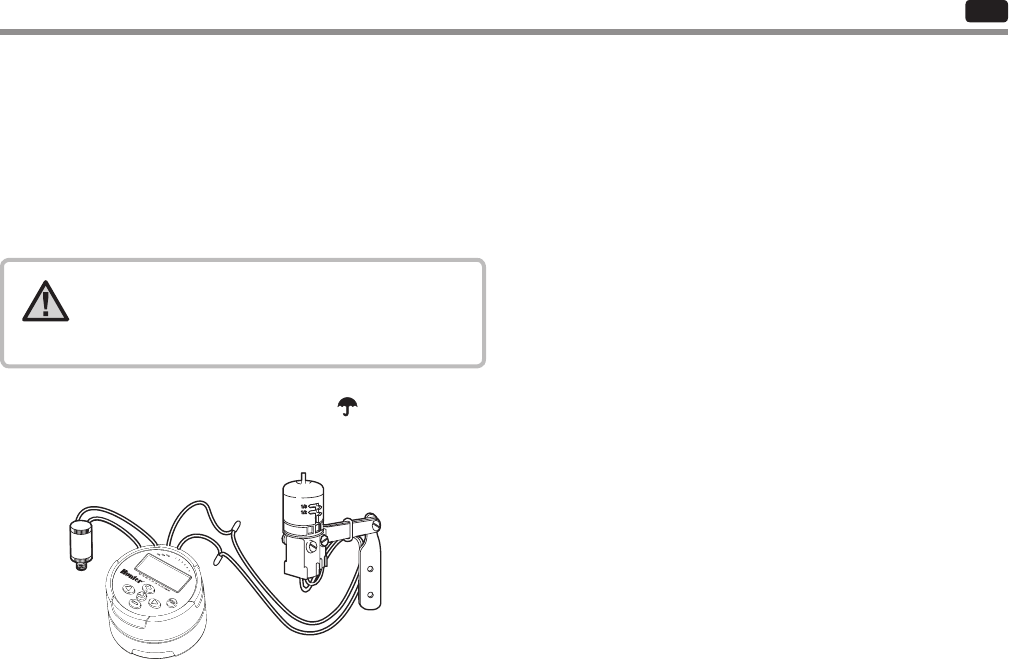
Hunter Mini-Clik
®
Modeli
NODE tutucusu
Şekil 1
TR
NODE kolaylıkla herhangi bir Hunter vanasına monte edilebilir. Özel
olarak tasarlanmış vana montaj aparatı montajı basit bir hale getirir.
Kauçuk koruma kapağı,NODE ‘un yüzeyinde biriken kirden korunmasını
sağlar.
NODE ‘un bir vanaya bağlanması (Şekil1)
1. Hunter DC latching solenoidi (P/N 458200) vana başlığına
vidalayın.
2. NODE’nin küçük açık ucunu solenoidin üst kısmına ayarlayın.
3. NODE kontrol ünitesini NODE tutucusunun büyük açık ucuna
ayarlayın.
Hunter Mini-Clik veya Kablolu Rain-Clik yağmur sensörü NODE’ye
bağlanabilir. Bu sensörün bağlanmasının temel amacı, hava koşullarının
uygun olmadığı zamanlarda sulamanın durdurulmasıdır.
1. NODE kontrol ünitesine bağlı sarı halka şeklindeki kabloyu
ortasından kesiniz.
2. Her bir kablodan yaklaşık 13 mm kısmı kablolardan sıyırınız. NODE
dan gelen her bir sarı kabloyu tek tek sensörden gelen kablolara
bağlayınız. Yağmur sensörünü NODE kontrol ünitesinden 30 m’ye
(100 ) uzağa monte edebilirsiniz (1 mm/18 AWG minimum kablo
boyutu)
3. Bütün kablo bağlantılarınızı su geçirmez birleştiriciler ile güvence
altına alın.
HAVA SENSORÜ BAĞLAMA
NOT: Kablolu Yağmur Sensörü sulamaya müdahale
ederken ekranda Sistem Kapalı simgesi , “OFF” ve
gösterilir.ktir.
NODE’ UN MONTAJI
6
TR
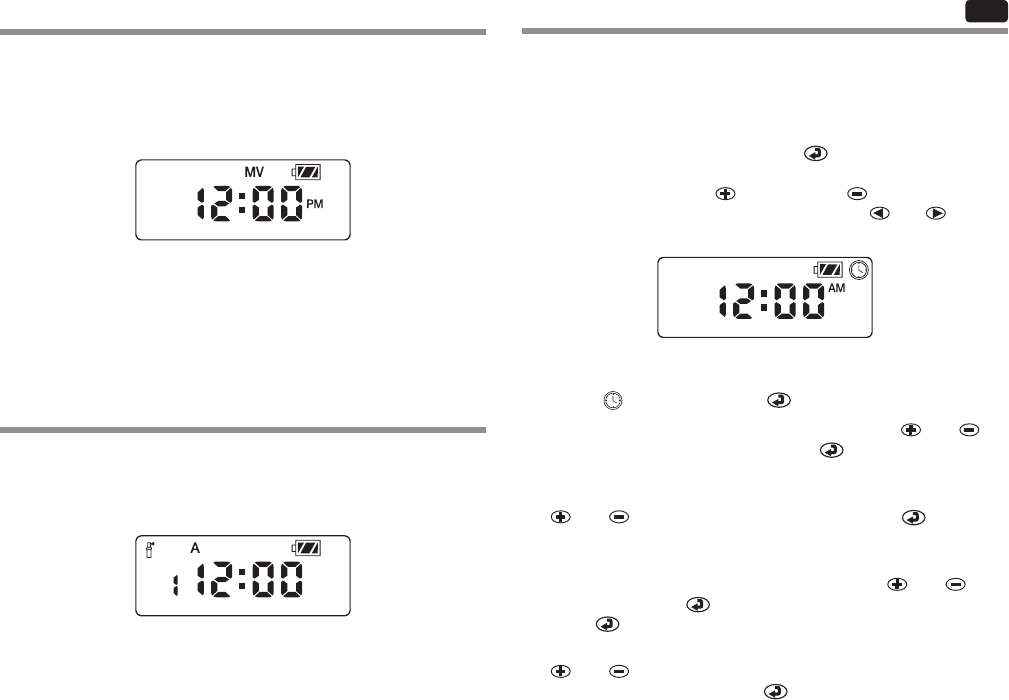
RÖLANTİ MODU
ÇALIŞMA MODU
Normal koşullarda NODE ekranında saat ve gün, haa günü, MV (ana
vana seçeneği etkinse) ve pil ömrü göstergesi gösterilir. Bir süre hiçbir
işlem yapılmazsa ekran, pil gücünü korumak için kapanır. Herhangi bir
Gebruikershandleiding.com neemt misbruik van zijn services uitermate serieus. U kunt hieronder aangeven waarom deze vraag ongepast is. Wij controleren de vraag en zonodig wordt deze verwijderd.
Product:
Spelregels forum
Om tot zinvolle vragen te komen hanteren wij de volgende spelregels:
lees eerst de handleiding door;
controleer of uw vraag al eerder door iemand anders is gesteld;
probeer uw vraag zo duidelijk mogelijk te stellen;
heeft u een probleem en al geprobeerd om dit op te lossen, vermeld dit erbij aub;
heeft u een oplossing gekregen van een bezoeker dan horen wij dat graag in dit forum;
wilt u een reactie geven op een vraag of antwoord, gebruik dan niet dit formulier maar klik op de knop 'reageer op deze vraag';
uw vraag wordt direct op de website gezet; vermijd daarom persoonlijke gegevens in te vullen;
Belangrijk! Als er een antwoord wordt gegeven op uw vraag, dan is het voor de gever van het antwoord nuttig om te weten als u er wel (of niet) mee geholpen bent! Wij vragen u dus ook te reageren op een antwoord.
Belangrijk! Antwoorden worden ook per e-mail naar abonnees gestuurd. Laat uw emailadres achter op deze site, zodat u op de hoogte blijft. U krijgt dan ook andere vragen en antwoorden te zien.
Abonneren
Abonneer u voor het ontvangen van emails voor uw Hunter Node bij:
nieuwe vragen en antwoorden
nieuwe handleidingen
U ontvangt een email met instructies om u voor één of beide opties in te schrijven.
Ontvang uw handleiding per email
Vul uw emailadres in en ontvang de handleiding van Hunter Node in de taal/talen: Duits, Engels, Frans, Italiaans, Portugees, Spaans, Turks als bijlage per email.
De handleiding is 15,18 mb groot.
U ontvangt de handleiding per email binnen enkele minuten. Als u geen email heeft ontvangen, dan heeft u waarschijnlijk een verkeerd emailadres ingevuld of is uw mailbox te vol. Daarnaast kan het zijn dat uw internetprovider een maximum heeft aan de grootte per email. Omdat hier een handleiding wordt meegestuurd, kan het voorkomen dat de email groter is dan toegestaan bij uw provider.
Stel vragen via chat aan uw handleiding
Stel uw vraag over deze PDF
Uw handleiding is per email verstuurd. Controleer uw email
Als u niet binnen een kwartier uw email met handleiding ontvangen heeft, kan het zijn dat u een verkeerd emailadres heeft ingevuld of dat uw emailprovider een maximum grootte per email heeft ingesteld die kleiner is dan de grootte van de handleiding.
Er is een email naar u verstuurd om uw inschrijving definitief te maken.
Controleer uw email en volg de aanwijzingen op om uw inschrijving definitief te maken
U heeft geen emailadres opgegeven
Als u de handleiding per email wilt ontvangen, vul dan een geldig emailadres in.
Uw vraag is op deze pagina toegevoegd
Wilt u een email ontvangen bij een antwoord en/of nieuwe vragen? Vul dan hier uw emailadres in.