SYSTEM SETUP
System Defaults
The final step of the installation is to establish the sys-
tem’s defaults. It is helpful to take a few minutes to
familiarize yourself with these settings, as they may
require change before the first use and later from
time to time.
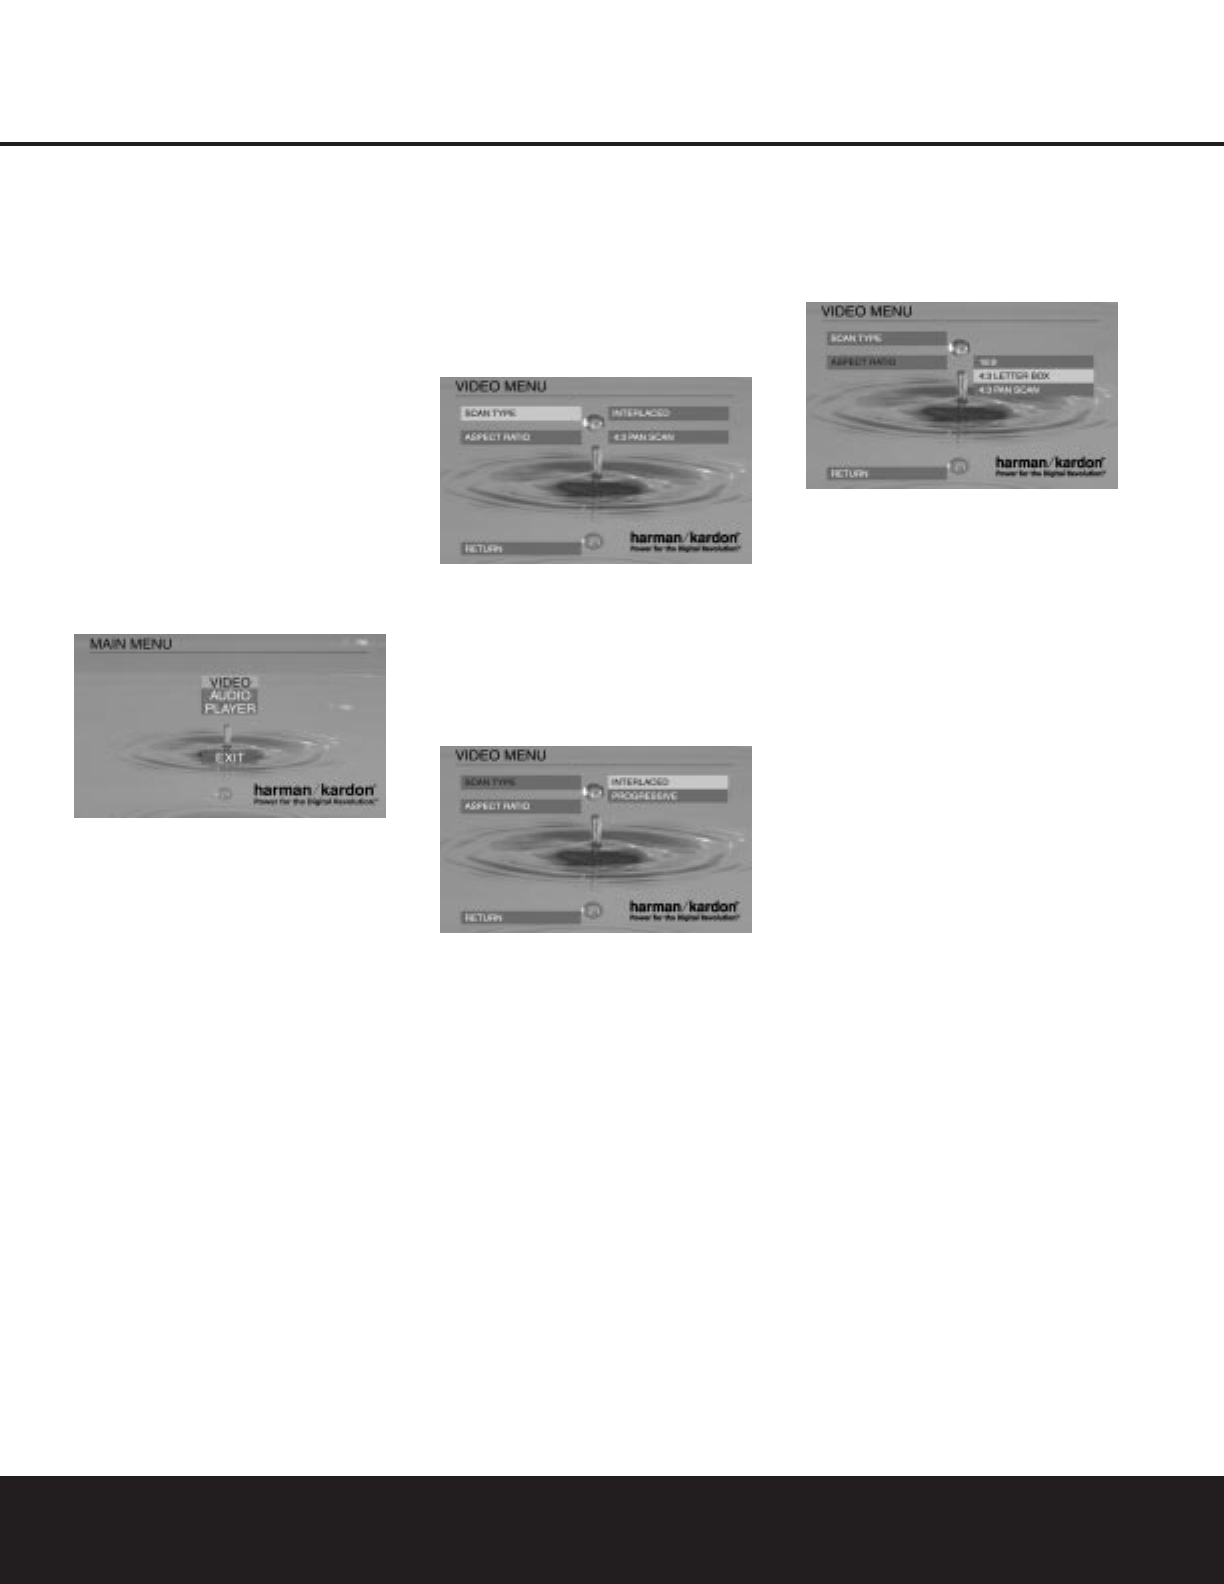
Main Menu
The first step in checking or changing the system
defaults is to access the Main menu. First, make certain
that the DVD 101 is properly connected to a video
display, and that power is connected. Turn the DVD
101 on by first pressing in the Main Power On/Off
Switch
0
and then pressing the Power On Button
1
/0.For this process, however, you do not need
to load a disc into the unit.
During Stop, Pause or Play mode, if you press the
Setup Button
8
on the remote, the Main menu
appears on the screen.
Navigating Menus
The remote’s Navigation (
K/L/N/M
) and Enter
Buttons
9
are used to navigate the menus and
select specific settings. Use the
K/L
Buttons
9
to move the cursor to highlight the desired submenu,
then press the
N
Button
9
or Enter Button
9
to enter the highlighted menu or choose the highlighted
content. The current setting is highlighted.
If you wish to change this setting, use the
K/L
Buttons
9
to select a new setting and press the
Enter Button
9
. Press the
M
Navigation Button
9
to return to the left submenu column. Press the
Play Button
3
G
or Setup Button
8
to exit the
Setup menu. Any new settings will be activated imme-
diately, except for Aspect Ratio, which will be activated
after the player exits the Setup menu.
After you press the
Setup Button
8
on the remote
to enter the Main menu, three submenus are shown:
Video, Audio and Player. You may press the
M
Navigation Button
9
or select Exit with the
Navigation Buttons
9
and press the Enter
Button
9
at any time to leave the Main menu.
You may restore all original factory default settings at
any time. When the player is in Standby, press and
hold the
Clear Button
V
for six seconds. This will
restore all default settings and any changes you have
made will be lost.
Video Menu
When you enter the Main menu, the Video submenu
should be highlighted. If not, use the
K/L
Buttons
9
to highlight the Video menu, then press the
N
Navigation Button
9
or Enter Button
9
to
access the Video menu. The left column shows the
items in the Video menu. The right column shows the
current setting for each item.
Scan Type
Select SCAN TYPE with the
K/L
Navigation
Buttons
9
, if it is not already selected; then press
the
N
Navigation Button
9
or Enter Button
9
to access the Scan Type submenu. The right
column displays the current setting (highlighted) and
one option.
IMPORTANT: Before you select Progressive mode,
you must make sure that your TV or projector can
accept a progressive signal. When a standard video
display is used you do not need to make any change
in this menu, as the INTERLACED setting is the correct
selection, even when component video is used. If the
player is set to Progressive, but connected to a display
device that cannot process a progressive signal, there
will be nothing on the TV screen. If this happens, you
can restore the player to Interlaced mode: Press the
Stop Button
I
on the remote and hold it down for
more than three seconds.The player will revert to Interlaced
mode and a picture should appear on the screen.
As a Progressive Scan DVD player, the DVD 101 can
provide a high-resolution image in Progressive mode.
If you have a compatible display device, you will
experience significantly enhanced picture quality.The
Progressive Scan E indicator in the front-panel display
will light when Progressive Scan has been selected.
Aspect Ratio
Select the Aspect Ratio menu with the
K/L
Buttons
9
if it is not already selected in the Video menu;
then press the
N
Navigation Button
9
or Enter
Button
9
to access the Aspect Ratio submenu. The
right column displays the current setting (highlighted)
and two options. If needed, select a new setting. Press
the
Enter Button
9
to confirm the new setting.
This menu selects the TV aspect ratio: conventional screen
shape (4:3) or widescreen (16:9), according to your TV.
• 4:3 Letterbox: Choose this setting if the DVD 101 is
connected to a conventional (4:3) TV set and you
would prefer to see movies without any parts being
cut off.You will see the entire frame of the movie
and DVDs recorded with normal 4:3 format will fill
the entire screen. But movies in widescreen will
occupy a smaller portion of the screen, with black
bars at the top and bottom of the screen.
• 4:3 Pan Scan: Choose this setting if the DVD 101 is
connected to a conventional (4:3) TV set and you
want widescreen movies to fill the entire screen.
Note that this setting is effective only with a few
widescreen DVDs recorded with the Pan and Scan
mode. With those movies you won’t see parts of
the picture (particularly the right and left edges).
Most discs produced in a widescreen format can’t
be cropped in this fashion, which means the black
bars will appear at the top and bottom of the screen
(letterbox format). Some widescreen DVDs, particu-
larly anamorphic types (with full vertical-line resolu-
tion; see section “16:9” below), may be shown with
original width but spread vertically.With these discs,
the letterbox format must be selected.This setting
is useful only with a few DVDs; with all others the
letterbox format fits best.
• 16:9 Widescreen: Choose this setting if your DVD player
is connected to a widescreen TV, or to a conventional
(4:3) TV changeable to widescreen (16:9) mode.
With this setup, discs recorded with 4:3 aspect ratio
will appear as a boxed image in the center of a
16:9 widescreen TV, with black bars to the left and
right of the image (not with 4:3 TVs changeable to
16:9 mode). True widescreen (anamorphic) DVDs
(i.e., those shown spread vertically when the
DVD 101 is set to
“
16:9” and your TV is set to
“
4:3”)
will be shown optimally with full vertical resolution.
With some 4:3 TVs set to 16:9 format, discs with
4:3 format may be played compressed vertically.With
those discs the TV must be set to 4:3 format.
SYSTEM SETUP 17