and PEDAL. This means you can record using individual Parts for the Upper, Lower and
Pedals.
If you do not want to record all Parts at once, you can use the numbered Touch Buttons to
select which Parts you want to record.
Use the top row of numbered Select Touch Buttons to select “REC” (Record) or
“OFF” for UPPER1,UPPER2,LOWER1 and LOWER2.
Use the bottom row of numbered Select Touch Buttons to select “REC” (Record) or
“OFF” for UPPERD (Upper Drawbar), LOWERD (Lower Drawbar), PEDALD (Pedal
Drawbar) and PEDAL (Pedal Voice).
If you select “OFF,” that particular Part will not record.
3.In addition to the basic parts of UPPER, LOWER, PEDAL and CONTROL,
you can also select whether you want to record other parameters such as
Drawbar movements. To see these other parameters, from the above page
touch the PART/EDIT Touch Button. If you touch the PART/EDIT Touch Button
once from the above menu, the Information Center Display will look similar to
this:
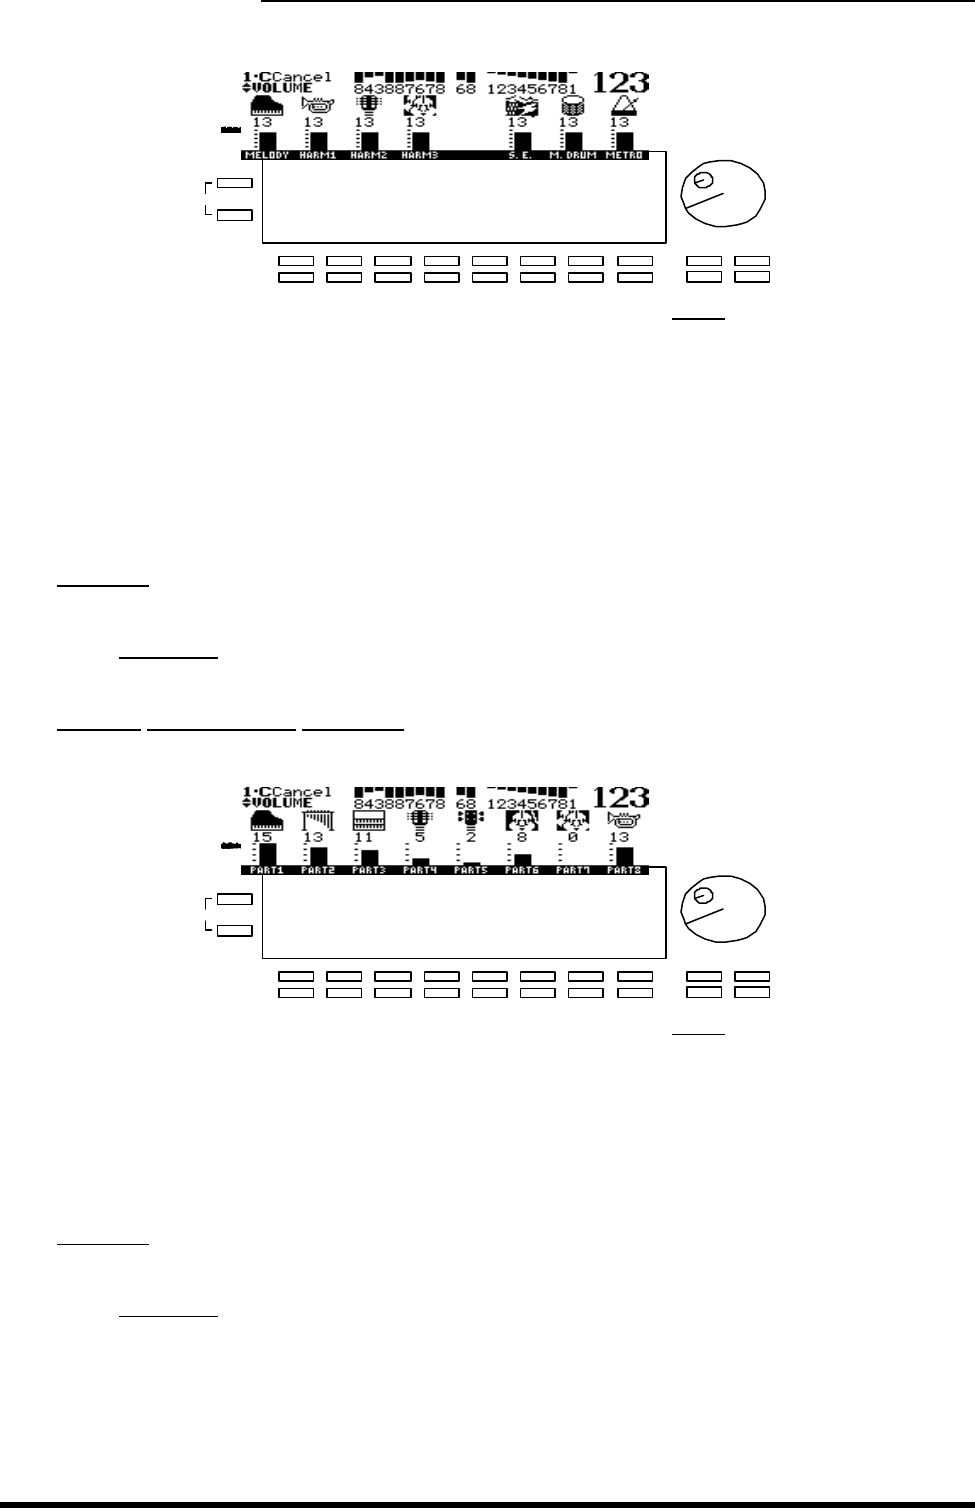
Notice that the Information Center Display shows seven parts: BASS, DRUM, PERC, ACC1,
ACC2, ACC3 and ACC4. This means you can record using individual Parts of the
AUTOBAND ORCHESTRA.
Use the numbered Select Touch Buttons to select “REC or OFF” for the individual Parts as
in the previous Page.
Using the Sequencer, Disk Drive & CompactFlash
HA<O> Model XE-1 Owner’s Playing Guide
162
If you touch the PART/EDIT Touch Button once from the above page, the Information
Center Display will look similar to this:
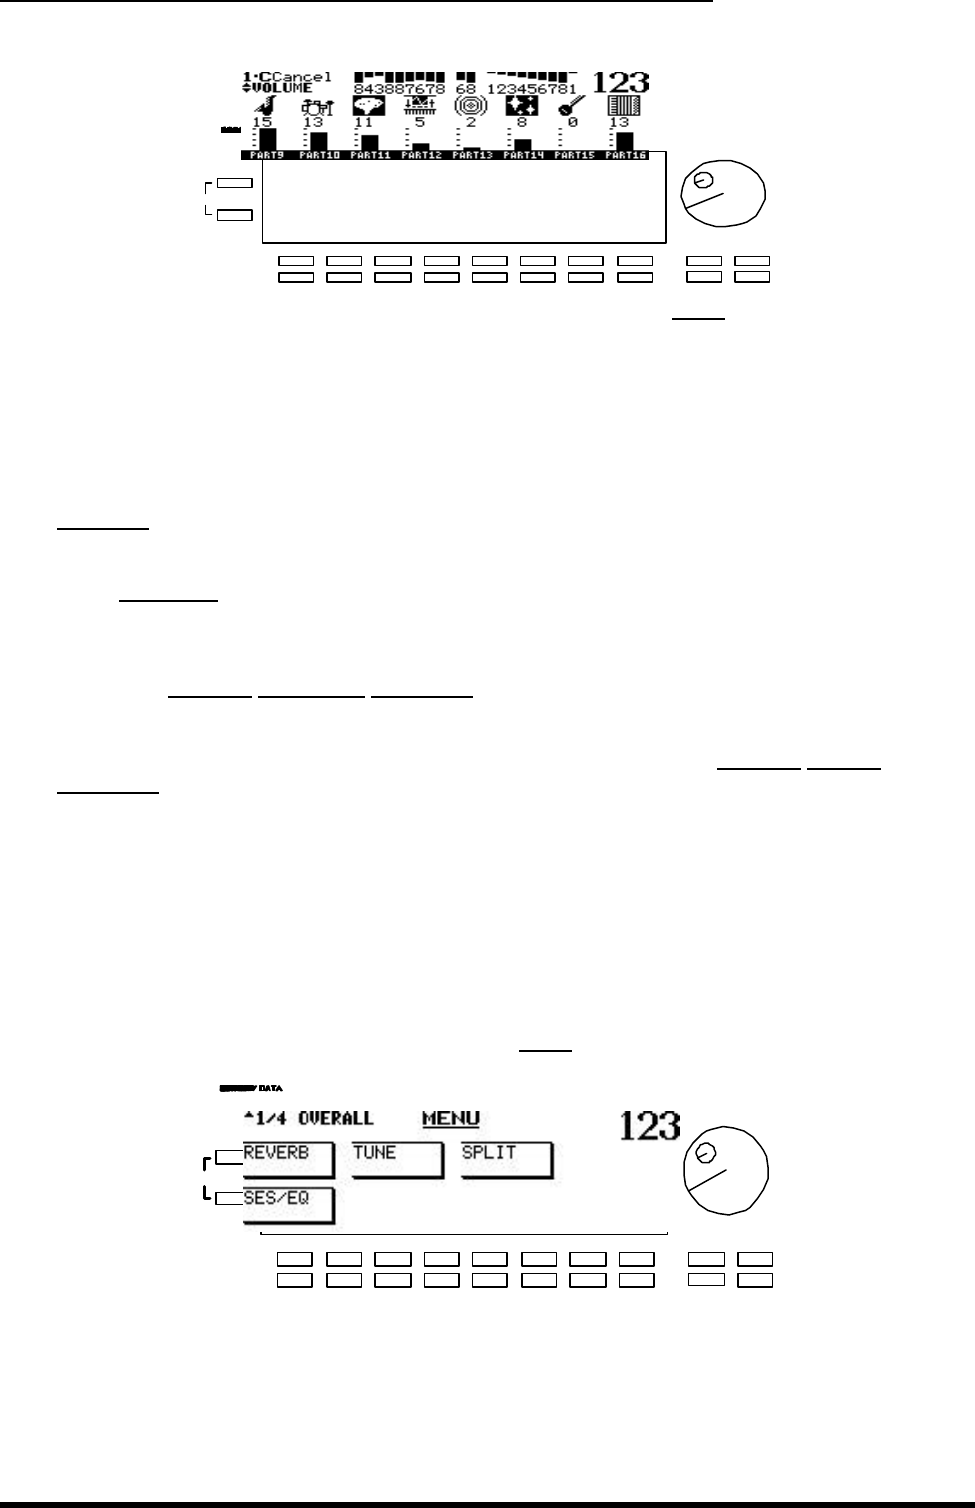
Notice that the Information Center Display shows six parts: M.DRM, S.E., EXPRESS,
DBCONT, TEMPO and CONTROL. This means you can record Manual Drums, Sound
Effects, Expression data, Drawbar registrations, Tempo data and other Controllers such as
Pitch Bend, Modulation, etc.
Use the numbered Select Touch Buttons to select “REC or OFF” for the individual Parts as
in the previous Page.
4.When you record a Sequence on the XE-1, a Metronome will count off each beat.
However, at this point you can change the way the Metronome functions.
If you wish to silence the Metronome while recording, touch the Number 6 Touch Button.
This will turn the Metronome “OFF.”
If you wish to hear the Metronome but want to change its parameters, touch the Number 14
Touch Button. The Information Center Display will now look like this:
You are now in the METRONOME Edit Menu, which can be accessed only via Shortcut. This
Advanced Feature Menu allows you to change the characteristics of the Metronome.
NOTE: The METRONOME Edit Menu is fully explained starting on page 77 of this Guide.
After you have finished setting the Metronome, or if you want to exit without making
changes, touch the Number 8 or Number 16 Select Touch Button to select “OK.” The
MULTI REC Menu will reappear.
5.If the “REC STBY” (Record Standby) box is not highlighted, touch the Number
Number 5 Select Touch Button to highlight it. The XE-1 is now in Standby
mode and you are now ready to begin recording.
6.Now touch the PLAY/PAUSE ( ) Touch Tab in the RHYTHM CONTROL
section. You will now see the Measure counter in the Information Center
Display count down 2 measures (“-2, 2, 3, 4, _1, 2, 3, 4") and the Metronome
will sound in the way you have programmed it.
Using the Sequencer, Disk Drive & CompactFlash
HA<O> Model XE-1 Owner’s Playing Guide
163
7.When the Measure counter has finished counting off the two introductory
measures, start playing your song, and play it through to the end.
8.When you have finished playing your song, touch the PLAY/PAUSE ( )
Touch Tab to stop recording. The Information Center Display will now look
similar to this:
Notice that the word, “PLAY” now appears in several places in the display. These places
indicate the parts or divisions of the XE-1 you used when recording your song. If the word,
“OFF” appears above a certain part, such as CONTROL, it means that you did not use
that part when recording your song.
Playing Back a Song
After you have finished recording your song and the MULTI REC screen reappears, the
REW/STOP ( ) Touch Tab will also turn “ON” (red LED lit). This is to let you know that
a song has been loaded into the XE-1's memory and that the song is ready to be played
back.
Touch the PLAY/PAUSE ( ) Touch Tab. The song will start playing.
You can use the numbered Touch Buttons below each Part to select “PLAY” or “OFF” for
any Part which has a “PLAY” box showing above it. In this way, you can hear each Part
separately.
If you wish to stop the song midway through, press the PLAY/PAUSE Touch Button. The
song will stop playing.
If you wish to start the song at the point at which you stopped it, simply touch the
PLAY/PAUSE Touch Button again. The song will start playing again and continue through
to the end.
If you wish to start the song at a specific measure, touch the Number 15 and Number 16
Touch Buttons to scroll through the Measures until the Information Center Display shows
the measure number you want. Then touch the PLAY/PAUSE Touch Tab to start the song
playing at that measure.
If you wish to start the song over again from the beginning, touch the REW/STOP Touch
Tab. This will reset the Information Center Display to measure 1 so that the song will start
from the beginning. Then touch the PLAY/PAUSE Touch Tab to start the song playing.
Using the Sequencer, Disk Drive & CompactFlash
HA<O> Model XE-1 Owner’s Playing Guide
164
16 TRACKS
This Advanced Feature Menu Page allows you to record your own songs, but uses a different
format than either EASY REC or MULTI REC.
Both EASY REC and MULTI REC allow you to record song data using the performance platforms
unique to the XE-1, such as UPPER 1, LOWER 1, Drawbars, Sound Effects, etc. 16 TRACKS
uses a format extended of GM(General MIDI) Level 1 in which individual Parts are assigned MIDI
channels and Program numbers without regard for where they may happen to fall on a specific
instrument. In this way, GM song data do not have to be played back on an instrument of any one
particular kind, or by any one particular maker.
Accessing the 16 TRACKS Menu Page using the MENU/EXIT Touch Button:
1.Touch the gray MENU Select Touch Button to see the first screen of the
MENU Mode. You will see “1/4" displayed in the extreme upper left corner of
the Information Center Display. This indicates that the MENU Mode has 4
Pages and that Page 1 is displaying.
8.Touch the PAGE UP Select Touch Button three times. Page 4 of the MENU
Mode will now display. You will now see “4/4" in the upper left corner of the
Information Center Display.
9.Touch either the Number 3 or Number 4 Select Touch Button. The words,
“SEQ MENU,” will now display at the top of the screen.
10.Touch either the Number 13 or Number 14 Select Touch Button. The words,
“16 TRACKS,” will now display at the top of the screen.
Accessing the 16 TRACKS Menu using the Shortcut:
1.Touch the SEQ MENU Touch Tab. The words, “SEQ MENU,” will display at
the top of the screen.
2.Touch either the Number 13 or Number 14 Select Touch Button. The words,
“16 TRACKS,” will now display at the top of the screen.
You are now in the 16 TRACKS Menu Page.
Recording a Song using 16 TRACKS
1.Touch the SEQ MENU Touch Tab and/or use the MENU/EXIT and numbered Touch
Buttons to enter the 16 TRACKS Menu.
Using the Sequencer, Disk Drive & CompactFlash
HA<O> Model XE-1 Owner’s Playing Guide
165
2.Touch the Number 13 Select Touch Button to select PART SETTING.
Notice that the Information Center Display shows six Parameters: PB (Pitch Bend) RANGE,
VOLUME, PAN, VELOCITY, REVERB and CHORUS in addition to the selected Voice. This
means you can select the settings for these Parameters for each selected Part.
Use the top row of numbered Touch Buttons to increase the amount of each Parameter.
Use the bottom row of numbered Touch Buttons to decrease the amount of each
Parameter.
NOTE: The PAN parameter adjusts the directionality of the selected Part. Use the Number 4
Touch Button to move the sound to the right, and the Number 12 Touch Button to move the sound
to the left.
3.After you have set the Parameters for the selected Part, touch the MENU/EXIT
Touch Button to return to the 16 TRACKS Menu.
4.If you are ready to record, touch the Number 5 Select Touch Button to select
REC STBY (Record Standby). The selected Part will “REC” automatically.
(NOTE: The Part cannot be turned “OFF.”)
When you record a sequence on the XE-1, a Metronome will count off each beat. If you
wish to silence or change the sound of the Metronome, or if you wish to change the time
signature, touch the Number 14 Select Touch Button to go to the METRONOME Menu.
NOTE: The METRONOME Edit Menu is fully explained starting on page 77 of this Guide.
After you have finished setting the Metronome, or if you want to exit without making
changes, touch the Number 8 or Number 16 Select Touch Button to select “OK.” The 16
TRACKS Menu will reappear.
Using the Sequencer, Disk Drive & CompactFlash
HA<O> Model XE-1 Owner’s Playing Guide
166
5.Now touch the PLAY/PAUSE ( ) Touch Tab. You will now see the
Measure counter in the Information Center Display count down 2 measures
(for example,
“-2:1, 2, 3, 4, -1:1, 2, 3, 4" in 4/4) and the Metronome will sound in the way you
have programmed it.
When the Measure counter has finished counting off the two introductory measures, start
playing your song, and play it through to the end.
6.When you have finished playing your song, touch the PLAY/PAUSE ( )
Touch Tab to stop recording. The Information Center Display will now look
similar to this:
Notice that the word, “PLAY” now appears in several places in the display. These places
indicate the parts or divisions of the XE-1 you used when recording your song.
7.If you wish to record another part, repeat from step 2.
Playing Back a Song
After you have finished recording your song and the 16 TRACKS screen reappears, the
REW/STOP ( ) Touch Tab will also turn “ON” (red LED lit). This is to let you know that
a song has been loaded into the XE-1's memory and that the song is ready to be played
back.
Touch the PLAY/PAUSE ( ) Touch Tab. The song will start playing.
You can use the numbered Touch Buttons below each Part to select “PLAY” or “OFF” for
any Part which has a “PLAY” box showing above it.
If you wish to stop the song midway through, press the PLAY/PAUSE Touch Button. The
song will stop playing.
If you wish to start the song at the point at which you stopped it, simply touch the
PLAY/PAUSE Touch Button again. The song will start playing again and continue through
to the end.
If you wish to start the song at a specific measure, touch the Number 15 and Number 16
Touch Buttons to scroll through the Measures until the Information Center Display shows
the measure number you want. Then touch the PLAY/PAUSE Touch Tab to start the song
playing at that measure.
If you wish to start the song over again from the beginning, touch the REW/STOP Touch
Tab. This will reset the Information Center Display to measure 1 so that the song will start
from the beginning. Then touch the PLAY/PAUSE Touch Tab to start the song playing.
Using the Sequencer, Disk Drive & CompactFlash
HA<O> Model XE-1 Owner’s Playing Guide
167
♦DISK DRIVE & CompactFlash
Your Hammond XE-1 can store and retrieve several types of data:
1.Sequencer or Song data
2.Preset data
3.Style data
The above types of data can be stored to, and retrieved from, two types of media:
1.Floppy Disks
2.Compact Flash Cards
The following pages will explain each function.
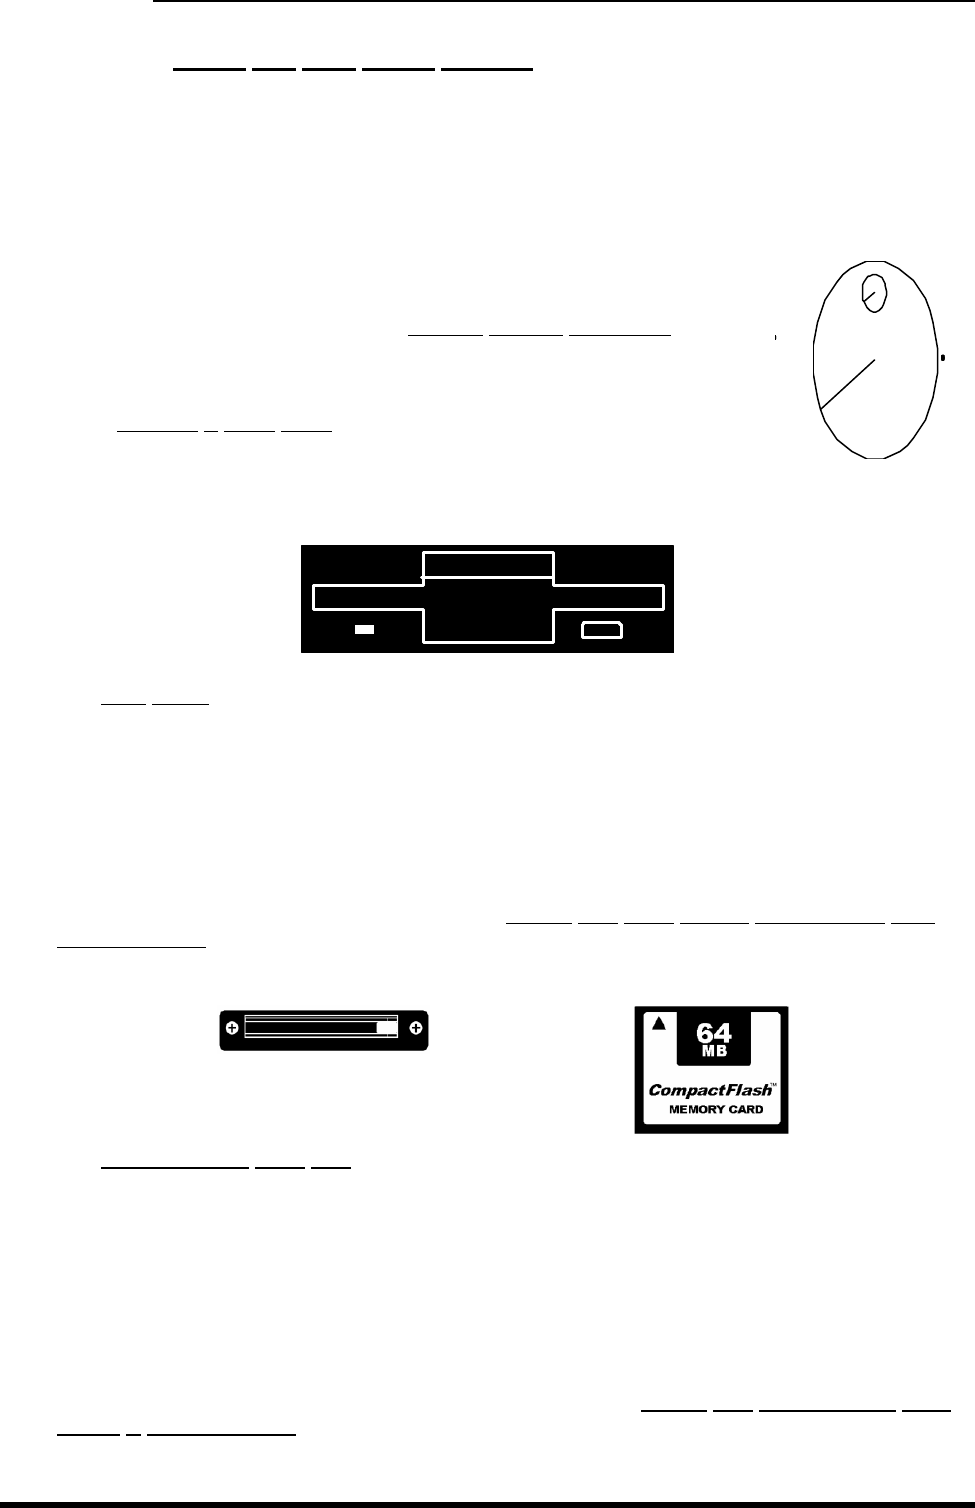
Disk Slot
The DiskSlot is located below the Pitch Bend and Modulation Wheels on the extreme left side of
the instrument. It will accommodate standard 3
1
/
2
" double-density or high-density Floppy Disks.
Access Indicator
This green LED on the left of the Disk Slot lights whenever the Disk Drive is in use - for eaxmple,
when data is being Saved to or Loaded from a Disk.
NOTE: Do not turn the AC Power to the XE-1 “OFF” when this LED it lit. This will prevent data loss.
Eject Button
When you insert a Disk into the Disk Slot, this button will protrude from its normally recessed
position so that you may press it to remove the Disk. Simply press it in, and the Disk will eject
from the Disk Slot.
CompactFlash Card Slot
The CompactFlashCardSlot is located on the Accessory Panel on the back of the XE-1.
Simply insert a CompactFlash Card into the Slot. Be sure to insert the Card with the label facing
up. Use the Eject Button located to the right of the slot to eject the Card after use.
SPECIAL NOTE: As of this writing, the following CompactFlash Card Types have been verified as
compatible with the XE-1:
SanDisk SDCFB-15, -30, -64, -128
MELCO RCF-C30M, -C64M
IO DATA PCCF-32M
This list is continually being updated. For the latest information, please contact Hammond at one of the
addresses listed on page 166, or visit the Hammond website at www.hammondsuzuki.com.
Using the Sequencer, Disk Drive & CompactFlash
HA<O> Model XE-1 Owner’s Playing Guide
168
A DISK UTIL Menu
This Advanced Feature Menu allows you to perform basic operations relating to Floppy Disks or
CompactFlash Cards.
Accessing the DISK UTIL Edit Menu using the MENU/EXIT Touch Button:
1.Touch the gray MENU Select Touch Button to see the first screen of the
MENU Mode. You will see “1/4" displayed in the extreme upper left corner of
the Information Center Display. This indicates that the MENU Mode has 4
Pages and that Page 1 is displaying.
9.Touch the PAGE UP Select Touch Button three times. Page 4 of the MENU
Mode will now display. You will now see “4/4" in the upper left corner of the
Information Center Display.
11.Touch either the Number 9 or Number 10 gray Select Touch Buttons. The
words, “DISK UTIL” will now display at the top of the screen.
Accessing the DISK UTIL Edit Menu using the Shortcut:
Touch the DISK Touch Tab. The words, “DISK UTIL” will display at the top of the
screen.
You are now in the DISK UTIL Edit Menu. You may now use the numbered Select Touch Buttons
below the screen to perform various operations with Floppy Disks or CompactFlash Cards.
These changes are explained below.
DISK UTIL - FORMAT
Since a Floppy Disk or CompactFlash Card must be formatted before it can be used, we will
explain the FORMAT process first. This only has to be done once, when a disk or card is new.
NOTE: The FORMAT operation is required even for pre-formatted disks.
To format a blank disk or card:
1.Insert a blank 3
1
/
2
" double-density or high-density Floppy Disk into the Disk
Slot, or if you are formatting a Card, insert the Card into the CompactFlash
Card Slot on the back of the XE-1.
Using the Sequencer, Disk Drive & CompactFlash
HA<O> Model XE-1 Owner’s Playing Guide
169
2.Touch the DISK Touch Tab or use the MENU/EXIT Touch Button to access the
DISK UTIL Menu. You will now see the DISK UTIL Menu in the Information
Center Display.
Using the Sequencer, Disk Drive & CompactFlash
HA<O> Model XE-1 Owner’s Playing Guide
170
3.Touch either the Number 13 or Number 14 Select Touch Button to select the
FORMAT Menu.
You will now see two Menu selections - “MEDIA” and “FORMAT.”
Media Type
This Advanced Feature allows you to select whether to format a Floppy Disk (FD) or
CompactFlash Card (CARD).
4.Use the Number 3 Select Touch Button to select FD if you are formatting a
Floppy Disk; or,
Use the Number 11 Select Touch Button to select CARD if you are formatting a
CompactFlash Card.
Format Type
This Advanced Feature allows you to select the type of format you want to perform -
“NORMAL” or “QUICK.” The NORMAL Format is a complete “low-level” format which
erases anything already on the Disk or Card and re-initializes it for use. The QUICK
Format merely erases the contents of the Disk or Card, and is therefore faster than the
NORMAL Format.
5.Use the Number 5 Select Touch Button to select NORM; or,
Use the Number 13 Select Touch Button to select QUICK.
NOTE: If you are formatting a Disk or Card for the first time, you cannot do a QUICK
Format.
6.Now touch the number 16 Select Touch Button to select “OK”. If you DO NOT
wish to format, touch the PLAY or MENU/EXIT Select Touch Button to exit the
FORMAT Menu.
If you are Formatting a Disk or Card which already contains data, the following warning
message will display:
If you DO NOT wish to overwrite the current contents of your Disk or Card, touch the
Number 6 Select Touch Button to Cancel the FORMAT procedure. If you are sure you
want to re-format the Disk or Card, touch the Number 14 (“OK”) Select Touch Button.
Using the Sequencer, Disk Drive & CompactFlash
HA<O> Model XE-1 Owner’s Playing Guide
171
Formatting a Disk will take about 1 minute. During that time, the Information Center Display
will display the following message:
NOTE: If you are formatting a CompactFlash Card, the display will read, “Formatting Card. Please
wait.”
After Formatting is completed, the Information Center Display will return to the FORMAT
Menu. You are now ready to begin recording songs, storing Presets or otherwise making
use of your Disk or Card.
DISK UTIL- SONG & SETUP
Loading a Song from a Disk or Card
1.Insert a 3
1
/
2
" Floppy Disk or a CompactFlash Card which contains Song data
into the appropriate slot. The Information Center Display will look similar to
this:
2.On the left side of the Information Center Display, you will see a list of song
titles or file names. The current location is marked by a cursor which
highlights the song name.
Use the Number 2, Number 3 or Number 4 Select Touch Button to scroll up through the
selections.
Use the Number 10, Number 11 or Number 12 Select Touch Button to scroll down through
the selections.
A Disk or Card may contain a large number of songs; however, if a Disk contains fewer
than that number, the Touch Buttons will continue scrolling until it has reached the last
song on the Disk.
Using the Sequencer, Disk Drive & CompactFlash
HA<O> Model XE-1 Owner’s Playing Guide
172
3.After you have made your selection, touch either the Number 6 or Number 14
Select Touch Button to select LOAD. The Information Center display will look
similar to this:
4.If you do not want to load the song, touch the Number 6 Select Touch Button to
select, “CANC.” If you want to load the song, touch the Number 14 Select Touch
Button to select, “OK.” The Information Center Display will show:
5.After the above message stops displaying,, the Information Center Display will
look similar to this:
The REW/STOP ( ) Touch Tab will also turn “ON” (red LED lit). This is to let you know
that a song has been loaded into the XE-1's memory and that the song is ready to be
played back.
6.Touch the PLAY/PAUSE ( ) Touch Tab. The song will start playing and
the Information Center Display will now show a screen similar to this:
If you wish to stop the song midway through, press the PLAY/PAUSE Touch Button. The
song will stop playing.
If you wish to start the song at the point at which you stopped it, simply touch the
PLAY/PAUSE Touch Button again. The song will start playing again and continue through
to the end.
Using the Sequencer, Disk Drive & CompactFlash
HA<O> Model XE-1 Owner’s Playing Guide
173
If you wish to start the song at a specific measure, touch the Number 15 and Number 16
Touch Buttons to scroll through the Measures until the Information Center Display shows
the measure number you want. Then touch the PLAY/PAUSE Touch Tab to start the song
playing at that measure.
If you wish to start the song over again from the beginning, touch the REW/STOP Touch
Tab. This will reset the Information Center Display to measure 1 so that the song will start
from the beginning. Then touch the PLAY/PAUSE Touch Tab to start the song playing.
Saving a Song to a Disk or Card
A single high-density Floppy Disk can hold up to 50 songs.
1.Insert a formatted 3
1
/
2
" double-density or high-density Floppy Disk or
CompactFlash Card into the appropriate Slot.
2.Record a song or songs into the instrument’s memory using the procedure
described above under “Recording a Song”. When you have finished, touch
the STOP Touch Button. The Information Center Display will show the
SONG/SET Menu.
3.If the Disk or Card you are using has Song data on it already and you don’t
want to erase any of it, touch the Number 10, Number 11 or Number 12 Select
Touch Buttons until the words, “New File” are highlighted. Then touch the
Number 15 Select Touch Button to select SAVE.
Notice that the Information Center Display shows three choices, “BOTH” and “SONG” and
“SETUP.”. This means that you can choose whether you want to save only the “SONG”
data (the notes you played on the manuals and/or pedals), only the “SETUP” data (the
registration changes you made) or the Song data plus whatever registration changes you
made while playing your song (“BOTH.”)
Use the Number 5 Select Touch Button to scroll up through the choices.
Use the Number 13 Select Touch Button to scroll down through the choices.
Using the Sequencer, Disk Drive & CompactFlash
HA<O> Model XE-1 Owner’s Playing Guide
174
If you DO NOT want to save either the SONG or SETUP data, touch the Number 7 Select
Touch Button to select “CANCEL.” If you want to save your SONG and/or SETUP data,
touch the Number 15 Select Touch Button to select “OK.” The Information Center Display
should look similar to this:
When the box, “Saving...” disappears and the screen returns to normal, your new Song
and Setup is saved.
Deleting a Song from a Disk or Card
1.Insert a 3
1
/
2
" Floppy Disk or a CompactFlash Card which contains Song data
into the appropriate Slot. The Information Center Display will display the
SONG/SET Menu.
2.On the left side of the Information Center Display, you will see a list of song
titles or file names. The current location is marked by a cursor which
highlights the letter it is over.
Use the Number 2, Number 3, Number 4 or Number 5 Select Touch Button to scroll
up through the selections.
Use the Number 10, Number 11, Number 12, or Number 13 Select Touch Button to
scroll down through the selections.
3.When you have made your selection, touch the Number 8 or Number 16
Select Touch Button to select “DEL.” The Information Center Display will then
show “YES” and “NO” on the extreme right side. This is to confirm that you
want to delete the selected Song.
4.Touch the number 8 Select Touch Button to select “YES”. If you DO NOT wish to
delete the Song, touch the Number 7 Select Touch Button to select “CANC”. If you
select “OK”, the Song will then be deleted from the Disk or Card.
Using the Sequencer, Disk Drive & CompactFlash
HA<O> Model XE-1 Owner’s Playing Guide
175
NOTE: You may prevent data from accidentally being erased from a Disk by pushing the "write-
protect" notch on the right edge of the disk "up", so that the hole on the right edge of the disk is
unblocked. If you follow the steps for deleting songs on a disk that has been "write-protected" in
this manner, no data will be deleted and an error message will display in the Information Center
Display.
Loading Style Data from a Disk or Card
1.Insert a 3
1
/
2
" Floppy Disk or a CompactFlash Card which contains Style data
into the appropriate Slot. The Information Center Display will look similar to
this:
2.Touch the Number 6 or Number 14 Select Touch Button to select LOAD
STYL. The Information Center Display will now look like this:
Notice that the Information Center Display shows, “DISKSTYLE1" and “DISKSTYLE2.” This
allows you to choose which Rhythm Touch Button you want to use to access the Disk
Styles. If you choose “DISKSTYLE1,” you would use the RHUMBA Touch Button to access
the Disk Styles. If you choose “DISKSTYLE2,” you would use the TANGO Touch Button to
access the Disk Styles. (See the legends on the RHUMBA and TANGO Touch Buttons.)
3.Use the numbered Select Touch Buttons below the Information Center Display to
select “DISKSTYLE1" or “DISKSTYLE2.” The Number 5, 6 and 7 Touch Buttons
will select “DISKSTYLE1,” while the number 13, 14 and 15 Touch Buttons select
“DISKSTYLE2.” Your choice will be highlighted.
If you want to EXIT this Menu, touch the Number 8 Select Touch Button.
4.If you want to load s Style, after you have made your choice touch the number 16
Select Touch Button to begin downloading the Disk Styles. The Information Center
Display should show the following:
Using the Sequencer, Disk Drive & CompactFlash
HA<O> Model XE-1 Owner’s Playing Guide
176
When the SONG&SETUP Page returns, the Loading process is complete.
Using the Sequencer, Disk Drive & CompactFlash
HA<O> Model XE-1 Owner’s Playing Guide
177
SPECIAL NOTE - Style Conversion Utility
In addition to the AutoBand Style Disks provided as part of the Hammond Style Library, your XE-1
will also utilize Style Data for the Technics
®
KN-5000 and Solton
®
MS-50 and MS-60.
The Style Data contained on these disks is in a different format than that contained on the
Hammond AutoBand Style Disks; however, the format conversion is done automatically by the
XE-1 operating sytem. Simply insert a Style Disk into the Disk Slot of your XE-1, and follow the
instructions starting on page 148 for loading Style Data. The conversion time will vary depending
on the complexity of the style data (possibly 1 to 3 minutes).
Playing the Loaded Styles
Touch and hold the Rhythm Touch Button which represents where the Disk Styles are
loaded:
If you selected “DISKSTYLE1,” touch and hold the RHUMBA Touch Button.
If you selected “DISKSTYLE2,” touch and hold the TANGO Touch Button.
The Information Center Display should now display the different Rhythm choices. The Disk
Styles will display from Page 2. Touch the PAGE UP Select Touch Button to the left of the
screen to scroll up to Page 2. When you do this, you will see the Disk Styles displayed in
the Information Center Display.
Use the numbered Touch Buttons to select the individual Rhythms just as you do with the
built-in Rhythms.
NOTE: The loaded styles will be retained in memory, even after the XE-1 is turned “OFF,” until the
XE -1 is reset.
Saving Style Data to a Disk or Card
1.Insert a 3
1
/
2
" Floppy Disk or a CompactFlash Card into the appropriate Slot.
The Information
Center Display will
look similar to this:
2.Touch the Number 8 or Number 16 Select Touch Button to select SAVE
STYL. The Information Center Display will now look like this:
3.Use the numbered Touch Buttons to name the Disk Style group. This name is
the name given to all of the Styles which are accessible by one Rhythm Touch
Using the Sequencer, Disk Drive & CompactFlash
HA<O> Model XE-1 Owner’s Playing Guide
178
Button (either RHUMBA or TANGO). The current name will display in a box in
the left part of the screen called “OLD NAME,” while the new name will display
in a box in the right part of the screen called “NEW NAME.” The way the
letters are displayed in the screen determines which numbered Touch Button
you would use to make your choice. For example, use the Number 1 Touch
Button to enter the characters, “1ABC,” use the Number 2 Touch Button to
enter the characters, “2DEF,” etc.
Using the Sequencer, Disk Drive & CompactFlash
HA<O> Model XE-1 Owner’s Playing Guide
179
Use the Number 11 Select Touch Button to enter a space.
Use the Number 12 Select Touch Button to select upper- or lower-case letters.
The letter boxes in the Information Center Display will show which type has been
selected - “1ABC,” or “1abc,” for example.
Use the Number 13 Select Touch Button to delete a character.
Use the Number 14 and Number 15 Select Touch Button to scroll backward and
forward through the characters.
Use the Number 16 Select Touch Buttons to enter characters after you have
selected them using the other numbered Touch Buttons.
4.After you have entered your name (up to 16 characters), touch the ENT
(Number 16 Select Touch Button). The Information Center Display will now
look similar to this:
Notice that the Information Center Display shows, “DISKSTYLE1" and “DISKSTYLE2.” This
allows you to choose which Rhythm Touch Button contains the Style data you want to save.
“DISKSTYLE1” is represented by the RHUMBA Touch Button, while “DISKSTYLE2” is
represented by the TANGO Touch Button. (See the legends on the RHUMBA and TANGO
Touch Buttons.)
5.Use the numbered Select Touch Buttons below the Information Center Display to
select “DISKSTYLE1" or “DISKSTYLE2.” The Number 5, 6 and 7 Touch Buttons
will select “DISKSTYLE1,” while the number 13, 14 and 15 Touch Buttons select
“DISKSTYLE2.” Your choice will be highlighted.
If you want to exit this Menu, touch the Number 8 (“CANC”) Select Touch Button.
6.If you want to Save the Style group, after you have made your choice, touch
the number 16 Select Touch Button to save your Styles. The Information
Center Display will look similar to this:
When the SONG&SETUP Page returns, the Styles have been saved.
Using the Sequencer, Disk Drive & CompactFlash
HA<O> Model XE-1 Owner’s Playing Guide
180
“Directories”
Because a Disk or Card can contain a large number of Songs, it may be desirable to put different
songs into different groups - for example, group all of the Rock songs together, all of the Jazz
songs together, all Love Ballads together, etc. You can create Directories on a Disk or Card
specifically for this purpose. A Directory is simply a location on a Disk or Card where you can
store groups of files - similar to a drawer of a file cabinet.
If a Disk or Card has Directories, when you view the contents using the Information Center
Display you will see something similar to this:
A File Name will be shown normally, while a Directory name will be shown in brackets “<>.” If the
highlighter (long black bar indicating which File or Directory is selected), is over a File, three
boxes - “LOAD” “SAVE” and “DEL” will appear on the right side of the screen, allowing you to
Load, Save or Delete files. If you move the highlighter over a Directory name, a box “ENTR” will
appear, allowing you to Enter, or see the contents of that Directory.
Touch the Number 6 or Number 14 Select Touch Button to select ENTR and see the
contents of the selected Directory.
To see the contents of other Directories while the contents of a Directory are displaying, use the
top row of numbered Touch Buttons to move the highlighter up to the top line in the display,
which should read, “UP ONE LEVEL.”
Touch the Number 6 or Number 14 Select Touch Button to select UP, which will move you out of
the Directory that is currently displaying. Now you may move the highlighter over another
Directory name and follow the above instructions to see its contents.
Using the Sequencer, Disk Drive & CompactFlash
HA<O> Model XE-1 Owner’s Playing Guide
181
Creating a Directory
1.If you move the highlighter down as far as it will go, down to “**New File**,” you
will see two boxes - “NEW DIR” and “SAVE.”
2.If you want to Save a file, select “SAVE” by touching the Number 7 or Number
15 Select Touch Button. If, however, you want to create a new directory,
select “NEW DIR” by touching the Number 8 or Number 16 Select Touch
Button. The Information Center Display will now look similar to this:
3.Use the numbered Touch Buttons to name the Directory. The current name
will display in a box in the left part of the screen called “OLD NAME,” while the
new name will display in a box in the right part of the screen called “NEW
NAME.” The way the letters are displayed in the screen determines which
numbered Touch Button you would use to make your choice. For example,
use the Number 1 Touch Button to enter the characters, “1ABC,” use the
Number 2 Touch Button to enter the characters, “2DEF,” etc.
Use the Number 11 Select Touch Button to enter a space.
Use the Number 12 Select Touch Button to select upper- or lower-case letters.
The letter boxes in the Information Center Display will show which type has been
selected - “1ABC,” or “1abc,” for example.
Use the Number 13 Select Touch Button to delete a character.
Use the Number 14 and Number 15 Select Touch Button to scroll backward and
forward through the characters.
Use the Number 16 Select Touch Buttons to enter characters after you have
selected them using the other numbered Touch Buttons.
4.After you have entered your name (up to 8 characters), touch the ENT
(Number 16 Select Touch Button). A box will show in the Information Center
Display, “Now saving...Please wait.” When this box disappears and the
screen returns to normal, your Directory name is saved, and you are now
ready to Save files to your new Directory.
Using the Sequencer, Disk Drive & CompactFlash
HA<O> Model XE-1 Owner’s Playing Guide
182
Types of Files
Because a Disk or Card can contain several different types of files, the choices available from the
Information Center Display will vary according to the type of file selected.
For example, if a “Combined Rhythm File” is selected, the Information Center Display will look
similar to this:
A “Combined Rhythm File” is a file which contains a quantity of Disk Styles, and is indicated by a
“C.” The Information Center Display allows you to “LOAD” the file, “SAVE” the file or “VIEW
DETL,” or see the details of what Rhythms the file contains.
If a “Song File” is selected, the Information Center Display will look similar to this:
A Song File will be represented by a Quarter note symbol followed by a “P” if it also contains
Preset data. The Information Center Display allows you to “LOAD” the file, “SAVE” the file or
“DEL,” or delete the file.
If a “Disk Style File” is selected, the Information Center Display will look similar to this:
A Disk Style File will be represented by a “D.” The Information Center Display allows you to
“LOAD” the file.
Using the Sequencer, Disk Drive & CompactFlash
HA<O> Model XE-1 Owner’s Playing Guide
183
An area of the Disk or Card which does not yet contain data is represneted by, “**New File** If
this area is highlighted, the Information Center Display will look similar to this:
The Information Center Display allows you create a new Directory (“NEW DIR”), SAVE whatever
File Type you wish, or save a Disk Style (“SAVE STYL”).
DISK UTIL - CHAIN PLAY
This Advanced Feature allows you to play multiple songs from a Disk or Card. To use this
feature, do the following:
1.Insert a 3
1
/
2
" Floppy Disk which contains Song data into the appropriate slot.
The Information Center Display will display the SONG/SET Menu.
2.Touch the DISK Select
Touch Button to display the
DISK UTIL Menu.
=
3.Touch the Number 11 or Number 12 Select Touch Button to display the
CHAIN PLAY Page.
4.On the left side of the Information Center Display, you will see a list of song
titles or file names. The current location is marked by a cursor which
highlights the letter it is over.
Use the Number 2, 3, 4 or 5 Select Touch Buttons to scroll up through the selections.
Use the Number 10, 11, 12 or 13 Select Touch Buttons to scroll down through the
selections.
The Touch Buttons will continue scrolling until they have reached the last song on the Disk.
Using the Sequencer, Disk Drive & CompactFlash
HA<O> Model XE-1 Owner’s Playing Guide
184
5.Use the Number 1 or Number 2 Select Touch Buttons to select the Mode.
You can select “ONE” (the selected song will play repeatedly), “ALL” (the disk
will play starting with the selected song and continue through to the end, at
which time the first song from the disk will start playing and each song will then
play in the order in which they are on the disk) or “SHUF” (the order in which
the songs play is “shuffled” so that song 4 may follow song 1, song 2 may
follow song 8, etc.).
6.After you have selected which Song you want to begin with, touch either the
Number 6 or Number 14 Select Touch Button to select LOAD. The
Information Center display will look similar to this:
7.Touch the PLAY/PAUSE ( ) Touch Tab. The songs will begin playing
from the disk and continue to play until you touch either the Number 15 or
Number 16 Select Touch Buttons to select “STOP”.
If you wish to stop a song midway through, press the PLAY/PAUSE Touch Button. The
song will stop playing.
If you wish to start the song at the point at which you stopped it, simply touch the
PLAY/PAUSE Touch Button again. The song will start playing again and continue through
to the end.
If you wish to start a song at a specific measure, touch the Number 15 and Number 16
Touch Buttons to scroll through the Measures until the Information Center Display shows
the measure number you want. Then touch the PLAY/PAUSE Touch Tab to start the song
playing at that measure.
If you wish to start a song over again from the beginning, touch the REW/STOP Touch
Tab. This will reset the Information Center Display to measure 1 so that the song will start
from the beginning. Then touch the PLAY/PAUSE Touch Tab to start the song playing.
A DISK UTIL - WHOLE CARD
Because the XE-1 is a very flexible instrument with a great many ways to change its musical
performance, it may be desirable to store the entire contents of memory - Presets, User Rhythms,
Custom Styles, Custom Voices, etc. - to a CompactFlash Card to be retrieved later so that it is
not necessary to re-program the entire instrument each time it is used. The XE-1 gives you this
capability. You can create what is called a WHOLECARD, which simply means the “whole”
memory content of the instrument, and save it to a single CompactFlash Card for later use. You
can even create a whole library of WHOLE CARDS for all of your different musical arrangements.
Saving a WHOLE CARD
1.Program your XE-1 with your own Custom Styles, Rhythm Presets, Presets,
Custom Voices, or other custom options you select.
Using the Sequencer, Disk Drive & CompactFlash
HA<O> Model XE-1 Owner’s Playing Guide
185
2.Insert a CompactFlash Card into the Card Slot.
Using the Sequencer, Disk Drive & CompactFlash
HA<O> Model XE-1 Owner’s Playing Guide
186
3.Touch the DISK Touch Tab or use the MENU/EXIT Touch Button to access the
DISK UTIL Menu. You will now see the DISK UTIL Menu in the Information
Center Display.
4.Touch the Number 5 or Number 6 Select Touch Button to select the WHOLE
CARD Menu. The Information Center Display will look similar to this:
5.If the Card you are using has data on it already and you don’t want to erase
any of it, touch the Number 10, Number 11 or Number 12 Select Touch
Buttons until the words, “New File” are highlighted. Then touch the Number 15
Select Touch Button to select SAVE.
When the box, “Saving WHOLE. Please wait.” disappears and the screen returns to
normal, your new WHOLE CARD is saved.
Loading a WHOLE CARD
1.Insert a CompactFlash Card which contains WHOLE CARD data into the
Card Slot.
2.Touch the DISK Touch Tab or use the MENU/EXIT Touch Button to access the
DISK UTIL Menu. You will now see the DISK UTIL Menu in the Information
Center Display.
Using the Sequencer, Disk Drive & CompactFlash
HA<O> Model XE-1 Owner’s Playing Guide
187
3.Touch the Number 5 or Number 6 Select Touch Button to select the WHOLE
CARD Menu. The Information Center Display will look similar to this:
4.On the left side of the Information Center Display, you will see a list of file
names. The current location is marked by a cursor which highlights the
name.
Use the Number 2, Number 3 or Number 4 Select Touch Button to scroll up through the
selections.
Use the Number 10, Number 11 or Number 12 Select Touch Button to scroll down through
the selections.
5.After you have made your selection, touch the Number 6 or Number 14 Select
Touch Button to select LOAD. The Information Center display will look similar
to this:
6.If you do not want to load the WHOLE CARD, touch the Number 6 Select Touch
Button to select, “CANC.” If you want to load the song, touch the Number 14 Select
Touch Button to select, “OK.” The Information Center Display will show:
When the box, “Loading WHOLE. Please wait.” disappears and the screen returns to
normal, your new WHOLE CARD has been loaded into the XE-1's memory.
Deleting a WHOLE CARD
1.Insert a CompactFlash Card which contains WHOLE CARD data into the
Card Slot.
Using the Sequencer, Disk Drive & CompactFlash
HA<O> Model XE-1 Owner’s Playing Guide
188
2.Touch the DISK Touch Tab or use the MENU/EXIT Touch Button to access the
DISK UTIL Menu. You will now see the DISK UTIL Menu in the Information
Center Display.
Using the Sequencer, Disk Drive & CompactFlash
HA<O> Model XE-1 Owner’s Playing Guide
189
3.Touch the Number 5 or Number 6 Select Touch Button to select the WHOLE
CARD Menu. The Information Center Display will look similar to this:
4.On the left side of the Information Center Display, you will see a list of file
names. The current location is marked by a cursor which highlights the letter
it is over.
Use the Number 2, Number 3, Number 4 or Number 5 Select Touch Button to scroll
upthrough the selections.
Use the Number 10, Number 11, Number 12, or Number 13 Select Touch Button to
scroll down through the selections.
5.When you have made your selection, touch the Number 8 or Number 16
Select Touch Button to select “DEL.” The Information Center Display will then
show “YES” and “NO” on the extreme right side. This is to confirm that you
want to delete the selected WHOLE CARD.
6.Touch the number 8 Select Touch Button to select “YES”. If you DO NOT wish to
delete the WHOLE CARD, touch the Number 7 Select Touch Button to select
“CANC”. If you select “OK”, the WHOLE CARD will then be deleted from the Card.
Special Utility Features
HA<O> Model XE-1 Owner’s Playing Guide
190
SPECIAL UTILITY FEATURES
♦DEMO PLAY
Your Hammond XE-1 contains a number of in-built song and arrangements, called DEMO
SONGS, which are intended to show off the full capabilities of the instrument.
DEMO Touch Tab
This Touch Tab allows you to play the inbuilt Demo Songs, as well as call up
User Rhythms, which are rhythms you have programmed. How to select the
function of this Touch Tab is covered starting on page 162.
Playing the Demo Songs
TRY THIS:
1.Touch the DEMO Touch Tab. The red LED will light, and the Information
Center Display should look similar to this:
NOTE: If you see, “USER RHYTHMS,” displayed at the top of the screen, you will need to change
the function of the DEMO Touch Tab so that it selects the Demo Songs. How to do this is
explained starting on page 162.
The song names are arranged in a pattern corresponding to that of the numbered Touch
Buttons, similar to the Rhythms and Voices, both of which are described earlier. Touching
one of the numbered Touch Buttons will highlight the selected Demo Song name., and that
Demo Song will start playing.
2.For this example, Touch either the Number 1 or Number 2 Select Touch
Buttons. The Information Center Display will now look similar to this:
The first Demo Song will now start playing. When it is finished, the second Demo Song will
play, then the third, and so on until all Demo Songs have played. The first Demo Song will
then start playing again and the entire sequence will repeat.
The order in which the Demo Songs will play is: Top row left to right, then bottom row left to
right, then Top row again, bottom row again, etc.
Special Utility Features
HA<O> Model XE-1 Owner’s Playing Guide
191
3.To stop the Demo Song, simply touch the same Touch Button you touched to
start the Demo Song.
The Demo Song will now stop playing and the Demo Song name will now display normally
in the Information Center Display.
To play another Demo Song, touch the appropriate Touch Button. The newly selected
Demo Song will play, then the next one in order will start and the entire library of Demo
Songs will play until you either touch the appropriate numbered Touch Button or touch the
DEMO Touch Tab to turn the DEMO PLAY feature “OFF.”
NOTE: While the XE-1 is in DEMO PLAY Mode, touching the MENU/EXIT, PLAY, DISPLAY HOLD
or PART/EDIT Touch Buttons will have no effect.
A TUNE Edit Menu
This Advanced Feature Menu allows you to change the overall tuning pitch of the entire
instrument, and the tuning temperament of the Drawbars.
NOTE: This Advanced Feature Menu has no Shortcut. It is accessible only via the MENU/EXIT Touch
Button.
Accessing the TUNE Edit Menu
4.From any of the PLAY Mode Pages, touch the MENU/EXIT Select Touch
Button to see the first page of the MENU Mode. You will see “1/4" displayed
in the extreme upper left corner of the Information Center Display.
1.Touch either the Number 3 or Number 4 Select Touch Buttons. The words, “TUNE
EDIT,” will now display at the top of the screen.
The MASTER TUNE Advanced Feature allows you to change the overall pitch of the entire organ.
The reference pitch is “A-440". The selectable range is from “A-430" through “A-450".
Use the Number 1 or Number 2 Select Touch Button to lower the pitch.
Special Utility Features
HA<O> Model XE-1 Owner’s Playing Guide
192
Use the Number 9 or Number 10 Select Touch Button to raise the pitch.
Special Utility Features
HA<O> Model XE-1 Owner’s Playing Guide
193
The TUNE MODE Advanced Feature allows you to select the tuning temperament of the
Drawbars. You can select either "E-TEMPERA" (Equal Temperament) or "TONEWHEEL,” which
will alter the frequency of certain notes in a manner similar to the characteristics of the tone-
wheel generator used in the B-3, C-3, RT-3 and A-100. The default mode is "TONEWHEEL".
Use the Number 3, Number 4, Number 11 or Number 12 Select Touch Buttons to change
the Tune Mode of the organ.
NOTE: The change in temperament is a subtle effect. It will not be obvious to the untrained ear.
A SYSTEM Menu
This Advanced Feature Menu allows you to select how certain features of the XE-1 operating
system will work.
Accessing the SYSTEM Menu:
1.From any of the PLAY Mode Pages, touch the MENU/EXIT Select Touch
Button to see the first page of the MENU Mode. You will see “1/4" displayed
in the extreme upper left corner of the Information Center Display.
2.Touch the PAGE DOWN Touch Button once. Page 4 of the MENU Mode will
now display.
3.Touch either the Number 11 or Number 12 Select Touch Buttons. The word,
“SYSTEM,” will now display at the top of the screen.
SYSTEM Menu - Page 1
DEFAULT Mode- Reset Procedure
This Advanced Feature Menu Page allows you to reset the XE-1 to factory-default settings.
WARNING!: Doing the following procedure will erase all parameters, settings and registrations,
returning the instrument to the original Hammond factory default settings.
To perform a Reset of the instrument, do the following:
1.From the above page, use the numbered Touch Buttons to select which
portions of the instrument will be Reset with factory-default settings:
“CANCEL”- This will reset the Cancel mode (the instrument’s Control Panel settings when
no Presets are active).
“C.PRESET” - This will reset the CombinationPresets.
“R.PRESET” - This will reset the RhythmPresets.
Special Utility Features
HA<O> Model XE-1 Owner’s Playing Guide
194
“C.VOICE” - This will reset the Custom Voices.
“C.STYLE” - This will reset the Custom Styles.
“USER RHY” - This will reset the User Rhythms.
“GLOBAL” - This will reset the Global Parameters.
“ALL” - This will reset the entire instrument.
Special Utility Features
HA<O> Model XE-1 Owner’s Playing Guide
195
Use either the Number 4 or Number 5 Select Touch Button to scroll up through the
choices.
Use either the Number 11 or Number 12 Select Touch Button to scroll down through the
choices.
2.Touch the Number 16 Select Touch Button to select “YES”, and Reset the
instrument to the default settings you have chosen. If you DO NOT wish to
Reset, touch either the PLAY or the MENU/EXIT Select Touch Button.
SYSTEM Menu - Page 2
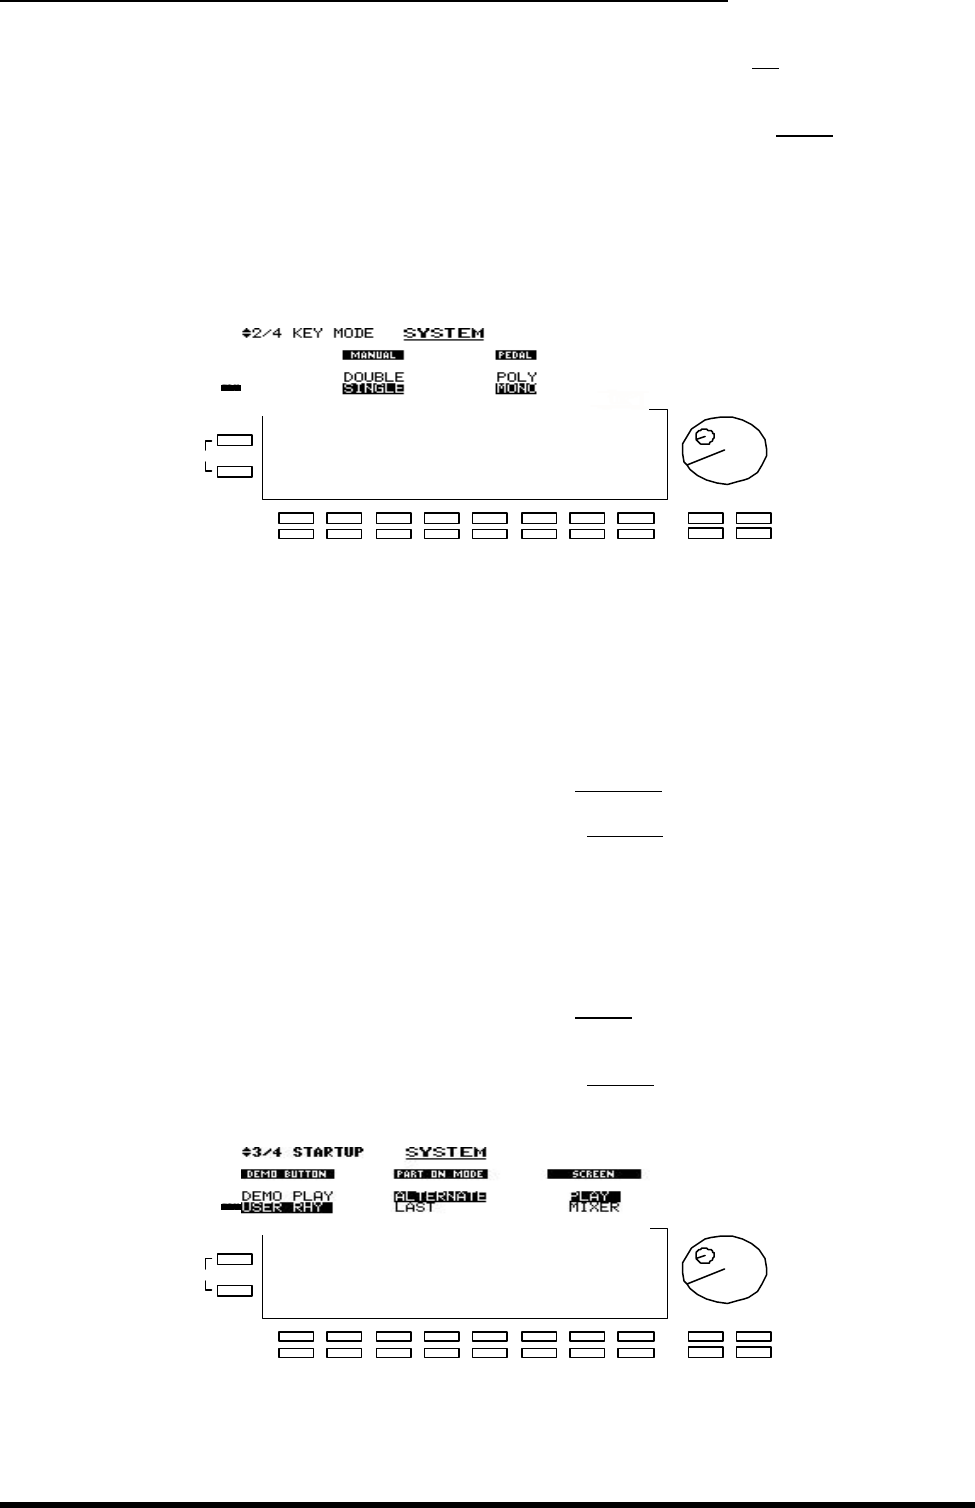
Manual Mode
Use this Advanced Feature when you want to connect a Hammond XLK-1 keyboard to your XE-1.
If you are using an XLK-1 keyboard as your Lower Manual, set Manual Mode to “DOUBLE” so
that features affecting manual operation, such as Keyboard Split, will work correctly. If you are
using the XE-1 without the XLK-1 keyboard, use “SINGLE mode, which is the normal default
setting.
Use the Number 3 Select Touch Button to select DOUBLE mode.
Use the Number 11 Select Touch Button to select SINGLE mode.
Pedal Mode
This Advanced Feature allows you to select whether the Pedals play only one note at a time or
several notes at once.
Use the Number 6 Select Touch Button to select POLY (polyphonic - several notes at
once).
Use the Number 14 Select Touch Button to select MONO (monophonic - one note).
SYSTEM Menu - Page 3
DEMO Touch Tab Mode
Special Utility Features
HA<O> Model XE-1 Owner’s Playing Guide
196
This Advanced Feature allows you to select whether you want to use the DEMO Touch Tab to
play the inbuilt Demo Songs, or to play User Rhythms you have created using the RHYTHM EDIT
Advanced Feature.
Special Utility Features
HA<O> Model XE-1 Owner’s Playing Guide
197
Use the Number 1 or Number 2 Select Touch Button to select DEMOPLAY.
Use the Number 9 or Number 10 Select Touch Button to select USERRHYTHM.
Part On Mode
This Advanced Feature allows you to select how the different Parts work with each other. You
can select “ALTERNATE” (when one Part is selected, such as UPPER 1, any other Parts that
might be on will automatically cancel) or “LAST” (the Parts are all additive, much like stops on an
organ).
Use the Number 4 or Number 5 Select Touch Button to select ALTERNATE Mode.
Use the Number 12 or Number 13 Select Touch Button to select LAST Mode.
PLAY/MIXER Mode Select
This Advanced Feature allows you to select whether PLAY Mode or MIXER Mode is the first
screen which displays after the XE-1 is first turned “ON” and after the introductory screen
displays.
Use the Number 7 or Number 8 Select Touch Button to select PLAYMode.
Use the Number 15 or Number 16 Select Touch Button to select MIXERMode.
SYSTEM Menu - Page 4
Software Version
This Advanced Feature Menu Page allows you to see the software version of your XE-1. The
software is in six sections: “MAIN” or the Main system program, “GENERATOR” or the tone
generating system, “DRAWBAR,” “STYLE” or the Rhythm & Style-playing software, “C.PRESET”
or the Combination Presets, and “R.PRESET” or the Rhythm Presets.
This page requires no button presses. It is simply an information screen to show the version of
your software.
HA<O> Model XE-1 Owner’s Playing Guide
198
INSTRUMENT CARE
♦AC Power
Be sure to turn the instrument “OFF” after use, and do not turn the unit “ON” and “OFF” in quick
succession, as this places an undue load on the electronic components.
♦Cabinet And Bench
As with any piece of furniture, direct sunlight can damage the finish of your instrument. Use a soft dry
cloth for dusting. To remove fingerprints or dulling film, use a soft cloth slightly moisten with water and
a little mild soap. Immediately wipe dry with a soft dry cloth.
♦Keys And Buttons
To clean keys and buttons, use a clean soft cloth moistened with water. Do not use any solvents,
thinners or dryers such as alcohol, gasoline, lighter fluid, carbon tetrachloride, etc. These solutions
may affect the letters and/or finish on the buttons and keys.
♦Moving Your Instrument
It is not necessary to bolt or fasten any parts of the instrument when moving. Careful consultation with
your mover will assure you of a satisfactory moving job.
HA<O> Model XE-1 Owner’s Playing Guide
199
♦IMPORTANT NOTE - BATTERY
Your Hammond XE-1 uses a battery-backed RAM to remember your changes to the Presets,User
Rhythms, Custom Styles, etc. When the battery voltage becomes low, the Information Center
Display will show:
If you see this message, you should immediately back up your parameter changes, if you have
made any. If there is no battery installed in the unit, or if the battery is completely dead, the
Information Center Display will show:
After the above message is displayed, the XE-1 will re-initialize itself, and the factory default
settings will be restored. Therefore, it is a good idea to periodically back up your data.
HA<O> Model XE-1 Owner’s Playing Guide
200
CAUTION
Danger of explosion if lithium battery is incorrectly replaced. Replace only with the same or equivalent
type recommended by the equipment manufacturer. Discard used batteries according to
manufacturer's instructions.
ADVARSELL
Lithiumbatteri. Eksplosionsfare ved fejlagtig håndering. Udskiftning må kun ske med batteri af samme
fabrikat og type. Lebér det brugte batteri tilbage til leverandøren.
Norge:ADVARSEL
Lithiumbatteri - Eksplosjonsfare. Ved utskiftning benyttes kun batteri som anbefalt av
apparatfabrikanten. Brukt batteri returneres apparatleverandøren.
Sverige:VARNING
Explosionsfara vid felaktigt batteribyte. Anv_nd samma batterityp eller et ekvivalent typ som
rekommenderes av apparattillverkaren, Kassera anv_nt batteri enlig fabrikantens instruktion.
Finland:VAROITUS
Paristo vo_ r_j_ht__, jos se on virheelliseeti ansennettu Vaihda paristo ainoastaan laitevalmistajan
suosittelemaan tyyppiin, H_v_t_ k_ytetty paristo valmistajan ohjeiden mukaisesti.
Manufacturer assumes no responsibility for loss of memory caused by damage to the unit after purchase, such as power surges,
battery replacement, repair, etc.
HA<O> Model XE-1 Owner’s Playing Guide
201
Hammond maintains a policy of continuously improving and upgrading its instruments and therefore
reserves the right to change specifications without notice. Although every attempt has been made to
insure the accuracy of the descriptive contents of this Guide, total accuracy cannot be guaranteed.
Should the player require further assistance, inquiries should first be made to your Authorized
Hammond Dealer. If you still need further assistance, contact Hammond at the following addresses:
In the United States contact:
HAMMOND SUZUKI USA, Inc.
733 Annoreno Dr.
Addison, IL 60101
UNITED STATES
In Europe contact:
HAMMOND SUZUKI EUROPE
B.V.
IR. D.S. Tuynmanweg 4A
4131 PN Vianen
THE NETHERLANDS
E-
mail:info@hammondsuzuki.com
Website:www.hammondsuzuki.co
m
All other countries contact:
HAMMOND SUZUKI Ltd.
25-12, Ryoke 2 Chome
Hamamatsu 430-0852
(Shizuoka)
JAPAN
Technical materials are available and can be obtained by mailing a request to the appropriate address listed above marked ATTENTION: SERVICE DEPARTMENT.
Manufacturer:
SUZUKIMUSICALINSTRUMENTMFG.CO.,Ltd
25-12, Ryoke 2 Chome
Hamamatsu 430-0852 (Shizuoka)
JAPAN
ACKNOWLEDGMENTS
In appreciation of the many fine players who have made their contributions to Hammond over
the years:
Axel Alexander
Milt Buckner
Buddy Cole
Jesse Crawford
Wild Bill Davis
Jackie Davis
"Papa" John DeFrancesco
Joey DeFrancesco
Lenny Dee
Collins Driggs
Artie Dunn
Eddie Dunstedter
Charles Earland
Richard Ellsasser
Keith Emerson
Fred Feibel
Virgil Fox
Ken Griffin
Jon Hammond
Glenn Hardman
Porter Heaps
Richard "Groove" Holmes
Milt Herth
Bob Kames
Al Kooper
Eddie Layton
Jon Lord
Captain Jack McDuff
Jimmy McGriff
Lee Micheals
Don Patterson
Big John Patton
Richard Purvis
Bob Ralston
Rosa Rio
Freddie Roach
Bryan Rodwell
Dr. Mario Salvador
Shirley Scott
Hal Shutz
Ethel Smith
Jimmy Smith
Cor Steyn
Paul Taubman
Shay Torrent
Juan Torres
Rick Wakeman
Thomas "Fats" Waller
Walter Wanderly
Lew White
Baby Face Willette
George Wright
Klaus Wunderlich
Pietro Yon
Larry Young
and many others too numerous to
list.
HAMMOND SUZUKI, LTD., Hamamatsu, JapanPrinted in Japan
Hallo, Hoe kan ik in een Hammond XE-1 de ritme disk afspelen ik heb alles gedownload en opgeslagen maar kan het niet afspelen. Heel vriendelijk bedankt om te antwoorden
Gesteld op 31-5-2024 om 12:44
Helaas heb ik geen antwoord op je vraag omdat ik nog steeds op zoek ben naar de door jou genoemde style cards.. en moeite hebt om ze te kunnen gebruiken. Kan jij me misschien daar aan helpen? Dan is er een mogelijkheid om je te laten weten hoe het wel kan....hoop ik dan. Mvg Eric
Geantwoord op 1-6-2024 om 16:38
Hi Eric, Heb die styles gekocht bij Pedro van Muziekhuis DERA : info@muziekhuisdera.nl> en heb dus alles gedownload en op opslaan geklikt en ze staan erin in m'n Hammond maar weet niet hoe ik het moet doen om ze af te spelen. Mvg Rosalyne Geantwoord op 2-6-2024 om 13:07
Beste Rosalyne, Hartelijk dank voor je tip,ik ga ze morgen benaderen. Heb je de gebruiksaanwijzing van de XE1 doorgenomen? Volgens mij is er duidelijk uitgelegd hoe het moet. Als ik meer weet geef ik het door ok? Veel succes en speel plezier!!!! Mvg Eric
Geantwoord op 3-6-2024 om 01:41
Oké Eric, maar Pedro is afwezig tot 17 juni hij zit in Italîe. Weet u ook misschien hoe je de schrijfbeveiliging kunt verwijderen in de Hammond xe-1 want krijg steeds dat venstertje maar kan ze niet verwijderen om een oude disk te formateren en er dan styles op te zetten? Groetjes Rosalynr van
Geantwoord op 3-6-2024 om 12:50
Ook op je gestelde vraag heb ik geen antwoord. Ik heb geen ervaring met de style cards,instaleren of schijfbeveiliging....zal ik moeten leren als ik de schijven heb. De gebruikershandleiding kan je gratis downloaden. Via Google.
Hallo, ik ben op zoek naar de gebruikshandleiding van de XE2 Bij voorbaat dank Mvg Eric van Santen ericvansanten54@gmail.com
Gesteld op 10-11-2021 om 09:35
Ik heb een vraag. Ik zou dit toestel kopen van iemand, maar de split werkt niet, ik heb nochtans de split ingesteld, maar dit blijft steeds op de upper klank + ik heb de indruk dat ik geen 2 klanken samen op de upper kan zetten en daar de lower niet werkt, dus ook niet op de lower. Kan iemand helpen ?
Gesteld op 28-1-2021 om 14:28
ik heb een 30-tonig pedaal gekoppeld aan de twee klaviers XE-1, maar nadat ik wat wijzigingen in de instellingen heb gedaan werkt dat niet zelfstandig meer, maar is gekoppeld aan het bovenklavier. Weet iemand hoe ik dat kan herstellen?
Gesteld op 10-10-2020 om 17:07
Hallo mede Hammond liefhebbers. Is er iemand die weet hoe je bij de aansluitingen komt achterop de Hammond XE1. Ik denk dat het chassis deel van het volume pedaal een losse aansluiting heeft. Wie weet hoe het los kan?? Groet Hans Wessels
Gesteld op 18-2-2018 om 12:57
Gebruikershandleiding.com neemt misbruik van zijn services uitermate serieus. U kunt hieronder aangeven waarom deze vraag ongepast is. Wij controleren de vraag en zonodig wordt deze verwijderd.
Product:
Spelregels forum
Om tot zinvolle vragen te komen hanteren wij de volgende spelregels:
lees eerst de handleiding door;
controleer of uw vraag al eerder door iemand anders is gesteld;
probeer uw vraag zo duidelijk mogelijk te stellen;
heeft u een probleem en al geprobeerd om dit op te lossen, vermeld dit erbij aub;
heeft u een oplossing gekregen van een bezoeker dan horen wij dat graag in dit forum;
wilt u een reactie geven op een vraag of antwoord, gebruik dan niet dit formulier maar klik op de knop 'reageer op deze vraag';
uw vraag wordt direct op de website gezet; vermijd daarom persoonlijke gegevens in te vullen;
Belangrijk! Als er een antwoord wordt gegeven op uw vraag, dan is het voor de gever van het antwoord nuttig om te weten als u er wel (of niet) mee geholpen bent! Wij vragen u dus ook te reageren op een antwoord.
Belangrijk! Antwoorden worden ook per e-mail naar abonnees gestuurd. Laat uw emailadres achter op deze site, zodat u op de hoogte blijft. U krijgt dan ook andere vragen en antwoorden te zien.
Abonneren
Abonneer u voor het ontvangen van emails voor uw Hammond XE-1 bij:
nieuwe vragen en antwoorden
nieuwe handleidingen
U ontvangt een email met instructies om u voor één of beide opties in te schrijven.
Ontvang uw handleiding per email
Vul uw emailadres in en ontvang de handleiding van Hammond XE-1 in de taal/talen: Nederlands als bijlage per email.
De handleiding is 1,95 mb groot.
U ontvangt de handleiding per email binnen enkele minuten. Als u geen email heeft ontvangen, dan heeft u waarschijnlijk een verkeerd emailadres ingevuld of is uw mailbox te vol. Daarnaast kan het zijn dat uw internetprovider een maximum heeft aan de grootte per email. Omdat hier een handleiding wordt meegestuurd, kan het voorkomen dat de email groter is dan toegestaan bij uw provider.
Stel vragen via chat aan uw handleiding
Stel uw vraag over deze PDF
Uw handleiding is per email verstuurd. Controleer uw email
Als u niet binnen een kwartier uw email met handleiding ontvangen heeft, kan het zijn dat u een verkeerd emailadres heeft ingevuld of dat uw emailprovider een maximum grootte per email heeft ingesteld die kleiner is dan de grootte van de handleiding.
Er is een email naar u verstuurd om uw inschrijving definitief te maken.
Controleer uw email en volg de aanwijzingen op om uw inschrijving definitief te maken
U heeft geen emailadres opgegeven
Als u de handleiding per email wilt ontvangen, vul dan een geldig emailadres in.
Uw vraag is op deze pagina toegevoegd
Wilt u een email ontvangen bij een antwoord en/of nieuwe vragen? Vul dan hier uw emailadres in.