15
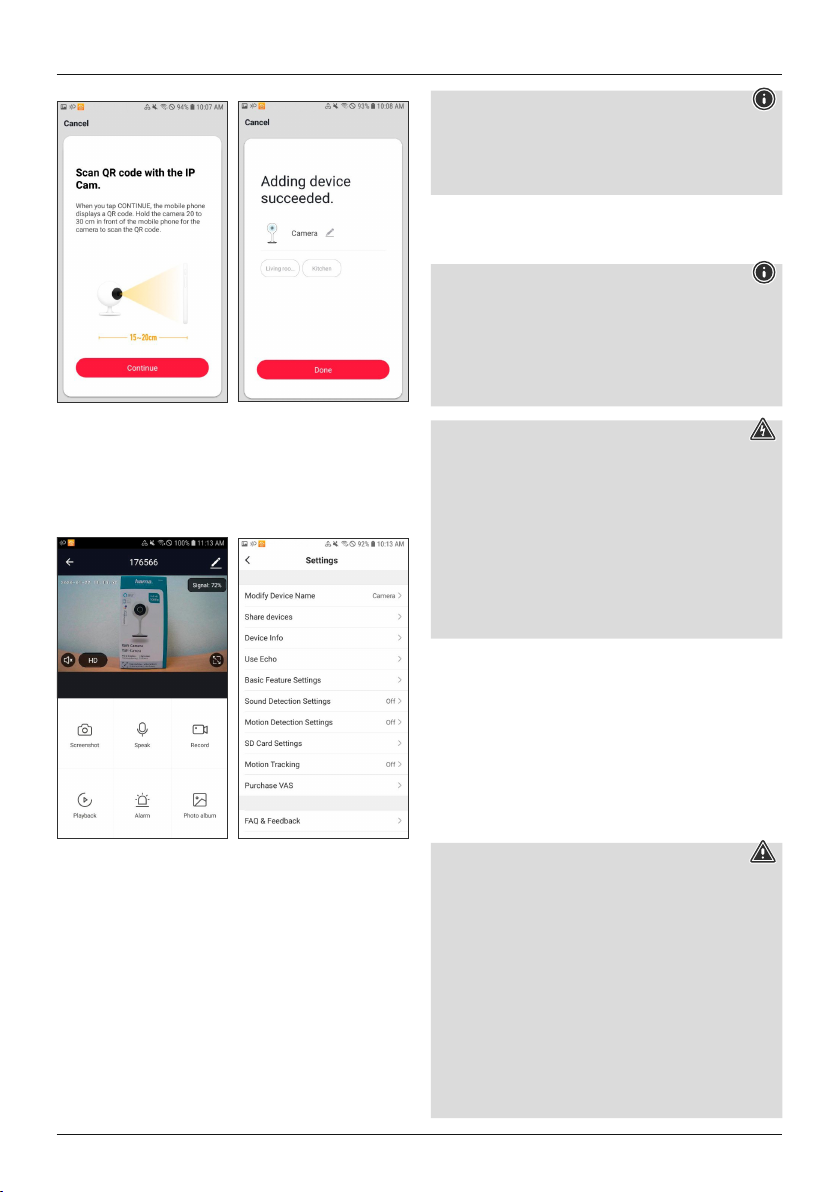
•Once the connection has been established, the LED stops
flashing quickly and emits a constant blue light; the app
confirms that your camera was connected. You can now
give the camera a name.
•Click ‘Finish’ to complete the process.
•Now you can attach the camera and set up, control and
configure it using the app.
•‘Screenshot’ allows you to take a snapshot.
•‘Speak’ allows you to speak via the camera.
•‘Record’ allows you to record the image currently shown
and store it in your gallery.
•‘Playback’ allows you to view past video recordings. They
are stored in encrypted form on an SD card (not included
in delivery), which must be inserted into the camera.
•‘Alarm’ allows you to access the motion detection
settings and configure them.
•‘Photo Album / Cloud Storage’ allows you to locate the
recorded images and videos.
Note - Pairing restart
Press and hold the Reset button on the back for
approximately 5 seconds until a signal tone sounds.
As soon as the LED begins to flash red, you can make
another pairing attempt.
4.7 WiFi controller for LED strips
4.7.1 Product features
Note
•Protect the product from dirt, moisture and
overheating, and only use it in a dry environment.
•Operate the product only with a mains plug that is
approved for the device, and connect it to a socket
approved for the device. The socket must be installed
close to the product and must be easily accessible.
Risk of electric shock
•Do not use damaged or unsuitable power supply units
or LED light strips.
•When changing LED light strips, always ensure that the
LED light strip in question is current-free. Switch off the
current and/or pull the mains plug.
•Do not open the product. Do not continue to operate
the product if it is damaged, which may be indicated
by smoke, odours or loud noises. Contact your dealer
or our service department immediately (see „Service
and support“).
4.7.2 Installation
•Connect the WiFi controller to an LED light strip. Make
sure that the polarity is correct: The arrow on the plug
indicates that the contact that must be connected to the
12 V contact of the LED light strip. Please also refer to
the operating instructions for the LED light strip used.
•Then connect the controller to a properly installed and
easily accessible power socket via a power supply unit.
Please refer to the operating instructions for the power
supply unit used.
Warning
•Use this product only with power supply units and
LED light strips (GRB, BRG) that are approved for
the application. To this end, check the technical
specifications of the power supply unit, LED light strip
and WiFi controller for compatibility.
•Before carrying out the installation, check that the
power supply unit and LED light strip are in perfect
technical condition.
•Please note that lights (even LEDs) can generate heat
and may become hot. Always let the light cool off for a
few minutes before touching it or changing it.
•Disconnect the product from the mains if it will not be
used for a long period of time.