WARNING!To reduce the possibility of heat-related injuries or of overheating the computer, do not place
the computer directly on your lap or obstruct the computer air vents. Use the computer only on a hard, at
surface. Do not allow another hard surface, such as an adjoining optional printer, or a soft surface, such as
pillows or rugs or clothing, to block airow. Also, do not allow the AC adapter to come into contact with the
skin or a soft surface, such as pillows or rugs or clothing, during operation. The computer and the AC adapter
comply with the user-accessible surface temperature limits dened by the International Standard for Safety
of Information Technology Equipment (IEC 60950-1).
iii
iv Safety warning notice
Table of contents
1 Starting right ................................................................................................................................................ 1
Visit the HP Apps Store .......................................................................................................................................... 1
Best practices ......................................................................................................................................................... 1
More HP resources ................................................................................................................................................. 2
2 Getting to know your computer ...................................................................................................................... 4
Right side ............................................................................................................................................................... 5
Left side ................................................................................................................................................................. 6
Top .......................................................................................................................................................................... 8
3 Connecting to a network .............................................................................................................................. 16
Connecting to a wireless network ....................................................................................................................... 16
Using the wireless controls ............................................................................................................... 16
Operating system controls ............................................................................................. 16
Connecting to a WLAN ....................................................................................................................... 17
Using HP Mobile Broadband (select products only) .......................................................................... 17
Using GPS (select products only) ...................................................................................................... 18
Using Bluetooth wireless devices (select products only) ................................................................. 18
Connecting Bluetooth devices ........................................................................................ 18
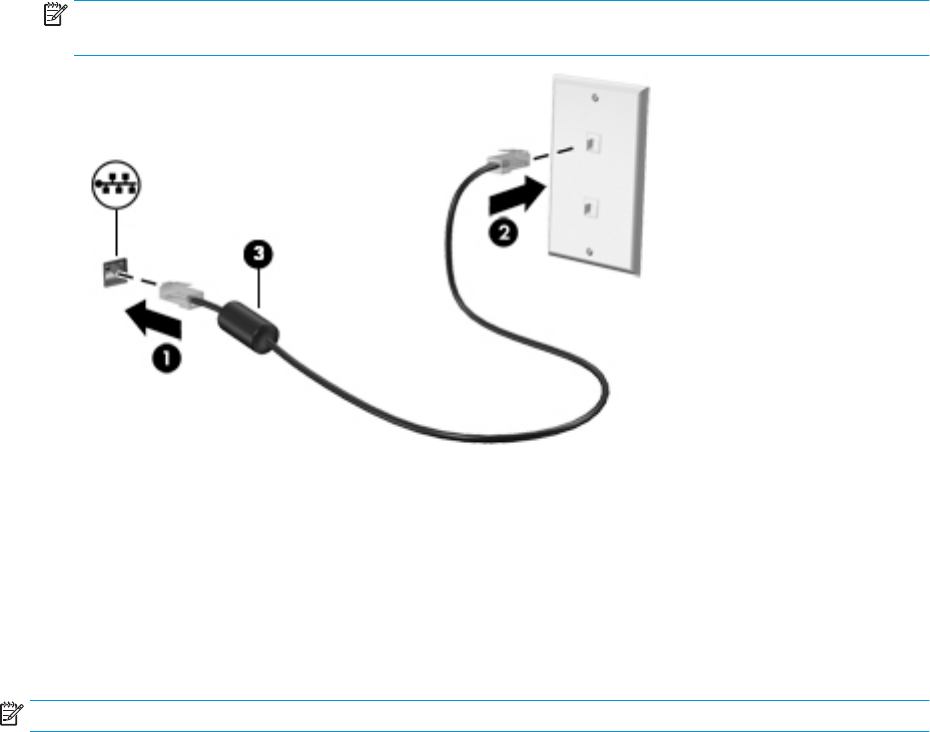
Connecting to a wired network—LAN (select products only) ............................................................................. 18
Sharing data and drives and accessing software ................................................................................................ 19
4 Enjoying entertainment features .................................................................................................................. 20
Using the camera ................................................................................................................................................. 20
v
Using audio .......................................................................................................................................................... 20
Using sound settings ......................................................................................................................... 21
Using video .......................................................................................................................................................... 21
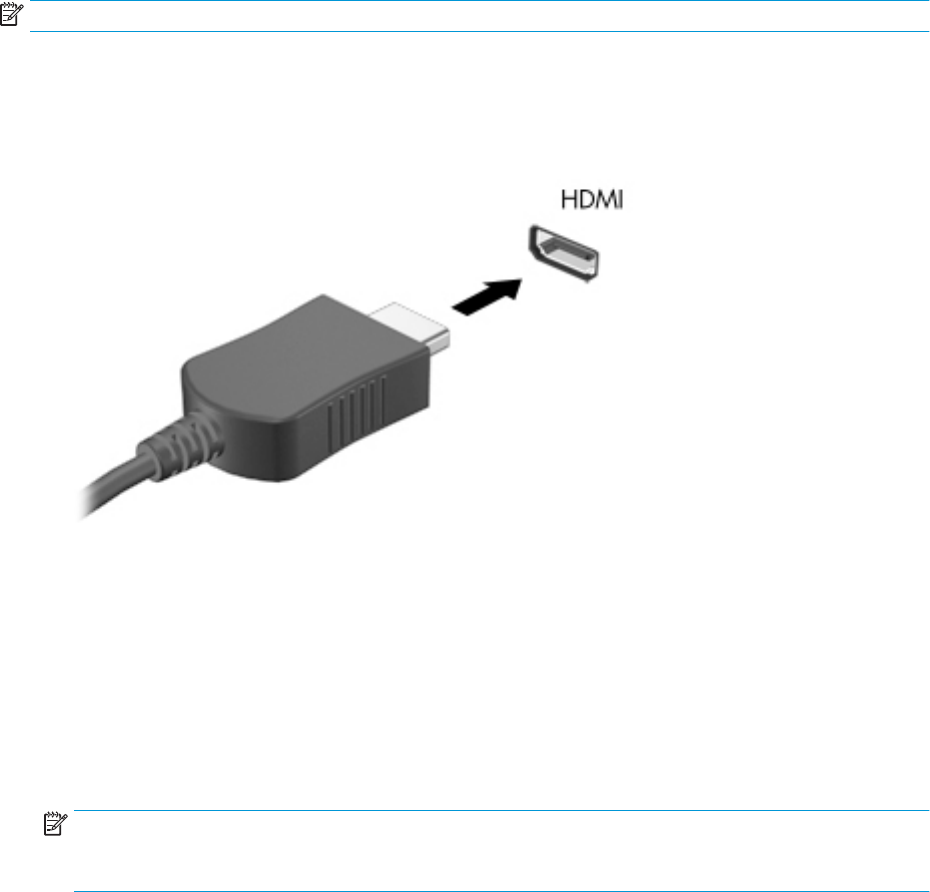
Connecting video devices using an HDMI cable ................................................................................ 22
Setting up HDMI audio .................................................................................................... 22
Discovering and connecting to Miracast-compatible wireless displays (select products only) ...... 23
Using gaming features ......................................................................................................................................... 23
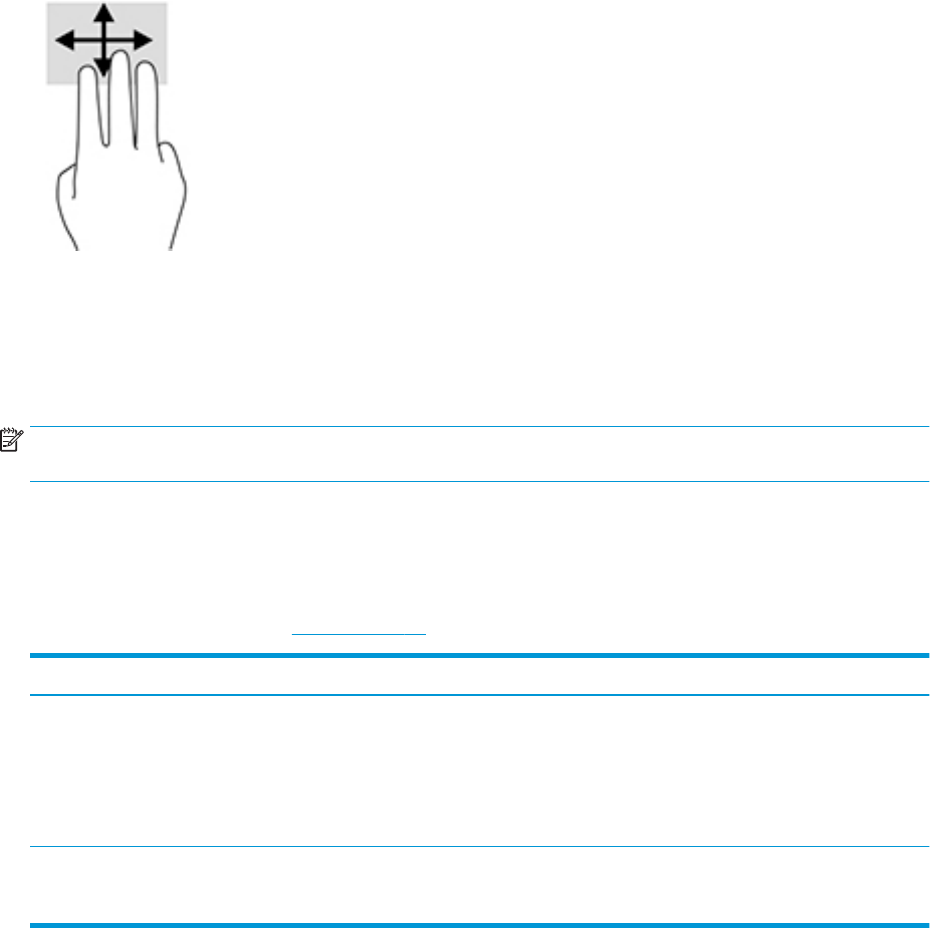
5 Navigating the screen .................................................................................................................................. 24
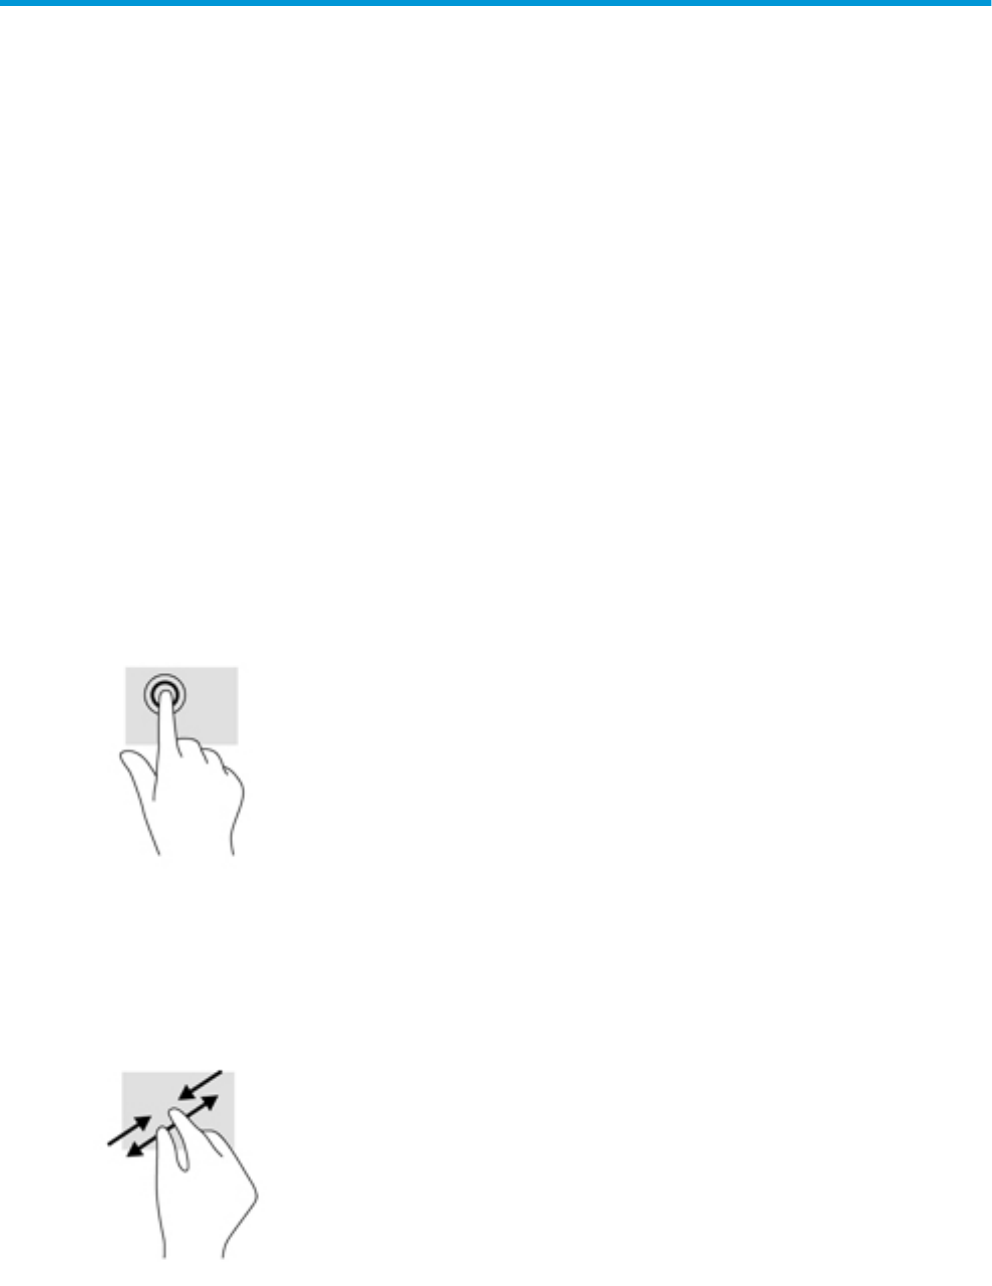
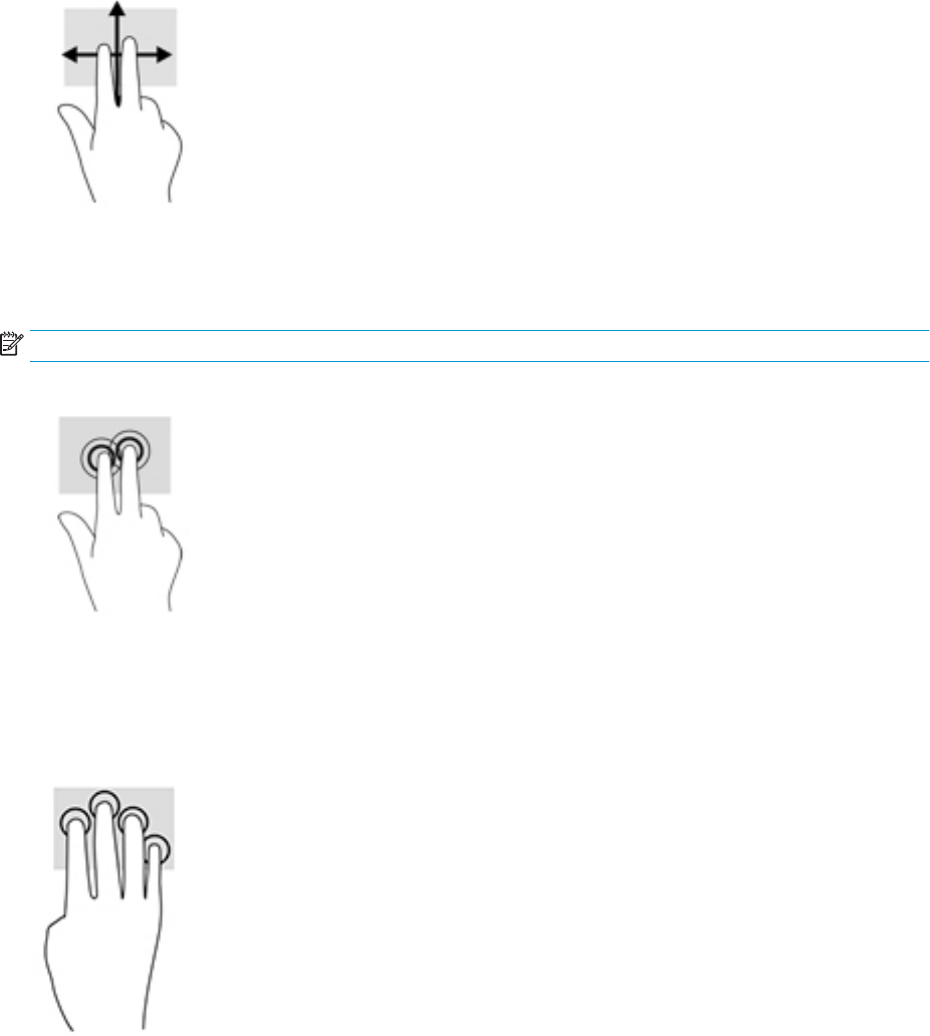
Using TouchPad gestures .................................................................................................................................... 24
Tap ..................................................................................................................................................... 24
Using the keyboard and optional mouse ............................................................................................................. 26
Using the integrated numeric keypad ................................................................................................................. 26
6 Managing power .......................................................................................................................................... 27
Initiating and exiting Sleep and Hibernation ....................................................................................................... 27
Manually initiating and exiting Sleep ................................................................................................ 28
Manually initiating and exiting Hibernation (select products only) ................................................. 28
Setting password protection on wakeup (exiting Sleep or Hibernation) ......................................... 28
Using the power meter and power settings ........................................................................................................ 29
Running on battery power ................................................................................................................................... 29
Resolving a low battery level ............................................................................................................ 31
Resolving a low battery level when external power is available ................................... 31
Resolving a low battery level when no power source is available ................................. 31
Resolving a low battery level when the computer cannot exit Hibernation .................. 31
Running on AC power ........................................................................................................................................... 31
Troubleshooting power problems ..................................................................................................... 32
vi
Shutting down (turning o) the computer .......................................................................................................... 32
7 Maintaining your computer .......................................................................................................................... 34
Using Disk Defragmenter .................................................................................................................. 34
Using Disk Cleanup ............................................................................................................................ 34
Using HP 3D DriveGuard (select products only) ................................................................................ 34
Identifying HP 3D DriveGuard status .............................................................................. 35
Updating programs and drivers .......................................................................................................................... 35
Cleaning your computer ...................................................................................................................................... 35
Cleaning the display ........................................................................................................ 36
Cleaning the sides or cover ............................................................................................. 36
Cleaning the TouchPad, keyboard, or mouse (select products only) ............................. 36
Traveling with or shipping your computer .......................................................................................................... 36
8 Securing your computer and information ...................................................................................................... 38
Using passwords .................................................................................................................................................. 38
Setting Windows passwords ............................................................................................................. 38
Using Windows Hello (select products only) ....................................................................................................... 39
Using Internet security software ......................................................................................................................... 39
Using antivirus software ................................................................................................................... 40
Using rewall software ..................................................................................................................... 40
Determining the BIOS version ........................................................................................................... 42
Downloading a BIOS update .............................................................................................................. 43
10 Using HP PC Hardware Diagnostics (UEFI) ..................................................................................................... 44
Downloading HP PC Hardware Diagnostics (UEFI) to a USB device .................................................................... 44
vii
11 Backing up, restoring, and recovering ......................................................................................................... 46
Creating recovery media and backups ................................................................................................................ 46
Creating HP Recovery media (select products only) ......................................................................... 46
Using Windows tools ........................................................................................................................................... 47
Restore and recovery ........................................................................................................................................... 48
Recovering using HP Recovery Manager ........................................................................................... 48
What you need to know before you get started ............................................................. 48
Using the HP Recovery partition (select products only) ................................................. 49
Using HP Recovery media to recover .............................................................................. 49
Changing the computer boot order ................................................................................ 50
Removing the HP Recovery partition (select products only) ......................................... 51
Input power .......................................................................................................................................................... 52
Contacting support .............................................................................................................................................. 55
Index ............................................................................................................................................................. 56
viii
1Starting right
This computer is a powerful tool designed to enhance your work and entertainment. Read this chapter to
learn about best practices after you set up your computer, fun things to do with your computer, and where to
nd additional HP resources.
Visit the HP Apps Store
The HP Apps Store oers a wide choice of popular games, entertainment and music apps, productivity apps,
and apps exclusive to HP that you can download to the desktop. The selection is updated regularly and
includes regional content and country-specicoers. Be sure to check the HP Apps Store frequently for new
and updated features.
IMPORTANT:You must be connected to the Internet to access the HP Apps Store.
To view and download an app:
1.Select the Start button, and then select the Store app.
‒ or –
Select the Store icon next to the taskbar search box.
2.Select the app you want to download, and then follow the on-screen instructions. When the download is
complete, the app appears on the All apps screen.
Best practices
After you set up and register the computer, we recommend the following steps to get the most out of your
smart investment:
●
Back up your hard drive by creating recovery media. See Backing up, restoring, and recovering
on page 46.
●
If you haven’t already done so, connect to a wired or wireless network. See details in Connecting to a
network on page 16.
●
Become familiar with the computer hardware and software. For more information, see Getting to know
your computer on page 4 and Enjoying entertainment features on page 20.
●
Update or purchase antivirus software. See Using antivirus software on page 40.
Visit the HP Apps Store1
More HP resources
To locate resources that provide product details, how-to information, and more, use this table.
ResourceContents
Setup Instructions
●
Overview of computer setup and features
HP support
For HP support, go to http://www.hp.com/support.
●
Online chat with an HP technician
●
Support telephone numbers
●
HP service center locations
Safety & Comfort Guide
To access this guide:
▲
Select the Start button, select All apps, select HP
Help and Support, and then select HP
Documentation.
‒ or –
▲
Select the Start button, select All apps, select HP,
and then select HP Documentation.
‒ or –
▲
Type support in the taskbar search box, and then
select the HP Support Assistant app. Select My PC,
select the Specications tab, and then select User
Guides.
‒ or –
▲
Click the question mark icon in the taskbar. Select My
PC, select the Specications tab, and then select
User Guides.
‒ or –
▲
Go to http://www.hp.com/ergo.
IMPORTANT:You must be connected to the Internet
to access the latest version of the user guide.
●
Proper workstation setup
●
Guidelines for posture and work habits that increase your comfort
and decrease your risk of injury
●
Electrical and mechanical safety information
Regulatory, Safety and Environmental Notices
To access this document:
▲
Select the Start button, select All apps, select HP
Help and Support, and then select HP
Documentation.
‒ or –
▲
Select the Start button, select All apps, select HP,
and then select HP Documentation.
‒ or –
▲
Type support in the taskbar search box, and then
select the HP Support Assistant app. Select My PC,
select the Specications tab, and then select User
Guides.
‒ or –
●
Important regulatory notices, including information about proper
battery disposal, if needed.
2Chapter 1 Starting right
ResourceContents
▲
Click the question mark icon in the taskbar. Select My
PC, select the Specications tab, and then select
User Guides.
Limited Warranty*
To access this document:
▲
Select the Start button, select All apps, select HP
Help and Support, and then select HP
Documentation.
‒ or –
▲
Select the Start button, select All apps, select HP,
and then select HP Documentation.
‒ or –
▲
Type support in the taskbar search box, and then
select the HP Support Assistant app. Select My PC,
select the Specications tab, and then select User
Guides.
‒ or –
▲
Click the question mark icon in the taskbar. Select My
PC, select the Specications tab, and then select
User Guides.
‒ or –
▲
Go to http://www.hp.com/go/orderdocuments.
IMPORTANT:You must be connected to the Internet
to access the latest version of the user guide.
●
Specic warranty information about this computer
*You can nd your HP Limited Warranty located with the user guides on your product and/or on the CD or DVD provided in the box. In
some countries or regions, HP may provide a printed warranty in the box. For countries or regions where the warranty is not provided
in printed format, you can request a copy from http://www.hp.com/go/orderdocuments. For products purchased in Asia Pacic, you can
write to HP at POD, PO Box 161, Kitchener Road Post Oce, Singapore 912006. Include your product name, and your name, phone
number, and postal address.
More HP resources3
2Getting to know your computer
Locating hardware
To nd out what hardware is installed on your computer:
▲
Type device manager in the taskbar search box, and then select the Device Manager app.
A list displays all the devices installed on your computer.
For information about system hardware components and the system BIOS version number, press fn+esc
(select products only).
Locating software
To nd out what software is installed on your computer:
▲
Select the Start button, and then select All apps.
‒ or –
Right-click the Start button, and then select Programs and Features.
4Chapter 2 Getting to know your computer
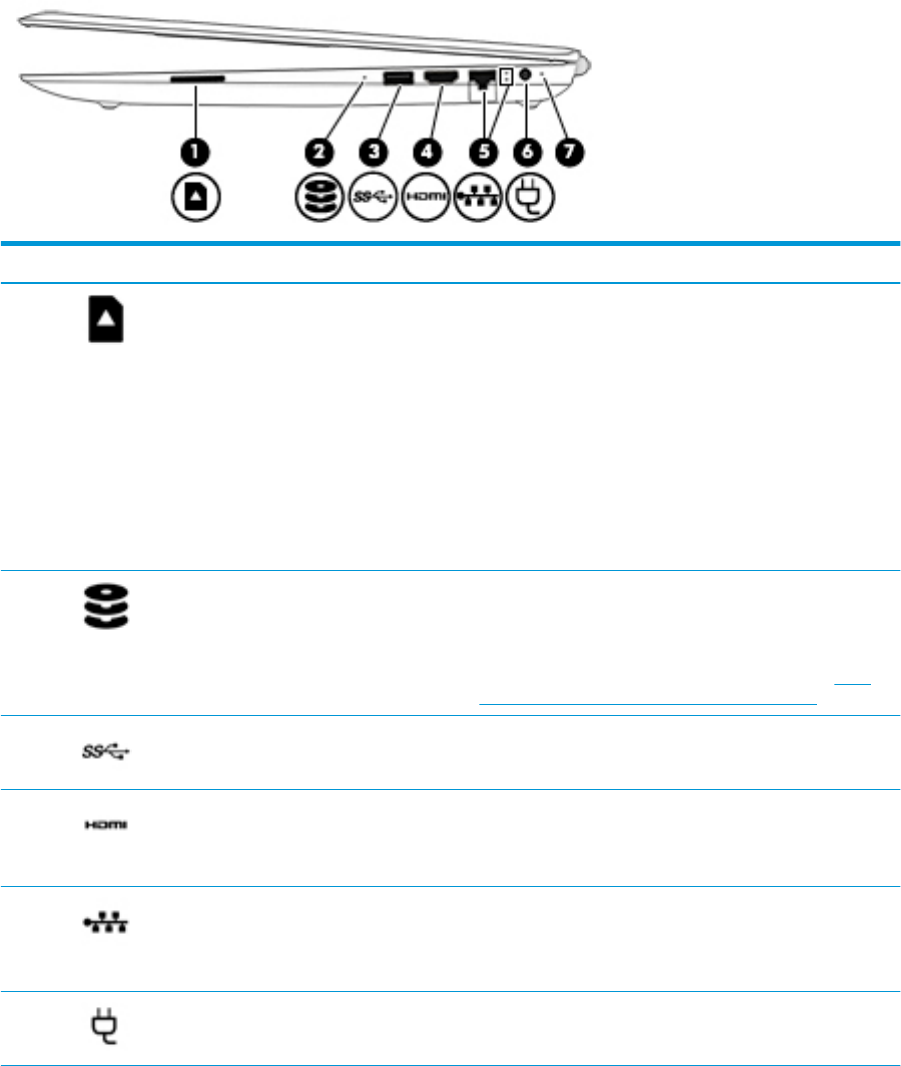
Right side
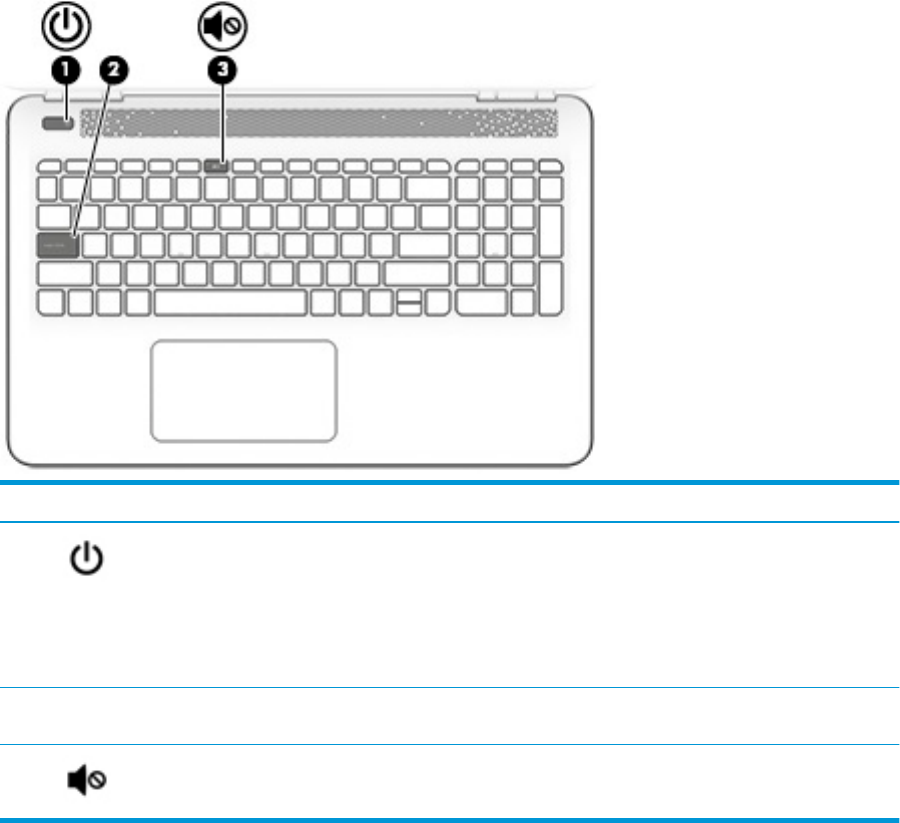
Description
(1)Memory card readerReads optional memory cards that enable you to store,
manage, share, or access information.
To insert a card:
1.
Hold the card label-side up, with connectors facing the
computer.
2.
Insert the card into the memory card reader, and then
press in on the card until it is rmly seated.
To remove a card:
▲
Press in on the card, and then remove it from the
memory card reader.
(2)Drive light (select products only)
●
Blinking white: The hard drive is being accessed.
●
Amber: HP 3D DriveGuard has temporarily parked the
hard drive (select products only).
NOTE:For information about HP 3D DriveGuard, see Using
HP 3D DriveGuard (select products only) on page 34.
(3)USB 3.0 portConnects an optional USB device, such as a keyboard, mouse,
external drive, printer, scanner or USB hub.
(4)HDMI portConnects an optional video or audio device, such as a high-
denition television, any compatible digital or audio
component, or a high-speed High Denition Multimedia
Interface (HDMI) device.
(5)RJ-45 (network) jack/status lightsConnects a network cable.
●
White: The network is connected.
●
Amber: Activity is occurring on the network.
(6)Power connectorConnects an AC adapter.
(7)AC adapter and battery light
●
White: The AC adapter is connected and the battery is
fully charged.
●
Blinking white: The AC adapter is disconnected and the
battery has reached a low battery level.
●
Amber: The AC adapter is connected and the battery is
charging.
Right side5
Description
●
O: The battery is not charging.
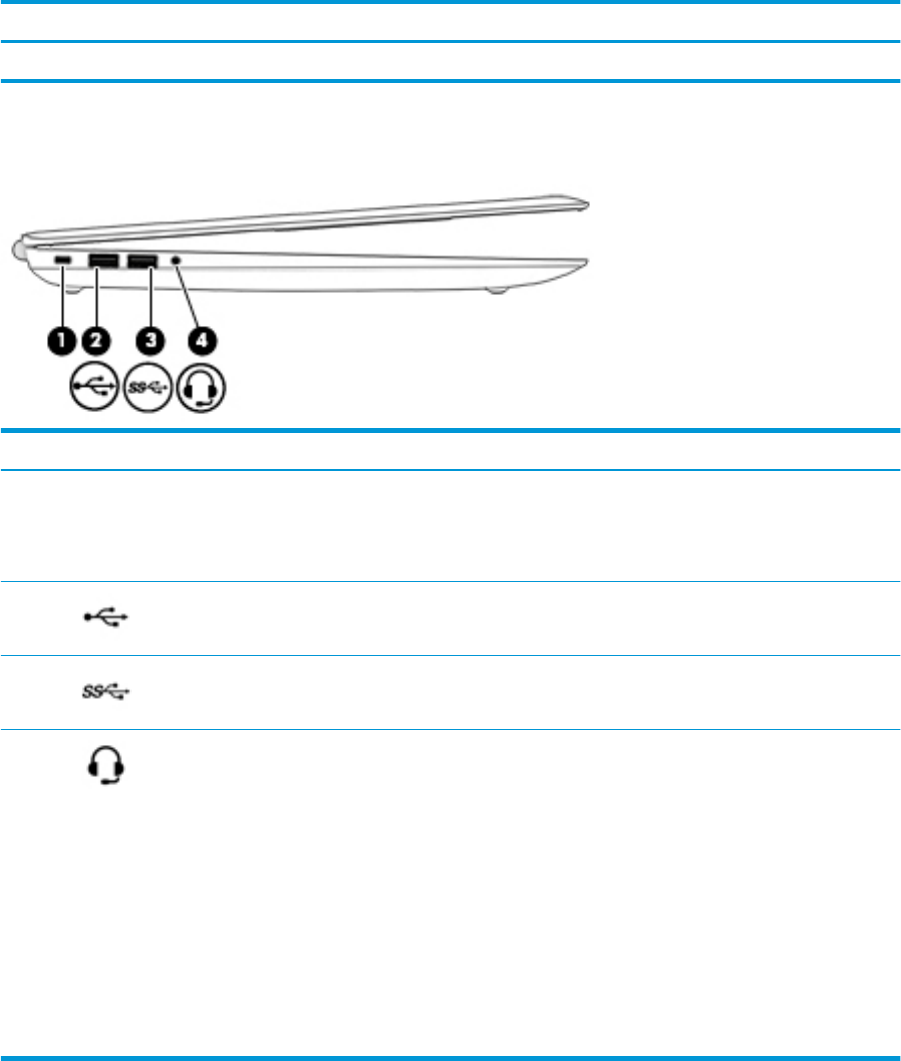
Left side
Description
(1)Security cable slotAttaches an optional security cable to the computer.
NOTE:The security cable is designed to act as a deterrent,
but it may not prevent the computer from being mishandled or
stolen.
(2)USB 2.0 portConnects an optional USB device, such as a keyboard, mouse,
external drive, printer, scanner or USB hub.
(3)USB 3.0 portConnects an optional USB device, such as a keyboard, mouse,
Gebruikershandleiding.com neemt misbruik van zijn services uitermate serieus. U kunt hieronder aangeven waarom deze vraag ongepast is. Wij controleren de vraag en zonodig wordt deze verwijderd.
Product:
Spelregels forum
Om tot zinvolle vragen te komen hanteren wij de volgende spelregels:
lees eerst de handleiding door;
controleer of uw vraag al eerder door iemand anders is gesteld;
probeer uw vraag zo duidelijk mogelijk te stellen;
heeft u een probleem en al geprobeerd om dit op te lossen, vermeld dit erbij aub;
heeft u een oplossing gekregen van een bezoeker dan horen wij dat graag in dit forum;
wilt u een reactie geven op een vraag of antwoord, gebruik dan niet dit formulier maar klik op de knop 'reageer op deze vraag';
uw vraag wordt direct op de website gezet; vermijd daarom persoonlijke gegevens in te vullen;
Belangrijk! Als er een antwoord wordt gegeven op uw vraag, dan is het voor de gever van het antwoord nuttig om te weten als u er wel (of niet) mee geholpen bent! Wij vragen u dus ook te reageren op een antwoord.
Belangrijk! Antwoorden worden ook per e-mail naar abonnees gestuurd. Laat uw emailadres achter op deze site, zodat u op de hoogte blijft. U krijgt dan ook andere vragen en antwoorden te zien.
Abonneren
Abonneer u voor het ontvangen van emails voor uw HP OMEN 15-ax214 bij:
nieuwe vragen en antwoorden
nieuwe handleidingen
U ontvangt een email met instructies om u voor één of beide opties in te schrijven.
Ontvang uw handleiding per email
Vul uw emailadres in en ontvang de handleiding van HP OMEN 15-ax214 in de taal/talen: Engels als bijlage per email.
De handleiding is 1,55 mb groot.
U ontvangt de handleiding per email binnen enkele minuten. Als u geen email heeft ontvangen, dan heeft u waarschijnlijk een verkeerd emailadres ingevuld of is uw mailbox te vol. Daarnaast kan het zijn dat uw internetprovider een maximum heeft aan de grootte per email. Omdat hier een handleiding wordt meegestuurd, kan het voorkomen dat de email groter is dan toegestaan bij uw provider.
Uw handleiding is per email verstuurd. Controleer uw email
Als u niet binnen een kwartier uw email met handleiding ontvangen heeft, kan het zijn dat u een verkeerd emailadres heeft ingevuld of dat uw emailprovider een maximum grootte per email heeft ingesteld die kleiner is dan de grootte van de handleiding.
Er is een email naar u verstuurd om uw inschrijving definitief te maken.
Controleer uw email en volg de aanwijzingen op om uw inschrijving definitief te maken
U heeft geen emailadres opgegeven
Als u de handleiding per email wilt ontvangen, vul dan een geldig emailadres in.
Uw vraag is op deze pagina toegevoegd
Wilt u een email ontvangen bij een antwoord en/of nieuwe vragen? Vul dan hier uw emailadres in.