The balloon whisk (8) is used for whisking o
cream, egg whites, etc.
Turn the accessory, so the pins on the shaft are
aligned with the depressions on the accessory’s
top edge. Press the accessory up towards the arm,
turning it at the same time to the right so that the
pins slide into position, thus securely locking the
accessory in place.
The accessory must
not be loose nor
should you be able
to pull it free.
Lower the arm so 8.
that it locks into
place with a click.
The lid must t
tightly onto the
mixing bowl. If not, it
is tted incorrectly.
The appliance is now ready for use. 9.
Whisking, kneading and mixing
Connect the appliance. The indicator next to the 1.
OFF button (g) lights up.
Start the appliance by pressing one of the ve 2.
speed buttons (a-e). Speed 1 (a) is the slowest and
speed 5 (e) is the fastest. Recommended speeds,
time and capacity are shown in the table below.
Stop the appliance by pressing the OFF button 3.
if you want to pause, for example to add more
ingredients.
If you need to scrape inside the mixing bowl, wait 4.
until the accessory has stopped completely. Use
the spatula, never your ngers.
Switch off the appliance by pressing the OFF 5.
button when you have nished mixing. Always
unplug the appliance before you change the
accessories or take the appliance apart.
Tilt the arm up using the arm release handle.6.
Dismantle the accessory by turning it to the left.7.
Remove the mixing bowl.8.
Clean all accessories before storing the appliance. 9.
See “Cleaning”.
Accessories: Speed Time Capacity
Dough hook 1, 2
1½ min. at
speed 1
and 8 min.
at speed 2
1,500 g our and
750 ml water
Dough whisk 1, 2, 3 10 min.
Balloon whisk 4, 5 10 min.
8 egg whites or
600 ml cream
Meat grinder 3, 4 10 min.
Blender 4,5,pulse
2 min. on /
2 min. off
Max. 1L
USING THE MEAT GRINDER
Assembly
Place the motor section on a at surface, e.g. a 1.
kitchen counter, and make sure it is standing rmly.
Check the arm is tilted down and locked into 2.
position and that the cover for the blender opening
has been tter over the blender opening.
Remove the protective cover from the accessory 3.
socket. Turn the cover so the white triangle is
aligned with the black circle and remove the cover.
Place the meat grinder body in the accessory 4.
opening and turn the body to
vertical position.
Fit the scroll in the meat grinder 5.
body with the thin metal
connection outwards, and press
rmly into place.
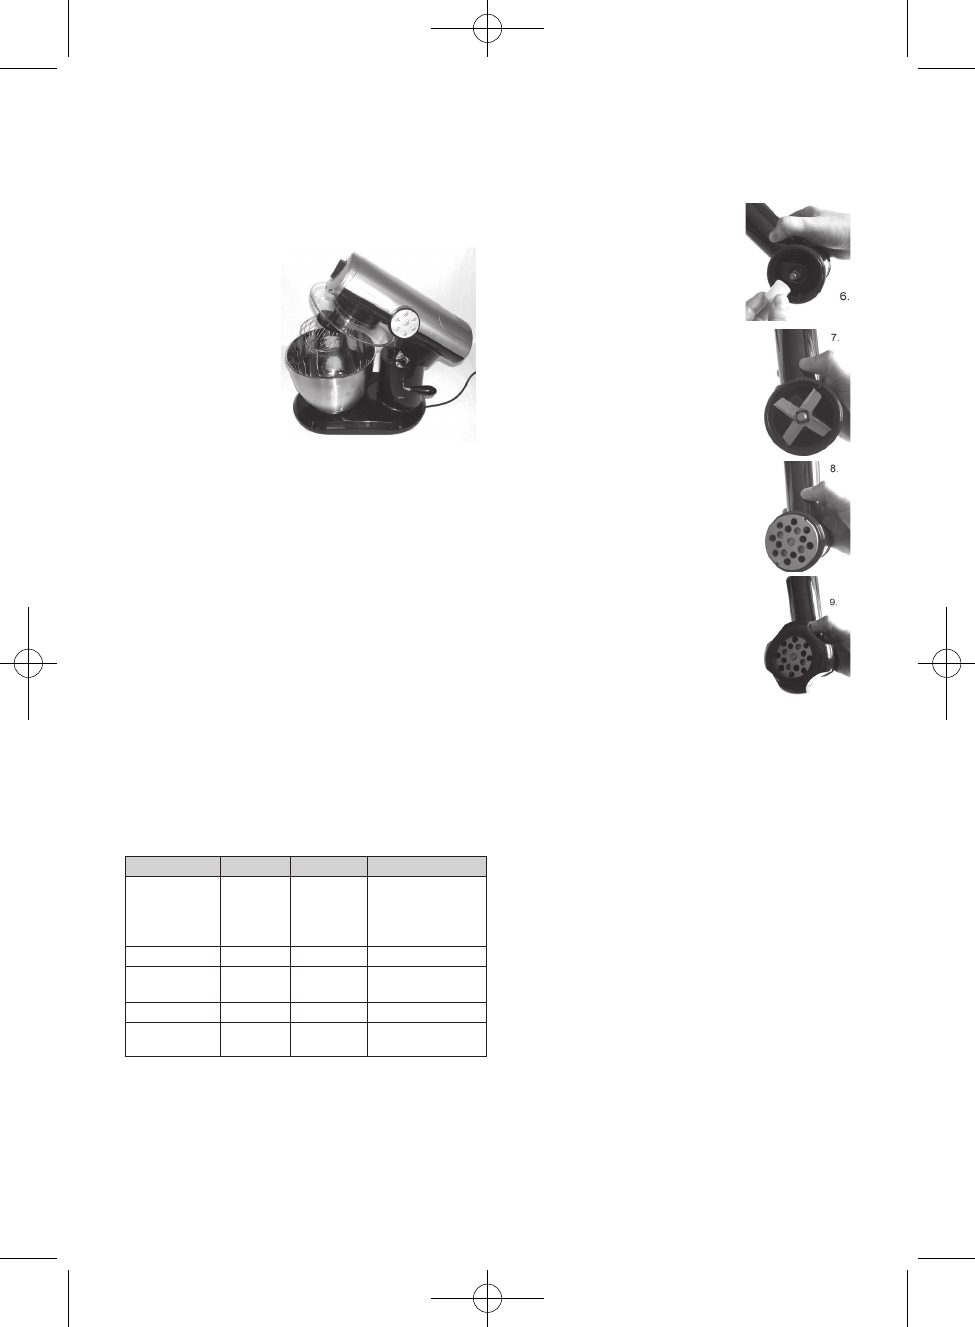
Fit the silicon coupling (15) onto 6.
the scroll connection (see picture
6).
Fit the knife onto the scroll 7.
connection (see picture 7). The
sharp edges of the knife should
point towards the meat screen.
Fit one of the three meat screens 8.
on top of the knife (see picture
8). Turn the screen so one of the
depressions on the side align with
the round projection on the meat
grinder body.
Select the meat screen for o
the required consistency. You
can choose ne, medium and
coarse.
Fit the ring nut (11) over the meat 9.
screen on the meat grinder body
(see picture 9). Turn clockwise to
lock. The ring nut must hold the
meat screen securely in place. But
do not over tighten.
Fit the meat tray (16) onto the meat 10.
grinder body so that the wide
part is positioned over the motor section of the
appliance.
The appliance is now ready for use.11.
Grinding Meat
Cut your meat into smaller pieces, so the pieces t 1.
into the feeding tube. Dice or cut into strips with a
width of approx. 2.5 cm.
Put the pieces of meat onto the tray.2.
Place the mixing bowl or similar under the meat 3.
grinder body opening.
Connect the appliance. The indicator next to the 4.
OFF button lights up.
Start the appliance by pressing one of the ve 5.
speed buttons. Speed 1 is the slowest and speed
5 is the fastest. Recommended speeds, time and
capacity are shown in the table above.
The meat pieces travel down the feeding tube. 6.
Push down carefully with the tamper (9). Do not
press too hard or you may damage the appliance.
Switch off the appliance by pressing the OFF 7.
button when you have nished chopping. Always
unplug the appliance before you change the
accessories or take the appliance apart.
Dismantle the meat chopper by turning the body 8.
slightly anti-clockwise and remove the body.
Fit the protective cover over the accessory socket 9.
again.