


-
Ik wil de scanner van Epson Stylus DX 5000 op mijn PC instaleren Gesteld op 30-3-2024 om 12:24
Reageer op deze vraag Misbruik melden -
Volledige installatie en gebruikerhandleiding DX 5000 Gesteld op 23-1-2021 om 13:28
Reageer op deze vraag Misbruik melden -
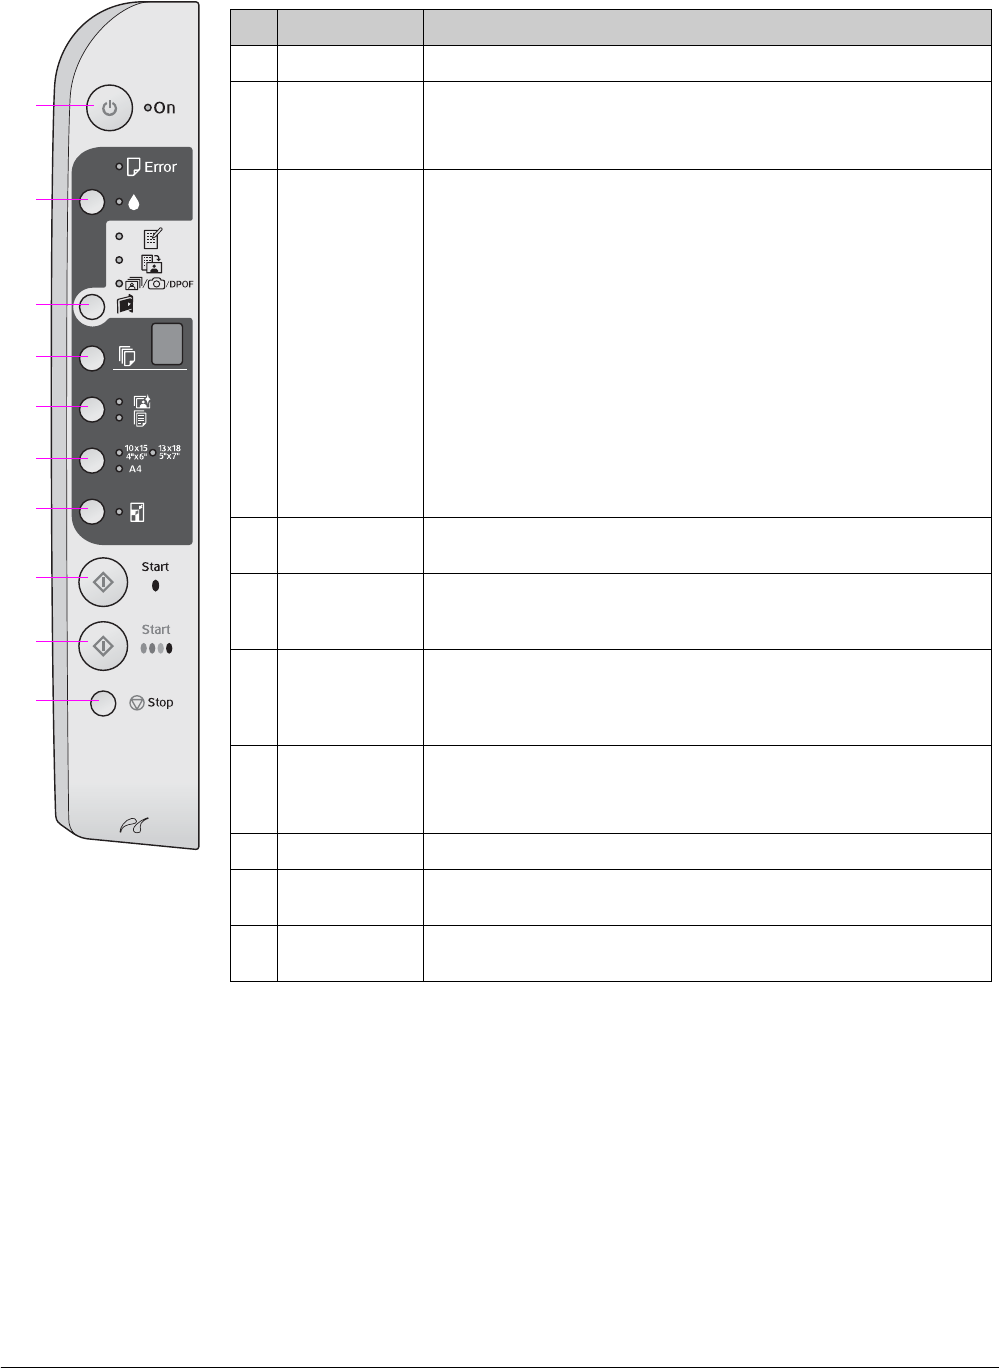
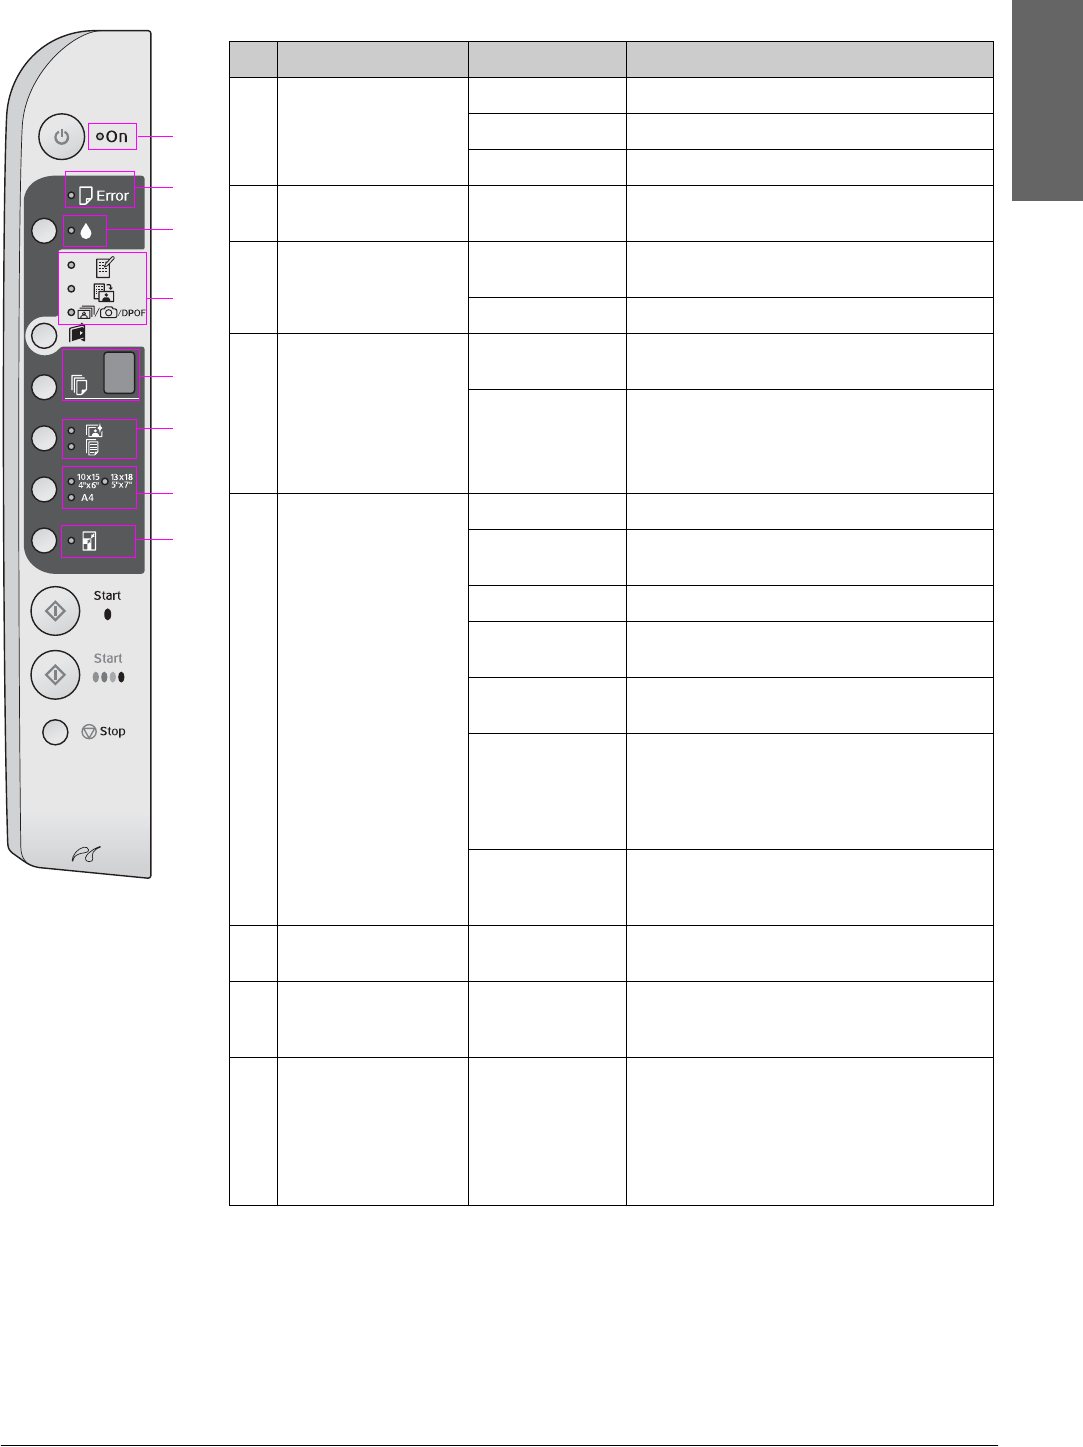
Ik heb als foutindicatie: de twee rode lampjes branden; alle andere lampjes knipperen, en de letter E.
Reageer op deze vraag Misbruik melden
Dat zou betekenen: "inktkussentje in de printer is verzadigd." Nu moet ik kontakt opnemen met de leverancier. Hoe moet dat, en kan ik er zelf iets aan doen?
Merci! Gesteld op 3-10-2013 om 22:16-
Hoe heb je het opgelost? Ik zit met hetzelfde probleem. Geantwoord op 19-10-2014 om 17:31
Waardeer dit antwoord (8) Misbruik melden
-
-
nieuwe inktpatronen geplaatst maar er wordt niets geprint. Sponsje droog ?
Reageer op deze vraag Misbruik melden
En kun je die vervangen Gesteld op 26-11-2012 om 17:23-
zou ik ook wel willen weten. Niemand ?? Geantwoord op 24-5-2013 om 07:25
Waardeer dit antwoord (2) Misbruik melden
-
-
printer drukt niet af
Reageer op deze vraag Misbruik melden
Gesteld op 22-6-2012 om 14:29-
Na 1 printje te hebben kunnen doen....jeahhhh........ staat ie weer zo vast als een huis en knippert alles nu! Geantwoord op 3-8-2012 om 00:04
Waardeer dit antwoord (14) Misbruik melden
-
-
Hoe kan ik de Epson Stylus DX 5000 ook als scanner gebruiken?
Reageer op deze vraag Misbruik melden
Ik heb een Apple met systeem OS X, versie 10.7.3 (Lion).
Gesteld op 1-6-2012 om 11:34-
Via apple software update (printer moet wel aanstaan) Geantwoord op 1-6-2012 om 14:03
Waardeer dit antwoord (3) Misbruik melden
-
-
de printer staat aan maar werkt niet. het druppellampje knippert evenals het on-lampje. wat te doen? Gesteld op 1-4-2012 om 11:07
Reageer op deze vraag Misbruik melden-
hu, hier net zo....erger me kapot aan het dure ding!! Geantwoord op 5-4-2012 om 03:08
Waardeer dit antwoord (3) Misbruik melden
-
-
Heel handig die NEDERLANDSE handleiding jammer alleen dat het in het ENGELS is ?!?!?1 wat ik ook probeer het blijft Engels, schiet mij maar lek................... Gesteld op 28-3-2011 om 13:15
Reageer op deze vraag Misbruik melden-
Dat heb ik dus ook. Heel apart. Misschien is de Engelse dan in het Nederlands? Geantwoord op 10-4-2011 om 15:53
Waardeer dit antwoord Misbruik melden
-
-
Ik ben de cd van mijn printer epson stylus dx5000 kwijt, nu kan ik mijn printer niet meer op mijn pc downloaden. wat kan ik hier aan doen?wie kan mij helpen? Alvast bedankt. Gesteld op 31-10-2010 om 16:55
Reageer op deze vraag Misbruik melden-
Google op het internet: Epson Stylus DX5000 drivers, en gij zult vinden.
Waardeer dit antwoord Misbruik melden
(drivers voor de printer en voor het scanner gedeelte)
Klepperbetje. Geantwoord op 26-11-2013 om 17:47
-
-
Ik heb de cd nog wel ,je mag hem wel even lenen. k.heddema@upcmail.nl Geantwoord op 5-3-2014 om 16:30
Waardeer dit antwoord Misbruik melden -
mijn printer zet de documenten alleen maar in de wachtrij en geeft aan dat de printer onderbroken is wat moet ik doen Gesteld op 5-5-2010 om 18:10
Reageer op deze vraag Misbruik melden-
Waardeer dit antwoord Misbruik melden
Ik zit met het zelfde probleem ! Geantwoord op 18-8-2011 om 21:15
-
-
hoe kan ik scannen met een epson stylus dx5000.Ik heb een apple en onder staat aangegeven epson scan, maar verder in de habndleiding van epson valt niets te lezen Gesteld op 15-3-2010 om 14:02
Reageer op deze vraag Misbruik melden-
Leg wat je wil scannen op de glasplaat, druk op de knop Start (voor een zwart/wit kopie) de 3e knop van onderaf. En voor kleuren kopie de 2e knop van onderaf.
Waardeer dit antwoord (2) Misbruik melden
De printer gaat scannen en drukt daarop volgend de kopie(en) af.
mvg Gerard Geantwoord op 24-5-2013 om 07:57
-
-
hoe kan ik scannen met een epson stylus dx5000.Ik heb een apple en onder staat aangegeven epson scan, maar verder in de habndleiding van epson valt niets te lezen
Waardeer dit antwoord Misbruik melden
Gesteld op 15-3-2010 om 14:02 in forum Epson Stylus DX5000 Geantwoord op 2-8-2019 om 09:31 -
ik wil graag weten hoe ik foto's moet scannen? wie kan mij helpen Gesteld op 7-3-2009 om 12:49
Reageer op deze vraag Misbruik melden-
foto op de glasplaat leggen, grote knop Start met een zwarte druppel ernaast voor een zwart/wit indrukken of grote knop start met 4 kleuren ernaast voor een kleuren kopie indrukken, even wachten en er wordt afgedrukt. Geantwoord op 24-5-2013 om 08:01
Waardeer dit antwoord (1) Misbruik melden
-
-
ik kom er niet uit hoe ik moet scannen met mijn pas aangeschafte Epson Stylus DX4450.
Reageer op deze vraag Misbruik melden
alvast bedankt Gesteld op 5-5-2008 om 11:04-
k snap je k begrijp t ook nie Geantwoord op 4-3-2011 om 16:07
Waardeer dit antwoord Misbruik melden
-
