


-
Hoe vervangen wij een inktpatroon van de EPSON xp 355 Gesteld op 28-7-2023 om 15:27
Reageer op deze vraag Misbruik melden -
ik wil een formulier uitprinten en ik krijg een fout melding 000041 en dat ik mijn printer uit moet zetten heb ik gedaan maar werkt nog niet Gesteld op 23-1-2023 om 19:01
Reageer op deze vraag Misbruik melden -
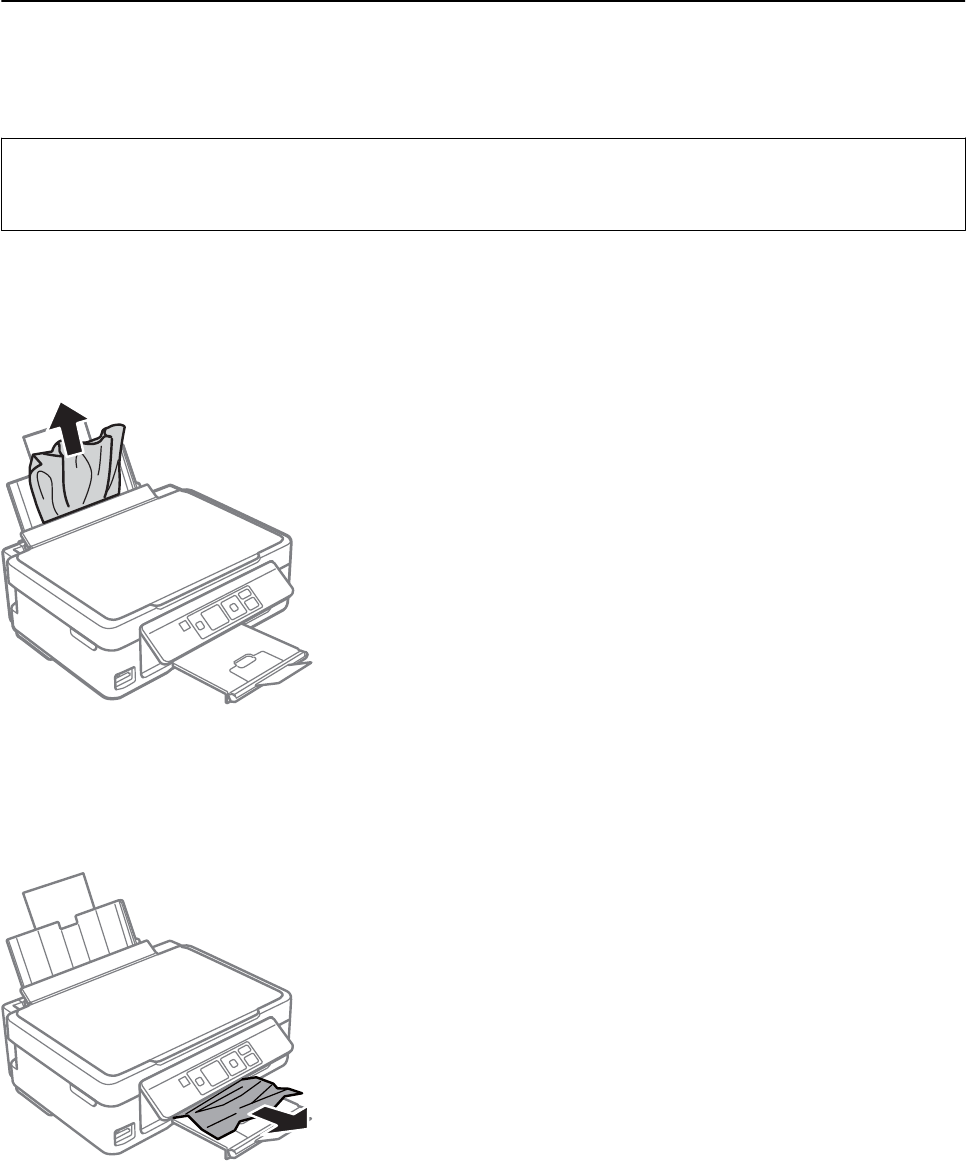
Er is een plastic zakje vast komen te zitten met uitprinten??
Reageer op deze vraag Misbruik melden
Er voorzichtig uit gehaald maar geeft toch fout aan na aan en uit zetten , wie kan helpen ?
Met vriendelijke dank
Sas Gesteld op 13-5-2022 om 11:47 -
Epson printer xp 355 kinderen hebben wachtwoord veranderd hoe kan ik de printer weer toegankelijk maken?
Reageer op deze vraag Misbruik melden
Of hoe kan ik hem resetten Gesteld op 25-1-2022 om 14:16 -
Ik print alleen zwart, dus ik vervang alleen de zwarte cartridge. De printer blijft aangeven dat ik de cartridge(s) moet vervangen. Gesteld op 28-2-2021 om 11:02
Reageer op deze vraag Misbruik melden -
Hoe kan ik scannen en een brief naar mijn pc sturen Gesteld op 2-12-2020 om 20:16
Reageer op deze vraag Misbruik melden
-
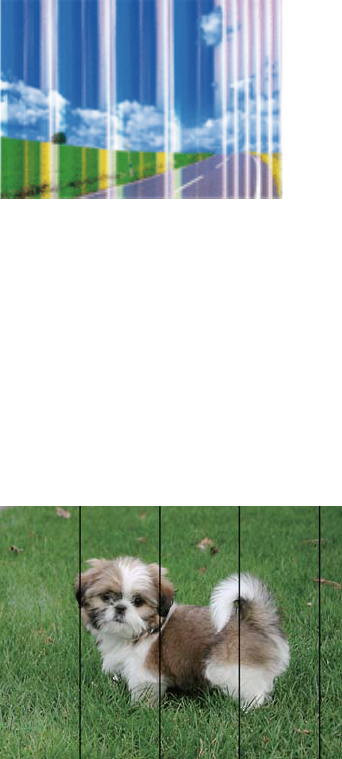
Bij het printen krijg ik onduidelijke zinnen die wazig zijn.alleen bij zwart. Gesteld op 15-9-2020 om 11:30
Reageer op deze vraag Misbruik melden -
hoe krijg ik mijn printer van glossy afdrukken, ??? Gesteld op 6-9-2020 om 10:23
Reageer op deze vraag Misbruik melden -
ik wil mijn printkoppen schoonmaken maar weet niet hoe Gesteld op 7-8-2020 om 09:11
Reageer op deze vraag Misbruik melden -
Hoe verander ik papier van glossy naar gewoon papier Gesteld op 3-8-2020 om 21:56
Reageer op deze vraag Misbruik melden -
Ik heb een printer van epson
Reageer op deze vraag Misbruik melden
Ik wil iets kopiëren met gewoon papier
Hij geeft steeds aan glossy en dat kan ik niet goed krijgen dat hij dus gewoon papier aangeeft . Met glossy kopiëren doet hij er lang over en niet zo goed . Wat doe ik fout? Gesteld op 3-8-2020 om 21:39 -
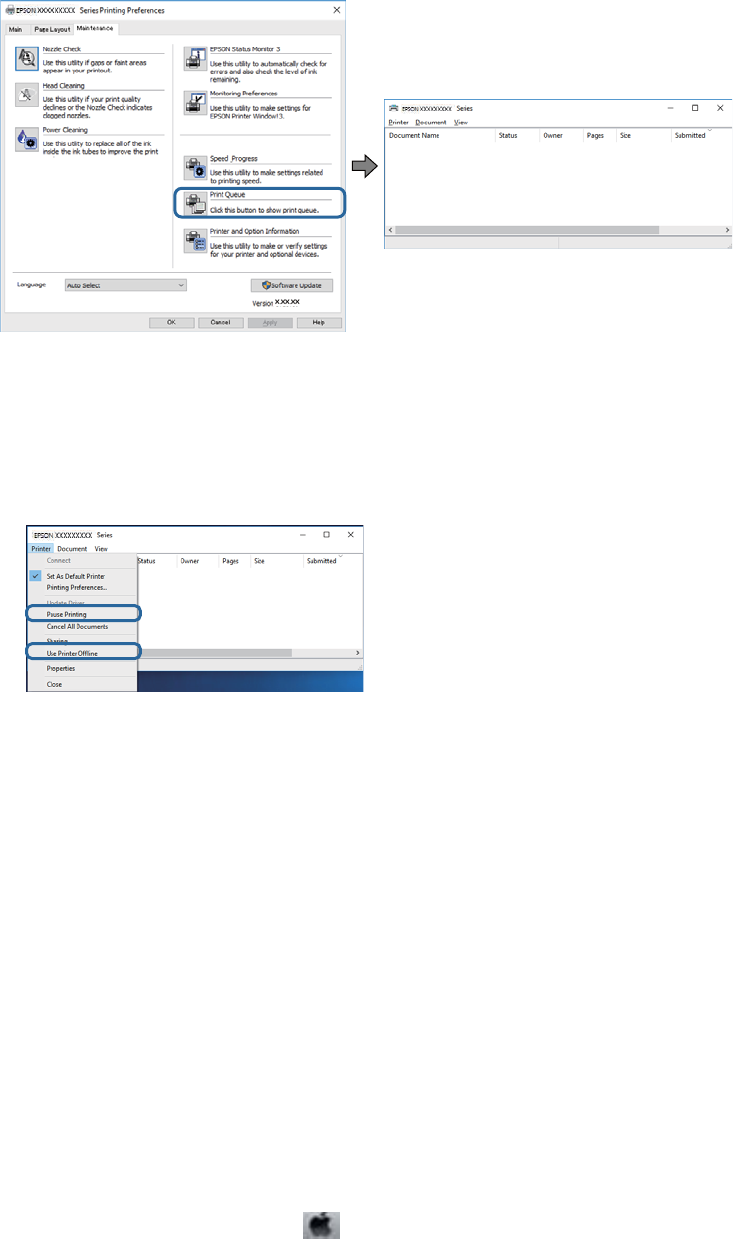
onze printer wil niet meer uitprinten als je de opdracht geeft vanaf de computer - printen Gesteld op 20-5-2020 om 15:29
Reageer op deze vraag Misbruik melden
-
Kan niet bij de inktpatronen komen deze blijven onder de behuizing zitten na het openen Gesteld op 8-3-2020 om 17:22
Reageer op deze vraag Misbruik melden -
ik ben mijn wachtwoord van mijn printer Epson XP 355 vergeten Gesteld op 6-3-2020 om 10:43
Reageer op deze vraag Misbruik melden -
ik ben mijn wachtwoord van mijn printer epson xp 355 vergeten Gesteld op 6-3-2020 om 10:41
Reageer op deze vraag Misbruik melden -
Melding: wat houdt de volgende melding in: Printerfout.Raadpleeg de documentatie voor details. 000041 Gesteld op 24-2-2020 om 14:36
Reageer op deze vraag Misbruik melden -
cartridges verwisselt maar kleuren zien er slecht uit en bij zwart vallen delen weg
Reageer op deze vraag Misbruik melden
Gesteld op 4-8-2019 om 13:02-
ik heb nog een antwoord op de zelf uitschakeling van de printer.
Waardeer dit antwoord (2) Misbruik melden
Ga naar scherm Printerinstallatie in het kleine scherm en vervolgens naar Uitschakelingstimer. Keuzemenu met meerdere mogelijkheden waaronder uitschakeling .
Geantwoord op 4-8-2019 om 13:28
-
-
Hier hetzelfde probleem cardridges verwisseld en onmogelijk on een fatsoenlijke print te maken zwart is helemaal onderbroken met witte lijnen Geantwoord op 13-8-2019 om 17:04
Waardeer dit antwoord (3) Misbruik melden -
Heb net een nieuwe XP-355. Voor afdrukken wordt standaard papier gebruikt. Maar bij stand kopiëren springt hij automatisch op een hoogwaardige papiersoort. Instellen van gewoon papier kan niet. Zit niet in het keuzemenu. (Alsof hij op fotostand staat) Vraag: hoe kan ik kopiëren op gewoon papier?
Reageer op deze vraag Misbruik melden
Leo de Bruijn, marleos@home.nl Gesteld op 31-1-2019 om 11:03-
Ik heb hetzelfde probleem.Kan niet instellen bij kopieeren op gewoon papier!!!!
Waardeer dit antwoord (6) Misbruik melden
Is er al een oplossing? Geantwoord op 7-11-2019 om 16:59
-
-
Heb nieuwe XP-355.Stel papiersoort in op gewoon papier bij afdrukken maar ik wil kopiëren springt hij vanzelf op glossy of andere hoogwaardiger papiersoort. Gewoon papier is dan geen optie in het menu.(staat er niet bij) Simpel iets kopieren lukt dus niet op gewoon papier. Gesteld op 31-1-2019 om 10:56
Reageer op deze vraag Misbruik melden-
Ik heb het zelfde probleem, helaas is er nig geen antwoord. Geantwoord op 10-3-2019 om 19:46
Waardeer dit antwoord (8) Misbruik melden
-
-
Ik heb dit probleem ook, maar nergens een oplossing kunnen vinden. Geantwoord op 14-11-2020 om 12:11
Waardeer dit antwoord (2) Misbruik melden
