473770
29
Verklein
Vergroot
Pagina terug
1/47
Pagina verder
Home Multimedia Center
Movie Cube V120H
Users Manual
(Version 1.0.3)
Table of Contents
1.
User Information.....................................................................................................................3
1.1 Caution................................................................................................................................3
2.
Product Introduction...............................................................................................................5
2.1 Product Overview................................................................................................................5
2.2 Package Contents ................................................................................................................6
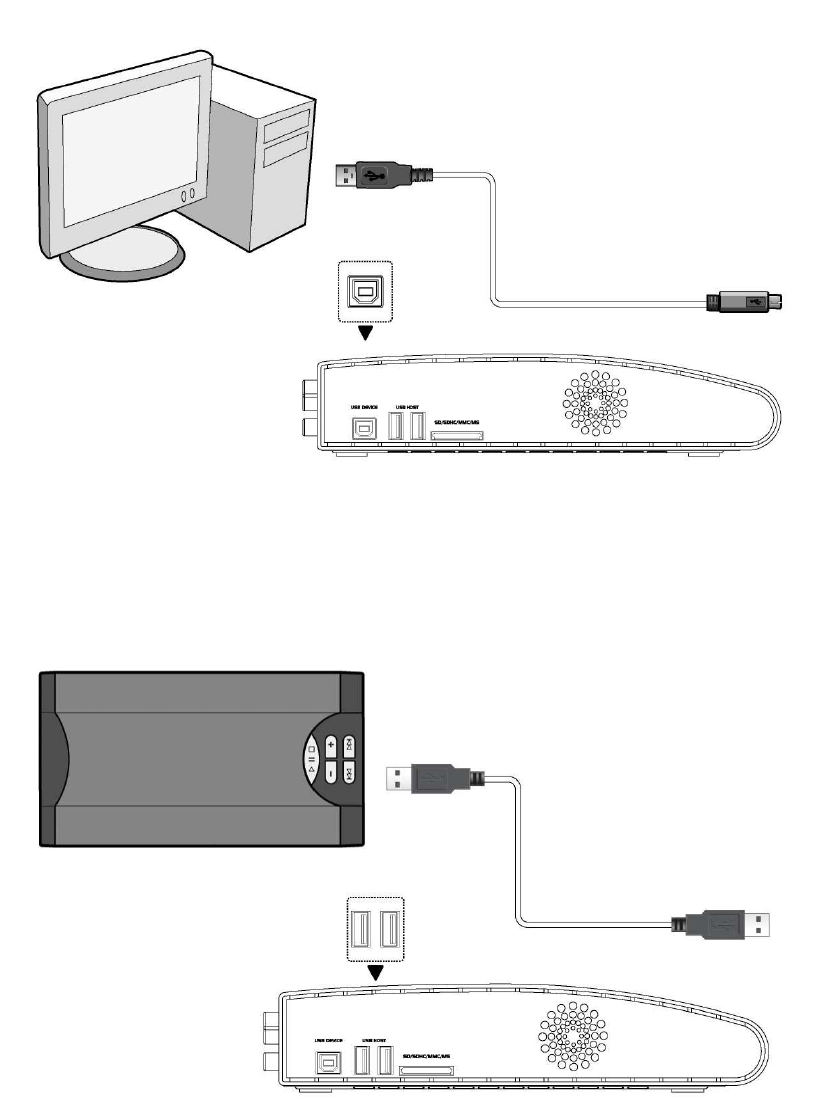
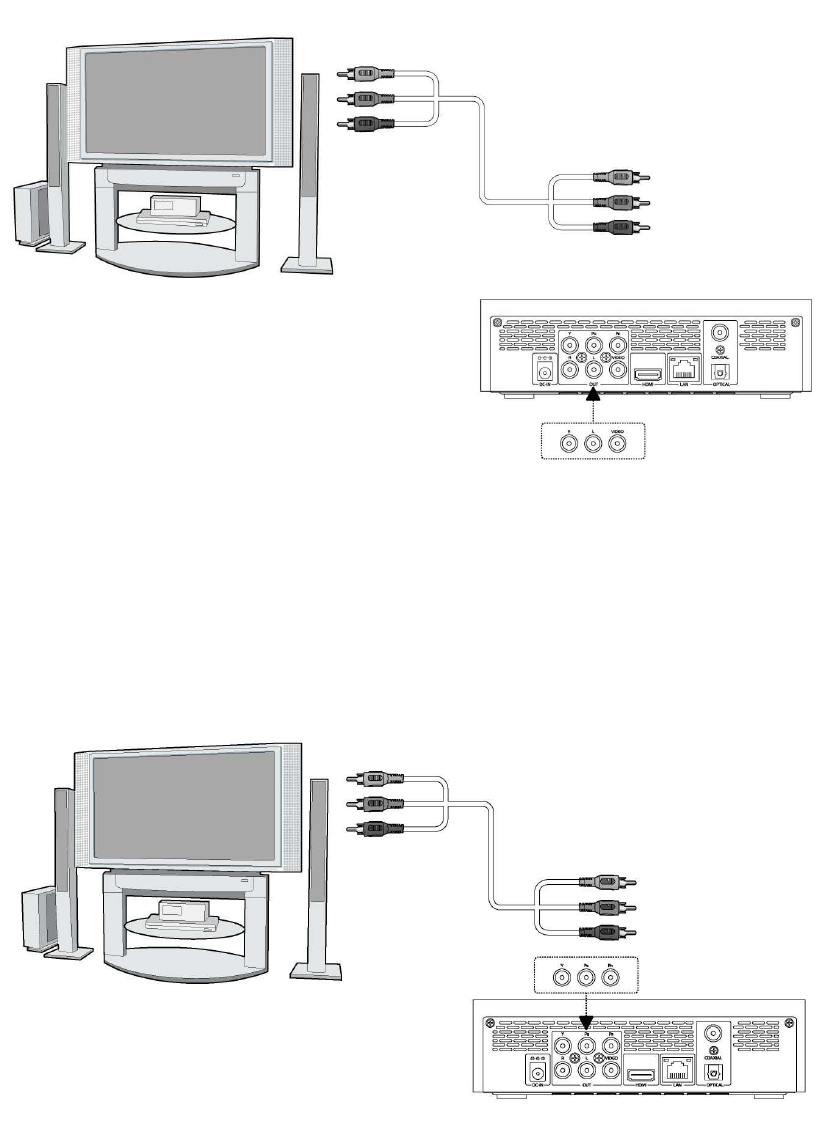
2.3. Connection .........................................................................................................................7
2.4 Front Panel ........................................................................................................................12
2.5 Side Panel..........................................................................................................................12
2.6 Back Panel .........................................................................................................................13
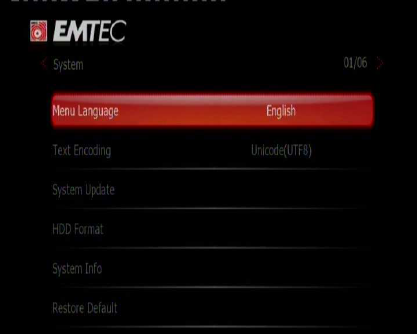
2.7 Menu Language.................................................................................................................13
2.8 HDD Format.......................................................................................................................13
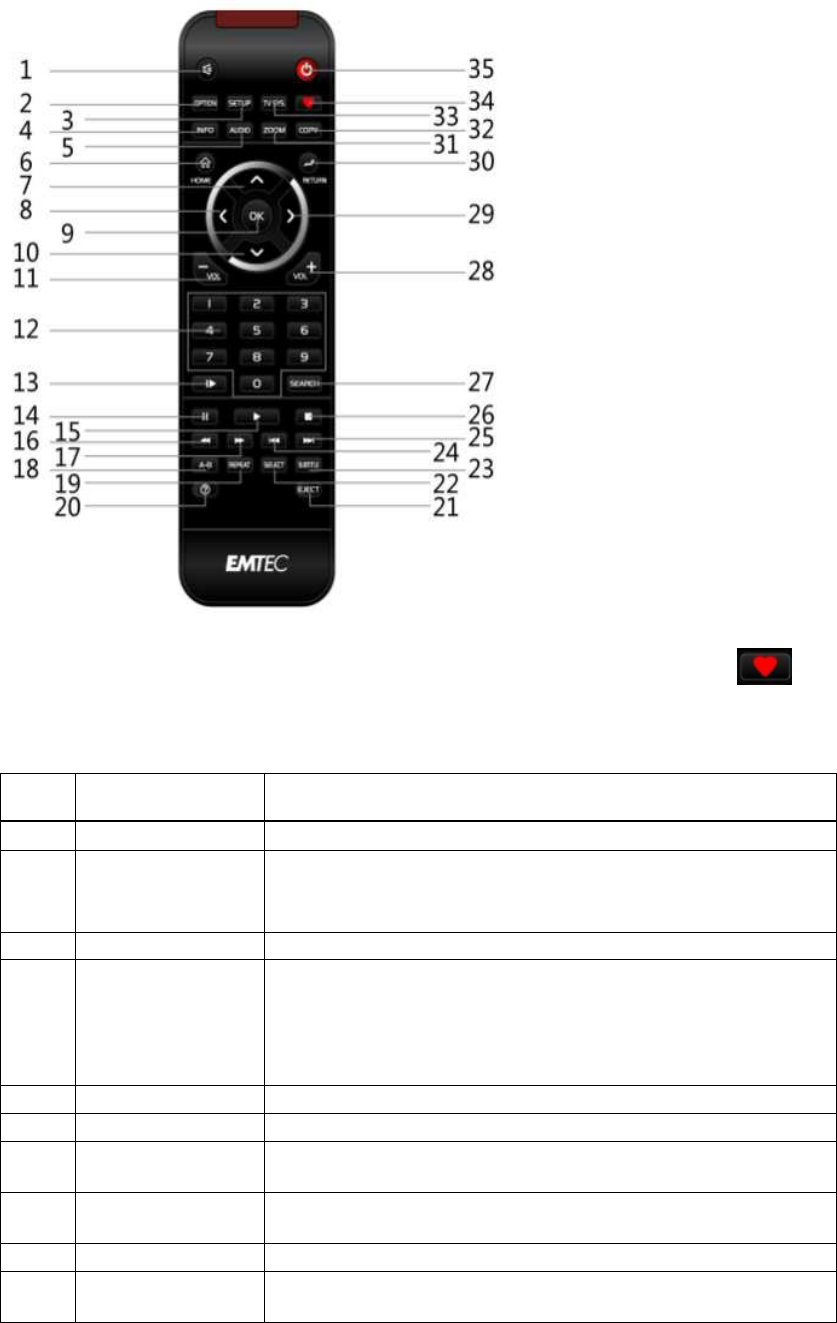
2.9 Remote Control .................................................................................................................15
3.
Main Menu.............................................................................................................................17
3.1
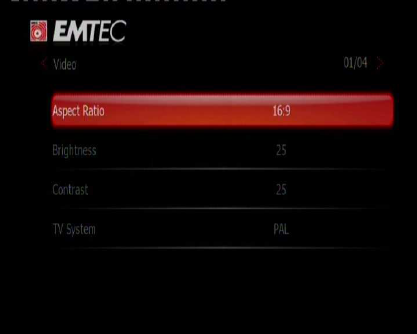
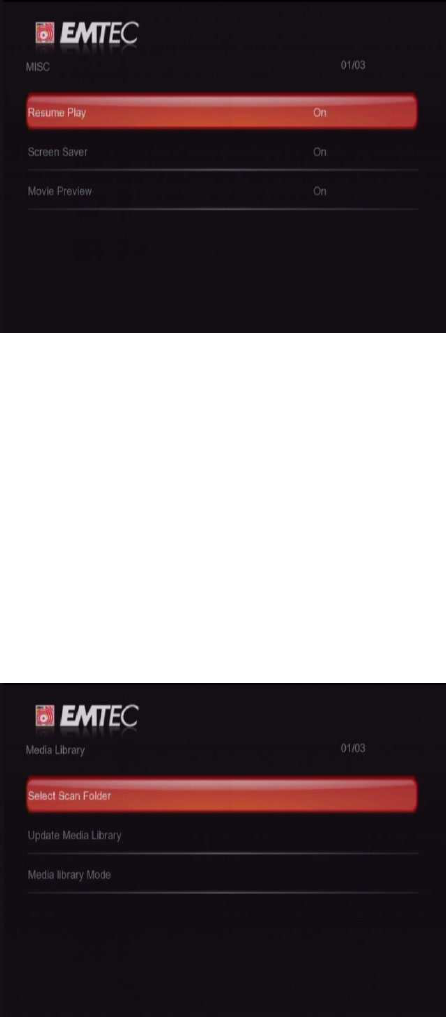
Setup Menu.......................................................................................................................17
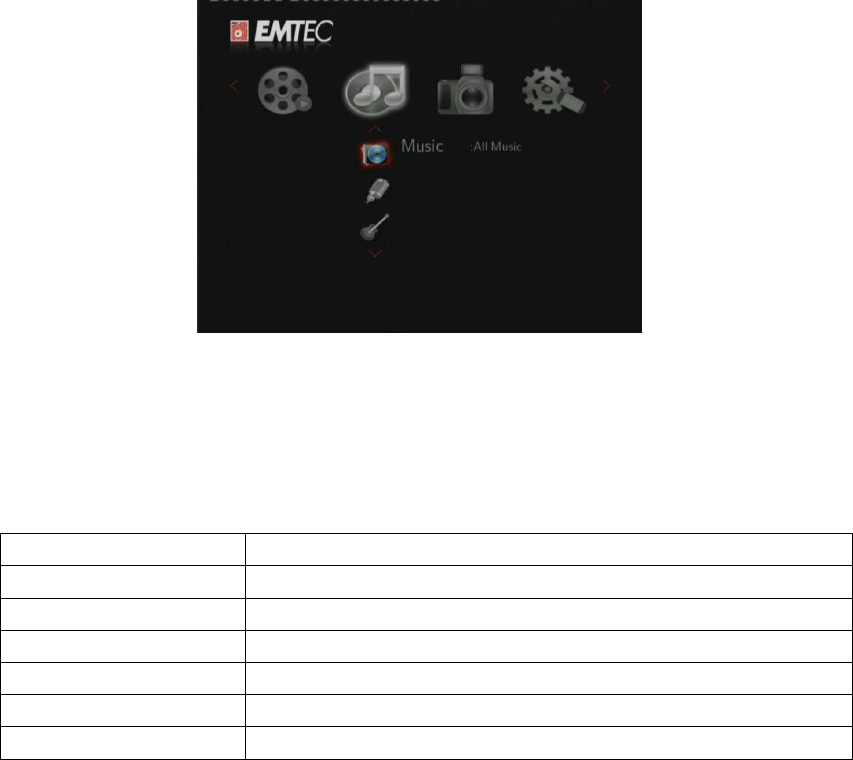
3.2 Music Playback..................................................................................................................25
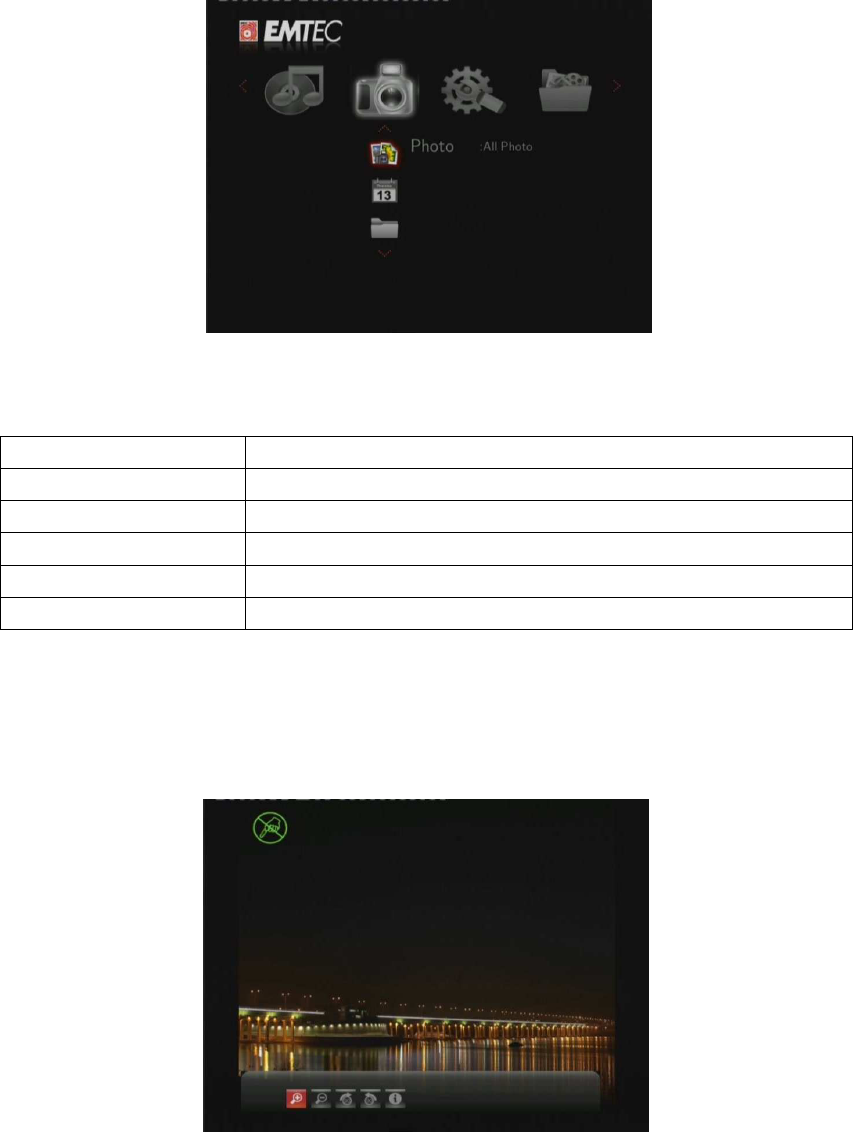
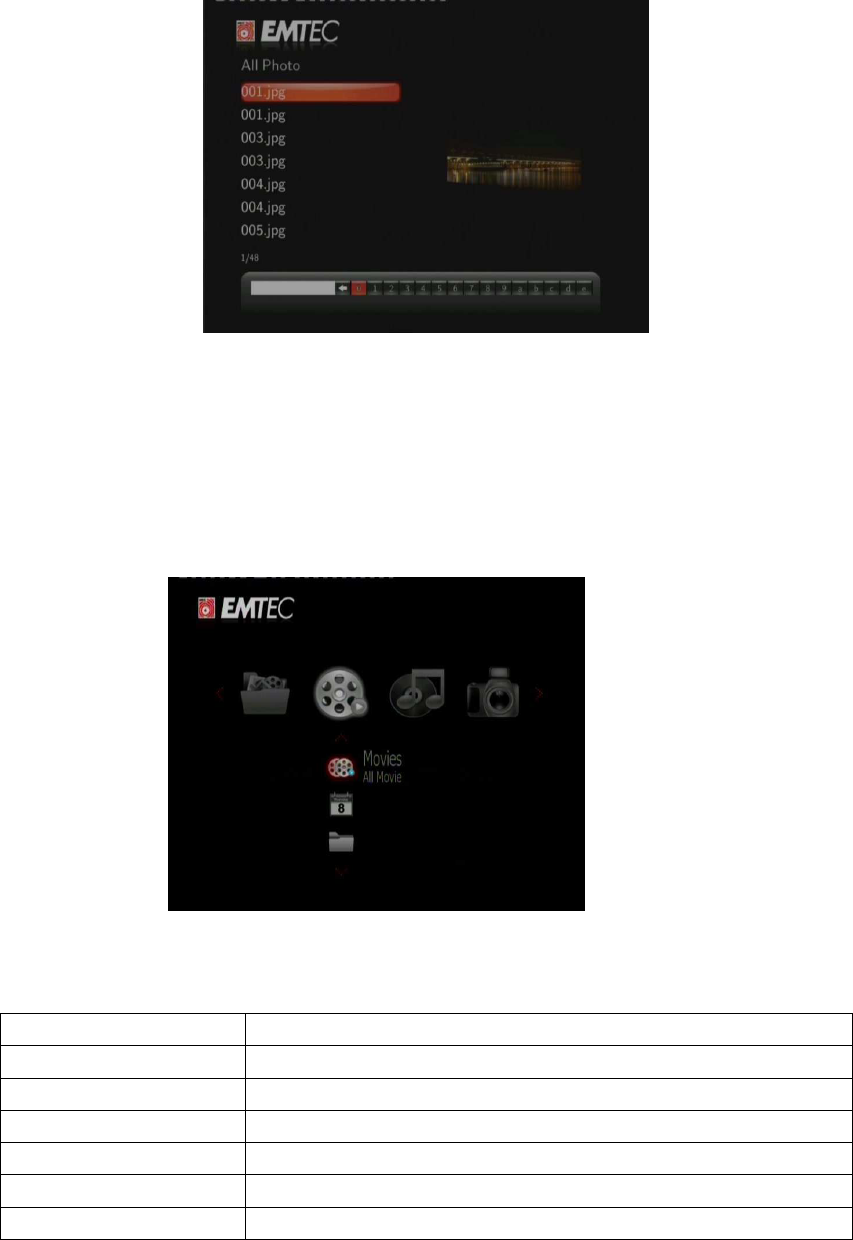
3.3 Photo Playback..................................................................................................................26
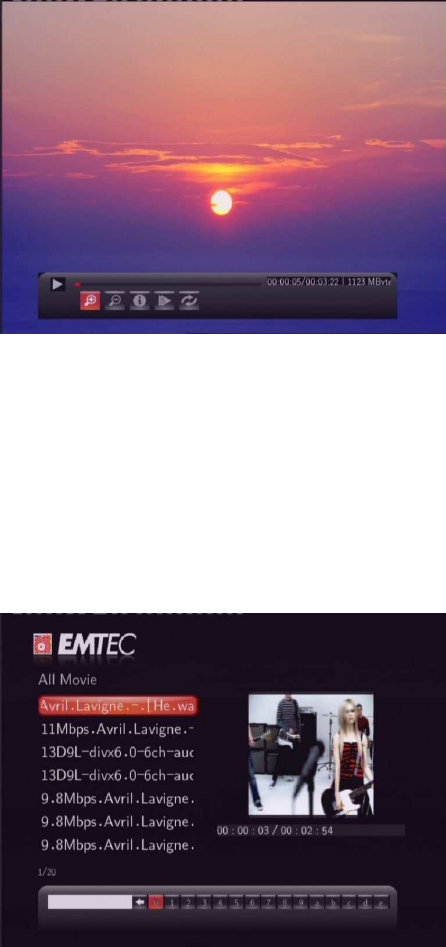
3.4 Movie Playback .................................................................................................................28
3.5 All Files ..............................................................................................................................29
3.6 Net Service ........................................................................................................................30
3.7
Help Function....................................................................................................................31
4.
Web Server & BitTorrent......................................................................................................32
4.1 Web Server (unicgi)...........................................................................................................32
4.2 Account Management.......................................................................................................32
4.3 Visit Neighbor (samba) .....................................................................................................33
4.4 BitTorrent Download (btpd) ..............................................................................................33
5.
Media Library ........................................................................................................................37
6.
Upgrading the Firmware......................................................................................................38
7.
Appendixes............................................................................................................................39
7.1 Specifications ....................................................................................................................39
7.2 Frequently Asked Questions..............................................................................................40
8. Copyrights and Trademarks...................................................................................................42
9. Warranty....................................................................................................................................42
10. License information ...............................................................................................................43
1. User Information
1.1 Caution
This player’s design and manufacture has your safety in mind. In order to safely and effectively
use this player, please read the following before usage.
1.1.1 Usage cautions
User should not modify this player. If commercial hard disk is being used, the environmental
temperature should be within +5 ~ +35 .
1.1.2 Power
The player’s power voltage: DC 12V.
When using this player, please connect the supplied AC adapter or AC adapter cable to the
player’s power jack. When placing the adapter cable, make sure it can not get damaged or be
subject to pressure. To reduce the risk of electric shock, unplug the adapter first before
cleaning it. Never connect the adapter to the player in a humid or dusty area. Do not replace
the adapter or cable’s wire or connector.
1.1.3 Radio interference/compatibility
- If not properly shielded, almost all electronic devices will get radio interference. Under some
conditions, your player might get interference.
- The design of this player has followed the FCC/CE standard, and has followed the following
rules:
(1) This player may not cause harmful interference;
(2) This player could accept some interference received including interference that may
cause undesired operation.
1.1.4 Repair
If the player has a problem, you should take it to an appointed repair center and let the
specialists do the repair, never repair the player yourself, you might damage the player or
endanger yourself or your data.
1.1.5 Disposing of the player
When you dispose of the player, be sure to dispose it appropriately. Some countries may
regulate disposal of electrical device, please consult with your local authority.
1.1.6 Hard disk cautions
The player uses an internal hard disk for data storage, in normal case, format or repair is not
required.
You should carefully read the < Frequently Asked Questions > chapter, and check our website
for latest information before formatting the hard disk.
- Physical impact may create bad sector in the hard disk, you can use CHKDSK to fix the
problem.
- All data stored in the player may be lost due to physical impact, electrical shock, power lost,
HDD format etc. Please backup your data.
- It is suggested to do defragment after a long period of usage.
- Regularly backup the data in the hard disk so that it can be recovered in the event of data
corruption or loss. Our company takes no responsibility for loss of data stored on the hard disk.
1.1.7 Others
When using this player, please do not let the player come into contact with water or other liquid,
if water is accidentally spilled on the player, please use a dry cloth to absorb the spillage.
Electronic products are vulnerable, when using please avoid shaking or hitting the player, and
do not press the buttons too hard.
Do not let the player come into contact with water or other liquid.
Do not disassemble the player, repair the player or change the design of the player, any
damage done will not be included in the repair policy.
Do not press the buttons of the player too hard.
Avoid hitting the player with hard object, avoid shaking the player, and stay away from
magnetic fields.
During electrostatic discharge and the strong electromagnetic field, the product will
malfunction, then unplug the power cable and the product will return to normal performance
next time it is powered on.
2. Product Introduction
2.1 Product Overview
Thank you very much for purchasing the Movie Cube V120H. In the digital era, this product is
a great home entertainment partner. With the outstanding design, you can enjoy Full HD
movies and music, view photos of precious moments. The editing function provides you with
an easy way to save these. It’s easy to use this product as a portable external storage device
with its built-in HDD and high-speed USB 2.0.
Network Feature
A/V streaming/transmission via Ethernet (10M/100M) & Wi-Fi (802.11b/g/n, optional)
File sharing via Samba server
A/V streaming via UPnP Media Server
BitTorrent download
Internet Radio
USB 2.0 Support
USB DEVICE port (for computer connection)
USB HOST port x 2 (for USB storage devices
)
Navigation Options Include
Search: search by genre, album, date, folder, recent, playlist and artist.
Media Library: lets you view all your media files in one menu regardless of its location in
folders or drivers. You can filter by categories such as genre, artist, album and so on.
Photo Viewing
You can view photos in slide show mode with background music.
Zoom in/out, Rotate
Photo format: HD JPEG/BMP/GIF/TIF/PNG
Movie Playback
Fast forward/rewind
View subtitle
Supports major audio formats (1080p HD video decoding)
Subtitle control: color/offset/size
Movie format: AVI/MKV/TS/TP/TRP/M2TS/MPG/MP4/M4V/MOV/VOB/ISO/IFO/DAT/
WMV/ASF/RM/RMVB/FLV
Music Playback
Fast forward/rewind
Shuffle
Repeat
Music format: MP3/OGG/WMA/WAV/FLAC
File Copy
Supports copying & moving files among USB, CARD, HDD, and Network
Note: All the information contained in this manual was correct at the time of publication.
However, as our engineers are always updating and improving the product, your device’s
software may have a slightly different appearance or modified functionality than presented in
this manual.
2.2 Package Contents
Part Quantity
Player 1
A/V cable
1
USB cable 1
Remote Control
1
AC/DC adaptor
1
User Manual 1
Quick Installation Guide
1
CD (with User Manual)
1
Warranty Card 1
SCART IN adapter
1
Note:
The actual contents in the package might be different from the packing list in this manual.
2.3. Connection
2.3.1 Connect to Computer
(1) Make sure the player is powered on;
(2) Plug in the squarish connector of the USB cable to this player’s USB DEVICE port;
(3) Plug in the rectangular connector of the USB cable to computer.
2.3.2 USB Mass Storage Device (like USB stick, MP3, USB HDD etc.) Connection
(1) Make sure the player is powered on;
(2) Plug in the USB stick or USB HDD etc. to one of the USB host ports of this player.
2.3.3 Connecting a Memory Card
Memory card can be used by inserting to the card slot
(1) Follow the picture to insert the memory card to the card slot properly;
(2) Insert the card by following the arrow pointer in the picture.
In this way, you can browse contents on the memory card.
Removing a USB Device or Memory Card
In order to prevent data loss, it is highly recommended you press EJECT button on the remote
control before remove a USB device or Memory Card.
To remove a USB Device or Memory Card:
1. Press EJECT button on the remote control
2. Select the USB device you want to remove
3. Press ENTER button on the remote control to remove USB device or Memory card.
2.3.4 TV connection
2.3.4.1 A/V OUT
(1) Follow the picture and plug in the 3 color connector to the player’s A/V OUT jack;
(2) Follow the picture and plug in the 3 color connector to the TV’s A/V IN jack.
In this way, you can enjoy the content in the player on TV or other display devices.
2.3.4.2 Y/Pb/Pr Component OUT
(1) Follow the picture and plug in the 3 color connector to the player’s Y/Pb/Pr jack;
(2) Follow the picture and plug in the 3 color connector to the TV’s Y/Pb/Pr jack.
Audio Connection while using Y/Pb/Pr Video out:
First method: use the audio output from the A/V OUT jack;
Second method: use the audio output from the S/PDIF Coaxial or Optical jack.
In this way, you can also enjoy videos, music, and photos in the player on TV.
2.3.4.3 HDMI OUT
(1) Follow the picture and plug one connector on your HDMI cable to the player’s HDMI jack;
(2) Follow the picture and plug the other connector on your HDMI cable to the TV’s HDMI jack.
In this way, you can have the highest quality video and audio via a single cable.
2.3.5 Digital Audio Device connection
(1) Follow the picture and plug in the RCA connector on your coaxial cable to the player’s
S/PDIF Coaxial jack. Or if you use optical fiber, please plug in the Toslink connector on your
optical fiber to the player’s S/PDIF Optical jack;(not supplied)
(2) Follow the picture and plug in the other connector on your coaxial cable or optical fiber to
the digital audio device.(not supplied)
2.3.6 Power connection
(1) Follow the picture and connect the AC adaptor to the players DC IN jack;
(2) Follow the picture and plug in the AC adaptor to the power outlet.
2.3.7 Ethernet connection
To connect to a LAN (Local Area Network) you require a cat5, cat5e or cat6 network cable (not
supplied).
(1) Connect one of the crystal plugs on the cable to the player’s RJ45 LAN socket;
(2) Connect the other crystal plug on the cable to a RJ45 LAN port on your router, switch, or
hub devices.
2.3.8 WLAN connection
(1) Make sure the player is powered on;
(2) Plug the Wireless LAN USB Adapter (i.e. Wi-Fi USB Dongle) to the USB HOST port of the
player.
2.4 Front Panel
1. POWER / STANDBY indicator 2. VFD Screen
2.5 Side Panel
1. USB DEVICE port 2. USB HOST x2 port 3. CARD slot
2.6 Back Panel
1.DC-IN jack 2. Y/Pb/Pr OUT jack
3. A/V OUT jack 4. HDMI jack
5. RJ45 LAN socket 6. S/PDIF COAXIAL jack
7. S/PDIF OPTICAL jack
2.7 Menu Language
The system language of this player can be set to English or other languages. Change the
language you wish in the setup menu, the selected language will take effect immediately.
2.8 HDD Format
For users who wish to install a new SATA HDD into the player, please refer to the following
procedures to format the hard disk on the player before usage.
- Step 1: Select OK on the Warning page, press ENTER to confirm.
Note: This page can be also accessed via Setup->System->HDD Format menu.
- Step 2: Select Format, press ENTER, and then hard disk format will start.
The formatting procedure will be finished within a few minutes. And then you can use the hard
disk properly on the player.
Note: HDD format will remove all data stored on the hard disk drive. Please take care and
backup your data in advance!
2.9 Remote Control
1. MUTE 2. OPTION
3. SETUP 4. INFO
5. AUDIO 6. HOME
7. UP 8. LEFT
9. OK 10. DOWN
11. VOL- 12.Numeric
buttons
13. SLOW 14. PAUSE
15. PLAY 16. FR
17. FF 18. A-B
19. REPEAT 20. HELP
21. EJECT 22. SELECT
23. SUBTITLE 24. PREV
25. NEXT 26. STOP
27. SEARCH 28. VOL+
29. RIGHT 30. RETURN
31. ZOOM 32. COPY
33. TV SYS.
34.
35. POWER
No. Button Function
1
MUTE
Press to mute audio output, and press again to resume.
2
OPTION
Press to add the file to Playlist;
Press to display or hide the information bar during playback;
3
SETUP
Press to enter the setup menu.
4
INFO
Press to display current status.
Press during playback and an onscreen display
appears, showing track number and time
elapsed/remaining.
5 AUDIO Press to select an audio track.
6 HOME Press to enter the home screen.
7 UP Navigational button. Press the arrow buttons to select
menu
options.
8 LEFT Navigational button.
Press the arrow buttons to select menu
options.
9 OK
Press OK button to confirm.
10 DOWN Navigational button.
Press the arrow buttons to select menu
options.
11 VOL- Press to decrease the volume.
12 Numeric buttons
changing settings.
13 SLOW
Press to play back in slow motion. Press the PLAY button
to
resume regular playback.
14 PAUSE Press to pause the current playback;
Press again to step to the next frame;
Press to pause the download in download menu.
15 PLAY Press to begin playback;
Press to start the paused download task.
16 FR
select speeds
17 FF Press to fast forward the current playbac
k. Press repeatedly to
select speeds.
18 A-B Press to set the beginning and end points of a section to repeat
19 REPEAT Press to set repeat option.
20 HELP Help Button. Press to get information guide.
21 EJECT Press to safely remove the USB device.
22 SELECT Press to select files in browser and file copy menu.
23 SUBTITLE
color/size/offset/text encoding of subtitle.
24 PREV Press to view the previous file / page up.
25 NEXT Press to view the next file / page down.
26 STOP Press to stop playback;
Press to stop the download.
27 SEARCH
search subfolder;
using Title, Chapter and Time.
28 VOL+ Press to increase the volume.
29 RIGHT Navigational button.
Press the arrow buttons to select menu
options.
30 RETURN Press to return to the previous screen while navigating menus.
31 ZOOM Press to zoom in/out the image (photo or video).
32 COPY Press to enter the file copy menu.
33 TV SYS.
and 1080P.
34
Press to go to movie/music/photo playlist
35 POWER Press to enter standby mode or wake up.
3. Main Menu
3.1 Setup Menu
The Setup menu allows you to personalize and configure the preferences for your player.
To select a Setup option:
- Select the Setup icon on the home screen
- Use the UP/DOWN navigational buttons to select an option, and then press ENTER.
There are seven Setup options, including Audio, Video, Photo, Network, System, MISC and
Media Library. Use the UP/DOWN navigational buttons to select a menu. Press ENTER to
confirm. Press RETURN to cancel and display the previous menu screen.
3.1.1 Changing Audio Settings
Use this menu to configure audio settings
Night Mode
- Choose between Off / On / Comfort. If the option is turned on, the audio output volume
will be decreased to make you more comfortable.
Digital Output
- Select to set Digital Output (S/PDIF) mode.
Note: In raw mode, Dolby Digital, DTS, or MPEG sound can be by passed to the HDMI TV or
Digital amplifier.
3.1.2 Changing Video Settings
Use this menu to configure video settings.
Aspect Ratio
- Pan Scan 4:3: Display a wide picture on the entire screen and cuts off the redundant
portions. Select when a standard 4:3 TV is connected.
- Letter Box 4:3: Display a wide picture with two black borders on the top and bottom of 4:3
screen. Select when a standard 4:3 TV is connected.
- 16:9: Compress the image to convert the whole image. Select when a 16:9 TV is
connected.
Brightness
- Adjust the level of brightness.
Contrast
- Adjust the level of contrast.
TV SYSTEM
- Select to adjust TV Type and video output resolution. This setting depends on your
regional location. Include:
NTSC – United States, Canada, Japan, Mexico, the Philippines, South Korea, and
Taiwan.
PAL – Europe, Greenland, parts of Africa and South America, the Mideast, China, India,
Australia, and Indonesia.
Resolution - video output resolution
3.1.3 Changing Photo Settings
Use this menu to configure photo settings
Slide Show Timing
- Select to set the interval time for photo slide show.
Transition Effect
- Select to set the transition effect for photo slide show.
Background Music
- Select to set the background music options while view pictures.
3.1.4 Changing Network Settings
Use this menu to configure Ethernet and WLAN (Wireless Local Area Network) settings.
Wired LAN Setup
- DHCP IP (AUTO)
Select to obtain IP address automatically.
- FIX IP (MANUAL)
Select to manually input the IP Address, Subnet Mask, Default Gateway, and DNS Server
IP Address.
Wireless Setup
- Selecting a connection profile
This player can store up to three wireless network connections. Press ENTER to go to next
step, press RETURN to cancel, and press PLAY to connect.
- Get Connection Mode
Choose between Infrastructure (AP) and Peer to Peer (Ad Hoc). Press ENTER to go to
next step, and press RETURN to cancel.
- Infrastructure (AP)
Infrastructure mode is used to connect computers with wireless network adapters, also
known as wireless clients, to an existing wired network with the help from wireless router
or access point.
Get SSID Name
Press ENTER to go to next step, press RETURN to cancel, and press OPTION to refresh
the SSID list.
Note: In the Security list, WEP (Wired Equivalent Privacy) and WPA (Wi-Fi Protected
Access) means the network is encrypted, i.e. an encryption key is needed to access the
network. NONE means it is an open system network.
Input WEP / WPA Key
Encryption keys can be inputted via the virtual keyboard. Press the navigational buttons to
select, ENTER to input, CAPS to switch between uppercase and lowercase, <- to delete a
character, -> to insert a space, shift to make more symbols available, and OK to confirm.
Test connection
The testing process will take for a while, please be patient to wait. If the test is ok, the network
information (Profile Name, IP address, Subnet Mask, Gateway, etc.) will be displayed on the
screen.
- Peer to Peer (Ad Hoc)
Peer to Peer mode, which is also called Ad Hoc mode or computer-to-computer mode, is
used to connect wireless clients directly together, without the need for a wireless router or
access point.
Ad-Hoc Setup
Press ENTER to go to next step, press RETURN to cancel, and press PLAY to connect.
Login Control
- Select to turn on / off password protect for the Web server (Neighbor Web).
Note:
1) The default user name is ‘admin’, and the default password is ‘123’;
2) When it is turned off, and then turned on again, the password will be restored to
default.
BT and SAMBA
- Select on/off to control the BitTorrent, samba and Web server services.
3.1.5 Changing System Settings
Use this menu to configure system settings.
Menu Language
- Select to choose the OSD (On-Screen Display) language.
Text Encoding
- Select to set the text encoding option (subtitle display)
System Info
- This tab gives you information about the software installed and about the material
components of your player.
System Update
- Select to update the firmware or extension package via a USB stick.
1) Copy ‘install.img’ or extension files to the root directory of a USB stick, and connect it
to the USB HOST port of the player.
2) Press ENTER to confirm.
HDD Format
- Select to format the HDD.
Restore Default
- Select to restore factory defaults.
3.1.6 Miscellaneous
Use this menu to adjust miscellaneous settings.
Resume Play
- Select to turn on / off resume playback (auto-bookmarking) feature for movies.
Screen Saver
- Select to turn on / off screen saver.
Movie Preview
- Select to turn on / off movie preview in the browser menu.
3.1.7 Changing Media library Settings
Use this menu to set the scan folder, update media library and media library mode.
Select Scan Folder
- Select the scan folders from HDD or external USB device.
Update Media Library
- Press to update media library.
Media library Mode
- Press to select media library mode. You can set off/auto/manual mode from USB/HDD.
Off: When you set off mode, system will turn off media library and won’t scan media
library.
Auto: When you set auto mode, system will update media library after you turn on the
player.
Manual: When you set manual mode, you need enter into Update Media library and select
update by manual.
Note: System only scan the folders what you have selected. System default to scan all of the
folders. It will take some time to scan all of the folders.
3.2 Music Playback
Enter music interface, only supported audio files and folder will be displayed. This player
supports MP3, WMA, and OGG audio files.
You can navigate using a filter option(Date, Folder, Recent, Playlist, All music, Artist, Genre, or
Album) by selecting the Music icon and using UP and DOWN button to scroll through the
options listed.
3.2.1 Music Playback Control
Button Function
PLAY/PAUSE
Begin/Pause playback.
FR / FF
Fast rewind or fast forward. Press repeatedly to select the speed.
PREV / NEXT
View the previous or next movie.
SEARCH
Search for a music file.
OPTION
Hide or display the Music toolbar during playback.
VOL+/-
Increase/Decrease the volume.
3.2.2 Music Playback Options
During music playback, press OPTION button. The music toolbar opens at the bottom of the
screen.
The music toolbar has several command icons to customize the way you play music.
The functions from left to right are repeat, shuffle mode, info.
3.2.3 Quick-Search
You can search for a media file by filter current folder to locate the specific media file. Press
SEARCH button while browsing music files in the music library.
3.3 Photo Playback
Enter into photo interface, only supported image files and folder will be displayed. This player
supports JPG/JPEG/BMP/files.
You can navigate using a filter option (Date, Folder, Recent or All photo) by selecting the photo
icon and using UP and DOWN button to scroll through the options listed.
3.3.1 Photo Playback Control
Button Function
PREV / NEXT
View the previous or next photo.
LEFT / RIGHT
Rotate a photo in any angle.
OPTION
Hide or display the Photo toolbar during playback.
STOP
Stop playback.
ZOOM
Zoom in and out the photo
3.3.2 Photo Playback Options
During photo playback, press OPTION button. The photo toolbar opens at the bottom of the
screen.
The photo toolbar has several command icons to customize the way you play photo.
The functions from left to right are zoom in, zoom out, rotate picture, info.
3.3.3 Quick-Search
You can search for a media file by filter current folder to locate the specific media file. Press
SEARCH button while browsing photo files in the photo library.
3.4 Movie Playback
Enter into movie interface, only supported image files and folder will be displayed. This player
supports AVI, MKV, MOV, MPG files.
You can navigate using a filter option (Date, Folder, Recent, Playlist, or All movie) by selecting
the photo icon and using UP and DOWN button to scroll through the options listed.
3.4.1 Movie Playback Control
Button Function
PLAY/PAUSE
Begin/Pause playback.
PREV / NEXT
View the previous or next file/chapter.
FR/FF
Fast rewind or fast forward. Press repeatedly to select the speed
OPTION
Hide or display the Movie toolbar during playback.
STOP
Stop playback.
VOL+/-
Press to increase/decrease the volume.
3.4.2 Movie Playback Options
During movie playback, press OPTION button. The photo toolbar opens at the bottom of the
screen.
The movie toolbar has several command icons to customize the way you play photo.
The functions from left to right are zoom in, zoom out, repeat, subtitle, info, audio, dvd.
3.4.3 Quick-Search
You can search for a media file by filter current folder to locate the specific media file. Press
SEARCH button while browsing movie files in the movie library.
3.5 All Files
The “all files” allows you to browse and play music, photo and movie files stored on an internal
HDD, external USB device, and Network.
29

Hulp nodig? Stel uw vraag in het forum

Spelregels

Misbruik melden

Gebruikershandleiding.com neemt misbruik van zijn services uitermate serieus. U kunt hieronder aangeven waarom deze vraag ongepast is. Wij controleren de vraag en zonodig wordt deze verwijderd.

Product:

Bijvoorbeeld antisemitische inhoud, racistische inhoud, of materiaal dat gewelddadige fysieke handelingen tot gevolg kan hebben.

Bijvoorbeeld een creditcardnummer, een persoonlijk identificatienummer, of een geheim adres. E-mailadressen en volledige namen worden niet als privégegevens beschouwd.

Spelregels forum

Om tot zinvolle vragen te komen hanteren wij de volgende spelregels:

Belangrijk! Als er een antwoord wordt gegeven op uw vraag, dan is het voor de gever van het antwoord nuttig om te weten als u er wel (of niet) mee geholpen bent! Wij vragen u dus ook te reageren op een antwoord.

Belangrijk! Antwoorden worden ook per e-mail naar abonnees gestuurd. Laat uw emailadres achter op deze site, zodat u op de hoogte blijft. U krijgt dan ook andere vragen en antwoorden te zien.

Abonneren

Abonneer u voor het ontvangen van emails voor uw Emtec Movie Cube V120H bij:


U ontvangt een email met instructies om u voor één of beide opties in te schrijven.


Ontvang uw handleiding per email

Vul uw emailadres in en ontvang de handleiding van Emtec Movie Cube V120H in de taal/talen: Engels als bijlage per email.

De handleiding is 1,81 mb groot.


U ontvangt de handleiding per email binnen enkele minuten. Als u geen email heeft ontvangen, dan heeft u waarschijnlijk een verkeerd emailadres ingevuld of is uw mailbox te vol. Daarnaast kan het zijn dat uw internetprovider een maximum heeft aan de grootte per email. Omdat hier een handleiding wordt meegestuurd, kan het voorkomen dat de email groter is dan toegestaan bij uw provider.

Stel vragen via chat aan uw handleiding

Stel uw vraag over deze PDF

Uw handleiding is per email verstuurd. Controleer uw email

Als u niet binnen een kwartier uw email met handleiding ontvangen heeft, kan het zijn dat u een verkeerd emailadres heeft ingevuld of dat uw emailprovider een maximum grootte per email heeft ingesteld die kleiner is dan de grootte van de handleiding.

Er is een email naar u verstuurd om uw inschrijving definitief te maken.

Controleer uw email en volg de aanwijzingen op om uw inschrijving definitief te maken

U heeft geen emailadres opgegeven

Als u de handleiding per email wilt ontvangen, vul dan een geldig emailadres in.

Uw vraag is op deze pagina toegevoegd

Wilt u een email ontvangen bij een antwoord en/of nieuwe vragen? Vul dan hier uw emailadres in.


Info