506470
9
Verklein
Vergroot
Pagina terug
1/71
Pagina verder
17. 16.
24
POWER SUPPLY AND BATTERIE BACKUP
The supply voltage for this device is 230 V ~ 50 Hz. The time settings are backed up by 3 x 3 V
CR 2025 Lithium cell batteries (not included). Please observe the polarities when inserting the
batteries. In case of power failure the device automatically activates the battery backup to save all
time and timer settings.
GETTING STARTED
Press the RESET button at the bottom side of the UNIT after you have connected it to the mains
supply.
The unit will display the full segment for about two seconds. Afterwards the unit turns back to normal
mode.
There is a night illumination switch on the device (blue LED light) (16); set to ON to turn on the
emergency light and set to OFF to turn it off again.
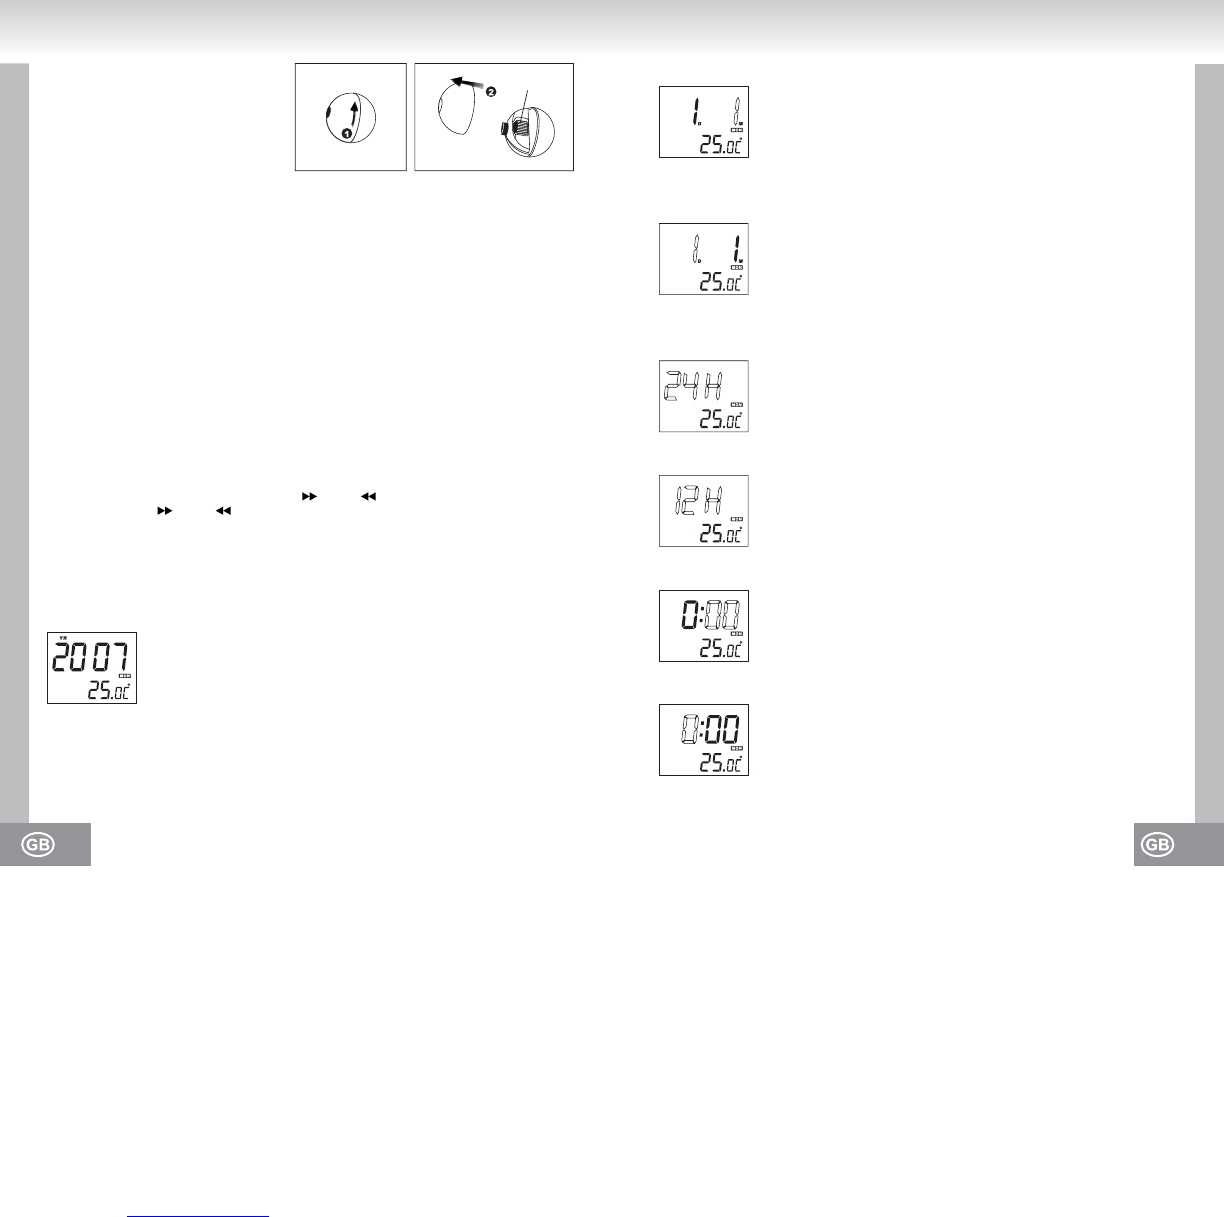
1. SETTING TIME AND DATE
During normal mode press MODE (1) for about 2 seconds in order to enter the time settings. Press
MODE (1) multiple times to switch through the mode cycle:
Year (YR) – Day (D) – Month (M) – 12 / 24-Hour-Format (12H/24H) – Hours (Hour display is
blinking) – Minutes (Minute display is blinking) - Normal
Adjust the corresponding settings as follows:
Adjust the respective values with the buttons (8) and (7).
Hold the buttons (8) and (7) pressed for quick adjustment.
Press MODE (1) after each respective setting to store and to enter the next setting.
The unit will turn back to normal mode and save all adjusted settings if you do not carry out any
setting for a few seconds.
Projector
Turn the ball left to open (direction of arrow:
OPEN); take off the upper part.
The FOCUS adjusting wheel (24) for setting
the focal length is located within the ball.
Put back the upper hemisphere and turn right
to secure (direction of arrow: CLOSE).
Setting the calendar year
Factory setting : 2006
Setting options : 2000 - 2099
Display showing calendar year
Display showing calendar month
Setting the calendar month
When setting the date the unit will calculate the weekday automatically.
Display showing date (day)
When setting the date the unit will calculate the weekday automatically.
Setting the date (day)
When setting the minutes the seconds will be automatically reset to Zero.
Setting the minutes
Display showing Minutes mode (The minute display is blinking)
Setting the hours
Display showing Hour mode (The hour display is blinking)
Display showing 12/24H mode (Choice: 12-Hour-Format)
Displaying 12 / 24-Hour-Formats
Setting the 12 / 24-Hour-Formats
Display showing 12 / 24 H mode (Choice: 24-Hour-Format)
Downloaded from www.Manualslib.com manuals search engine
9

Hulp nodig? Stel uw vraag in het forum

Spelregels

Misbruik melden

Gebruikershandleiding.com neemt misbruik van zijn services uitermate serieus. U kunt hieronder aangeven waarom deze vraag ongepast is. Wij controleren de vraag en zonodig wordt deze verwijderd.

Product:

Bijvoorbeeld antisemitische inhoud, racistische inhoud, of materiaal dat gewelddadige fysieke handelingen tot gevolg kan hebben.

Bijvoorbeeld een creditcardnummer, een persoonlijk identificatienummer, of een geheim adres. E-mailadressen en volledige namen worden niet als privégegevens beschouwd.

Spelregels forum

Om tot zinvolle vragen te komen hanteren wij de volgende spelregels:

Belangrijk! Als er een antwoord wordt gegeven op uw vraag, dan is het voor de gever van het antwoord nuttig om te weten als u er wel (of niet) mee geholpen bent! Wij vragen u dus ook te reageren op een antwoord.

Belangrijk! Antwoorden worden ook per e-mail naar abonnees gestuurd. Laat uw emailadres achter op deze site, zodat u op de hoogte blijft. U krijgt dan ook andere vragen en antwoorden te zien.

Abonneren

Abonneer u voor het ontvangen van emails voor uw Elta 4521 bij:


U ontvangt een email met instructies om u voor één of beide opties in te schrijven.


Ontvang uw handleiding per email

Vul uw emailadres in en ontvang de handleiding van Elta 4521 in de taal/talen: Nederlands, Duits, Engels, Frans, Italiaans, Portugees, Spaans, Pools, Turks als bijlage per email.

De handleiding is 3,61 mb groot.


U ontvangt de handleiding per email binnen enkele minuten. Als u geen email heeft ontvangen, dan heeft u waarschijnlijk een verkeerd emailadres ingevuld of is uw mailbox te vol. Daarnaast kan het zijn dat uw internetprovider een maximum heeft aan de grootte per email. Omdat hier een handleiding wordt meegestuurd, kan het voorkomen dat de email groter is dan toegestaan bij uw provider.

Stel vragen via chat aan uw handleiding

Stel uw vraag over deze PDF

loading

Uw handleiding is per email verstuurd. Controleer uw email

Als u niet binnen een kwartier uw email met handleiding ontvangen heeft, kan het zijn dat u een verkeerd emailadres heeft ingevuld of dat uw emailprovider een maximum grootte per email heeft ingesteld die kleiner is dan de grootte van de handleiding.

Er is een email naar u verstuurd om uw inschrijving definitief te maken.

Controleer uw email en volg de aanwijzingen op om uw inschrijving definitief te maken

U heeft geen emailadres opgegeven

Als u de handleiding per email wilt ontvangen, vul dan een geldig emailadres in.

Uw vraag is op deze pagina toegevoegd

Wilt u een email ontvangen bij een antwoord en/of nieuwe vragen? Vul dan hier uw emailadres in.


Info