699128
9
Verklein
Vergroot
Pagina terug
1/10
Pagina verder
3. Name of parts
We strongly suggest using a clean, dry, non-alcohol cotton swab to insert into the film scanner slot
and clean the glass surface periodically to produce a clear image.
Please make sure your film, slide and holder are clean before inserting into the scanner as well.
Dust or dirt on the film, slide and holder will affect the quality of your scanned images.
4 How to install slides and film into the tray holder
a. Open the film holder as illustrated
b. Put a film/slide in the film/slide slot as shown.
Note: Do not flip the film/slide. If flipped, the pictures will be scanned backwards.
c. Close the film/slide holder
5. Insert and take out SD card ( prerequisite )
Insert SD card before scanning.
The scanner has no built-in memory, SD card is required.
Please close and then open the cover after card inserted.
Note: This device does not support hot-plug. Inserting SD card during operation will cause
the device power off.
6. Quick Start
Connect to the AC power source to turn on the device.
Open the upper cover and you can see the power LED light will become red.
Insert the SD card into the SD card slot.
Insert the slide or film tray into the scanner and move the tray carefully to adjust the film.
Press the Start button to capture a picture
Power On/Off:
Power On: Open the upper cover and you can see the power LED light will become red.
Power Off: Close the upper cover.
Select Function
Press the Function button to enter function mode.
You can see the icon on the screen.
Press the Left or Right buttons to select function.
Select Home
Press Start button to back to capture mode.
Scanning Type
To enter the Film Type, you can use the Left or Right button to select, press the Start button to
confirm.
Slide: You need select the Slide mode when you scanner the slide.
Monochrome: You need select the Monochrome mode when you scanner the BW film.
Film: You need select the Film mode when you scanner the color film.
Resolution
To enter the Resolution Function, you can use the Left or Right button to select, press the Start
button to confirm.
1800 DPI --2592 x 1680 Pixels
3600 DPI 5184 x 3360 Pixels
Format
To enter the Format, to select ‘ do not format’ (X) or ‘ format’ (), press the Start button to confirm.
Caution: Formatted files cannot be recovered.
TV Output
Connect the scanner to your TV with TV cable.
NTSC: Setting the TV Output to NTSC.
PAL: Setting the TV Output to PAL.
Exposure value
To enter the EV mode, press the Left or Right button to select, and press Start button to confirm.
Exposure compensation helps you change the exposure setting manually to adjust object lighting.
This feature helps to achieve better results when scanning a film or slide image with a strong
backlight, or an image that is against a dark background.
The settings can be adjusted in 1/2 steps within the range 2EV ~ +2EV.
You can check the result of the compensation by viewing the image on the screen panel.
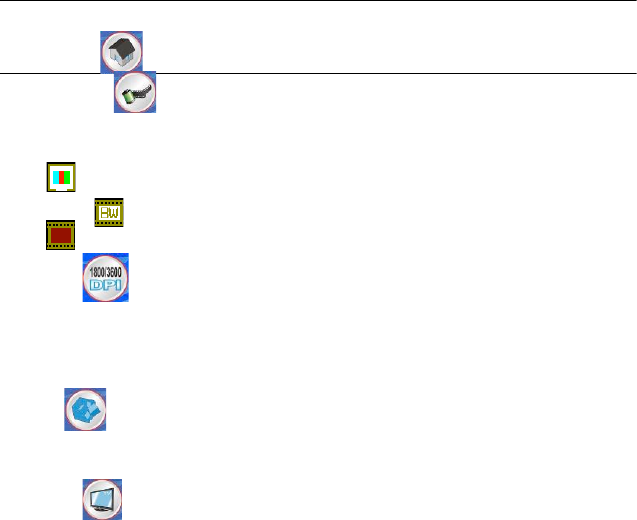
Mirror
Press the Left or Right buttons to select the icon on the screen, and press Start button to confirm.
Press Start button to capture the picture again.
Playback
Press the Playback button to enter playback mode, and view the scanned photos. Press Left or
Right button to select the next / previous photo.
Playback Menu
Press the Start/Playback Menu button to enter the menu
mode.
You can see the icons on the screen.
Press the Left or Right buttons to select these items.
Single
When you select the icon, press Start button to confirm. You need press Left or Right
button to review the next / previous picture.
Slide Show
Use the Slide Show feature to continue display your photos on the scanner screen panel.
Once selected the Slide Show Mode, camera will automatically play all the photos. Press
any button to stop the slide show.
Delete One
Select the to delete current image.
Delete All
Select the icon will delete all the stored images from the internal memory or SD card.
Files that are erased cannot be recovered. Make sure you select the image you want to delete.
Rotate 90 (Left)
Select the icon, the current image will rotate 90by counter clockwise direction..
Rotate 90 (Right)
Select the icon, the current image will rotate 90clockwise direction.
9

Hulp nodig? Stel uw vraag in het forum

Spelregels

Misbruik melden

Gebruikershandleiding.com neemt misbruik van zijn services uitermate serieus. U kunt hieronder aangeven waarom deze vraag ongepast is. Wij controleren de vraag en zonodig wordt deze verwijderd.

Product:

Bijvoorbeeld antisemitische inhoud, racistische inhoud, of materiaal dat gewelddadige fysieke handelingen tot gevolg kan hebben.

Bijvoorbeeld een creditcardnummer, een persoonlijk identificatienummer, of een geheim adres. E-mailadressen en volledige namen worden niet als privégegevens beschouwd.

Spelregels forum

Om tot zinvolle vragen te komen hanteren wij de volgende spelregels:

Belangrijk! Als er een antwoord wordt gegeven op uw vraag, dan is het voor de gever van het antwoord nuttig om te weten als u er wel (of niet) mee geholpen bent! Wij vragen u dus ook te reageren op een antwoord.

Belangrijk! Antwoorden worden ook per e-mail naar abonnees gestuurd. Laat uw emailadres achter op deze site, zodat u op de hoogte blijft. U krijgt dan ook andere vragen en antwoorden te zien.

Abonneren

Abonneer u voor het ontvangen van emails voor uw Easypix CyberScanner Vision Compact bij:


U ontvangt een email met instructies om u voor één of beide opties in te schrijven.


Ontvang uw handleiding per email

Vul uw emailadres in en ontvang de handleiding van Easypix CyberScanner Vision Compact in de taal/talen: Engels als bijlage per email.

De handleiding is 1,3 mb groot.


U ontvangt de handleiding per email binnen enkele minuten. Als u geen email heeft ontvangen, dan heeft u waarschijnlijk een verkeerd emailadres ingevuld of is uw mailbox te vol. Daarnaast kan het zijn dat uw internetprovider een maximum heeft aan de grootte per email. Omdat hier een handleiding wordt meegestuurd, kan het voorkomen dat de email groter is dan toegestaan bij uw provider.

Stel vragen via chat aan uw handleiding

Stel uw vraag over deze PDF

Andere handleiding(en) van Easypix CyberScanner Vision Compact

Easypix CyberScanner Vision Compact Gebruiksaanwijzing - Deutsch - 9 pagina's

Easypix CyberScanner Vision Compact Gebruiksaanwijzing - Français - 10 pagina's


Uw handleiding is per email verstuurd. Controleer uw email

Als u niet binnen een kwartier uw email met handleiding ontvangen heeft, kan het zijn dat u een verkeerd emailadres heeft ingevuld of dat uw emailprovider een maximum grootte per email heeft ingesteld die kleiner is dan de grootte van de handleiding.

Er is een email naar u verstuurd om uw inschrijving definitief te maken.

Controleer uw email en volg de aanwijzingen op om uw inschrijving definitief te maken

U heeft geen emailadres opgegeven

Als u de handleiding per email wilt ontvangen, vul dan een geldig emailadres in.

Uw vraag is op deze pagina toegevoegd

Wilt u een email ontvangen bij een antwoord en/of nieuwe vragen? Vul dan hier uw emailadres in.


Info