• Read and follow all instructions carefully.
• This appliance can be used by children
aged from 8 years and above and persons
with reduced physical, sensory or mental
capabilities or lack of experience and
knowledge if they have been given
supervision or instruction concerning use of
the appliance in a safe way and understand
the hazards involved. Children shall not
play with the appliance. Cleaning and user
maintenance shall not be made by children
without supervision.
• Appliances can be used by persons with
reduced physical, sensory or mental
capabilities or lack of experience and
knowledge if they have been given
supervision or instruction concerning use of
the appliance in a safe way and understand
the hazards involved.
• Children shall not play with the appliance.
• Do not touch hot surfaces. Use handles or
knobs.
• To protect against electric shock do not
immerse or rinse cords or plug in water or
other liquid.
• Unplug from outlet when not in use and
before cleaning. Allow to cool before
putting on or taking off parts.
• Do not operate any appliance with
a damaged cord or plug or after the
appliance malfunctions or has been
damaged in any manner. Return appliance
to the nearest authorised service facility for
examination, repair or adjustment.
• Do not use any attachments or utensils that
were not recommended or supplied by the
manufacturer. The use of attachments not
recommended for use by the manufacturer
may cause serious hazardous situations
including personal injury.
• Do not use outdoors.
• Do not let cord hang over edge of table or
counter, or touch hot surfaces.
• Do not place on or near a hot gas or
electric burner, or in a heated oven.
• Extreme caution must be used when
moving an appliance containing hot oil or
other hot liquids.
• Always attach plug to appliance first,
then plug cord into the wall outlet. To
disconnect, remove the plug from wall
outlet.
• Do not use appliance for anything other
than its intended use.
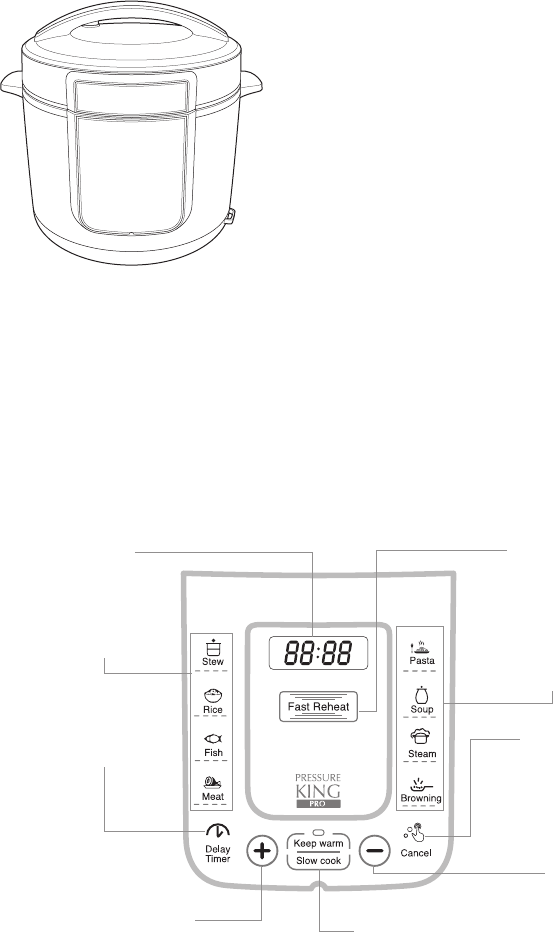
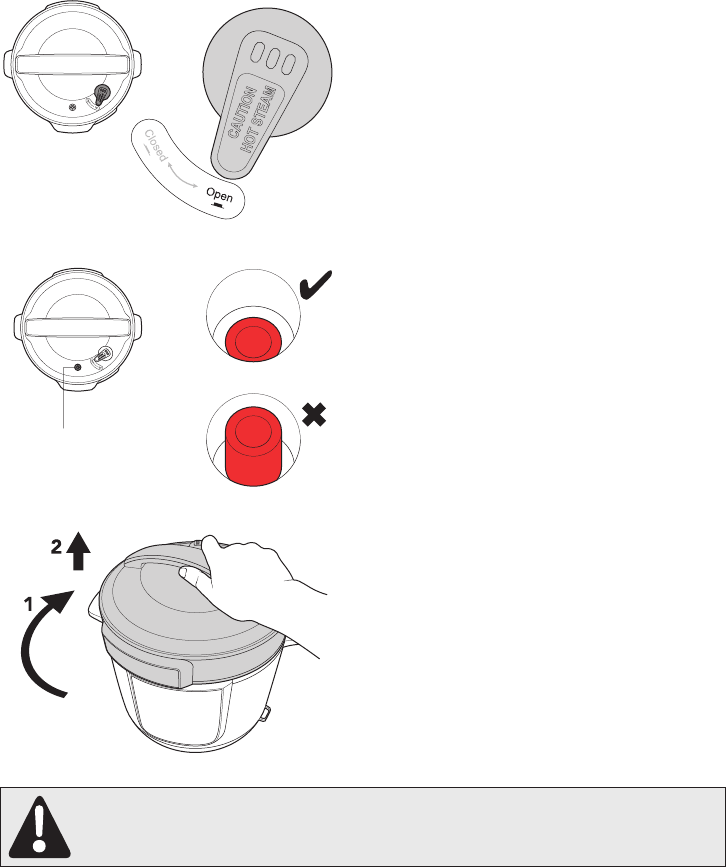
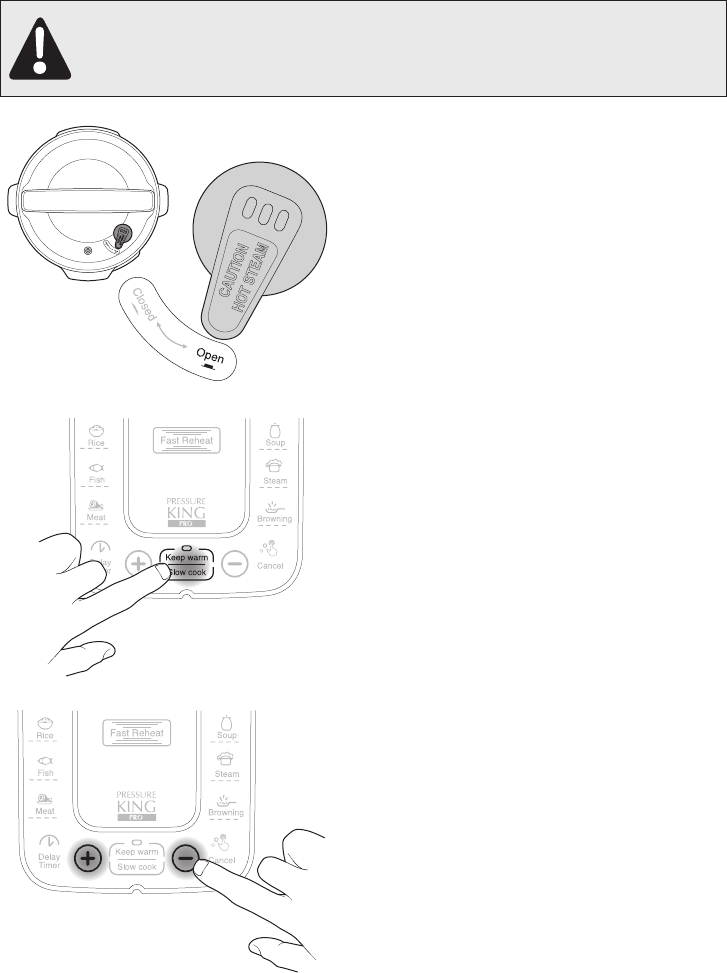
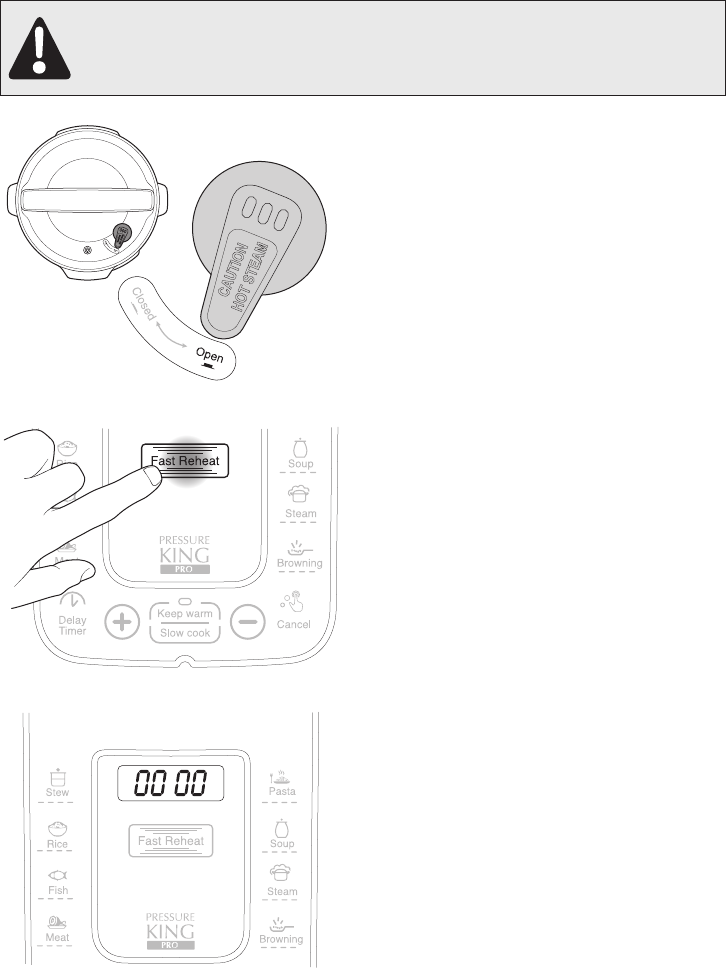
• This appliance cooks under pressure.
Improper use may result in scalding injury.
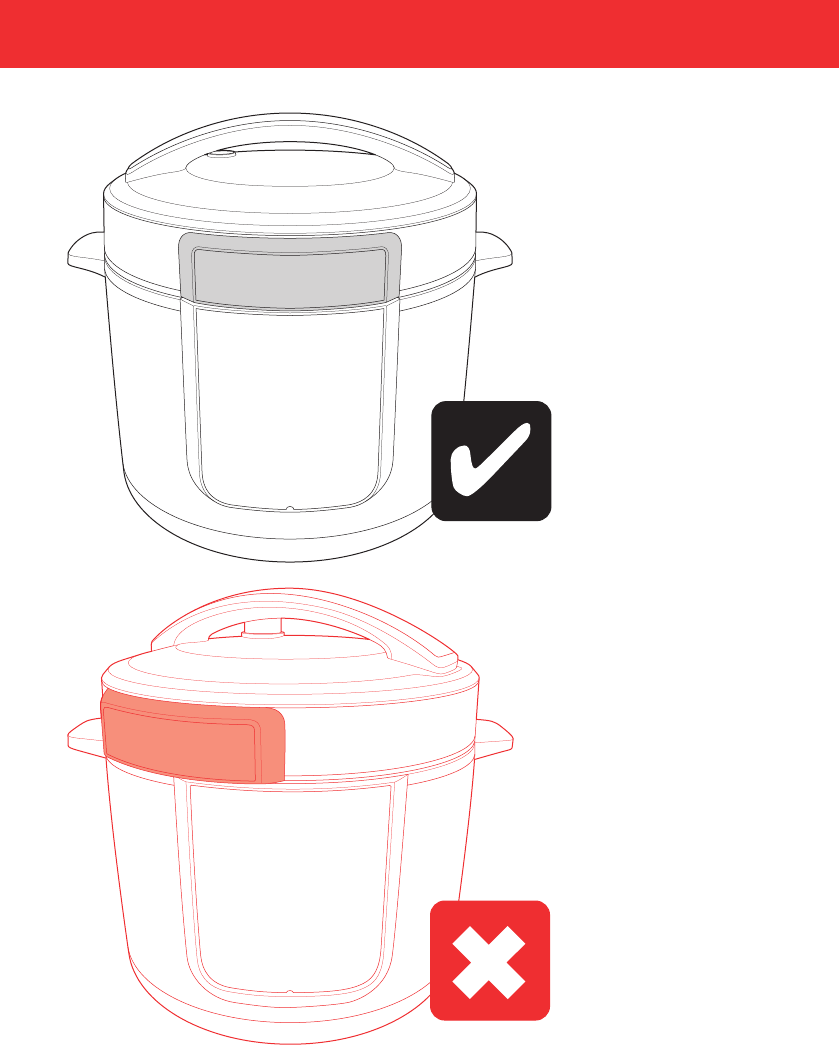
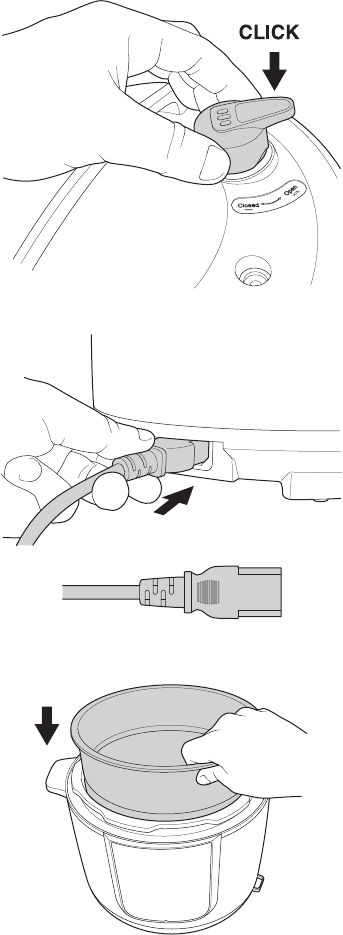
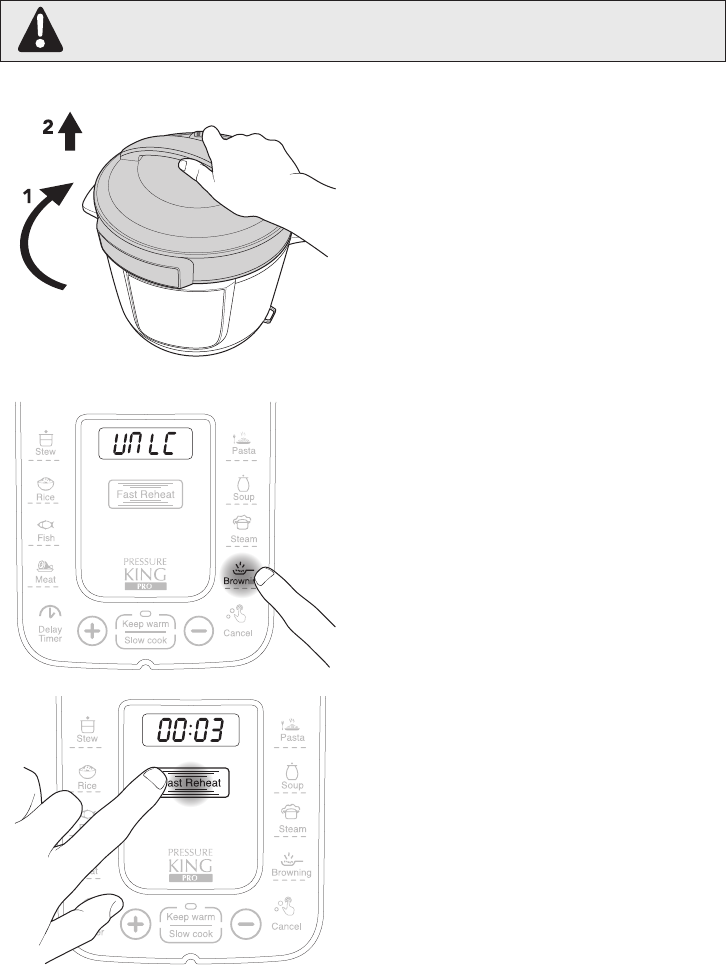
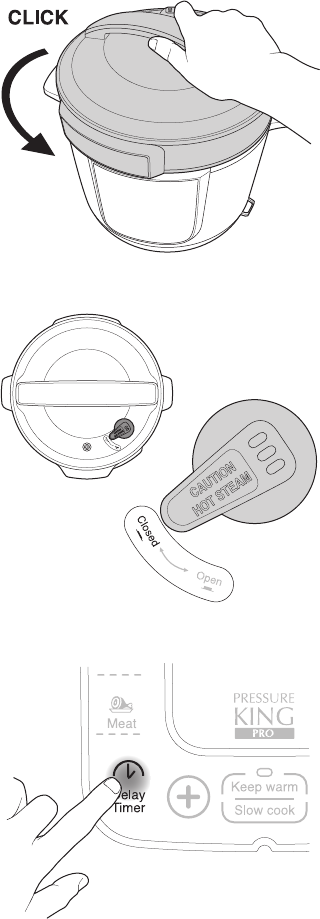
Make certain unit is properly closed
before operating. See instructions For
Use.
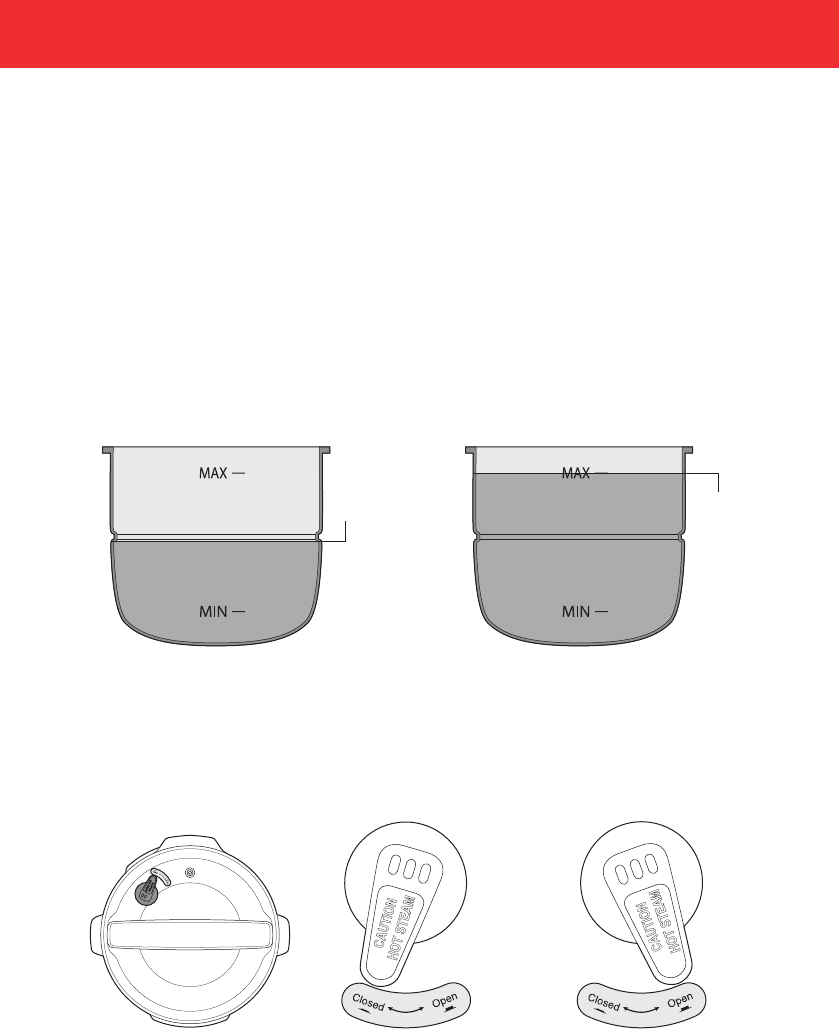
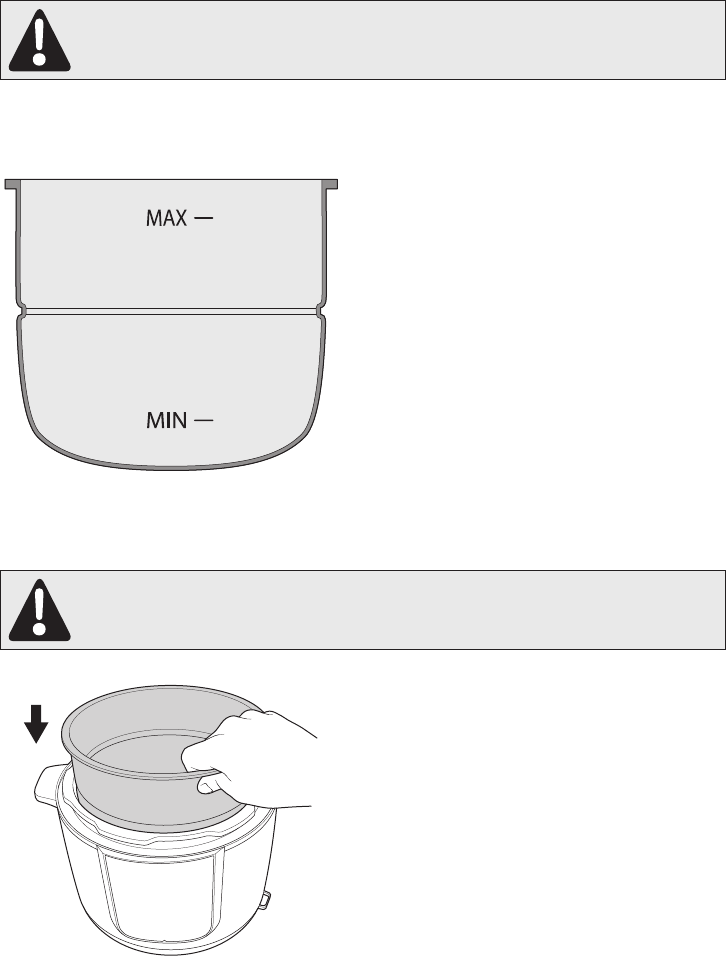
• Never fill the unit above MAX line in the
Inner Pot. When using foods that expand
during cooking such as rice or dried
beans, follow the recipe for “pressure
cooking” those products, and as a rule
of thumb, do not fill the unit above the
“halfway” point. Overfilling may cause
clogging, allowing excess pressure to
develop.
• Be Aware that certain foods, such as
apple-sauce, cranberries, pearl barley,
oatmeal or other cereals, split peas,
noodles, macaroni, rhubarb, and
spaghetti, can foam, froth, sputter, and
clog the pressure release device (steam
vent). Recipes using these items must be
followed carefully to avoid problems.
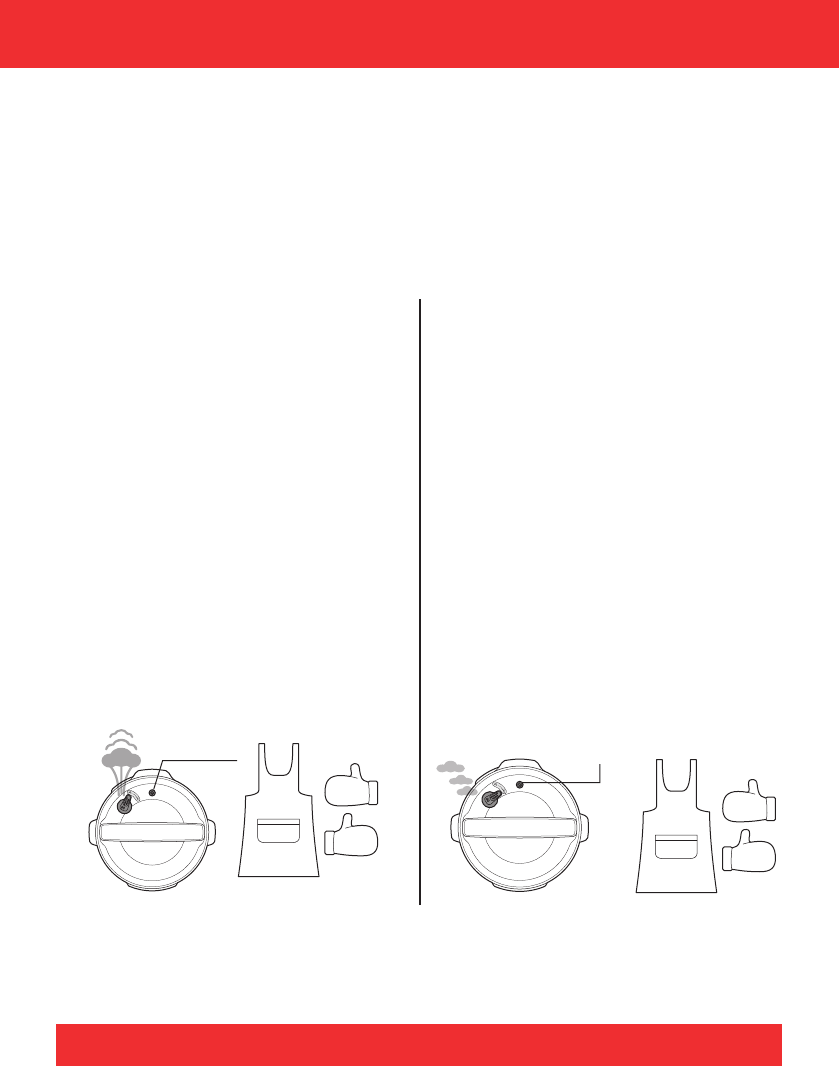
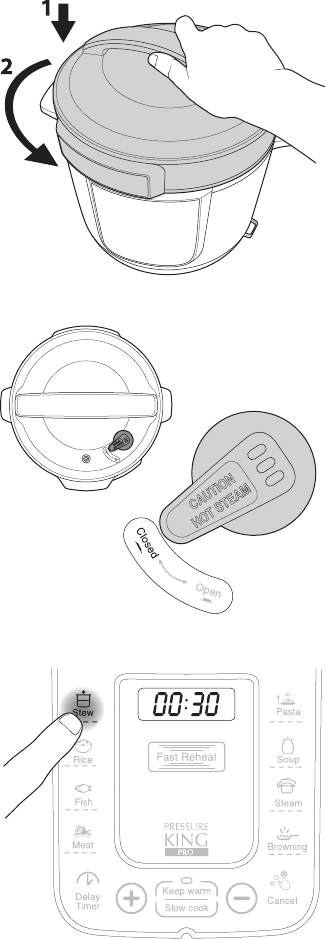
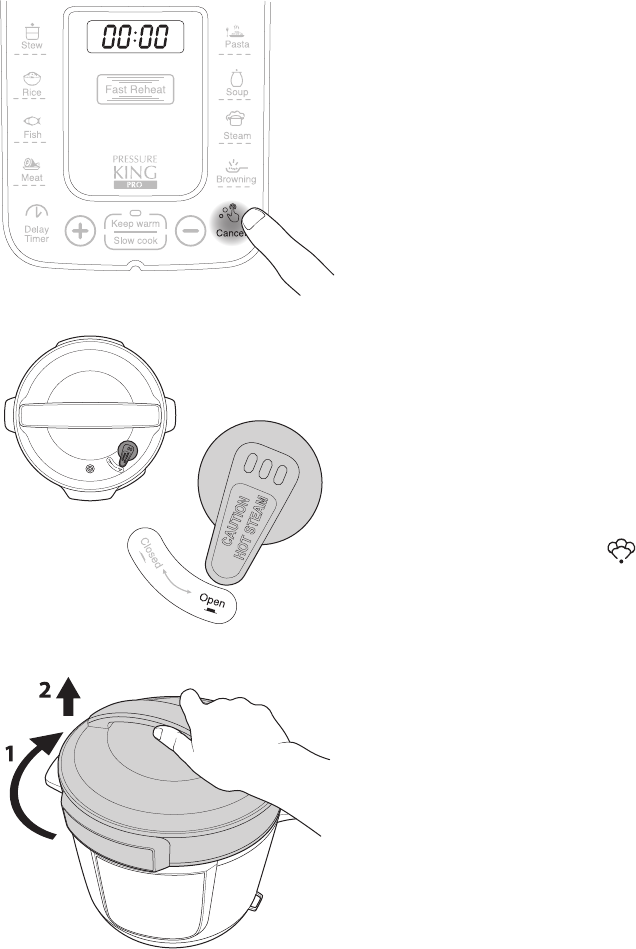
• Always check the pressure release devices
for clogs before use
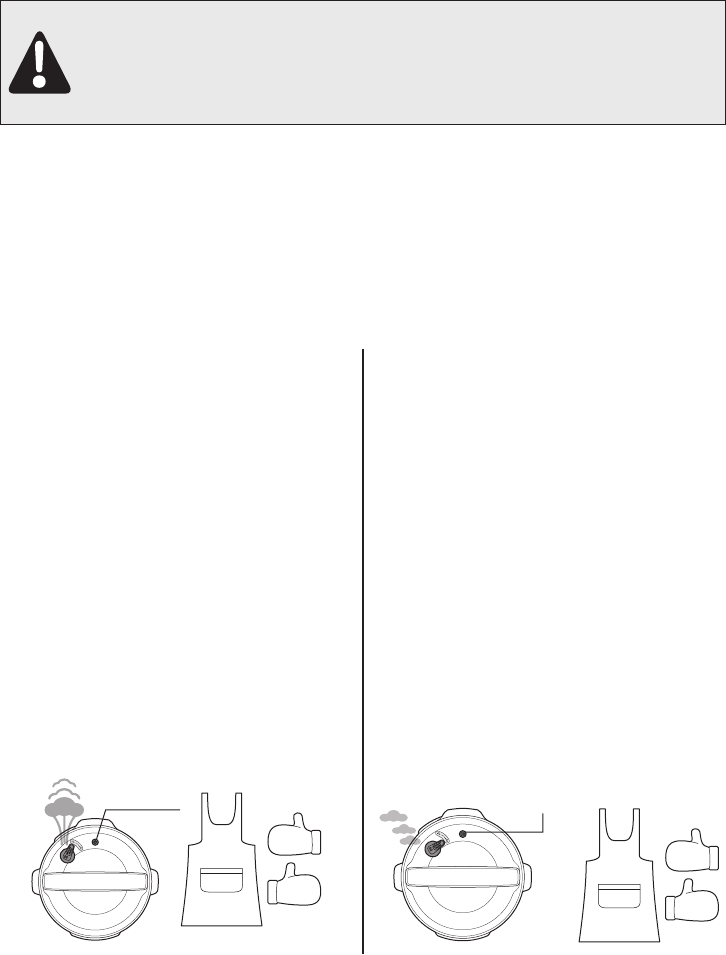
• Do not open the pressure cooker until the
unit has cooled and all internal pressure
has been released. If the unit is difficult to
open, this indicates that the cooker is still
pressurised – do not force it open. Any
pressure in the cooker can be hazardous.
Please read these instructions.
• Do not use this pressure cooker for pressure
frying with oil.
When using electrical appliances, basic safety precautions should always be
followed including the following:
Important Safeguards
SAVE THESE INSTRUCTIONS- FOR HOUSEHOLD USE ONLY
6