6
thermometer after leaving the refrigerator operating for a
further period to settle down again.
6. Ice cubes
Fill the ice tray to 4/5 with drinking water, and place the ice
tray on the ice-tray shelf. Wipe off any excess water to
prevent the ice tray from freezing to the surface.
To speed up the making of ice cubes, turn the thermostat
to position „MAX” for a short while. Remember to turn the
dial to its normal setting when the ice cubes are frozen.
To remove the cubes from the ice tray, hold it under running
water. The ice cubes can now be taken out easily.
7. Useful suggestion
Do not overfill the appliance. It is advisable to leave some
space between the products in the cabinet to ensure
efficient and even cooling. If the shelves are packed too
tightly there may be unacceptable temperature variations.
8. Defrosting, cleaning and
maintenance
Frost will gradually form on the cooling surfaces and it
must not be allowed to become too thick since it acts
as an insulator and interferes with the cooling.
A semi-automatic
defrosting model device
can be identified by the
push-button in the centre
of the thermostat dial.
(Fig. 5.) To defrost, push
in the button in the
centre of the thermostat
dial but do not turn the
dial to another position-
leave it at its usual
setting.
Close the door.
The defrost button will stay in and the cooling unit will
remain switched off until the frost has melted. The
defrost button will then automatically spring out to its
normal position and the refrigerator will start work
again. The time taken to defrost will depend on the
amount of frost to be removed and the room
temperature.
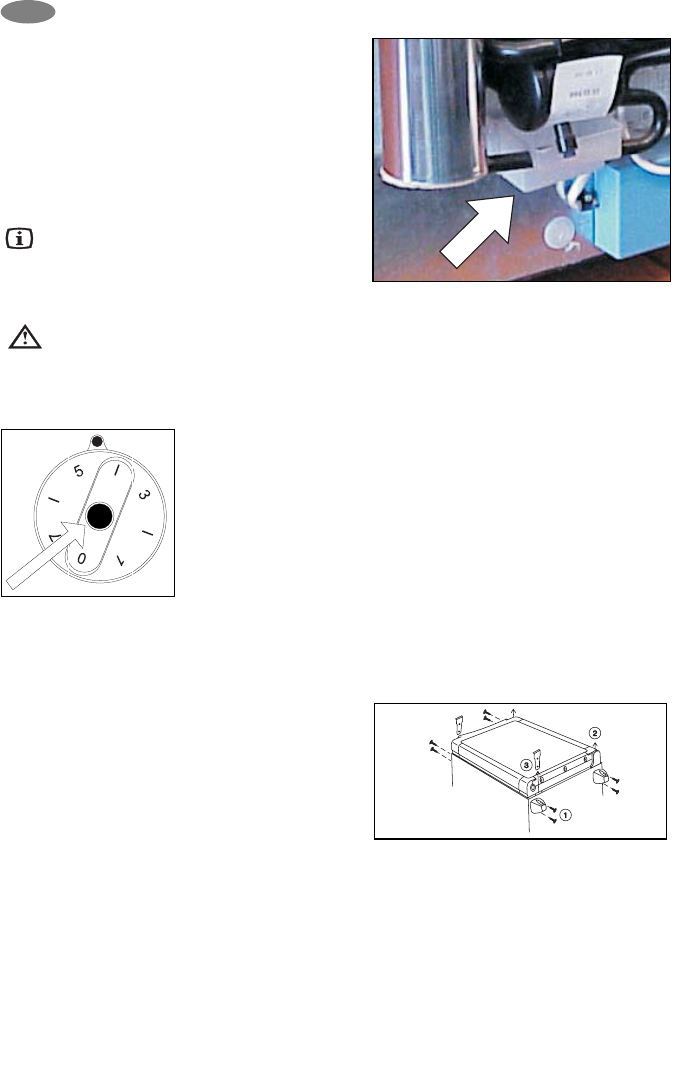
The frost will melt and the defrost water will run
through the drain tube from the drip channel into an
evaporating vessel located at the bottom rear of the
refrigerator. (Fig. 6.) The defrost water will evaporate
automatically into the circulating air and the vessel will
not need emptying manually.
Figure 6.
9. Changing the lightbulb (If available)
If the lightbulb needs changing, pull out the plug and
proceed as follows:
Press the metal reflector to one side and draw the lamp
covering backwards. Replace the bulb and push the
covering back into place.
A new max. 10-watt bulb can be obtained at any service
shop.
10. Reversing the door hang, (Fig. 7)
Lay the appliance on its back. Remove the 8
screws (1). Remove the door, together with the two
hinges (2), from the housing.
Remove the two cover caps (3) from the housing
and place them in the open hinge holes in the
housing. Place the bottom righthand hinge in the
top left of the door and the top righthand hinge in
the bottom left of the door and hang the door on its
hinges in the open cover cap holes in the housing.
Secure the hinges and cover caps with the 8
screws.
Check that the door closes easily and is sealed
properly.
11. Replacing the decorative door
panel
(Fig. 8-10.)
Remove the two screws (1) from the upper hinge of the
door.
Pull the door together with the hinge away from the
housing and up off the lower hinge bolt (2-3).
Remove screws (4) and pull off the frame edge (5).
Slide the decorative panel (6) out of the door frame and
insert the new panel (7), so that the upper edge of the
GB
Figure 5.
Figure7.