ENGLISH
Getting Started Connections Playback Remote Control Information Troubleshooting Specifi cations
Making the Optimum Settings for the Connected Speakers Automatically (Audyssey Auto Setup)
The acoustic characteristics of the connected speakers and listening room are measured and the optimum settings are made automatically.
NOTE
• Loud test sounds may be played during Audyssey MultEQ automatic
speaker setup. This is part of normal operation. If there is background
noise in room, these test signals will increase in volume.
• Do not stand between the speakers and setup microphone or allow
obstacles in the path while the measurements are being made. This
will cause inaccurate readings.
• Make the room as quiet as possible. Background noise can disrupt
the room measurements. Close windows, silence cell phones,
televisions, radios, air conditioners, fl uorescent lights, home
appliances, light dimmers, or other devices as measurements may
be affected by these sounds.
Cell phones should be placed away from all audio electronics during
the measurement process as Radio Frequency Interference (RFI)
may cause measurement disruptions (even if the cell phone is not in
use).
Audyssey MultEQ
®
automatically measures the acoustical
problems in the listening environment to create the best audio
experience for your home theater.
• When the Audyssey Auto Setup procedure is performed, the
MultEQ, Dynamic EQ and Dynamic Volume functions (vpage 41)
are enabled.
• Use the included setup microphone (DM-A409) to perform the
Audyssey Auto Setup procedure.
• Measurements are performed by placing the calibrated microphone
successively at multiple positions throughout the listening area as
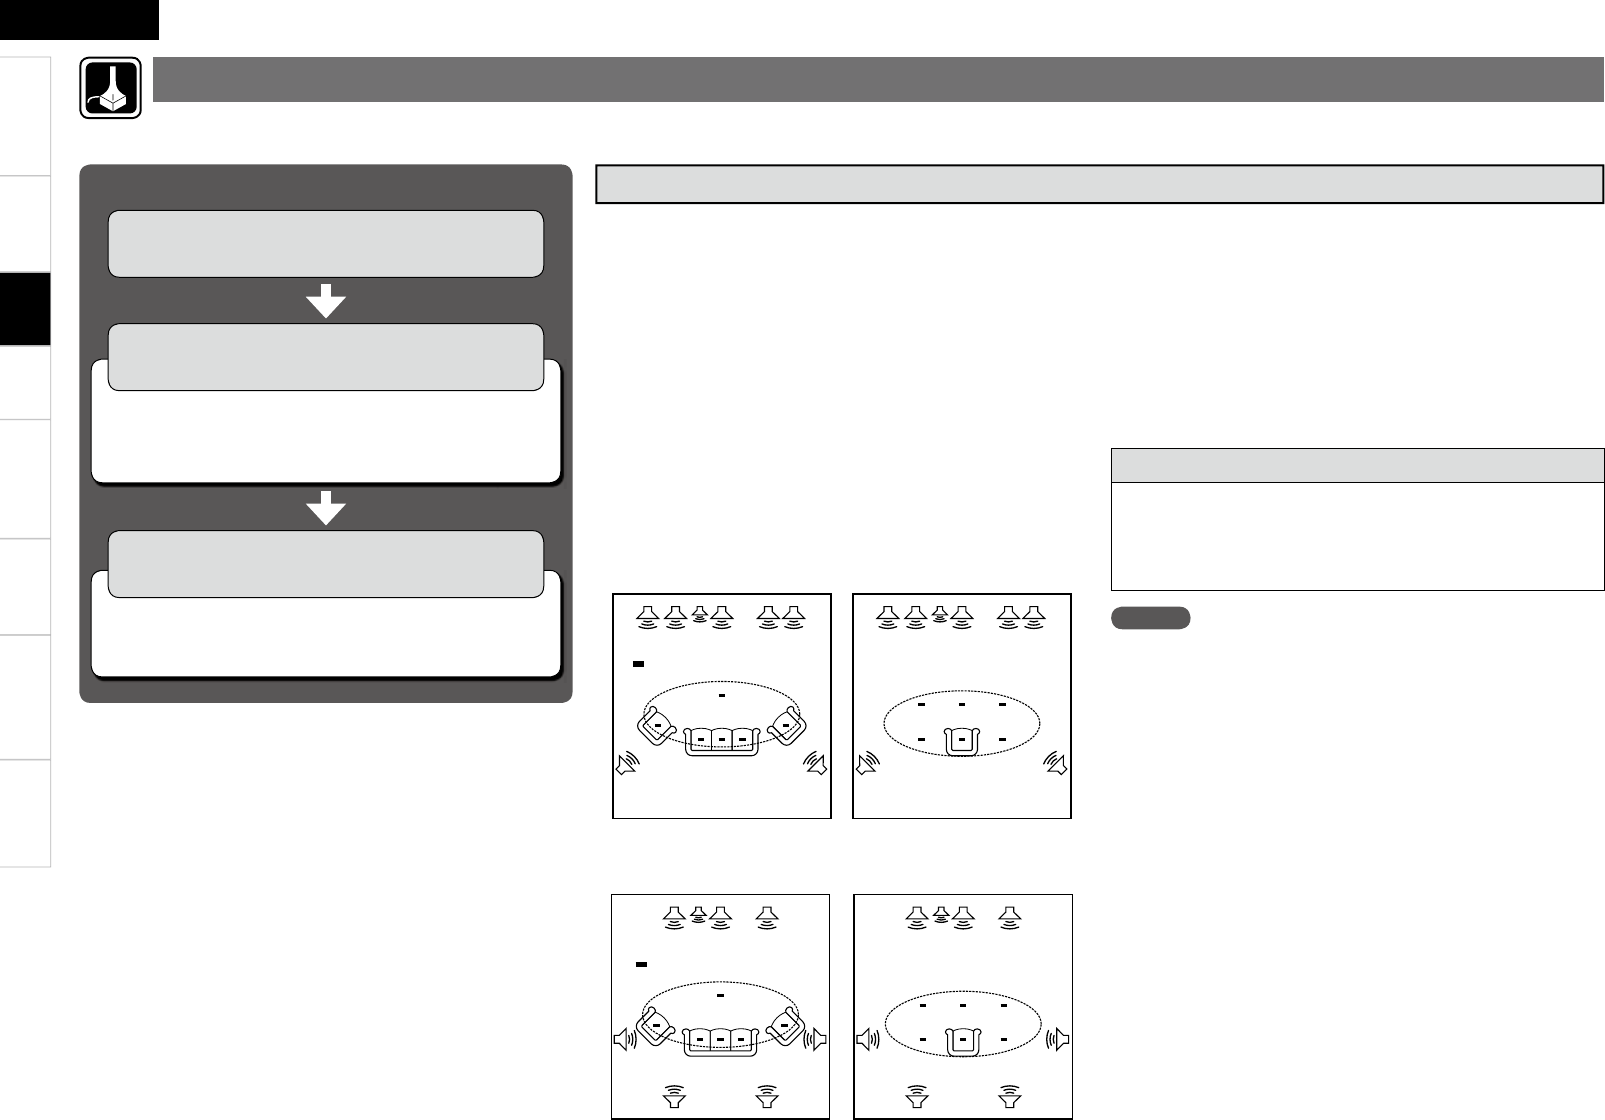
shown in GExample qH. For best results, it is strongly recommended
to measure 6 positions so that the measurements have the proper
spatial weighting.
Even if the listening environment is small as shown in GExample wH,
measuring at multiple points throughout the listening environment
results in more effective correction.
n When using Front Height Speakers
GExample qH GExample wH
( : Measuring positions)
Important Information
About the main listening position (*M)
The main listening position refers to the most central position where
one would normally sit within the listening environment.
MultEQ uses the measurements from this position to calculate
speaker distance, level, polarity, and the optimum crossover value
for the subwoofer.
FHL : Front height speaker (L)
FL : Front speaker (L)
SW : Subwoofer
C : Center speaker
FR : Front speaker (R)
FHR : Front height speaker (R)
SR : Surround speaker (R)
SBR : Surround back speaker (R)
SBL : Surround back speaker (L)
SL : Surround speaker (L)
( : Measuring positions)
n Check Audyssey Auto Setup Measurement
Results (Parameter Check) (vpage 23)
Audyssey Auto Setup Flown
Step 1 :Connect the included Setup
Microphone (vpage 20)
Step 3 : Performing the Audyssey Auto Setup
Procedure (vpage 21)
Step 2 :Audyssey Auto Setup Preparations
(vpage 21)
n Changing the PRE OUT connectors assignment
(Pre Assign) (vpage 21)
Settings